Oh, give me a rainy Saturday and the smell of toasting bread, and I am instantly taken back to my happy place! There’s nothing on earth quite like a perfect grilled cheese sandwich. It’s pure, simple comfort, right? But making the *best* one—one with that shatteringly crisp, golden-brown exterior and that glorious, gooey, unbelievably melty center—that takes a secret or two. That’s exactly what we’re diving into today as we break down Why Everyone Loves This Grilled Cheese Recipes (+ Make-Ahead Tips).
I remember my son’s first bite of a gluten-free grilled cheese, just a few months after his celiac diagnosis. I was determined to recreate an old family favorite without compromising taste. It was tough work, but when I finally served it, the look of pure joy on his face was priceless. That moment, born out of necessity, sparked “Grilled Cheese Day” every Saturday in our house. It proved we could adapt our traditions while keeping the flavor. So trust me, whether you need a super quick lunch or a comforting dinner, these steps ensure perfection every time!
Why Everyone Loves This Grilled Cheese Recipes (+ Make-Ahead Tips): The Core Components
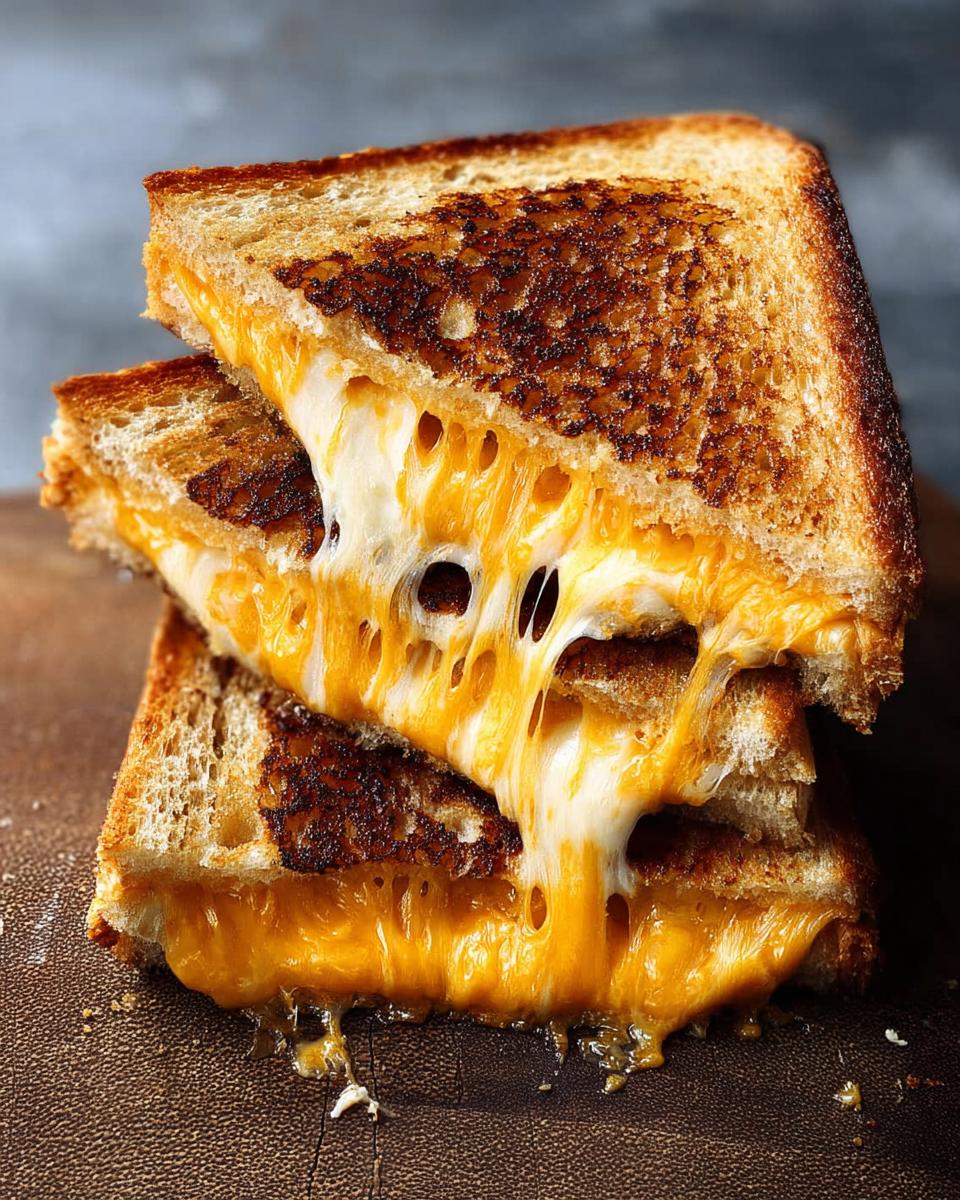
So, what makes this specific grilled cheese recipe the one that keeps everyone asking for seconds? It all comes down to ditching the basic slice-and-a-half of American cheese. We’re building layers of flavor and texture right from the start. You need good bread, yes, but pairing the right cheeses is what gets you that incredible, satisfying pull.
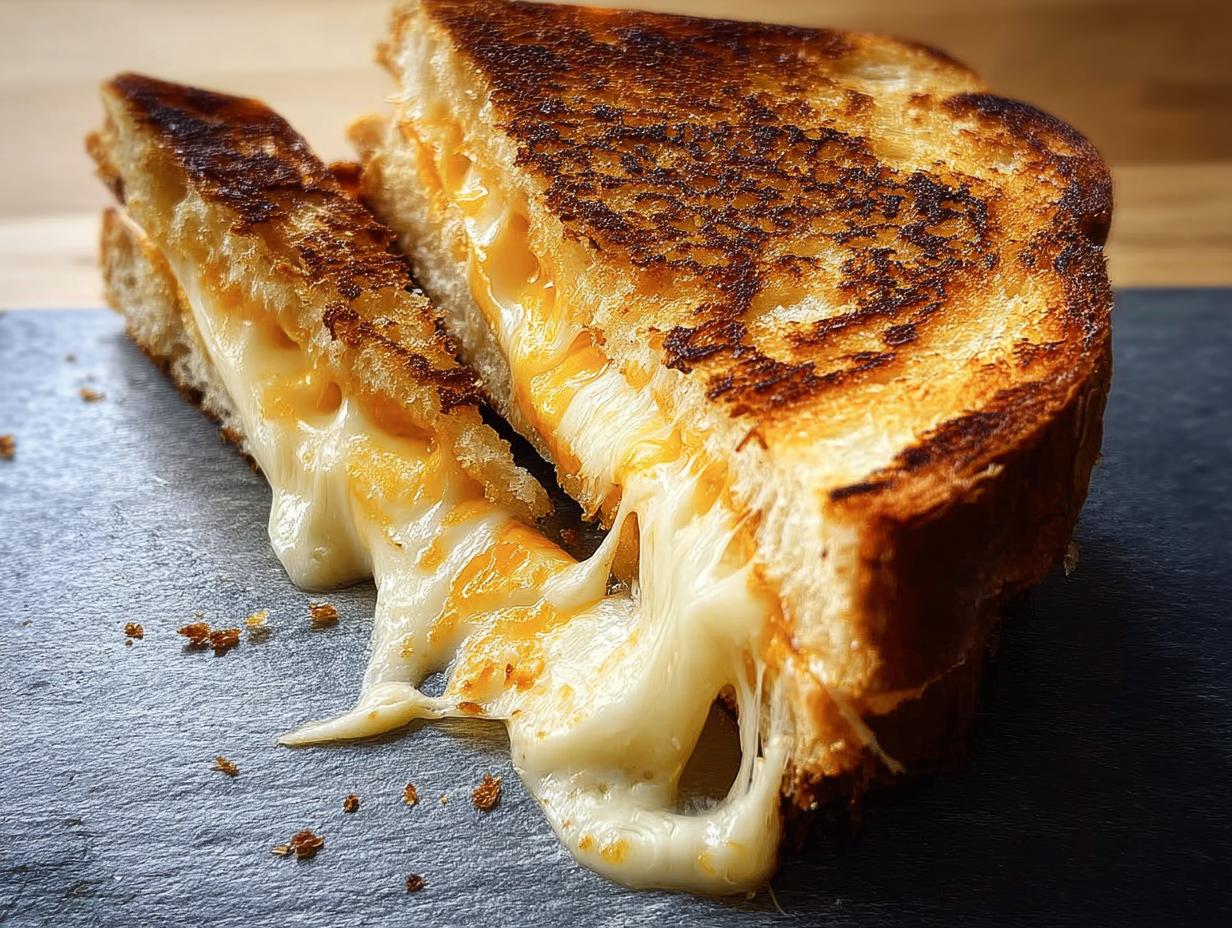
I absolutely swear by sourdough for this. It’s sturdy enough to hold up to the melting cheese, and that slight tang gets beautifully caramelized when it hits the skillet. And the cheese blend? It’s non-negotiable for achieving that perfect ooze. You need sharp cheddar for that familiar bite, and then something creamy like Gruyère or even Raclette to ensure it gets truly, deeply melty without turning oily.
Ingredients for the Perfect Melty Grilled Cheese
Gather these items before you even think about turning on the stove. Trust me, efficiency is key when you want a fast lunch!
- Sourdough bread: Two slices, please!
- Mayonnaise: Just a thin layer for the outside. This is my secret weapon for the best golden crust—it browns perfectly.
- Dijon mustard: This goes on the inside, adding a tiny kick that cuts through the richness of the cheese.
- Grated sharp cheddar cheese: About 1 to 2 ounces, depending on how thick your bread slices are. Grate it yourself!
- Grated Gruyère or raclette cheese: Another 1 to 2 ounces. Mixing cheeses gives you complex flavor and supreme smoothness.
- Butter: Just a little bit for coating the pan before we start grilling.
See? It looks fancy, but it’s still just three main components: bread, fat, and flavorful cheese. That combination just works every single time.
How to Prepare This Quick Grilled Cheese: Step-by-Step Instructions
Alright, now that we have the perfect ingredients assembled, let’s talk technique. This is where we move from just a regular sandwich to a truly glorious grilled cheese. The trick to making this happen super quick without burning it is all about managing that skillet heat. Don’t rush this part, even if you’re hungry!
Assembling the Sandwich for Maximum Melt
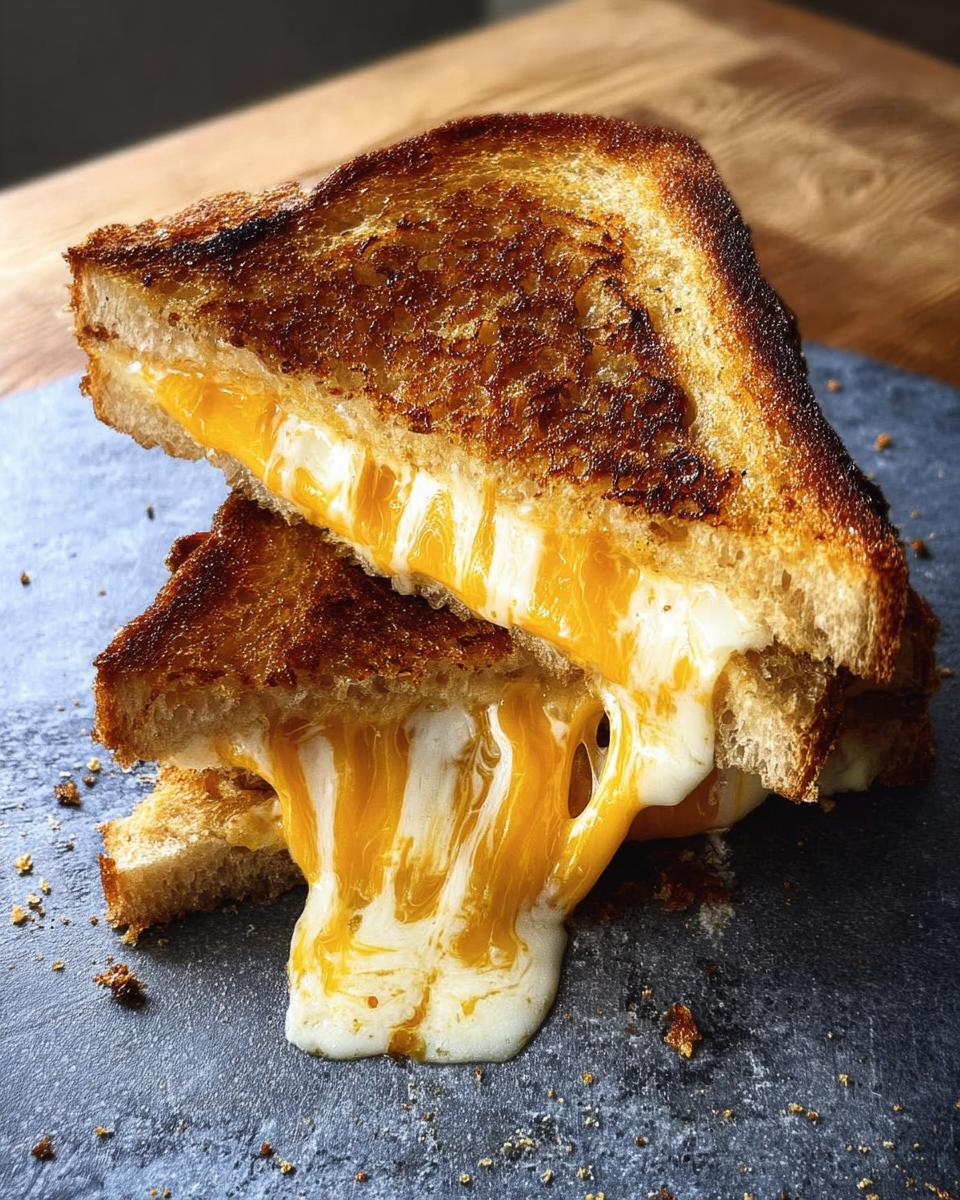
First things first: grab your sourdough slices. You want the outside of the bread to be protected and ready to crisp up beautifully. Take one slice and spread a very thin, even layer of mayonnaise on one side only. Don’t glob it on; we just need enough to make it golden. Flip that second slice and generously spread Dijon mustard on the center—this is just for the inside flavor, remember!
Next, the important layering: pile your grated cheddar and Gruyère right on top of that mustard layer. Then, top it all off with that mayo-coated slice, making sure that shiny, fatty side is facing out and ready for the pan. This layering system guarantees the mustard flavor is trapped inside while the mayo works outside to create that perfect crust.
Cooking Technique for a Golden, Crisp Grilled Cheese
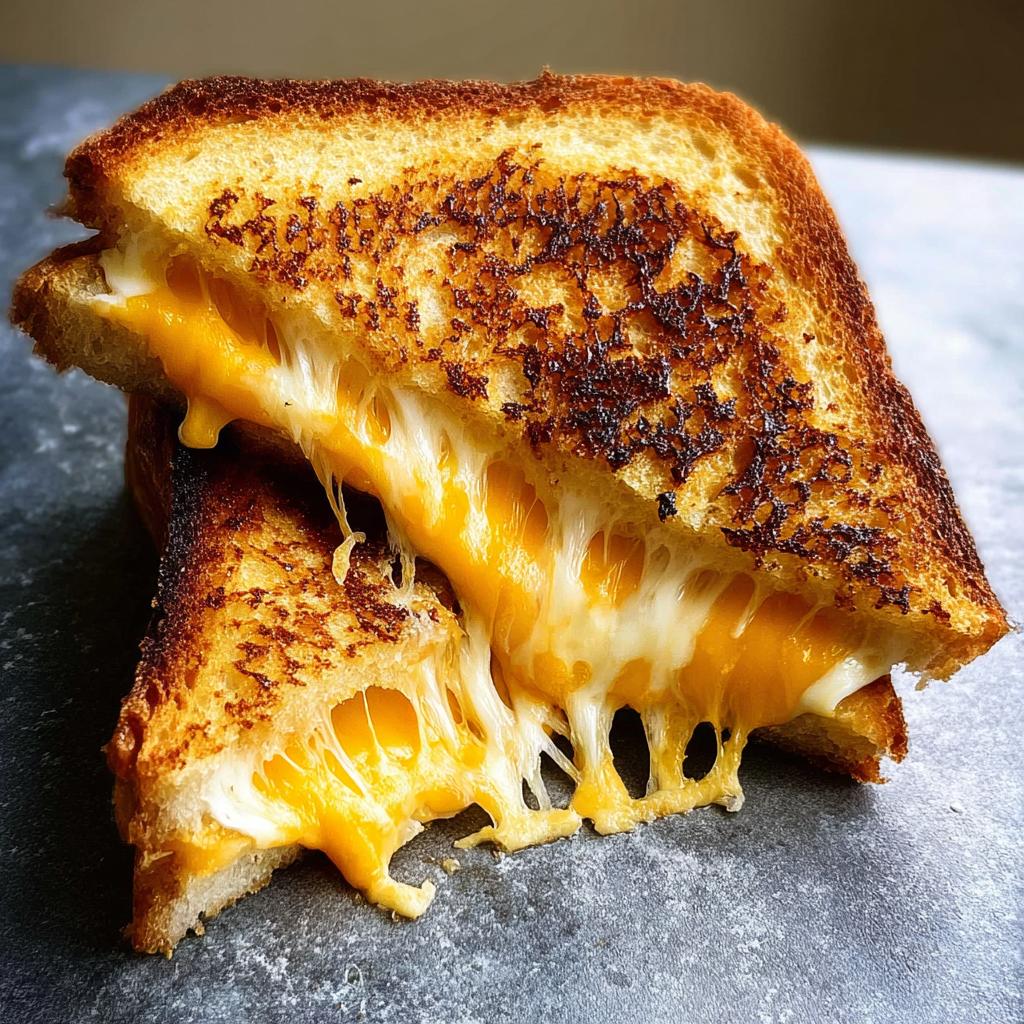
Heat your skillet—I love cast iron for that even heat—over what feels like low heat, or maybe medium-low at the absolute most. Add just enough butter to coat the bottom of the pan. We want sizzle, not smoke! Lay your sandwich gently into that warm butter.
Here’s the game-changer: cover the skillet with a lid! Trapping that heat is vital; it keeps the steam inside, which gently melts that thick layer of mixed cheese before the bread has a chance to burn. Let it sit for maybe three minutes until you see the bottom turning that lovely golden brown color. Flip it over, put the lid back on, and cook for another couple of minutes until the second side matches and you can feel the center has gone completely soft and gooey. That low and slow coverage is how you get the best, most melty result!

Why Everyone Loves This Grilled Cheese Recipes (+ Make-Ahead Tips): Tips for Success
Even following the steps perfectly, sometimes a grilled cheese tries to play tricks on you, right? Maybe your bread is getting dark before the center even warms up. Don’t panic! I have a few runner tricks up my sleeve that guarantee success every time we make this recipe. Remember, we are striving for that utterly satisfying, perfect *pull*!
The biggest piece of advice I can give you, which seems small but makes a huge difference, is related to your cheese prep. Please, please grate your dairy yourself! Pre-shredded cheese is coated in anti-caking agents, often potato starch or cellulose, which stops it from melting smoothly. When you grate it fresh, it melts evenly into that liquid gold consistency we crave.
Achieving the Ultimate Melty Texture
If you really want that next-level melty cheese, try pulling your grated blend out of the fridge about 15 minutes before you start assembling. Letting the cheese warm up just slightly takes the chill off, meaning it starts melting immediately when it hits the warm bread. It really cuts down on that dreaded moment where your bread is charred but your cheese is still fighting to soften.
Also, never underestimate the power of the pan lid. I mentioned covering it while cooking, but if you are struggling, try this: After you flip the sandwich, turn the heat down to the lowest possible setting, cover it tightly, and just let it steam-cook for a good minute. You walk away, do something else entirely, and when you come back, that cheese will be perfectly soft and ready to burst out when you slice it. It’s honestly foolproof for getting that hot, gooey center without damaging the crust. That crisp exterior protecting the gooey interior is what makes everyone love this recipe!
Why Everyone Loves This Grilled Cheese Recipes (+ Make-Ahead Tips): Make-Ahead and Storage Guidance
This is where the grilled cheese becomes a hero for busy families! I know mornings are chaos, so having a dinner or lunch that only needs 6 minutes of cooking time is a lifesaver. You can totally assemble this sandwich ahead of time, which is amazing. You just skip the melting step for now. Honestly, prep hacks like this, much like the ones I use for my overnight French toast bakes, are essential when you have a house full of hungry people!
You go through the entire assembly process—mayo outside, cheese inside, bread on top—just like normal. Then, wrap that whole sandwich *super* tight in plastic wrap. We need to keep the air out so the sourdough stays fresh and doesn’t toast prematurely. You can keep these wrapped beauties tucked away in the fridge for up to 24 hours! I often prep a few on Sunday nights for the week.
Now, here’s the one step you absolutely cannot skip before cooking: Let the wrapped sandwich hang out on the counter for about 15 minutes before it hits the pan. If you try to cook it straight from the cold fridge, the bread will burn before the center warms up. Patience for those 15 minutes means you still get that fast, quick cook time everyone loves.
Ingredient Notes and Substitutions for Your Grilled Cheese
Remember how I told you about making this perfect for my son after his diagnosis? That’s why versatility in ingredients is so important in my kitchen. Everyone deserves a great, melty grilled cheese! If Sourdough isn’t your go-to, or if you’re navigating different dietary needs, I’ve got you covered with some fantastic swaps that keep the core philosophy—crispy outside, gooey inside—intact.
When I first started adapting recipes, finding a good gluten-free bread that actually toasted well was an adventure in itself. Some brands crumble the second you touch them! I finally found a few that hold up beautifully, and I always keep a loaf on hand for those Saturday cravings. If you’re interested in baking your own sturdy loaves, I have a favorite gluten-free bread recipe that works wonders here.
Swapping Out the Sourdough
While I adore sourdough for its firmness, feel free to use a sturdy white bread or even a hearty whole wheat if that’s what you have handy. The key thing here is to avoid bread with too many huge, uneven holes, or else your cheese will run out the minute you press it. Heavy rye bread is also a wonderful, flavorful option if you don’t need to skip gluten!
Cheese Alternatives for Flavor Twists
Cheddar and Gruyère are my tried-and-true favorites because they melt so well together, but grilled cheese is the perfect place to experiment! If you want something milder, swap the Gruyère for Monterey Jack; it melts like nothing else and gets incredibly stretchy. For a little more sharpness without the Gruyère flavor, try a good aged Provolone. Seriously, try mixing Provolone with a bit of Havarti—it’s like a dream! The ratio is always the most important part: keep it about 50/50 between your sharp cheese and your melting cheese, whatever you choose.
And hey, don’t forget the mustard can go, too! If Dijon is too bold for your taste, a tiny smear of honey creates an amazing sweet and salty combination with the cheddar. It’s all about making this quick comfort food perfect for *your* family.
Serving Suggestions to Complete Your Grilled Cheese Meal
Okay, you’ve mastered the perfect crispy outside and that glorious, decadent, melty inside. But what do you serve next to this masterpiece? A grilled cheese sandwich is fantastic on its own for a super quick meal, but when you have an extra five minutes, adding a side elevates it from a snack to a real dinner—even if you’re feeding busy kids!
For me, since I’m always balancing dietary needs, I like sides that are easy to adapt. I usually keep it simple because the sandwich is the star here. It needs something warm and comforting to dip into, or maybe something bright and fresh to cut through all that delicious butter and cheese.
The absolute classic pairing, and one my son always asks for, is tomato soup. The tangy warmth of the tomato just coats the savory cheese perfectly. If you’re looking for a truly amazing version, I have a creamy potato soup recipe that is so hearty; if tomatoes are out for your family, this rich soup dip is phenomenal. It feels indulgent even though it’s simple to whip up.
But maybe you want something lighter! If you’re eating outside in the sunshine, or just need to sneak in some greens, don’t overcomplicate it. A very simple side salad works wonders. I just toss some mixed greens with a drizzle of olive oil and a tiny bit of red wine vinegar. Seriously, that’s it! The sharp vinegar cleanses your palate after every rich, cheesy bite.
Another favorite, especially for using up leftover ingredients, is quick pickles. Sliced cucumbers or carrots, vinegar, water, a little sugar, and salt. You let that sit while the sandwich grills, and you get this wonderful crunchy, acidic pop that is the perfect contrast to the soft bread. Remember, the goal is always comfort, and these sides help you feel like you made a full, satisfying meal without spending hours in the kitchen!
Frequently Asked Questions About Why Everyone Loves This Grilled Cheese Recipes (+ Make-Ahead Tips)
I get so many questions after people try this recipe—it’s heartwarming! It seems once folks try that mayo crust, they never go back, but they always have little tweaks they want to try. Here are some of the things I hear most often about making the perfect quick, melty grilled cheese.
Can I use regular butter on the outside instead of mayonnaise for this grilled cheese?
Oh, you totally can use butter! Butter is the traditional way, and it tastes fantastic. However, I use mayonnaise because it has a higher smoke point and a different fat composition than butter, which gives me a more even, deep golden-brown crust without burning. Butter tends to brown faster, and sometimes it can look a little mottled. With mayo, the crust is just perfectly crisp and consistently colored all over the bread. It’s a small switch, but it makes the exterior texture unbeatable!
What is the secret to getting a super melty interior quickly?
If your cheese isn’t melting fast enough, it almost always comes down to heat management. Everyone wants this grilled cheese done in a flash, but high heat will just burn the sourdough before the Gruyère even starts to soften. The absolute secret is to keep the heat on medium-low and to cover your pan! That lid traps the ambient heat and steam around the bread, basically creating a little oven inside your skillet. This forces the heat inward to make everything truly melty without over-browning the outside. It makes the actual cooking process feel quick because you aren’t standing around waiting for the cheese to give up!

Share Your Favorite Variations of This Grilled Cheese
I’ve shown you my go-to blend for that ultimate, satisfyingly melty experience, but honestly, the best part about making a grilled cheese is making it *yours*. Once you master the basic technique—the mayo crust, the low-and-slow cook—the possibilities open up like crazy!
Remember when I told you about adapting things for my son? That’s how we ended up with our Saturday tradition of trying a new flavor profile every week! We learned quickly that almost any crisp vegetable or savory meat pairs beautifully, as long as you respect the cheese balance.
Now I want to hear from you! I love seeing what creative twists you all are making in your kitchens. Have you tried adding caramelized onions? Maybe some thinly sliced pears with smoked Gouda? Tell me about it!
Are you someone who dips your sandwich into a homemade soup, or do you pile on the inside fillings until it’s practically bursting? Drop your favorite variation or secret ingredient—no matter how simple or gourmet—down in the comments below. Sharing these little culinary secrets is how we all get better (and have more fun!) cooking together. I can’t wait to see what delicious ideas you bring to the table!
Estimated Nutritional Snapshot for This Grilled Cheese
Listen, when you’re making something this delicious and comforting, the last thing you want to worry about is counting every single calorie, right? But I always feel better getting a general idea of what’s in our weekend lunch! These numbers are based on using standard sourdough slices, 1 ounce of sharp cheddar, 1 ounce of Gruyère, and the mayo/butter combination we talked about.
Trust me when I say this is just a ballpark estimate for one glorious, satisfying sandwich. You might get slightly different numbers depending on how thick you cut your bread or how rich your cheese block was! Treat this as a helpful guide, not gospel truth, because the real nutritional benefit here is the sheer joy it brings!
Here’s what my best guess looks like for a single, perfect serving of this melty favorite:
- Calories: Roughly 450–500 kcal
- Total Fat: Around 30g
- Protein: About 20g
- Carbohydrates: Approximately 30g
That protein count is thanks to all that wonderful, high-quality cheese we’re piling in there! It helps keep you satisfied so you don’t need a second sandwich five minutes later—though I certainly wouldn’t blame you if you did! Enjoy every bite of this ultimate comfort food!
Why Everyone Loves This Grilled Cheese Recipes (+ Make-Ahead Tips)
Ingredients
Equipment
Method
- Place the bread slices on a cutting board. Spread the top side of one slice with a thin layer of mayonnaise.
- Flip the second slice of bread and spread its other side with Dijon mustard.
- Layer the cheddar and Gruyère or Raclette cheeses on top of the mustard. Place the mayonnaise-coated slice of bread on top of the cheese, with the mayo side facing out.
- Heat a nonstick or cast-iron skillet over medium-low heat. Melt enough butter in the pan to coat the bottom.
- Place the sandwich in the pan, cover it, and cook for 2 to 3 minutes, or until the bottom slice of bread is golden brown and crisp.
- Flip the sandwich, replace the lid, and cook until the other slice is golden brown and the cheese is melted, which takes 1 to 3 minutes.
- If the bread browns too quickly before the cheese melts, reduce the heat to low.
- Slice the sandwich and serve it.
Notes
Tried this recipe?
Let us know how it was!
Gluten-Free Chef & Latin Cuisine Innovation Specialist
My youngest son’s celiac diagnosis at four changed everything. Suddenly, all those traditional Brazilian and Portuguese recipes from my avó needed to be completely reimagined without losing their soul.
After graduating from Johnson & Wales and working Miami’s Latin fusion scene, my son’s diagnosis became my calling. How do you make gluten-free empanadas that taste like childhood? Over eight years, I’ve developed 320+ gluten-free recipes celebrating authentic Latin flavors using cassava flour and plantain alternatives.
My gluten-free empanada recipe won “Best Appetizer” at the 2023 Miami Gluten-Free Food Festival. I ran “Sabores Sin Gluten,” a catering business serving Miami’s Latino community—quinceañeras, family gatherings, all the celebrations that matter.
Food is culture, and everyone deserves to experience the joy of sharing traditional family meals, regardless of dietary restrictions.