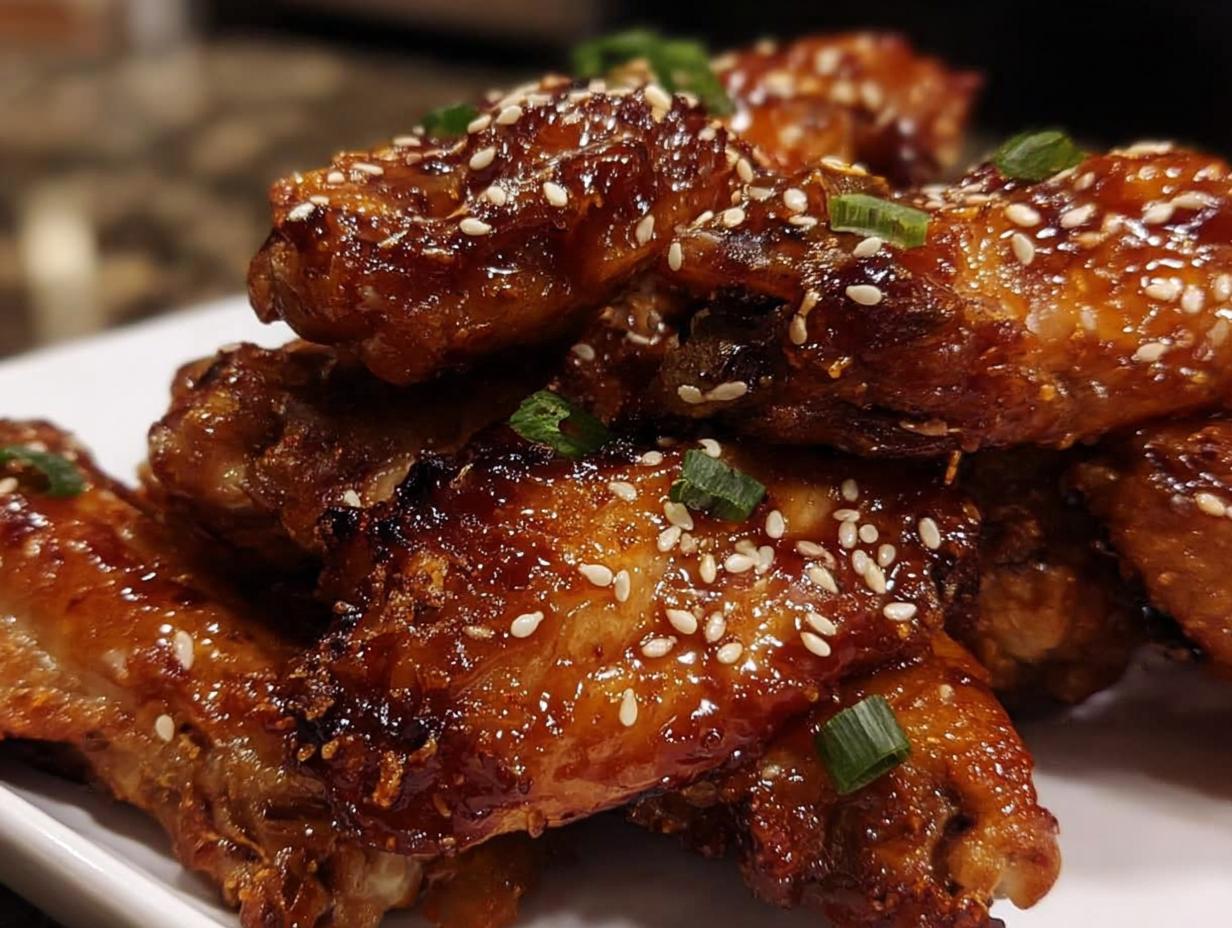
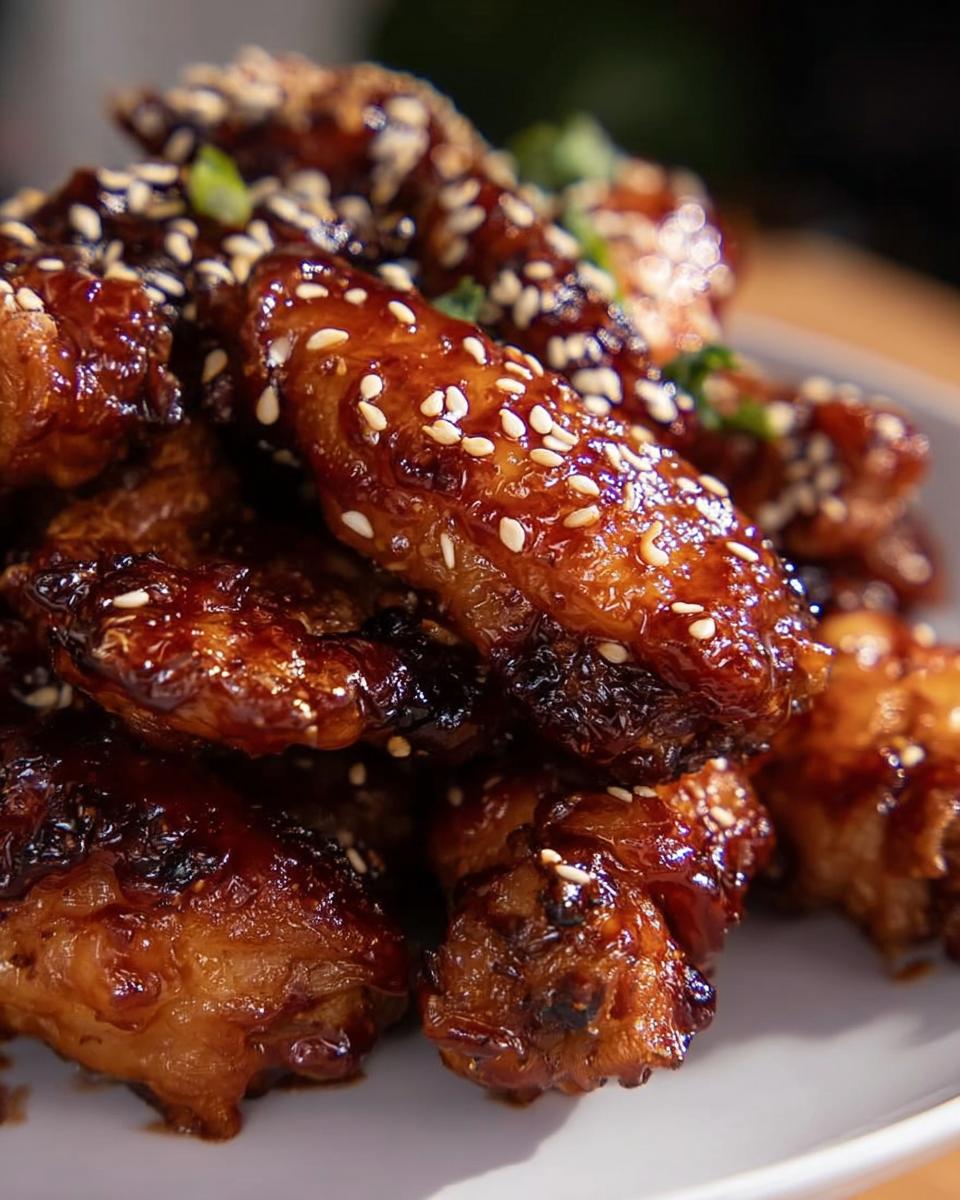
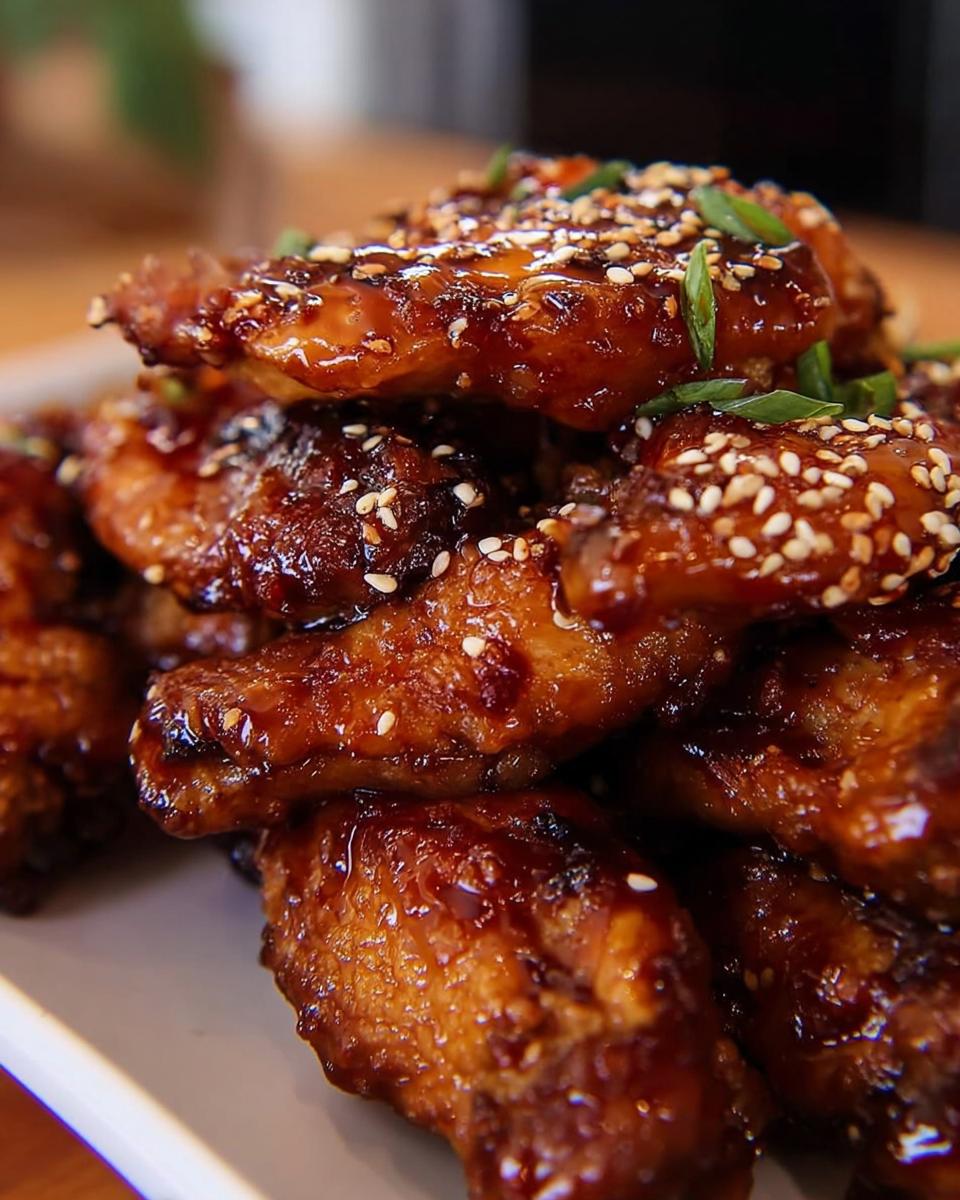
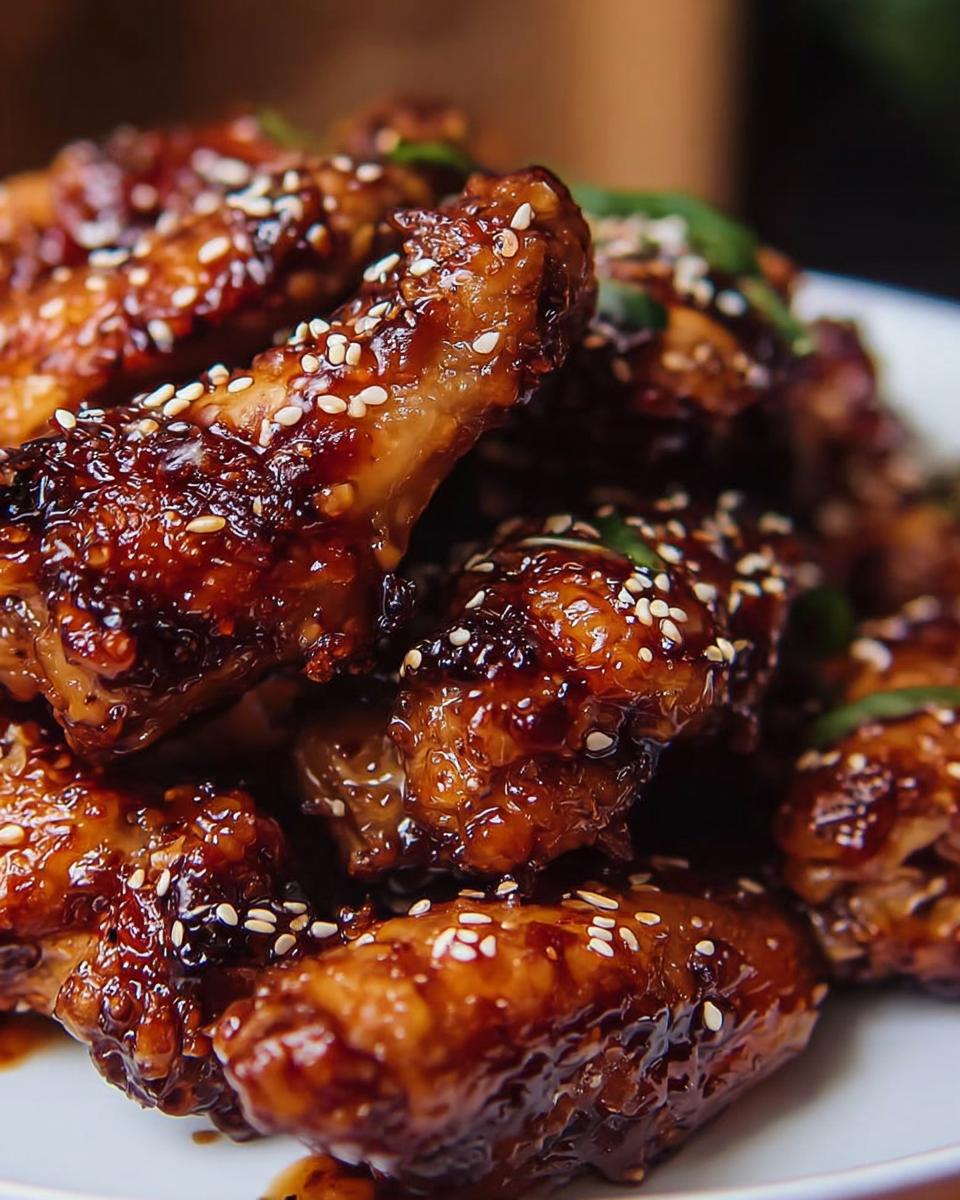
If you’re anything like me, you live for those moments when everyone gathers around the table, hands reaching for the same hot platter. Forget fussy finger foods; we need appetizers that deliver maximum flavor with minimum fuss, right? That’s exactly what my recipe for Teriyaki Sesame Baked Chicken Wings gives you. They come out perfectly crispy, coated in that sweet and savory Asian-inspired glaze you dream about!
I still remember the first time I made these for a family get-together. My youngest son had just been diagnosed with celiac disease, and I was determined to whip up something everyone could enjoy. As the wings baked in the oven, the sweet, savory aroma filled our home, evoking a sense of comfort and celebration. When I pulled them out, crispy and caramelized, my family gathered around the table, and with that first bite, all our worries melted away, replaced by laughter and joy. This dish has since become a staple in our home, reminding me that great food can bridge any dietary gap.
Why You Will Love These Teriyaki Sesame Baked Chicken Wings
Listen, I’ve made wings a million ways—deep-fried, smoked, grilled—but honestly, these baked ones are the champions for weeknight use or when you just need a big batch fast. They hit all the right notes without making a huge mess!
- They are ridiculously easy to make! Just toss, bake, and glaze—no standing over hot oil! We love using crispy baked chicken wings as our starting point.
- That flavor profile is just perfection: perfectly salty, sweet, and that nutty sesame finish sings!
- The baking powder trick? It’s pure magic! It gives you that deep, satisfying crunch you usually only get from deep frying, but in your oven.
- They are fantastic for feeding a crowd, whether it’s a big game day or just the ultimate family movie night snacks setup.
- This recipe is super adaptable for dietary needs, which is important to me since we had to adjust our menu years ago.
- Cleanup is so simple when you use that baking rack trick—a huge win in my book!
Essential Equipment for Perfect Teriyaki Sesame Baked Chicken Wings
Okay, so you don’t need a smoker or a deep fryer to get amazing texture here. Nope! We keep this simple, which is why these wings are perfect for throwing together on a Tuesday. Having the right gear makes all the difference between decent wings and absolutely rockstar wings.
Here’s the lineup you’ll need ready to go:
- Your trusty Oven—it’s doing hard work here!
- A good, sturdy Large bowl for tossing everything without making a huge mess. Trust me on this one; a small bowl just won’t cut it.
- A Skillet for building that glorious glaze. Any standard saucepan will do the trick.
- The absolute MVP: Your Baking rack. This is non-negotiable for that crispiness!
- A sturdy Baking sheet to sit underneath the rack.
Now for my absolute favorite pro-tip regarding that rack setup, which I learned through painful trial and error! You want to ensure air circulates completely around every single wing. Don’t crowd the pan trying to bake a giant batch at once—seriously, don’t do it! If the wings are touching, they steam instead of crisp. Use two sheets if you have to. You place the rack on top of the baking sheet, and if you want extra easy cleanup, line that sheet with some foil or parchment paper underneath the rack. That way, when that sweet teriyaki sauce inevitably bubbles and drips, you just toss the foil and wipe down the pan. Easy peasy!
Ingredients for Crispy Teriyaki Sesame Baked Chicken Wings
You know that sometimes, just reading a list of ingredients can make your mouth water? That’s what happens to me looking at this list because I know what magic we’re about to create! Getting the right balance of components here is what separates a good wing night from a legendary one. We are keeping things basic but totally effective. If you want extra inspiration for Asian-flavored cooking, check out this great recipe from Tasty.
We need to keep our ingredients separated into two teams: the wings themselves and the incredible sauce we are coating them in later. Don’t panic if you see baking powder—it’s our secret weapon for crispiness, not for making it rise!
For the Wings Preparation
This is where we prep the foundation. Remember, drying the wings completely is step one—moisture is the enemy of crispiness! These ingredients are what we toss them in before they hit that hot oven.
- 1 lb chicken wings (that’s about 455 grams, if you’re measuring by weight). Make sure they are separated into flats and drumettes if they came whole!
- 2 teaspoons baking powder. YES, baking powder! This dries out the skin beautifully and helps it brown. Don’t skip it!
- 1 teaspoon salt. Just simple table salt to season everything up nicely.
Creating the Sesame Glaze for Teriyaki Sesame Baked Chicken Wings
Oh boy, this glaze comes together fast and smells absolutely incredible while it cooks down. You want this sauce slightly thickened so it coats every nook and cranny of your crispy Teriyaki Sesame Baked Chicken Wings when the time comes.
- 1/3 cup low sodium soy sauce (about 70 mL). I use low sodium so the final glaze doesn’t taste too salty once it reduces.
- 2 tablespoons honey. This brings the sweetness and helps it caramelize.
- 2 tablespoons brown sugar. I prefer brown over white here because the molasses in it adds depth.
- 1 tablespoon sesame seed. These go in right at the end for crunch and flavor!
That’s it! It seems too simple, but when paired with properly baked wings, it’s unbeatable.
Step-by-Step Instructions for Teriyaki Sesame Baked Chicken Wings
Alright, let’s get cooking! This is the fun part where we turn those raw wings into crispy golden nuggets ready for their final, shiny bath of teriyaki goodness. Follow these steps closely, and you’ll have the best baked appetizers ready in just about an hour. If you need a little extra inspiration on wing techniques in general, I have a fun resource right over here!
Preparing and Baking the Wings
The first thing you absolutely must do is get that oven heating up! We need buckets of heat to activate that baking powder and make the skin crackle.
- First thing’s first: Get your Oven preheated to 400˚F (200˚C). High heat is your friend!
- Now, take your wings and pat them down thoroughly. I mean *thoroughly*. Grab paper towels and press until the skin feels dry to the touch. If there’s moisture, they steam, and we want crisp, not sweat!
- In that big Large bowl you set aside, toss the baking powder and salt together. It needs to be evenly mixed so you don’t end up with salty pockets.
- Add the dried wings to the bowl and toss them around until every single piece is completely coated in that white powder mixture. Look for even coverage!
- Set up your baking station: Place the Baking rack over the Baking sheet—remember, we lined the sheet with foil for easy cleanup, right?
- Lay those seasoned wings out on the rack in a single layer. No overlapping allowed, or they’ll get soggy!
- Bake them for a full hour, but this is key: you need to flip them every 20 minutes. Seriously, set a timer! Flipping ensures every side gets that glorious golden brown color and seals in the crispiness.
Making the Teriyaki Sesame Glaze
While those wings are busy getting crispy in the oven, you switch gears to the stovetop to make the star of the show. This sauce reduction is fast, so stay close!
- Grab your Skillet and set it over medium heat—not scorching hot, just warming up.
- Pour the low sodium soy sauce, honey, and brown sugar right into the skillet. Give it a quick whisk to get those sweeteners dissolving.
- Let this mixture come right up to a boil. Watch it—it bubbles up fast! Once it’s rolling, keep it boiling gently until it has visibly thickened up. You’re looking for it to coat the back of a spoon a little bit. This should only take a few minutes.
- Once it looks suitably thick—our amazing **sesame glaze** is forming!—stir in the sesame seeds. Keep the heat on low while the wings finish baking; we want the sauce warm when we toss them.
Finishing Your Teriyaki Sesame Baked Chicken Wings
The moment of truth! Your wings should be beautifully cooked—crispy, dark golden, and smelling like heaven. Now, we make them shiny!
Carefully take the baking sheet out of the oven. Transfer the piping hot wings from the rack directly into the skillet with your warm teriyaki sauce. Use tongs so you don’t burn yourself!
Toss them quickly and gently until every single wing is completely drenched and coated in that sticky, sweet sauce. Don’t let them sit in the sauce too long, or the crust you worked so hard for will soften up. Serve them immediately while they are still piping hot and glossy. That fantastic texture is best enjoyed right away!
Tips for Success with Teriyaki Sesame Baked Chicken Wings
I’ve been through the soggy wing phase, trust me. We want crunchy, sticky perfection every single time we make these! These little secrets are what turn a good attempt into a restaurant-quality snack right out of your own oven. These tips really help seal the deal and make these the best baked chicken appetizers around.
Here are the three things I absolutely insist upon when making these:
- The Baking Powder/Drying Combo is Mandatory: I cannot stress this enough. You need baking powder on the skin, but first, you must dry the wings off completely with paper towels! If you skip the drying, the powder won’t adhere right, and you get a weird, pasty coating instead of a crackle.
- Give Them Space to Breathe: When they’re on the rack, they need their own tiny personal space bubble. If wings are touching—even just slightly touching—they steam each other, and that hard-earned crispiness instantly vanishes. I’d rather bake two smaller batches than one giant, soggy mess.
- Toss While the Sauce is Warm: When you toss the baked wings in the skillet with the finished teriyaki sauce, make sure the sauce is still warm and slightly thick, but not boiling hot. If the sauce is cold, it’ll cool the wings down too fast and won’t stick properly. If it’s scalding hot, it can steam them slightly. Warm is the sweet spot for a super sticky, caramelized final coat.
- Don’t Forget the Final Broiler Flash (Optional but Amazing): If you really want maximum caramelization, after you toss the wings in the sauce, spread them back out on the rack (no need to crowd now!). Pop them under the broiler for just 1 to 2 minutes *max*. Keep your eye on them like a hawk because that honey and sugar will burn instantly, but it gives you this incredible, deep, sticky char that is just addictive.
Serving Suggestions for Teriyaki Sesame Baked Chicken Wings
When you get wings this good, you really need to think about what else is going on the serving platter! Since these teriyaki wings are so flavorful and sticky, everything else should be light, fresh, or cooling to balance that intense sweet and savory experience. We definitely aren’t making a full meal here; these are meant to be devoured while mingling or sitting on the couch!
I love how versatile these are. They are perfect for summer parties, sure, but honestly, the best time to make them is for a cozy family movie night snacks session. You can serve them right out of the bowl, and everyone just digs in!
Here are a few things I always put out alongside these gorgeous wings:
- Cooling Cucumber Salad: A super simple salad—cucumbers sliced thin, maybe a splash of rice vinegar and a pinch of salt. The crunch and coolness cut right through the rich glaze.
- Simple Steamed Edamame: These take five minutes, and you can toss them with a tiny bit of salt or even those leftover sesame seeds. They are fantastic for keeping little hands busy while the wings are still hot.
- Crisp Veggie Sticks: Think carrots, celery, and bell peppers—the classic wing sides! They provide a necessary fresh bite. Skip the heavy blue cheese dressing, though; these flavor profiles are better kept clean.
- A Light Pickle or Quick Kimchi: If you have time for quick refrigerator pickles, they offer a vinegary punch that resets your palate beautifully between wings. This is great for larger gatherings, check out some fun appetizer ideas for big parties over at my New Year’s Eve snack roundup for inspiration!
The goal is simple: Keep the sides easy, refreshing, and totally supportive of that amazing sesame glaze. You’ve done the hard work making the perfect wing; now, just keep the surrounding snacks simple so everyone focuses on those sticky fingers!

Storing and Reheating Your Teriyaki Sesame Baked Chicken Wings
Oh man, the eternal question! Even when these wings are the absolute star of the show, there are almost always a few lonely leftovers staring back at you from the fridge the next day. That’s totally okay, because these are almost as good the next day—if you reheat them correctly, that is. We absolutely refuse to let leftover deliciousness turn into sad, soggy sadness around here!
I’ve learned that you just can’t microwave these if you want to keep any semblance of that gorgeous crispiness we worked so hard for with the baking powder and rack setup. Trust me, the microwave turns that crunchy skin into soft, chewy disappointment. We need gentle heat to bring back the snap!
Proper Storage for Best Flavor
When you’re done snacking, you need to get these wings into an airtight container as soon as they are cool enough to handle. If you leave them out on a plate, the residual steam gets trapped, and they will definitely get gummy. It’s all about locking the texture in while we can!
Make sure any extra sauce you have left over is stored separately in a small lidded jar. If you’ve already tossed all the wings in the sauce, that’s fine, but just be aware that they will be softer to start with when reheating. They should be good in the fridge for about three to four days. Any longer than that, and I’d start worrying about that beautiful glaze.
If you are worried about the wings sticking together while refrigerated, you can try placing a small piece of parchment paper between any layered wings in the container. It sounds fussy, but it stops that sticky glaze from gluing everything into one giant, delicious brick!
Restoring That Baked Crunch When Reheating
As I mentioned, we are avoiding the microwave at all costs unless you truly, truly just need them warm and texture doesn’t matter one bit. For the best results, you want to get them back under dry heat.
Here is the method I swear by to bring these teriyaki wings back to life:
- Set your oven—yes, back to the oven!—to 375˚F (190˚C). You don’t need to go super high heat this time.
- Grab a fresh baking sheet and place your wire baking rack back on it. You want that airflow again!
- Lay the leftover wings out in a single layer on the rack. Again, no crowding! If they are touching, they will steam each other and stay soft.
- Bake them for about 8 to 12 minutes. Keep an eye on them, especially if they were heavily sauced! You are just looking to heat them through completely and dry out that skin again.
- If you saved extra sauce, you can warm that up in the skillet again for two minutes while the wings are in the oven, and then quickly toss them right before serving. That fresh coat of warm sauce makes them taste like they were just made!
A quick blast in the oven is the best way to ensure those crispy edges return. It takes just a few minutes longer than heating up a plate of leftovers, but oh my goodness, the payoff is huge!
Frequently Asked Questions About Teriyaki Wings
It’s the natural end to any great recipe, right? You’ve got questions, and I’ve got answers from making these wings practically every week for my family since we first figured out this foolproof method! Don’t hesitate to ask—it’s how we all get better at cooking!
Here are the things people ask me most often about making these sensational teriyaki wings.
Can I make these Teriyaki Sesame Baked Chicken Wings in an air fryer?
Oh yes, you absolutely can! My air fryer gets a serious workout, especially when I’m making a smaller batch of these baked chicken appetizers. The air fryer makes the wings even crispier, often faster than the oven method, which is fantastic if you’re in a real rush!
Here’s the quick swap: For the pre-baking step, toss the seasoned wings in the air fryer basket (remember, don’t overcrowd them!) at about 380˚F (195˚C) for 15 minutes. Flip them, and go another 10–15 minutes until they look golden. Then, you just proceed to stage two: toss them immediately in your warm teriyaki sesame glaze made on the stovetop and serve right away! You might save about 15 minutes off the total cook time.
What is the best way to ensure the sesame glaze sticks?
This is all about temperature and texture management when it comes to the sticky part! If you toss cold wings into cold sauce, the sauce just isn’t going to grab onto the skin properly; it’ll slide right off or cool the wings down immediately.
You want two things working for you: First, make sure your sauce has reduced down nicely in the skillet. It should be thick—not Syrupy or paste-like, but definitely thicker than when you first poured the ingredients in—so it has body. Second, when you take those hot, crispy wings out of the oven rack, toss them directly into that skillet with the warm sauce immediately. The heat from the wings helps the warm glaze spread evenly and adhere beautifully to all those little crispy edges. A quick, decisive toss is key here!
Are these Teriyaki Sesame Baked Chicken Wings gluten-free safe?
Since I developed this recipe after my son’s diagnosis, this was my number one concern! The wings themselves (chicken, baking powder, salt) are naturally gluten-free, which is great! However, the sauce is the tricky part. Standard soy sauce almost always contains wheat.
To make sure your teriyaki wings are completely safe for gluten-free guests, you MUST swap out the regular soy sauce for Tamari or a certified gluten-free soy sauce substitute. Honestly, I find Tamari sometimes adds an even deeper, richer color to the finished glaze! Just make sure that substitution is firmly in place before you start cooking, and you’re good to go! If you love finding other easy dishes we rely on, check out some of my favorite gluten-free finds here.
Can I bake the wings ahead of time and sauce them later?
Yes, you totally can! This is a great move if you are having a huge party and need a staggered serving time. You can bake the wings the way we detailed in the instructions—dry, seasoned, and perfectly crispy—and let them cool completely.
Store those baked wings in the fridge until you are ready to serve. When company arrives, just warm up the teriyaki sauce in the skillet until it’s nice and hot, then toss those already-crispy wings in the warm sauce. They won’t be *quite* as crunchy as if you served them straight from the oven, but it’s a fantastic compromise for busy hosts!
Share Your Teriyaki Sesame Baked Chicken Wings Creation
That’s it, friends! You’ve successfully conquered the prep, stood guard over the oven, and whipped up that incredible sticky, sweet sesame glaze. Seriously, take a moment to admire those beautiful Teriyaki Sesame Baked Chicken Wings you just made. I truly hope the aroma filled your kitchen the way it always does mine—that comforting, savory scent that just screams, “This is going to be a great night!”
Sharing food is my absolute favorite way to connect with people, and documenting our kitchen successes means we can cheer each other on. Whether this was just a fun snack for a Tuesday or the highlight of a big party, I want to hear all about it!
Please, please, please come back here and let me know how they turned out for you. Drop a rating below—five stars if you’re planning to make them again next weekend (which I bet you are!). Did your kids love the crunch? Did the glaze stick perfectly? Tell me everything in the comments!
And if you snapped a photo of your platter piled high with those irresistible sticky wings, I’d be thrilled if you shared it on social media! Tag me so I can see your handiwork. Cooking is a joy when we share the results, and I’m always looking for new ways to get inspired, just like the great dips and sides you might find over at my guacamole recipe post. Happy cooking, and enjoy every single bite of that amazing finger food!

Teriyaki Sesame Baked Chicken Wings
Ingredients
Equipment
Method
- Preheat your oven to 400˚F/200˚C.
- Remove excess moisture from the chicken wings using a paper towel.
- In a large bowl, stir the baking powder and salt together until the chicken is fully coated.
- Bake the wings on a baking rack for 1 hour, flipping every 20 minutes, until they are golden brown and crispy. Place the baking rack on a baking sheet covered with parchment paper or foil to catch drippings for easier cleanup.
- In a skillet, combine the soy sauce, honey, and brown sugar over medium heat. Bring the mixture to a boil and then add in the sesame seeds.
- Once the sauce has thickened, stir in the baked chicken wings until they are completely coated.
- Serve the wings with your preferred side dish or dipping sauce.
Notes
Tried this recipe?
Let us know how it was!
Gluten-Free Chef & Latin Cuisine Innovation Specialist
My youngest son’s celiac diagnosis at four changed everything. Suddenly, all those traditional Brazilian and Portuguese recipes from my avó needed to be completely reimagined without losing their soul.
After graduating from Johnson & Wales and working Miami’s Latin fusion scene, my son’s diagnosis became my calling. How do you make gluten-free empanadas that taste like childhood? Over eight years, I’ve developed 320+ gluten-free recipes celebrating authentic Latin flavors using cassava flour and plantain alternatives.
My gluten-free empanada recipe won “Best Appetizer” at the 2023 Miami Gluten-Free Food Festival. I ran “Sabores Sin Gluten,” a catering business serving Miami’s Latino community—quinceañeras, family gatherings, all the celebrations that matter.
Food is culture, and everyone deserves to experience the joy of sharing traditional family meals, regardless of dietary restrictions.