Oh my goodness, if you’re anything like me, weeknights are a whirlwind! Juggling appointments and trying to get something truly satisfying on the table feels impossible sometimes. That is exactly why I’m obsessed with these Sticky Chicken Bowls—they are fast, packed with flavor, and totally safe for our gluten-free lifestyle.
I still remember the chaos of trying to prepare a meal after a long day at the hospital, only to find my pantry looking barren. On one such evening, I pulled out some chicken, rice, and a few vegetables, and from that simple combination, the recipe was born! With just a couple of pantry staples and a flavorful sauce, I turned what could have been a bland dinner into a vibrant meal that my kids devoured without complaint. It proved that with a little creativity, even the busiest days can end deliciously.
As a Gluten-Free Nutritionist and Family Meal Planning Expert, I promise this recipe is a game-changer for stress-free dinners. You’ll get that amazing takeout flavor right at home, and we didn’t even need flour to thicken that incredible sauce! You can check out a similar great version over at this sticky chicken rice bowls post to see how universally loved this concept is.
Why These Sticky Chicken Bowls Are Your New Weeknight Hero
Listen, when you’re battling the afternoon slump, you don’t need recipes that demand your entire evening. That’s why this recipe for Sticky Chicken Bowls clicked with me instantly. It delivers huge flavor payoff for minimal effort—which is exactly what busy parents need.
We know what you’re thinking: Asian-inspired food takes forever. Nope! We’ve managed to keep everything under an hour, and since we skip the flour dredge, they are naturally gluten-free, which is a huge relief for school lunches or sensitive tummies! They are just so satisfying.
- Huge, restaurant-quality flavor without the takeout price tag.
- Perfectly balanced savory, sweet, and spicy notes everyone enjoys.
- Easy to customize with whatever veggies you have on hand. Check out why folks are loving this style of bowl! And for more easy meals, look at this collection of healthy inspiration.
Quick Prep and Cook Time Breakdown
This one is super quick, I promise! You only need about 15 minutes of hands-on prep time. Once things are tossed into the air fryer and the sauce is simmering, the cook time clocks in around 30 minutes. Seriously, you’ll be eating dinner before the kids finish their homework!
Essential Ingredients for Perfect Sticky Chicken Bowls
Okay, gathering your ingredients is half the battle, right? Since this is a gluten-free recipe, we need to be a tiny bit more precise with a couple of things, like our thickener. But honestly, once you have everything laid out on the counter—what we call *mis en place*—the cooking goes so smoothly. You’ll find a link below to my guide on setting up your bowl station like a pro!
Don’t substitute the soy sauce unless you’re using tamari, or you lose that beautiful savory depth. Everything else is pretty solid and pantry-friendly, which is key for those busy evenings!
For the Bowl Base Components
This is what fills up your tummy and makes these bowls hearty enough for dinner. Make sure your broccoli is chopped into small, even pieces so it cooks quickly alongside the chicken!
- 2 cups uncooked rice
- 2 small heads broccoli, chopped
- 3 large chicken breasts
- 2 tbsp olive oil
- 1 tsp salt
- 1/2 tsp pepper
- 1 tsp chili powder
- 1 tsp smoked paprika
- 1 tsp onion powder
- 1 tsp oregano
Crafting the Signature Sticky Sauce
This sauce is pure magic, trust me! When you make the slurry, make sure it’s totally smooth *before* you add it to the boiling liquid. If you use cornstarch instead of arrowroot, that’s totally fine, just know that arrowroot tends to give a slightly cleaner, glossier shine.
- 1/2 cup soy sauce (Make sure it’s gluten-free, like Tamari!)
- 1/2 cup honey
- 1/4 cup rice vinegar
- 3 cloves garlic, minced
- 2 tbsp sriracha (taste this first, some brands are zingier!)
- 2 tsp sesame oil
- 1 tsp ground ginger
- 2 tsp arrowroot powder mixed with 2 tbsp water to make a slurry (sub cornstarch)
Spicy Mayo and Final Toppings
This spicy mayo is the ribbon on top, making everything cohesive. You might think you want less water, but trust me, you need some liquid in there to get that perfect drizzle consistency over the hot chicken.
- 1/2 cup mayo
- 1 tbsp sriracha
- 2-3 tbsp water (you might need less if your mayo is thinner)
- as needed sesame seeds for topping
Step-by-Step Instructions for Flavorful Sticky Chicken Bowls
Okay, follow me closely here, because putting the pieces together is where the magic of these Sticky Chicken Bowls really happens. Don’t stress about juggling everything; we’ll tackle the base first, then the sauce while the chicken cooks. It’s all about timing, and you’ve got this! If you want the definitive guide on how to crush any bowl recipe, check out this technique guide.
Preparing the Base and Chicken
First things first, get that rice going according to the package directions—that’s your easy starter! While it’s bubbling away, steam your chopped broccoli until it’s tender enough for a fork, then set it aside nearby.
Next, cube those chicken breasts up nice and small. Toss them generously with your olive oil and all those amazing dry spices we mixed up—chili powder, paprika, all of it! Lay the seasoned chicken in a single layer in your air fryer. Make sure that fryer is preheated to 400F! Pop them in and let them cook for about 12 minutes, but you really need to check that internal temperature; we are aiming for 160F to be safe before we even think about glazing them.
Making the Thick Sticky Sauce
While your chicken is air frying away, grab a little sauce pot. Dump in your soy sauce, honey, vinegar, garlic, sriracha, sesame oil… the works! Get that mixture going over medium heat until it hits a rolling boil. This part is important: once it’s bubbling hard, slowly whisk in that arrowroot slurry we made. You need to let it boil for a good 4 to 5 minutes after adding the thickener until you see it gripping the spoon—it needs to get seriously thick!
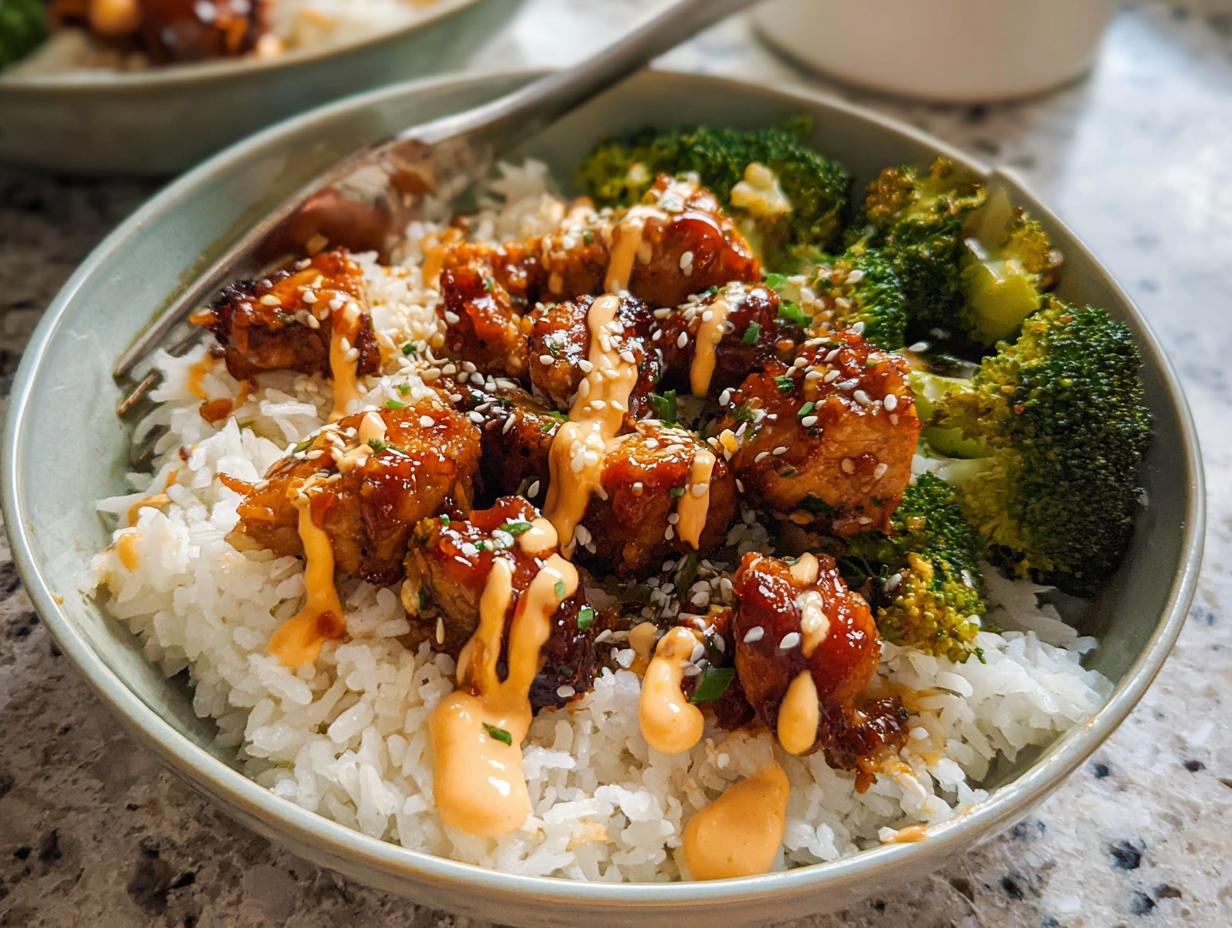
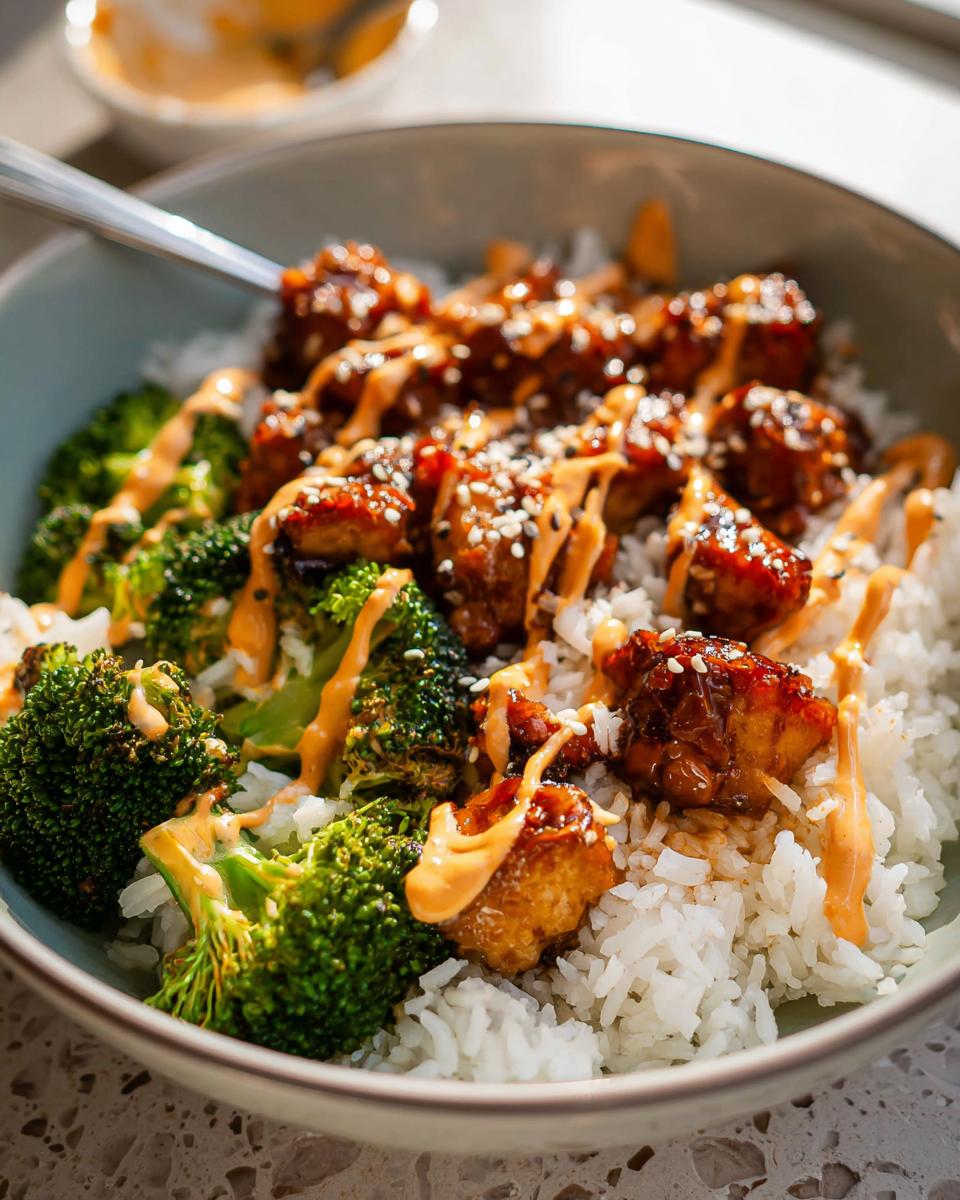
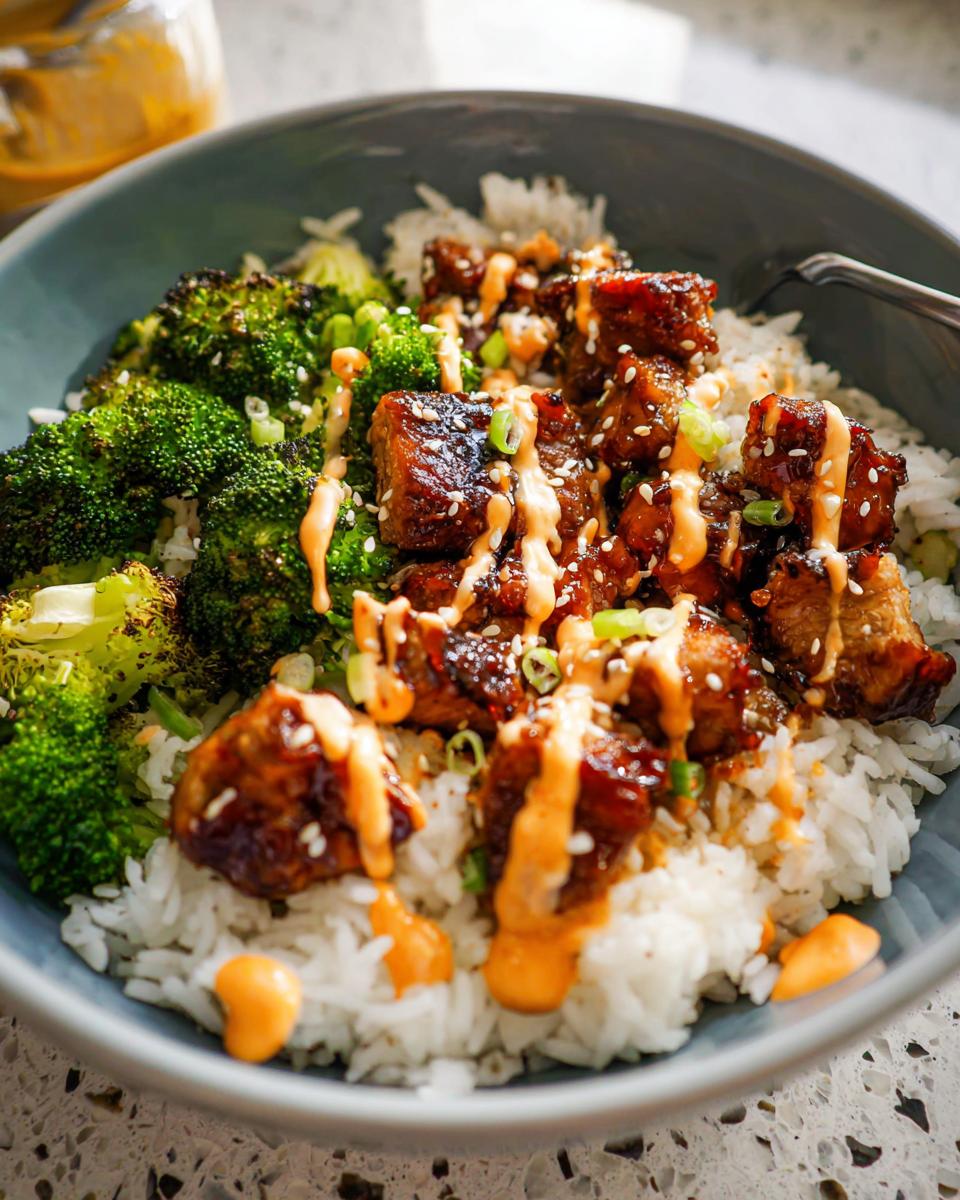
Assembling Your Perfect Sticky Chicken Bowls
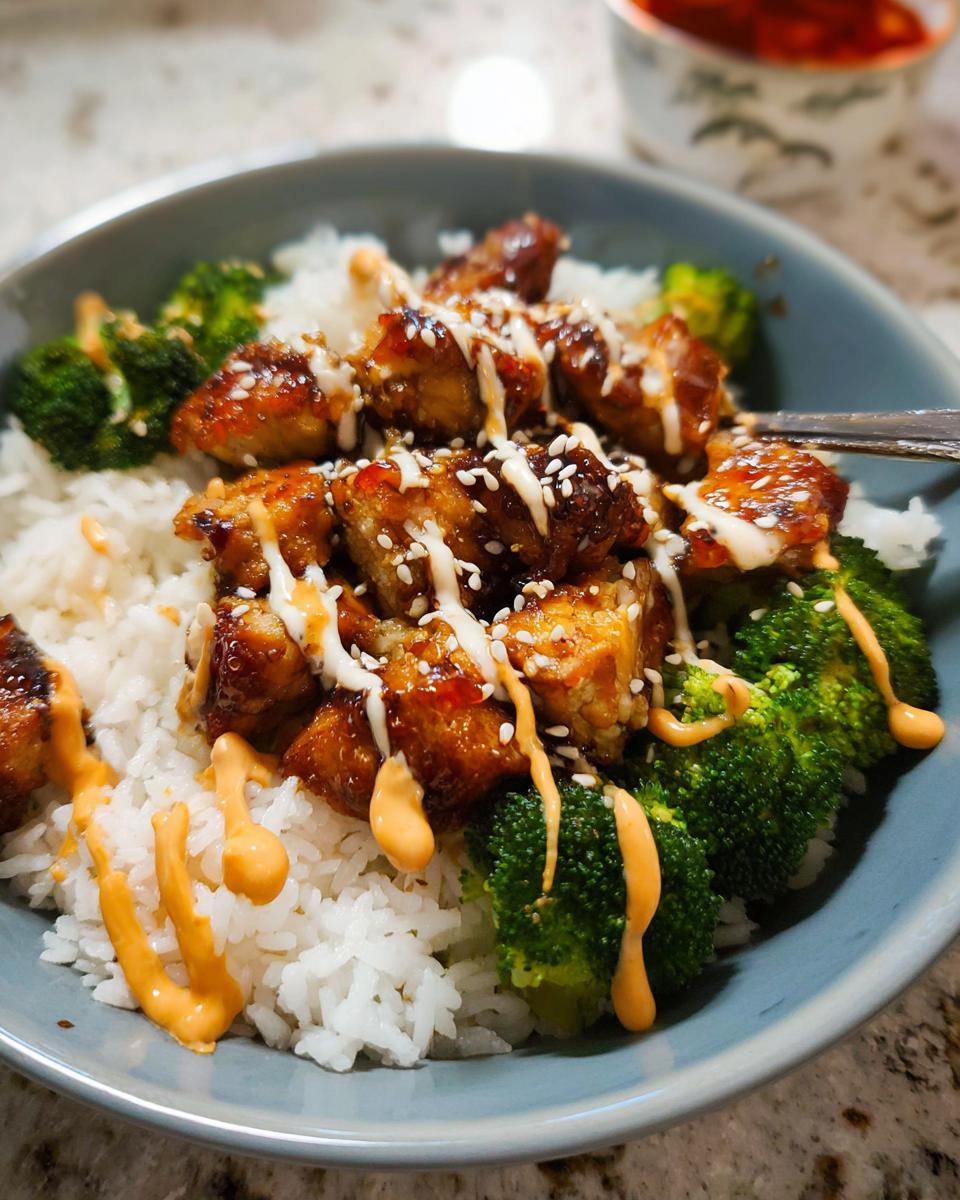
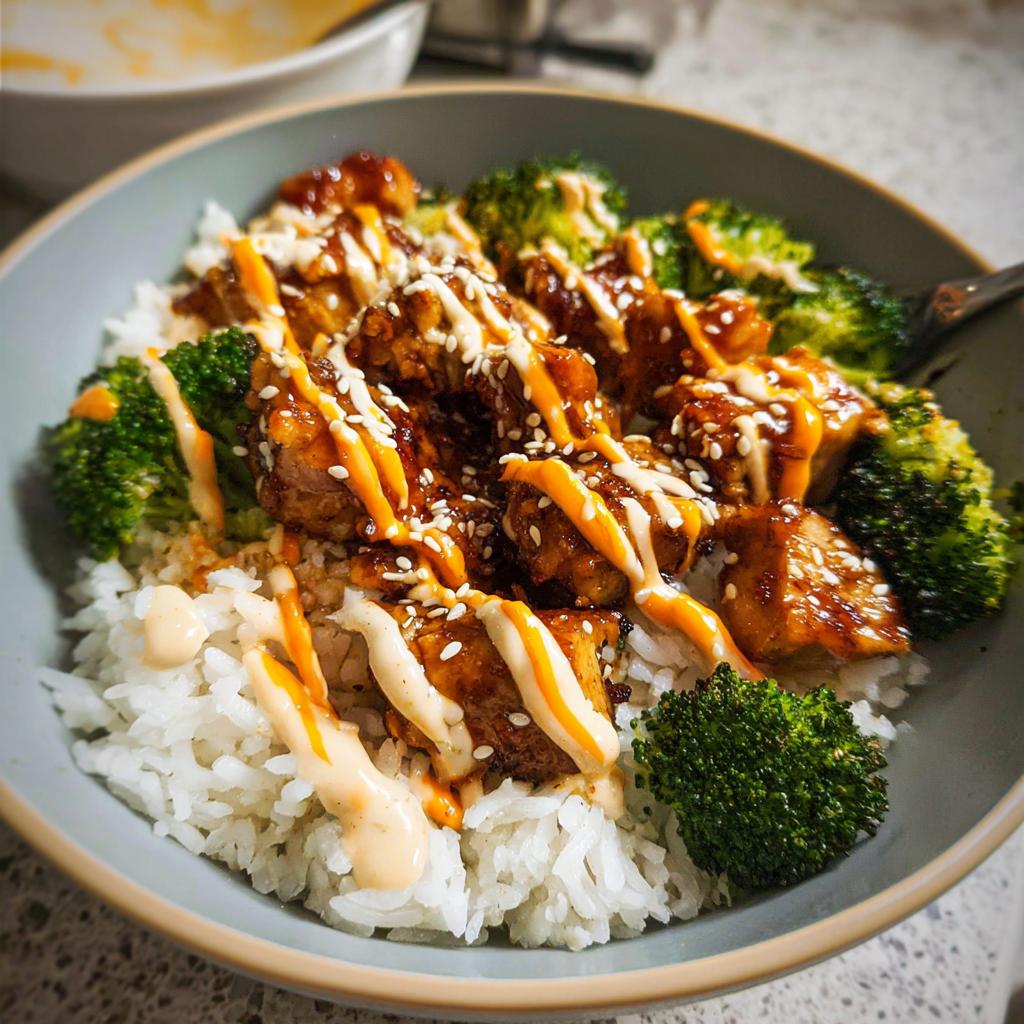
Now we build! Start with a nice bed of warm rice in each bowl. Then you layer those bright green steamed broccoli pieces right next to the rice, followed by all that perfectly cooked, seasoned chicken. Drench everything generously with that thick, glossy sticky sauce you just made—don’t be shy!
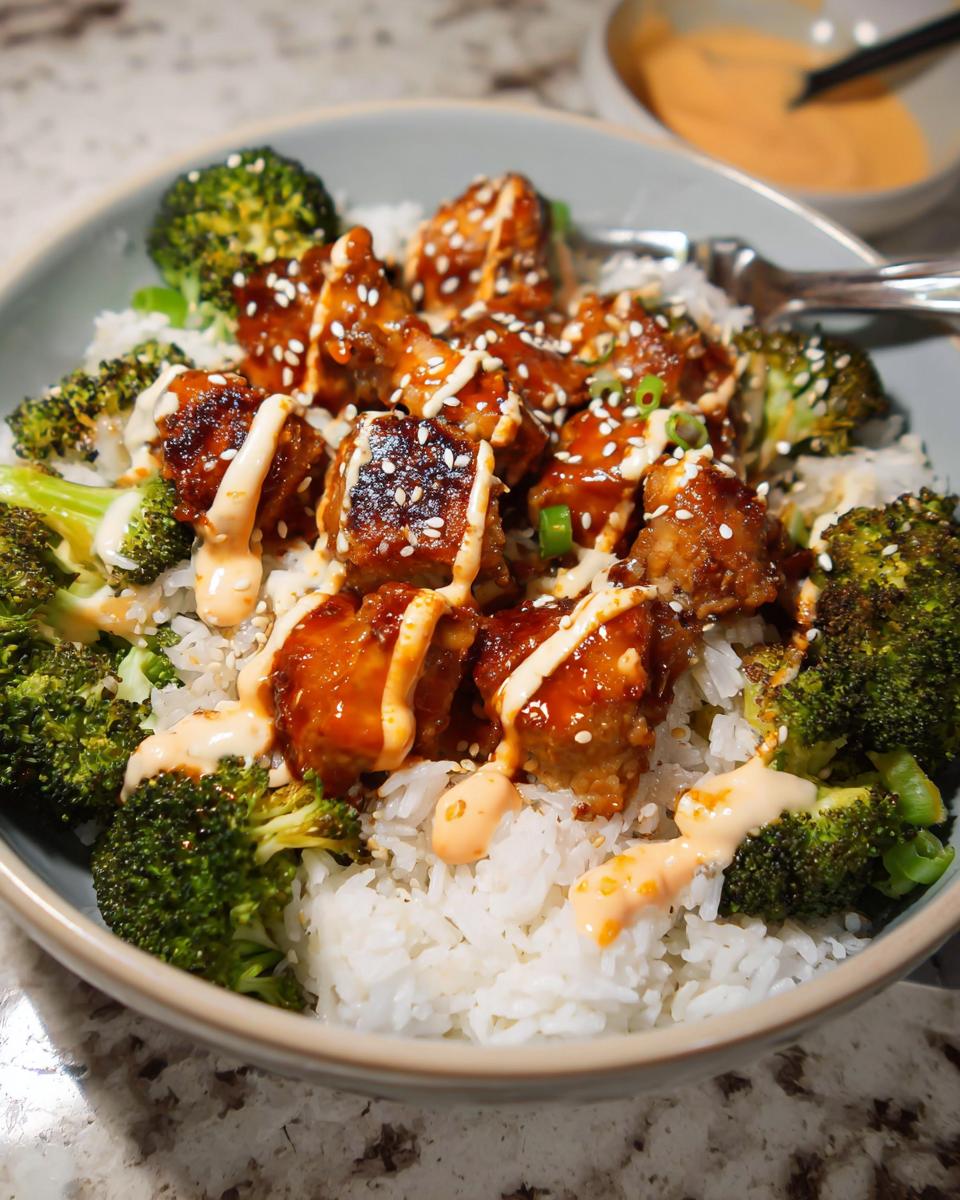
For the finale, just quickly whisk your mayo with the extra sriracha and water until it’s runny enough to drizzle. Spoon that spicy mayo over the top, and finish with a sprinkle of sesame seeds. Dinner is served! Can you smell that?
Tips for Making the Best Sticky Chicken Bowls
Honestly, making this recipe absolutely shine comes down to treating those simple ingredients right. Since these are Sticky Chicken Bowls, the sauce thickness is everything! If your sauce looks thin after the cook time, just keep it simmering—it will tighten up. Don’t rush that 4 to 5 minute boil after adding the slurry, or it’ll run off your chicken later.
Also, since we are keeping this gluten-free, always double-check your soy sauce bottle. If it doesn’t specifically say ‘Gluten-Free’ or ‘Tamari,’ assume it has wheat lurking in there. That’s my nutritionist hat coming on!
When it comes to that air fryer trick, I learned that you absolutely cannot overcrowd the basket for the chicken. If the pieces are piled up, they steam instead of crisping, and nobody wants steamed chicken in a sticky bowl! Make sure they have space; you might need to cook in two batches. To get more professional cooking knowledge, take a peek at this guide on boosting healthy meals.
Meal Preparation Ideas for Sticky Chicken Bowls
I know, I know, the thought of taking leftovers and making them taste almost as good the next day seems like a dream, especially with saucy chicken! Meal prepping Sticky Chicken Bowls is totally doable, you just can’t treat it like a casserole. We want to keep things separate so the rice doesn’t turn to mush and the chicken stays somewhat firm.
When I pack mine for my lunches—especially after a crazy shift—I divide the meal into three main containers. This is the absolute secret to keeping meal prep exciting all week long. Why ruin a perfectly crispy piece of chicken with sauce overnight?
For quick reference on making meal prep easier overall, you should definitely check out this section on meal prep inspiration. It gives great overall strategies!
Here is my go-to segregation method that keeps these bowls tasting fresh for up to four days:
- Container 1: The Base. Scoop your cooked rice and the steamed broccoli into the bottom. They hold up really well together and warm up nicely.
- Container 2: The Protein. Keep the air-fried chicken completely separate. Don’t even think about saucing it yet! When you pull it out of the fridge the next day, it reheats beautifully in the air fryer for about 3 minutes to crisp up again.
- Container 3: The Sauces. This is key for leftovers! Portion your sticky sauce and your spicy mayo into tiny little dressing containers. If you pour the sauce directly onto the rice, it’s soggy city by day two.
I love pulling those containers out at work. I microwave the rice/veggie mix for a minute, then toss the chicken in for 30 seconds just to warm it through. Then I pour the sauce over top. It tastes like I just made it! It saves me from grabbing fast food, and it always hits the spot.
Healthy Eating Options within Sticky Chicken Bowls
One of the best things about these Sticky Chicken Bowls is how naturally balanced they are for a busy weeknight meal. You’ve got your lean protein from the chicken, a whole grain base with the rice, and a serving of green power from the broccoli. It checks all the boxes for a nutritionist-approved dinner!
When I tell families about these, especially parents managing those dietary needs, I always point out how simple it is to “boost” the health factor without changing the core taste. You’re already using quality ingredients, but we can sneak in even more goodness!
For example, if you want to seriously amp up the fiber, switch out the white rice for brown rice. It takes a little longer to cook, so plan that into your 30 minutes, but the nutty flavor works beautifully with the sweet soy sauce glaze. If you want more veggies, don’t be shy!
You can easily double the amount of broccoli or even toss in some shredded carrots or thinly sliced bell peppers when you steam them. The sticky sauce does a great job of coating whatever you throw in there, so the kids won’t even notice the extra greens hiding!
And let’s bring up the gluten-free aspect one more time, because this is important for true healthy eating for those who need it: remember we used that arrowroot slurry to thicken the sauce instead of traditional flour? That keeps the bowls totally safe and naturally gluten-free, without adding any weird processed fillers. If you’re looking for more ways to keep dinner healthy and fun, you have to check out this page of healthy dinner inspiration for more ideas!
Ingredient Substitutions for Your Sticky Chicken Bowls
I know that perfect ingredient matching doesn’t always happen, especially when you’re trying to pull dinner together after a long day. Flexibility is key when you are in the middle of feeding a hungry family! The good news is that these Sticky Chicken Bowls are incredibly forgiving. That core flavor profile—the sticky, savory punch—comes mostly from the sauce ratio, so we can swap out some of the base items without major issues.
Before we dive into swaps, remember that for truly reliable gluten-free cooking, you should always consult my comprehensive guide to chicken recipes if you have deep concerns about cross-contamination in products.
Here are the swaps I’ve tested successfully in my own kitchen when staples were missing:
- For the Chicken: If you don’t have chicken breasts, go straight for boneless, skinless chicken thighs! I actually prefer thighs sometimes because they are more forgiving in the air fryer and stay juicier. Just watch the cook time—thighs might need an extra minute or two to hit that safe internal temp.
- Thickening the Sauce: We specified arrowroot powder, which is great for a clear, glossy finish, but honestly, if you only have regular cornstarch, use it exactly cup-for-cup. It works the same way, though sometimes it can look a little cloudier, but the taste? Totally unaffected. Don’t use flour, though; it changes the texture way too much for this glaze.
- Vinegar Swap: If you ran out of rice vinegar, I’ve successfully substituted it with white wine vinegar in a pinch. You might want to add just a tiny splash (like half a teaspoon) of extra sugar to the sauce batch just to balance out the sharper acidity you get from the wine vinegar.
- Sweetener Alternatives: Honey is the best because it really helps the sauce cling, but maple syrup works beautifully as a substitute if you have that on hand instead. Just use an equal amount—the earthy notes feel right at home with the soy sauce.
The goal is speed and satisfaction, so if a swap gets dinner on the table faster, I say go for it!
Frequently Asked Questions About Sticky Chicken Bowls
I always get so many questions when readers try this recipe for the first time, which just proves how much everyone loves a good Sticky Chicken Bowls night! Since this is a staple quick meal in my house, let me jump in and clear up some of the most common things people ask about making the best bowls.
Whether you’re worried about dietary restrictions or just missing an appliance, we have workable solutions. When you look through these, you’ll see just how flexible this dinner can be!
Can I make this Sticky Chicken Bowls recipe without an air fryer?
Oh, absolutely! The air fryer is my go-to because it cooks the chicken so fast and keeps it moist, but if you don’t have one, don’t panic! You have two great options. For quicker cooking, you can just sear the seasoned chicken pieces right on the stovetop in a large skillet over medium-high heat with a little extra oil. You’re aiming for that lovely browned crust on all sides, making sure they cook through to 160F internally—this usually takes about 6 to 8 minutes total.
Alternatively, you can bake the seasoned chicken on a parchment-lined baking sheet at 400 degrees Fahrenheit. Baking usually takes about 18 to 20 minutes, depending on the size of your cubes. Either way, you get that perfect seasoning crust; just remember to keep an eye on the internal temperature for safe gluten-free chicken!
How do I ensure the sauce is truly gluten-free?
This is such an important question, especially since we rely so heavily on the soy sauce base for that classic flavor! Most mainstream soy sauces contain wheat because regular soybeans are fermented using wheat. If you are dedicated to keeping these Sticky Chicken Bowls 100% gluten-free, you absolutely must look specifically for GF soy sauce or—even better—use Tamari.
Tamari is traditionally made with little to no wheat and offers that deep, savory umami flavor we need in the sauce. Just make sure the bottle explicitly says “Gluten-Free Tamari” if you are serving someone with an allergy or sensitivity. It makes all the difference for peace of mind!
Can I use a different grain instead of rice in these bowls?
For sure! Rice is traditional, and it soaks up that sticky sauce beautifully, but sometimes we want a change or maybe we are trying to cut back on grains. I frequently swap rice out for a few other bases, and they work just wonderfully!
- Quinoa: This is a fantastic, nutrient-dense swap. Quinoa has a slightly earthier flavor that pairs surprisingly well with the sweet glaze. Cook it according to package directions, just like you would the rice.
- Cauliflower Rice: If you’re aiming for a lower-carb meal or just want to load up on more vegetables, pre-riced cauliflower is my favorite quick fix. You can steam it right on the stovetop for about 5 minutes until just tender. Because it’s so light, it makes the whole bowl feel much brighter.
Seriously, don’t let a simple lack of rice stop you from making this amazing dinner. You can find more inspiration for quick swaps in my quick dinner collection!
Storage and Reheating Instructions for Leftover Sticky Chicken Bowls
We already talked about how I pack these things up for lunches, but let’s nail down the exact science of storing leftovers so they don’t turn into gummy sadness the next day! Because these Sticky Chicken Bowls have a slightly crispy element on the chicken and a thick sauce, keeping the texture sharp means keeping things separate.
The absolute worst thing you can do is store everything mixed together. If the rice sits under that sticky sauce overnight, it turns mushy, and any crispness you achieved on the chicken? Gone. Poof! I use airtight containers, and I make sure my leftovers are fully cooled before they hit the fridge—that helps prevent condensation, which is the enemy of leftovers.
Here is the bulletproof system I swear by, which helps keep the quality high for about three to four days in the fridge:
- The Chicken Factor: If you have any chicken that didn’t get fully coated in sauce during the first serving, that piece is gold! Keep it totally naked in its own little compartment. If you have sauced chicken, just try to keep it in a single layer so the sauce doesn’t solidify into one big clump.
- Sauce Containment: Never, ever pour the remaining sticky sauce or the spicy mayo over the leftovers *before* storage. Keep them in their tiny little containers! If the sauce gets cold, it firms up, which is normal. You are just reheating the components separately, not trying to revive a pre-made, soggy bowl.
- Veggies and Rice: These two components can hang out together just fine. Rice might dry out slightly after day three, but you can splash a teaspoon of water over it before reheating to revive it.
Now for the reheating part! This step brings back the joy of this quick meal. If you want that slightly crispy texture back on the chicken, the microwave is your enemy. Take the chicken out of the fridge and toss it into a toaster oven or a regular oven set to 350F for about 5 minutes. That warms it through gently!
If you are super pressed for time, the microwave is okay for the rice and veggies only. Then, once that’s warm, just put the chicken on top and pour the sauce over everything right before serving. It keeps the meal feeling fresh! If you want more pro-tips on keeping your meal prep tasting amazing all week, check out this great guide on meal prep tasting great!
Sticky Chicken Bowls
Ingredients
Equipment
Method
- Cook rice according to package directions.
- Steam broccoli in a microwave or on the stovetop until it is fork tender. Set the broccoli aside.
- Cut the chicken into small, bite-sized pieces.
- Toss the chicken with oil and all the dry spices. Lay the chicken flat in a preheated air fryer set to 400F and cook for 12 minutes or until the internal temperature reaches 160F.
- While the chicken cooks, add the soy sauce, honey, rice vinegar, garlic, sriracha, sesame oil, and ground ginger to a sauce pot. Bring the mixture to a boil. Once boiling, add the arrowroot slurry. Let it boil for 4 to 5 minutes or until the sauce has thickened significantly.
- Prepare the bowls by layering the rice, broccoli, and chicken. Cover the ingredients with the sticky sauce. Mix together the spicy mayo ingredients and drizzle this mixture on top. Finish by sprinkling with sesame seeds.
Notes
Tried this recipe?
Let us know how it was!
Gluten-Free Nutritionist & Family Meal Planning Expert
Working as a pediatric dietitian at Children’s Hospital of Denver, I kept meeting families overwhelmed by managing their children’s celiac disease. Parents stressed, kids frustrated, everyone eating bland boxed “gluten-free” products.
That’s when I realized my calling: creating practical, balanced gluten-free solutions for real families with busy schedules. I’ve developed 375+ family-friendly recipes focusing on lunch boxes, after-school snacks, and make-ahead dinners that actually work.
My meal planning system was featured in Parents Magazine, and I presented research at the Rocky Mountain Pediatric Nutrition Conference. My evidence-based approach ensures recipes meet both taste and health standards—families need solutions that work in the real world, not just perfect test kitchens.