Oh, you have got to try these! Sometimes you just need that perfect, decadent treat that cuts through the ordinary, right? Well, I promise you, these Nutella Swirl Cheesecake Bars deliver that rich, creamy, chocolate-hazelnut blast you’re craving. And the best part? They’re totally gluten-free, which makes them even sweeter!
I remember the first time I introduced my son to cheesecake bars—I was so determined to create a gluten-free version that captured the essence of indulgence. As we stirred the creamy batter and swirled in that heavenly Nutella, my kitchen transformed into a sanctuary of laughter and sweet memories. The look on his face when he took the first bite was unforgettable; it was pure bliss! Those Nutella Swirl Cheesecake Bars have since become our family tradition, a symbol of resilience and creativity in the kitchen, proving that gluten-free can be just as delicious!
Why You Will Love These Nutella Swirl Cheesecake Bars
I’ve made a lot of desserts in my time, but these bars are always the first to disappear when I bring them out. Honestly, they are just pure comfort food in a neat little square. Trust me on this one!
- They’re incredibly rich but surprising simple to pull together, perfect for those busy afternoons when you need an easy sliced dessert miracle.
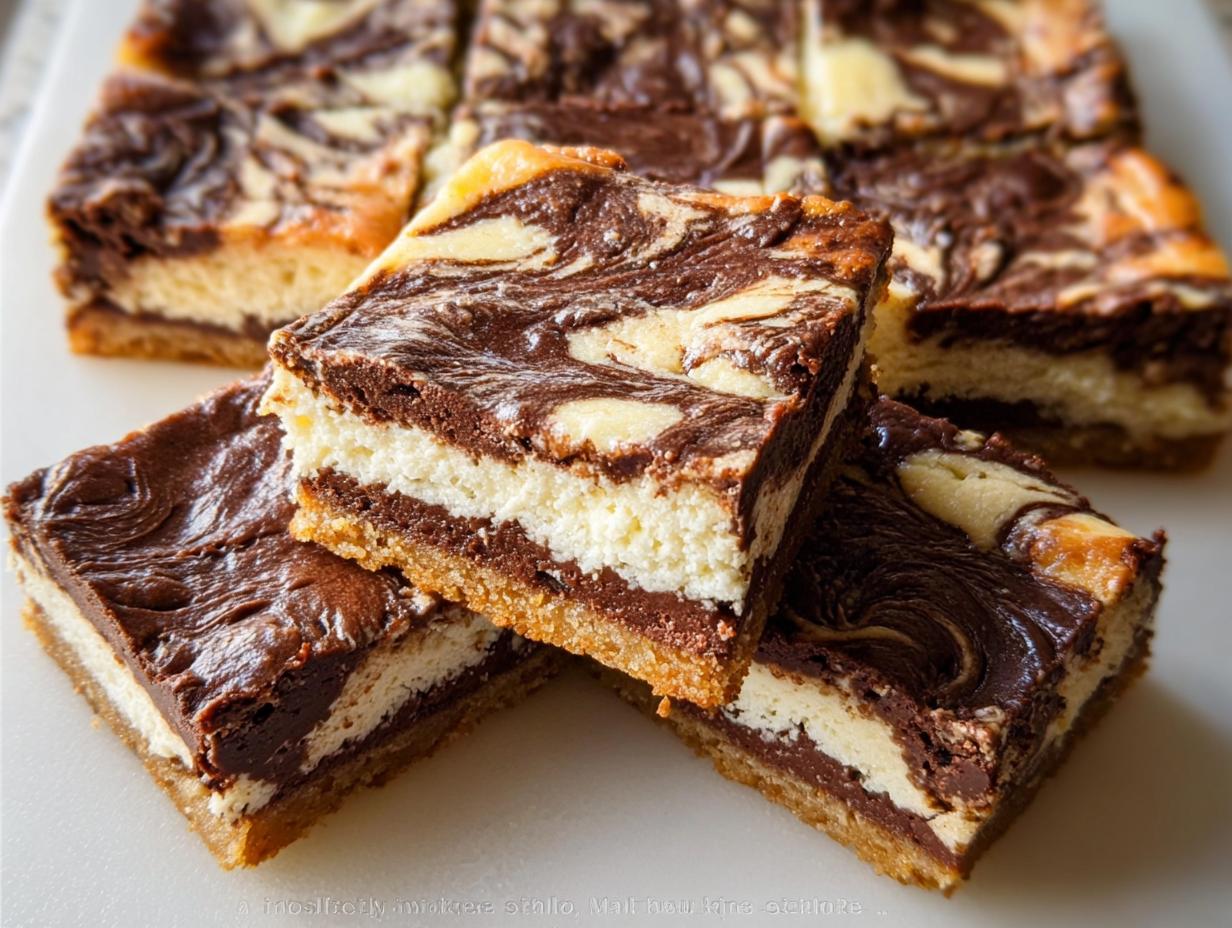
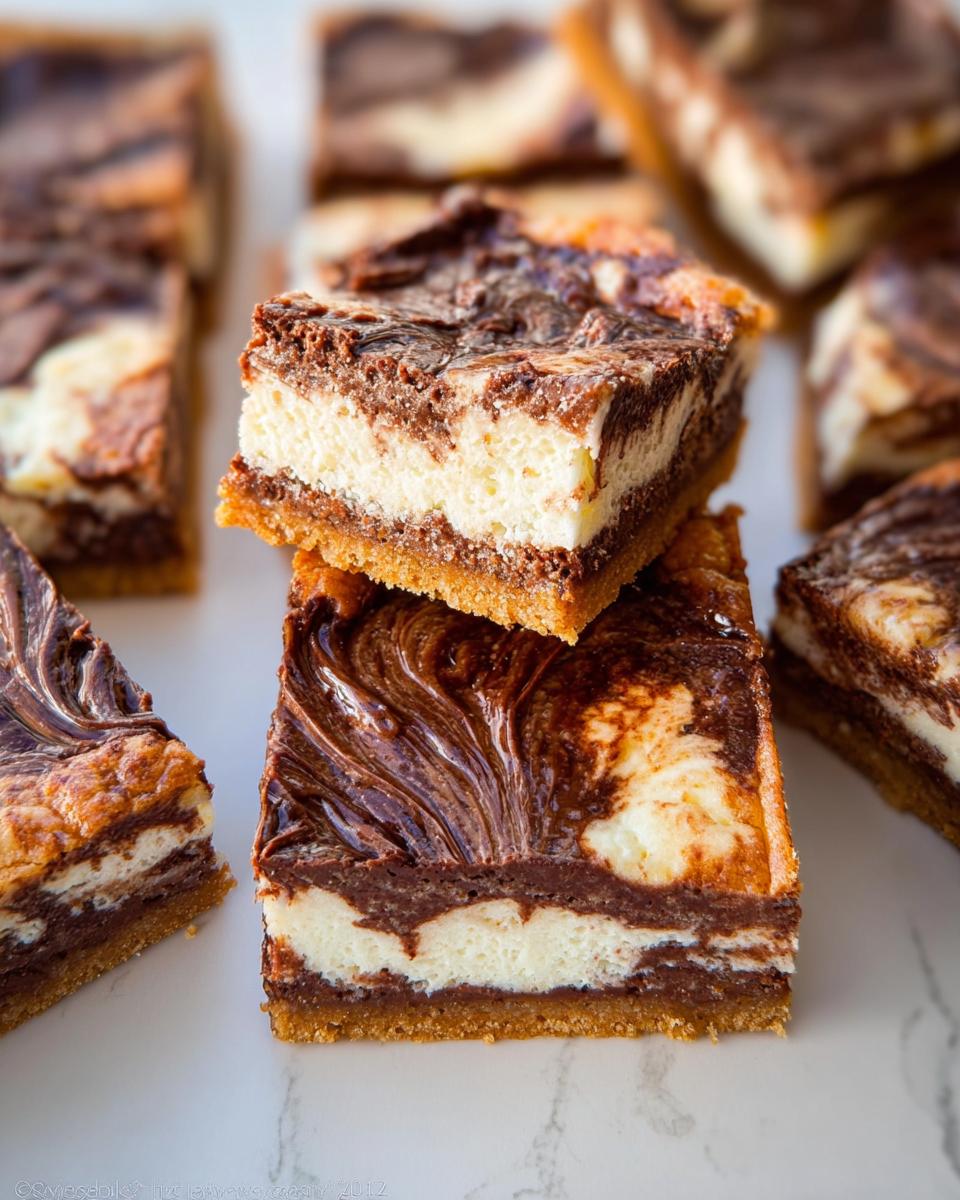
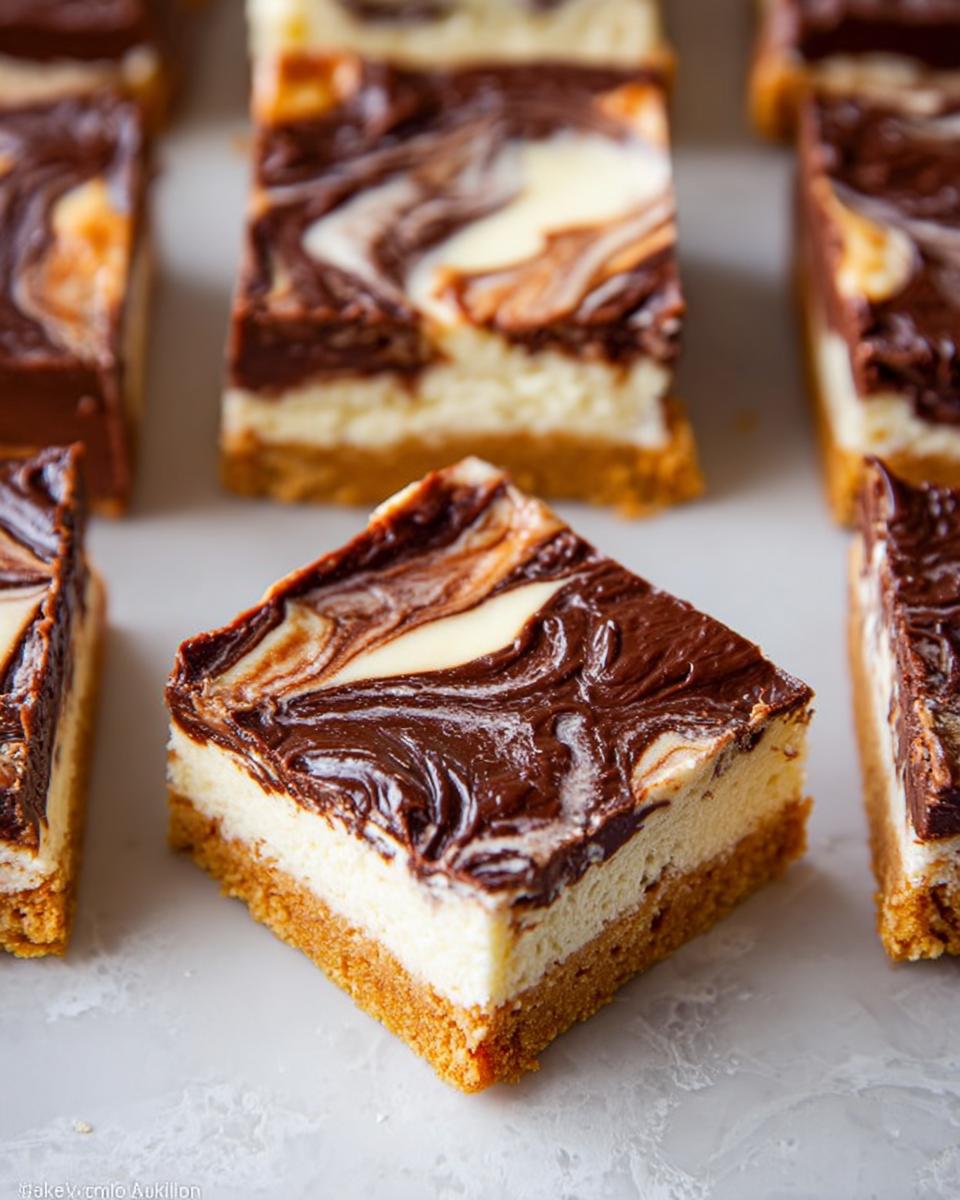
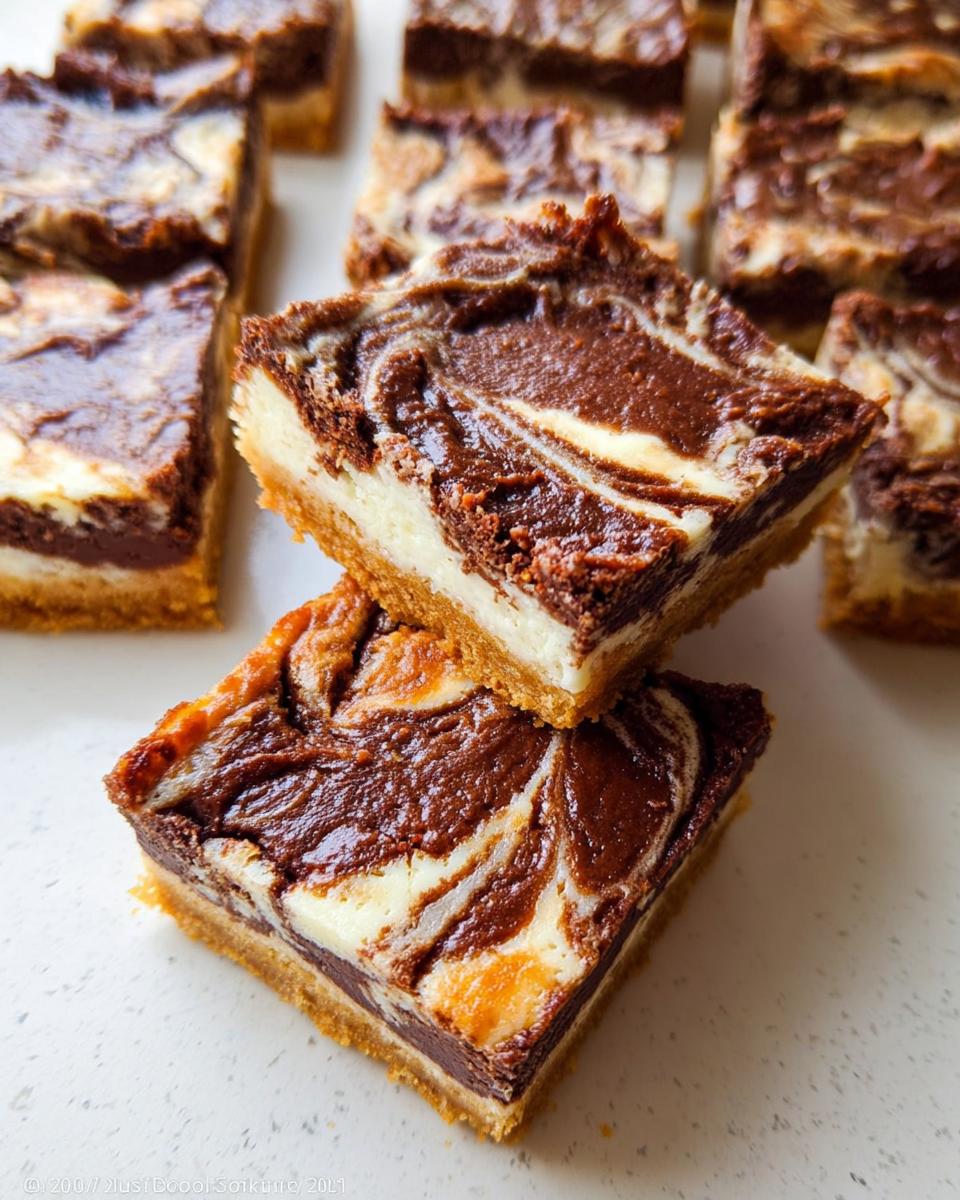
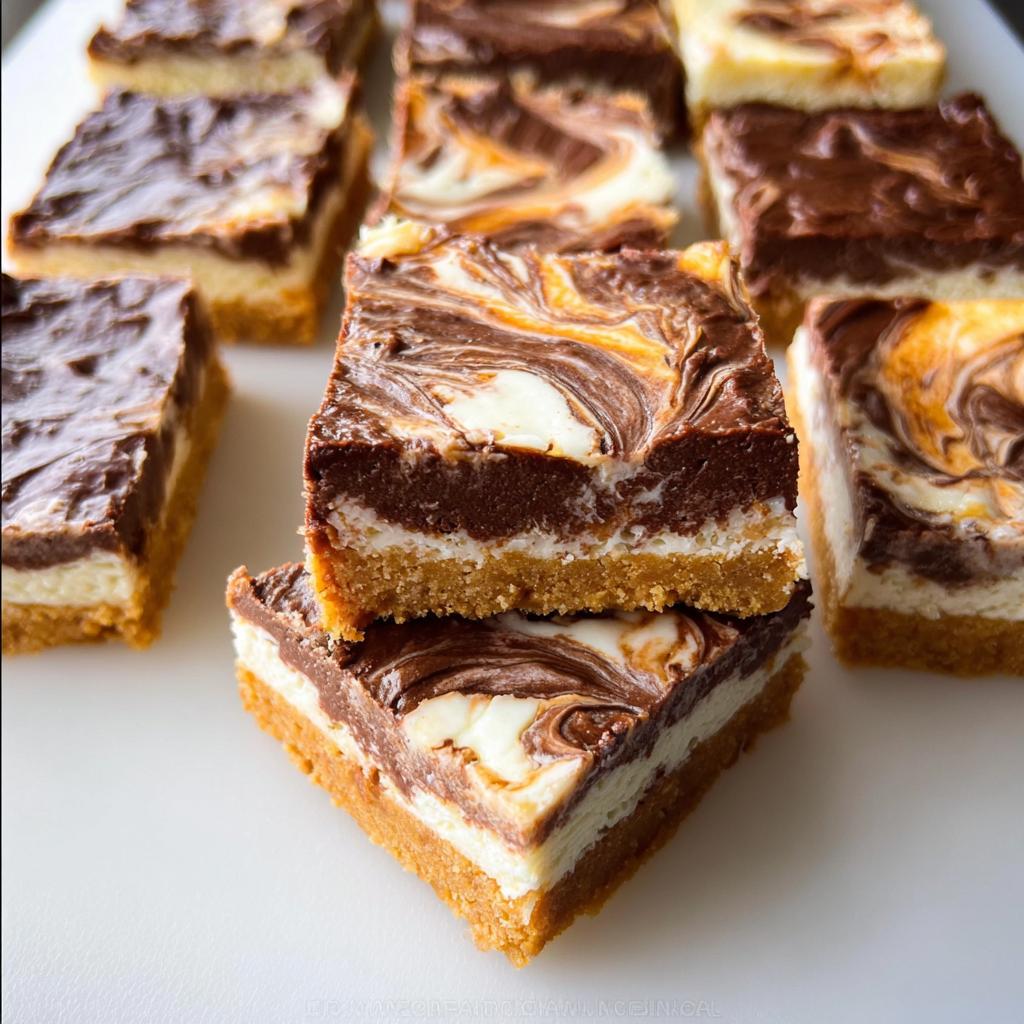
- The texture contrast is just divine: that crunchy, buttery crust meeting the smooth, tangy cheesecake, all marbled with warm, sweet hazelnut spread.
- You get all that incredible indulgence while keeping it totally gluten-free, so everyone at the party can enjoy these chocolate hazelnut treats!
- We’re using brick cream cheese, which gives the filling that dense, luxurious mouthfeel that separates a good cheesecake from a *great* one. They hold up perfectly when you slice them!
Essential Equipment for Perfect Nutella Swirl Cheesecake Bars
Okay, let’s talk tools! Before you even open the fridge, make sure you have these things ready to go. It keeps the process smooth, and trust me, having the right pan makes all the difference when it’s time to slice these babies up.
- You absolutely need that 8-inch square baking pan—this is key for the right bar thickness!
- Make sure you grab your food processor or blender for quickly crushing those graham crackers.
- A hand or stand mixer is essential for cheating you that super-creamy cheesecake filling.
- And a simple wire rack for cooling—don’t skip letting it breathe for a bit!
Gathering Ingredients for Your Nutella Swirl Cheesecake Bars
Getting your ingredients ready is half the battle, right? Once everything is measured and sitting out looking pretty, this recipe just flies by. I’ve broken down exactly what you need for the crust and that dreamy filling below. If you’re shopping, you can check out some of my favorite baking staples over here: my go-to baking resources.
For the Crust
We’re keeping this crust simple but flavorful. Make sure your butter is melted before you start mixing!
- 1.5 cups graham cracker crumbs (that’s about 180g, or roughly 12 full sheets if you’re crushing your own!)
- 6 Tablespoons unsalted butter (85g, melted)
- 1/4 cup granulated sugar (50g)
For the Cheesecake Filling
This is where the magic happens, so pay close attention to preparation notes here! Room temperature matters so much for cream cheese—don’t rush it, or your filling will be lumpy, and nobody wants that sad surprise.
- 16 ounces full-fat brick cream cheese (452g), softened perfectly to room temperature
- 1 large egg, also at room temperature
- 1/4 cup granulated sugar (50g)
- 2 teaspoons pure vanilla extract
- 1/3 cup Nutella (100g), which you should slightly warm up—just a quick 10 seconds in the microwave helps it swirl beautifully!
Step-by-Step Instructions for Nutella Swirl Cheesecake Bars
Now we get to the fun part! This isn’t just a recipe; it’s a little show you put on in your kitchen. Follow these steps closely, especially around the cooling, and you’ll have the most perfect Nutella Swirl Cheesecake Bars. Want an extra trick for easy removal later? Make sure you grab those foil or parchment overhangs—it’s a lifesaver!
Preparing the Crust and Preheating
First things first: let’s get the oven ready. Set your oven to 350\u00b0F (177\u00b0C). Take that 8-inch square baking pan and line it really well with parchment paper or foil, making sure you leave a good overhang on the sides. That overhang is your handle for lifting these babies out later!
For the crust, grind those graham crackers down to a fine crumb—you can check out my easy guide on making perfect bar bases if you need a visual. Mix those crumbs with your melted butter and sugar until it looks like wet sand. Press that mixture down *firmly* into the bottom of your lined pan. Pop it in the oven to bake for just 5 minutes, then take it out to rest while we work on the filling.
Creating the Creamy Filling and Swirl
Time for the smoothness! Grab your mixer and beat the softened cream cheese, the room-temperature egg, sugar, and vanilla extract until everything is completely creamy and smooth. I usually mix this on medium speed for about 3 minutes—you don’t want any lumps showing in your final product!
Pour all that gorgeous filling right over your slightly cooled crust. Now for the showstopper: drop large spoonfuls of your slightly warmed Nutella all over the top. Take a knife—a butter knife works just fine—and gently swirl the chocolate hazelnut goodness into the cream cheese. Don’t overdo it; you want distinct ribbons, not a muddy brown mess. If you want more inspiration on swirling techniques, I sometimes look at Sally’s tips over at her blog for ideas.
Baking and Chilling Your Nutella Swirl Cheesecake Bars
Slide the pan carefully back into the oven. You’ll bake these for about 30 to 35 minutes. You know they’re done when the edges look set and lightly golden, even if the very center jiggles just a tiny bit. They firm up as they cool, so don’t overbake them!
Cooling is mandatory here! Let them sit on the counter on a wire rack for about 30 minutes until they aren’t piping hot. Then, the real test of patience: chill them in the refrigerator for a solid 3 hours. That 180 minutes of chilling time is what allows these bars to set up beautifully so they slice cleanly.
Tips for Success When Making Nutella Swirl Cheesecake Bars
So you want these Nutella Swirl Cheesecake Bars to be absolutely perfect? I get it! A few little tricks that I learned over countless batches really make the difference between a good cheesecake bar and one that makes people ask for your secret recipe. Honestly, it’s all about temperature and treating that swirl gently.
Here are my must-know tips for flawless chocolate hazelnut treats:
- Temperature is Everything: I can’t stress this enough! Your cream cheese *has* to be fully softened—I mean, totally squishy—and your egg must be at room temperature. If they are cold, they won’t blend smoothly with the sugar, and you’ll end up with sticky, slightly grainy batter instead of that lovely creamy base.
- Warm the Nutella Slightly: Remember how I mentioned warming the Nutella just a bit? That’s crucial! If it’s cold from the jar, it won’t swirl; it will just sit in thick clumps on top of the filling. A quick 10-second zap in the microwave loosens it up perfectly so it glides through the batter when you drag your knife through it.
- Don’t Over-Swirl! This is my biggest tip for the visuals and the flavor balance. You want ribbons of Nutella, not a uniform brown color. Swirl gently—maybe 3 or 4 passes with your knife max. You’re aiming for contrast! If you mix too much, you waste that beautiful hazelnut flavor by mixing it too thoroughly into the cream cheese.
- Embrace the Chill Time: Seriously, put the knife down and wait! These bars turn into fantastic, easy sliced desserts only after they are completely, thoroughly chilled. If you try to slice them warm, you’ll just get a sloppy mess. Three hours is the minimum, but if you can wait until the next day? Wow. They slice like a dream. For more tips on handling gluten-free baking, I always check out my notes on handling gluten-free doughs!
Storage and Reheating Instructions for This Bar Dessert Recipe
The great news about baked cheesecake bars, especially these rich Nutella Swirl Cheesecake Bars, is that they hold up wonderfully. This means less stress about serving them right away and more time enjoying the party!
Since they are so creamy and tangy, they actually taste even better the next day after they’ve had a full night to settle in the fridge. I’ve found they keep their texture beautifully.
Storing the Bars Perfectly
Once you have sliced the chilled bars (and I mean *really* chilled, remember that 3-hour minimum!), you need to handle storage carefully to keep that cream cheese fresh and delicious.
Here is my personal method:
- Make sure you use an airtight container, or if you’re stacking them, use parchment paper or wax paper between the layers, as the tops can get a little sticky otherwise.
- Keep them in the refrigerator. They are perfectly good for up to 5 days this way. Honestly, mine never last that long, but they stay wonderfully fresh!
Do You Need to Reheat These Chocolate Hazelnut Treats?
Probably not! These are designed to be eaten cold or slightly cooler than room temperature. Reheating cheesecake bars usually ruins that wonderful, firm texture we worked so hard to achieve when mixing and chilling them.
If you are serving them on a very cold day, you can take the container out of the fridge about 15 minutes before you plan to serve them. That little bit of time on the counter softens them just enough to bring out the full flavor of the Nutella without making them mushy. Enjoy that perfect, cool bite!
Frequently Asked Questions About Nutella Cheesecake Bars
I know sometimes you have questions pop up right when you’re elbow-deep in batter. Don’t worry! I’ve gathered the things people ask me most often about these bars. Hopefully, this clears up any last-minute baking anxiety so you can focus on getting that swirl just right. If you need to reach out with a question I haven’t covered, feel free to send a message over on my contact page!
Can I make these Nutella Swirl Cheesecake Bars ahead of time?
Oh, please, yes! In fact, I highly recommend it. These Nutella Swirl Cheesecake Bars are seriously one of the best make-ahead desserts out there. While the recipe calls for a minimum of three hours chilling, I find that if you let them chill overnight in the fridge, they set up even firmer.
Chilling overnight means you can take them out, slice them into perfect squares—making them truly the best easy sliced desserts—and they won’t fall apart on you. Just let them sit on the counter for about 15 minutes before serving if they’ve been tucked away in the cold overnight!
Are these chocolate hazelnut treats truly gluten-free?
They absolutely are! That’s one of the main reasons I developed this version of the nutella cheesecake. As long as you use graham cracker crumbs that are specifically labeled gluten-free for your crust, then the whole recipe stays safely in that category. The filling itself is naturally gluten-free, so it’s just that base layer we need to watch when shopping!
What if I don’t like Nutella? Can I swap it?
That is a tough question for me to hear, because the hazelnut flavor is what makes them pop! But, I understand everyone has different tastes. If you must swap, you can try using a quality dark chocolate ganache instead; warm it up just like the Nutella. It won’t give you the hazelnut kick, but you still get that wonderful chocolate swirl effect. Just remember to use less liquid if the ganache ends up thinner than the Nutella was!
Why is my cheesecake filling lumpy even after mixing?
Nine times out of ten, this happens because your cream cheese was still cold when you started! Cold cream cheese doesn’t emulsify properly with the sugar and egg. If you find lumps, stop mixing and let the bowl sit on the counter for another 20 minutes to warm up slightly, then try mixing again on low speed. Patience is key for a smooth texture in any nutella cheesecake!
Serving Suggestions for Your Chocolate Hazelnut Treats
Now that you’ve mastered these beautiful Nutella Swirl Cheesecake Bars, the only question left is: how should you eat them? Since they are so rich and decadent, they don’t need much dressing up, but a little something on the side can really tie the whole dessert experience together beautifully.
I love keeping my accompaniments simple so the chocolate hazelnut flavor of the bar is the star. Think about what cuts through that richness! If you’re looking for ideas on pairing desserts, I often gather inspiration from my posts on homemade presentation techniques.

Here are my favorite ways to serve these amazing bars:
- A Perfect Cup of Coffee: Honestly, nothing beats these bars alongside a strong, dark roast coffee. The slight bitterness of the coffee really balances the sweetness of the Nutella and the tang of the cheesecake. It’s my go-to afternoon snack pairing.
- A Sprinkle of Sea Salt: If you didn’t add flaky sea salt on top before chilling (which I sometimes forget to do!), you can always sprinkle just a tiny pinch over the top of the bars right before you serve them. It brightens up the chocolate flavor instantly.
- Fresh, Tart Berries: Because this is a very rich dessert, a small handful of fresh raspberries or tart strawberries on the plate is wonderful. The freshness cuts right through the density, giving you a little palate cleanser between bites. They look gorgeous on the plate too!
Keep it easy, keep it fresh, and don’t overthink it. These bars are already perfect just the way they are!
Share Your Nutella Swirl Cheesecake Bars Experience
Wow, I hope you loved making these! Seriously, seeing your creations makes all my work in the kitchen worthwhile. I’d love to know how yours turned out.
If you enjoyed these Nutella Swirl Cheesecake Bars, please give the recipe 5 stars right here on the blog, and share your gorgeous, gooey squares on social media! Tell me all about your swirl technique in the comments below—I built this community on sharing our baking triumphs. See who else is baking!
Nutella Swirl Cheesecake Bars
Ingredients
Equipment
Method
- Preheat your oven to 350°F (177°C). Line an 8-inch square baking pan with parchment paper or aluminum foil, leaving overhang on the sides. Set the pan aside.
- Make the crust: Grind the graham crackers into a fine crumb using a food processor or blender. Place the crumbs in a medium bowl and mix them with the melted butter and sugar. Press this mixture firmly into the lined pan. Bake for 5 minutes. Let the crust cool while you prepare the filling.
- Make the filling: Beat the cream cheese, egg, sugar, and vanilla extract together using a hand or stand mixer until the mixture is smooth and creamy, which takes about 3 minutes. Spoon the filling onto the cooled crust. Drop large spoonfuls of Nutella over the filling and swirl it gently using a knife.
- Bake for 30 to 35 minutes, or until the cheesecake has set and the edges are lightly browned. The bars will look puffy but will sink slightly as they cool. Allow the bars to cool for 30 minutes at room temperature on a wire rack, then chill them in the refrigerator for a minimum of 3 hours.
- Lift the foil out of the pan and cut the chilled cheesecake into squares. Store the bars in a covered container in the refrigerator for up to 5 days.
Notes
Tried this recipe?
Let us know how it was!
Gluten-Free Chef & Latin Cuisine Innovation Specialist
My youngest son’s celiac diagnosis at four changed everything. Suddenly, all those traditional Brazilian and Portuguese recipes from my avó needed to be completely reimagined without losing their soul.
After graduating from Johnson & Wales and working Miami’s Latin fusion scene, my son’s diagnosis became my calling. How do you make gluten-free empanadas that taste like childhood? Over eight years, I’ve developed 320+ gluten-free recipes celebrating authentic Latin flavors using cassava flour and plantain alternatives.
My gluten-free empanada recipe won “Best Appetizer” at the 2023 Miami Gluten-Free Food Festival. I ran “Sabores Sin Gluten,” a catering business serving Miami’s Latino community—quinceañeras, family gatherings, all the celebrations that matter.
Food is culture, and everyone deserves to experience the joy of sharing traditional family meals, regardless of dietary restrictions.