When you need a truly satisfying sweet fix but ditching the oven feels like necessary self-care, I’ve got your answer! These No Bake Chocolate Peanut Butter Oat Bars are my absolute secret weapon for busy afternoons. They come together in less than fifteen minutes, seriously! I still remember the day I discovered how to whip up my first batch. My son had just been diagnosed with celiac disease, and I wanted to create a delicious treat that he could enjoy alongside his friends. As we mixed the oats and peanut butter, the kitchen filled with the rich scent of chocolate. We laughed, we stirred, and when we finally tasted the bars, it was pure joy! That moment was not just about creating a snack; it was about building a new tradition in our gluten-free kitchen. Since then, these bars have become a staple in our home—a quick and satisfying treat that brings us all together.

Why You Will Love These No Bake Chocolate Peanut Butter Oat Bars
Look, life is too short to spend hours waiting for dough to bake when you could be enjoying the results! These peanut butter bars are pure magic for people on the go.
- Lightning Fast Prep: We’re talking fifteen minutes max before chilling starts.
- Oven-Free Zone: Perfect for those scorching summer days when the thought of turning on the stove gives you hives.
- Real Satisfaction: They hit that sweet-and-salty craving right on the head.
- Dietary Friendly: Because we use certified oats, these are a go-to for our gluten-free friends!
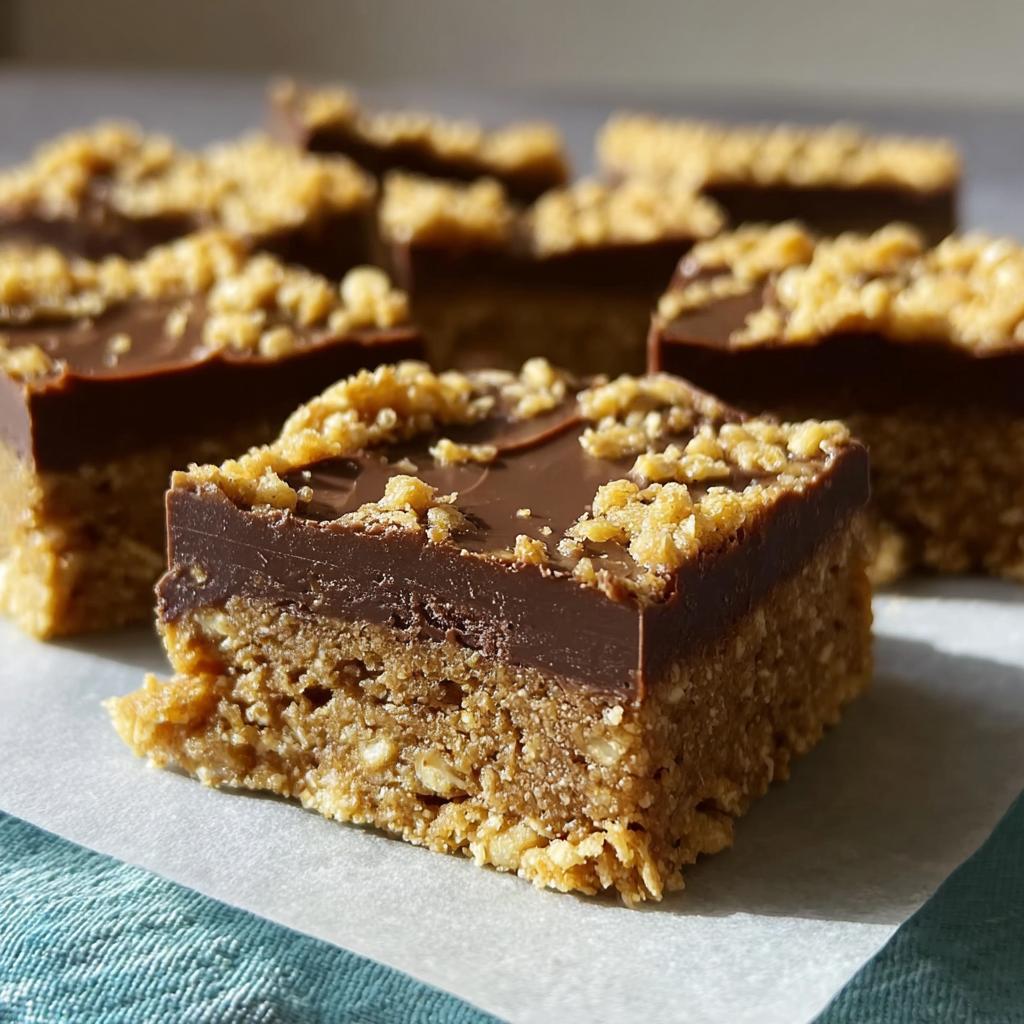
Essential Ingredients for Perfect No Bake Chocolate Peanut Butter Oat Bars
Okay, this is where the real fun starts! You only need a few pantry staples to make these incredible peanut butter bars. Don’t worry about complicated flour combinations or weird baking powders here; we keep it super simple, which is why this recipe is so reliable. Trust me, getting the right kind of oats makes a huge difference in the final texture.
For the Oat Base
- 1 cup butter (You need the good stuff melted down!)
- 1/2 cup packed brown sugar
- 1 teaspoon vanilla extract
- 3 cups quick cooking oats (Make sure they’re quick cooking, not the steel-cut kind!)
- 1/2 cup peanut butter (Creamy style works best for smoothness!)
For the Chocolate Topping
This part is pure indulgence, the beautiful ribbon of sweetness on top of our sturdy oat foundation.
- 1 cup semisweet chocolate chips
- 1/2 cup peanut butter
Expert Tips for Making the Best No Bake Chocolate Peanut Butter Oat Bars
Even though these are no bake desserts, technique still matters! I’ve learned a few little tricks over the years to make sure these peanut butter bars turn out picture-perfect every single time, especially when I’m trying a new gluten-free baking variation. Don’t skip these steps if you want the best results!
First, you absolutely must pack that oat base down tightly into the pan. Use the bottom of a measuring cup or a sturdy spatula. If it’s loose, the bars crumble when you try to cut them later. Think of it like building a strong foundation!
Next, when you melt the chocolate and peanut butter for the topping, take your time microwaving it in short bursts. If you scorch the chocolate, the whole batch is ruined, and nobody wants a grainy top layer. Stir until it’s just glossy and smooth.
Finally, patience for the chill time is key. Don’t try to rush the chilling process in the fridge by putting it in the freezer for an hour. That usually just makes the chocolate hard and prone to cracking when you slice them up. Two hours minimum in the fridge lets everything set perfectly.
Step-by-Step Instructions for No Bake Chocolate Peanut Butter Oat Bars
Now that you have your ingredients ready, let’s get these simple sweet recipes put together! Seriously, if you can stir things in a pot and operate a microwave, you can nail these wonderful no bake desserts. Remember, this process is quick, but we do rely a lot on that chilling time later on, so plan ahead!
Preparing the Pan and Melting the Base Ingredients
First things first, grab that 9×13 inch pan and line it with parchment paper. Make sure you leave some paper hanging over the sides—those are your handles for lifting the whole thing out later! That parchment makes clean-up a breeze, trust me.
Next, head over to the stove. Get your butter into a medium saucepan and set the heat to medium. Let it melt completely. Once it’s looking liquid and happy, whisk in the brown sugar. You’ll want to keep stirring gently for about two minutes until that sugary goodness is all dissolved away into the butter. It’s looking liquid and rich!
Mixing and Pressing the Oat Base for No Bake Chocolate Peanut Butter Oat Bars
Okay, take that pan off the heat immediately. That’s important! Now, we toss in the vanilla extract, those three cups of quick cooking oats, and your first half-cup of peanut butter. Stir everything like crazy until it’s uniformly coated. You don’t want any dry patches hiding in there!
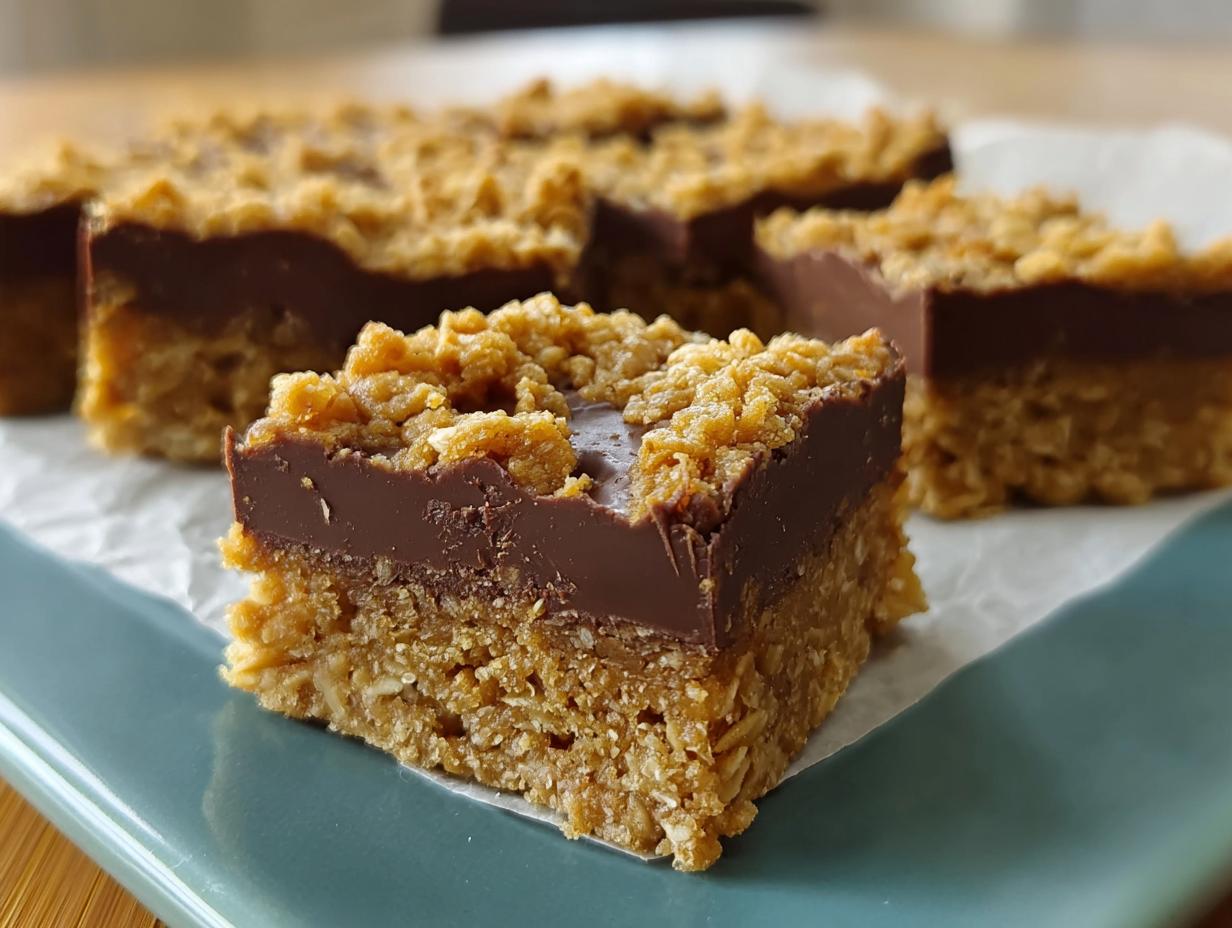
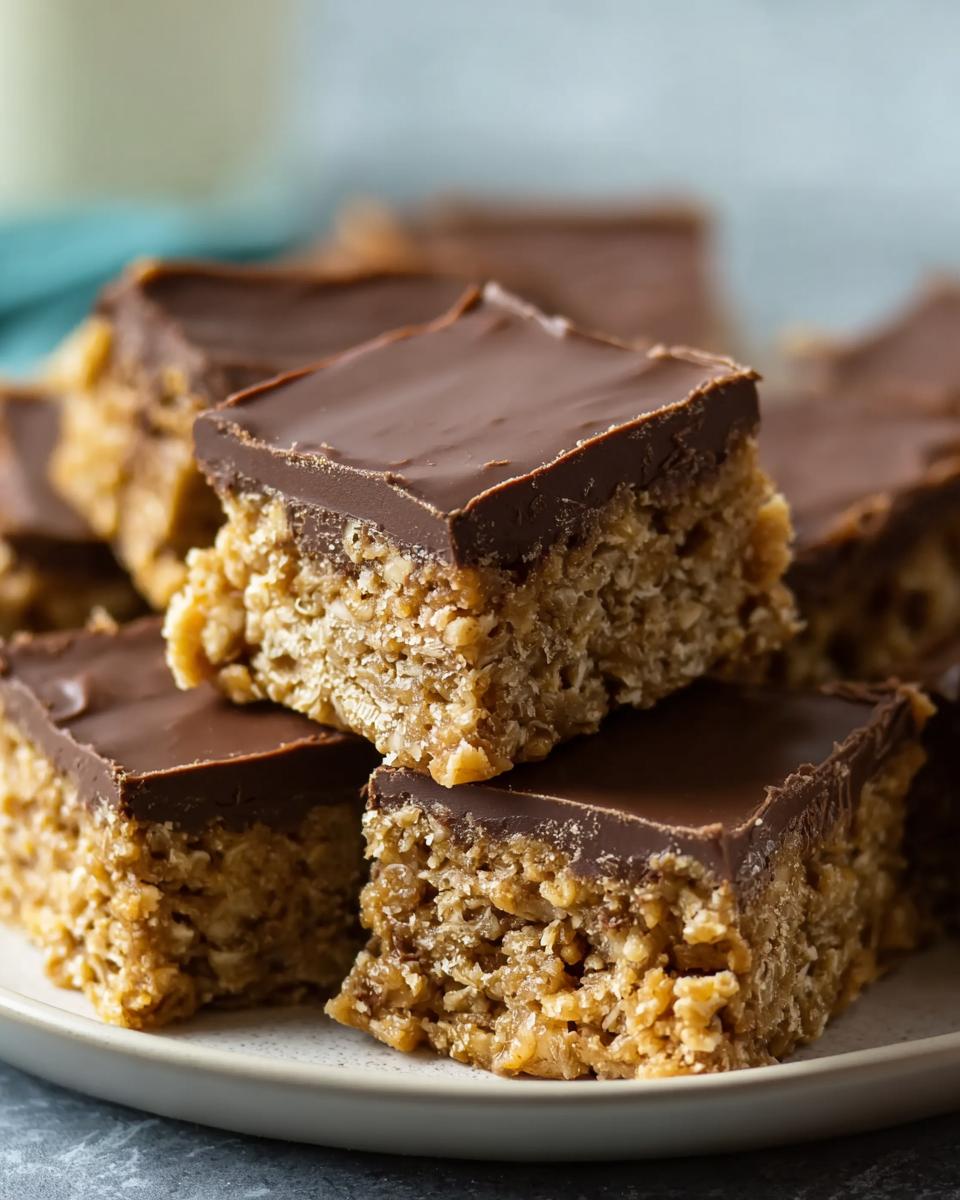
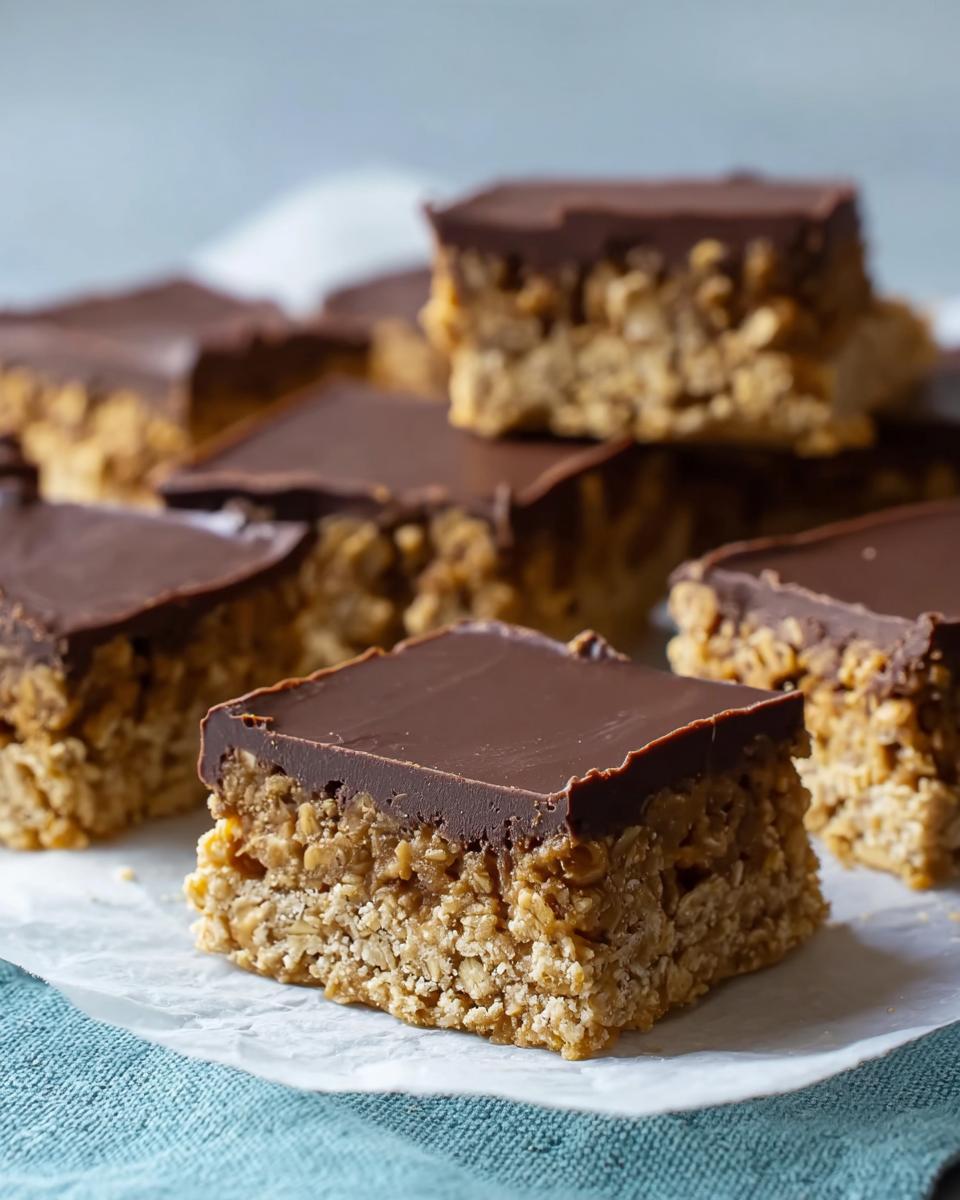
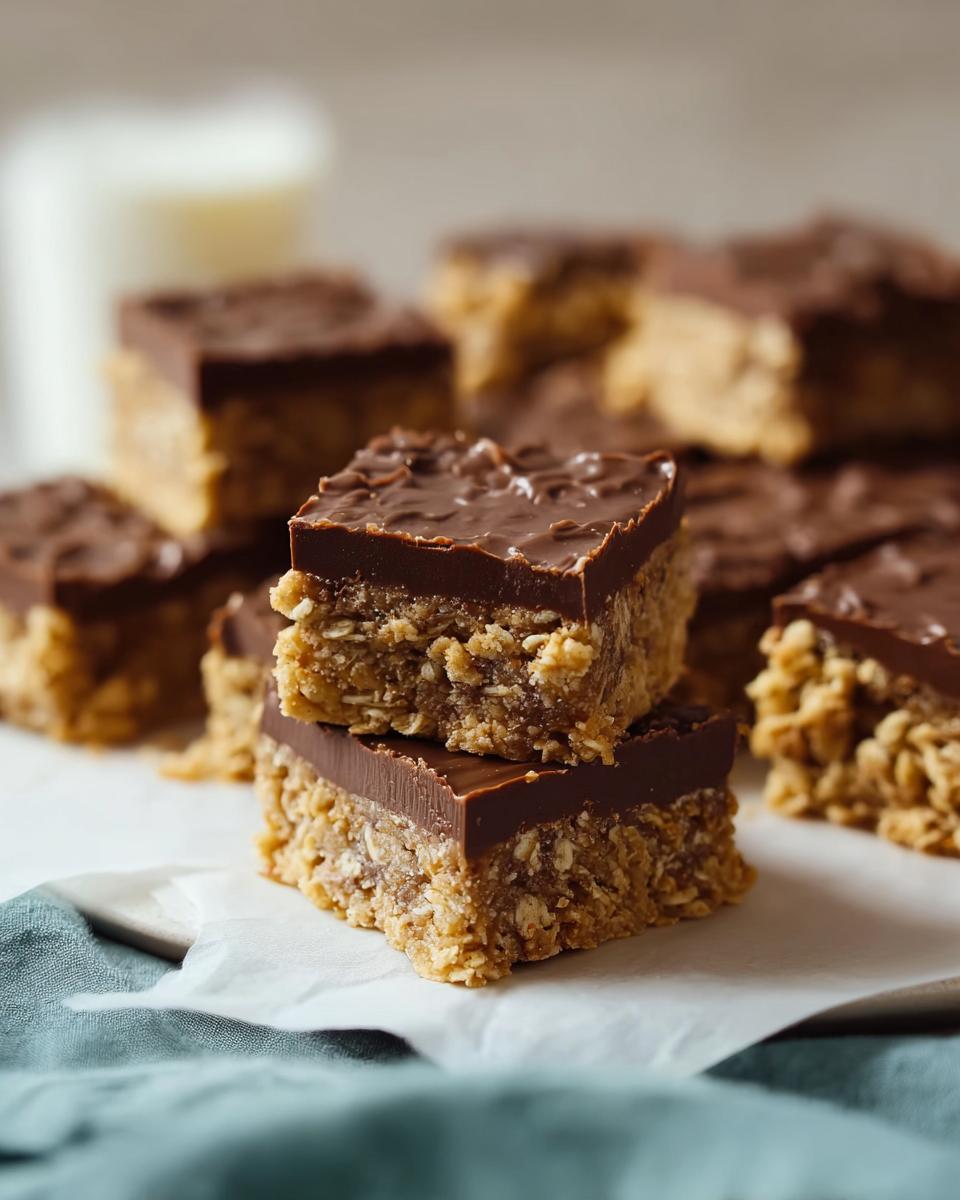
This is the critical part for sturdy peanut butter bars. Dump the whole mixture into your prepared pan. Grab a spatula or the back of a measuring cup and press that oat layer down. Press it firmly! We want this base compact so it holds up when you slice it later.
Creating and Spreading the Chocolate Topping
Time for the chocolate layer! Put your chocolate chips and the remaining half-cup of peanut butter into a microwave-safe bowl. Microwave these in short bursts—I always start with 30 seconds. You’ll need to pull it out and stir well after every 30 seconds until it’s completely smooth and incredibly glossy. Don’t overheat it, or you’ll burn that pretty chocolate!
Carefully pour that gorgeous melted topping right over your pressed oat layer. Use your spatula to spread it right out to the edges. Make sure the layer is even so every bite of your No Bake Chocolate Peanut Butter Oat Bars gets that perfect chocolate hit.
Chilling and Cutting the Finished Bars
The hard part is over, but now we wait! Pop the whole pan into the refrigerator for a minimum of two hours. You are waiting for that chocolate top to be totally firm to the touch. If you cut them too soon, you’ll have a chocolate mess everywhere.
Once they’re set, use those parchment paper handles to lift the whole slab out onto a cutting board. Run a large, sharp knife under hot water for a second, wipe it dry, and then slice. Re-warming the knife slightly between cuts helps you get perfect squares. These chilled bars are genius as freezer snacks!
Ingredient Substitutions for No Bake Chocolate Peanut Butter Oat Bars
I always get questions about swapping things out, especially when we’re talking about managing allergies or just running low on something! It’s great that we can adapt these simple sweet recipes easily, but remember, the texture might shift a little bit when you make big changes.
If you’re avoiding peanuts, sunflower seed butter or almond butter works just fine in both the base and the topping for your peanut butter bars. Just know that sunflower seed butter can sometimes turn things slightly green when mixed with baking soda, but since there’s no baking here, we should be safe!
For that crucial gluten-free aspect, I cannot stress this enough: you MUST use certified gluten-free quick cooking oats if celiac disease is a concern in your house. This is one area where I simply won’t compromise.
Want to make them dairy-free? Swap the butter for a high-quality vegan butter stick, and use dairy-free chocolate chips for the topping. If you need to reach out for clarification on any tough swaps, don’t hesitate to send me a message on my contact page!
Storage and Make-Ahead Tips for Your No Bake Chocolate Peanut Butter Oat Bars
One of the biggest wins with these No Bake Chocolate Peanut Butter Oat Bars is that you hardly ever have to eat them right away! They are fantastic make-ahead treats.
Once you’ve sliced them, store any leftovers in a single layer inside a truly airtight container. Your refrigerator is the best spot, and they will keep beautifully for up to one week. They firm up even more in there, which I love!
If you need them to last longer, absolutely freeze them! Wrap them individually in wax or parchment paper first, then tuck them into a freezer-safe bag. They freeze perfectly for up to two months, making them the ultimate grab-and-go freezer snacks for school lunches or a quick afternoon treat!
Frequently Asked Questions About No Bake Chocolate Peanut Butter Oat Bars
I know when you are making something new, especially one of these amazing no bake desserts, you need assurances! Here are the questions I get asked most often about getting these bars just right.
Can I use rolled oats instead of quick cooking oats in the No Bake Chocolate Peanut Butter Oat Bars?
You can, but you need to know the texture difference! Quick oats dissolve just enough into the melted butter and sugar mixture to create that dense, slightly chewy base we love. If you use old-fashioned rolled oats, the final bars will be much chewier and chunkier. If you must use them, I suggest letting the mixture sit for about 10 minutes after adding the liquid before you press it into the pan—it lets the oats absorb a bit more moisture.
Are these considered simple sweet recipes for beginners?
Oh, absolutely! These are perhaps the most wonderfully simple sweet recipes you’ll ever find! If you have a saucepan and a microwave, you’re basically ready to go. There’s no tricky rising, no whipping egg whites, and zero oven temperature worries. They are perfect for baking newbies or when you need a fast kid-friendly activity.
How do I prevent the chocolate topping from cracking when cutting?
This is usually all about temperature control. After you spread the chocolate topping, let the bars sit on the counter for about 15 minutes before they go into the fridge to fully set. This lets the chocolate cool down slowly rather than plunging ice-cold from the counter straight into a deep chill. Then, just like I mentioned before, use a hot, sharp knife when cutting your finished peanut butter bars!
Estimated Nutritional Snapshot for No Bake Chocolate Peanut Butter Oat Bars
I always tell people that these No Bake Chocolate Peanut Butter Oat Bars are a little better for you since they are loaded with oats, but they are still a treat, plain and simple! Remember, these numbers are just estimates based on the ingredients in the recipe card. The exact values change depending on the brand of peanut butter or chocolate chips you choose, so treat these as a good guide!
- Calories: About 200 per bar
- Fat: Around 10g
- Carbohydrates: We are looking at 25g
- Protein: Roughly 5g
- Sugar: About 12g
Share Your Simple Sweet Recipes Experience
I truly hope you loved making these as much as my family does! When you whip up a batch of these wonderful No Bake Chocolate Peanut Butter Oat Bars, please come back and let me know how they turned out. Did you make any fun variations?
Rate them right on the page, leave a comment below telling me about your experience, and snap a picture to share on social media! I would absolutely love to see your delicious results from these simple sweet recipes!
No Bake Chocolate Peanut Butter Oat Bars
Ingredients
Equipment
Method
- Line a 9×13 inch baking pan with parchment paper, leaving some overhang to lift the bars out later. Set aside.
- In a medium saucepan over medium heat, melt the butter. Once melted, stir in the brown sugar until it dissolves, about 2 minutes.
- Remove the saucepan from the heat. Stir in the vanilla extract, quick cooking oats, and 1/2 cup of peanut butter until everything is well combined.
- Press this mixture firmly and evenly into the bottom of your prepared baking pan.
- In a separate microwave-safe bowl, combine the chocolate chips and the remaining 1/2 cup of peanut butter. Microwave in 30-second intervals, stirring well after each interval, until the mixture is smooth and fully melted.
- Pour the melted chocolate mixture over the oat base. Spread it evenly across the top.
- Place the pan in the refrigerator for at least 2 hours, or until the chocolate topping is completely set. Once firm, use the parchment paper overhang to lift the bars out of the pan. Cut into 32 squares.
Nutrition
Notes
Tried this recipe?
Let us know how it was!
Gluten-Free Chef & Latin Cuisine Innovation Specialist
My youngest son’s celiac diagnosis at four changed everything. Suddenly, all those traditional Brazilian and Portuguese recipes from my avó needed to be completely reimagined without losing their soul.
After graduating from Johnson & Wales and working Miami’s Latin fusion scene, my son’s diagnosis became my calling. How do you make gluten-free empanadas that taste like childhood? Over eight years, I’ve developed 320+ gluten-free recipes celebrating authentic Latin flavors using cassava flour and plantain alternatives.
My gluten-free empanada recipe won “Best Appetizer” at the 2023 Miami Gluten-Free Food Festival. I ran “Sabores Sin Gluten,” a catering business serving Miami’s Latino community—quinceañeras, family gatherings, all the celebrations that matter.
Food is culture, and everyone deserves to experience the joy of sharing traditional family meals, regardless of dietary restrictions.