Are you looking for that show-stopping dessert that doesn’t eat up your entire afternoon? Trust me, I get it! As a busy mom and a Gluten-Free Nutritionist, finding treats that everyone loves and that fit into a hectic schedule is my whole job. That beautiful afternoon we spent turning our kitchen into a culinary lab resulted in these incredible Mini Cheesecake Bites with Berry Topping. They are the perfect individual treats—rich, creamy, and totally safe for our gluten-free family members. Watching the kids giggle while scooping the crust into the little cups made the baking session sweeter than the dessert itself! I’m Sophie Williams, and I promise these simple recipe favorites will wow your guests at the next gathering.
Why You Will Love These Mini Cheesecake Bites with Berry Topping
Honestly, these little guys check every box for a busy family cook. They’re super straightforward, which means less stress for you when company is coming over. Here’s why they will become your go-to:
- They are perfectly portioned—no slicing required on a crowded party dessert platters!
- The flavor is unbelievably rich, just like a classic cheesecake, but in a fun, bite-sized desserts format.
- The fresh berry topping adds that gorgeous color and tart contrast we all need.
- Since we used a simple graham cracker base, they come together fast, making them ideal individual treats.
Essential Equipment for Perfect Mini Cheesecake Bites with Berry Topping
Don’t let the equipment list scare you; most of these items are probably sitting in your cabinet already! Having the right tools really helps these mini cheesecakes bake up beautifully without cracking. You absolutely need your standard 12-count muffin pan, naturally, lined with cupcake liners.
For that super-creamy, professional texture we love, you’ll want a large metal roasting pan. This is for the optional but highly recommended water bath setup. Also, grab your mixer—handheld or stand—to get that filling silky smooth before we pop these individual treats into the oven!
Ingredients for Mini Cheesecake Bites with Berry Topping
Okay, gathering your supplies is half the battle won! For these bite sized desserts to turn out perfectly creamy, temperature really matters. Make sure you pull out your dairy and eggs early. This is where so many people trip up when making individual treats at home, but we aren’t going to let that happen!
It’s helpful to have everything measured out before you even turn on the oven. I always lay mine out nicely on the counter so I can see everything at a glance. If you want to check out some other fantastic cheesecake ideas while you’re gathering supplies, I loved the tips on this other baking blog.
For the Crust
This is super simple—just needs to bake for a few minutes to set up before we add the creamy stuff. You’ll need:
- 1 cup graham cracker crumbs (that’s about 8 full crackers, crushed up!)
- 2 Tablespoons granulated sugar
- 3 Tablespoons unsalted butter, melted
For the Filling
This is where we need the room temperature magic to happen so we don’t end up with lumpy mini cheesecakes. Remember: soft cream cheese and room temp eggs are your best friends!
- 16 ounces full-fat brick cream cheese, softened
- 1/2 cup granulated sugar
- 1/4 cup full-fat sour cream, at room temperature
- 1 teaspoon pure vanilla extract
- 1 teaspoon freshly squeezed lemon juice
- 2 large eggs, at room temperature
Step-by-Step Instructions for Making Mini Cheesecake Bites with Berry Topping
Alright, let’s get baking! This recipe moves pretty quickly once you have all your ingredients ready. We are going to handle this in four neat little stages so nothing gets rushed. Remember, rushing cheesecake is the fastest way to get cracks on the surface of your lovely individual treats! If you want to check out some other fantastic gluten-free baking ideas while you wait for the oven to heat up, I’ve got tons of recipes right here.
Preparing the Crust and Pre-Baking
First things first, get your oven warmed up to 350\u00b0F (177\u00b0C) and line that 12-count muffin pan with liners—this makes cleanup a breeze! Mix up all those crust ingredients until they look sandy. Take a heaping Tablespoon of that mix and press it down firmly into the bottom of each liner. Pop them in the oven for exactly 6 minutes to set. Then you can just leave the oven on, we’ll need it in a minute.
Mixing the Creamy Filling
Grab your softened cream cheese and sugar and beat them together on medium-high speed until they’re absolutely silky. I mean it—get rid of all those little lumps! Once it’s smooth, add the sour cream, vanilla, and lemon juice and combine. Now for the eggs: put the mixer on medium speed and add those 2 eggs one by one. Only beat until *just* combined after each addition! Seriously, stop mixing as soon as the yolk disappears. Over-mixing those eggs introduces air, and air equals cracks later on.
Baking with Steam for Smooth Mini Cheesecake Bites with Berry Topping
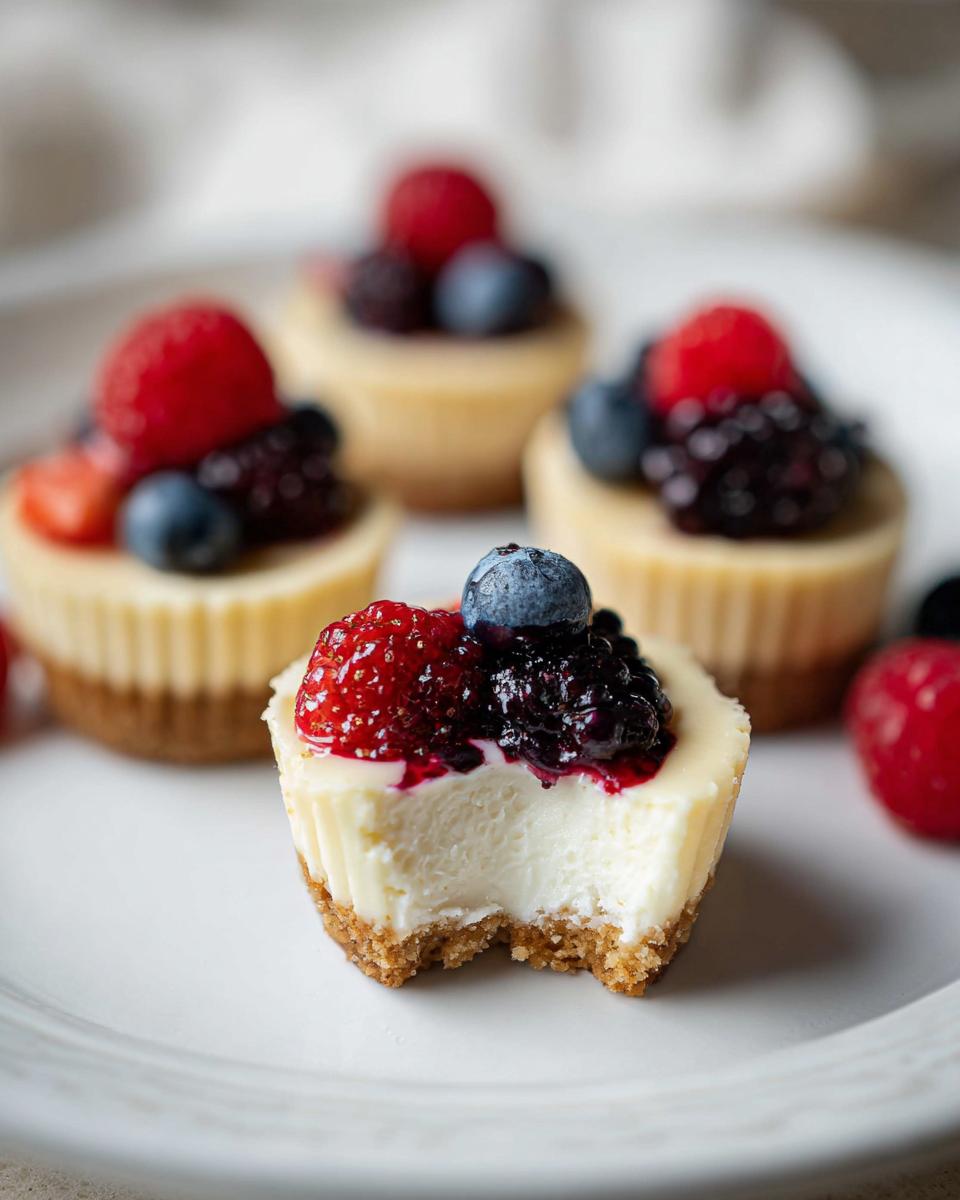
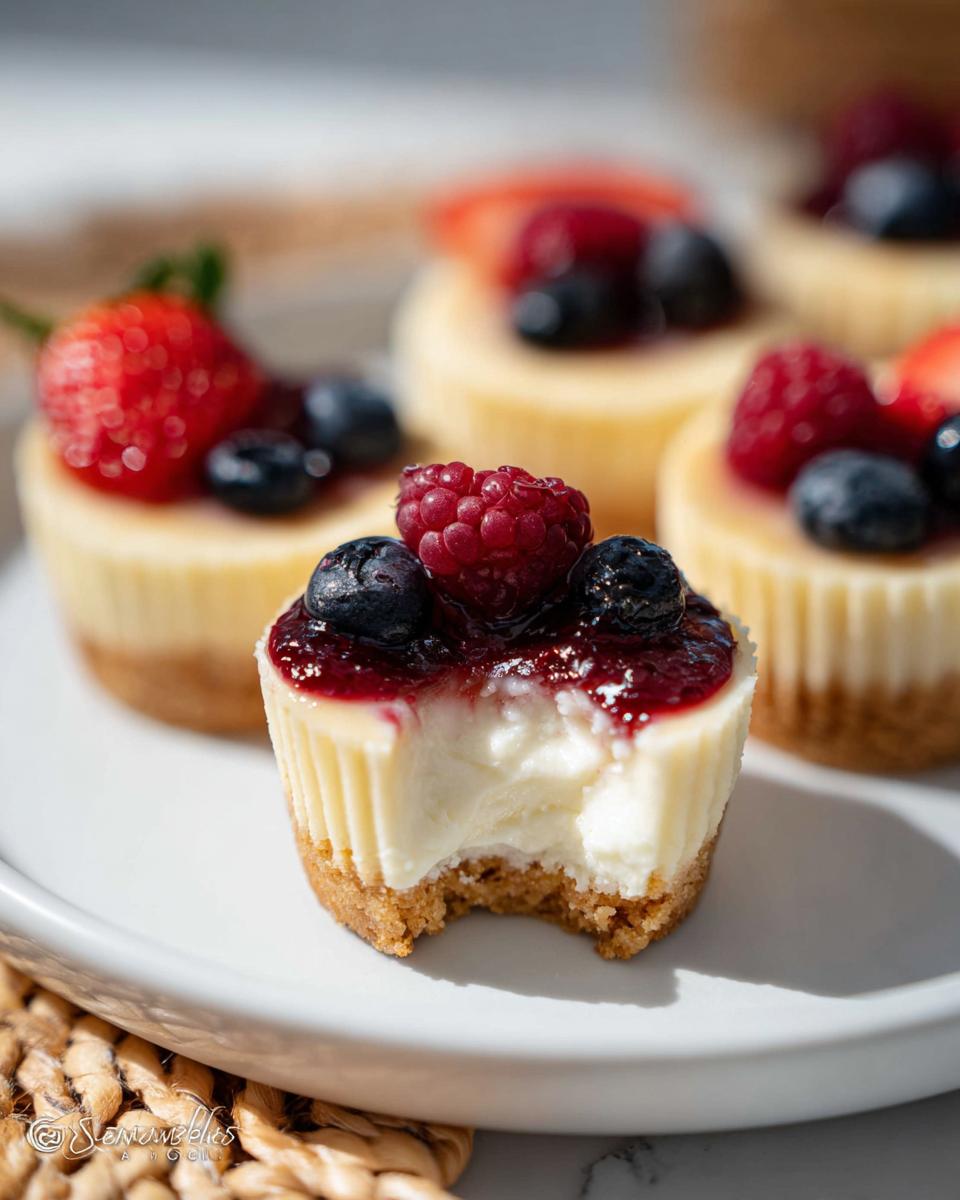
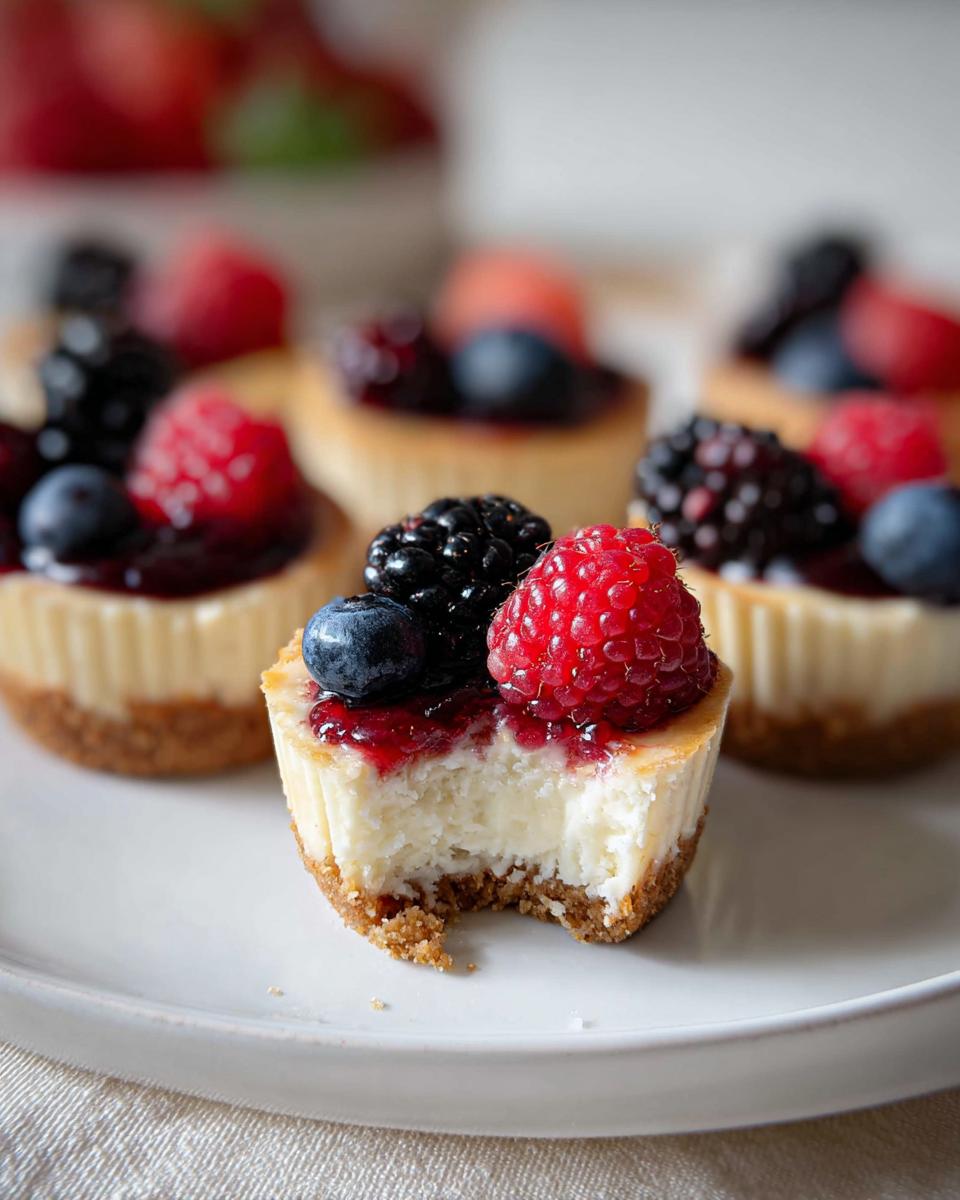
Carefully divide the batter, filling those crusts right to the top. This is the pro tip time! You need a large roasting pan. Boil a kettle of water. Place the roasting pan on the bottom rack, then pour that boiling water carefully into the pan—about an inch deep. Slide your muffin pan onto the middle rack over the steam. Bake for about 20 minutes. You’re done when the edges look set, but the very middle still gives a gentle wiggle when you tap the side of the pan. That jiggle means creamy perfection!

Cooling and Chilling Requirements
This step is non-negotiable for the best texture. Pull the whole setup out and let the cheesecakes cool sitting right in the roasting pan on a rack for about 45 minutes. After they’ve cooled down a bit, move just the muffin pan to the fridge to chill for at least 2 hours, but honestly, overnight is even better for amazing flavor! If you’re in a huge hurry, pop them in the freezer for an hour to speed things up before you add that gorgeous berry topping.
Tips for Success When Making Mini Cheesecake Bites with Berry Topping
I’ve ruined plenty of cheesecakes in my day, trust me, but these tips right here guarantee you gorgeous, crack-free individual treats every single time. The absolute number one secret? Ingredients must be room temperature! If your cream cheese is cold, you’ll end up with lumps, no matter how long you beat it.
Also, remember what I said about the eggs? Go easy! Beat them in gently and stop the second they’re incorporated. Don’t feel like you need to whip air into this batter—cheesecake wants to be dense and smooth, not fluffy. That water bath, even for these little guys, is your shield against dry edges and those awful surface cracks. If you’re looking for more foolproof muffin and cupcake bases, I have a few articles on that over here that might help too!
Ingredient Notes and Substitutions for Bite Sized Desserts
Because we focus so much on family-friendly, safe baking here, let’s quickly talk substitutions! If you’ve got a gluten-free crew coming over, the crust is the easiest switch. Don’t just use regular graham crackers; swap them out for your favorite gluten-free variety. Or, better yet, try mixing almond flour into your crust base—it adds a wonderful nuttiness to these individual treats. If you run out of sour cream, plain Greek yogurt works just fine for that touch of tanginess in the filling.
For more ways to adapt recipes for dietary needs, check out my tips on making great gluten-free bread—it uses the same principle of finding the right substitute!
Serving Suggestions for Party Dessert Platters
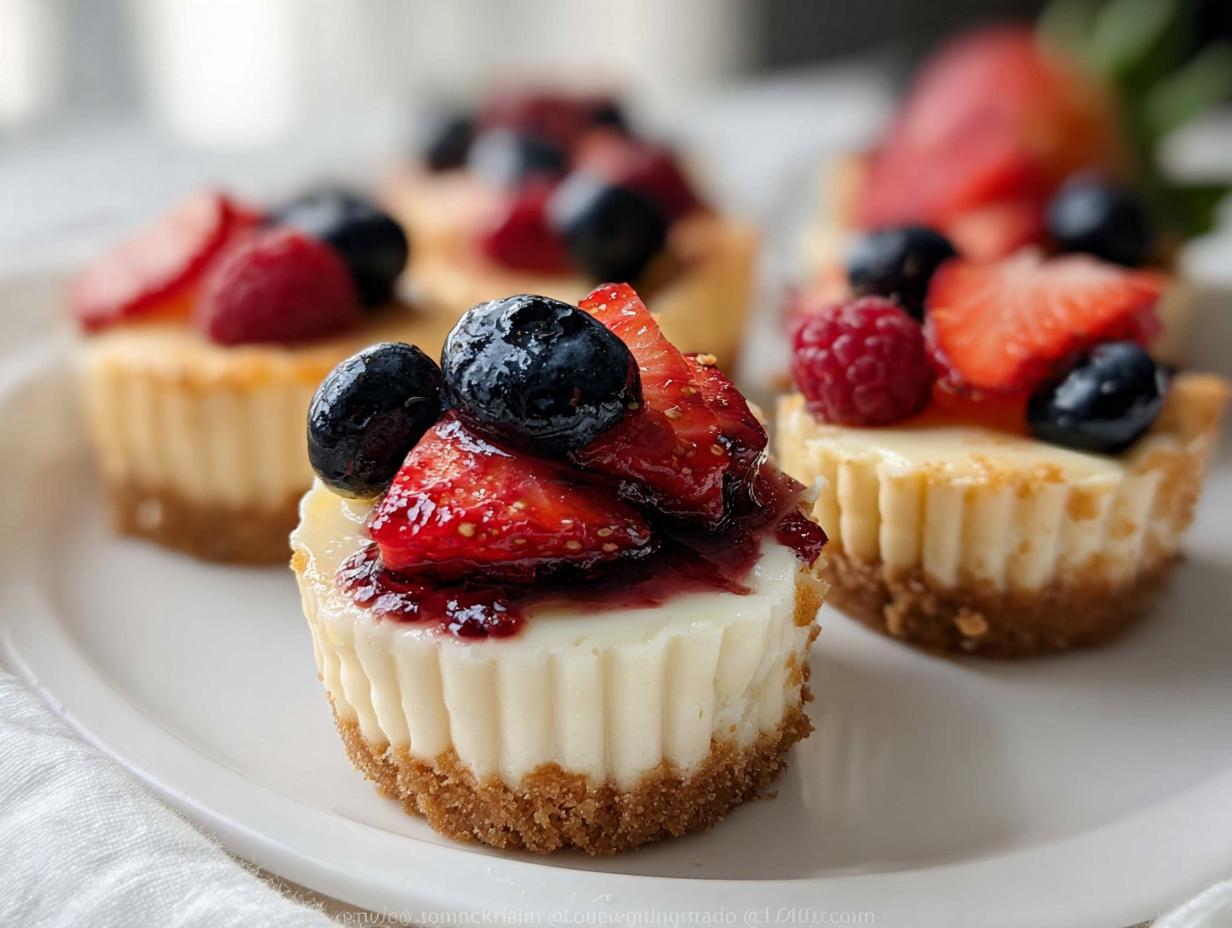
The best part about making Mini Cheesecake Bites with Berry Topping is how gorgeous they look arranged together. They are instant winners on any party dessert platters because they don’t require slicing! Once they are chilled and topped, try arranging them on a white platter for a clean look, or use a tiered stand to give them height.
If you want to mix things up beyond the fresh berries, try a drizzle of salted caramel sauce or a tiny dab of lemon curd on top of the berry layer. These individual treats honestly look fantastic all grouped together. To see how I incorporate these easy servings into bigger party spreads, check out my ideas for holiday appetizer layouts!
Storage and Make-Ahead Tips for Mini Cheesecake Bites with Berry Topping
If you’re planning a big party—and I usually am!—making these ahead of time is essential. The great news about these little beauties is they actually taste better the next day! The chilling time we put them through isn’t just for setting; it lets those vanilla and lemon notes really meld into the creamy filling. So, yes, you absolutely can make these the day before your event.
The recipe says you can chill them for up to 24 hours before adding the topping, and I stick to that 100%. Once you add fresh berries, the moisture starts to transfer, so the cheesecakes won’t last as long looking perfect once they are fully decorated. If you top them the day before, you might notice the berry juice start to bleed a tiny bit, which some people don’t mind at all!
When it comes to storage, keep them covered. I usually just use the plastic wrap that came with the muffin tin cover, or I’ll place a large overturned bowl over the entire muffin pan, which keeps them fresh and stops them from smelling like whatever else is hanging out in the fridge. These mini cheesecakes stay fantastic—firm and creamy—in the refrigerator for up to 5 days. It’s handy, because if you have leftovers, they make a perfect dessert any day of the week!
If you need to make them even further ahead of time, you can freeze the undecorated bites! Pop the whole pan (or transfer them to an airtight container) into the freezer. They handle freezing really well. When you want to serve them, just give them a good 3 to 4 hours in the fridge to thaw slowly. For more fantastic make-ahead secrets, check out my post on chocolate mousse—the freezing concepts are very similar!
Frequently Asked Questions About Mini Cheesecakes
I get so many questions every time I post one of these recipes on social media! It’s wonderful that you all are loving these bite sized desserts. Here are the things I hear most often about making beautiful Mini Cheesecake Bites with Berry Topping that look great on any party dessert platters.
Can I skip the water bath when making these mini cheesecakes?
Oh, I know the water bath sounds like such a hassle when we only have 12 little bites to make! You *can* skip it, but I really don’t recommend it if you want that porcelain-smooth top. The steam keeps the oven heat gentle and even, which prevents the edges from cooking faster than the center. Without it, your little cheesecakes are much more likely to form those surface cracks we hate so much.
How do I prevent my mini cheesecake bites from sticking to the liners?
This one is simple, especially when dealing with individual treats! If you’re making them just a few hours ahead, sometimes just letting them cool completely will help them release easily. But my best trick for guaranteed clean release is peeling the paper liner away using two spoons—gently scoop under the bottom layer before peeling upwards. Parchment liners, rather than the thin white paper ones, often make peeling much easier too!
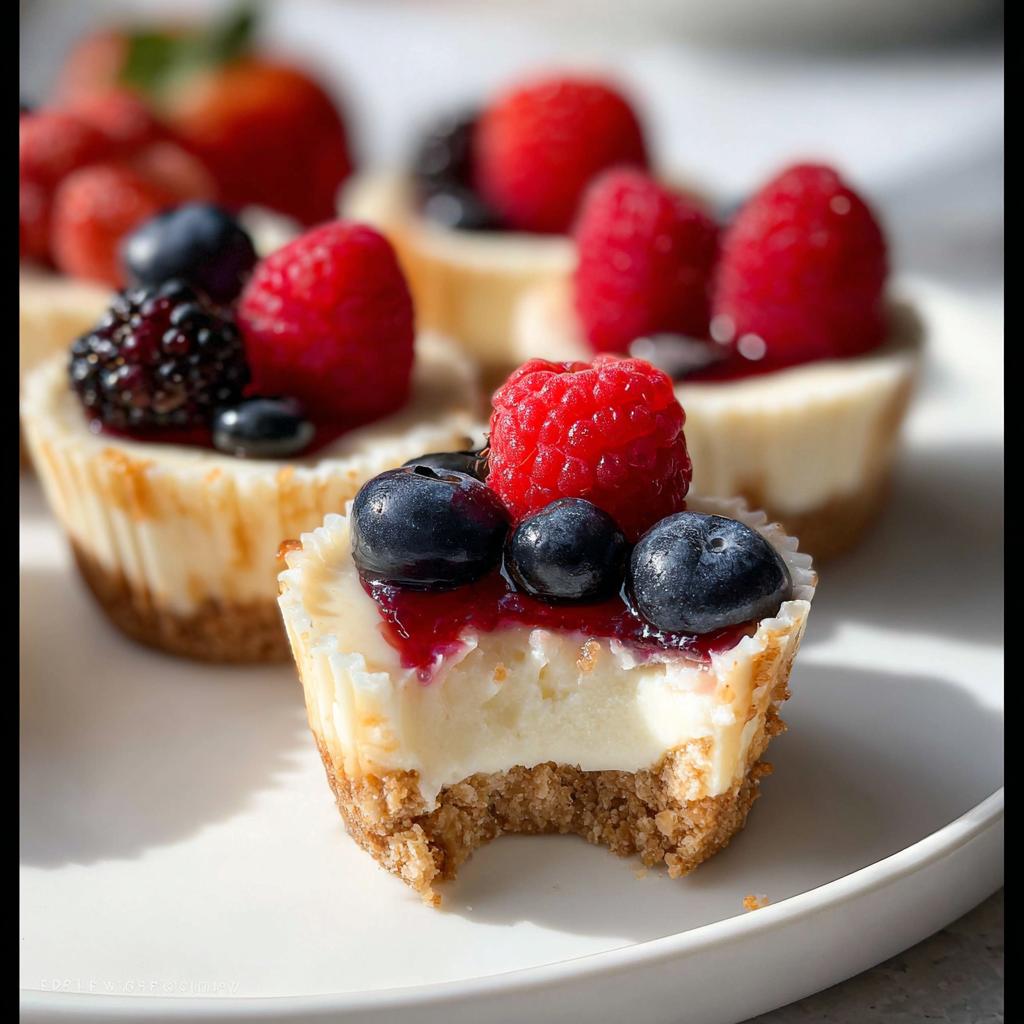
What are the best berries to use for the topping?
For the best visual effect on your Mini Cheesecake Bites with Berry Topping, you want color contrast! I always use a mix. Fresh blueberries are great because they hold their shape, and then I slice up some bright red strawberries. Sometimes I’ll toss in a few raspberries if they look good at the store. That mix of deep blue and vibrant red over the creamy white is what makes them look so special on a party dessert platters.
If you have any more tricky questions while you’re baking, feel free to reach out to me on my contact page! Happy baking!
Mini Cheesecake Bites with Berry Topping
Ingredients
Equipment
Method
- Preheat your oven to 350°F (177°C). Line a standard 12-count muffin pan with cupcake liners.
- Combine all of the crust ingredients in a medium bowl. The mixture will be sandy. Firmly press a heaping Tablespoon of crust mixture into each liner. Bake the crusts for 6 minutes.
- Beat the cream cheese and granulated sugar together on medium-high speed in a large bowl until the mixture is completely smooth and creamy, about 2 minutes. Add the sour cream, lemon juice, and vanilla extract, and beat until fully combined.
- With the mixer running on medium speed, add the eggs 1 at a time, beating just until combined before adding the next. Do not over-mix.
- Divide the batter among the liners, filling each all the way to the top. It is acceptable if the crust is still warm.
- For the optional water bath: Boil a pot of water. Place a large metal baking or roasting pan (like a 9×13-inch pan) on the bottom oven rack of the preheated oven. Pour boiling water into the pan, about 1 inch deep. Immediately place the muffin pan on the center rack. Close the oven door to trap the steam inside.
- Bake until the edges are set and the centers slightly jiggle when you tap the pan, about 20 minutes.
- Set the pan on a cooling rack and allow cheesecakes to cool at room temperature for 45 minutes. Then transfer them to the refrigerator and chill for at least 2 hours and up to 24 hours. You can place them in the freezer for 1 hour to cool faster.
- Top the cheesecakes. Garnish with berries, mint, or other toppings. You can pipe whipped cream onto the mini cheesecakes up to 24 hours in advance. Refrigerate decorated cheesecakes until you are ready to serve them.
- Cover and store leftover cheesecakes in the refrigerator for up to 5 days.
Notes
Tried this recipe?
Let us know how it was!
Gluten-Free Nutritionist & Family Meal Planning Expert
Working as a pediatric dietitian at Children’s Hospital of Denver, I kept meeting families overwhelmed by managing their children’s celiac disease. Parents stressed, kids frustrated, everyone eating bland boxed “gluten-free” products.
That’s when I realized my calling: creating practical, balanced gluten-free solutions for real families with busy schedules. I’ve developed 375+ family-friendly recipes focusing on lunch boxes, after-school snacks, and make-ahead dinners that actually work.
My meal planning system was featured in Parents Magazine, and I presented research at the Rocky Mountain Pediatric Nutrition Conference. My evidence-based approach ensures recipes meet both taste and health standards—families need solutions that work in the real world, not just perfect test kitchens.