When you want to serve something absolutely stunning at the end of a great meal but don’t want to spend all day hovering over the stove, I have your answer. Forget fussy cakes or complicated pastry work! If you’re looking for an elegant dinner party idea that whispers ‘luxury’ without shouting ‘stress,’ look no further. I still remember the first time I tasted panna cotta during a sun-soaked summer picnic in Italy. Wow, the creamy, velvety texture combined with the bright, fresh berries was a revelation.
Inspired, I returned home determined to recreate that blissful moment. After several trials in my own kitchen, I developed this gluten-free version of Classic Vanilla Bean Panna Cotta with Berries that not only captures the essence of my Italian adventure but also brings joy to my own family. It has become a staple at our gatherings—a delicious reminder that dessert can be both indulgent and wholesome. Trust me, this simple recipe feels incredibly sophisticated!
Why This Classic Vanilla Bean Panna Cotta with Berries Recipe Works (EEAT Focus)
Look, I’ve tested enough desserts to know what works and what just causes kitchen meltdowns! This panna cotta is famous in my circle for being foolproof. It’s a winner because it checks all the boxes for busy cooks like us.
- It’s naturally gluten-free, so everyone can enjoy it without worry—big win for us nutrition-focused folks!
- The ratios of heavy cream to gelatin are just perfect.
- You mix it, pour it, and forget it until serving time.
Velvety Texture Achieved Easily
The trick here is the way we bloom the gelatin and gently warm the cream. We aren’t cooking it, just warming it enough to completely dissolve the gelatin into the cream. This ensures you get that signature, smooth, melt-in-your-mouth texture every single time. No lumps allowed in my kitchen!
Ideal Make Ahead Desserts for Entertaining
Honestly, this recipe is my secret weapon for hosting. Because it needs to chill for at least four hours—overnight is even better—you make zero fuss on the day of the party. Nothing beats being able to say, “Desserts are ready!” the second your guests finish the main course. That’s the power of great make ahead desserts.
Essential Equipment for Classic Vanilla Bean Panna Cotta with Berries
You don’t need any fancy gear for this beautiful dessert, which is another reason I love it so much! Just the basics will get you rolling. Make sure you have these three things ready before you start heating up that cream.
- A sturdy saucepan—we just need to warm things up, not blast boil them.
- A whisk! You need to whisk that gelatin in until it vanishes, so grab your sturdiest one.
- Ramekins or small serving glasses. I use cute little clear glasses so you can see those gorgeous vanilla flecks!
Ingredients for the Perfect Classic Vanilla Bean Panna Cotta with Berries
Since this dessert relies on only a few things, the quality really shines through! You don’t need much, but those vanilla bean flecks are non-negotiable for that authentic look. You can check out this similar recipe idea if you want another perspective, but stick with my measurements for creaminess!
For the Creamy Vanilla Base
This is where the magic happens. Don’t skip splitting that vanilla bean! You want every little speck of flavor.
- 1 quart Heavy cream (yes, the full fat stuff—it deserves it!)
- 1/2 cup Sugar
- 1 whole Vanilla bean, split lengthwise, seeds scraped out (keep the pod!)
- 2.25 teaspoons Unflavored powdered gelatin
- 3 tablespoons Water (just to get the gelatin happy)
For Topping and Presentation
Simple, bright, and beautiful. That’s what we’re aiming for here contrasted against that rich, creamy white.
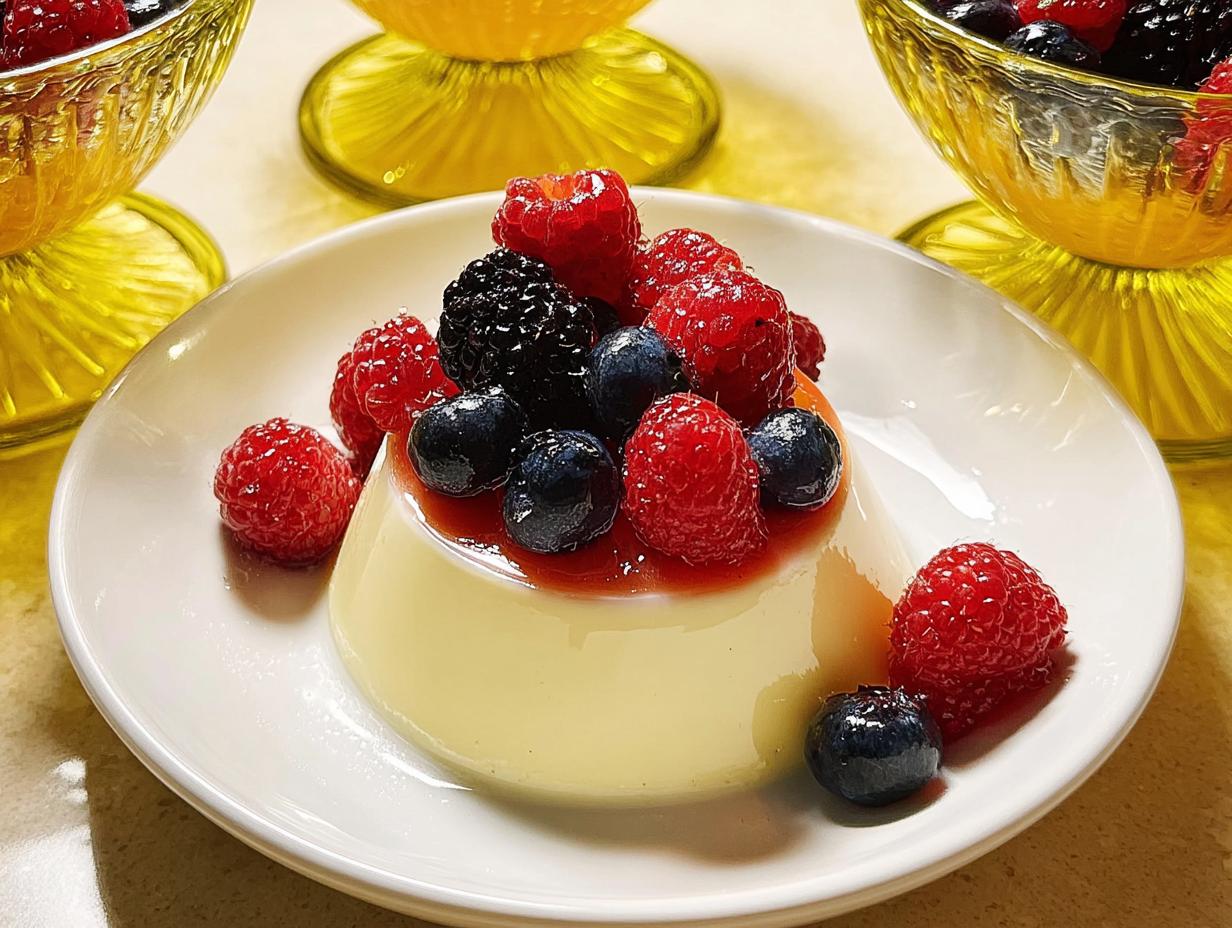
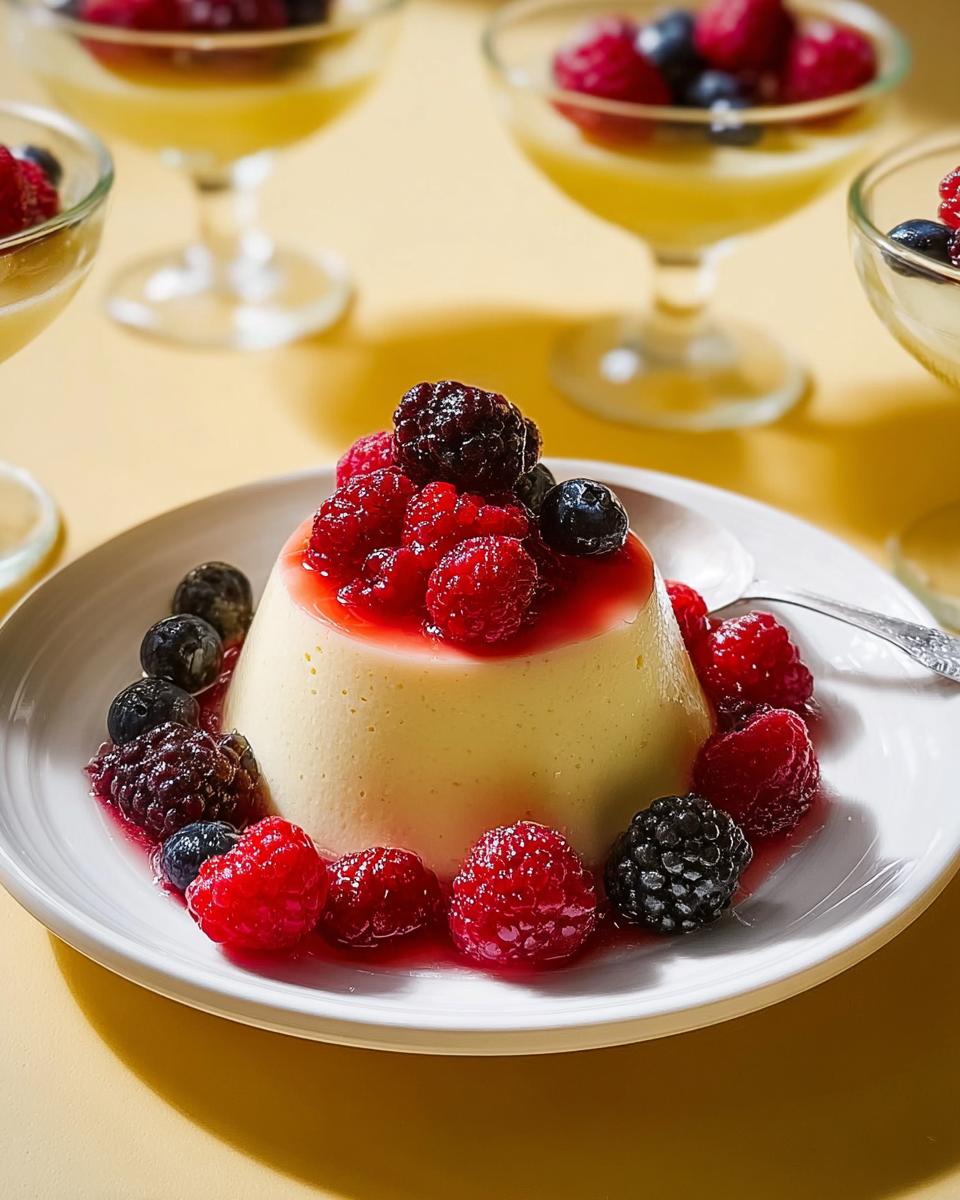
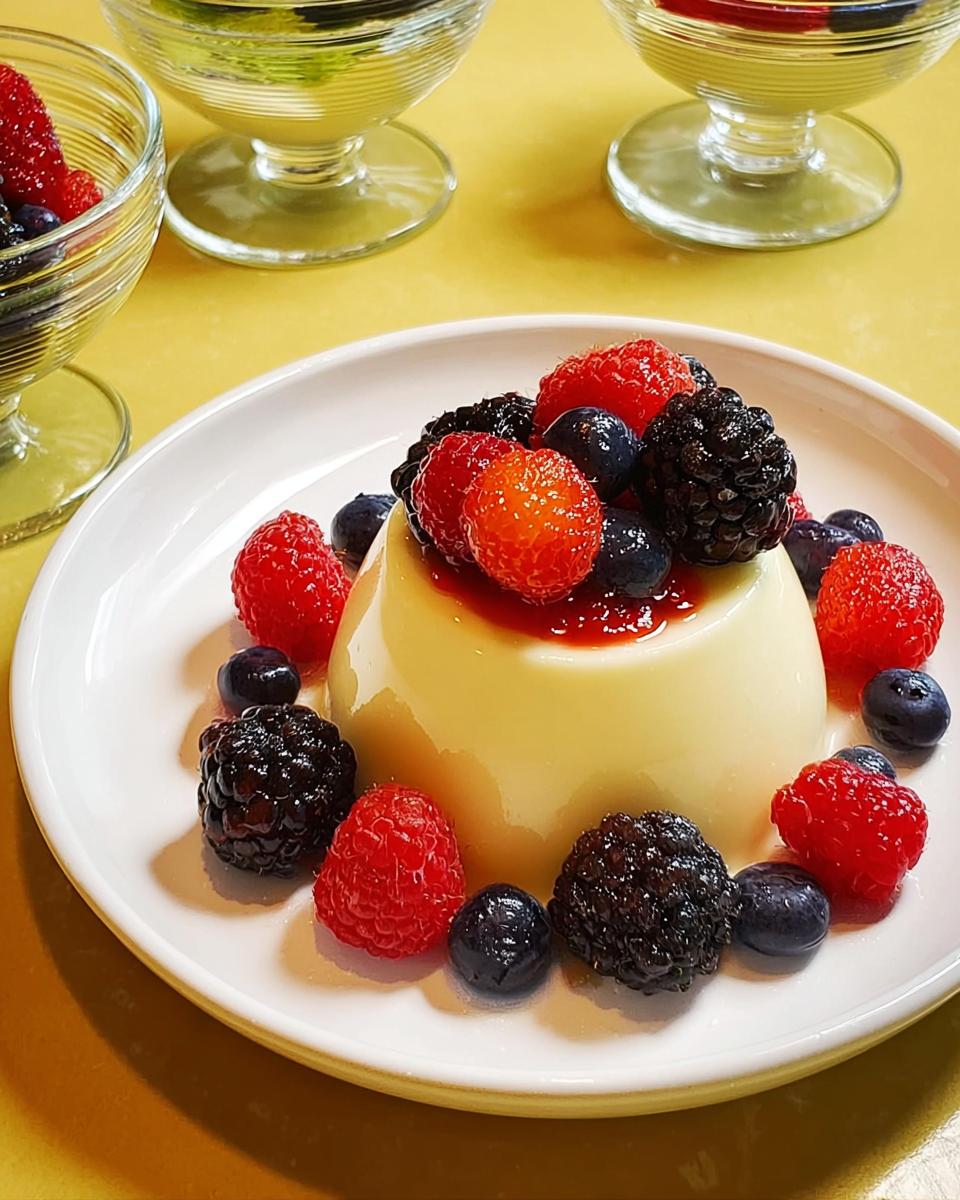
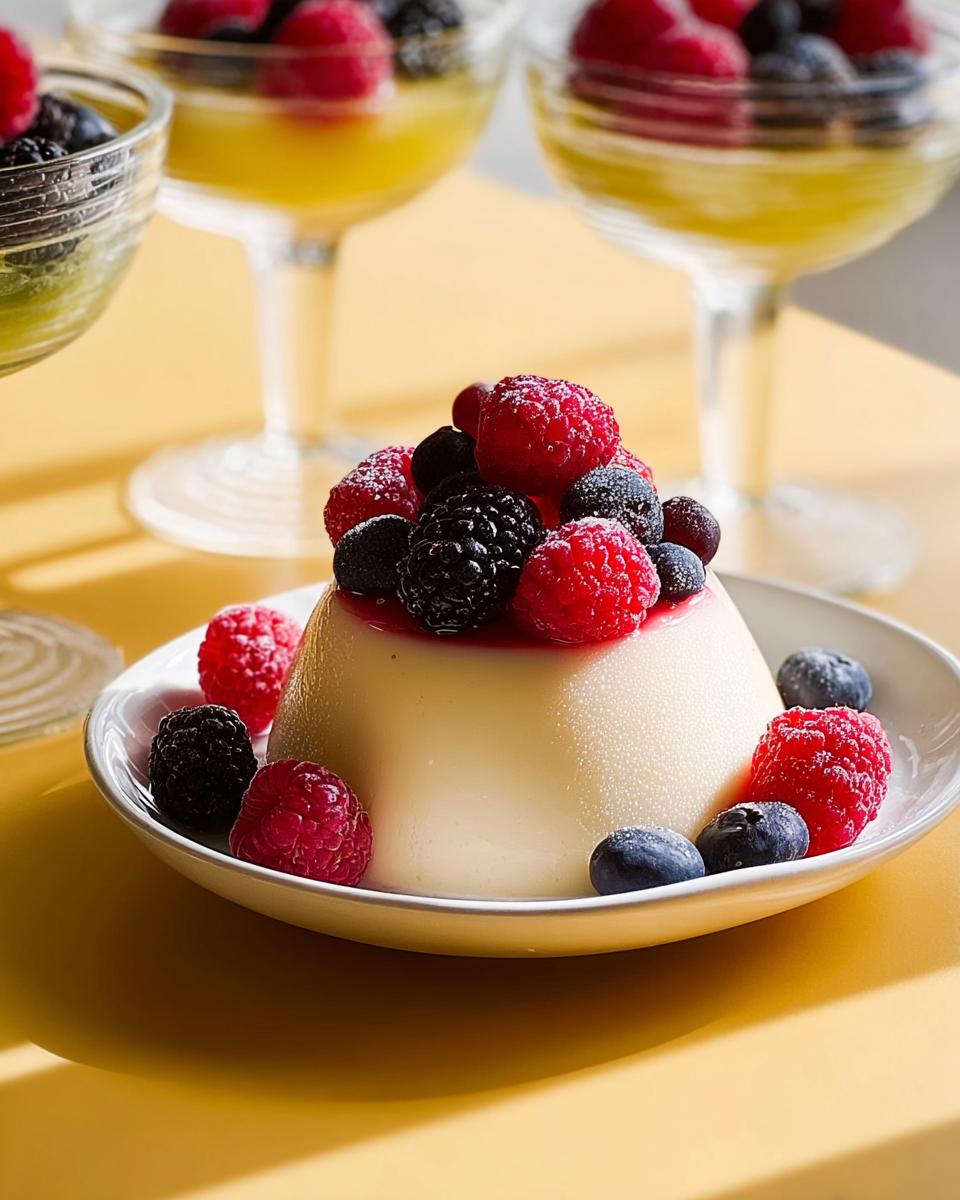
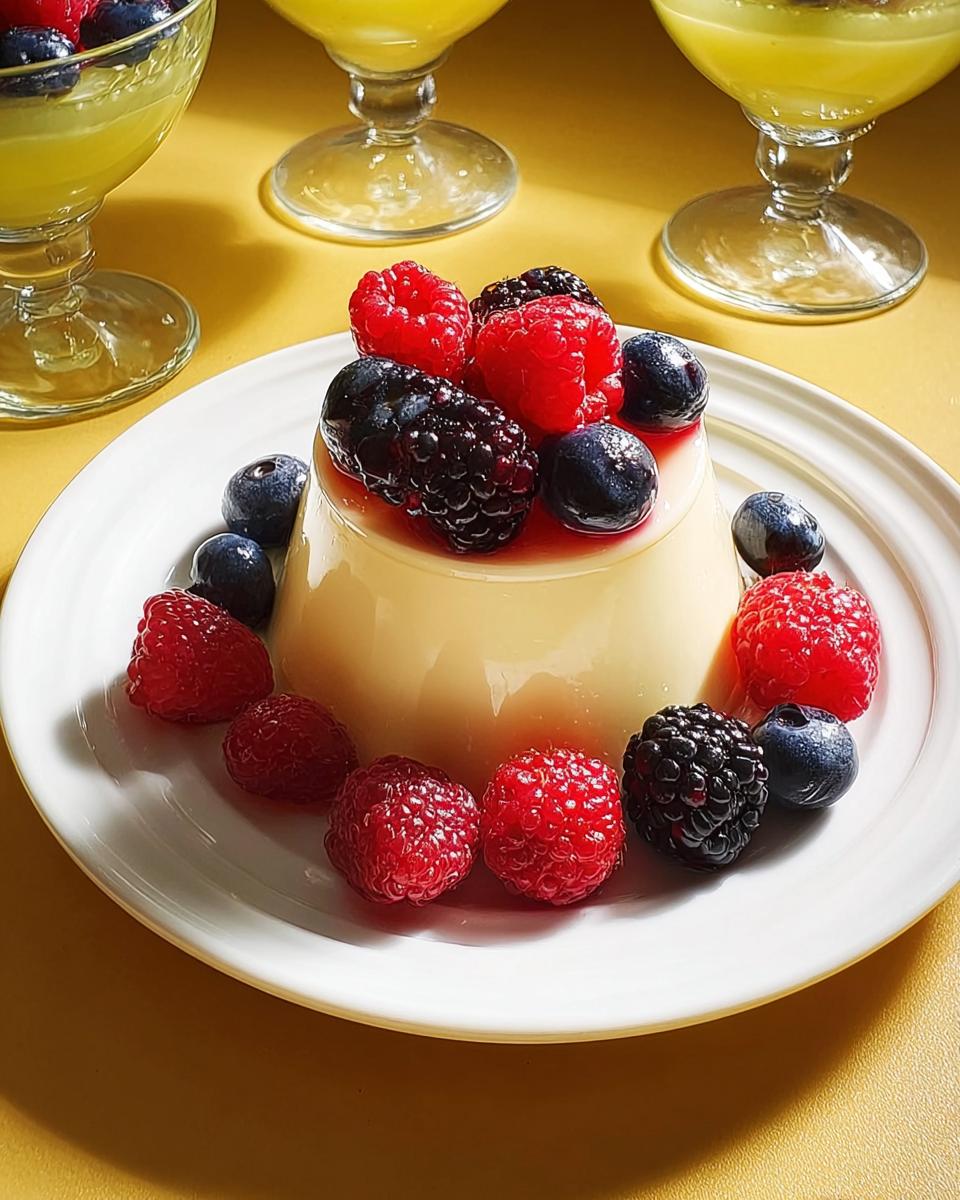
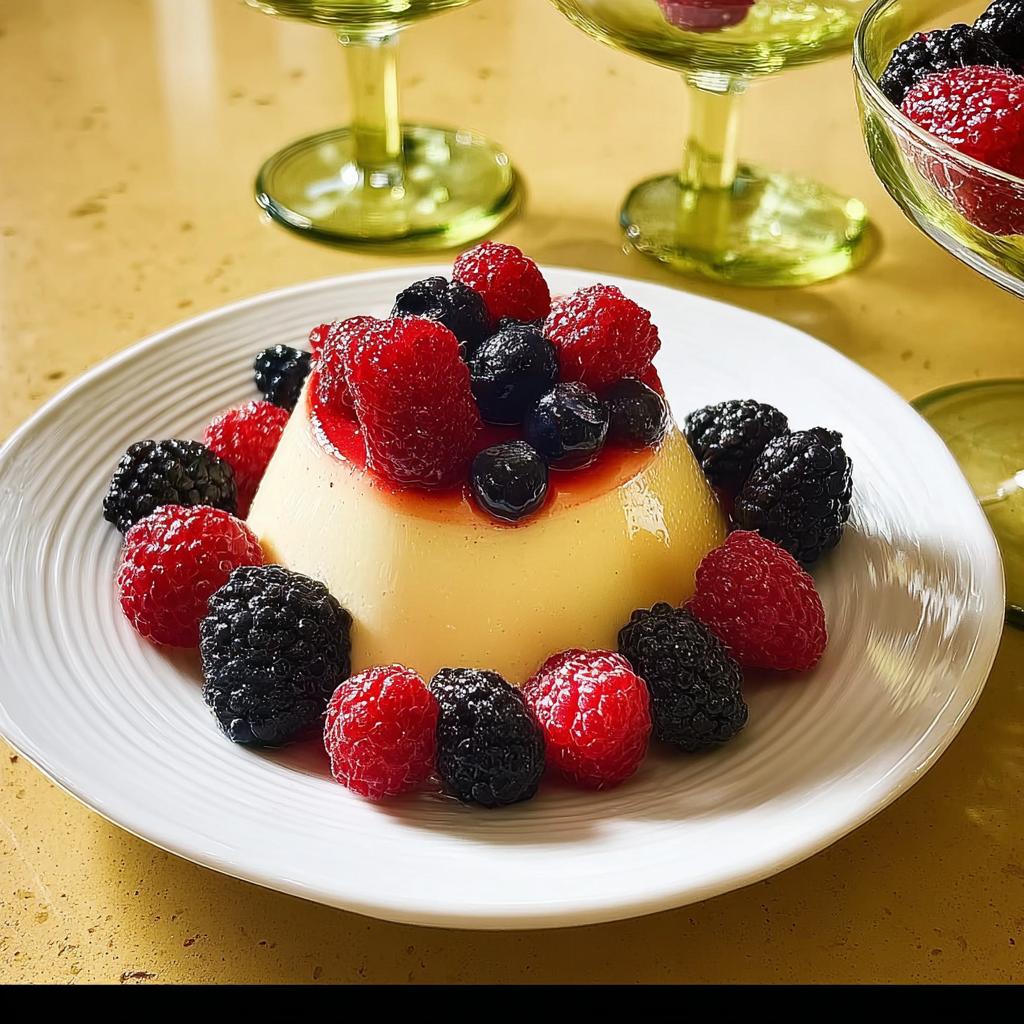
- Mixed berries for serving—whatever looks gorgeous in the market that week!
Step-by-Step Instructions for Your Classic Vanilla Bean Panna Cotta with Berries
Okay, time to put on our aprons! Honestly, this is the easiest part, but precision matters, especially with gelatin. I always follow these steps exactly—it keeps my panna cotta looking smooth and never rubbery. If you are looking for great tips on other desserts you can prepare early, check out my guide on make ahead desserts!
Blooming the Gelatin
First things first, we need to wake up that powdered gelatin. Just sprinkle your 2.25 teaspoons of gelatin right over the 3 tablespoons of cold water in a tiny bowl. Don’t stir it! Just let it sit there untouched for about 5 to 10 minutes. When it’s done blooming, it will look spongy and thick—that means it’s ready to melt into our cream.
Infusing the Cream for the panna cotta recipe
In your saucepan—medium heat is all you need—toss in the heavy cream, the sugar, and that gorgeous vanilla bean pod along with all those lovely scraped seeds. Stir it gently now and then until the sugar is completely gone and the mixture is steaming nicely. Pay attention here: it should be hot, but please, please, *do not* let it come to a rolling boil. We are infusing flavor, not cooking a custard for this panna cotta recipe.
Combining and Setting the Creamy Vanilla Sweets
Once it’s steaming, kill the heat immediately and pull out that vanilla pod—toss it in the compost jar. Now, take your bloomed gelatin and whisk it right into the warm cream until you can’t see it anymore. Whisk until it’s perfectly smooth. Then, pour that sweet liquid evenly into your six little ramekins. Don’t forget to cover them tightly with plastic wrap and into the fridge they go! You need at least 4 hours, but seriously, letting them chill right through the night brings out the best in these creamy vanilla sweets.
Tips for Perfecting Your Classic Vanilla Bean Panna Cotta with Berries
Getting a flawless finish on panna cotta can feel intimidating, but honestly, it all comes down to managing two things: that gelatin and the chilling time. Follow these little tips, and you’ll feel like a total kitchen pro!
Vanilla Bean Substitute Guidance
If you looked in your spice drawer and realized you were out of a whole vanilla bean—oops!—don’t panic. You can absolutely use good quality pure vanilla extract instead. Just be sure to remove the saucepan from the heat first, just before you add the gelatin, and stir in about 1 teaspoon of the extract then. It won’t give you the pretty flecks, but the flavor will still knock your socks off. You can find some great gluten-free recipe ideas over here if you need inspiration!
Troubleshooting Common Issues
Did you end up with tiny lumps of undissolved gelatin? That means you didn’t whisk enough once you added it to the warm cream. Try warming *just* the lumpy panna cotta mixture slightly more and whisking vigorously off the heat until those bits disappear. If yours sets up like a rubber tire, you accidentally added too much gelatin. Next time, pull back just a touch, or use slightly less water when blooming!
Serving Suggestions and Berry Pairing Ideas
This gorgeous Classic Vanilla Bean Panna Cotta with Berries is already dressed for success, but we can always give it a little extra sparkle! If you’re aiming for those truly breathtaking elegant dinner party ideas, presentation is everything. Don’t just dump the fruit on top; treat it nicely!
Elevating the Berry Topping
My trick for next-level flavor is macerating. Just take your chosen berries—strawberries are amazing here—chop them slightly, and toss them with maybe a teaspoon of sugar and a tiny squeeze of lemon juice. Let them sit on the counter for about 20 minutes while the panna cotta is setting up. They release their own incredible, bright syrup!
For the ultimate finish that screams sophistication? Drizzle just a thread of high-quality honey or maybe a light maple syrup right over the berries when you serve. It adds a hint of depth that keeps people guessing. For more ideas on impressive, easy menus, check out how I plan my elegant yet simple meals!
Storing Your Make Ahead Desserts
Because this is such a champion among make ahead desserts, knowing how to store it properly is key to making sure it’s just as perfect three days later as it was the minute you unmolded it! This panna cotta recipe is really sturdy, which is fantastic.
If you’ve poured yours into individual ramekins or glasses, just make sure you cover them tightly with plastic wrap before they hit the cold air of the fridge. A tight seal prevents them from absorbing any weird fridge smells—nobody wants their creamy vanilla sweets tasting like last night’s onions, right? If you notice condensation forming, you can carefully dab that away before serving.
When kept well-covered in the refrigerator, these creamy vanilla sweets stay beautifully set and delicious for up to four days. That’s practically a whole week of easy desserts covered! I often make a big batch right after my weekly grocery shop so they are ready for any weeknight craving or last-minute guest. If you are looking for other desserts that benefit from advance prep, check out my tips for making chocolate lava cake ahead of time!
Frequently Asked Questions About This panna cotta recipe
I get so many questions popping up when people try this at home, which is awesome! It means you’re excited to make these creamy vanilla sweets. Here are the ones I hear most often when people are diving into this classic panna cotta recipe.
Can I use gelatin sheets instead of powdered gelatin in this panna cotta recipe?
Oh yes, you totally can! Gelatin sheets can sometimes give an even slightly silkier texture, but you have to get the swap right. Generally, you swap 1 teaspoon of the powdered gelatin for about one standard leaf of gelatin. Since our recipe calls for 2.25 teaspoons of powder, you would generally use two full sheets. Make sure you bloom the sheets fully in very cold water until they are totally pliable, squeeze out every drop of water, and then dissolve them into that warm cream mixture. It works perfectly for these elegant dinner party ideas!
How long must the Classic Vanilla Bean Panna Cotta with Berries chill before serving?
This is really important for texture! We need it firm enough to hold its shape. The absolute minimum chilling time for the Classic Vanilla Bean Panna Cotta with Berries is 4 hours. But honestly, if you can wait until the next day—overnight is ideal—that’s when the texture really firms up into that perfect, wobble-free sliceable creaminess we love. It’s definitely one of the great make ahead desserts because waiting is built right into the instructions!
Is this dessert truly gluten-free?
Yes, absolutely! That’s one of the best things about this panna cotta recipe. Heavy cream, sugar, gelatin, and vanilla—none of those things contain gluten. As long as you are using unflavored powdered gelatin that hasn’t been cross-contaminated, this dessert is naturally 100% gluten-free. You can serve these creamy vanilla sweets to everyone with total confidence! For more tips on going gluten-free in the kitchen, check out my main About Page for my philosophy!
Share Your Creamy Vanilla Sweets Creation
Now that you’ve whipped up this luscious, gluten-free dessert, I genuinely want to see it! There is nothing more satisfying than seeing my kitchen creations pop up in your homes. Did you use fresh raspberries or maybe sliced peaches?
Please drop a star rating right below this post and let me know how your batches of Classic Vanilla Bean Panna Cotta with Berries turned out. Did the kids try to sneak a taste before the chilling was done? Tell me all about it in the comments!
And if you shared photos on social media—you know you did!—please tag me or use the hashtag #SophieBakesCreamy. I love featuring your beautiful results! If you have any last-minute questions or need a recipe chat, feel free to reach out via my contact page. Happy baking, everyone!
Classic Vanilla Bean Panna Cotta with Berries
Ingredients
Equipment
Method
- Sprinkle the gelatin over the 3 tablespoons of water in a small bowl. Let it sit for 5 to 10 minutes to bloom.
- In a saucepan, combine the heavy cream, sugar, and the scraped vanilla seeds along with the scraped vanilla pod.
- Heat the cream mixture over medium heat, stirring occasionally, until the sugar dissolves and the mixture is steaming, but do not let it boil. Remove the saucepan from the heat.
- Remove the vanilla pod from the cream mixture. Add the bloomed gelatin to the warm cream and whisk until the gelatin is completely dissolved.
- Pour the mixture evenly into 6 small ramekins or serving glasses.
- Cover the ramekins with plastic wrap and refrigerate for at least 4 hours, or until fully set. Overnight chilling works best.
- To serve, top each panna cotta with fresh mixed berries.
Notes
Tried this recipe?
Let us know how it was!
Gluten-Free Nutritionist & Family Meal Planning Expert
Working as a pediatric dietitian at Children’s Hospital of Denver, I kept meeting families overwhelmed by managing their children’s celiac disease. Parents stressed, kids frustrated, everyone eating bland boxed “gluten-free” products.
That’s when I realized my calling: creating practical, balanced gluten-free solutions for real families with busy schedules. I’ve developed 375+ family-friendly recipes focusing on lunch boxes, after-school snacks, and make-ahead dinners that actually work.
My meal planning system was featured in Parents Magazine, and I presented research at the Rocky Mountain Pediatric Nutrition Conference. My evidence-based approach ensures recipes meet both taste and health standards—families need solutions that work in the real world, not just perfect test kitchens.