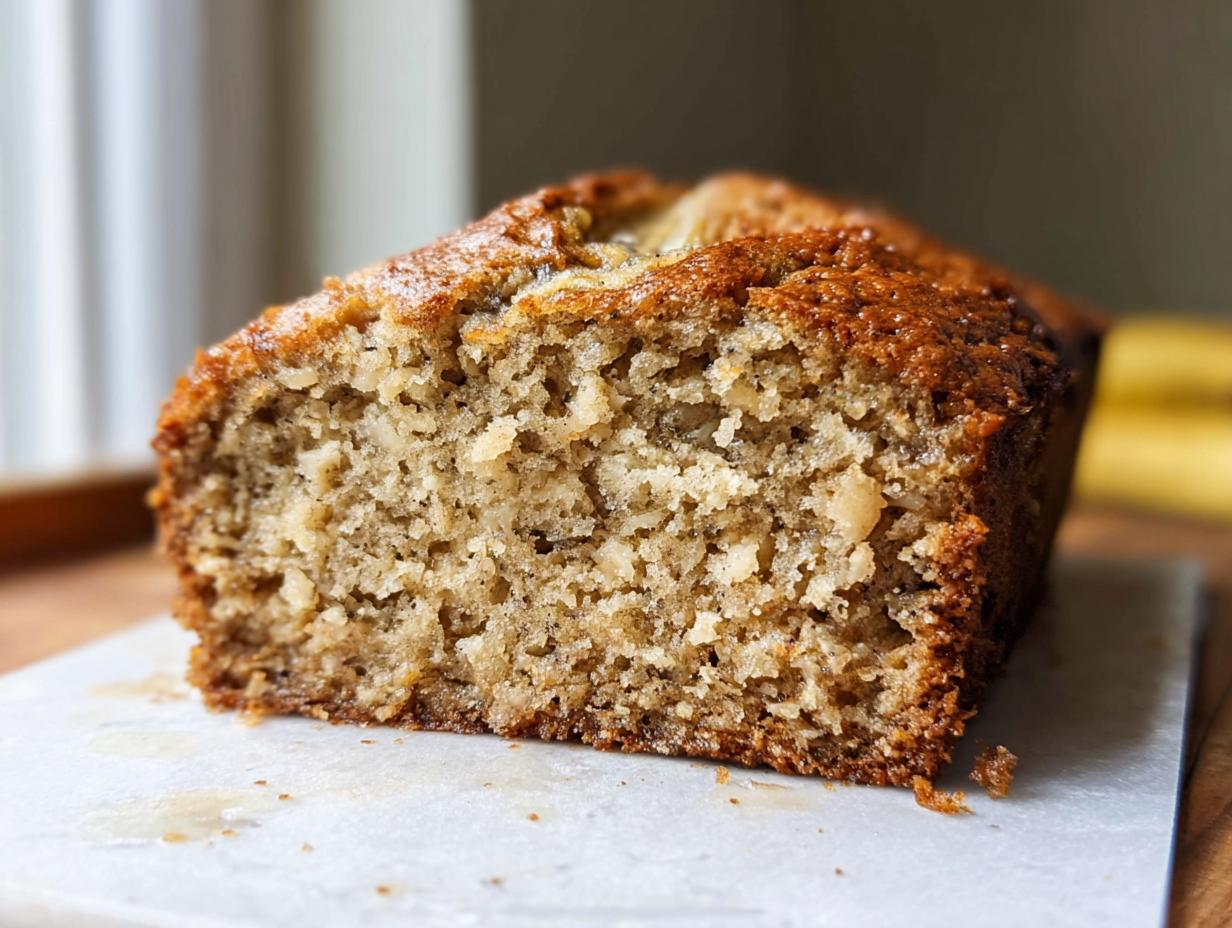
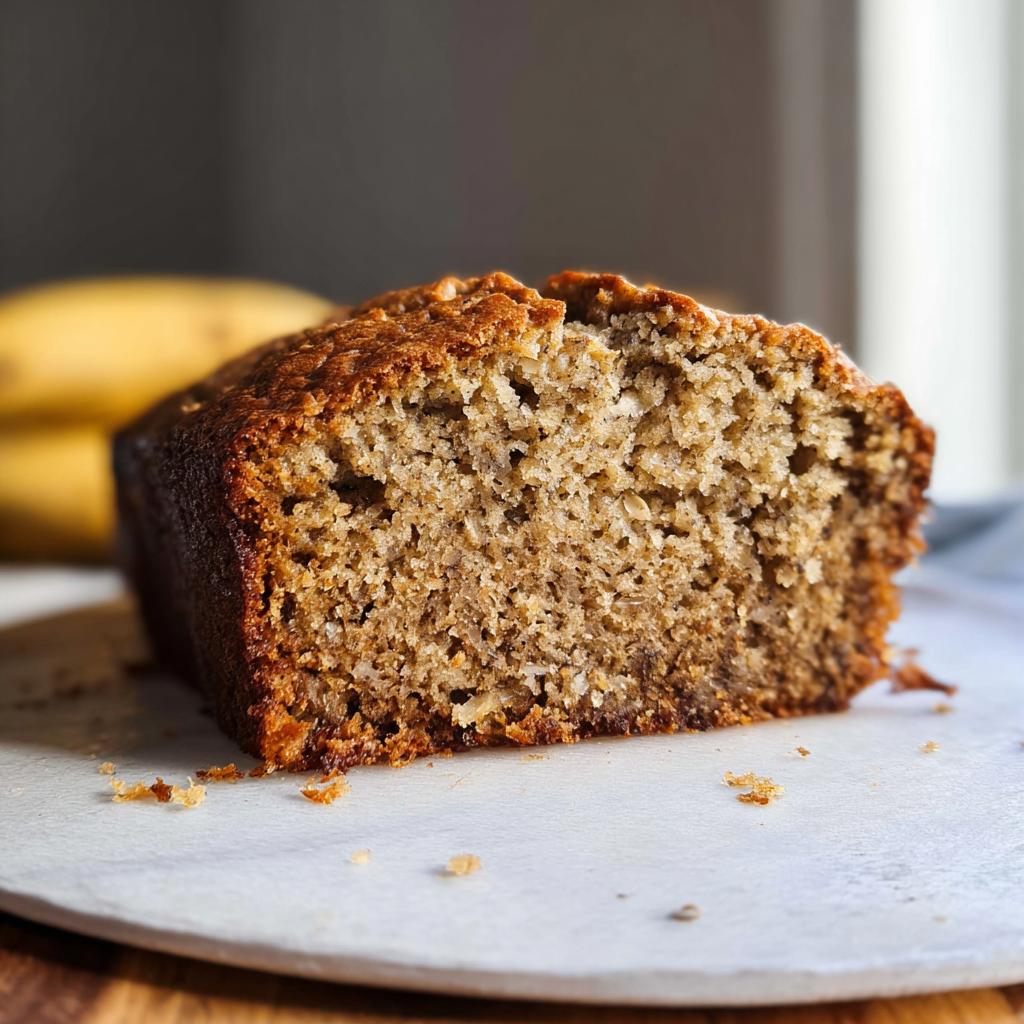
There is just nothing on earth that smells as much like pure comfort as warm banana bread baking. Seriously, it wraps the whole house up in a hug! I’m Elena, and if you’re chasing that perfectly soft, deeply flavorful loaf—the one that practically melts in your mouth—you’ve found your match. This Classic Moist Banana Bread recipe is foolproof, I promise. It creates the ultimate texture, which is always my main goal in baking.
I still remember the first time I baked a banana bread in my tiny Brooklyn kitchen, inspired by the smell of my nonna’s banana bread cooling on the counter during family gatherings. It was my favorite comfort food, but after my gluten sensitivity diagnosis, I feared I’d never taste that warm, moist goodness again. Determined not to let my condition diminish my culinary heritage, I meticulously experimented until I crafted a gluten-free version that captured the same familiar flavors and textures. The first slice I shared with my family was met with joyful smiles, just like the ones I remembered from my childhood. It reminded me that food is not just about ingredients, but about the connections and memories we create around it.
Why This Classic Moist Banana Bread is Your New Go-To
You really don’t need a complicated recipe to get incredible results, and that’s the beauty of this easy quick bread. I designed this one to deliver maximum comfort with minimal fuss. Forget dry, crumbly loaves; this one is heavenly!
- Stays Moist for Days: Seriously, the texture holds up beautifully overnight.
- Perfect Spice Balance: Just enough cinnamon to warm things up without overpowering the banana flavor.
- Simple Mashing: Since we mash the bananas really well, you get that intense banana flavor packed in every bite.
- Tried and Tested: You can check out my favorite nut variation right here, but this basic version is where it all starts!
Ingredients for the Perfect Classic Moist Banana Bread
Alright, let’s talk ingredients! This is where we lay the groundwork for that famously moist texture we’re all craving. I’ve broken the list into two groups—dry versus wet—because how you combine them later is everything, trust me. But for now, just gather everything up.
And listen, when it comes to the bananas? They need to be seriously overripe. I mean it, the peel should be mostly black. That’s where all the sugar and moisture hides out! Make sure your eggs are at room temperature before you start too; it really helps them emulsify properly with the butter.
Dry Ingredients for Classic Moist Banana Bread
- 2 cups all-purpose flour (make sure you spoon your flour into the cup and level it off—don’t scoop it!)
- 1 teaspoon baking powder
- 1/2 teaspoon baking soda
- 1/2 teaspoon ground cinnamon
- 1/2 teaspoon salt
Wet Ingredients for Classic Moist Banana Bread
- 1/2 cup unsalted butter, softened beautifully
- 1/2 cup granulated sugar
- 1/4 cup light brown sugar, packed in tight
- 2 large eggs, sitting out until they reach room temperature
- 2 teaspoons pure vanilla extract
- 2 cups mashed banana (The riper, the better!)
- 1/2 cup chopped walnuts (Only if you’re feeling wild!)
Step-by-Step Instructions for Classic Moist Banana Bread
Now for the fun part—putting it all together! Don’t stress over perfection here; baking is supposed to be joyful. Just follow my sequence, and you’ll have the most beautiful, fragrant loaf ready in no time. If you want to see my absolute best tips on getting that fluffy texture, check out my full guide here. We’re aiming for easy, straightforward steps that guarantee marvelous results.
Preparing the Oven and Dry Mix for Classic Moist Banana Bread
First things first: get that oven preheating to 350°F (177°C). Don’t let it cool while you mix! Next, prepare that 9×5 loaf pan. I always spray it with nonstick cooking spray, and then I line the bottom with parchment paper with a little overhang for easy lifting. That overhang is your handle later, trust me! Once that’s done, take your flour, baking powder, soda, cinnamon, and salt, and whisk them together in a big bowl. Just make sure they look totally uniform before moving on.
Creaming Butter and Sugars
This step is non-negotiable for moisture! Get your softened butter, granulated sugar, and brown sugar into your stand mixer bowl—or use your trusty electric hand mixer if that’s what you have. You absolutely have to beat this mixture for a good 4 to 5 minutes until it gets pale and really light and fluffy. That creaming action whips air in, which is exactly what we need! For a great external resource on classic banana bread techniques, always check out what others are doing, like this article over at Live Well Bake Often.
Combining Wet Ingredients and Final Batter Mix
Once you’ve got that lovely creamy base, mix in your room-temperature eggs one at a time, making sure you mix well after each addition. Then drizzle in that vanilla and finally, dump in all those mashed-up bananas. Mix just until they disappear. Now, gently fold in the dry ingredients until they are *just* combined. I mean it—stop mixing the second you don’t see any streaks of flour left! Overmixing is the enemy of a tender loaf. If you’re using those optional walnuts, stir those in super last.
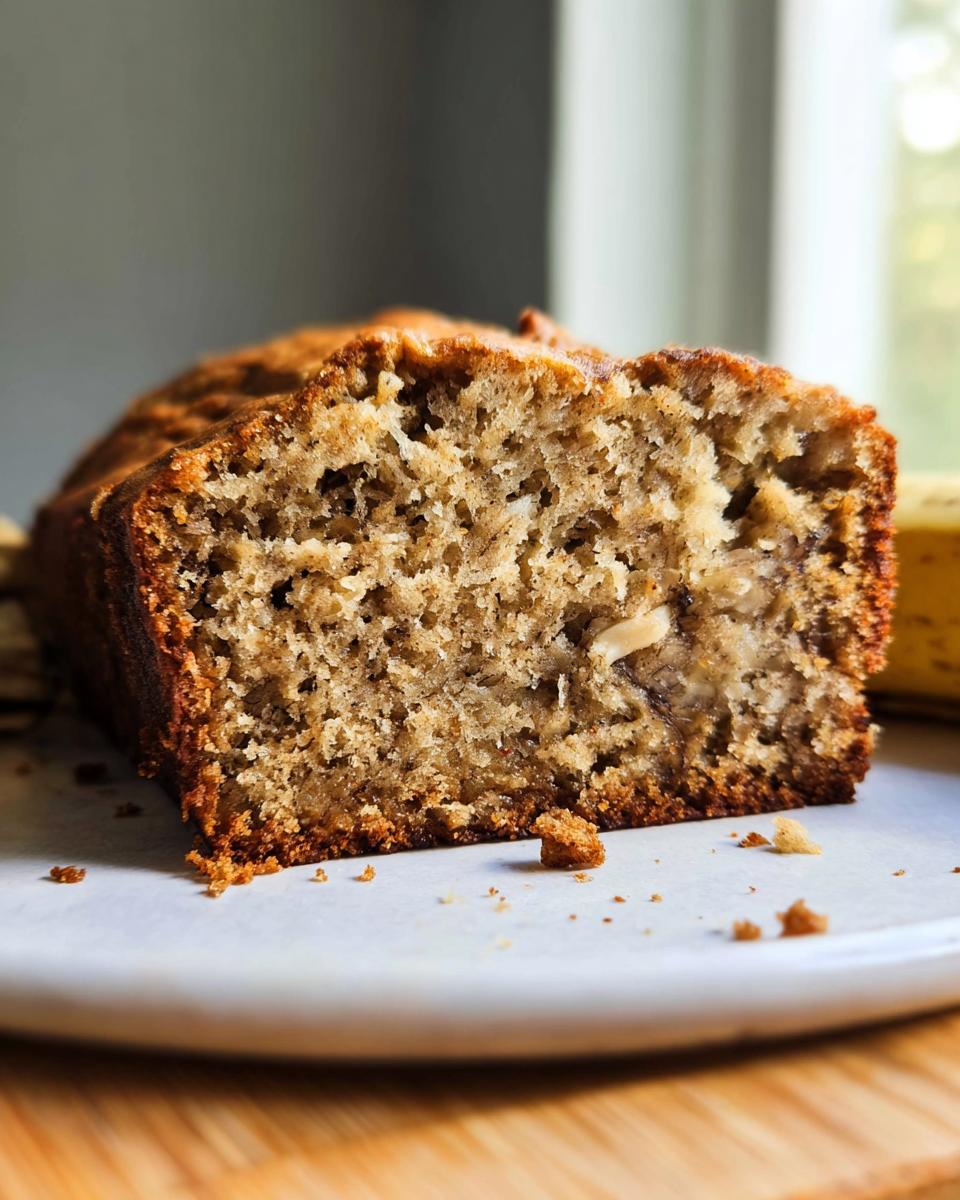
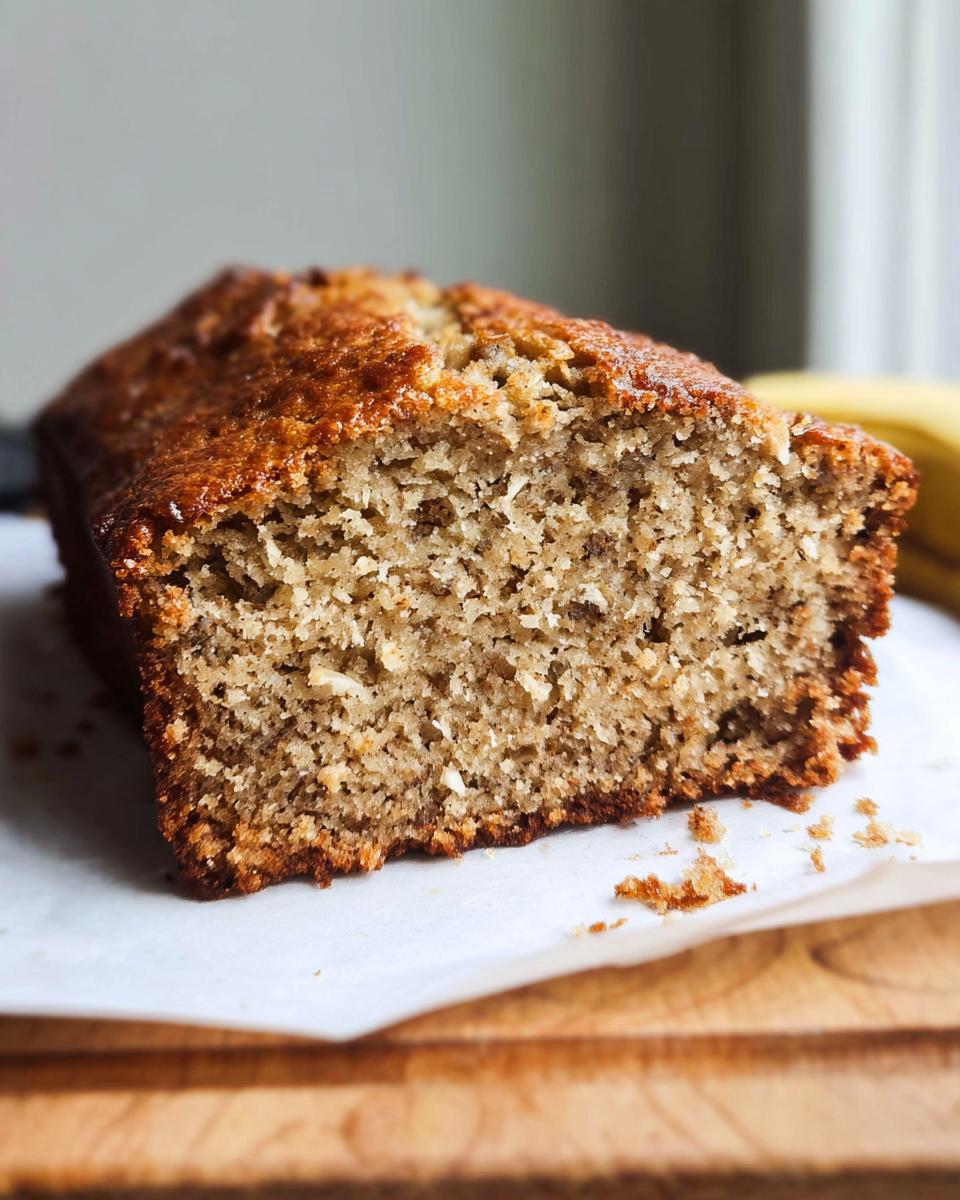
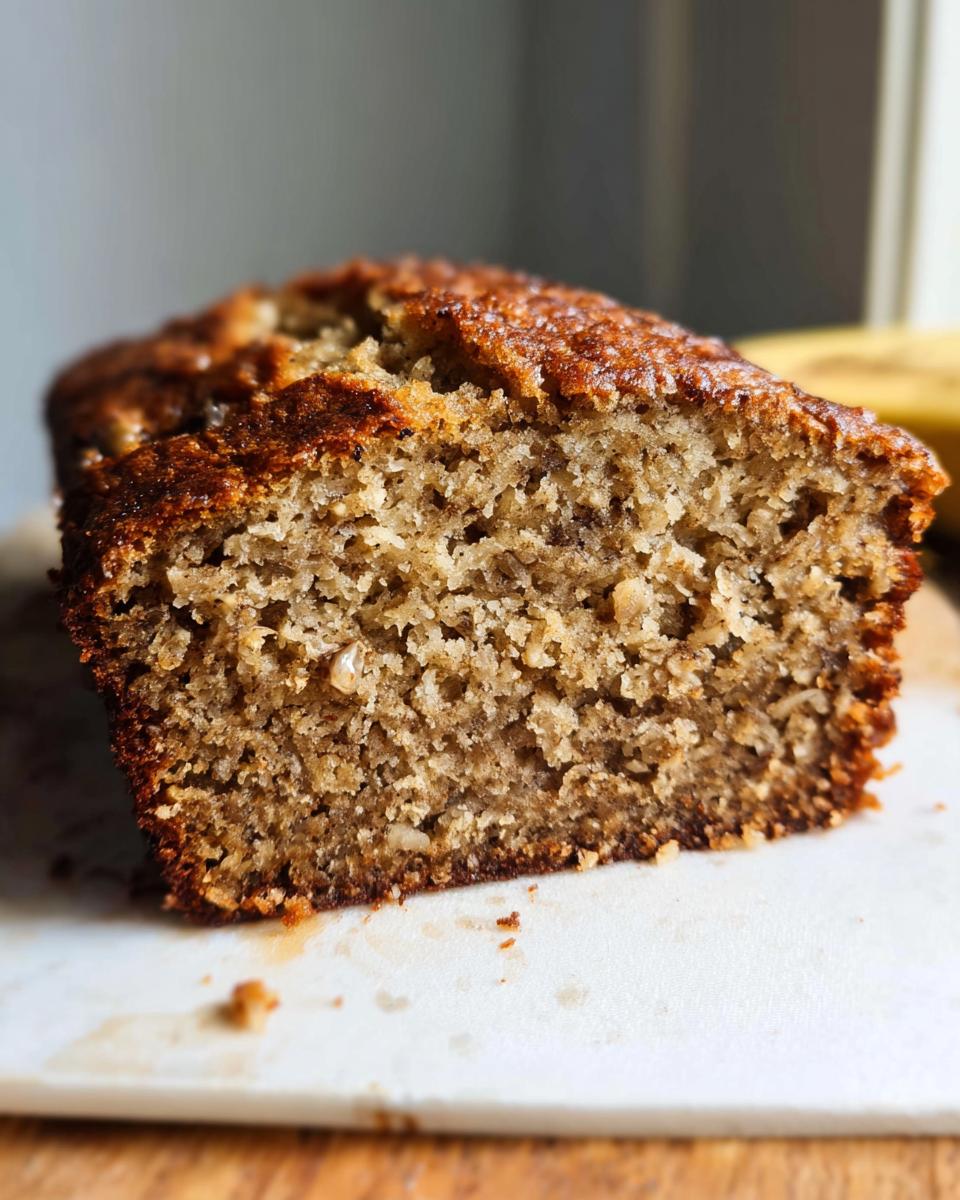
Baking and Cooling Your Classic Moist Banana Bread
Scrape that beautiful batter into your prepared pan and smooth the top out so it bakes evenly. Pop it into the center rack of your preheated oven for about 55 to 65 minutes. If you notice the top is getting too dark before the center is finished, just loosely tent a piece of aluminum foil over the top to shield it. When a toothpick inserted right near the center comes out clean, you know it’s ready! Let it cool in the pan for exactly 20 minutes before carefully using those parchment handles to lift the loaf out onto a wire rack until it cools down more.
Tips for Achieving the Best Classic Moist Banana Bread Texture
Look, anyone can throw flour and bananas in a bowl, but if you want that cloud-like, never-dry texture, you need to pay attention to a couple of my little secrets. I learned these the hard way when I was trying to nail that gluten-free conversion! These tips aren’t in the main instructions, but they are the real keys to success.
First up: those bananas! They aren’t just a suggestion; they are mandatory. If your banana peel is yellow, wait another day! You need peels that are almost black—skin that’s splitting and looks totally unappetizing on the counter. That’s when the starches have converted to pure sugar, giving you maximum flavor and moisture. You can even freeze those super-spotted ones; just thaw them completely before mashing.
Second, and I can’t stress this enough: respect the creaming stage. That 4 to 5 minutes you spend beating the butter and sugar? That’s not idle time; that’s your aeration phase. You are beating in the air that will make the whole bread rise beautifully and tenderly. If you rush it, the bread will be denser than a brick. Learn how to manage that mixing process properly, and you can see my thoughts on other gluten-free baking techniques here for added insight!
Variations on Your Classic Moist Banana Bread
This recipe is absolutely fantastic just as it is—a perfect, basic baking recipe that lets that banana flavor shine. But let’s be honest, sometimes we need a little extra something, right? I love changing things up based on what I have in the pantry or what mood I’m in. These simple additions don’t mess with the structure, they just crank up the fun factor!
Think of this as your starting line for culinary creativity. You can try swirling things in, topping it before it bakes, or even boosting those spices a tiny bit more. For even more ideas on how I adapt recipes, you can browse my general gluten-free baking category!
- Chocolate Lover’s Dream: Stir in 1 cup of semi-sweet chocolate chips right at the very end with the walnuts. If you want them to sink less, toss the chips with a tiny spoonful of flour before adding them to the batter.
- Spice it Up: If you feel like the cinnamon isn’t enough kick, try adding an extra 1/4 teaspoon of ground nutmeg or even a pinch of allspice when you mix your dry ingredients. It deepens the flavor profile beautifully when the bread is warm.
- The Streusel Topping: This is my favorite choice for making it feel special! Mix 1/4 cup flour, 2 tablespoons brown sugar, 2 tablespoons cold, cubed butter, and a pinch of cinnamon. Crumble this over the top of the batter in the pan right before it goes into the oven. It gives you a lovely crunchy crust.
Frequently Asked Questions About Classic Moist Banana Bread
I get so many great questions when people try this recipe for the first time! It’s wonderful seeing everyone trying their hand at this easy quick bread. Here are some of the things I hear most often about getting this banana bread recipe just right. If you have a question not covered here, feel free to reach out to me over on my contact page!
What kind of bananas should I use for the best banana bread recipe?
Oh, the bananas! This is the absolute key to getting that rich flavor and moisture. You must use overripe bananas. I mean it—don’t skimp here! They should be covered in black spots, or honestly, completely black if you can handle it. As bananas ripen that much, their starches convert to sugar, which means your bread tastes sweeter and stays much more moist. If they are even slightly yellow, the flavor just won’t be intense enough, and your bread will taste less sweet overall.
Can I make this an easy quick bread without a mixer?
Yes, absolutely! This whole recipe is built on basic baking principles, so a heavy-duty appliance isn’t required. When you get to the creaming step—beating the butter and sugars—you just need some good old-fashioned elbow grease. Use a sturdy wooden spoon or a hand whisk and just beat hard until the mixture lightens up and gets noticeably fluffy, maybe take an extra minute or two compared to the mixer. It takes more effort, but the results for this easy quick bread are still fantastic!
How do I store leftovers of this Classic Moist Banana Bread?
Keeping this moist is my priority, even after it’s baked! Once the loaf is completely cool—and I mean *completely* cool, or you’ll sweat the crust—wrap it very tightly. I prefer using plastic wrap first, and then popping that into a zip-top bag. You can keep it on the counter at room temperature for about three days, and it stays wonderfully soft. If you need it to last longer, the fridge is an option, but make sure you let a slice warm up a little before eating so it regains that perfect texture.
Storage and Make-Ahead Options for Classic Moist Banana Bread
One of the things I adore about this banana bread recipe is that it tastes even better the next day! It seems like the flavors just settle in overnight, making it a perfect make-ahead treat. You don’t want to wrap it up while it’s even slightly warm, though—that traps steam and makes the crust mushy, and we worked too hard for a mushy crust!
When I’m planning ahead for the week, I usually wait until the loaf has cooled completely on the rack. Then, I slice it up. This makes grabbing a single slice for breakfast so much easier!
Storing Your Loaf at Room Temperature
To keep that moist texture locked in on the counter, you need a tight seal. I always wrap my whole, unsliced loaf—or my pre-cut slices—very tightly in plastic wrap first. Then, I pop that wrapped loaf into a large, sturdy zip-top bag, squeezing out as much air as possible before sealing. It keeps perfectly fresh like this for about three to four days. If you’re making a double batch like I often do, this method is essential!
Freezing Classic Moist Banana Bread for Later
Freezing banana bread is a lifesaver, especially when you have way too many overripe bananas calling your name. Once the loaf is totally cool, I wrap the whole thing (or individual slices) in plastic wrap first, just like for counter storage. Then, I add a layer of aluminum foil over the plastic wrap. That double wrap prevents freezer burn like a charm!

When you’re ready to eat it, just pull out what you need. You can thaw slices overnight right on the counter, or you can even pop a slice (still wrapped in foil) directly into a toaster oven for a few minutes. It warms up beautifully! If you want some inspiration for other make-ahead breakfast bakes, check out this great recipe for stratas right over here: Make-Ahead Breakfast Strata Bread!
Estimated Nutritional Information for Classic Moist Banana Bread
Okay, for those of you who like to keep track—and I totally get it, especially when adjusting for dietary needs like gluten-free—here’s the basic snapshot of what you are looking at per serving. Remember, this is an estimate for a single slice of the loaf, assuming average ingredient amounts. Since I tweak my recipe for gluten-free flour blends sometimes, your own numbers might vary a touch, but this gives you a fantastic starting point for this basic baking recipe.
We’re looking at a wonderfully satisfying slice thanks to the butter and sugar, but it’s still packed with that yummy banana goodness!
- Calories: Around 300
- Carbohydrates: About 45 grams
- Protein: Roughly 5 grams
- Total Fat: Around 12 grams (including about 7 grams of saturated fat)
Just a quick note of caution: These figures are based on the recipe as written, using standard ingredient amounts before any optional additions like walnuts or chocolate chips are added in. When you start adding extra delicious things, those numbers are going to shift a little, so enjoy it for the treat that it is!
Share Your Classic Moist Banana Bread Creations
Whew! If you made it this far, congratulations! You are now ready to bake the most wonderful, comforting loaf of banana bread. But the journey doesn’t end when it comes out of the oven, trust me. This whole food heritage thing relies on sharing and connecting, which is why I love hearing from you all.
I genuinely want to know what you thought! Did it live up to the hype? Did you try adding that streusel topping? Did you manage to keep your family from devouring the entire loaf in one afternoon? Drop a rating below—five stars if it made your kitchen smell like heaven!
Every time you leave a comment, it helps another new baker feel confident trying this recipe, and that builds up such a lovely community here. If you snap a photo of your stunning, golden-brown loaf, please tag me on social media; I absolutely adore seeing your kitchen creations come to life! I still get a thrill seeing a picture of someone else’s loaf cooling on their own wire rack—it reminds me of my own little Brooklyn kitchen and my nonna’s memory.
Feel free to browse around my About page too, to learn more about my journey from gluten-free baking disasters to triumphs! Happy baking, friends!
Classic Moist Banana Bread
Ingredients
Equipment
Method
- Preheat your oven to 350°F (177°C). Spray a 9×5 loaf pan with nonstick cooking spray, line the pan with parchment paper, and set it aside.
- In a large mixing bowl, whisk together the flour, baking powder, baking soda, cinnamon, and salt.
- In the bowl of a stand mixer fitted with the paddle attachment, or in a large mixing bowl using an electric mixer, mix together the butter, granulated sugar, and brown sugar for 4 to 5 minutes or until light and fluffy.
- Mix in the eggs and vanilla, making sure to mix well after each addition. Stop and scrape down the sides of the bowl, then add the mashed banana and mix until fully combined.
- Add the dry ingredients to the wet ingredients and mix until just combined. Do not overmix the batter. Gently stir in the chopped walnuts.
- Scoop the batter into the prepared loaf pan and spread it around into one even layer.
- Bake at 350°F (177°C) for 55 to 65 minutes or until a toothpick inserted into the center comes out clean. Tent with aluminum foil to prevent excess browning if needed.
- Remove the bread from the oven and allow it to cool in the loaf pan for 20 minutes. Carefully remove the bread from the loaf pan and transfer it to a wire rack to cool completely.
Nutrition
Notes
Tried this recipe?
Let us know how it was!
Gluten-Free Culinary Storyteller & Recipe Heritage Specialist
Getting diagnosed with non-celiac gluten sensitivity in my late twenties felt like losing my Italian identity. Growing up in nonna’s Brooklyn kitchen, learning traditional techniques that suddenly became off-limits—I decided to fight for those family food traditions instead of giving up.
With my food journalism background and European baking training, I became obsessed with recreating authentic flavors in gluten-free formats. I’ve adapted 400+ traditional recipes from various cultures, with my gnocchi recipe winning “Recipe of the Year” from the National Gluten-Free Living Awards in 2022.
I collaborate with the Italian-American Cultural Center to document traditional family recipes and volunteer with the Westchester Celiac Support Group, teaching monthly pasta-making classes.
Food is the heart of family storytelling. No one should sacrifice their cultural heritage due to dietary restrictions.