You know how sometimes you just want breakfast and dessert to hug each other? I live for those fun mashup moments in the kitchen! Forget boring toast; we are transforming simple bread into these unbelievably delightful Cinnamon Roll French Toast Roll-Ups. It’s pure magic, and trust me, this recipe is your new Saturday morning secret weapon. I vividly remember one Saturday morning when I decided to surprise my kids with a special breakfast. I wanted to create something that combined two of their favorites: cinnamon rolls and French toast. That moment of flipping the first roll-up onto the plate was magical. The kitchen filled with the sweet scent of cinnamon and vanilla, and my children rushed in, their eyes wide with excitement. As we sat down to enjoy the warm, gooey rolls together, I realized that these creations were not just about the food; they were about the laughter and love shared over breakfast.
As a Gluten-Free Chef & Latin Cuisine Innovation Specialist, I love taking humble ingredients and making them extraordinary. These roll-ups prove that you don’t need hours or fancy equipment to make memories—just a rolling pin and some courage! You can see some of my other flavor adventures over here: Cinnamon Roll French Toast Roll-Ups.
Why You Will Love These Cinnamon Roll French Toast Roll-Ups
This isn’t just breakfast; it’s an event! Honestly, these roll-ups check every box when you need something quick but crave something spectacular. They are perfect for pleasing both little eyes and adult palates.
- Total time is only 20 minutes—yes, you can make these on a busy morning!
- The sheer fun of rolling the bread makes them fantastic for getting the kids involved.
- You get that gooey cinnamon warmth of a cinnamon roll combined with the perfection of French toast
You can check out some of my ideas for fast breakfast meal prep right here: breakfast ideas recipes.
Essential Ingredients for Perfect Cinnamon Roll French Toast Roll-Ups
Okay, don’t panic thinking you need huge lists of specialty items! That’s the beauty here. We’re working with pantry staples to make something totally over-the-top. Trust me, the magic is in the simple ratio of these components. I’ve broken down exactly what you need so you can grab everything quickly. If you’re curious about minimalist cooking, check out my guide on 10 ingredient breakfast ideas.
For the Cinnamon Sugar Filling
This is where all that warm, gooey flavor comes from! You need 3 tablespoons of butter, totally melted down. Then, mix that with 3 tablespoons of brown sugar—make sure it’s packed in there—and 2 tablespoons of ground cinnamon. Mix it up until it looks like wet sand.
For the French Toast Batter
For the dipping bath, grab 3 large eggs; they give the coating the right structure. We stretch that out with just 1 tablespoon of milk. Then, for that classic cozy spice note, add 1/2 teaspoon of ground cinnamon and another 1/2 teaspoon of vanilla extract. Whisk this well!
For the Roll-Ups and Cooking
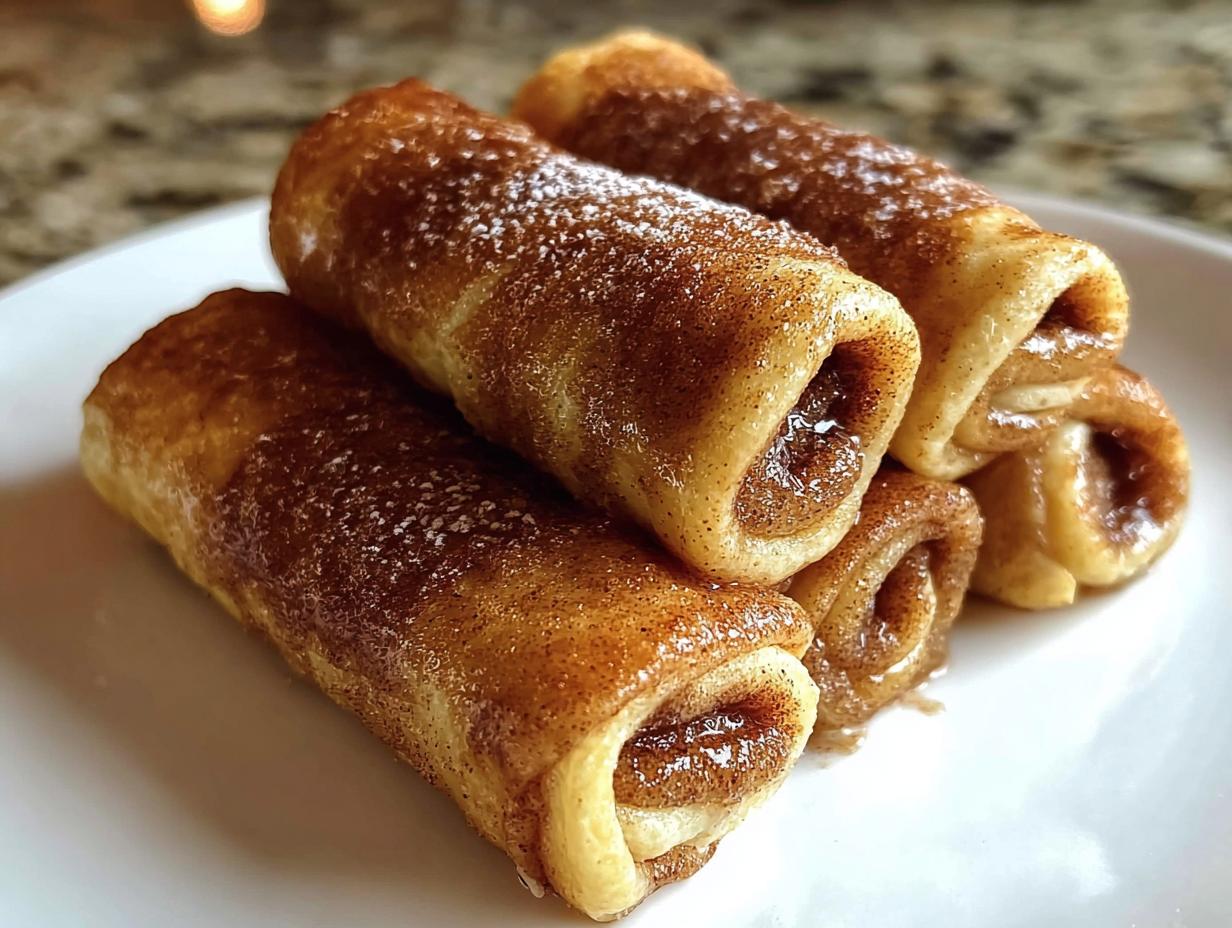
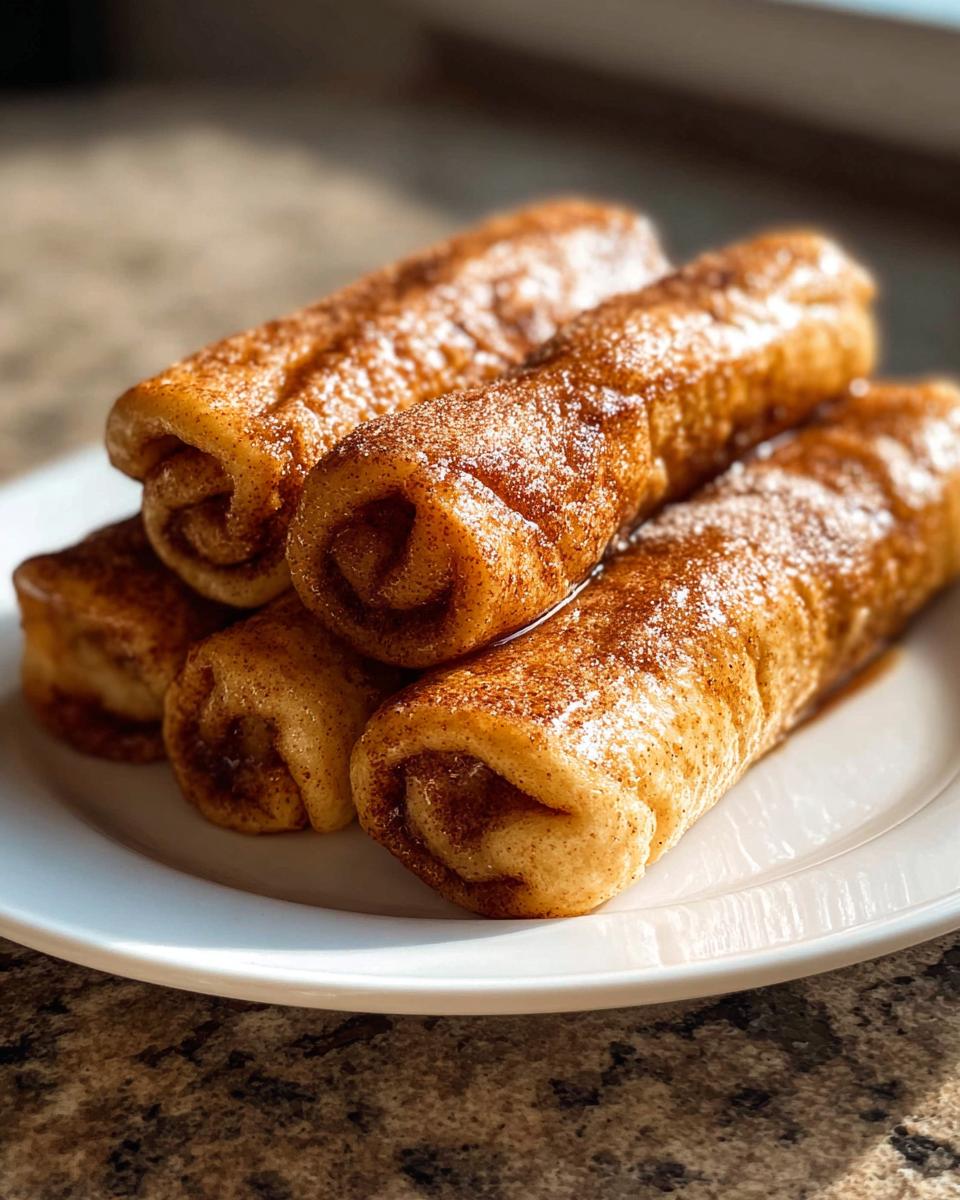
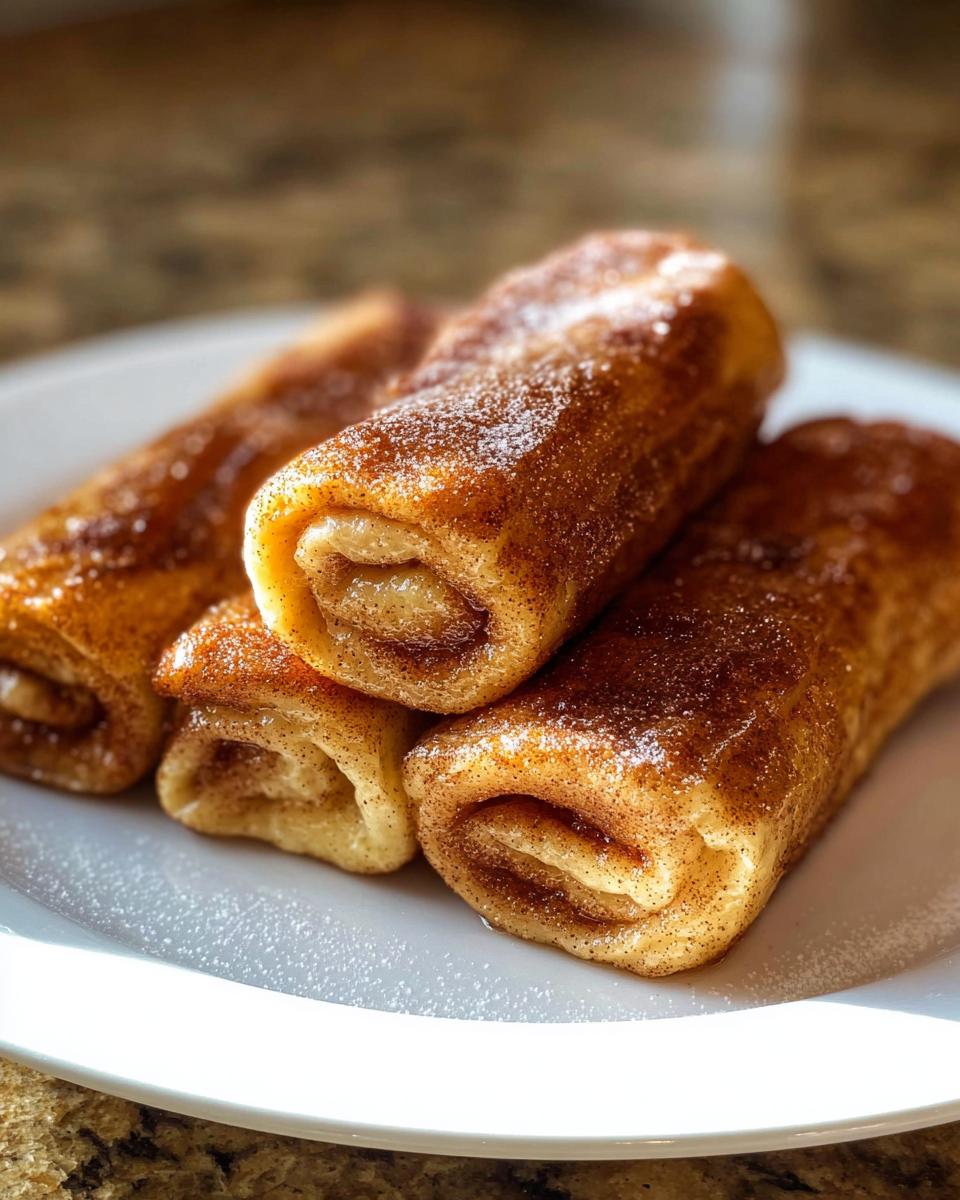
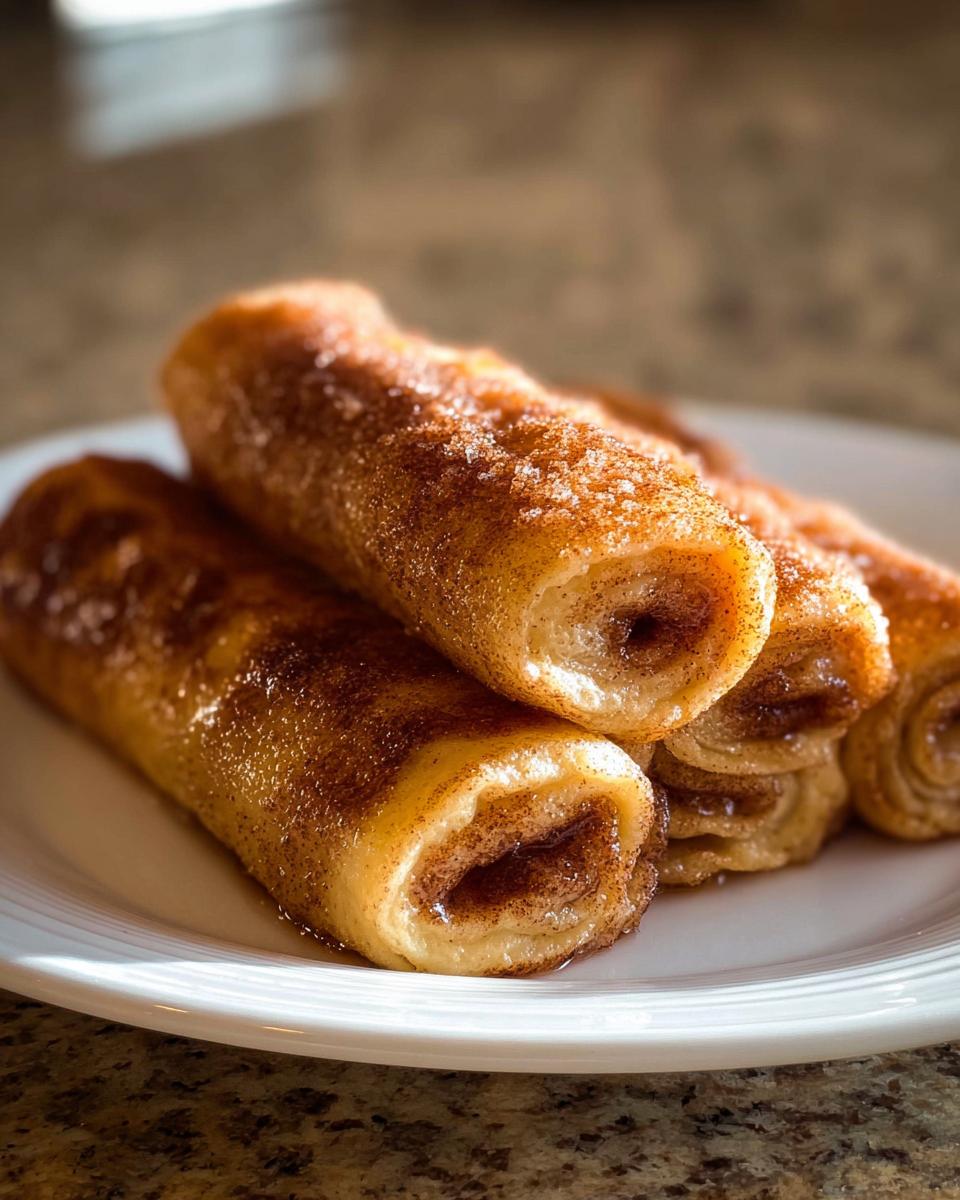
You’ll need 10 slices of soft white sandwich bread—crusts off, remember! We are also frying these beauties in 2 to 3 tablespoons of butter. Using real butter here really elevates the flavor, so don’t skimp!

Step-by-Step Guide to Making Cinnamon Roll French Toast Roll-Ups
This is where the fun really starts, and believe me, if my kids could handle the stove, they’d be doing this part! Making these roll-ups is almost like playing with play-doh, but you get to eat your creation afterward. Just follow these core steps, and you can’t go wrong. If you want to nail the golden-brown texture, you can check out the tips I use for my basic pancake recipe!
Preparing the Bread for Cinnamon Roll French Toast Roll-Ups
First things first, get those crusts off your 10 slices of bread! I always sneak them to the chickens or save them for breadcrumbs later. Once the crusts are gone, grab your rolling pin and flatten each slice out until it’s nice and thin. You really need it flat so you can get a tight swirl when you roll it up later on.
Assembling the Cinnamon Filling and Rolling
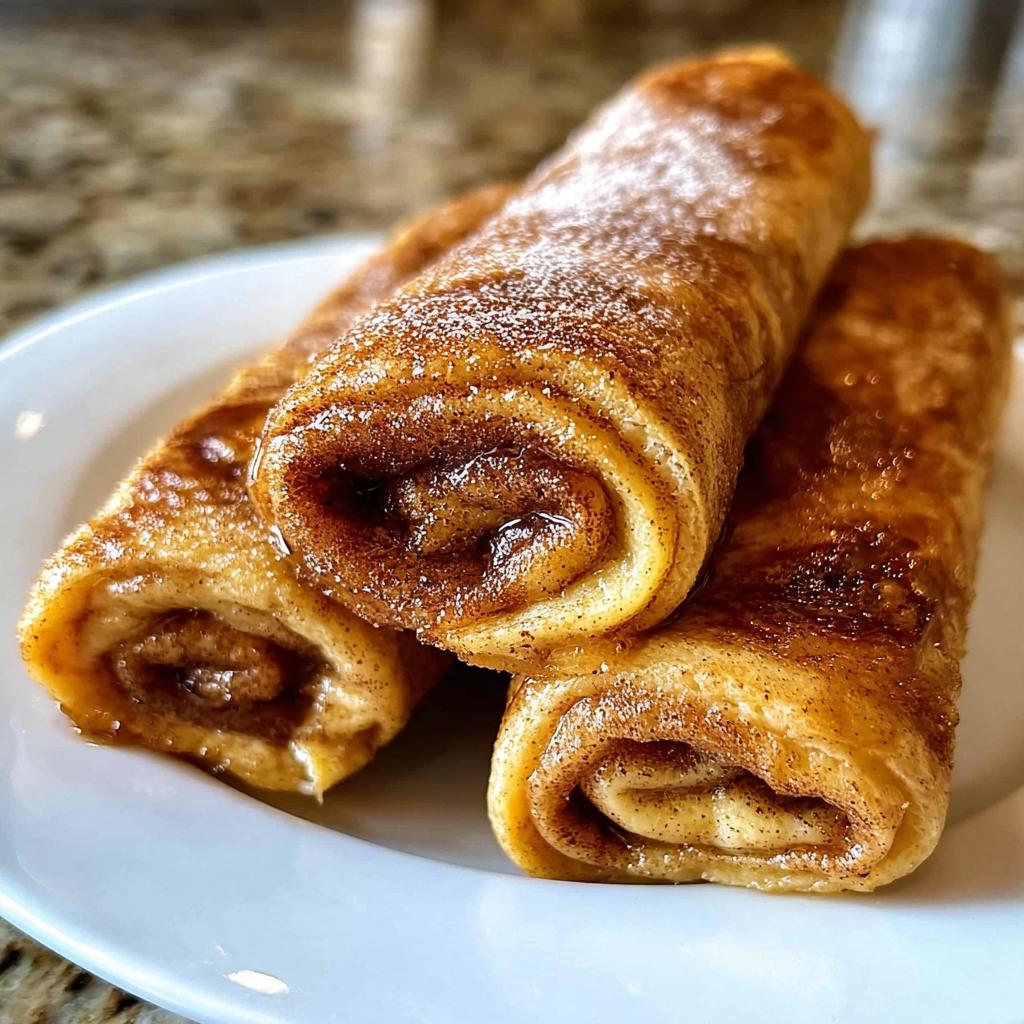
Now, take that glorious cinnamon-sugar-butter mixture we talked about and spread it thinly over the flattened bread. A little bit goes a long way here! Be sure to leave about a half-inch border along one of the long edges. This border is important because it helps seal the deal when you roll it up tight, keeping all that sweet goodness inside while it cooks.
Dipping and Cooking Your Cinnamon Roll French Toast Roll-Ups
Get your skillet warmed over medium heat—medium is key so the inside warms up before the outside burns! While that’s heating, give your egg mixture a good whisk until it’s smooth. For more insight on getting that perfect dip consistency, take a peek at my guide about making breakfast like a pro. Dip each roll-up quickly—we don’t want soggy bread—and lay it seam-side down in the melted butter. Cook for about 3 minutes total, turning gently so you get an even, golden-brown crust all the way around. That quick flip is what makes these better than a regular pancake!
Expert Tips for Perfect Cinnamon Roll French Toast Roll-Ups
Honestly, even a simple recipe like this thrives on a few little secrets. These aren’t rules written in stone, but they are the things I learned after my first couple of batches when I was still figuring out the timing!
Tip number one, and I mentioned this before, is the bread quality. You absolutely need soft white bread. If your bread is dry or stale, it’ll crack when you try to flatten it, and you’ll have jagged rolls. Fresh bread bends beautifully!
Next, let’s talk about the dip. You want to move those roll-ups through the egg mixture quickly. If you let them sit for too long, they get waterlogged, and they won’t crisp up nicely on the skillet. Just a quick dunk on each side is all you need. Be sure to check my guide on 20-minute breakfast ideas for more speed tricks.
Finally, when it comes to the cooking surface, don’t be tempted to crank the heat up to medium-high to save time. Keeping it strictly at medium ensures that the internal cinnamon filling and the center of the bread get warm and gooey without burning the buttery outside. A slightly less crowded pan also works wonders for consistent browning!
Creative Variations for Cinnamon Roll French Toast Roll-Ups
Once you master the basic formula, you totally have permission to start tinkering! That’s the fun part of cooking, right? Since these are inspired by cinnamon rolls, we can bring in some classic extras to make them even more decadent for your family breakfast.
My favorite little trick is adding a schmear of softened cream cheese right before you sprinkle on the cinnamon sugar. It gets wonderfully tangy and melts right into the center. If you love swirls, you must check out my recipe for cinnamon swirl banana bread—it uses a similar filling concept!
Also, don’t feel stuck with plain white bread; Brioche slices work like a dream because they are already richer and hold up beautifully to rolling. And for topping? A sprinkle of chopped pecans or walnuts right onto the butter while they cook adds a fantastic, much-needed crunch!
Serving Suggestions for Your Cinnamon Roll French Toast Roll-Ups
What’s the point of making something this fun if you don’t go all the way with the toppings? These roll-ups are sweet enough on their own, but a little drizzle makes them next-level breakfast indulgence. Forget the boring table syrup for a minute!
I always keep a little pitcher of warmed maple syrup nearby, but since we’ve already got lots of cinnamon flavor going on, try mixing in a splash of vanilla extract right into your syrup. It adds that extra creamy warmth.
If you are looking for something lighter to balance the sweetness, a simple side of fresh berries—strawberries and blueberries are perfect—really cuts through the richness. For a look at how I jazz up my simple sides, check out my tips on homemade pancakes and syrup. Sometimes, I even top the rolls directly with a dollop of Greek yogurt instead of syrup for a little tang!
Storing and Reheating Cinnamon Roll French Toast Roll-Ups
One of the absolute best things about these? They make fantastic leftovers! You can totally prep these ahead of time, which is a lifesaver on busy mornings. If you have extras, just let them cool completely first.
For the fridge, slap those treats in an airtight container; they’ll keep happily for about three days. When you’re ready to eat them again, I highly recommend reheating them in a toaster oven or a standard oven at about 350 degrees F until they are crisp and warm through. This brings back that fresh-from-the-skillet texture. If you are looking for other make-ahead options, take a peek at my favorite overnight breakfast casserole!
You can even freeze them for up to a month! Just make sure they are sealed tight. Microwave them in short 30-second bursts for a super fast reheat.
Frequently Asked Questions About Cinnamon Roll French Toast Roll-Ups
Whenever I share these roll-ups, people always have a few excellent questions about tweaking the recipe or making sure they get that perfect spiral. It’s all about technique, but these are easy fixes! If you check out my guide on quick breakfast meal prep, you’ll see I love efficiency, and these questions help everyone get speedy results right away.
Can I use bread other than white sandwich bread for these roll-ups?
You absolutely can, but you need soft bread! The key here is texture. If the bread is too sturdy or has large air holes, it will tear when you try to flatten it with the rolling pin. A softer bread, like Hawaiian rolls (if sliced open) or thin-cut Brioche, works beautifully because they are pliable and flatten out easily for a nice, tight roll-up.
How do I prevent the roll-ups from unrolling while cooking?
That’s the crucial step! Make sure you leave that little border empty of cinnamon filling on one long edge—that bare bread acts like natural glue. Once you roll it up tightly, the pressure should help it stick together. The most important flip is the very first one you place in the hot butter; always lay them seam-side DOWN first! That way, the heat instantly sets the seam closed.
Are these Cinnamon Roll French Toast Roll-Ups suitable for a quick weeknight dessert?
Oh, yes! They are totally perfect for a weeknight treat. Since the total time is only 20 minutes, they are faster than waiting for the oven to preheat for brownies! They hit that sweet spot—you get the comforting flavors of a cinnamon roll but with the delightful texture of deep-fried French toast. They make a wonderful, easy dessert idea after a long day.
Share Your Cinnamon Roll French Toast Roll-Ups Adventure
Whew! I hope you’re already smelling the cinnamon coming from your kitchen because now it’s your turn to jump in and make some magic happen!
I pour a lot of love and testing into these kinds of recipes, and nothing makes me happier than seeing them come to life at your house. Did they stay rolled? Did the kids go totally wild for them? I absolutely need to know!
Don’t be shy! Drop a comment below and tell me how your batch turned out. Did you try adding a little zest, or did you stick to the classic maple drizzle? If you snapped a quick photo of your glorious rolls, I’d love for you to share it so we can all see your amazing breakfast creation. You can learn a bit more about my own kitchen philosophy right over here: About Me.
And seriously, if you loved this fun twist on breakfast, please consider giving this recipe a rating so other busy parents can find it easily. Happy rolling, everyone!
Cinnamon Roll French Toast Roll-Ups
Ingredients
Equipment
Method
- Remove the crusts from the bread slices. Use a rolling pin to flatten each slice.
- In a small bowl, mix the melted butter, brown sugar, and 2 tablespoons of cinnamon.
- Spread this mixture evenly on each bread slice, leaving a small border at the edges.
- Roll up each slice tightly, sealing the edges with gentle pressure.
- In a shallow bowl, whisk together the eggs, milk, 1/2 teaspoon of cinnamon, and vanilla extract.
- Heat a skillet over medium heat and add the butter for cooking.
- Dip each roll into the egg mixture, then place it seam-side down in the skillet.
- Cook for about 3 minutes total, rotating the roll-ups to brown all sides evenly.
Notes
Tried this recipe?
Let us know how it was!
Gluten-Free Nutritionist & Family Meal Planning Expert
Working as a pediatric dietitian at Children’s Hospital of Denver, I kept meeting families overwhelmed by managing their children’s celiac disease. Parents stressed, kids frustrated, everyone eating bland boxed “gluten-free” products.
That’s when I realized my calling: creating practical, balanced gluten-free solutions for real families with busy schedules. I’ve developed 375+ family-friendly recipes focusing on lunch boxes, after-school snacks, and make-ahead dinners that actually work.
My meal planning system was featured in Parents Magazine, and I presented research at the Rocky Mountain Pediatric Nutrition Conference. My evidence-based approach ensures recipes meet both taste and health standards—families need solutions that work in the real world, not just perfect test kitchens.