Oh, you are going to LOVE these Cheesy Lasagna Roll-Ups! You know, as Elena Brown, a Gluten-Free Culinary Storyteller, my mission is to bring those classic, comforting Italian flavors right into your kitchen, even with a little twist. These roll-ups? They’re pure magic. We’re talking a hearty, approachable Italian dinner that’s just begging to be shared around the family table. They might look fancy, but trust me, they’re surprisingly easy and absolutely delicious—the perfect way to capture that cozy, nostalgic feeling of a home-cooked meal.
Why You’ll Love These Cheesy Lasagna Roll-Ups
- They’re surprisingly easy to make, perfect for busy weeknights!
- Packed with cheesy goodness and savory meat sauce – total comfort food.
- They look impressive, but they come together fast.
- Great for families and even picky eaters will gobble them up.
- A fantastic way to enjoy classic Italian flavors without all the fuss.
Gather Your Ingredients for Cheesy Lasagna Roll-Ups
Alright, let’s get down to business! To make these amazing Cheesy Lasagna Roll-Ups, you’ll want to have all your goodies ready to go. It makes the whole process just so much smoother, trust me. Here’s what you’ll need:
The Creamy Cheese Filling
- 15 oz. ricotta cheese, (whole milk makes it extra creamy!)
- 1 large egg
- 2 cups mozzarella cheese, (shredded from a block is best, okay?)
- ½ cup Parmesan cheese, freshly grated
- 1 teaspoon dried oregano
- ½ tsp. salt
- ½ tsp. dried basil
- ½ tsp. dried parsley
- ¼ tsp. pepper
The Hearty Meat Sauce
- 1 tablespoon olive oil
- 1 small yellow onion, diced (get it nice and small!)
- ½ lb. ground beef
- ½ lb. ground Italian sausage (hot or mild, your call!)
- 3 cloves garlic, minced (no skimping on garlic!)
- ½ cup chicken broth
- 32 oz. marinara sauce (use your favorite store-bought or homemade!)
- 1 teaspoon Worcestershire sauce (optional, but it adds a nice depth!)
- 1 teaspoon hot sauce (optional, for a little kick!)
For the Lasagna Rolls
- 12 lasagna noodles (plus a couple extra, just in case one breaks, happens to the best of us!)
- 1.5 cups mozzarella cheese (for topping, because more cheese is always a good idea!)
Essential Equipment for Making Cheesy Lasagna Roll-Ups
To whip up these amazing Cheesy Lasagna Roll-Ups, you’ll just need a few trusty kitchen stars. Grab a 9 x 13-inch casserole dish – that’s where all the magic happens! You’ll also need a large pot for boiling those noodles, and a medium bowl for mixing up that dreamy cheese filling. A good spatula will be your best friend for stirring and spreading, and don’t forget some parchment paper or wax paper for lining things up. Oh, and a piece of foil for that cheesy topping! For more tips on making these tasty treats, check out this great resource. Easy peasy.
Step-by-Step Guide to Perfect Cheesy Lasagna Roll-Ups
Putting these gorgeous Cheesy Lasagna Roll-Ups together is actually pretty fun! It’s where the magic really happens, and it’s not as tricky as it might seem. Just follow along, and you’ll have a crowd-pleaser on your hands in no time. Remember, a little patience here makes all the difference!
Preparing the Cheese Filling and Sauce Base
First things first, let’s get that yummy cheese filling ready. Just toss all those creamy ricotta, egg, mozzarella, and Parmesan cheeses into a medium bowl with all those lovely herbs and spices. Give it a good mix until everything is combined. Then, grab your 9×13 inch baking dish and spread about half a cup of your marinara sauce right on the bottom. This is like the cozy bed for our roll-ups!
Cooking the Flavorful Meat Sauce
Now for the sauce! Heat up that olive oil in your big pot over medium heat and toss in your diced onions. Let them soften up for about 10 minutes – you want them sweet and tender, not crunchy. Then, add in your ground beef and Italian sausage. Crank the heat up a bit and break up that meat with your spatula until it’s all nicely crumbled and cooked through, usually about 8-10 minutes. Don’t forget to mince in that garlic during the last minute! Once it’s all cooked, drain off any extra grease. Seriously, get that grease out of there if you don’t want a heavy sauce.
Boiling and Preparing the Lasagna Noodles
Okay, time for the noodles! Get a big pot of salted water boiling – make sure it’s nice and salty like the sea! Cook your lasagna noodles until they’re *al dente*, which just means they still have a little bite to them. Follow the package directions, but keep an eye on them. Once they’re done, carefully drain them and give them a quick rinse with cold water. This stops them from sticking together. Lay them out on some parchment or wax paper; this makes them super easy to grab for rolling.
Assembling Your Cheesy Lasagna Roll-Ups
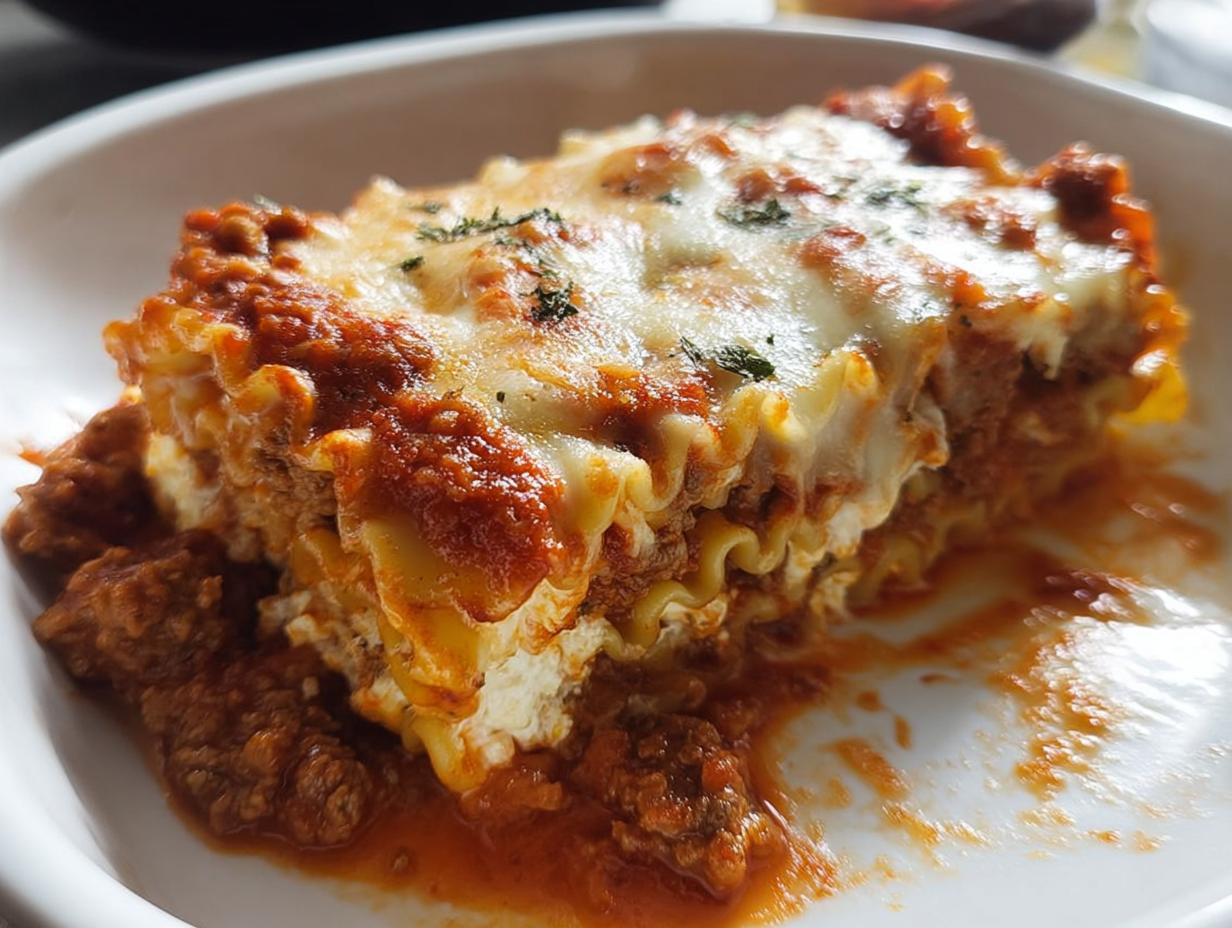
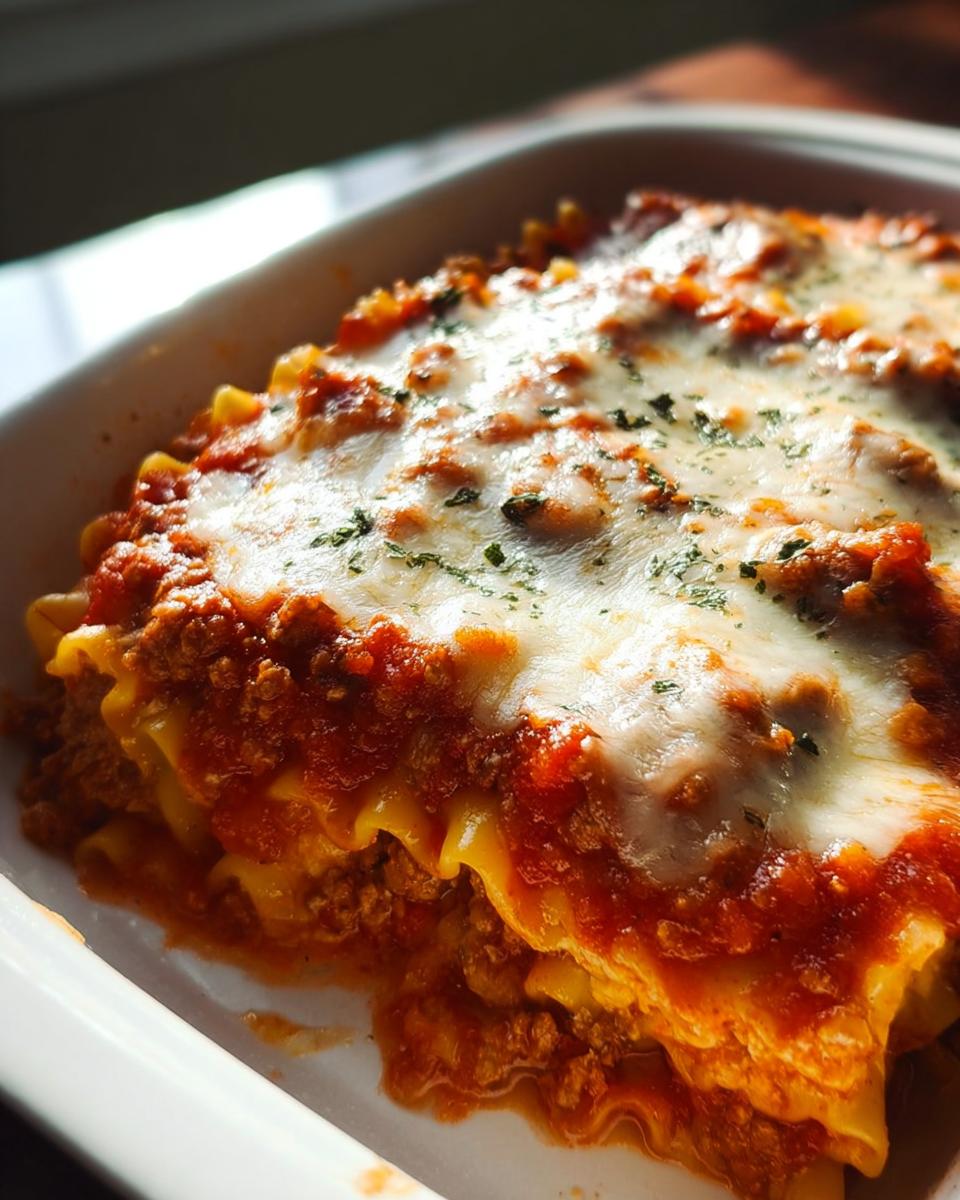
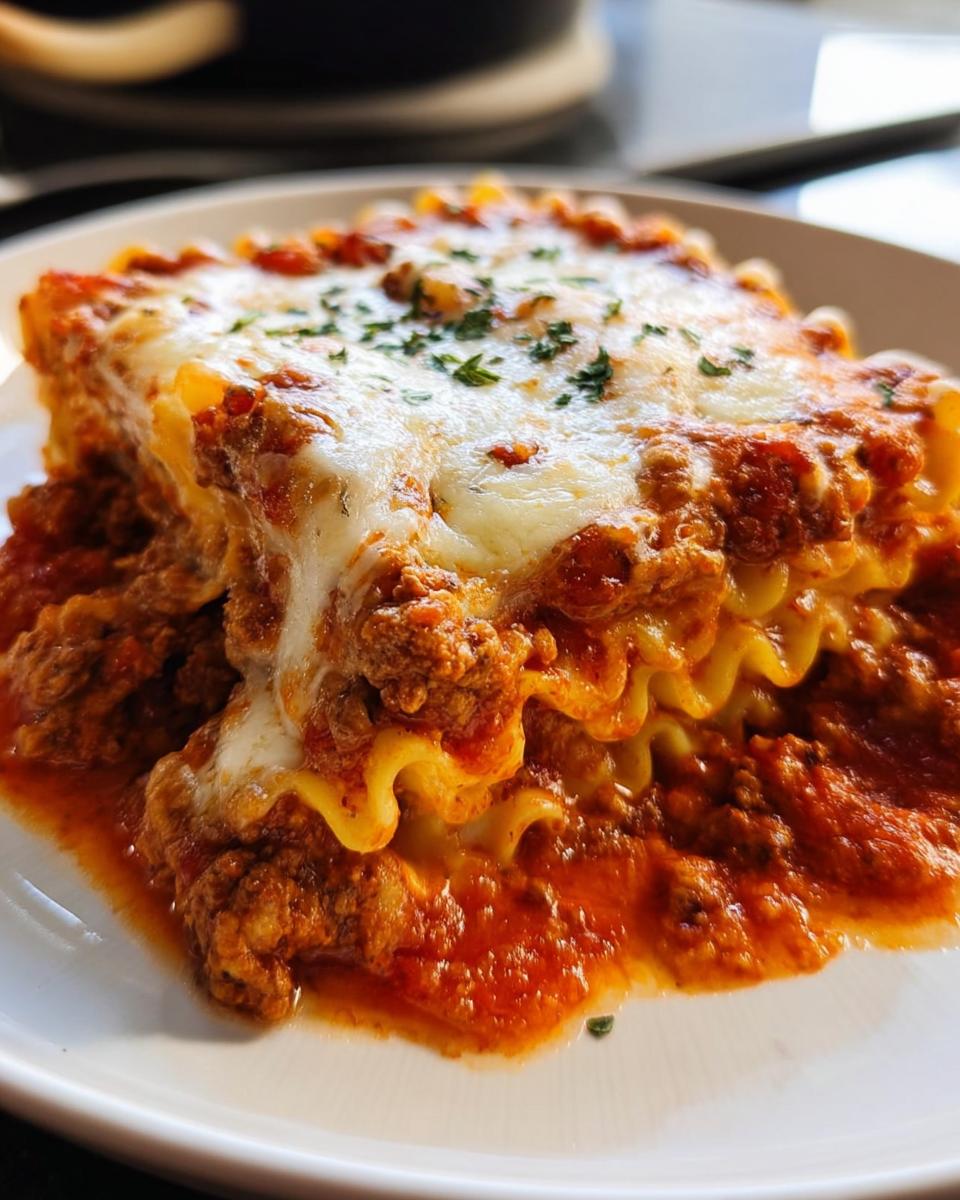
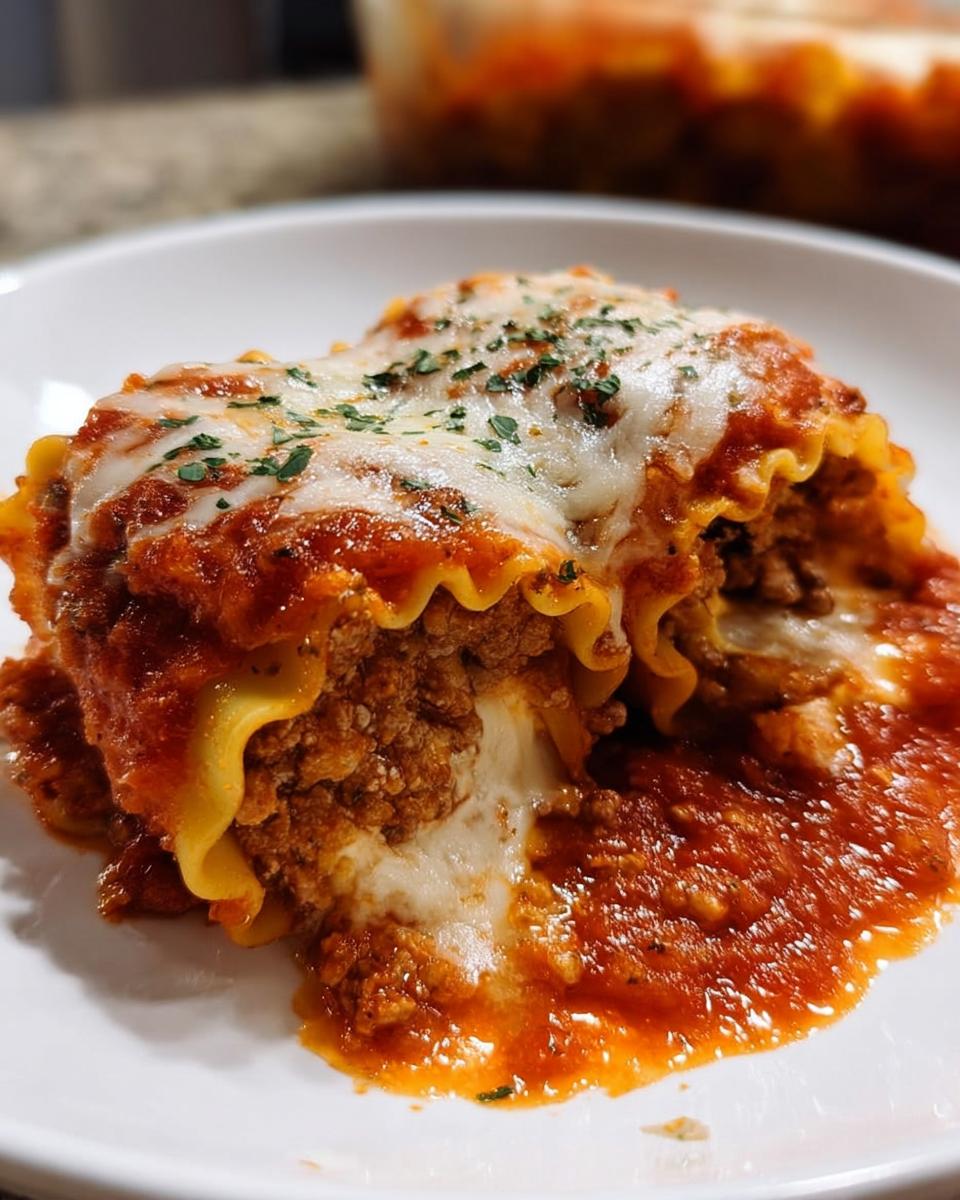
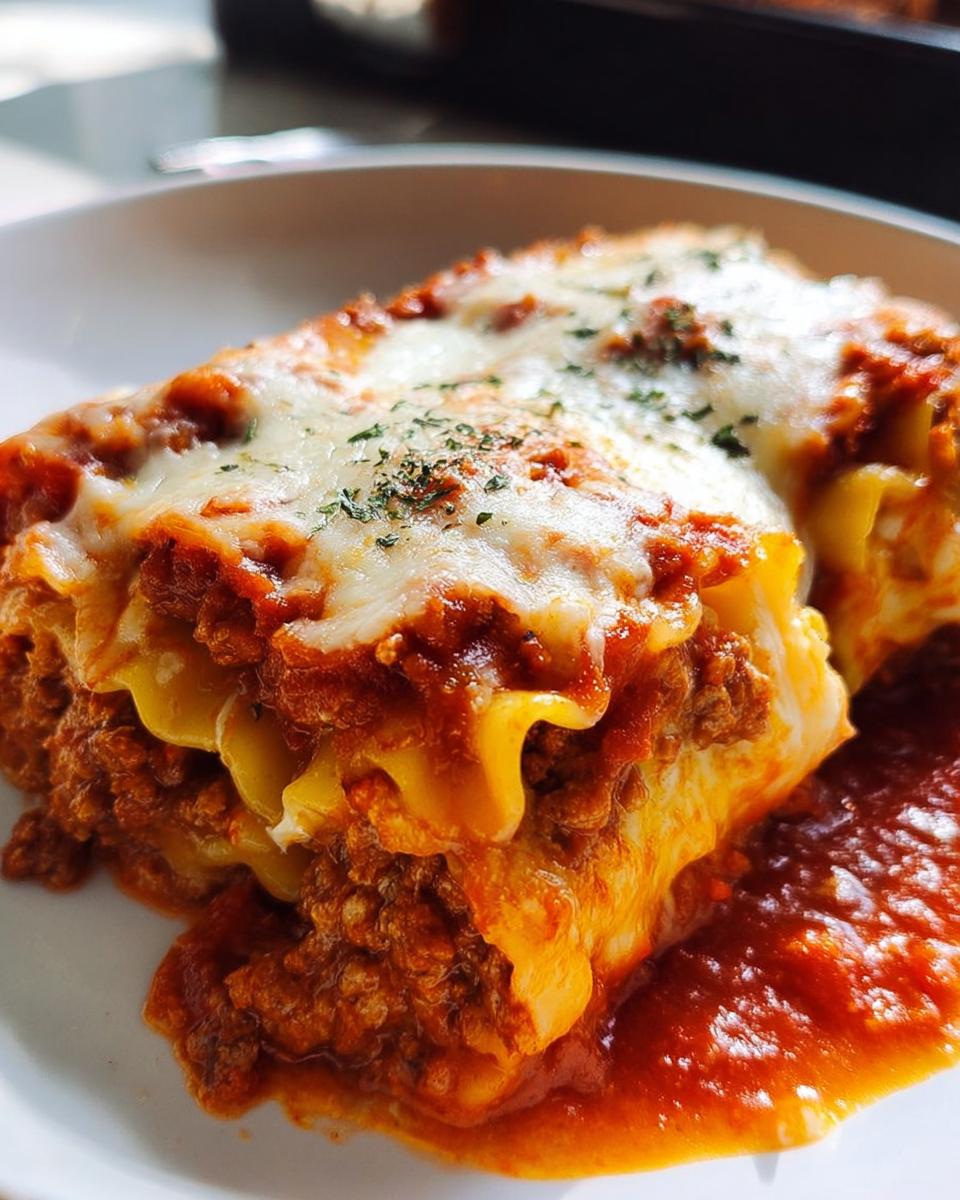
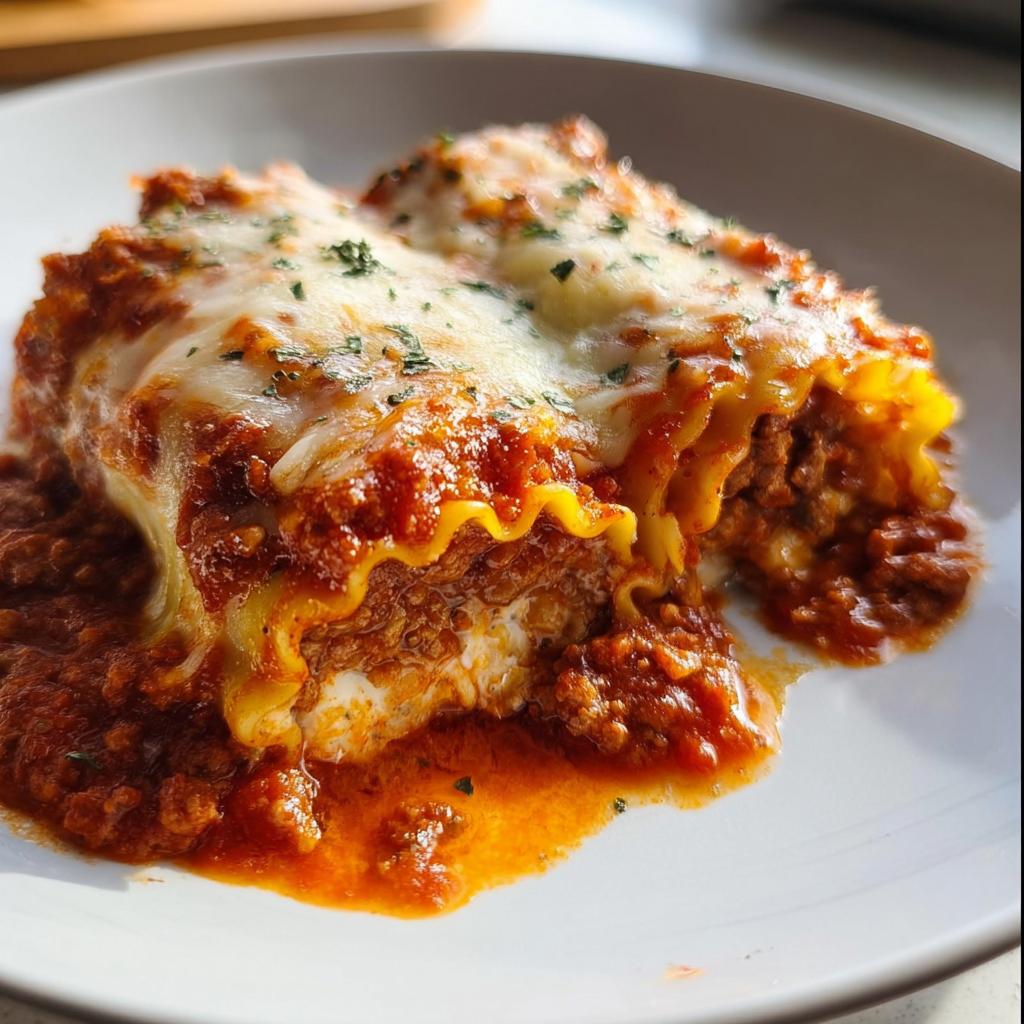
This is the fun part – rolling! Take each noodle and spread a nice, even layer of that glorious cheese mixture all over it. About two and a half tablespoons should do the trick. Then, drizzle about a quarter cup of that savory meat sauce over the cheese. Now, carefully but firmly, roll up each noodle, starting from one end, keeping all that goodness tucked inside. Place them seam-side down in your prepared baking dish, snuggly next to each other. Top them off with the rest of that delicious meat sauce and sprinkle on that final cup and a half of mozzarella cheese. Yes, please!
Baking and Finishing Your Cheesy Lasagna Roll-Ups
We’re almost there! Preheat your oven to 375°F (190°C). Cover the baking dish with foil that you’ve sprayed with non-stick cooking spray (this stops that top cheese from sticking!). Bake for about 35 minutes. If you like a little extra golden crisp on top, you can carefully remove the foil and pop it under the broiler for a minute or two – just watch it like a hawk so it doesn’t burn! Let them rest for a few minutes after they come out. Then, sprinkle with fresh parsley for a pop of color before serving these amazing Cheesy Lasagna Roll-Ups.
Tips for Success with Your Cheesy Lasagna Roll-Ups
Okay, so you want your Cheesy Lasagna Roll-Ups to be absolute perfection? I get it! A few little tricks can make these even more amazing. First off, trust me on this: shredding your own mozzarella cheese from a block makes a HUGE difference. Those pre-shredded bags have anti-caking agents that just don’t melt as beautifully. And for the best flavor, use whole milk ricotta and freshly grated Parmesan. If you want to sneak in some veggies, sauté a couple of cups of chopped spinach until it’s all wilted and drained, then swirl it right into that cheesy filling. Yum!
Serving Suggestions for Cheesy Lasagna Roll-Ups
These hearty Cheesy Lasagna Roll-Ups are practically a meal on their own, but they’re even better with a few simple sides! A fresh, crisp green salad with a tangy vinaigrette is always a winner – it cuts through all that cheesy goodness so nicely. You could also serve them with some crusty garlic bread for dipping up any extra sauce. For something a little more Italian, a side of roasted vegetables like broccoli or asparagus is fantastic. It just makes the whole dinner feel complete! Check out more dinner ideas here!
Storage and Reheating Your Cheesy Lasagna Roll-Ups
Got leftovers of these amazing Cheesy Lasagna Roll-Ups? Lucky you! They store like a dream. Just pop them into an airtight container or cover the baking dish tightly with plastic wrap or foil, and they’ll be great in the fridge for about 3-4 days. When you’re ready to reheat, you can pop them back in the oven at around 350°F (175°C) for about 15-20 minutes until they’re heated through and gooey again. Microwaving works in a pinch, too, but the oven keeps that lovely texture best!
Nutritional Information for Cheesy Lasagna Roll-Ups
A little heads-up: these numbers are just an estimate for one cheesy lasagna roll-up, and they can totally change depending on the exact ingredients you use, like the type of sausage or how much extra cheese you sprinkle on top! But generally, you’re looking at around 403 calories, 25 grams of protein, 28 grams of carbs, and 21 grams of fat per serving. Enjoy every bite!
Frequently Asked Questions About Cheesy Lasagna Roll-Ups
Got questions about whipping up these amazing Cheesy Lasagna Roll-Ups? I’ve got answers! This recipe is pretty straightforward, but here are a few things folks often wonder about. Don’t hesitate to reach out if you have more thoughts – you can always check out my about page for more about my cooking journey!
Can I make Cheesy Lasagna Roll-Ups ahead of time?
Oh, absolutely! You can totally assemble the roll-ups (filling them and rolling them up) and place them in the baking dish, then cover and refrigerate them for up to 24 hours before baking. Just add a few extra minutes to the baking time so they heat through properly.
What kind of pasta is best for Cheesy Lasagna Roll-Ups?
I usually use regular lasagna noodles, but you could totally use gluten-free lasagna noodles if that’s your jam – just make sure to cook them to *al dente*; you don’t want them mushy! The key is that they should be flexible enough to roll without breaking.
How do I prevent my Cheesy Lasagna Roll-Ups from falling apart?
The trick is to not overcook your noodles – al dente is best! And when you’re rolling them, try to do it fairly snugly so the filling stays tucked inside. Placing them seam-side down in the dish also helps keep everything together. Don’t pack them too tightly, though; give them a little room to breathe!
Share Your Cheesy Lasagna Roll-Ups Experience
I just love hearing from you all! If you give these Cheesy Lasagna Roll-Ups a try, please, please, please let me know how they turned out. Did your family love them? Any special tweaks you made? Drop a comment below or share your pics – I’d be tickled pink to see them! You can even get in touch via my contact page. Happy cooking!
Cheesy Lasagna Roll-Ups
Ingredients
Equipment
Method
- Combine the cheese filling mixture in a medium bowl and set aside. Spread ½ cup of the marinara sauce on the bottom of a 9 x 13-inch baking dish.
- Preheat oven to 375°F (190°C) and bring a large pot of salted water to a boil.
- Heat olive oil over medium heat in a large pot and add the diced onions. Cook for 10 minutes until softened.
- Add the ground beef and sausage. Increase heat to medium-high. Break up the meat with a spatula until finely crumbled. Cook for 8-10 minutes, or until cooked through. Add garlic during the last minute. Drain excess grease.
- Add the chicken broth and scrape the bottom and sides of the pot to loosen any browned bits. Add the remaining marinara sauce, Worcestershire sauce, and hot sauce. Bring to a boil, then reduce to a simmer.
- Let the sauce simmer gently while you boil the lasagna noodles to al dente according to package instructions. Drain and rinse with cold water.
- Line the noodles up on parchment or wax paper.
- Spread an even layer of the cheese mixture over each lasagna noodle, about 2 ½ tablespoons each.
- Spread ¼ cup of sauce over each noodle, reserving the rest.
- Roll up the noodles tightly, keeping the filling inside, and transfer them to the baking dish, seam side down. Top with the remaining meat sauce, then sprinkle with the remaining mozzarella.
- Spray foil with nonstick cooking spray and place it spray-side-down on top of the baking dish to prevent the cheese from sticking.
- Bake for 35 minutes. If desired, remove foil and broil at 450°F (230°C) to brown the top, watching carefully.
- Remove from oven and garnish with fresh parsley before serving.
Nutrition
Notes
Tried this recipe?
Let us know how it was!
Gluten-Free Nutritionist & Family Meal Planning Expert
Working as a pediatric dietitian at Children’s Hospital of Denver, I kept meeting families overwhelmed by managing their children’s celiac disease. Parents stressed, kids frustrated, everyone eating bland boxed “gluten-free” products.
That’s when I realized my calling: creating practical, balanced gluten-free solutions for real families with busy schedules. I’ve developed 375+ family-friendly recipes focusing on lunch boxes, after-school snacks, and make-ahead dinners that actually work.
My meal planning system was featured in Parents Magazine, and I presented research at the Rocky Mountain Pediatric Nutrition Conference. My evidence-based approach ensures recipes meet both taste and health standards—families need solutions that work in the real world, not just perfect test kitchens.