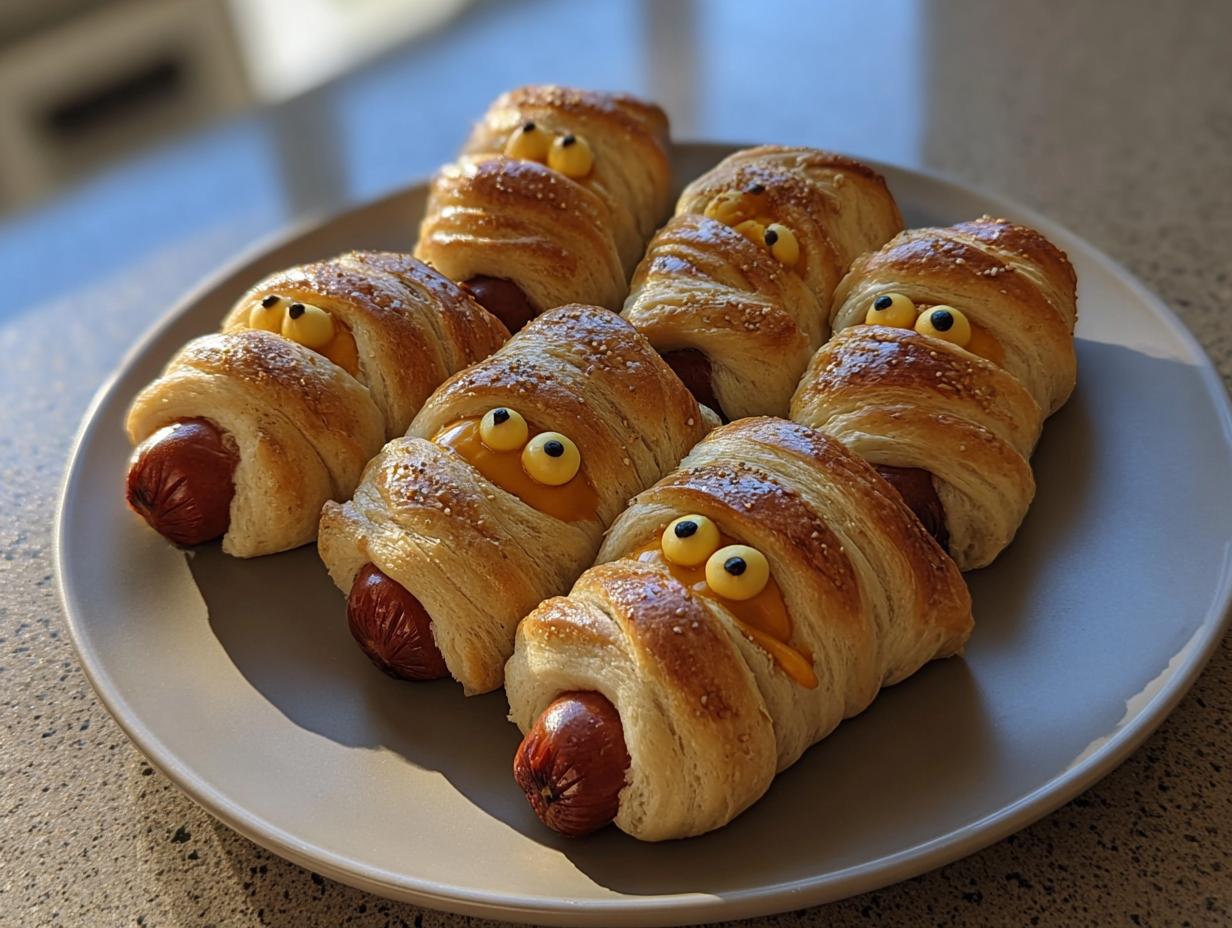
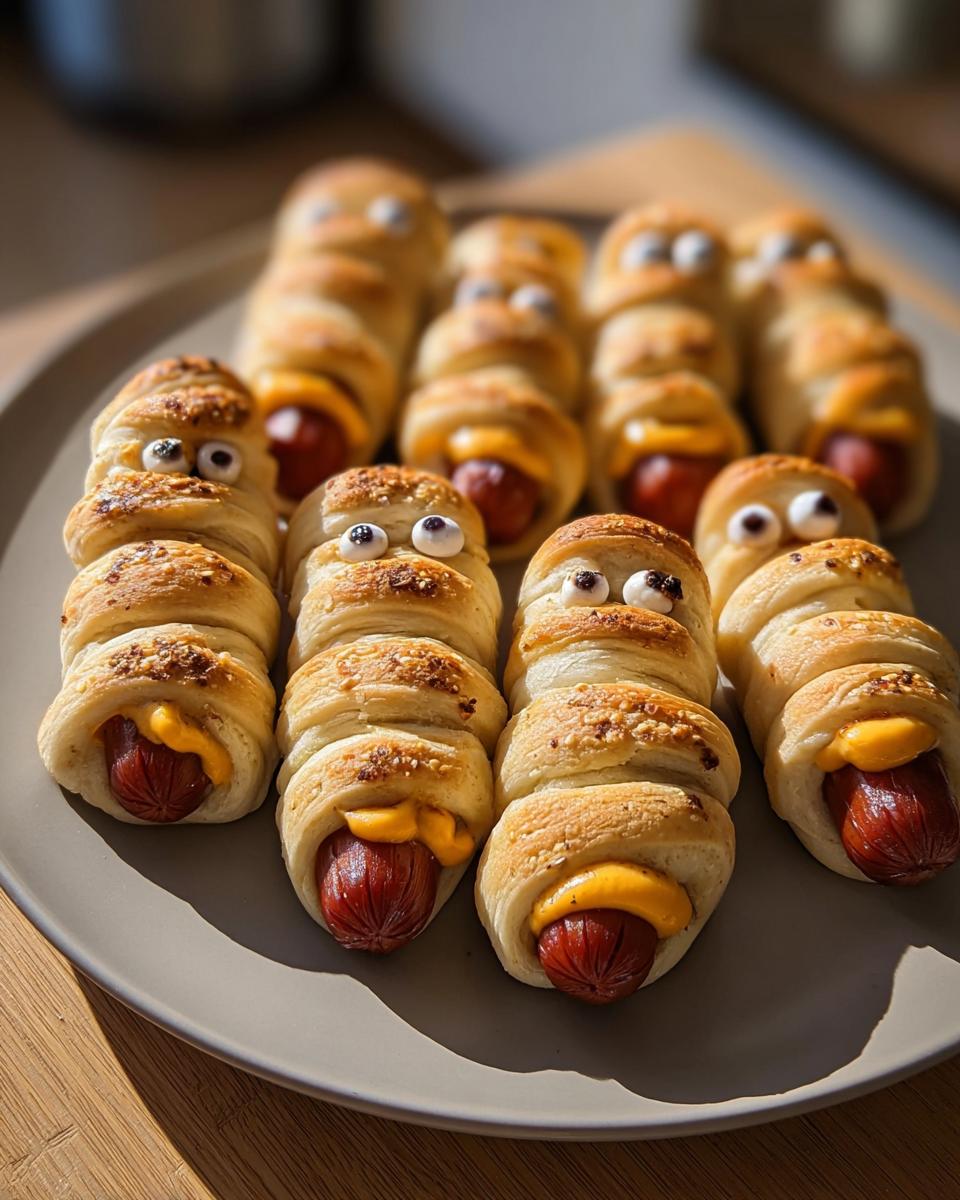
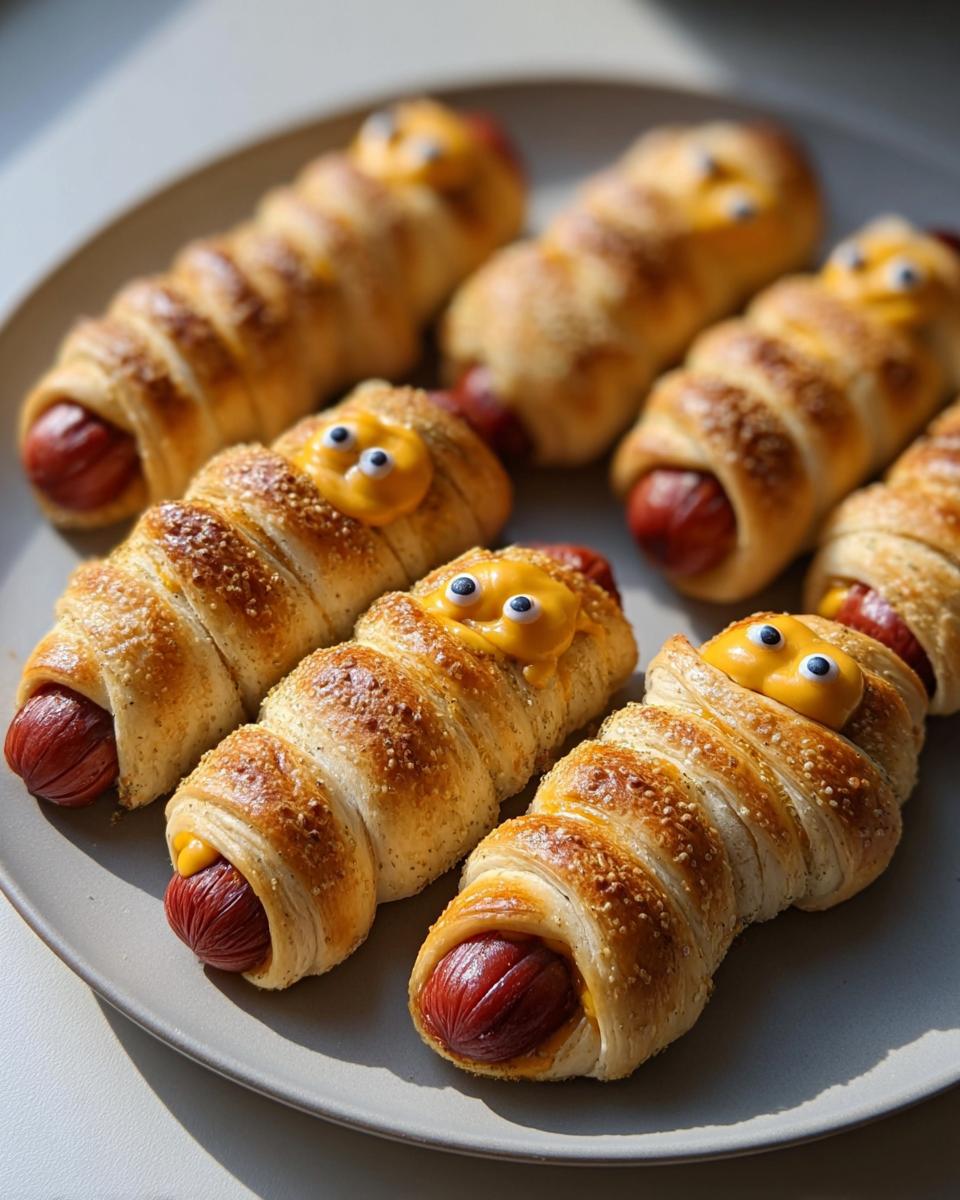
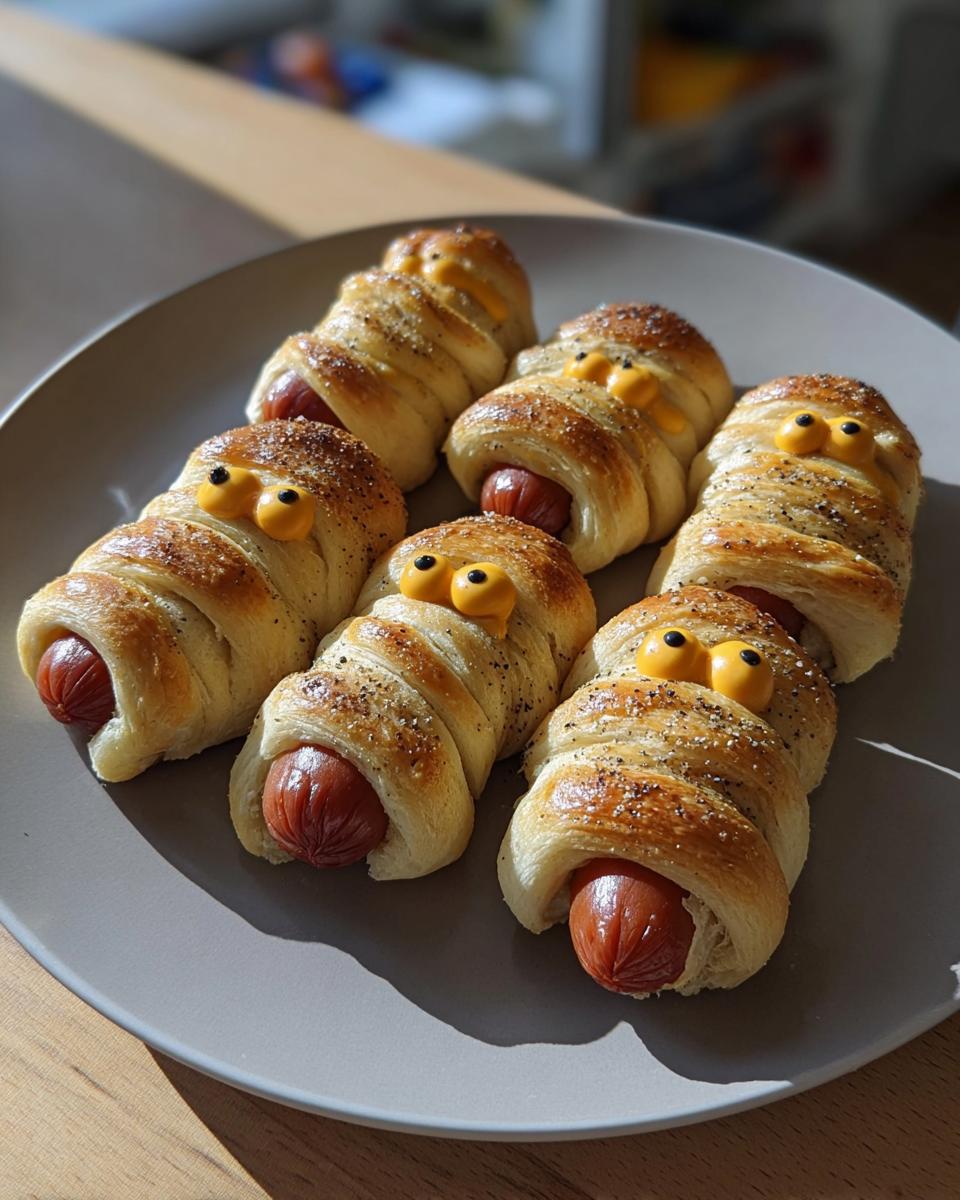
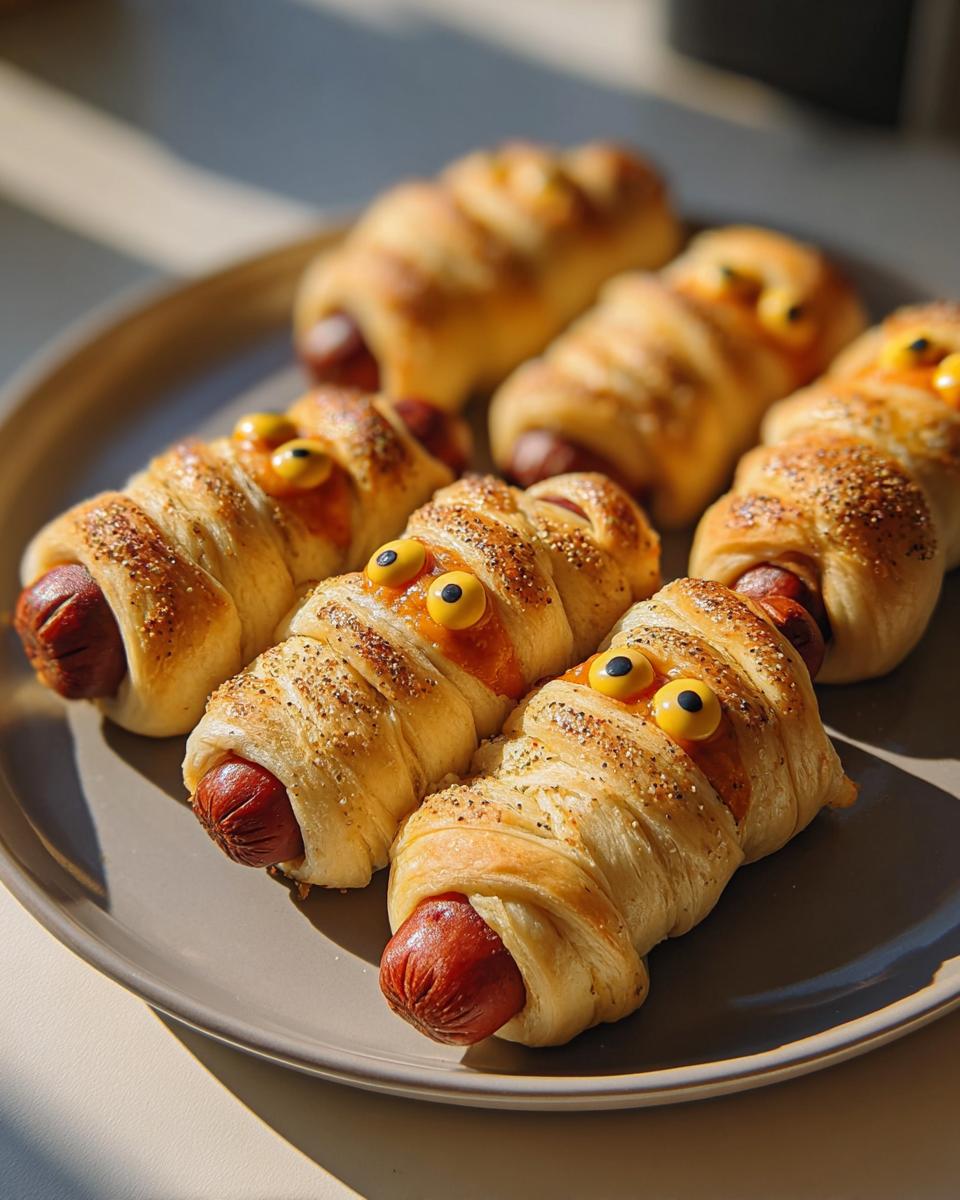
Halloween just isn’t complete without some seriously spooky snacks, right? And when it comes to fun, festive treats, you really can’t beat a good mummy theme. I absolutely adore taking classic comfort foods and giving them a playful Halloween makeover, and that’s exactly what we’ve done with these Cheddar‑Stuffed Mummy Dogs with Everything Seasoning. They’re not just adorable; they’re a cheesy, savory dream wrapped in flaky dough.
 I remember years ago, after I found out I had to cut out gluten, I really thought some of my favorite holiday traditions were gone. But that just pushed me to get creative! I reinvented these mummy dogs using gluten-free dough, and seeing my nieces’ faces light up as we “decorated” them and watched them puff up into these cute little monsters was just the best. It’s all about making those magical Halloween moments inclusive for everyone.
Why You’ll Love These Cheddar‑Stuffed Mummy Dogs with Everything Seasoning
Trust me, you’re going to adore these little guys! They’re:
- Super Easy: Seriously, it’s kid-friendly fun that comes together in a flash.
- Chock-Full of Flavor: That cheesy center and everything seasoning? Pure magic!
- Perfectly Festive: They’re the cutest addition to any Halloween party platter.
- Dietary Friendly: Great for everyone, with easy gluten-free swaps, too!
Gather Your Ingredients for Cheddar‑Stuffed Mummy Dogs
Alright, let’s get down to business! To make these delightfully spooky Cheddar‑Stuffed Mummy Dogs with Everything Seasoning, you’ll only need a handful of things. Most of it you might already have in your fridge or pantry, which is always a bonus when you’re craving a quick, fun snack!
Here’s what you’ll want to grab:
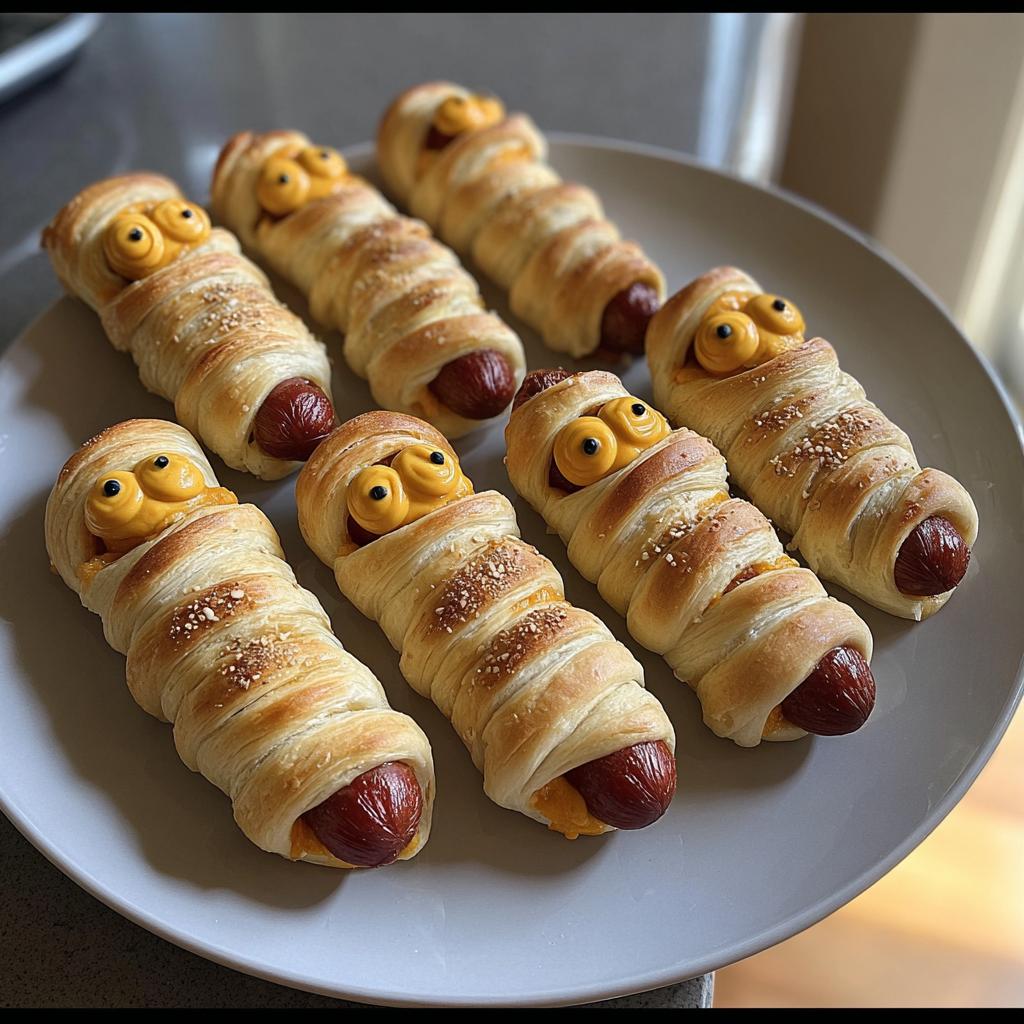
- 8 cheddar-stuffed hot dogs: These are the superstars! Make sure they’re the ones with the cheese already snuggled inside – it makes them extra gooey and delicious.
- 1 can of refrigerated crescent roll dough: Just your basic can of crescent rolls will do the trick. Look for a full sheet if you can, as it makes cutting strips a bit easier, but the classic perforated ones work fine too.
- 1 tablespoon of mustard or ketchup: This is for the mummy’s eyes! I usually grab mustard because it’s a nice bright yellow against the golden dough, but ketchup works in a pinch.
- Everything Seasoning (optional): If you’re feeling fancy and want that extra pop of flavor and texture, give these a sprinkle before they go in the oven. It’s totally optional but oh-so-good!
That’s really it! Simple, right? The beauty of this recipe is how few ingredients it takes to create something so fun and tasty.
Step-by-Step Guide to Making Cheddar‑Stuffed Mummy Dogs
Okay, so you’ve got your ingredients ready? Awesome! Let’s get these spooky little guys into the oven. It’s honestly super simple, and the biggest challenge is trying not to eat all the dough before you even get started!
Preheat and Prepare Your Workspace
First things first, let’s get that oven nice and toasty. Go ahead and preheat it to 375°F (190°C). While it’s heating up, grab a baking sheet and just line it with some parchment paper if you have it – makes for super easy cleanup later, trust me!
Cutting the Crescent Dough Strips
Now for the fun transformation! Carefully unroll your can of crescent dough. If you’re using the kind that’s pre-cut into triangles, just press those seams back together slightly. Grab a pizza cutter or a sharp knife and cut the dough into thin strips, maybe about half an inch wide. You want them thin enough to wrap nicely!
Wrapping the Hot Dogs into Mummies
This is where the mummy magic happens! Take one of your cheddar-stuffed hot dogs and begin wrapping a dough strip around it, crisscrossing it back and forth like little bandages. Don’t worry about making it perfect; a little messy adds to the mummy charm! Just make sure to leave a small space uncovered at one end – that’s where the eyes will go!
Baking Your Mummy Dogs to Golden Perfection
Carefully place your dough-wrapped hot dogs onto the prepared baking sheet. Pop them into that preheated oven and bake for about 12 to 15 minutes. You’re looking for that dough to be puffed up and beautifully golden brown. Keep an eye on them; ovens can be sneaky!
Adding the Mummy Eyes
Once they’re out of the oven and looking gloriously toasted, grab your mustard or ketchup. Just a tiny dot or two in the uncovered spot on each mummy dog gives them their signature spooky eyes. How cute is that?
Tips for Perfect Cheddar‑Stuffed Mummy Dogs
Oh, these little mummy dogs are so much fun to make! Over the years, I’ve picked up a few tricks to make sure they turn out just right every single time. It’s all about the little details, you know? Following these might just make your mummy dogs the star of the Halloween party!
First off, when you’re wrapping the dough, don’t pull it too tight. The crescent dough needs a little room to puff up and get golden brown. If you wrap it super snug, you won’t get those lovely flaky layers. And hey, if the dough feels a bit sticky, just dust your fingers *very* lightly with a tiny bit of flour – it helps a ton!
Also, don’t be afraid to get creative with the cheese! While we’re using cheddar-stuffed hot dogs here, you could try wrapping a plain hot dog with a thin slice of cheddar cheese inside the dough. Just make sure it’s tucked in there well so it doesn’t ooze out too much. Oh, and for extra special flavor, a light sprinkle of that Everything Seasoning before baking is divine – just make sure it doesn’t fall into the “eyes” spot!
Ingredient Notes and Substitutions
When making these spooky little treats, a few things really make them shine. For the hot dogs, using the pre-cheddar-stuffed ones is super convenient for that extra gooeyness, but you can totally use regular hot dogs and tuck a little square of sharp cheddar cheese inside the dough before you wrap it – just make sure it’s snug!
If you’re looking for gluten-free mummy dogs, just grab your favorite brand of gluten-free crescent roll-style dough. It works beautifully! And when it comes to handling the dough, if it feels a little sticky, a whisper of flour on your hands usually does the trick without making it tough.
Serving and Storage for Your Mummy Dogs
These little mummy dogs are best served fresh and warm right out of the oven when the dough is puffy and the cheese is perfectly melty. They’re a big hit at parties when they’re still warm, but honestly, they’re still pretty darn tasty at room temperature too. If you happen to have any leftovers (which is rare in my house!), just pop them in an airtight container once they’ve cooled down. They should keep well in the fridge for a couple of days.
To reheat, I usually just pop them in a toaster oven or a regular oven at around 300°F (150°C) for about 5-10 minutes until they’re warmed through. You can also microwave them for a quick warm-up, but be aware the dough might get a little chewier.
Frequently Asked Questions about Cheddar‑Stuffed Mummy Dogs
Got questions about these spooky little snacks? I’ve got you covered!
Can I make these Cheddar‑Stuffed Mummy Dogs ahead of time?
You can totally wrap them ahead of time and keep them in the fridge for up to 24 hours before baking. Just add a few extra minutes to the baking time if they’re going in straight from the fridge!
What kind of hot dogs work best for mummy dogs?
Honestly, any regular-sized hot dog works great! The cheddar-stuffed ones are fantastic for that extra cheesy surprise, but regular all-beef franks or even chicken dogs are totally fine underneath all that doughy bandage action.
How do I ensure the cheese doesn’t leak out?
I find that if you really tuck the cheese in well when you’re wrapping the dough, it helps a lot! Also, make sure you’re not baking them at too high a temperature, which can melt the cheese too quickly. Sealing those dough edges helps too!
Are these mummy dogs suitable for a party tray?
Absolutely! They’re practically made for party trays. Arrange them nicely on a platter, maybe with some extra ketchup or mustard for dipping. They’re always a huge hit and disappear fast!
Nutritional Information
Just a friendly reminder that the nutritional info below for these Cheddar‑Stuffed Mummy Dogs with Everything Seasoning is an estimate! It can totally change depending on the specific brands of hot dogs and crescent rolls you use. But generally, expect around 250-300 calories, 15-20g of fat, 8-10g of protein, and about 15-20g of carbs per mummy dog. Enjoy!
Share Your Spooky Creations!
Okay, my spooky chefs, that’s it for our creepy little Cheddar‑Stuffed Mummy Dogs with Everything Seasoning! I really hope you give these a try this Halloween. If you do, please, please leave a comment below and tell me how they turned out! Did your mummies get big, googly eyes? Did the cheese ooze out just right? I’d love to hear all about your spooky successes! You can also share your amazing photos on social media – tag me! And if you have any burning questions not covered here, just shoot me a message through my contact page. Happy haunting!
Cheddar‑Stuffed Mummy Dogs with Everything Seasoning
Ingredients
Equipment
Method
- Preheat your oven to 375°F (190°C).
- Unroll the crescent dough. Cut the dough into thin strips.
- Wrap the dough strips around each hot dog. Leave a small space uncovered at one end for the mummy’s eyes.
- Place the wrapped hot dogs on a baking sheet. Bake for 12-15 minutes, or until the dough is golden brown.
- Use mustard or ketchup to create eyes on the uncovered part of each hot dog.
- Serve the mummy dogs warm.
Notes
Tried this recipe?
Let us know how it was!
Gluten-Free Culinary Storyteller & Recipe Heritage Specialist
Getting diagnosed with non-celiac gluten sensitivity in my late twenties felt like losing my Italian identity. Growing up in nonna’s Brooklyn kitchen, learning traditional techniques that suddenly became off-limits—I decided to fight for those family food traditions instead of giving up.
With my food journalism background and European baking training, I became obsessed with recreating authentic flavors in gluten-free formats. I’ve adapted 400+ traditional recipes from various cultures, with my gnocchi recipe winning “Recipe of the Year” from the National Gluten-Free Living Awards in 2022.
I collaborate with the Italian-American Cultural Center to document traditional family recipes and volunteer with the Westchester Celiac Support Group, teaching monthly pasta-making classes.
Food is the heart of family storytelling. No one should sacrifice their cultural heritage due to dietary restrictions.