Oh, family dinners. Sometimes they feel like another item on an endless to-do list, right? But they don’t have to be! I’m Sophie, and I swear by meals that are minimal fuss but big on flavor. That’s why this Baked Chicken Parmesan with Mozzarella is my absolute go-to recipe when things get hectic.
I remember one particularly hectic afternoon when I was juggling work and a million things on my to-do list, and my kids were growing increasingly impatient for dinner. I wanted to prepare something quick yet satisfying and realized I hadn’t made Baked Chicken Parmesan with Mozzarella in ages. It was a family favorite, and I could practically hear their cheers at the thought of that cheesy goodness.
As the glorious aroma of baking cheese and herbs finally filled our home, my kids came storming into the kitchen, and their eyes lit up at the sight of that golden, bubbling cheese. In that moment, it was crystal clear that meals made with love—even the quick ones—have the power to turn even the busiest days into cherished family moments. You are going to love this simple, satisfying baked classic!

Why This Baked Chicken Parmesan with Mozzarella Is a Family Favorite
Listen, when you’re trying to get dinner on the table fast for the whole crew, you need dishes that deliver huge flavor payoff for minimal elbow grease. This Baked Chicken Parmesan with Mozzarella is perfect for that weeknight crunch! We love it because it’s that cozy dish everyone swoons over, and yes, we can easily tweak it for our gluten-free friends too!
This recipe helps us get dinner done without stress. Even if you use conventional flour, it comes together in a flash.
Quick Prep for Busy Weeknights
Seriously, setting up your dredging station only takes about 15 minutes. That’s my golden rule for weeknight cooking—if it takes longer than 20 minutes to prep, I’m ordering pizza! We sear quickly and then the oven does all the heavy lifting.
Cheesy Comfort Food That Satisfies Everyone
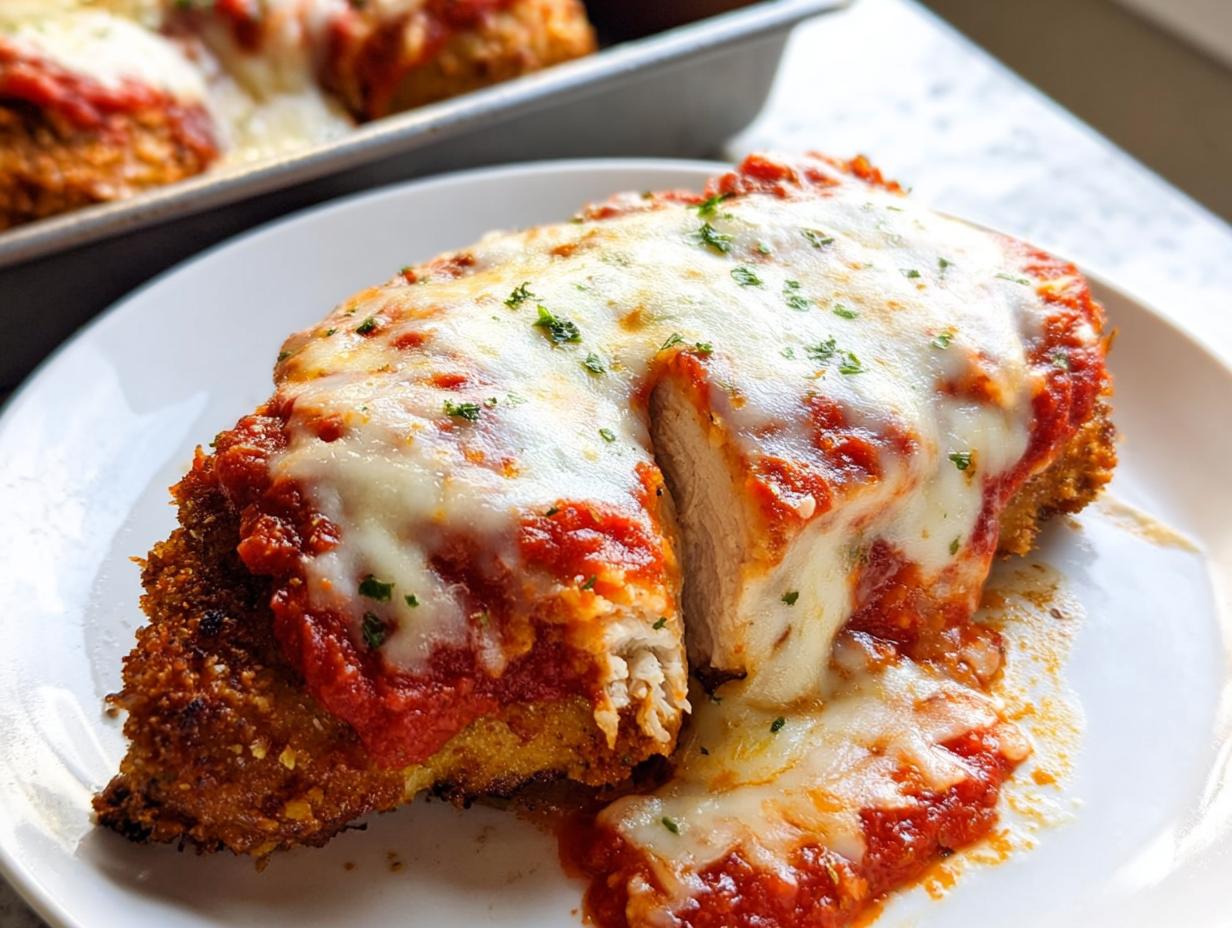
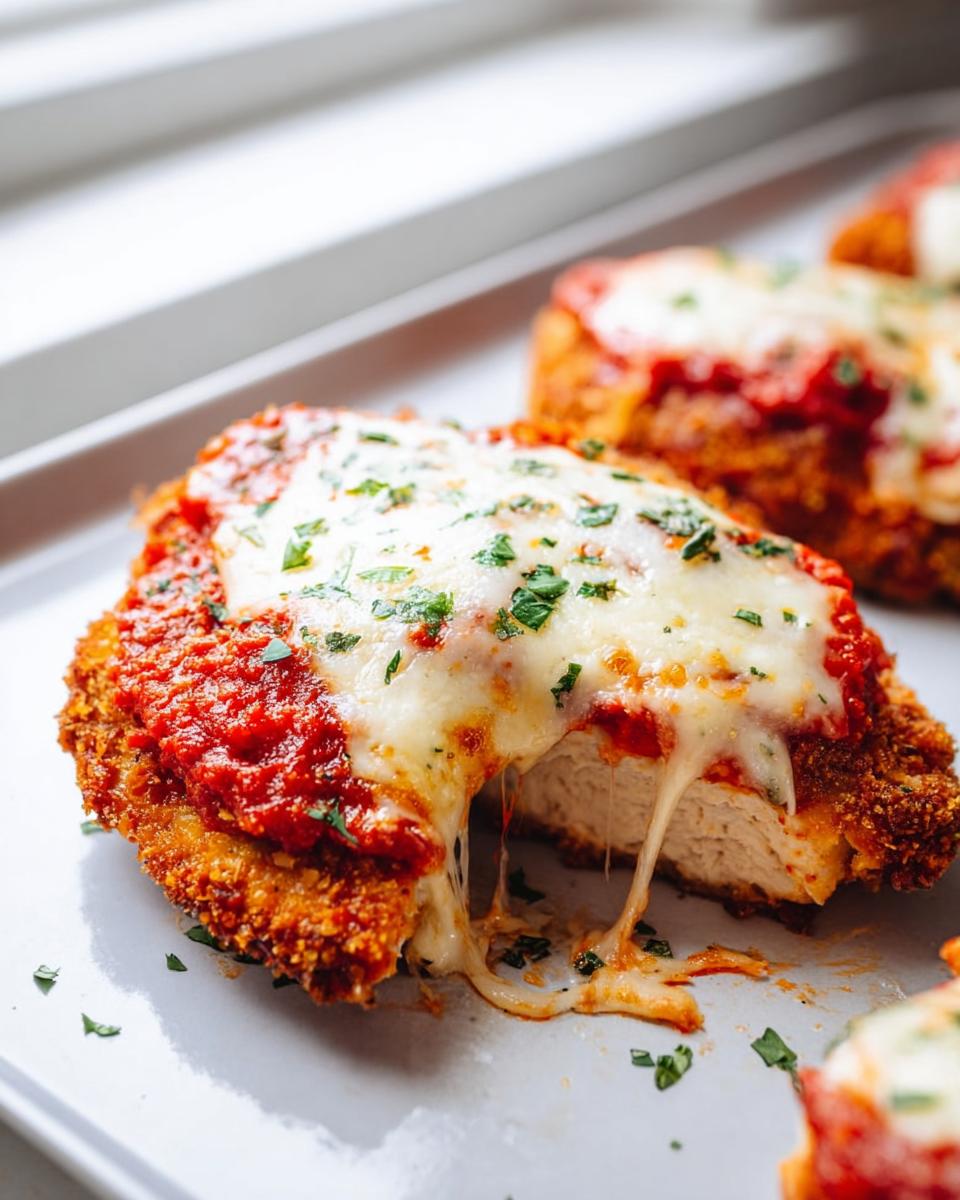
There is just something about that bubbly, slightly browned blanket of mozzarella cheese that brings instant happiness to the table. It’s pure cheesy comfort food, and watching the kids devour it makes every minute worth it. Don’t forget that good quality marinara makes the whole thing sing!
Essential Ingredients for Perfect Baked Chicken Parmesan with Mozzarella
Getting this right isn’t about fancy techniques, trust me. It’s about having the right players on the field! When I gather my ingredients, I make sure they cooperate. Quality counts here; a mediocre sauce or breadcrumb means a mediocre result, and we aren’t settling for mediocre when it comes to our family meals!
We’ll split these into three simple groups so setting up your station is a breeze. You can check out my general favorite recipe staples here!
For the Chicken and Searing
You need two nice, large boneless, skinless chicken breasts. The absolute number one crucial step for this recipe is pounding them out! Grab that meat mallet—or even a heavy rolling pin if you don’t have one—and flatten them gently between parchment paper until they’re uniformly about a half-inch thick. This helps them cook fast and evenly. Give them a good hit of salt and pepper before they go near any flour.
The Three-Step Coating Station
This is where the crunch comes from! Set up three shallow dishes. First up is plain flour mixed with a little seasoned salt and pepper. Second is your simple egg wash—just the two eggs beaten up with a tiny bit of that garlic powder. The third dish is the star: the breading. You absolutely must use Panko breadcrumbs if you want real crispiness! Mix those Panko crumbs with the freshly grated Parmesan cheese, dried parsley, and oregano. That freshly grated Parmesan makes such a difference to the flavor!
Topping the Baked Chicken Parmesan with Mozzarella
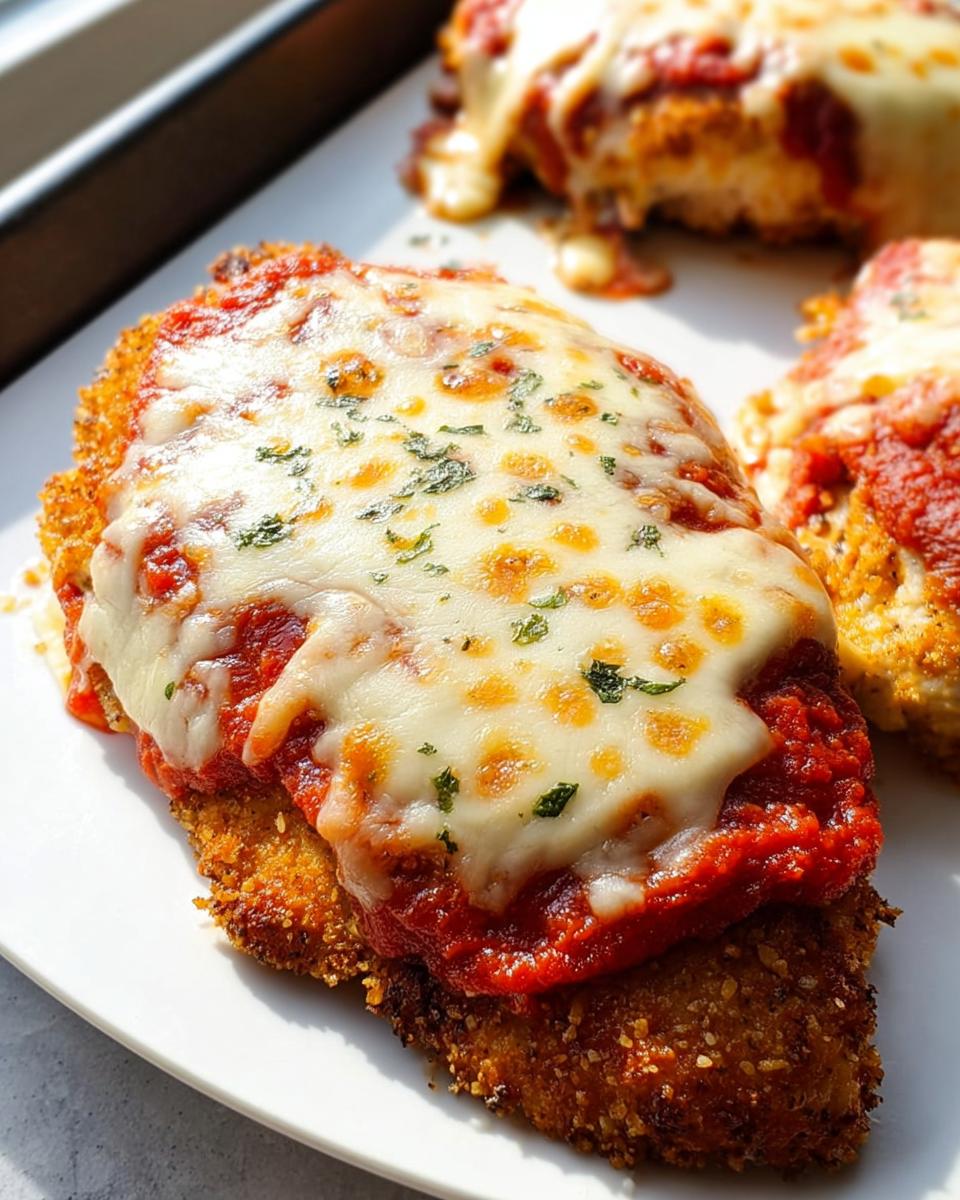
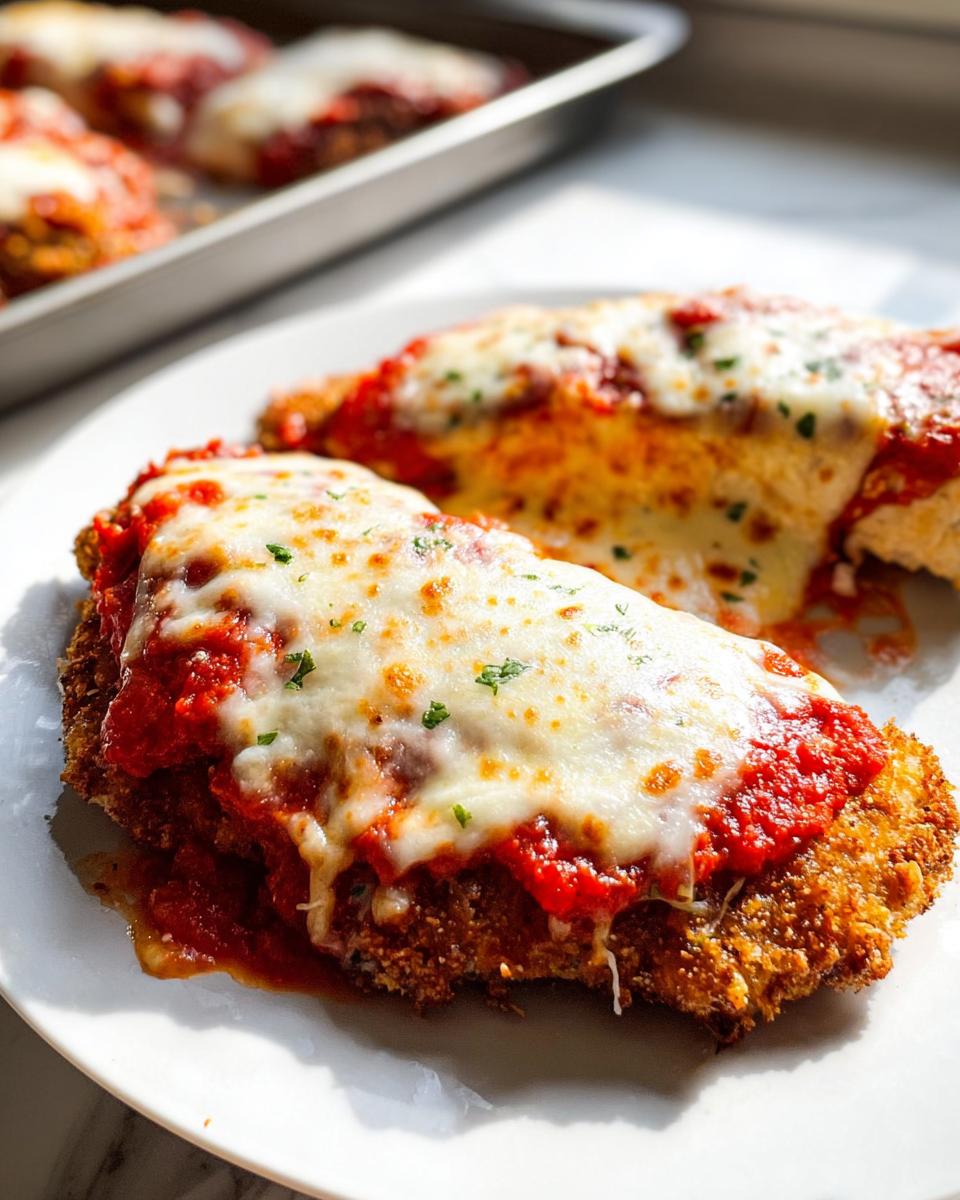
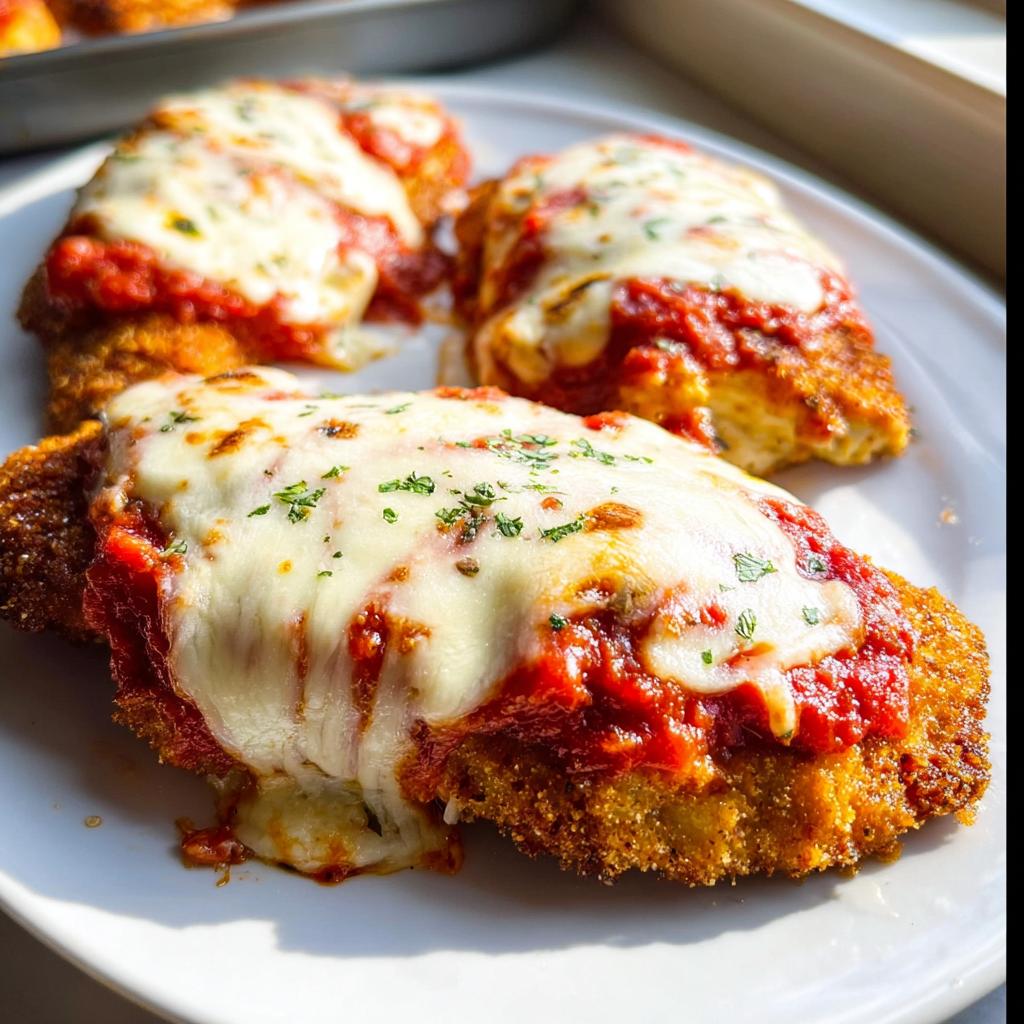
Once it’s seared and ready for its trip into the oven, we pile on the good stuff. You’ll need about a cup of your favorite marinara sauce—don’t skimp on flavor here! Then heap on that shredded mozzarella cheese. I use about 1.5 cups so you get that wonderful, gooey melt. Fresh parsley at the end is just for looks, but honestly, it makes plating feel fancy!
Step-by-Step Instructions for Baked Italian Chicken
Alright, let’s get cooking! This is the fun part where we turn those prepped ingredients into a gorgeous, family-ready meal. Follow these steps exactly, and you’ll have the best baked italian chicken on the table in no time. We’re moving fast, but we aren’t skipping the important bits that make it crispy!
Preparation and Pounding
First things first—get that oven hot! Preheat your oven right up to 400 degrees Fahrenheit (that’s 200 Celsius). While it’s warming up, make sure your baking sheet is lightly greased. Now, grab those chicken breasts. Remember what I said about pounding? Sandwich that meat between plastic wrap or parchment, and go at it with your mallet until both pieces are about a half-inch thick. Evenness equals even cooking time, which is key!
Dredging and Breading Technique
Time to set up your assembly line! Flour mixture first, then the frothy egg wash, and finally that fantastic Panko/Parmesan breading. Take one pounded chicken piece and give it a good shake in the flour—always tap off the excess excess! Then dip it right into the egg—make sure it’s fully coated. The last step is pressing it hard into the breading. You need to press firmly so that crispy coating sticks when we hit the hot oil.
Searing for Golden Color
Don’t skip this! Heat about 1/4 cup of vegetable oil in a large oven-safe skillet over medium-high heat. We aren’t trying to cook it through here, just toast that coating! Lay the chicken in carefully—watch out, it **will** splatter—and sear for just 2 to 3 minutes per side until it’s gorgeously golden brown. If you have two pieces, you might have to do this in two rounds, which is totally fine. Once they look beautiful and crunchy, move them right over to your prepared baking sheet.
Baking the Baked Chicken Parmesan with Mozzarella
Okay, these cutlets are golden and ready for their cheesy blanket! Spoon about two tablespoons of your marinara sauce right on top of each golden cutlet. Don’t drown it, just cover the top surface! Then, completely cover that sauce with your shredded mozzarella. Pop that baking sheet into the 400°F oven for 12 to 15 minutes. You’re looking for that cheese to be completely melted and bubbly, and the internal temperature of the chicken to hit 165 degrees Fahrenheit for safety. A quick sprinkle of fresh parsley when it comes out? Perfection!
- Check out more easy cooking ideas for busy cooks!
Tips for Perfect Baked Chicken Parmesan with Mozzarella
Even though this is a baked version, we still want that satisfying crunch, right? Soggy breading is the absolute enemy in my kitchen! A few little secrets from my years of juggling family schedules means you get a crispy crust and perfectly cooked meat every single time this Baked Chicken Parmesan with Mozzarella hits the oven.
It’s all about controlling moisture and using the right tools.
Achieving Maximum Crispness
Here’s a simple trick: right after you pat your pounded chicken breasts dry with paper towels, lightly season them, and then before they even see the flour, give them a quick, light dusting of flour. Don’t shake the excess off yet! This acts like a moisture sponge and helps the egg wash stick way better. And, as I mentioned before, always, always use Panko breadcrumbs! Regular crumbs get damp too quickly because they are too fine. Panko’s jagged edges create air pockets, which equals crunch, even after baking.
Internal Temperature Check for Safety
Since we are cooking in the oven, it’s super easy to guess if the center is done, and guessing isn’t safe when serving chicken to little ones! You absolutely have to use a meat thermometer for accuracy, especially since we pounded these thin. Pull them out of the oven only once that thermometer reads 165 degrees Fahrenheit in the thickest part of the breast. A minute too long is better than being undercooked; that hot cheese and sauce will keep the meat moist even if it hits 170°F, but we need that 165°F baseline for peace of mind!
Ingredient Notes and Substitutions for Your Baked Chicken Parmesan with Mozzarella
I know so many of you parents are navigating gluten-free life, whether it’s a choice for the whole family or just for one little person! Making this classic feel inclusive shouldn’t feel like homework, so let’s chat about how we can swap a few things in this Baked Chicken Parmesan with Mozzarella recipe without losing that amazing flavor we’ve worked so hard to build.
It’s all about finding the right substitutes that behave well under heat and mimic that classic texture. Don’t stress if you’re missing one item; we have options!
Gluten-Free Adaptations
This is a big one! If you need gluten-free, you just have to swap those two main flour components. For the all-purpose flour in the dredging step, grab a certified gluten-free all-purpose blend—just make sure whichever kind you get has that good binding agent, like xanthan gum, or you might need to add a tiny pinch yourself. For the star, the Panko breadcrumbs, you can actually find some fantastic gluten-free Panko nowadays!
If you can’t find GF Panko, you can pulse up some gluten-free sandwich bread in the food processor until it’s coarse, or try using crushed cornflakes for a totally wild, but surprisingly delicious, crunch! You can check out my favorite tips on baking gluten-free breads here if you feel ambitious, but for weeknights, store-bought GF Panko is your friend.
Cheese Variations
Look, I love mozzarella because it melts beautifully and looks exactly how cheesy comfort food should look. But sometimes, you want a little kick, right? Feel free to swap out about half of that mozzarella for Provolone cheese. Provolone melts just as well but has a slightly sharper, nuttier flavor that really complements the marinara sauce.
If you want to get really fancy for a special occasion, try mixing in some freshly shredded Gruyère with the mozzarella. It gets incredibly creamy and golden brown, but just be mindful that you’ll need to watch it closely as those higher-fat cheeses can brown faster in the oven under all that heat!
Serving Suggestions for Pasta Night Ideas
We’ve got this amazing, bubbly, cheesy chicken finish—so naturally, we need the perfect support system on the plate! When planning our pasta night ideas, I always aim for simplicity because the chicken is the star of the show. We don’t need complicated sauces here; we need things that soak up that extra marinara lurking underneath the mozzarella!
Since this is a hearty meal, texture balance is everything. If you’ve already made your gluten-free adjustments, everything pairs beautifully, but remember: the side dishes shouldn’t take more time than the main event!
- The Classic Side: You absolutely have to have a spaghetti or linguine base ready to catch all those cheesy drips. If you’re doing gluten-free like us sometimes, those rice or lentil-based pastas work incredibly well here.
- Go Green: A simple side salad is non-negotiable; it cuts through the richness of the cheese and fried coating. I usually just toss some crisp romaine with cherry tomatoes, cucumber, and a basic vinaigrette. Nothing fancy, just fresh crunch!
- Garlic Bread (Optional but Recommended): If you have 5 extra minutes, grab a loaf of bread and brush it with melted butter mixed with garlic powder and dried parsley. Toast it while the chicken rests. Perfect for dipping into any leftover sauce on your plate!
You can find some really quick and fun pasta dinner inspirations over here if you need a new spin on your usual side dish!
Storage and Reheating Baked Chicken Parmesan with Mozzarella
Okay, so confession time: even though this Baked Chicken Parmesan with Mozzarella disappears fast, sometimes we just have leftovers! And when we do, I want to make absolutely sure those leftovers taste almost as good as the first time around. The main battle here is fighting sogginess, especially since we seared the chicken before baking. We don’t want mushy breading!
If you’re planning on meal-prepping lunches, check out my guide to simple weekly lunches for extra planning tips!
Here’s my advice for making reheating successful when you’re dealing with that delicious marinara sauce and melted cheese.
Storing Leftovers Properly
First, you need to allow the chicken to cool briefly, but don’t leave it sitting out at room temperature for more than an hour—food safety first, always! Once cool, you have to separate the components if you can. If you leave the chicken submerged in sauce and covered in cheese, that breading will get soft fast. I try to scrape off most of the excess sauce and cheese before packing it up.
Store the cutlets in an airtight container in the refrigerator. They usually stay perfectly good for about three days, which is perfect for grabbing one or two for a quick lunch later in the week.
The Best Way to Reheat for Crispness
Listen carefully, because this is non-negotiable for retaining any crunch: Do NOT use the microwave if you care about texture! The microwave is great for reheating soup, but it will steam your beautiful breading and turn it into wet sponge material. I know it’s slower, but trust me on this one.
The absolute best method is the oven or toaster oven. Set your oven to about 350 degrees Fahrenheit. Place the leftover chicken right on a baking rack set over a baking sheet—this allows air to circulate underneath the bottom coating. Top it with a tiny bit more sauce and a sprinkle of fresh mozzarella if you like! Bake it for about 10 to 12 minutes. That heat will dry out the crust slightly while reheating the cheese perfectly. If you only have leftover plain chicken (no sauce/cheese), you can use an air fryer for about 4–6 minutes at 375°F for fantastic results!
Frequently Asked Questions About Chicken Parmesan Recipe
I always get questions when I post this recipe because everyone wants to make sure their versions turn out perfect. It’s normal! Cooking for your family means wanting the very best results, so let’s tackle these common hiccups head-on. These tips will ensure your next attempt at the classic chicken parmesan recipe is a total win!
If you have more burning questions after reading these, feel free to reach out to me using my contact page!
Can I skip the searing step in this chicken parmesan recipe?
Oh, you can technically skip it, but please, please, please don’t! I really don’t recommend skipping the quick sear. That fast trip to the hot oil is what sets that beautiful Panko and Parmesan crust. If you skip it, the breading has a much higher chance of getting totally soggy from the marinara sauce in the oven, and it won’t ever achieve that beautiful golden-brown color we associate with great chicken parmesan recipe.
Searing is just a couple of minutes per side, and it makes all the difference between good and *amazing*! It’s worth the extra pan cleanup, trust me.
What is the best way to make this a complete pasta night ideas meal?
For a perfect all-around dinner that fits our pasta night ideas theme, keeping the sides super breezy is the move. Since this chicken is rich and full of flavor, you want something that acts as a simple vehicle for sauce and a little freshness!
Here’s my go-to combo: boil up some simple spaghetti or linguine—cook it just shy of al dente so it keeps cooking slightly when you toss it with the sauce. Then, alongside that, you must have a very simple green salad. Think crisp, cold lettuce, maybe some sliced cucumbers, tossed with a bright lemon vinaigrette. The acidity in the vinaigrette really cuts through that heavy mozzarella and makes you feel less guilty about eating seconds!
Can I prepare the breading ahead of time for this baked italian chicken?
Yes, absolutely! Preparing the dry components of this baked italian chicken ahead of time is one of my favorite shortcuts for getting dinner out fast. You can mix up your flour mixture and your Panko breading mixture in separate completely airtight containers and keep them right in the pantry for up to a week. When you are ready to cook, you just need to crack your eggs and you’re good to go!
Now, what you *don’t* want to do is bread the chicken completely ahead of time. Once the chicken is coated in the flour, egg, and breading, that crust starts absorbing moisture from the fridge. It will be softer when you go to sear it. It’s best to dredge and bread the chicken right before you heat up that oil!
Estimated Nutritional Information for Baked Chicken Parmesan with Mozzarella
I always get asked about the nutrition break-down for my favorite family meals, and trust me, I totally get it! Trying to balance flavor with knowing what you’re feeding your family is important, especially when you’re looking for those hearty, satisfying meals.
Here are the estimates for one serving (half of the recipe total) of this Baked Chicken Parmesan with Mozzarella. Remember, these numbers are based on the specific amounts listed in the recipe, and if you use a high-fat cheese or a really oily sauce, your final numbers might shift a bit! I always use this as a guide, not a strict law.
For a quick look at the important macros:
- Calories: Approximately 550 per serving
- Total Fat: Around 30 grams
- Protein: A whopping 45 grams! This is why kids grow so fast!
- Carbohydrates: About 25 grams
We also get a decent little boost of fiber (around 3 grams) and hopefully not too much sodium, depending on how much salt you used. This is a fantastic protein source for any night of the week!
If you want to learn more about my approach to family nutrition and meal planning, feel free to check out my About Me page!
Disclaimer time: These figures are estimates based on standard grocery item calculations. If you switch brands, use less oil, or load up on extra cheese, your numbers will change. Always adjust based on your specific ingredients!
Baked Chicken Parmesan with Mozzarella
Ingredients
Equipment
Method
- Preheat your oven to 400 degrees Fahrenheit (200 degrees Celsius). Lightly grease a baking sheet.
- Place the chicken breasts between two pieces of plastic wrap or parchment paper. Pound them to an even thickness, about 1/2 inch thick, using a meat mallet or rolling pin.
- Set up three shallow dishes. In the first dish, combine the flour, seasoned salt, and pepper for the flour mixture. In the second dish, place the beaten eggs mixed with garlic powder. In the third dish, mix the panko breadcrumbs, grated Parmesan cheese, dried parsley, and dried oregano for the breading.
- Dredge each chicken piece first in the flour mixture, shaking off any excess. Next, dip it completely into the egg mixture. Finally, press the chicken firmly into the breading mixture to coat both sides evenly.
- Lightly coat the bottom of a large oven-safe skillet with vegetable oil over medium-high heat. Sear the breaded chicken for about 2 to 3 minutes per side until the coating is golden brown. You may need to do this in batches. This step adds color and texture.
- Transfer the seared chicken cutlets to the prepared baking sheet. Spoon about 2 tablespoons of marinara sauce over the top of each cutlet. Sprinkle the shredded mozzarella cheese over the sauce.
- Bake for 12 to 15 minutes, or until the chicken is cooked through (internal temperature reaches 165 degrees Fahrenheit) and the cheese is melted and bubbly.
- Remove from the oven, garnish with fresh parsley, and serve immediately. This pairs well with your favorite pasta or a side salad.
Nutrition
Notes
Tried this recipe?
Let us know how it was!
Gluten-Free Nutritionist & Family Meal Planning Expert
Working as a pediatric dietitian at Children’s Hospital of Denver, I kept meeting families overwhelmed by managing their children’s celiac disease. Parents stressed, kids frustrated, everyone eating bland boxed “gluten-free” products.
That’s when I realized my calling: creating practical, balanced gluten-free solutions for real families with busy schedules. I’ve developed 375+ family-friendly recipes focusing on lunch boxes, after-school snacks, and make-ahead dinners that actually work.
My meal planning system was featured in Parents Magazine, and I presented research at the Rocky Mountain Pediatric Nutrition Conference. My evidence-based approach ensures recipes meet both taste and health standards—families need solutions that work in the real world, not just perfect test kitchens.