Oh my gosh, you know that feeling? That first glorious sip of a fancy cold brew topped with that thick, vanilla-kissed sweet cream foam they make at the coffee shops? It’s pure bliss in a cup! Seriously, I remember being completely obsessed. But, let me tell you, as a busy pediatric dietitian juggling meal plans, finding time to visit that café became a challenge. So, I got determined to bring that coffeehouse magic home.
That’s how I perfected this totally Easy Recipe for the Vanilla Sweet Cream Cold Foam Cold Brew (Easy). Trust me, you don’t need any fancy barista training for this beloved drink. After testing a few batches while trying to keep my sanity during hectic family mornings, I landed on this simple method. It’s the perfect way to sneak a little indulgence into your day, even when you’re short on time. I’m Sophie Williams, and while I usually focus on family meal planning expertise, even I need a quick, delicious coffee boost! Learn more about my background over at my About page.
Why This Vanilla Sweet Cream Cold Foam Cold Brew (Easy) is Your New Favorite
I know you’re busy, just like me! That’s why I put so much work into making sure this recipe delivers serious flavor without sucking up your morning. When you ditch the drive-thru, you gain control over your ingredients, which is important to me as a nutritionist.
- Quick Prep for Busy Mornings: Honestly, the syrup takes about five minutes to cook, and then you just whip up the cream when you’re ready to drink it! It’s faster than sitting in line waiting for someone else to make it.
- Café Style Flavor Without the Wait: Forget those watered-down versions. This is a fantastic Starbucks Copycat that gives you that perfect creamy texture we all crave. It’s top-tier Homemade Coffee!
Gathering Ingredients for Your Vanilla Sweet Cream Cold Foam Cold Brew (Easy)
Okay, making this café style drink at home is super straightforward, but we need to treat the two parts like they are separate little projects. First, we tackle the rich vanilla syrup; this is what gives our beverage that signature, rounded sweetness. After that, we look at what we need for the cold brew base and the foam itself. Don’t worry about your Cold Brew—it can be store-bought or something you brewed last weekend!
I keep the syrup stored perfectly, but you can find more ideas on all my favorite homemade recipes over at my recipes page.
For the Homemade Vanilla Syrup
This syrup is the heart of the flavor, so pay attention here! If you don’t have a vanilla bean lying around (who does, honestly?), just grab the extract.
- 1 cup water
- 1/2 cup maple syrup (we’ll talk substitutions later!)
- 1 large vanilla bean, split open, OR 1 tablespoon of good quality vanilla extract.
For the Vanilla Sweet Cream Cold Foam Cold Brew (Easy)
For the actual drink assembly, you only need a few things. It’s surprisingly simple!
- 1 cup almond milk (this is what I use for the lightest foam)
- 1/4 cup vanilla syrup (use what you just made!)
- 4 cups homemade cold brew (or store-bought concentrate will work, just dilute as needed)
- Ice (you’ll need plenty for serving!)
Step-by-Step Instructions for Vanilla Sweet Cream Cold Foam Cold Brew (Easy)
Ready to see how fast this comes together? Don’t worry, the syrup is the only part that requires heat, and we only do that once! Once you have that base ready, making your decadent coffee drink takes mere minutes.
Making the Quick Vanilla Syrup
Grab a small saucepan because we’re going to cook this down just enough to dissolve everything beautifully. Add your water and the maple syrup. Bring that mixture right up to a boil—watch it carefully, it happens fast!
Once that syrup is totally dissolved, kill the heat immediately. Toss in your lovely vanilla bean if you are using one, and here’s a crucial tip for safety and flavor: you need to let it cool completely to room temperature before you put a lid on it. Sealing hot liquids can create dangerous pressure, and we definitely don’t want any kitchen excitement!
Once it’s cool, pull that vanilla bean out—we want the flavor, not the tough pod! Store the finished syrup in a clean mason jar in the fridge. This syrup will last you ages; I can usually keep mine for about 180 days, so you’re set for a long time.

Creating the Sweet Cream Foam
This is where the coffeehouse magic happens! You have two awesome options here, depending on what equipment you’ve got nearby. If you want the absolute best, thickest foam texture, toss the almond milk and your measured vanilla syrup into your blender. Blend it up until it looks perfectly whipped and soft. It should mimic that thick, cloud-like texture you get in the café!
No blender handy? No problem! Just pour those two ingredients into a mason jar, seal it tight—and I mean *tight*—and shake it like you mean it! Alternatively, if you have a little handheld milk frother, those work wonders too for getting that glorious whipped consistency quickly.
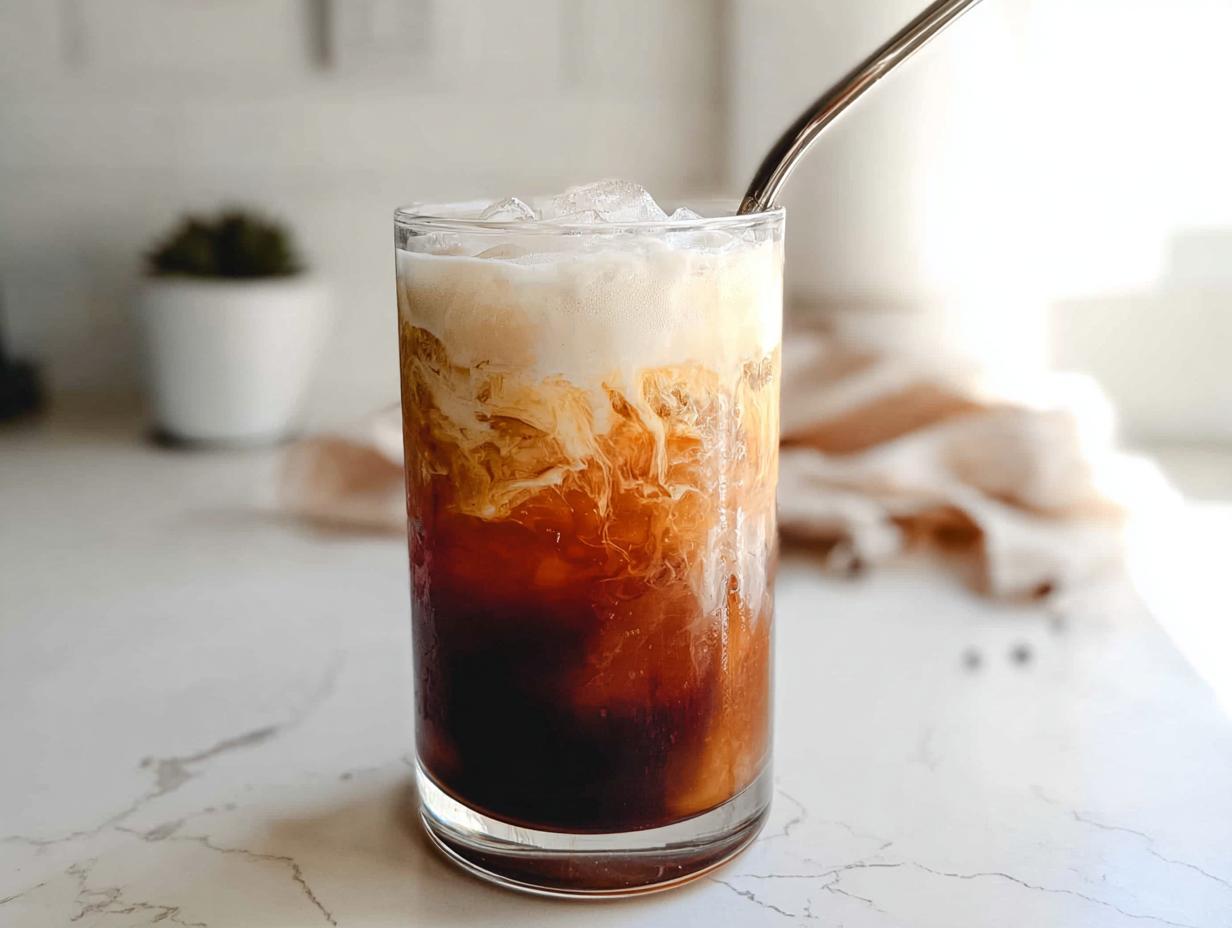
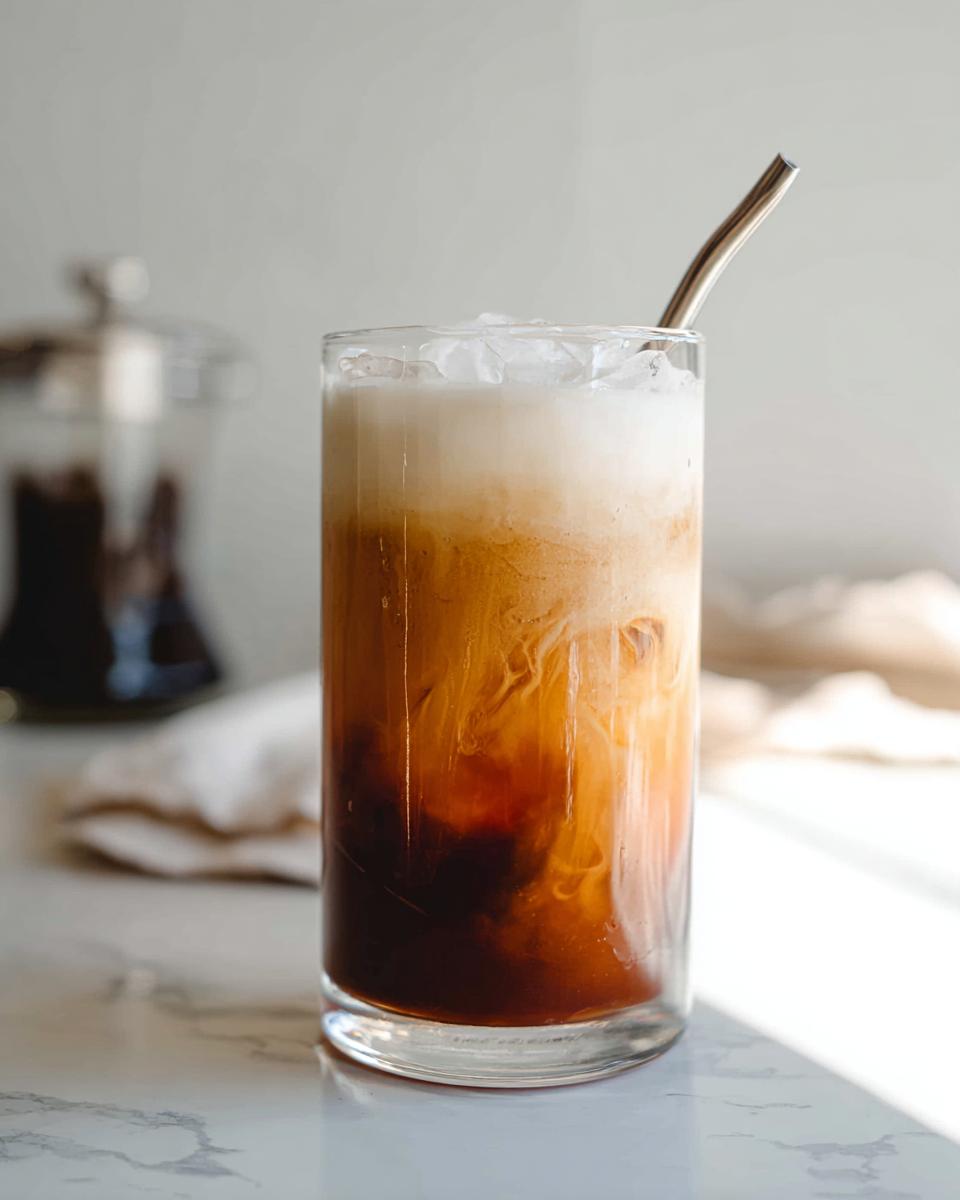
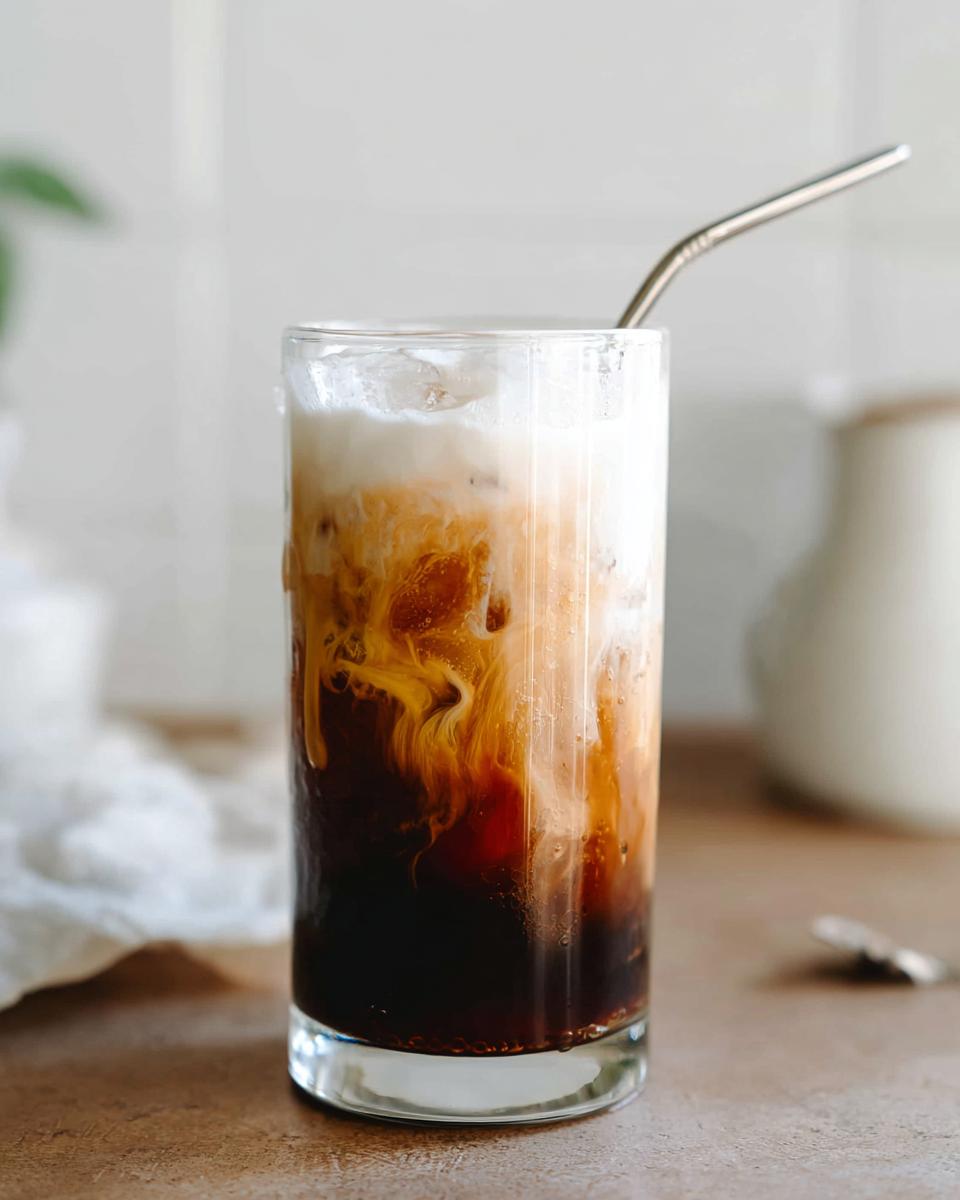
Assembling Your Vanilla Sweet Cream Cold Foam Cold Brew (Easy)
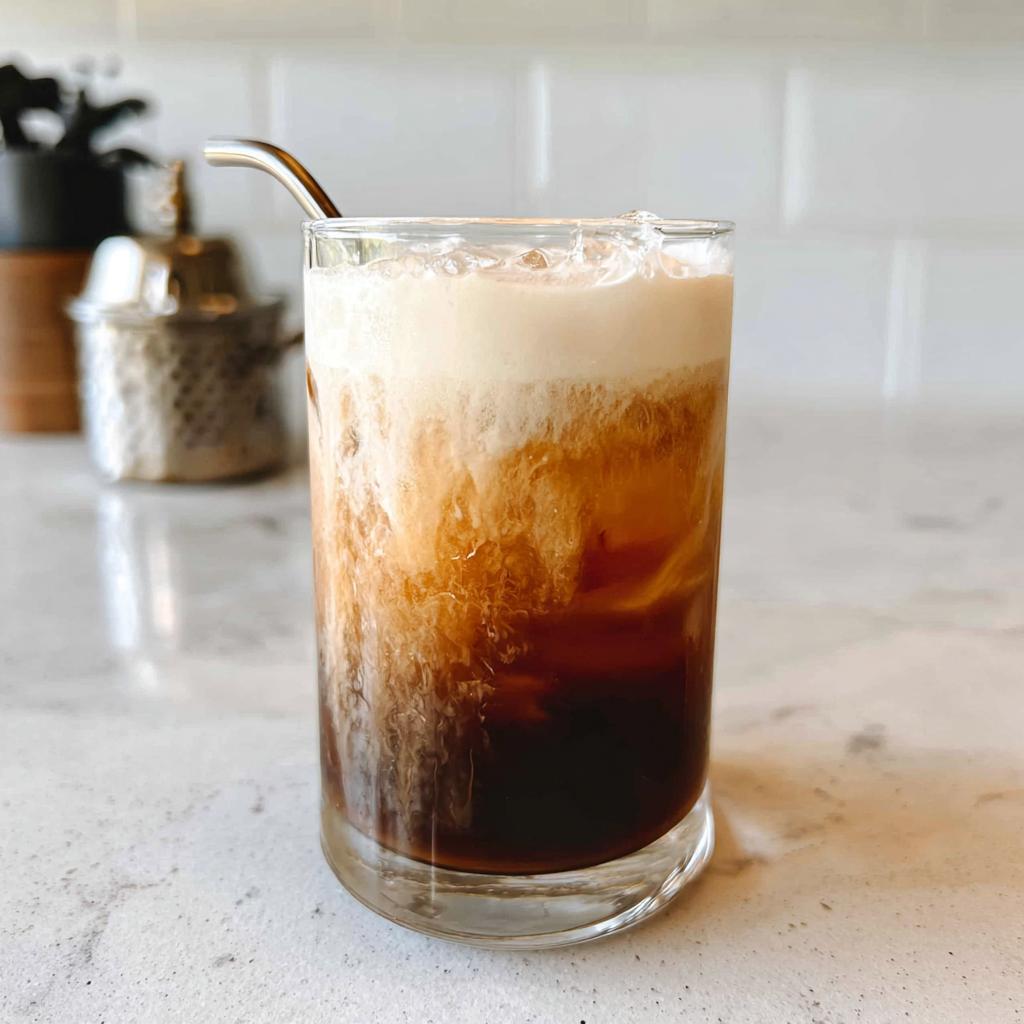
Okay, now for the moment we’ve been waiting for! Get your favorite big glass ready and fill it up generously with ice. Pour in about one cup of your prepared cold brew. Doesn’t that look strong and lovely already? You can check out some ways to make intense Starbucks Copycat cold brew bases here!
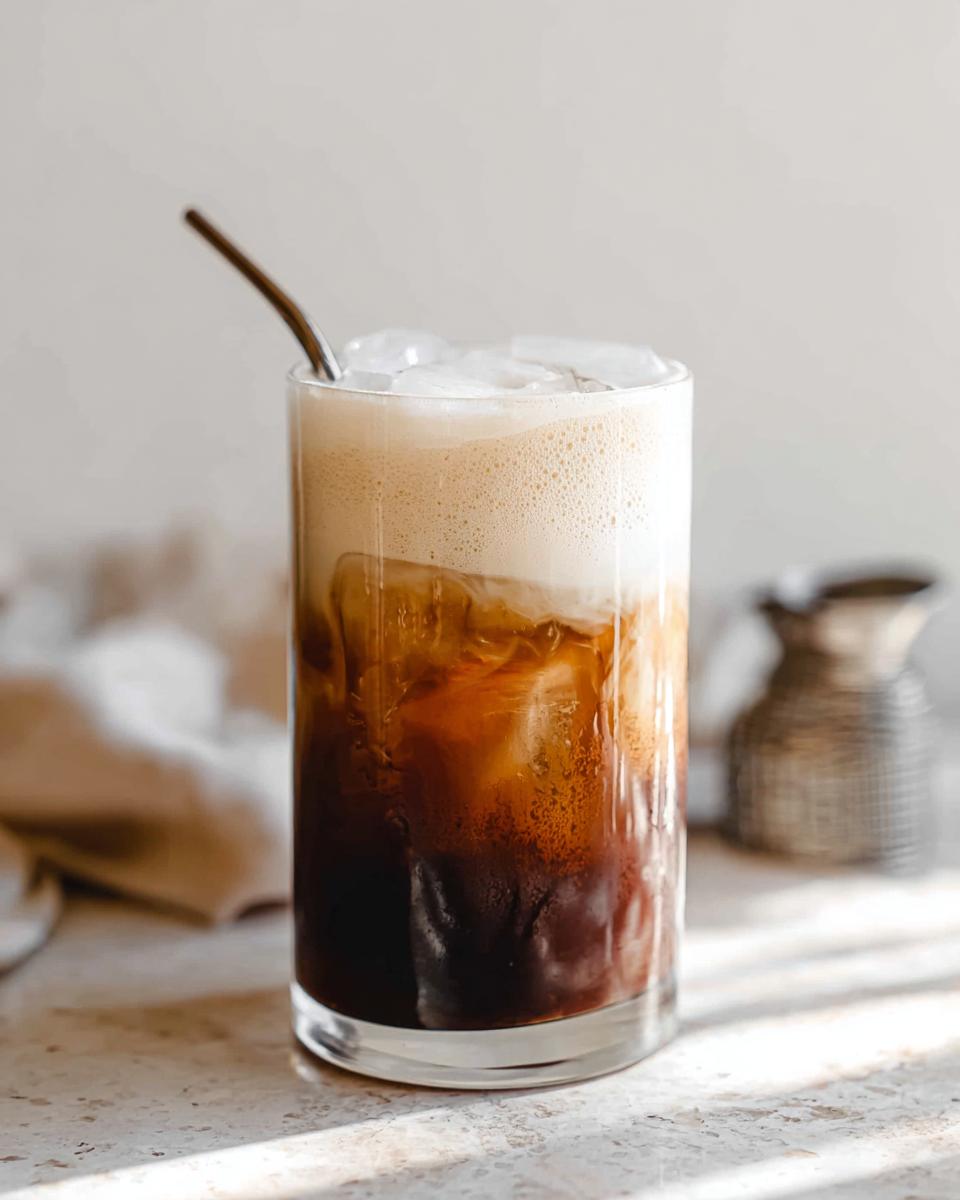
Finally, gently spoon or stream your glorious, freshly made foam right over the top of the cold brew. Taste it first, then add more foam if you think it needs an extra creamy kick! Give it a gentle stir if you like it all mixed in from the start, but I prefer to sip through the foam layers first. Enjoy your Vanilla Sweet Cream Cold Foam Cold Brew (Easy)!
Expert Tips for Perfect Vanilla Sweet Cream Cold Foam Cold Brew (Easy)
Now that you’ve mastered the basics, let me share a couple of things I learned while obsessing over getting the *perfect* balance between the bitter coffee and the sweet cream. As a nutritionist, I love tweaking recipes to make them better, not just easier! These little secrets will take your Homemade Coffee from good to seriously out-of-this-world.
Cold Brew Strength Matters
This is non-negotiable if you want that café taste! If you use a very weak batch of cold brew, the sweet cream layer will just completely overpower your drink. It’ll taste like sweet milk instead of coffee. I always recommend using your cold brew concentrate if you brew at home. If you’re using pre-made cold brew, make sure it’s on the stronger side. You want that deep, rich coffee flavor cutting through that creamy topping. If you want to see how serious I get about my brew methods, check out some of my other recipe pages!
Sweet Cream Texture Control
The texture of that foam is everything! If you find your foam is coming out a little too thin, even after blending or shaking hard, the culprit is usually too much almond milk relative to the syrup. Next time, use just a splash less milk in the blender. Or, if it’s too thick and won’t pour nicely, you might have blended it too long, or maybe your syrup was too cold!
If you want a truly decadent foam, you can swap out the almond milk entirely for heavy cream—it whips up faster and holds its shape longer. I learned that trick from a friend who loves this recipe too; you can see her take on a version of it over at this external site. It’s thick, rich, and totally worth the extra calories when you need a treat!
Ingredient Notes and Substitutions for Your Vanilla Sweet Cream Cold Foam Cold Brew (Easy)
One of the best parts about making a drink like the Vanilla Sweet Cream Cold Foam Cold Brew (Easy) at home is that you are in total control, right? If you’re missing an ingredient or just prefer something different, go for it! I want you to feel confident whipping this up even if your pantry doesn’t look exactly like mine. Don’t let a missing item stop you from enjoying this amazing treat!
Sweetener Swaps
I used maple syrup in the main recipe because it adds such a lovely, earthy depth that pairs wonderfully with the vanilla and the dark coffee. However, if you don’t have maple syrup on hand, you are totally fine! You can easily swap it out for traditional simple syrup (equal parts water and white sugar boiled together). Just know that without the molasses flavor from the maple, the syrup might taste a bit cleaner or sharper.
Honey is another great option. If you use honey, your syrup will be slightly sweeter, so when you measure it out for the foam later, maybe start with just a teaspoon less than what the recipe calls for. You can always add more, but you can’t take it out once it’s blended!
Milk Choices for the Foam
My recipe calls for almond milk because it froths up surprisingly well for a non-dairy option, and it has a relatively neutral flavor profile. But if you are looking for a denser, richer foam, you absolutely must try heavy whipping cream next time.
Heavy cream is what most coffee shops use to get that super stable, thick layer. It’ll be much thicker than the almond milk version, so you might need to add a little extra vanilla syrup to balance the richness. If you prefer a dairy-free alternative that might froth even better than almond milk, try oat milk! Seriously, oat milk is becoming my go-to for homemade lattes because it has just enough fat content to make a beautiful, fluffy cloud for your cold brew.
Storage and Reheating for Vanilla Sweet Cream Cold Foam Cold Brew (Easy)
I always tell people that if you’re going to make this recipe, you absolutely need to make a double batch of the vanilla syrup. It takes the same five minutes to cook, and then you have that gorgeous, flavorful boost ready for weeks! Store everything separately so nothing gets funky or loses its texture.
Syrup Longevity
Remember that beautiful syrup we made? Keep it sealed tight in its jar—that original mason jar is perfect—and stash it in the back of your fridge. Because we used maple syrup, which has natural preservatives, and because we boiled everything down, it lasts ages! I’m serious; you can keep that syrup kicking for up to three months. That means you can have this treat ready to go without having to cook anything on a Tuesday morning!
Preparing the Cold Brew Base
Your actual Cold Brew coffee base is also excellent for storage. If you make a big pitcher of concentrate, that will keep well in the fridge for about a week, depending on when you brewed it. That’s your staple! Just be sure you are giving it a good stir before pouring out a cup because sometimes the denser stuff settles at the bottom.
Now, here’s the crucial part about keeping that creamy topping delicious: the sweet cream foam needs to be made fresh every single time. You can’t store the frothed almond milk mixture! It deflates incredibly quickly, and frankly, it just gets sad looking. You want that airy, cloud-like texture collapsing into watery milk? Nope! So, brew your coffee base, keep your syrup ready, and only whip up that glorious cream right when you’re ready to assemble and drink.
Frequently Asked Questions About Vanilla Sweet Cream Cold Foam Cold Brew (Easy)
I totally get it; sometimes you have one last little question lingering when you’re about to start your next batch. That’s okay! I’ve gathered up the questions I get asked most often about whipping up this indulgent drink. If you have even more thoughts, feel free to reach out to me over at my contact page!
How much caffeine is in this Homemade Coffee?
This is a great question, especially when we are trying to balance indulgence with energy needs! For the Vanilla Sweet Cream Cold Foam Cold Brew (Easy), almost all the caffeine comes from your coffee, not the foam. The sweet cream layer—the almond milk and syrup—has practically zero caffeine in it. So, how much you get depends entirely on the strength of your base Cold Brew. If you use a strong concentrate for your 4 cups, you’ll get a big boost! If you use a milder ready-to-drink carton, it will be lighter. It’s all about adjusting that base to your preference!
Can I make the Vanilla Sweet Cream Cold Foam Cold Brew (Easy) ahead of time?
You can prep about 90% of this drink ahead of time, which is the secret weapon for busy weekdays! Yes, absolutely make your vanilla syrup ahead of time—it lasts for months in the fridge. And definitely brew a big batch of cold brew coffee, too. That’s your perfect Homemade Coffee base waiting for you!
The one thing you just can’t prep is the sweet cream foam itself. That gorgeous, whipped topping needs to be made right before you serve it. If you try to make it ahead, the air bubbles will deflate, and it turns back into sweetened milk quickly. So, keep the syrup and coffee ready, but whip that cream fresh!
Is this recipe truly an Easy Recipe?
Yes, I promise you, this is the most Easy Recipe for achieving that coffee shop perfection! Look at the timing—the syrup takes maybe five minutes of hands-on cooking time, and then the foam takes about one minute in the blender or two minutes vigorously shaking in a jar. There’s no complicated chilling time needed like you get with traditional cold brew concentrate making. If you can boil water and use a blender, you can make this fantastic Vanilla Sweet Cream Cold Foam Cold Brew (Easy)!
Estimated Nutritional Snapshot for Vanilla Sweet Cream Cold Foam Cold Brew (Easy)
Okay, I know what you’re thinking next! Since I’m a nutritionist, I know you’re curious about what you’re actually putting into your body, even when it’s a treat! Since we aren’t using heavy cream right in the foam (we used almond milk, whew!), this version is much lighter than what you’d get at the drive-thru. But remember, this is just a snapshot, okay? I’m calculating this breakdown based on the recipe divided over the four servings listed, and I’m using standard values for basic almond milk and pure maple syrup, so treat these numbers as a friendly guideline!
I’m not calculating the caffeine here because, as we discussed, that depends entirely on the strength of the Cold Brew you choose to use. Here’s a rough look at what one serving (one glass) of this amazing Vanilla Sweet Cream Cold Foam Cold Brew (Easy) might look like calorie-wise:
- Calories: Approximately 140–165 kcal
- Total Fat: Less than 1g (due to using almond milk)
- Protein: Around 1g
- Total Carbohydrates: Approximately 35g – 40g (This is where most of the content comes from, mainly from the maple syrup we used for our homemade vanilla syrup.)
See? Not bad at all for something that tastes like a dessert! You get that wonderful flavor without a huge calorie bomb, especially if you’re watching your intake. It’s so much better knowing exactly what went into making that sweet layer, which is why these homemade versions trump the coffee shops every single time. I try to keep my family’s treats balanced, and this certainly fits the bill! You can read more about my approach to healthy family eating over at my privacy policy page if you’d like to dig deeper into my food philosophies.
Share Your Homemade Coffee Creations
Now that you’ve made yourself what I hope is the best cup of Homemade Coffee you’ve ever had without leaving your kitchen, I genuinely want to know what you think!
If you tried this recipe and that creamy, sweet layer just sent you over the moon, please do me a huge favor: leave a rating out of five stars right down below in the comments section. It helps other folks who are nervous about ditching the café habit know that this recipe is foolproof and delicious.
And oh, if you snapped a picture of your perfect icy, frothy creation—especially if you styled it beautifully in a tall glass—please post it on Instagram or Facebook and tag me! I absolutely love seeing your creations and celebrating your success in making these complex-tasting drinks so easily. Don’t forget to check out my site policies over at my terms of service before you dive into sharing!
Cheers to easy mornings and truly excellent caffeine!
Vanilla Sweet Cream Cold Foam Cold Brew (Easy)
Ingredients
Equipment
Method
- For the vanilla syrup: Add water and maple syrup to a small saucepan and bring to a boil.
- Once maple syrup has dissolved, turn off heat, add vanilla bean, and let cool to room temperature.
- Remove vanilla bean and store the syrup in a mason jar or glass container in the fridge for up to 3 months.
- For the Vanilla Sweet Cream Cold Brew: Add almond milk and 1/4 cup of vanilla syrup to your blender and blend until it reaches a whipped consistency. Alternatively, add to a mason jar and shake vigorously and/or use a milk frother to froth into a cream foam.
- Add ice to a large glass and top with 1 cup of cold brew. Pour in your vanilla sweet cream to taste. Stir to combine.
Notes
Tried this recipe?
Let us know how it was!
Gluten-Free Nutritionist & Family Meal Planning Expert
Working as a pediatric dietitian at Children’s Hospital of Denver, I kept meeting families overwhelmed by managing their children’s celiac disease. Parents stressed, kids frustrated, everyone eating bland boxed “gluten-free” products.
That’s when I realized my calling: creating practical, balanced gluten-free solutions for real families with busy schedules. I’ve developed 375+ family-friendly recipes focusing on lunch boxes, after-school snacks, and make-ahead dinners that actually work.
My meal planning system was featured in Parents Magazine, and I presented research at the Rocky Mountain Pediatric Nutrition Conference. My evidence-based approach ensures recipes meet both taste and health standards—families need solutions that work in the real world, not just perfect test kitchens.