You know those nights when dinner needs to be fast, super easy, and something the whole family will actually *devour*? Yep, I’ve got those nights too, and let me tell you, my secret weapon is whipping up a big batch of homemade crunchwraps! Forget the drive-thru; making these at home is way more fun and honestly, so much tastier. They’re like a delightful little surprise package with seasoned ground beef, melty cheese, and that satisfying crunch all wrapped up. My kids go absolutely bonkers for them, and I love how simple it is to customize them with whatever we have in the fridge. Seriously, these Ground Beef Recipes With Homemade Crunchwraps for Fun Dinners are a game-changer for busy weeknights, and I’m so excited to share exactly how I make them!
Why You’ll Love These Ground Beef Recipes With Homemade Crunchwraps
Okay, so why are these homemade crunchwraps total winners? Let me break it down for you:
- Super Speedy: We’re talking 30 minutes from start to finish, folks! Perfect for those nights when you’re rushing around but still want a delicious, home-cooked meal.
- Seriously Easy: The instructions are straightforward, no fancy tricks needed. You’ll be a crunchwrap pro in no time!
- Flavor Explosion: That seasoned ground beef? The melty cheese? The surprise crunch from the tortilla chips? It’s a party in your mouth, I promise!
- Totally Customizable: This is where the fun really happens! You can load ’em up with your favorite toppings, swap out the cheese, or even try different seasonings. They’re begging to be personalized.
- Kid-Approved Gold: If you’re looking for a way to get your little ones excited about dinner, these are it. They’re interactive and just plain fun to eat!
Honestly, these Ground Beef Recipes With Homemade Crunchwraps for Fun Dinners are just pure joy on a plate. They hit all the right notes for a satisfying meal that everyone will ask for again and again.
Gather Your Ingredients for the Best Ground Beef Recipes With Homemade Crunchwraps
Alright, let’s get down to business! To make these absolutely epic Ground Beef Recipes With Homemade Crunchwraps for Fun Dinners, you’ll need a few things. Don’t worry, they’re all pretty standard kitchen staples. My secret? Using good quality ingredients really makes a difference! For instance, I always use freshly shredded cheese and I’ve found that a little cottage cheese can even be a secret ingredient for extra creaminess in some fillings, though here we’re sticking to sour cream!
First up, for that amazing savory filling:
- Ground Beef: About 1 pound. Whatever fat content you like best works. I usually go for 80/20 for great flavor.
- Taco Seasoning: Just one packet. You *can* totally make your own, but honestly, the packet is so easy and always tastes right.
- Water: About 2/3 cup. This helps form that delicious sauce.
Now for the fun part – assembling these beauties!
- Taco-Sized Tortillas: You’ll need 8 of these. They’re perfect for the inside layers.
- Burrito-Sized Tortillas: Grab 4 of these big guys. They’re our outer shell!
- Shredded Cheese: I love a good cheddar or a Mexican blend, about 1 cup. Make sure it’s shredded so it melts gooey!
- Crushed Tortilla Chips: About 1/2 cup. This is where the *crunch* comes from! I just take some plain tortilla chips and give them a good mash in a bag.
- Sour Cream: 1/4 cup, if you like it! It adds a nice creamy coolness.
- Salsa: 1/4 cup, also optional, but it adds a little zing!
That’s pretty much it! Simple, right? You can always add other goodies like lettuce or tomatoes later, but these are the core players for a totally satisfying crunchwrap.
Step-by-Step Guide to Making Your Homemade Crunchwraps
Alright, let’s get rolling with these amazing Ground Beef Recipes With Homemade Crunchwraps for Fun Dinners! It’s super straightforward, almost like building a little taco masterpiece. Don’t worry if yours look a little wonky the first time, mine totally did too! The most important thing is just to have fun with it. And hey, if you loved those chipotle ranch burritos, you’ll definitely get a kick out of these!
Preparing the Savory Ground Beef Filling
First things first, we need that yummy ground beef filling. Grab your biggest skillet and toss in the pound of ground beef. We’re going to cook it over medium-high heat until it’s all nicely browned. Now, here’s a little trick I learned: once it’s browned, I like to drain off as much of that excess grease as I can. It just makes the filling taste that much better, trust me! Then, stir in the whole packet of taco seasoning and pour in the 2/3 cup of water. Give it a good mix, bring it to a gentle simmer, and let it cook for about 3 to 5 minutes. You want that sauce to thicken up nicely into a rich, savory coating for the beef. It should smell totally amazing right about now! Cooking up some yummy Mongolian ground beef noodles is also a go-to in my house when I want something savory and quick!
Assembling Your Perfect Homemade Crunchwraps
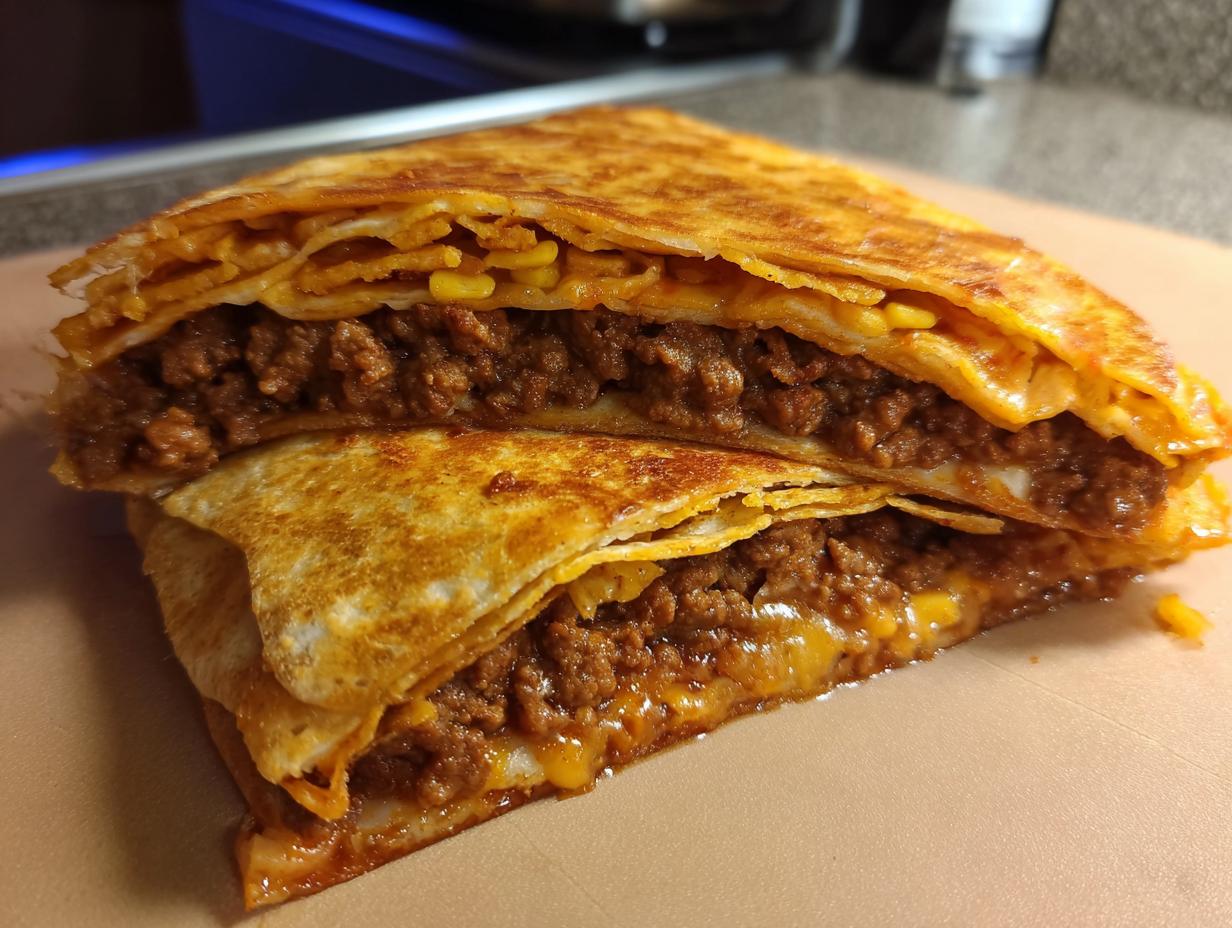
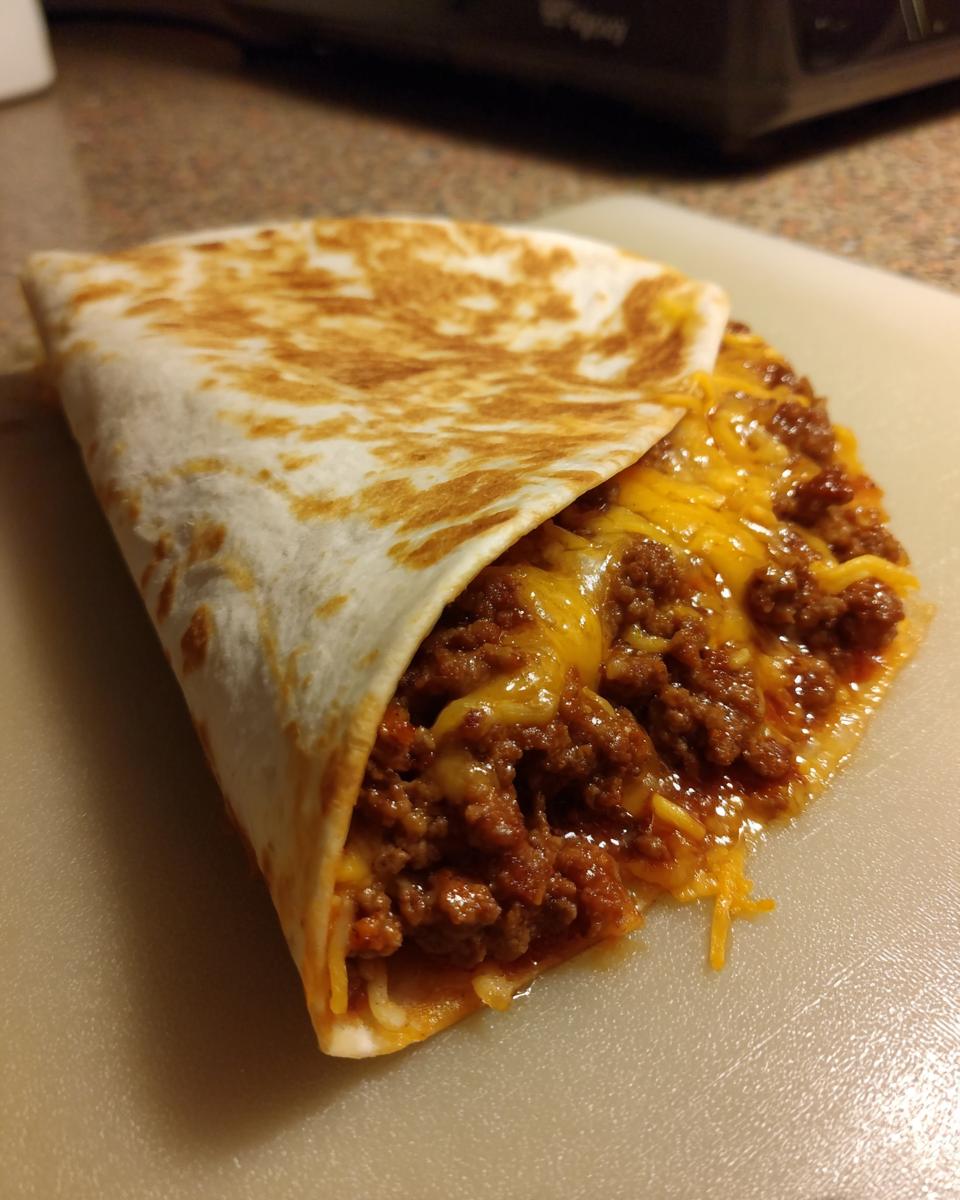
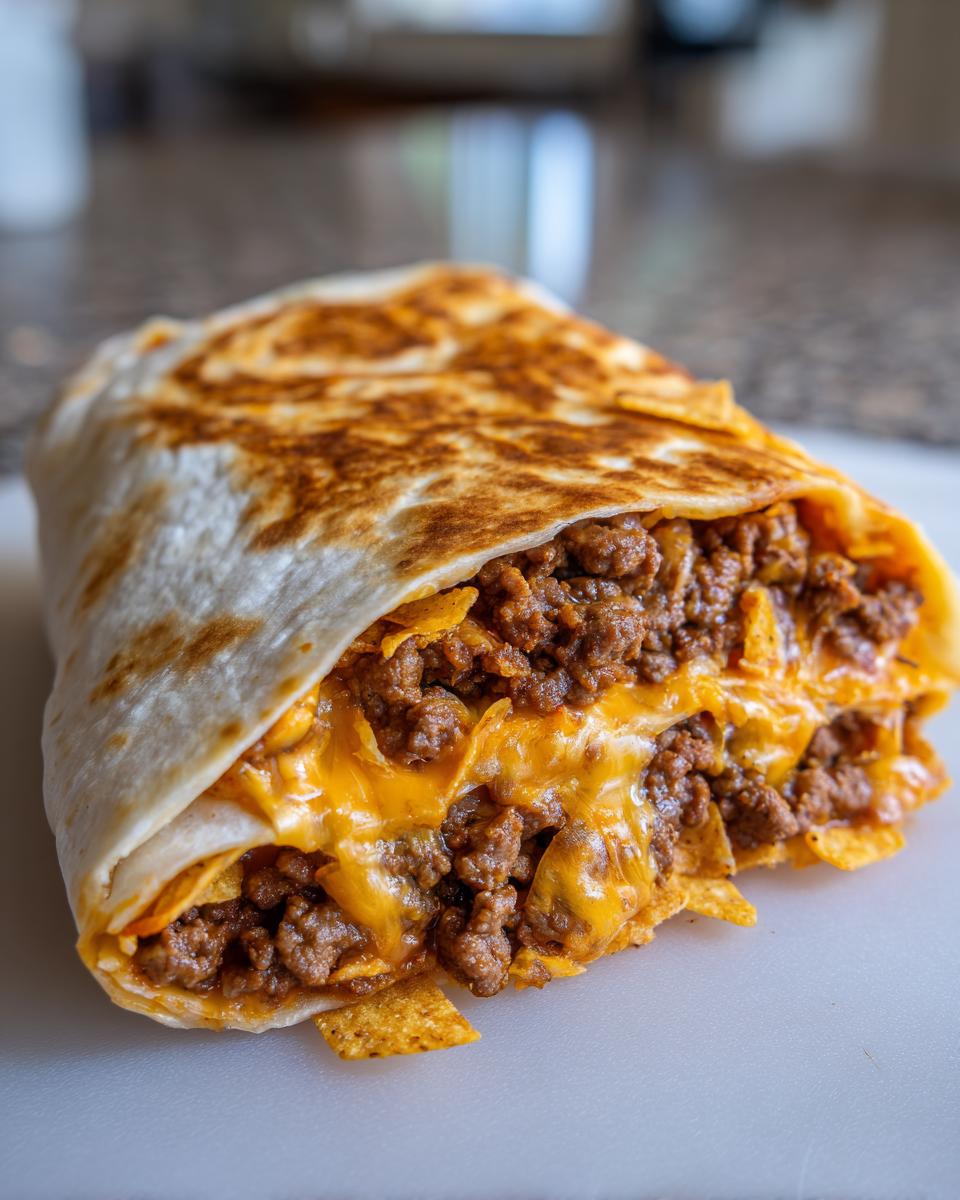
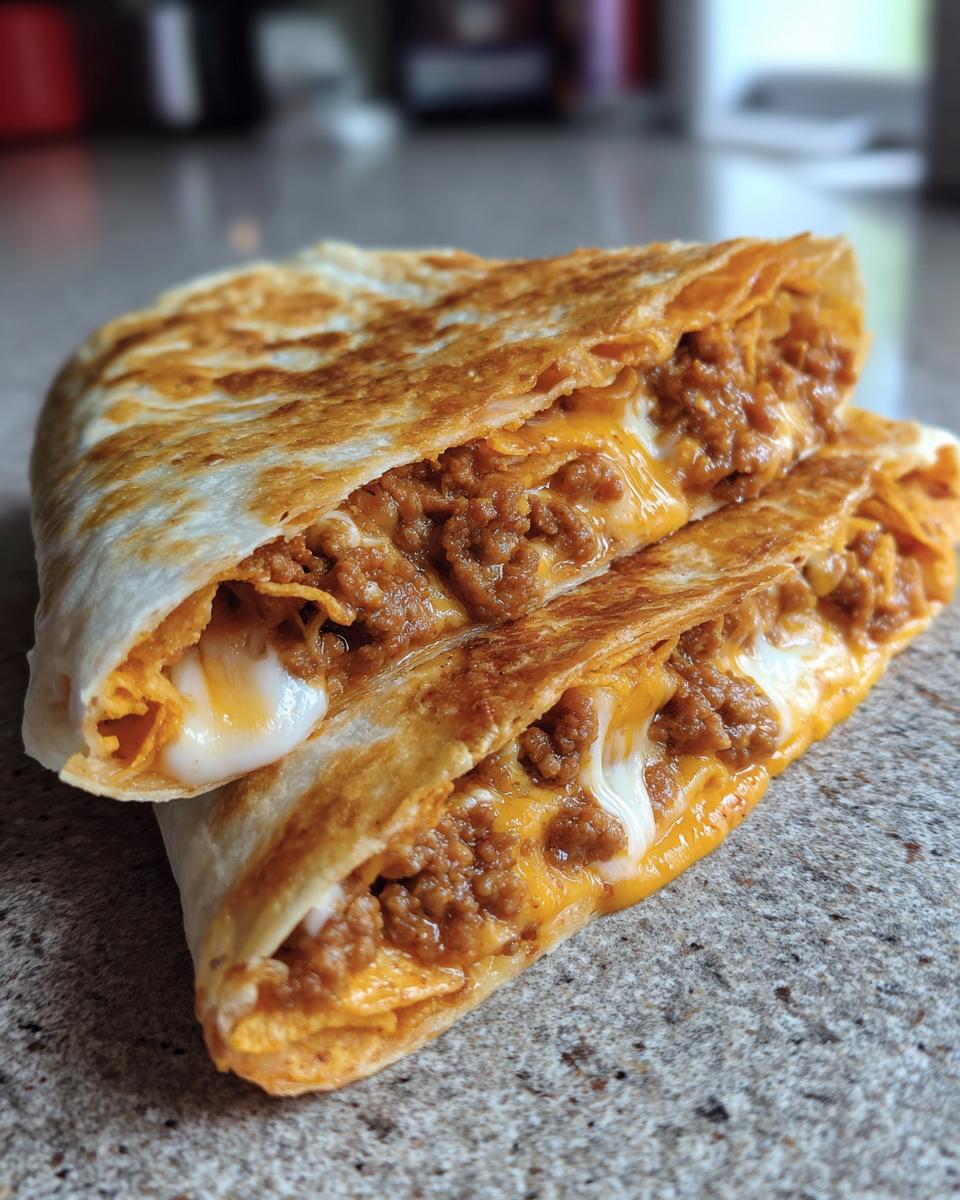
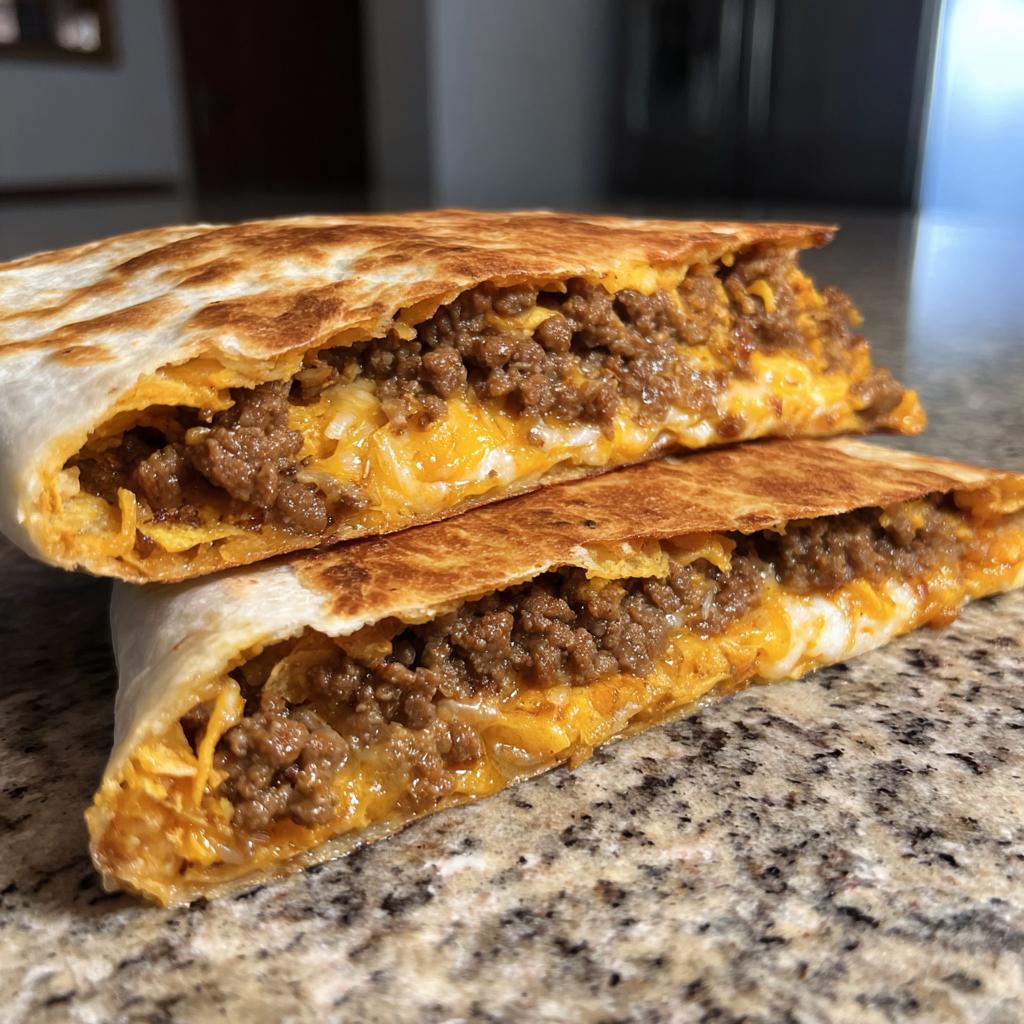
This is where the magic really happens! Lay out your big, burrito-sized tortillas. On *one half* of each tortilla, we’re going to start layering our goodies. I usually go with a sprinkle of shredded cheese first, then a nice generous scoop of that taco-seasoned ground beef. Next comes the star of the show – the crushed tortilla chips for that essential crunch! If you’re using sour cream and salsa, now’s the time to dollop those on too. Once everything’s piled up, it’s time to fold! Take the empty half of the tortilla and fold it right over the filling, making a neat half-moon shape. Then, here’s the secret step: place one of the smaller taco-sized tortillas right on top, covering the folded-over part. It sounds weird, but it helps everything stick together and gets that awesome crispy layer!
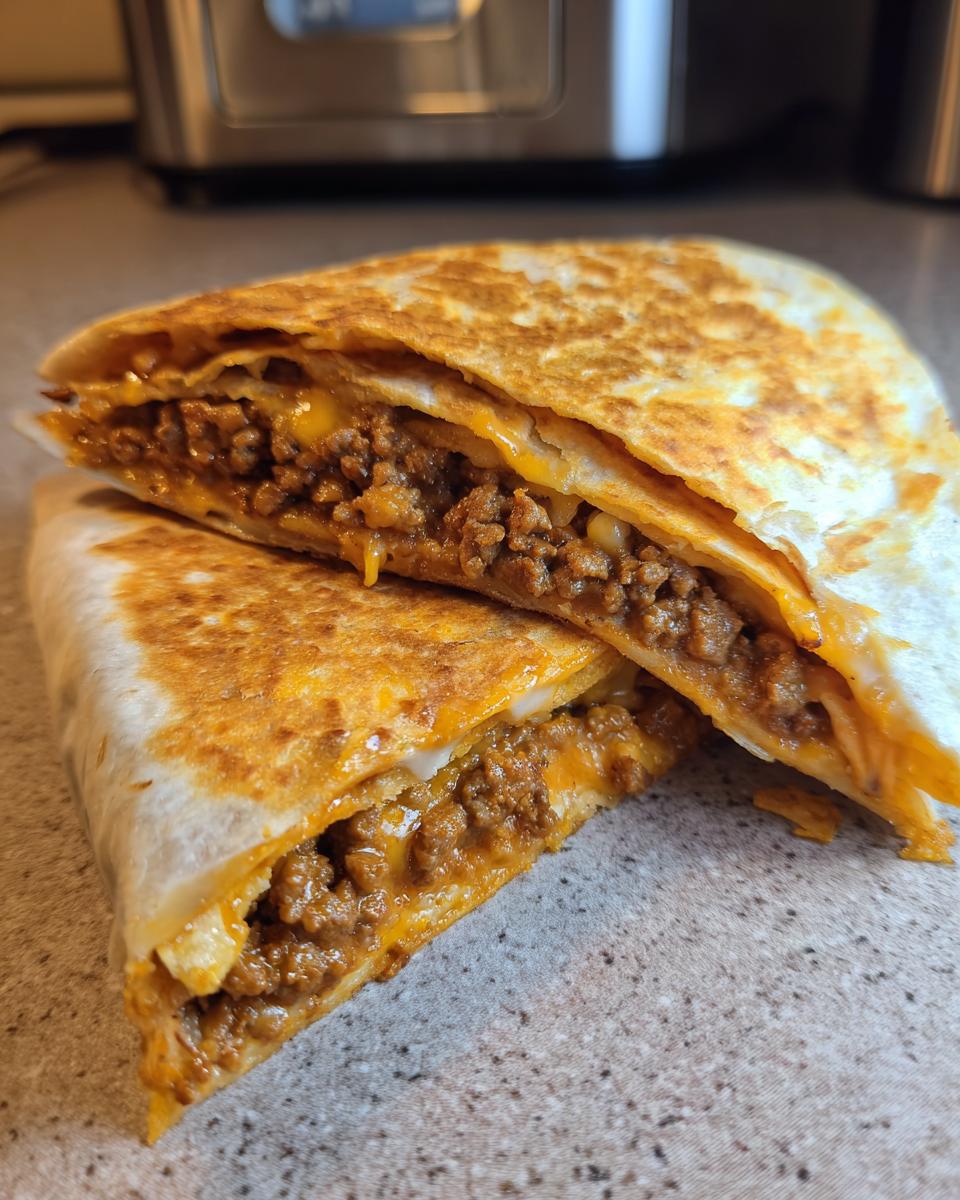
Achieving the Ultimate Crispy Exterior
Now we just need to make them golden and crispy! You can use the same skillet you cooked the beef in – no need to wash it! Just put it back over medium heat. Carefully take your assembled crunchwrap (the taco-sized tortilla should be on the bottom now) and place it right into the warm skillet. We want to cook these for about 3 to 5 minutes on each side. Keep an eye on them! You’re looking for that beautiful golden-brown color and a satisfying crispness. It’s kind of like grilling a fancy quesadilla. Once one side is perfect, gently flip it over with your spatula and do the other side. Repeat this whole process for all your crunchwraps. You want them hot, golden, and wonderfully crispy!
Tips for the Best Ground Beef Recipes With Homemade Crunchwraps
Okay, so you’ve got the basics down for these awesome Ground Beef Recipes With Homemade Crunchwraps for Fun Dinners, but let me give you a few little secrets I’ve picked up that really make them sing! These aren’t complicated changes, just little tweaks that take them from good to downright incredible.
First off, don’t skimp on the crunch! That 1/2 cup of crushed tortilla chips is crucial, but I sometimes like to add a little extra, or even mix in some crushed Fritos for a different flavor. You want that distinct crunch in every single bite. If you’re a big fan of burgers, you might even try thinking about these like mini keto hamburgers, but with all the crunchy goodness!
Another little trick? Pre-toast your tortillas slightly. Before you even start filling them, you can give those big burrito-sized tortillas a quick 15-second warm-up in a dry skillet. It makes them more pliable and less likely to crack when you’re folding them. It’s a small step, but it makes a big difference in how easy they are to assemble.
Also, don’t be afraid of bold fillings! While taco seasoning is fantastic, you can totally switch it up. Try a smoky chipotle seasoning, or even a dash of your favorite hot sauce stirred into the beef mixture. Think outside the taco box! If you love a good loaded meal, you might also enjoy these high-protein cheeseburger bowls – similar satisfaction, different format!
And finally, watch that heat when you’re crisping them up. Medium heat is your friend! Too high and you’ll burn the outside before the cheese melts. Too low and you’ll end up with a soggy wrap instead of a perfectly crispy one. A little patience goes a long way to that ideal golden-brown finish.
Frequently Asked Questions About Homemade Crunchwraps
Got questions about making these awesome crunchwraps? I totally get it! It’s always good to have a little extra info. Here are a few things people often ask me:
Can I make these ahead of time?
You know, while they’re best eaten fresh right off the skillet for that ultimate crunch and melty cheese, you *can* prep the filling ahead of time! Just store the cooked ground beef mixture in an airtight container in the fridge for up to 3 days. Then, you can assemble and cook your crunchwraps whenever you’re ready for a quick meal. Assembling and frying them completely ahead of time usually results in a less crispy crunchwrap when reheated, but it’s still tasty!
What are some good alternative fillings?
Oh, the possibilities are endless! Beyond the classic seasoned ground beef, you could try shredded chicken (maybe with some buffalo sauce!), pulled pork, seasoned black beans for a vegetarian option, or even some leftover shredded steak. Just make sure your filling isn’t too wet, or it might make the crunchwrap soggy. Think of it like a super-stuffed quesadilla – anything that works in there can probably work in a crunchwrap!
How do I prevent them from getting soggy?
The key to avoiding a soggy bottom is all about the layers and the cooking! Make sure you drain your ground beef really well. Also, don’t overload them with too many wet ingredients like extra salsa or sour cream *inside* the crunchwrap itself – save those for dipping! And crucially, cooking them over medium heat until they’re nice and golden brown on both sides is what really seals the deal and gives you that perfect crispy exterior.
Serving Suggestions for Your Fun Dinner
Now that you’ve got these amazing homemade crunchwraps ready to go, let’s talk about making it a full-blown feast! You don’t want to just serve them naked, right? They deserve some fabulous companions! Think about what goes great with tacos and quesadillas, and you’re on the right track. For a super refreshing side, you can’t beat a light, bright salad. My go-to is often something like this Watermelon Mint Feta Salad – it’s a total tastebud party and cuts through the richness of the crunchwrap perfectly.
If you’re feeling a dip vibe, a cool, creamy guacamole or even some classic pico de gallo are always winners. And of course, you can’t forget drinks! A big pitcher of iced tea, some sparkling water with lime, or even a fun mocktail can really elevate the whole experience. We’re aiming for a fun dinner, after all, so let’s make it feel special!
Storage and Reheating Instructions
So, you managed to have leftovers? Lucky you! To keep these fantastic crunchwraps tasting their best, let them cool completely, then wrap them up tight in plastic wrap or pop them into an airtight container. They’ll stay good in the fridge for about 2 to 3 days. When you’re ready to reheat, try the skillet method! Pop them back into a medium-heated skillet for a few minutes per side until they’re warm and toasty again. This really helps bring back that lovely crispiness that makes them so special!
Nutritional Information (Estimated)
Just a friendly reminder that these numbers are just estimates, folks! They can totally change depending on the exact ingredients you use, like the fat content of your ground beef or the type of cheese. But generally, for one of these glorious crunchwraps, you’re looking at around 450-550 calories, with about 25-30g of protein, 20-25g of fat, and 40-50g of carbs. Pretty satisfying for such a fun meal!
Homemade Crunchwraps
Ingredients
Equipment
Method
- Cook the ground beef in a large skillet over medium-high heat until browned. Drain off any excess grease.
- Stir in the taco seasoning and water. Bring to a simmer and cook for 3-5 minutes, or until the sauce has thickened.
- Lay out the burrito-sized tortillas. On one half of each tortilla, layer the ingredients: cheese, seasoned ground beef, crushed tortilla chips, sour cream, and salsa (if using).
- Fold the other half of the tortilla over the filling to create a half-moon shape.
- Place a taco-sized tortilla on top of the folded burrito tortilla, covering the filling.
- Carefully flip the crunchwrap so the taco tortilla is on the bottom.
- Cook in the same skillet over medium heat for 3-5 minutes per side, until golden brown and crispy.
- Repeat with the remaining tortillas and filling.