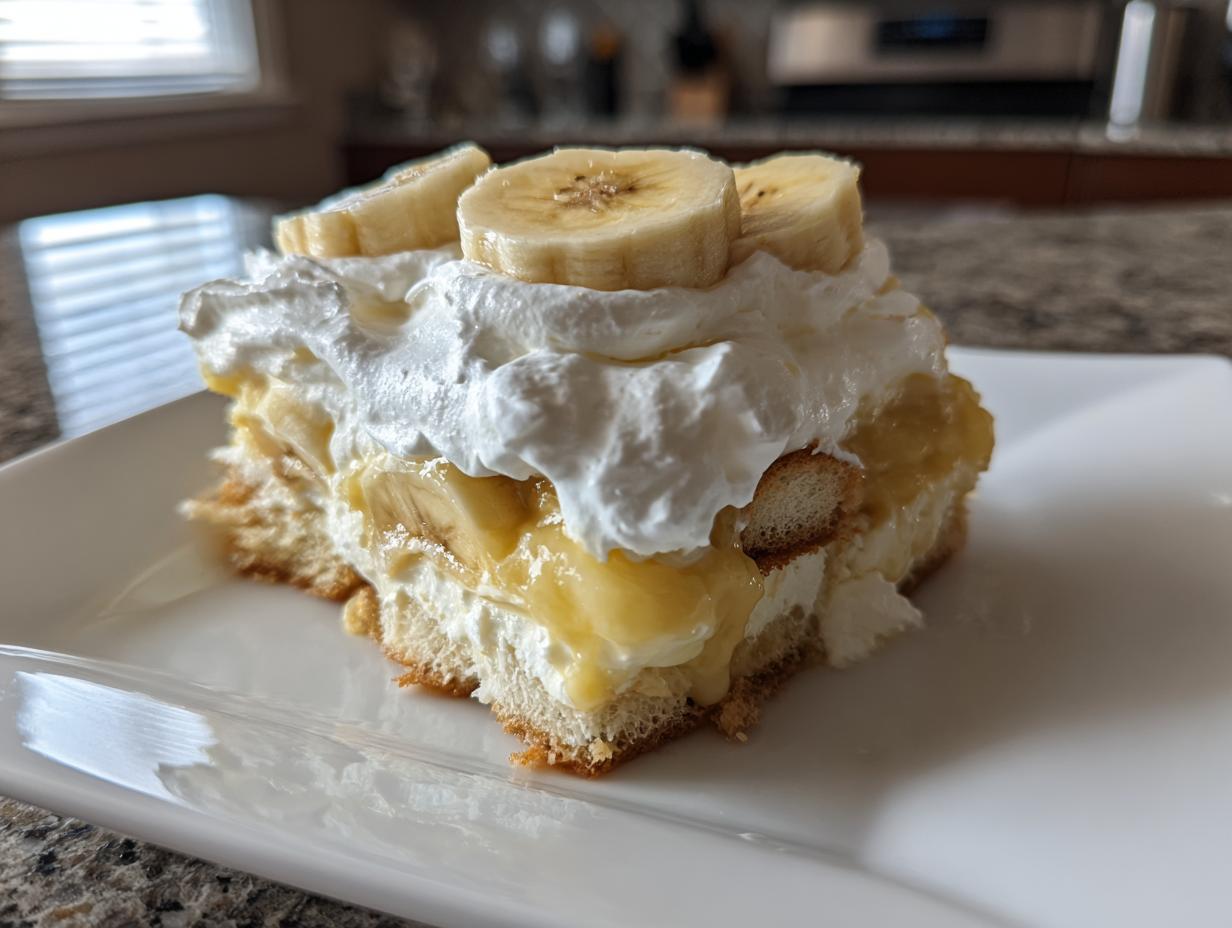
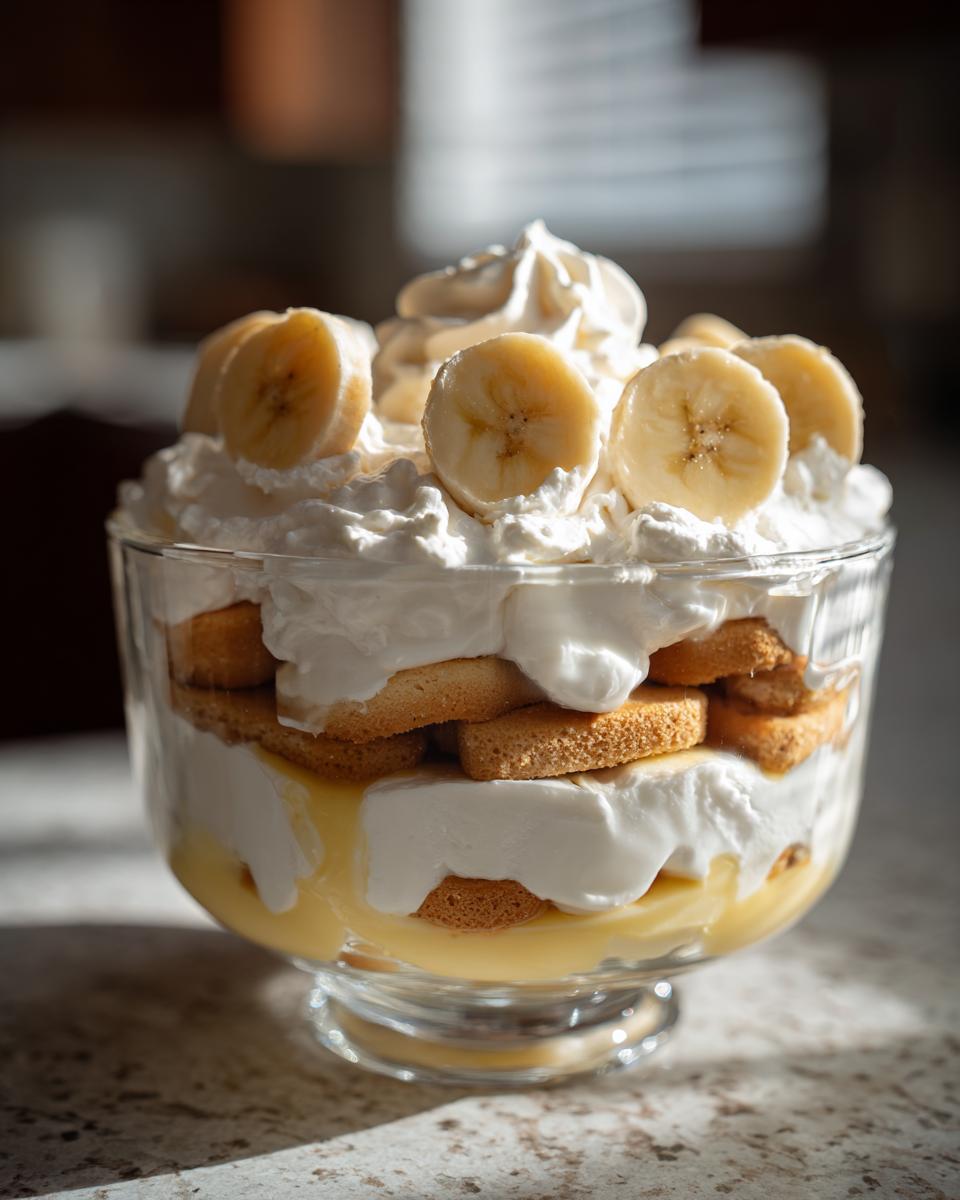
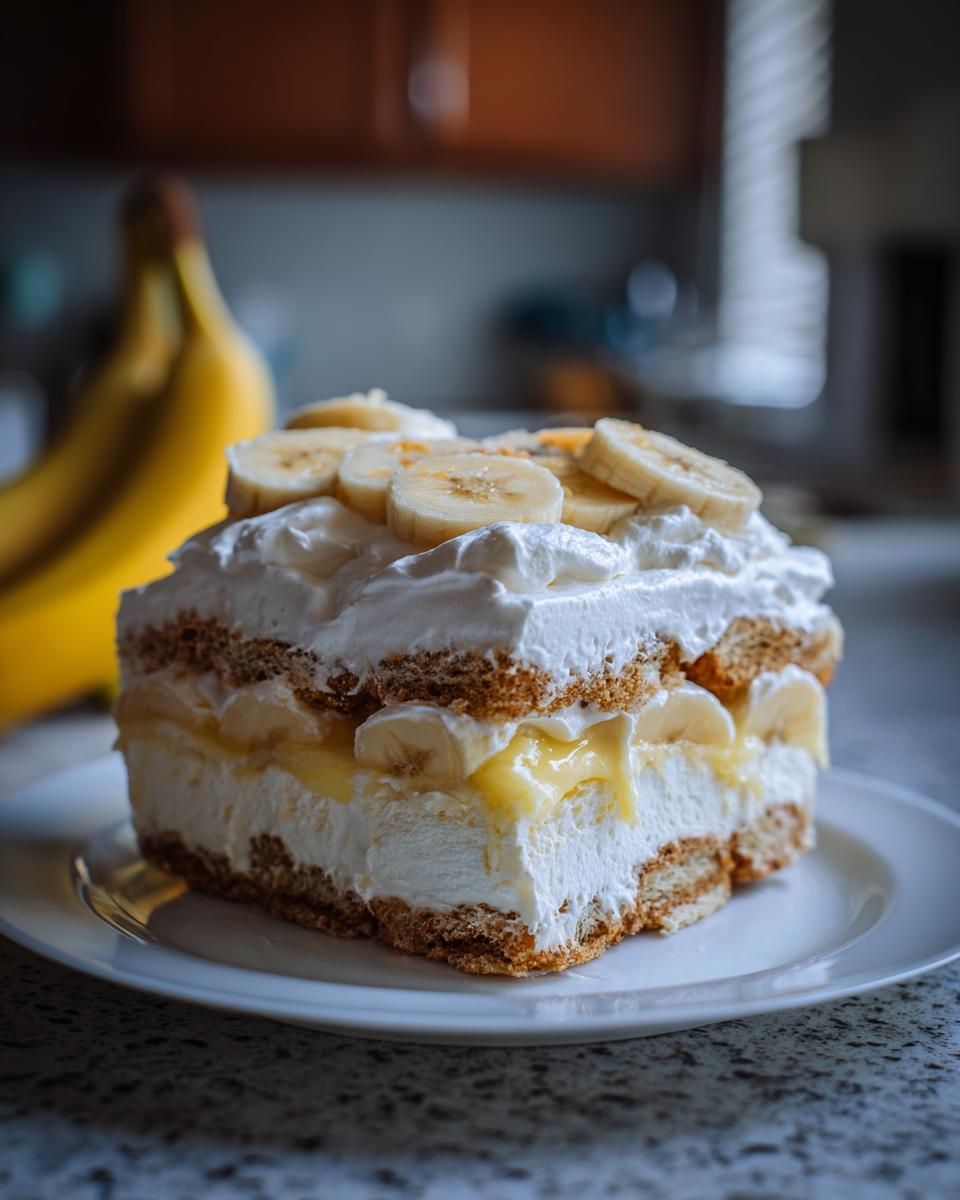
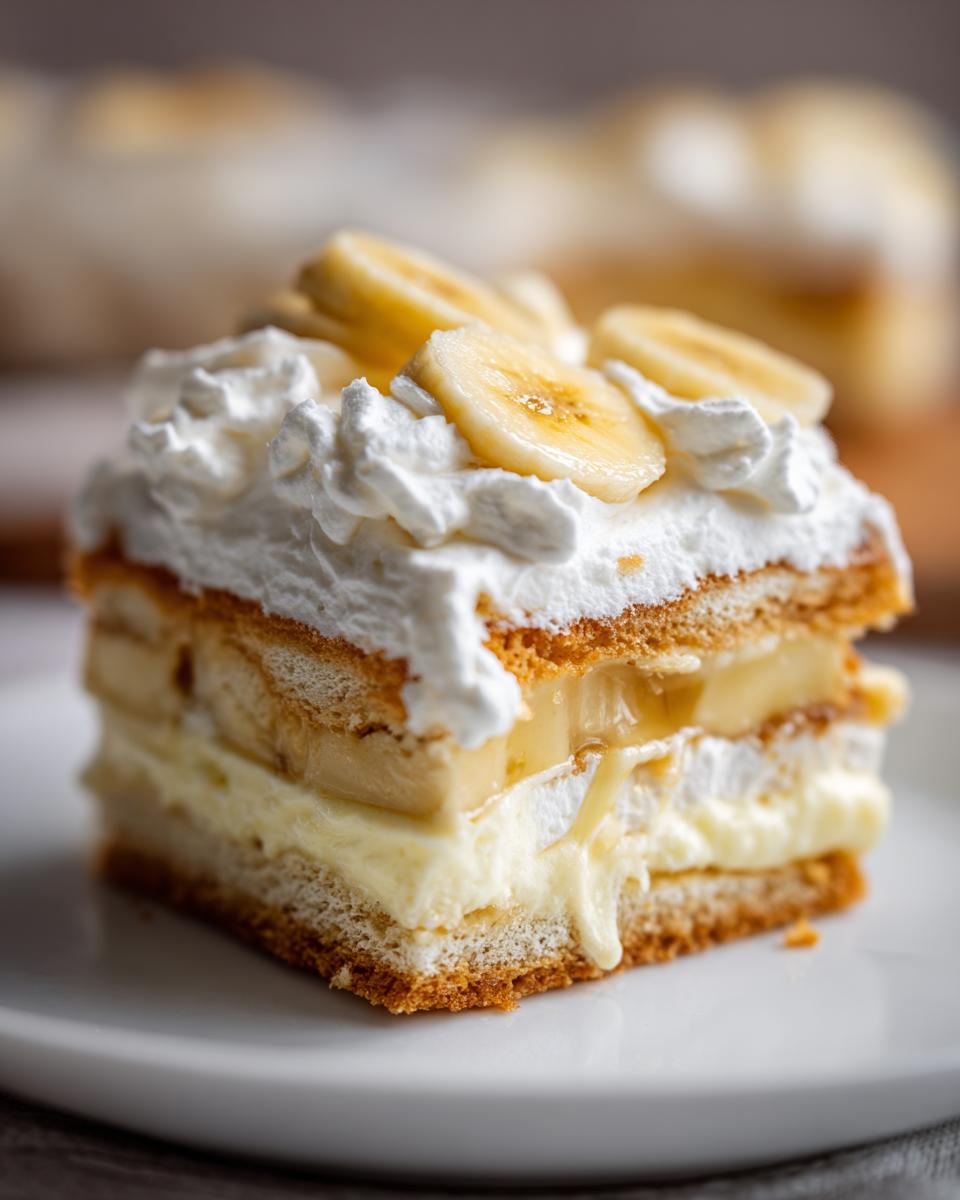
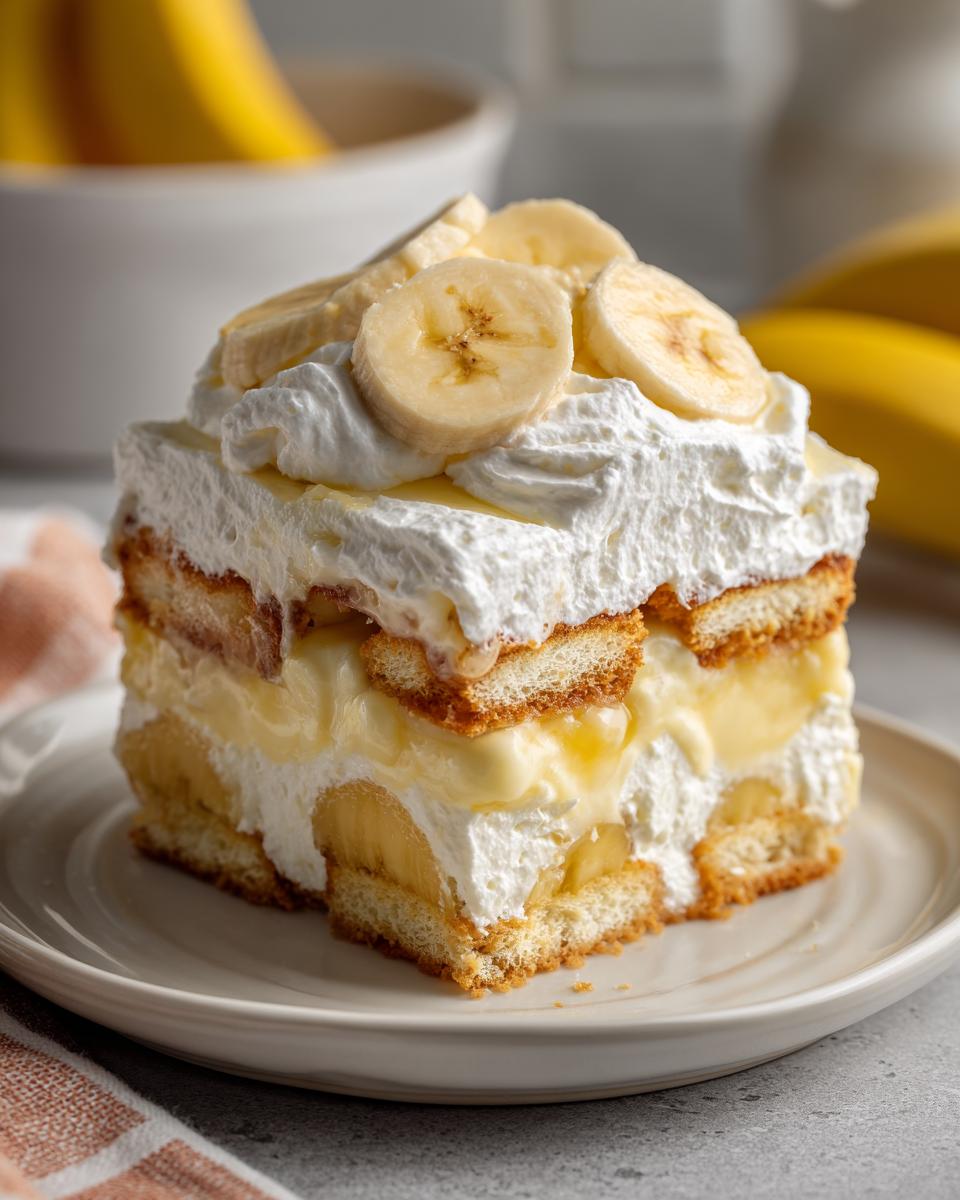
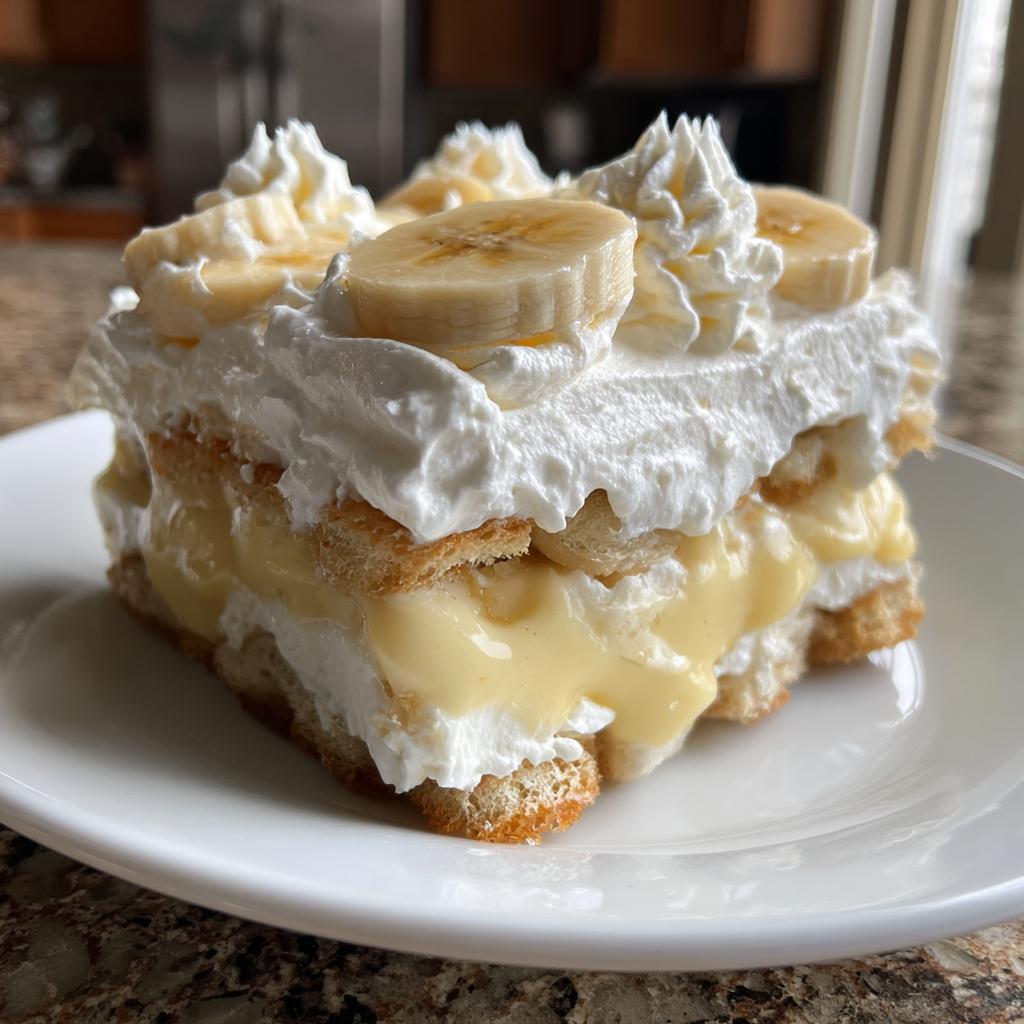
Oh, banana pudding! Just saying the name brings back a rush of cozy memories, doesn’t it? It’s one of those classic American desserts that just instantly feels like home. And let me tell you, this recipe for Classic Banana Pudding With Homemade Whipped Cream is something truly special. Forget the store-bought stuff; we’re talking about a rich, creamy custard layered with tender vanilla wafers and sweet, ripe bananas, all crowned with the most luscious, homemade whipped cream you’ve ever tasted. It’s the kind of dessert that makes everyone ask for seconds (and the recipe, of course!).
Why You’ll Love This Classic Banana Pudding With Homemade Whipped Cream
This is the ultimate dessert when you need a little taste of home. It’s nostalgic, familiar, and always hits the spot.
Our homemade custard is rich, smooth, and bursting with vanilla flavor – so much better than any boxed mix!
Forget that stuff from a can. This homemade whipped cream is light, fluffy, and melts in your mouth. It’s a game-changer!
The sweet bananas, creamy custard, and buttery wafers all come together in perfect harmony.
Don’t let “homemade” scare you! I’ll walk you through every step, and you’ll be amazed at how simple it is to create this showstopper.
Whether it’s a family dinner, potluck, or holiday gathering, this banana pudding is always a massive hit.
Ingredients for Classic Banana Pudding With Homemade Whipped Cream
Alright, let’s talk ingredients! This is where the magic really starts to happen. We’re keeping it classic and delicious, with a few key players that make all the difference. For the best results, especially with the custard, I always reach for whole milk. It just gives everything a richer, creamier texture that you can’t get with skim or even 2%.
For the Custard:
- 1/2 cup granulated sugar
- 1/4 cup cornstarch
- 1/4 tsp salt
- 3 cups whole milk (trust me on this one!)
- 4 egg yolks, lightly beaten
- 2 tbsp unsalted butter
- 1 tsp vanilla extract
For the Whipped Cream:
- 2 cups heavy cream, ice cold
- 1/4 cup powdered sugar
- 1 tsp vanilla extract
For Assembly:
- 1 package (about 36 cookies) vanilla wafers
- 3-4 ripe bananas, sliced
Got all that? Good! Having everything prepped and ready to go makes the whole process so much smoother, just like making our cottage cheese pancakes!
Essential Equipment for Your Dessert Recipes
To whip up this delightful banana pudding, you’ll want a few key players in your kitchen. A good medium saucepan is crucial for making that silky smooth custard. You’ll definitely need a whisk and some sturdy mixing bowls. An electric mixer will make your whipped cream dreams come true in no time, and of course, a nice serving dish to show off your masterpiece!
Step-by-Step Guide to Making Classic Banana Pudding
Alright, buckle up, buttercups! This is where we turn all those amazing ingredients into pure banana pudding bliss. Making this classic banana pudding with homemade whipped cream is like a little culinary adventure, and I promise, it’s totally doable and oh-so-worth-it. Follow along, and you’ll see how simple it really is to create something truly special. Think of it like making our easy homemade pancakes or our fluffy homemade pancakes – a few key steps, and bam! Deliciousness.
Prepare the Custard Base
First things first, let’s get that luscious custard going. Grab a medium saucepan – this is where the magic happens! Toss in your granulated sugar, cornstarch, and that pinch of salt. Give that a good whisk together; you want to make sure there are no sneaky lumps. Now, slowly, slowly, start whisking in the milk. Keep that whisk moving until it’s all smooth and lovely. Pop it over medium heat and stir, stir, STIR! You’ve got to keep it moving constantly so it doesn’t scorch on the bottom. We’re waiting for it to thicken up and just start to bubble. Once it boils, let it do its thing for one minute, still stirring like a pro. Take it off the heat. Now for the yolks – don’t just dump them in! Whisk a tiny bit of that hot milk mixture into your beaten egg yolks first. This is called tempering, and it stops the yolks from cooking into sad little scrambled eggs. Once they’re warmed up, whisk that whole yolk mixture back into the saucepan. Put it back on low heat for just another minute, stirring constantly. Remember, we don’t want it to boil again! Finally, stir in that butter and vanilla until it’s all melty and glossy. Perfection!
Chill the Custard Properly
This step is super important, so don’t skip it! Pour that beautiful, warm custard into a bowl. Now, grab some plastic wrap and gently press it *directly* onto the surface of the custard. This little trick stops that unwanted skin from forming. Pop that bowl into the fridge and let it chill for at least 2 hours. Honestly, longer is even better – we want it completely cold so it holds its shape when we assemble the pudding.
Whip Up the Homemade Whipped Cream
Okay, time for the crown jewel: the homemade whipped cream! Make sure your heavy cream is super cold – that’s key! Pour it into a large bowl and whip it up with your electric mixer on medium-high speed. You’re looking for soft peaks to form, which means when you lift the beaters, the cream forms little soft droops. Then, gradually add your powdered sugar and that teaspoon of vanilla. Keep whipping until stiff peaks form – that means the cream stands up straight when you lift the beaters. It’s like fluffy white clouds!
Assemble Your Classic Banana Pudding
Now for the fun part – putting it all together! Grab your prettiest serving dish. Spread a nice, even layer of vanilla wafers across the bottom. Next, arrange a layer of your sliced ripe bananas right on top of those wafers. Then, scoop a generous layer of that chilled, thick custard over the bananas. We’re going to repeat these layers: another layer of wafers, then bananas, then custard. Finish it all off with a nice top layer of wafers. And now, drape that glorious homemade whipped cream all over the top, spreading it out evenly so everyone gets some creamy goodness. Pop it back in the fridge for at least 30 minutes to let everything meld together. Trust me, the wait is worth it!
Tips for the Best Classic Banana Pudding
Okay, so you’ve made it this far, and you’re ready for some insider tips to make this classic banana pudding absolutely sing. It’s all about the little things, really! First off, for the bananas, you want them ripe, but not *too* ripe. A few little brown spots are perfect – that’s when they’re sweetest and have the best flavor. If they’re bright yellow with no spots, they might be a little too firm and not sweet enough.
Now, about those wafers getting soggy… it happens! To minimize it, I like to assemble the pudding fairly close to serving time, or at least make sure that custard is *really* chilled. If you’re making it way ahead, try to keep the top layer of wafers a little less soaked, or even add some of the whipped cream directly onto some of the wafers to create a bit of a barrier. And remember that custard consistency? If it seems a bit too thin after chilling, don’t panic! It will continue to thicken up. If it seems way too thick, just whisk in a tiny splash more milk or cream until it’s spreadable.
These little tricks make a world of difference, just like fussing over the perfect moist banana bread!
Variations on Classic Banana Pudding
While I’m a total purist when it comes to this classic banana pudding, I know sometimes you like to shake things up!
For a little tropical twist, try adding some shredded coconut on top or even a few small chunks of pineapple in between the layers. A pinch of nutmeg or cinnamon in the custard can add a lovely warmth, kind of like a spiced banana bread. And if you’re feeling adventurous, swap out some vanilla wafers for shortbread cookies or even graham crackers for a different crunch!
Frequently Asked Questions About Banana Pudding
Can I make this banana pudding ahead of time?
Yes, absolutely! In fact, it’s even better if you let it chill for a few hours before serving. This gives the wafers time to soften up just right and the flavors to really meld together beautifully. Just assemble it, cover it well with plastic wrap, and keep it in the fridge. I usually make mine the morning of or even the night before. Just make sure to add any extra garnishes right before serving!
How do I prevent the vanilla wafers from getting soggy?
That’s the age-old question, isn’t it? A little softening is part of the charm, but we don’t want a mush puddle! My best tip is to make sure your custard is super cold and thick before you layer it. Also, try to get at least two good layers of wafers in there, and don’t let it sit out at room temperature for too long before serving. Some folks even like to quickly dip the wafers in a little milk before layering, but I find the chill and the custard do the trick beautifully on their own!
What kind of bananas are best for banana pudding?
You want bananas that are ripe but still firm. Think bananas that have a few little brown speckles on them, but aren’t mushy or overly soft. These have the best sweetness and flavor, and they hold their shape better when sliced and layered. Totally green bananas won’t be sweet enough, and ones that are super soft and bruised can make your pudding watery and just… well, sad.
My custard seems too thin after chilling, what happened?
Don’t you worry if your custard seems a tad thin right out of the fridge! This can happen sometimes. The good news is that it will continue to thicken as it chills further, especially once it’s layered with the wafers and bananas. If it’s still *really* thin after a good couple of hours chilling and you’re nervous, you can always whisk in another tablespoon of cornstarch while you’re heating it up next time, or even pop it back on the stove briefly to thicken a bit more. Just be super careful not to scorch it!
Nutritional Information
Please keep in mind that these are just estimates, as the exact nutritional content can vary based on your specific ingredients and how you prepare everything. This recipe makes about 8 servings. A typical serving size contains roughly 450-550 calories, with about 25-35g of fat, 50-60g of carbohydrates, and 8-10g of protein. But honestly, who’s counting when it tastes this good?
Classic Banana Pudding With Homemade Whipped Cream
Ingredients
Equipment
Method
- Make the custard: In a medium saucepan, whisk together the sugar, cornstarch, and salt.
- Gradually whisk in the milk until smooth.
- Cook over medium heat, stirring constantly, until the mixture thickens and comes to a boil. Boil for 1 minute, stirring constantly.
- Remove from heat. Whisk a small amount of the hot milk mixture into the beaten egg yolks, then whisk the yolk mixture back into the saucepan.
- Return to low heat and cook, stirring constantly, for 1 minute more. Do not boil.
- Remove from heat and stir in the butter and vanilla extract until the butter is melted and the custard is smooth.
- Pour the custard into a bowl. Press plastic wrap directly onto the surface of the custard to prevent a skin from forming. Chill for at least 2 hours, or until completely cold.
- Make the whipped cream: In a large bowl, beat the cold heavy cream with an electric mixer on medium-high speed until soft peaks form.
- Gradually add the powdered sugar and vanilla extract, and continue beating until stiff peaks form.
- Assemble the pudding: Spread a layer of vanilla wafers in the bottom of your serving dish.
- Top with a layer of sliced bananas.
- Spread a layer of the chilled custard over the bananas.
- Repeat the layers: wafers, bananas, custard. Finish with a layer of wafers.
- Spread the homemade whipped cream evenly over the top layer of wafers.
- Chill for at least 30 minutes before serving to allow the flavors to meld.