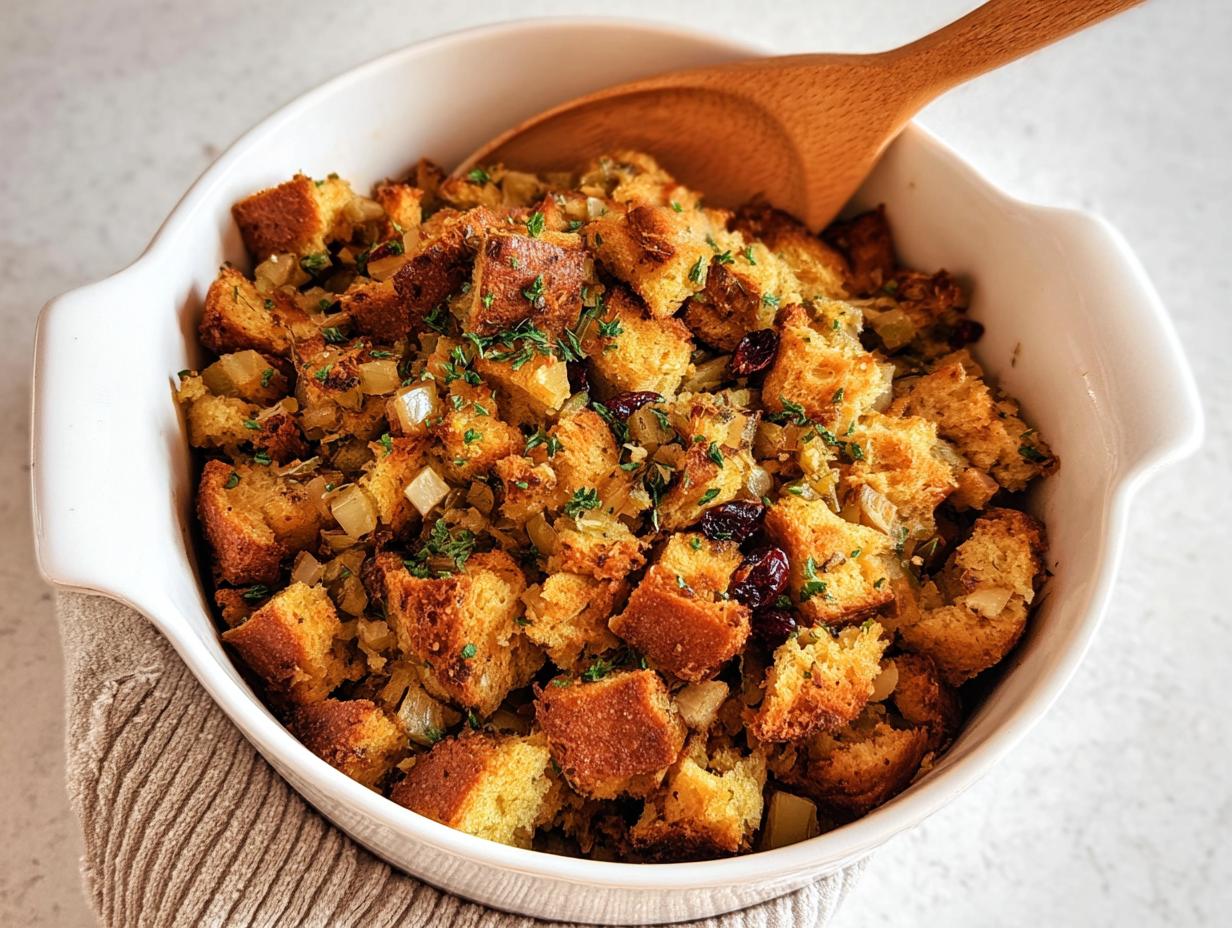
Oh, the holidays! There’s nothing that makes me feel instantly warm and cozy like the smell of stuffing baking in the oven. It just teleports me right back to family kitchens, you know? For me, the perfect side dish has to hit that nostalgic sweet spot. That’s exactly what this stuffing achieves—it’s comforting, loaded with incredible fresh herbs and hints of sweet apple, and it’s a lifesaver because it lets you make it ahead of time.
I remember the first big Thanksgiving after my youngest son needed to go completely gluten-free. I worried he wouldn’t feel included in the traditional feast, but I was determined to make something special for him. After a few tries, I landed on this version, using the flavors I remembered from my avó’s cooking, but tailored just right. Seeing his face light up when he tasted that first bite of *Why Everyone Loves This Stuffing Recipes (+ Make-Ahead Tips)*? That moment told me everything. Food is community, and everyone deserves a place at the table.
Why Everyone Loves This Stuffing Recipes (+ Make-Ahead Tips): The Flavor Foundation
This stuffing just hits different, doesn’t it? It’s not those dry, crumbly things you sometimes get stuck with. The real secret sauce here is the commitment to moisture and deep flavor, which comes right from using fresh ingredients. We rely heavily on the fresh rosemary and thyme; the smell alone when they hit hot butter is incredible.
And seriously, don’t skip the apple! I use a Honeycrisp because it holds its shape while baking. That little bit of tart sweetness balances the savoriness from the herbs and broth perfectly. It’s why Why Everyone Loves This Stuffing Recipes (+ Make-Ahead Tips) remains my go-to for Thanksgiving or any big meal where comfort is key.
Expert Tips for Perfect Bread Cubes
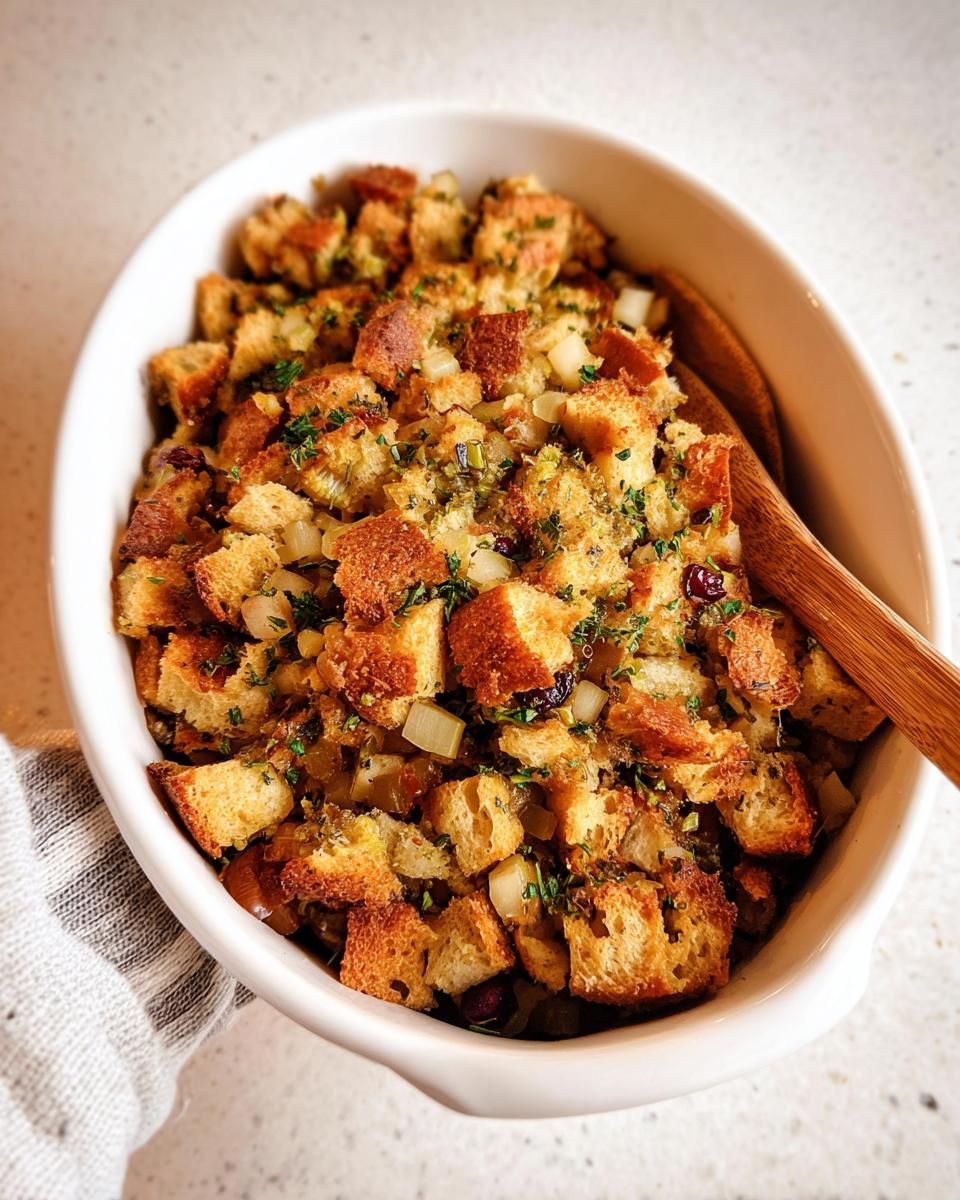
The bread is the backbone, so treat it right! We need those cubes to be mostly dry so they can suck up all that amazing seasoned butter later without turning to mush. My trick is to cut the bread a day ahead of time, just toss the cubes onto a sheet pan, and leave them out on the counter—no need to turn on the oven yet! This air-drying process locks in structure. When you do toast them, go low and slow, just until they feel light and crispy, not rock hard.
Essential Ingredients for Why Everyone Loves This Stuffing Recipes (+ Make-Ahead Tips)
You know I’m a firm believer that quality ingredients make all the difference, especially when you’re cooking for people you love on a big day like Thanksgiving. When developing this stuffing, I kept my avó’s pantry in mind—simple things, prepared well. I laid everything out before starting because mixing up the herbs and seasonings is where the magic really happens. Trust me on this layout; it keeps you organized!
For the Bread and Flavor Base Ingredients
- 16 slices whole wheat bread, cut into 1 inch cubes
- 0.75 cup unsalted butter
- 1 tbsp fresh rosemary, chopped
- 1 tbsp fresh thyme leaves
- 1.5 tsp salt
- 1.5 tsp salt-free chicken seasoning
- 1 tsp dried parsley
- 0.5 tsp black pepper
- 0.5 tsp garlic powder
- 1 medium Honeycrisp apple, cored and diced
- 3 stalks celery, diced
- 0.5 medium sweet onion, diced
- 0.25 cup dried cranberries
For Baking Ingredients
- 2 cups chicken broth
Step-by-Step Guide: Making Why Everyone Loves This Stuffing Recipes (+ Make-Ahead Tips)
Okay, now for the fun part—putting this delicious creation together! It’s a multi-step process, but honestly, each segment is simple, and the payoff is huge. Remember, organization is the key to serving up the best holiday side dishes, so check out my other great side dish recipes if you need more ideas for your menu!
Preparing and Toasting the Bread
First things first, we gotta get that oven humming. Preheat it to 325°F and make sure you’ve got parchment paper lining a nice big baking sheet. Take your 1-inch bread cubes and spread them out evenly. They need about 30 minutes in the oven to get that perfect foundation. We’re looking for dry and slightly golden, not scorched!
Creating the Herb Butter Mixture
While that bread is gently toasting, grab a medium saucepan and melt your butter down over low heat—don’t rush this butter! Whisk in all those amazing seasonings: rosemary, thyme, salt, pepper, all of it. Once that smells incredible, toss in your diced apple, celery, and sweet onion, plus those cranberries. You want this whole vegetable mix to simmer gently for exactly 10 minutes. This softens them slightly and lets the herbs really infuse the butter.
Combining and Final Bake
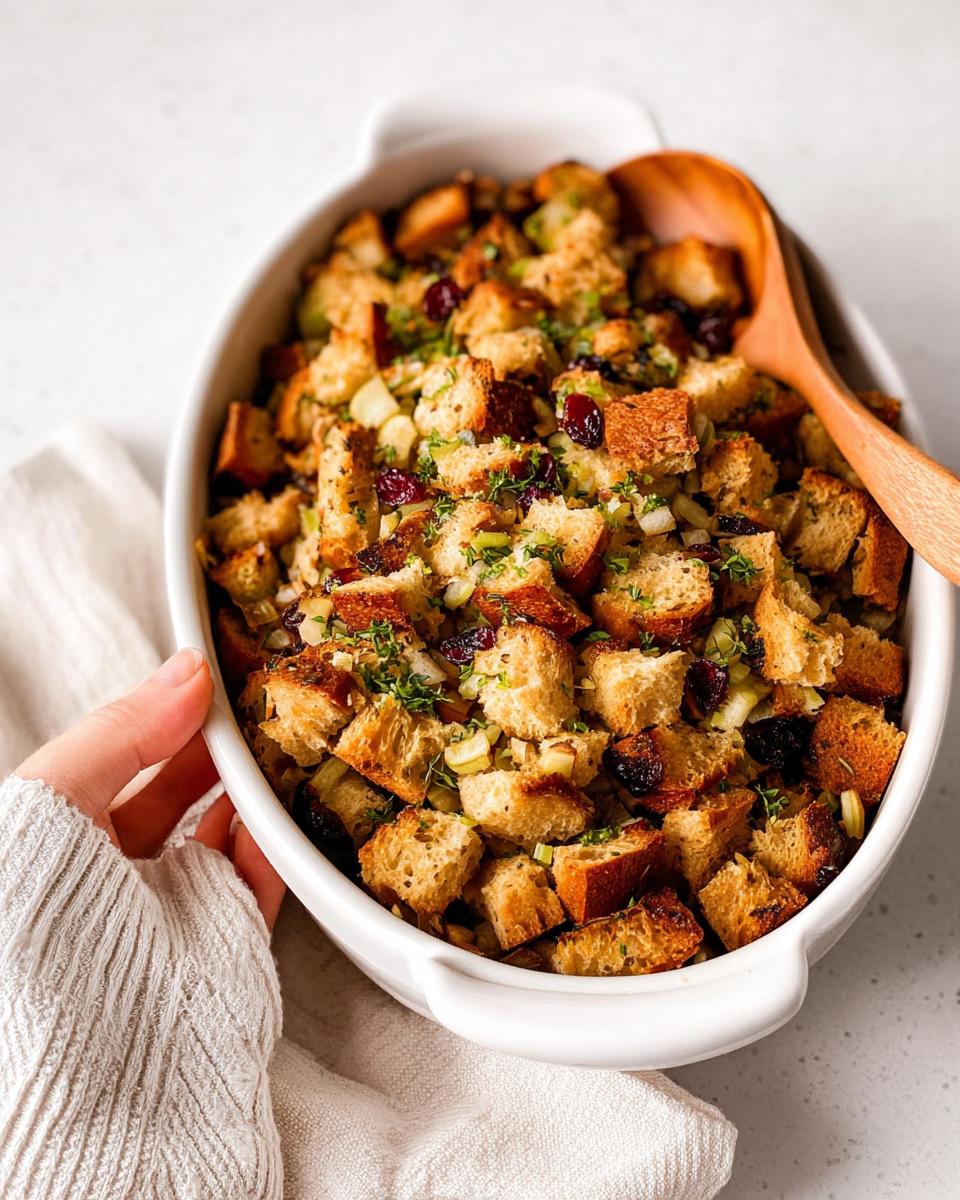
When the bread is ready, gently transfer those toasted cubes into your 9×13 baking dish. Pour that heady butter mixture right over the top and toss everything gently to coat. Now, here comes the crucial broth step! Stir in your chicken broth. At this point, the recipe says you can chill it, but if you’re baking it now, cover it tightly with foil and bake it at 425°F for 20 minutes. After that, pull that foil off! Let it bake uncovered for 15 more minutes. That uncovered time is what gives you those coveted crispy edges on Why Everyone Loves This Stuffing Recipes (+ Make-Ahead Tips).
Make-Ahead Mastery: Planning Why Everyone Loves This Stuffing Recipes (+ Make-Ahead Tips)
If you’re hosting a big holiday bash, you know that juggling everything coming out of the oven is pure chaos! That’s why mastering the make-ahead strategy is my favorite trick, and this recipe is built for it. The instructions clearly tell you where to stop: right after you toss the bread cubes with the amazing herb butter mixture and before you add the broth.
You can mix everything up to that point—the toasted bread, the savory butter, the veggies—and pop the whole thing, covered, into the fridge for up to 24 hours. Seriously, it’s a game-changer for your Thanksgiving workflow. When you’re finally ready to bake, you just pull it out cold, stir in the chicken broth, and bake it as directed. You might need an extra 5 or 10 minutes at the beginning when reheating from cold, but that 425°F blast gets it cozy and ready in no time. If you want some more brilliant ideas on prepping holiday items early, check out this great article on make-ahead stuffing strategies!
Having the base prepared means that when it’s crunch time, all you have to do is add liquid and turn on the heat. It makes enjoying the day so much sweeter, and nobody needs that last-minute stress when you’re trying to perfect Why Everyone Loves This Stuffing Recipes (+ Make-Ahead Tips).
Ingredient Notes and Substitutions for This Stuffing
I know we all have different needs at the table now, which is why I always try to include notes on versatility. Remember how I mentioned needing to adapt this for my son? That was the genesis for putting the gluten-free note right into the recipe card. If you need to swap out the whole wheat bread for a gluten-free version, you absolutely can! Just grab your favorite GF loaf, cube it, and toast it thoroughly—you need that structure to hold up to the butter bath.
The key thing when substituting bread, in general, is texture, not just ingredients. If you use something too soft, your stuffing will collapse into a savory puddle. You really want a sturdy bread so it can absorb the savory liquid without disintegrating.
What if you’re out of Honeycrisp apples? Don’t panic! Granny Smith works great too; it’s tart, which keeps that beautiful balance. If you don’t have those vibrant fresh herbs on hand, you can definitely use dried ones, but you must adjust the amount. Dried herbs are much more potent, so use about a third of what the recipe calls for in fresh herbs.
For the herbs specifically, if you’re missing fresh rosemary, you can use less dried rosemary, or sometimes I even throw in a tiny pinch of sage, which is classic Thanksgiving flavor, even though it isn’t in the main list. It just adds another layer. If you’re looking to bake your own base for this from scratch, I have a great guide for making gluten-free bread!
The broth is another spot you can customize. If you don’t have chicken broth, veggie broth is a perfect swap, especially if you’re cooking for vegetarians, but make sure your veggie broth is flavorful! A weak broth means a weak stuffing flavor, and we don’t want that!
Tips for Success When Making This Stuffing
I’ve made this stuffing hundreds of times, especially when testing versions for my gluten-free friends, and I’ve picked up a few little secrets along the way that take it from good to absolute holiday winner. These aren’t in the main instructions, but they really help ensure your stuffing comes out exactly the way you dream about!
First up: Broth Temperature Matters! Never, ever pour cold broth over your bread mixture. If it’s ice cold, it shocks the toasted bread and slows down that absorption process, which can lead to uneven moisture distribution. Warm up your chicken broth slightly—not hot, just warm to the touch. It integrates so much better and begins flavoring the bread instantly.
Second, let’s talk about that incredible crispy top. When you uncover the stuffing for the final 15 minutes of baking, give the very top surface a quick, light drizzle of melted butter—just maybe a tablespoon or two. This fat helps the top layer brown beautifully and gives you those irresistible crunchy patches that everyone fights over. We love a crisp top here!
My third tip is about resting time. Once it’s out of the oven, covered in foil again, let your stuffing rest on the counter for at least 10 minutes before you even think about serving it. It lets the internal steam redistribute, making the whole dish even more tender. Think of it like resting a roast—it holds everything together! If you ever wonder how I get my crispy potatoes so perfect, it honestly comes down to this kind of patience. You can read more about my philosophy on textures and cooking techniques here: crispy roasted potatoes perfect every time.

Follow those small tweaks, and I promise your stuffing will be the star of the show this year!
Serving Suggestions for Your Perfect Stuffing
You’ve made the star side dish—now we need to pair it up! This stuffing is so savory and comforting; it works beautifully right alongside the classics everyone expects at Thanksgiving. You absolutely can’t go wrong with a perfectly roasted turkey, of course, and maybe some simple green beans.
But since I bring a little bit of my background into everything I cook, I always try to offer something that bridges that comforting American food with that bold Latin flavor. Have you ever tried serving this stuffing next to slow-cooked carnitas? The way the herbs and slightly sweet apple complement the richness of the pork is just stunning. It’s unexpected, but everyone asks for it the next year!
If you really want to make the starches shine on your table, you need a great creamy side dish next to it so you can get a little bit of everything in one spoonful. I adore making my creamy potato and leek gratin when I serve this stuffing. The silky texture of the gratin contrasts so well with the slightly crisp edges of the stuffing. It’s basically a holiday hug on a plate!
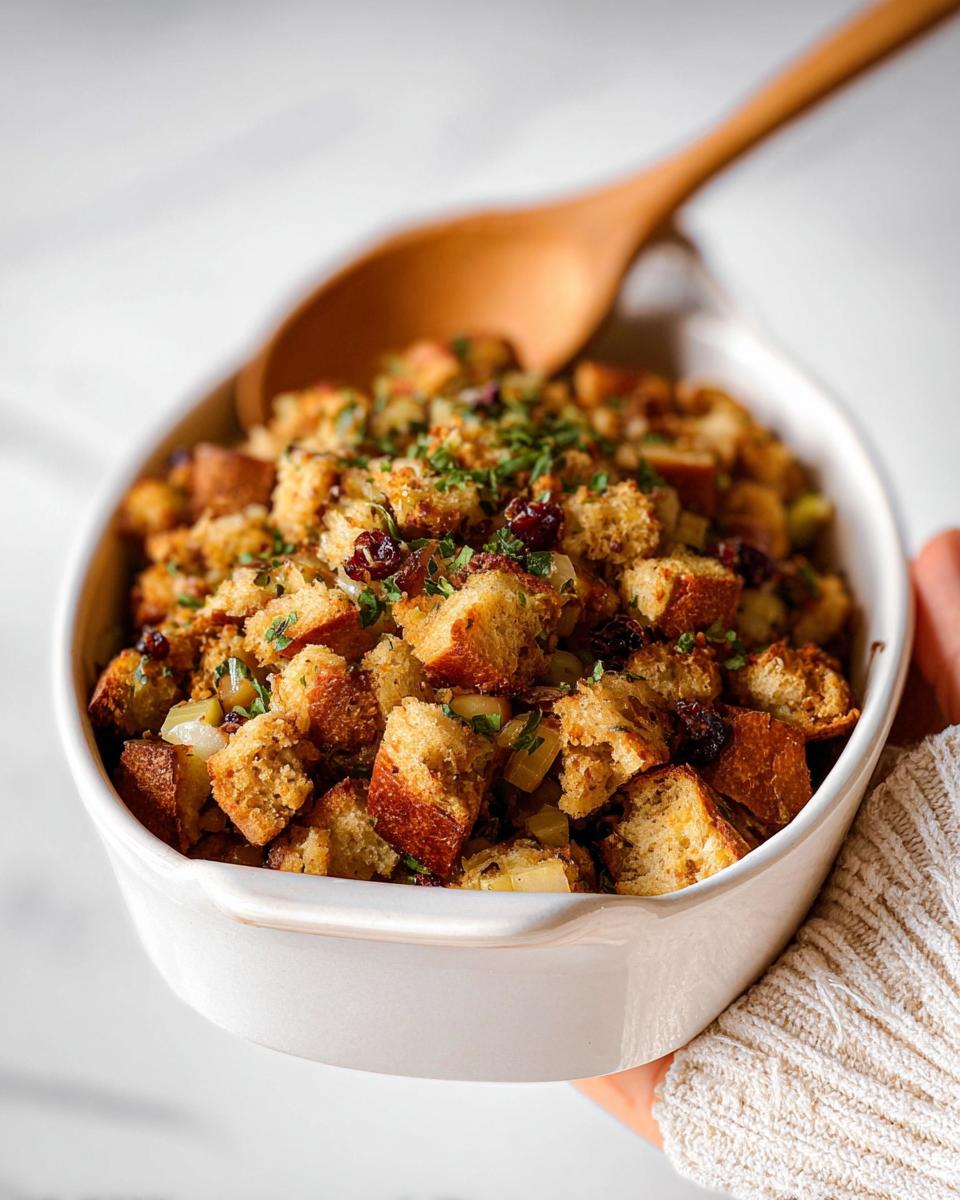
Honestly, the best suggestion is whatever makes your family happy. But if you want a dish that tastes like home but feels a little special, lean into those rich textures. You’ve earned this amazing stuffing; make sure the plates around it are just as fantastic!
Storage and Reheating Instructions for Leftover Stuffing
My family *never* manages to finish a batch of this stuffing, which is a blessing because leftovers are almost as good as the first batch—if you reheat them right, that is! The biggest challenge with stuffing is keeping that lovely texture we worked so hard for; nobody wants a soggy bowl of savory mush the next day.
If you have any good stuffing left over, wrap it up tightly! You need to get it into the refrigerator within two hours of it coming out of the oven. I always use an airtight container or wrap the baking dish very securely with heavy-duty foil. This hearty stuffing should keep perfectly well in the fridge for up to three or four days. Any longer than that, and you risk losing that fresh herb punch.
The Best Way to Reheat Stuffing in the Oven
The oven is always my top recommendation for reheating, especially if you loved the crispy bits! Transfer your leftovers into a clean baking dish—it doesn’t have to be the original one. Add a splash of extra broth or even just a tablespoon of water around the bottom of the dish. This steam is essential to re-moisturize the inside without making the whole thing heavy.
Cover that dish tightly with foil and heat it in a moderate oven, say 350°F, for about 20 minutes. Then, this is key: pull the foil off for the last 5 to 7 minutes. This final blast of dry heat brings back some of that fantastic texture on the top layer. It really mimics that fresh-baked quality we want on Thanksgiving!
Quick Reheating Using the Microwave
Okay, let’s be real, sometimes you just need stuffing *now*, and that means the microwave comes into play. I won’t tell anyone! The microwave is fast, but it tends to steam the stuffing, making it softer faster. If you use this method, put your portion into a microwave-safe bowl.
Place a damp paper towel right over the top of the stuffing before you cover it with a microwave lid or another plate. That steam barrier helps keep the moisture even. Heat it in short 60-second bursts, stirring in between, until it’s heated completely through. It won’t get crispy, but it will be warm, moist, and so comforting!
Frequently Asked Questions About Why Everyone Loves This Stuffing Recipes (+ Make-Ahead Tips)
I always get emails, especially around the holidays, with questions about perfecting this stuffing. It’s the centerpiece of so many family traditions, and I want yours to be perfect! Here are some of the most common things folks ask me when they’re planning their perfect thanksgiving meal.
Can I use dried bread instead of fresh bread cubes for this stuffing?
That’s a great question about the base of the stuffing! The recipe calls for toasting fresh bread because it gives you control over the final dryness. When you start with fresh bread, you toast it just enough to create internal pockets that are ready to absorb liquid without getting mushy. If you use bread that’s already stale or dried out, it often absorbs the seasoned butter too quickly and turns crumbly instead of tender. If you *must* use pre-dried bread, try soaking those cubes in a little water mixed with some extra butter for about 15 minutes before you start the toasting process. That helps them hold up better!
What is the best broth substitute if I need a vegetarian thanksgiving stuffing?
Oh, absolutely! We make dietary tweaks all the time, and it never means sacrificing flavor. If you need a vegetarian option for your thanksgiving table, skip the chicken broth and go straight for a high-quality vegetable broth. My biggest tip here is to make sure that veggie broth is super savory and flavorful. If you find basic veggie broths are a bit weak, try simmering your vegetable broth with a dried mushroom or a bay leaf while you are sweating the onions and celery. It adds that rich, deep umami note that chicken broth usually provides, keeping your final stuffing tasting gourmet!
How can I boost the fresh herbs flavor in this stuffing recipe?
This is one of my favorite ways to dial up the comfort factor! If you want those fresh herbs to really sing, don’t stop at just stirring them into the melted butter. You want to “bloom” them. When you melt the butter in the saucepan, add the chopped rosemary and thyme in right away, before you add the apple and onion. Let them sizzle gently in the fat for just a minute or two over very low heat. The warm fat unlocks so many more aromatic compounds from the herbs. You’ll notice the difference immediately—the scent will be way stronger, and that flavor infuses every piece of bread perfectly. You can find even more ideas for holiday cooking and customizing recipes in my general holiday section here: holiday cooking and customizing recipes.

Why Everyone Loves This Stuffing Recipes (+ Make-Ahead Tips)
Ingredients
Equipment
Method
- Preheat your oven to 325°F and line a large baking sheet with parchment paper.
- Cube the bread slices, then place them on the prepared baking sheet in an even layer. Bake in the preheated oven for 30 minutes.
- While the bread toasts, melt the butter over low heat in a medium saucepan. Stir in the rosemary, thyme, salt, chicken seasoning, parsley, pepper, and garlic powder until everything is well combined.
- Add the apple, celery, onion, and dried cranberries to the butter mixture and stir to combine. Bring the butter mixture to a simmer, and simmer for 10 minutes.
- Once the bread cubes finish toasting, transfer them to a 9×13 baking pan. Pour in the butter mixture and toss to combine. Cover with aluminum foil. You can either proceed to step 6 now, or store it in the fridge for up to 24 hours to make ahead. When ready to bake, move to step 6.
- Preheat the oven to 425°F. Stir the chicken broth in with the stuffing, tossing to combine. Cover and bake in the preheated oven for 20 minutes. After 20 minutes, uncover and continue to bake for another 15 minutes. Serve the stuffing.
Nutrition
Notes
Tried this recipe?
Let us know how it was!
Gluten-Free Chef & Latin Cuisine Innovation Specialist
My youngest son’s celiac diagnosis at four changed everything. Suddenly, all those traditional Brazilian and Portuguese recipes from my avó needed to be completely reimagined without losing their soul.
After graduating from Johnson & Wales and working Miami’s Latin fusion scene, my son’s diagnosis became my calling. How do you make gluten-free empanadas that taste like childhood? Over eight years, I’ve developed 320+ gluten-free recipes celebrating authentic Latin flavors using cassava flour and plantain alternatives.
My gluten-free empanada recipe won “Best Appetizer” at the 2023 Miami Gluten-Free Food Festival. I ran “Sabores Sin Gluten,” a catering business serving Miami’s Latino community—quinceañeras, family gatherings, all the celebrations that matter.
Food is culture, and everyone deserves to experience the joy of sharing traditional family meals, regardless of dietary restrictions.