Oh, if I had a dollar for every time I stared into the pantry at 5:30 PM, wondering how to make something delicious before everyone melted down from hunger! We all know that panicked feeling when you need a real dinner on the table fast, but you don’t want to pull out a complicated recipe. That’s why I guard this recipe like gold. It uses those super-thin breakfast pork chops that cook in mere minutes and still manage to be incredibly flavorful. Seriously, these are my secret weapon. This is **Why Everyone Loves This Pork Chops Recipes (+ Make-Ahead Tips)**, and trust me, you need it.
I remember the first time I made pork chops for my family after we transitioned to a gluten-free lifestyle. It was a hectic weeknight, and I needed something comforting yet quick to prepare. As the chops sizzled in the pan, the aroma took me back to my childhood, where family dinners were filled with laughter and good food. I paired them with a homemade gluten-free marinade, and to my delight, my kids devoured them! That moment solidified my belief that wholesome meals could still bring joy and connection to our family, no matter our dietary needs. By Sophie Williams Gluten-Free Nutritionist & Family Meal Planning Expert
Why You Will Love This Pork Chops Recipes (+ Make-Ahead Tips)
Honestly, this recipe is my go-to when I feel like I have exactly zero energy left at the end of the day. It’s not fancy, but it’s deeply satisfying. If you’re looking for simplicity without sacrificing that comforting, home-cooked flavor, you are in the right spot. You can find more quick meals like this one right here on my blog.
- It’s done in about 20 minutes total—that’s barely enough time to set the table!
- The breading is so simple, even if you rarely cook.
- We get maximum flavor payoff for almost no effort.
Speed and Simplicity for Busy Weeknights
Seriously, 20 minutes from the fridge to the plate. That’s the magic number we are working with here. Because we use those thin breakfast chops, there’s no pounding required, and there’s no fussing with internal temperatures for an hour. Throw them in a hot skillet, and you are practically done.
Achieving Juicy Pork Chops Every Time
The trick is in two things: the cut and the heat. Since these pork chops are so thin, they cook fast. That quick sear in the hot oil and butter locks all the flavor right inside. It keeps the meat tender and ensures you get wonderfully juicy pork chops, not those hockey pucks people sometimes dread.
Essential Equipment for Juicy Pork Chops
You don’t need a million gadgets for this recipe—that’s another reason it’s such a winner for weeknights! We are keeping things super simple here. You’ll rely heavily on your trusty skillet, which is where all the crispy, juicy magic happens. If you love skillet meals, you have to check out my recipe for garlic herb skillet potatoes, too!
Here is what you absolutely must have handy:
- A sturdy, heavy-bottomed skillet—this helps keep that heat even.
- A shallow plate or dish for dredging the pork chops in the flour mix.
- Tongs for flipping everything safely!
Ingredients for Why Everyone Loves This Pork Chops Recipes
You won’t believe how little you need for such a big flavor payoff! Everything here is designed to keep things fast and simple. I always pull these ingredients out while the skillet is heating up, since there is almost zero prep work involved. Remember, using those thin cuts makes all the difference in how these pork chops turn out so tender.
For the Simple Breading Mixture
This coating is what gets us a beautiful, crisp exterior on the outside of the meat. You’ll mix this all together in one shallow dish before you start seasoning. Trust me, this slight dusting is what keeps the crust nice and thin—no sloppy breading here!
- 1 cup all-purpose flour
- 1 tsp. seasoned salt
- 1 tsp. black pepper
- to taste Cayenne pepper (just a pinch for warmth!)
For Cooking the Pork Chops
This duo of fats is key to getting high heat fast without burning everything immediately. The oil gives us the high smoke point we need, and that tablespoon of butter? That’s purely for that deep, nutty flavor that makes everything taste better when it comes out of the skillet.
- 1/2 cup canola oil
- 1 Tbsp. butter
- Extra salt and pepper for finishing seasoning once cooked
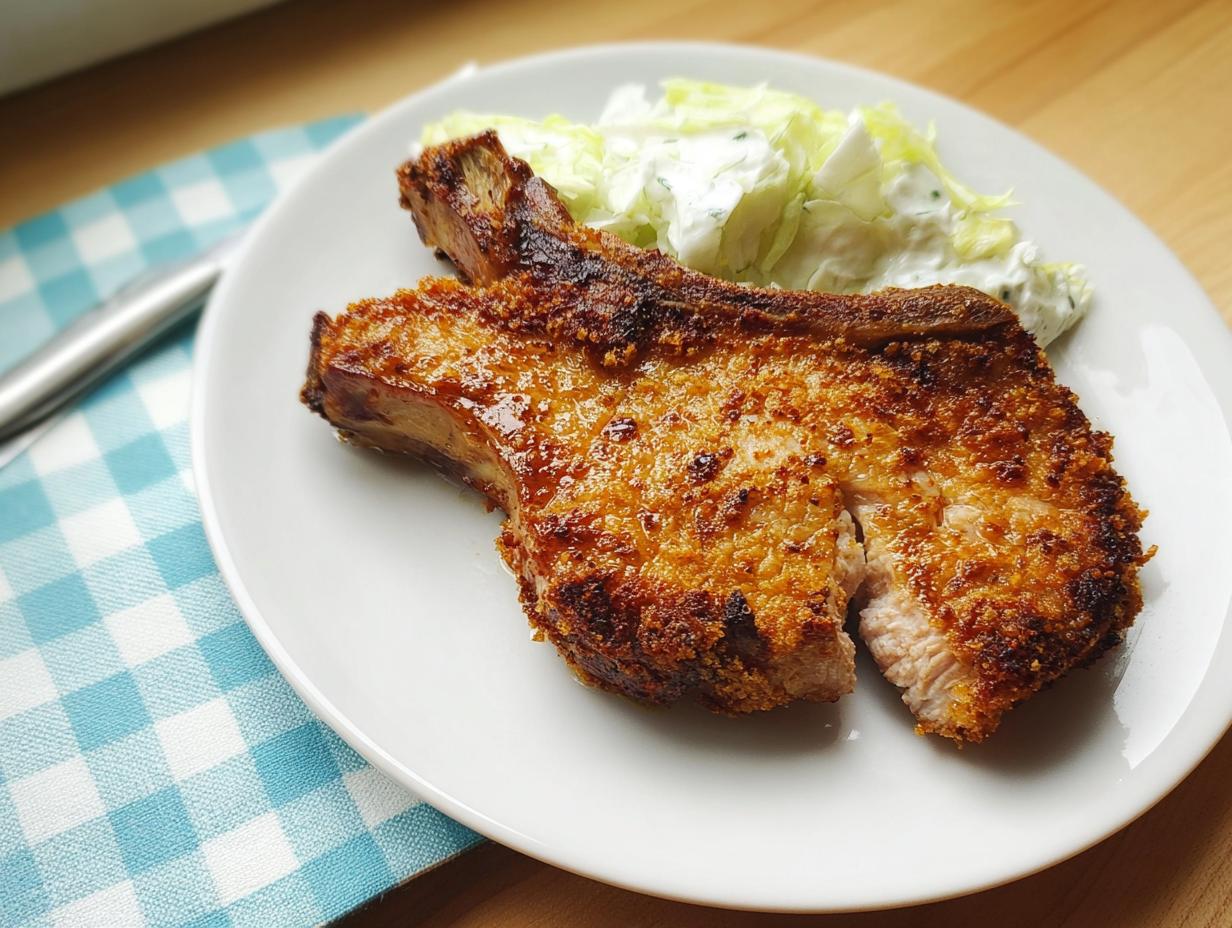
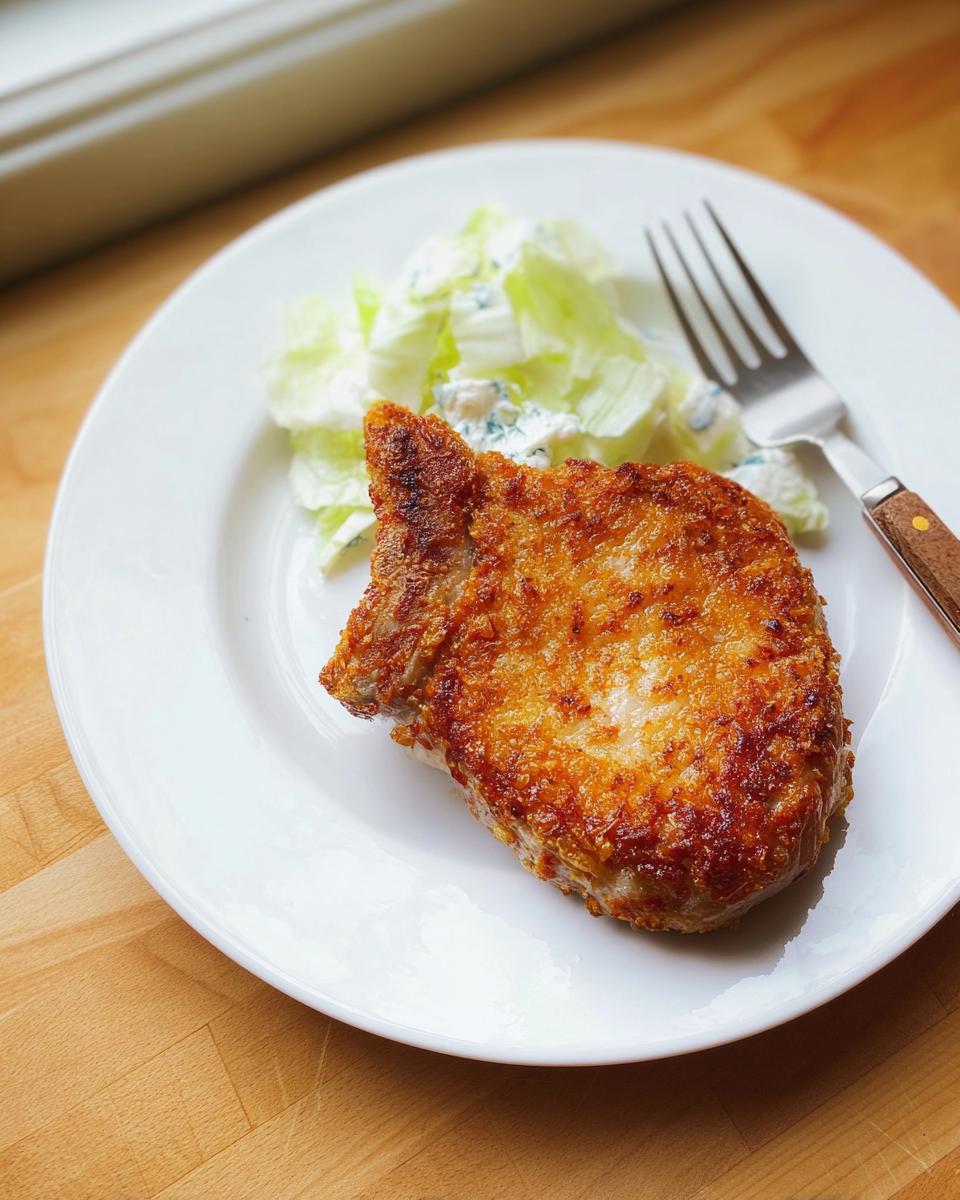
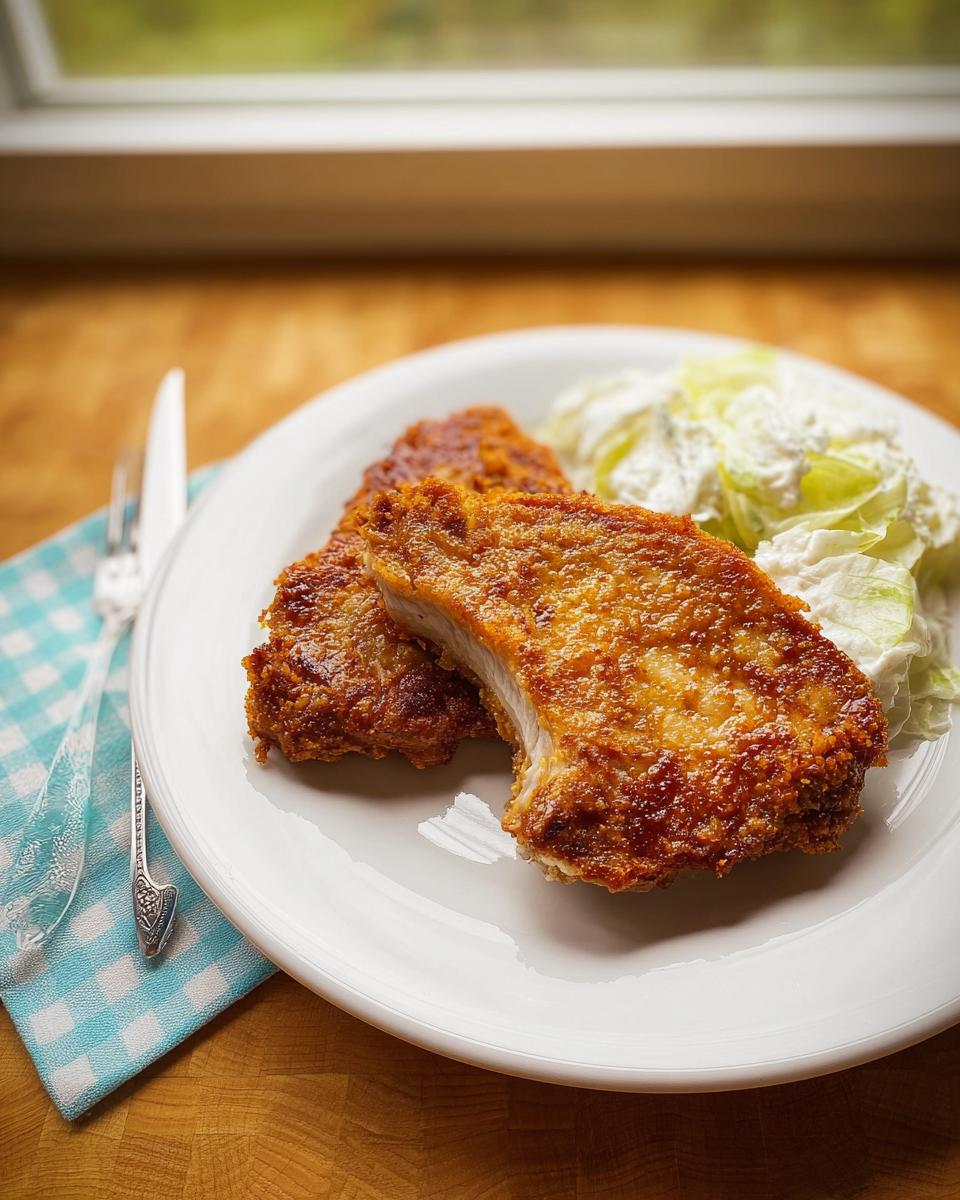
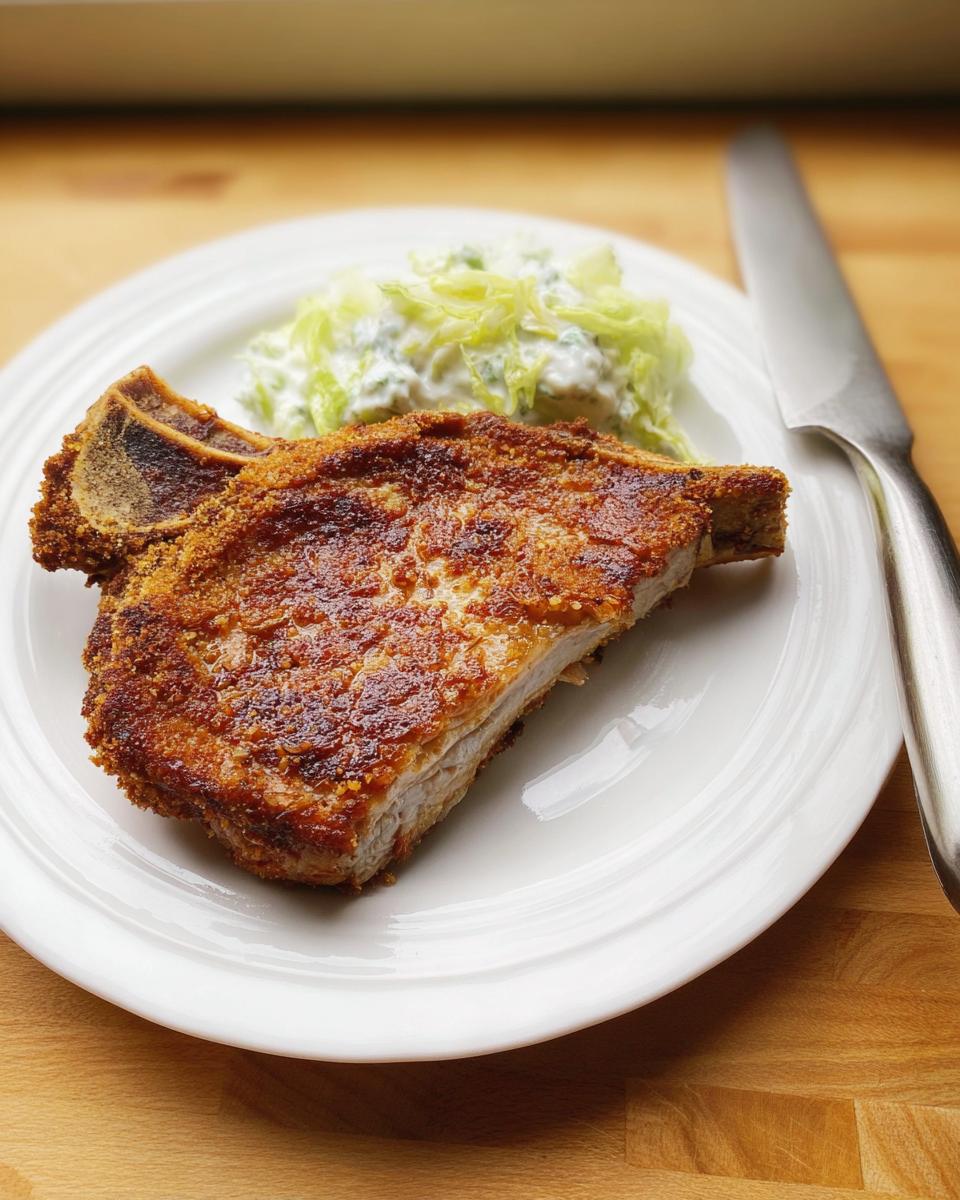
Oh, and don’t forget the main event: 7 to 8 breakfast chops. These are the very thin bone-in ones we talked about—they really are the core of why this meal is so quick!
How to Prepare Why Everyone Loves This Pork Chops Recipes (+ Make-Ahead Tips)
Alright, let’s get these chops ready! This is where the speed comes in, but you still need a little bit of focus to make sure they come out golden brown and never dry. If you’re really rushing on a Tuesday night, remember my little trick: you can totally mix up that dry dredging mixture ahead of time and keep it in a sealed container on the counter. That saves you those critical first two minutes when everyone is sniffing the air and asking if dinner is ready yet!
First things first, you need to treat those pork chops right. Take your 7 or 8 thin breakfast chops and give both sides a good sprinkling of salt and pepper. Don’t be shy, as this is your primary layer of flavor before the crust goes on. You can even check out some of my other dry rub ideas if you want to mix things up completely!
Seasoning and Dredging the Pork Chops
Next, take your flour mixture—that combo of flour, seasoned salt, pepper, and cayenne—and stir it all together well. Now, we dredge! Take each seasoned pork chop and press it into that flour mix until both sides are fully coated. Shake off the excess so you don’t end up with thick, pasty breading. Just a good, light coat is what we are aiming for. Once they are dredged, set them aside on that clean plate waiting for the pan to heat up.
Skillet Cooking for Perfect Texture
This part requires you to pay attention! Get that canola oil—half a cup—into your skillet over medium to medium-high heat. Crucially, add that tablespoon of butter right when the oil starts shimmering. We want that fat hot! When the butter melts and foams a bit, carefully lay in about three chops at a time. We can’t crowd the pan, or they’ll steam instead of crisping up!
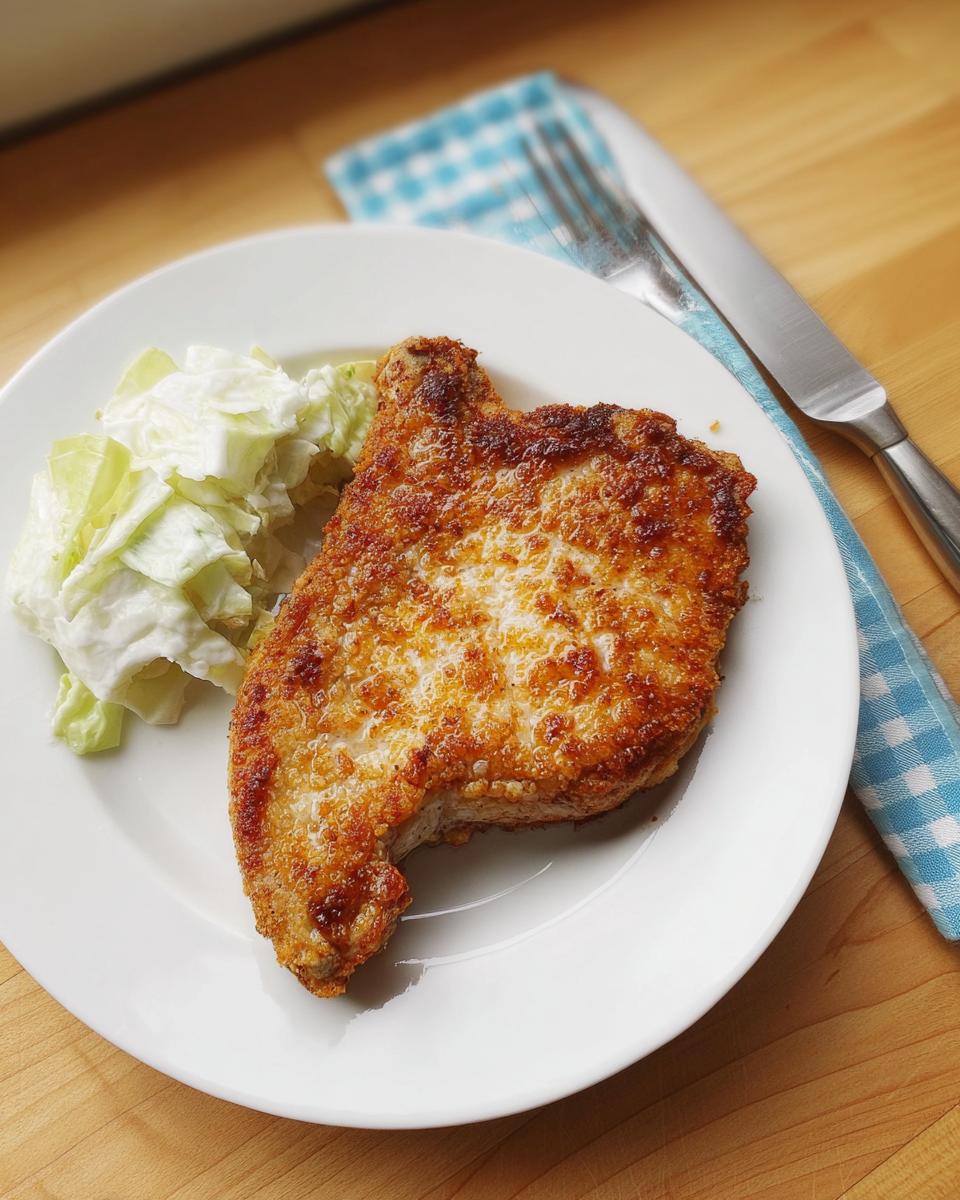
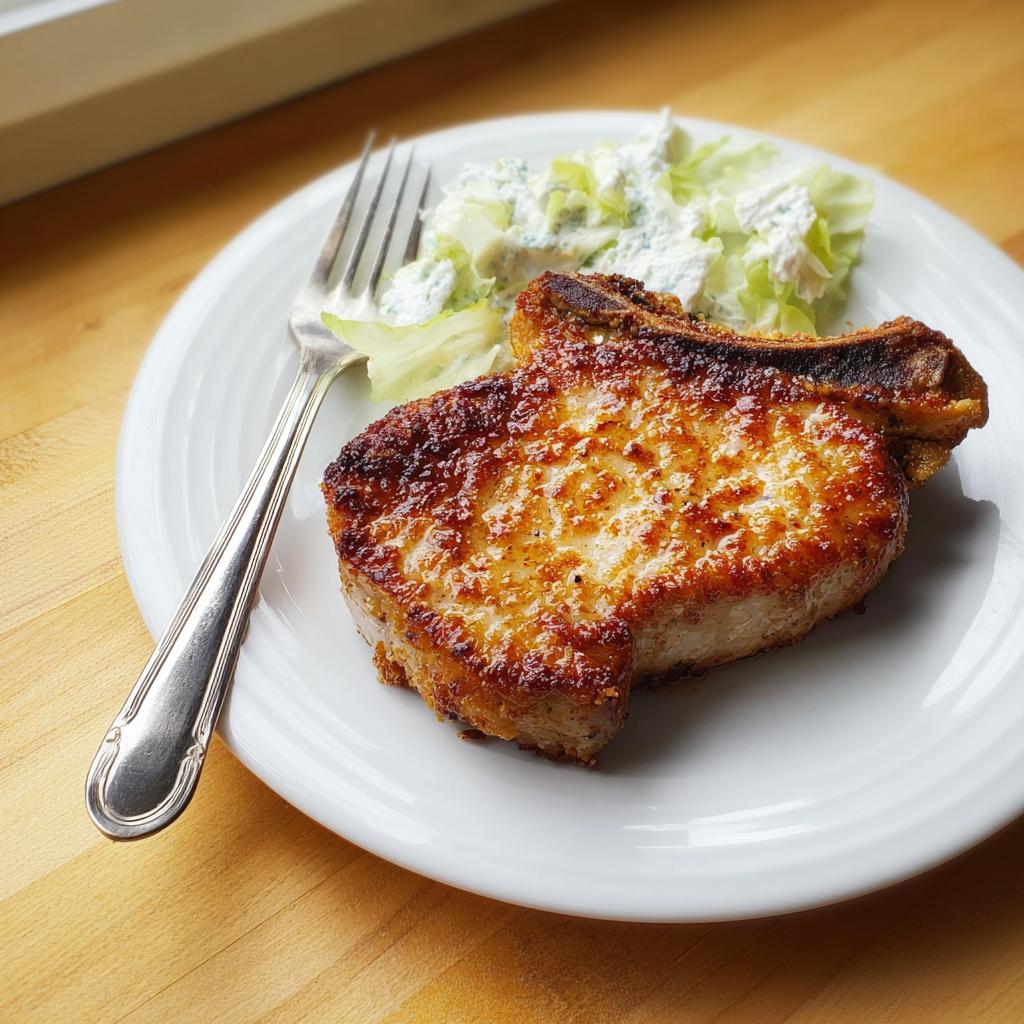
Cook the first side for 2 to 3 minutes until it’s beautifully golden. Then, flip them over and cook the second side for just 1 to 2 short minutes. Seriously, watch them closely! You must make sure no pink juices remain. Quickly remove them to a clean plate. If you want to see how others handle quick searing, The Pioneer Woman has a great technique that mirrors this fast approach. Repeat with the rest of the chops, maybe adding a tiny bit more oil if the pan looks dry.
Expert Tips for Perfectly Juicy Pork Chops
Look, thin pork chops are fantastic because they are fast, but fast means you have a tiny window before they go from perfectly cooked to, well, tasting like shoe leather. Because we are looking for those wonderfully juicy pork chops every single time, we need to focus on searing them quickly. My methods here are all about getting that fast, beautiful crust while keeping the inside tender. If you want to see how I aim for supreme tenderness in other meats, check out how I make my melt-in-your-mouth chicken—it uses similar heat principles!
The Importance of Hot Fat for Searing
This is non-negotiable, friends. You *must* wait until that canola oil is shimmering and that little bit of butter is melted and frothing before the chops even think about hitting the pan. If the fat isn’t hot enough, the crispy, seasoned coating just soaks it up like a sponge, and you end up with soggy, greasy pork chops that stick. The moment they hit the heat, you want to hear that satisfying sizzle. That sound means you are sealing in all those delicious juices!
Resting Time for Tender Pork Chops
I know, I know, the recipe says pull them out and serve them with potatoes, and you absolutely can. But if you have an extra three minutes—and I mean *just* three minutes—take them off the heat, put them on that clean plate, and just let them sit there. You don’t need foil or anything fussy! This resting time allows the juices that were pushed to the center during the fast, hot cook in the skillet to redistribute back into the meat fibers. This one tiny step is the difference between good and unbelievably juicy pork chops.
Make-Ahead and Storage for Why Everyone Loves This Pork Chops Recipes (+ Make-Ahead Tips)
This recipe is built for speed, but that doesn’t mean we can’t get ahead of the game! The absolute best make-ahead tip I can give you is to prep your dredging mix days ahead of time if you need to. Just mix that flour, seasoned salt, pepper, and cayenne, seal it up tight, and keep it in the pantry. When dinner time rolls around, you just season the meat and dip—instant prep time saved!
If you happen to have leftovers (which usually doesn’t happen in my house!), you want to treat them gently. Store any cooked pork chops in a shallow, airtight container in the fridge. They are best eaten within three days. When reheating, the absolute best way to bring them back to life is to warm them in a dry, hot skillet for just a minute per side over medium heat, rather than microwaving them, which always dries them out.
For more ideas on prepping components for simple meals during the week, like my quick meat sauce, you should check out this post. Getting the boring parts done early is the key to stress-free cooking!
Serving Suggestions to Complete Your Pork Chops Dinner
We’ve got the main event—the perfectly seasoned, juicy pork chops sizzling in the skillet—but what do we put next to them? Since this recipe is designed to be super fast, we need sides that can keep up the pace. You don’t want to spend an hour steaming broccoli when the pork chops only took 15 minutes to cook!
The recipe note mentioned smashed new potatoes, and honestly, that’s a classic for a reason. They are hearty and soak up any little bit of pan flavor left behind. If you are looking for a side that’s just as quick and way more fun than plain potatoes, you have to try my roasted ranch seasoned potato wedges. They are incredibly easy!
But sometimes, you just need green. When I’m rushing, I grab a bag of fresh spinach or mixed greens. All you do is toss it with a little drizzle of olive oil, some fresh lemon juice, salt, and pepper. It takes about two minutes, brings a nice bright flavor to cut through the richness of the cooked pork, and suddenly, you have a balanced, complete family dinner.
The beauty of these simple chops is they pair well with almost anything, so don’t feel pressured to make anything complex!
Frequently Asked Questions About Skillet Pork Chops
I get so many messages asking me about variations on this recipe—which I love! It means you are actually cooking these wonderful, quick meals. Since these chops cook so fast in the skillet, people naturally have questions about substitutions and timing. Here are the most common ones I hear about getting those perfectly juicy results!
Can I use boneless pork chops instead of bone-in for this recipe?
You absolutely can! Since the bone adds a little protection against overcooking, you might want to watch the time on boneless cuts even more closely. If you use boneless, I’d start checking them after just one minute on the second side. They cook up lightning fast because they are usually thinner than bone-in cuts already. The coating will still be amazing, though!
How do I keep these pork chops from drying out?
This is the golden question! The number one thing is using the right cut—those very thin breakfast chops are your best friend here. Secondly, you cannot walk away while they are cooking. Because the total cook time is only about 5 minutes total, you have to pull them before you think they are done. If you see just a tiny hint of pink that fades when you press them, they are perfect. That residual heat will carry them the rest of the way without drying out, keeping them so juicy!
What if I don’t have canola oil?
No problem at all! Canola oil is great because it has a really high smoke point, meaning it handles the medium-high heat well without breaking down. If you don’t have it, go for another neutral oil like vegetable oil or avocado oil. You still want to use that tablespoon of butter right at the end with the oil, though. That butter is essential for getting that rich, nutty flavor on the crust as they fry in the pan. If you have any questions at all about substitutions, feel free to reach out using my contact form!
Sharing Your Experience with This Pork Chops Recipes
Now that you’ve whipped up a fast, flavorful, and totally juicy batch of these skillet pork chops, I really want to hear all about it! Cooking should be a conversation, not just a one-way street, right? I get such a thrill seeing your family gathered around the table enjoying these quick meals.
Did you try my little trick of prepping the dry dredge mix the night before? Let me know in the comments below if that made your weeknight timeline feel even less stressed! And if you added a little extra cayenne for heat, tell me how it turned out!
If you want to check out what other amazingly quick, real-food recipes are cooking in my kitchen, you can browse all my favorites over on my main recipes page. Don’t be shy—snap a picture of your perfectly crisp chops, tag me, and let’s celebrate another successful, easy weeknight dinner together!
Why Everyone Loves This Pork Chops Recipes (+ Make-Ahead Tips)
Ingredients
Equipment
Method
- Salt and pepper both sides of the pork chops.
- Combine all dry ingredients. Dredge each side of the pork chops in the flour mixture, then set aside on a plate.
- Heat canola oil over medium to medium-high heat. Add butter. When the butter is melted and the butter/oil mixture is hot, cook 3 pork chops at a time, 2 to 3 minutes on the first side; 1 to 2 minutes on the other side. Make sure no pink juices remain. Remove to a plate and repeat with remaining pork chops.
- Serve with smashed new potatoes.
Notes
Tried this recipe?
Let us know how it was!
Gluten-Free Nutritionist & Family Meal Planning Expert
Working as a pediatric dietitian at Children’s Hospital of Denver, I kept meeting families overwhelmed by managing their children’s celiac disease. Parents stressed, kids frustrated, everyone eating bland boxed “gluten-free” products.
That’s when I realized my calling: creating practical, balanced gluten-free solutions for real families with busy schedules. I’ve developed 375+ family-friendly recipes focusing on lunch boxes, after-school snacks, and make-ahead dinners that actually work.
My meal planning system was featured in Parents Magazine, and I presented research at the Rocky Mountain Pediatric Nutrition Conference. My evidence-based approach ensures recipes meet both taste and health standards—families need solutions that work in the real world, not just perfect test kitchens.