I still remember the first time I attempted to make chicken wings for a big game night with friends. I was a total newbie in the kitchen, and while I spent the entire afternoon looking up different recipes, the thrill of seeing those wings sizzling kept me going. When the moment came to serve them, my heart raced as I watched my friends devour them with glee. That night, I realized that cooking doesn’t have to be expert-level to be special—it’s about the joy of sharing delicious food. Seriously, those first wings weren’t perfect, but they tasted amazing because *I* made them! That joy is exactly why I put together The Ultimate Chicken Wings Recipes Guide for Beginners. Forget all the complicated steps you see everywhere else. This guide cuts straight to the simple techniques you need to get those beautiful, crispy chicken wings popping right out of your own kitchen.
Why This Is The Ultimate Chicken Wings Recipes Guide for Beginners
Look, I get it. Chicken wings seem intimidating because frying is involved, right? But trust me, once you nail the temperature, you’ve mastered 90% of the game. This guide isn’t about fancy gadgets; it’s about confidence. We focus only on the straightforward methods that lead to success on the first try.
- We keep the ingredient lists short and sweet.
- Our seasoning is foolproof and boosts that natural chicken flavor.
- You’ll feel like a pro after making that first perfect batch for your friends!
Focus on Beginner Cooking Tips
I worked really hard to boil down these recipes into the most basic actions. You really don’t need a ton of specialized skill here. The big secret for beginners is paying attention to the oil temperature. If it’s too cold, your wings get greasy and sad. Too hot, and the outside burns before the inside is cooked. We use an easy measuring stick in this guide so you get that perfect, solid cook every single time.
Achieving Crispy Results Every Time in The Ultimate Chicken Wings Recipes Guide for Beginners
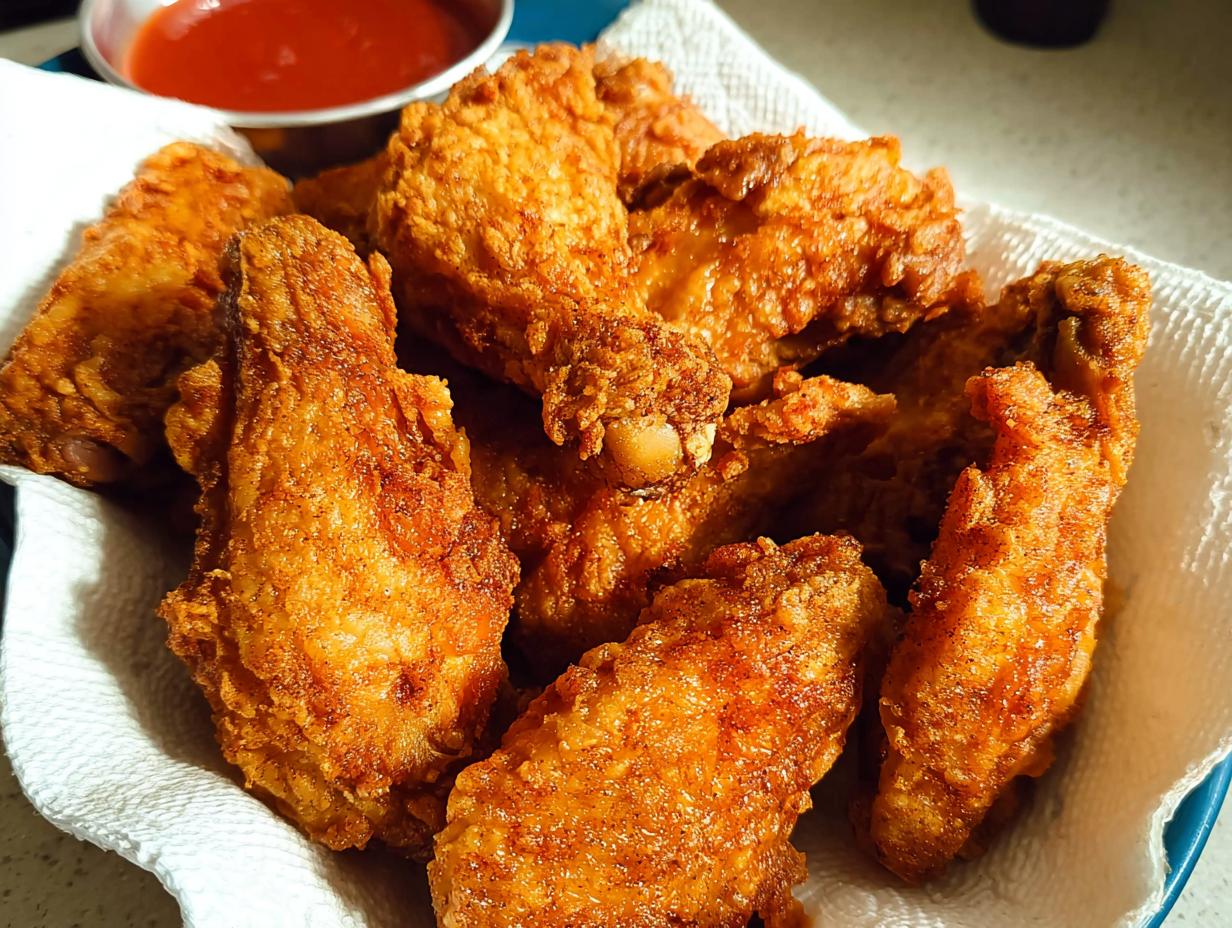
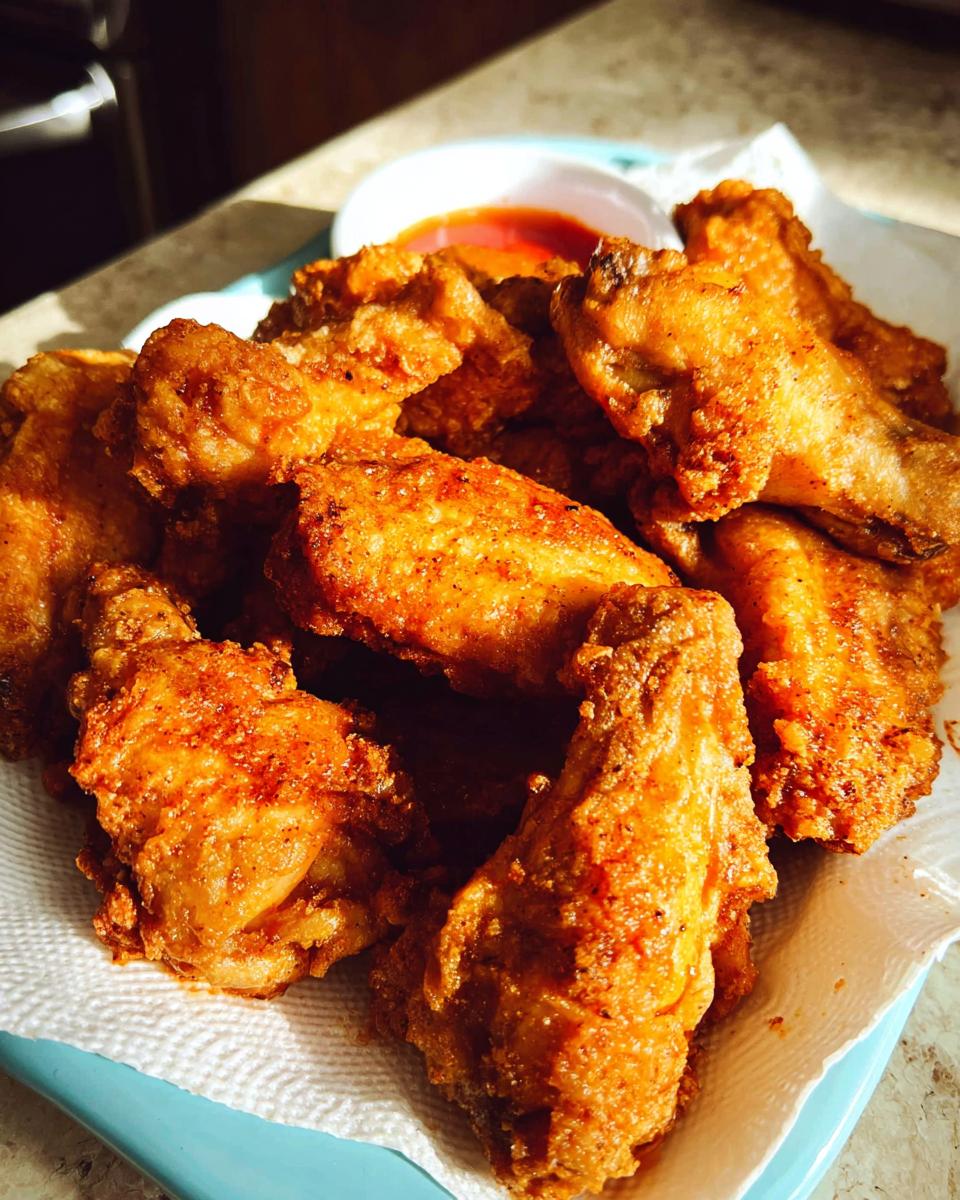
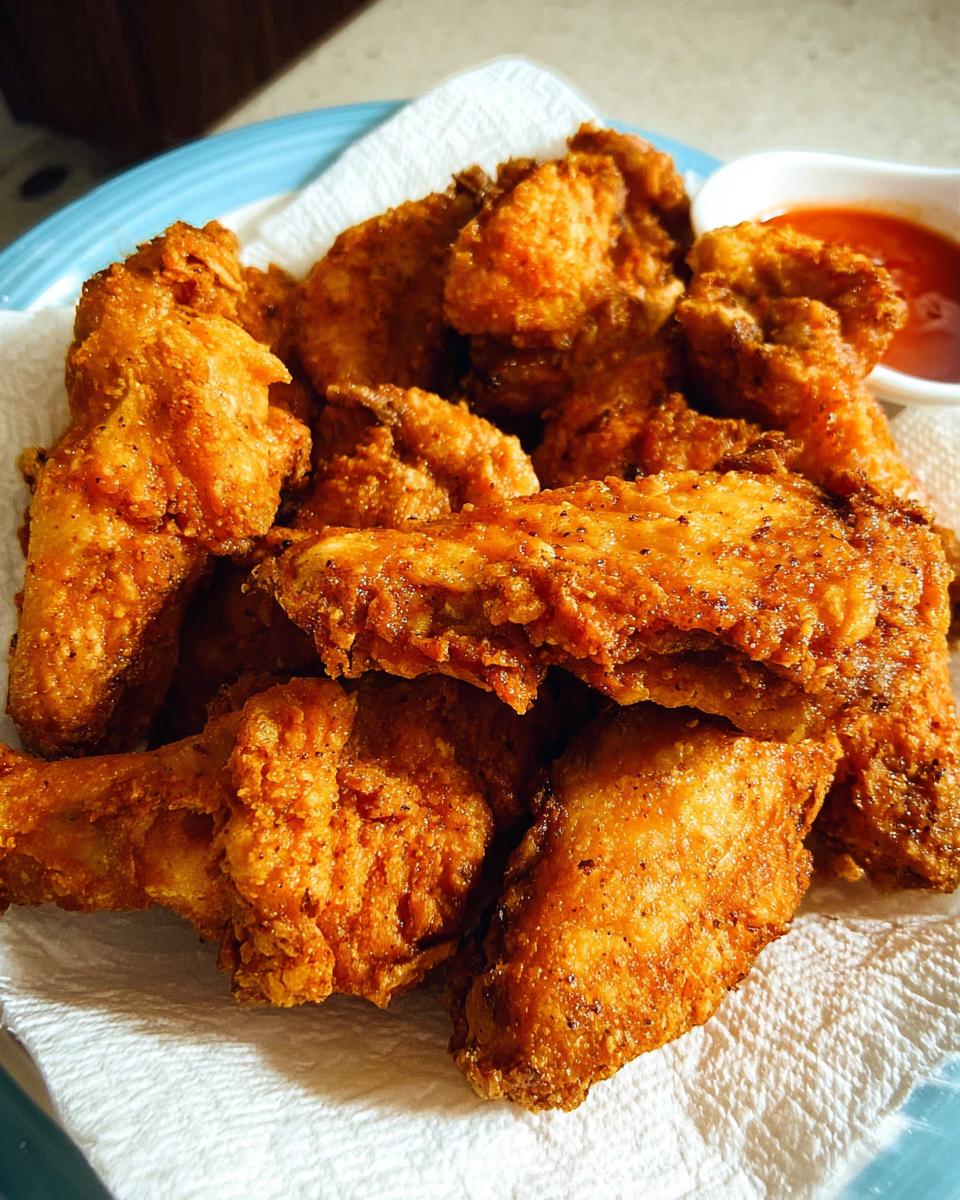
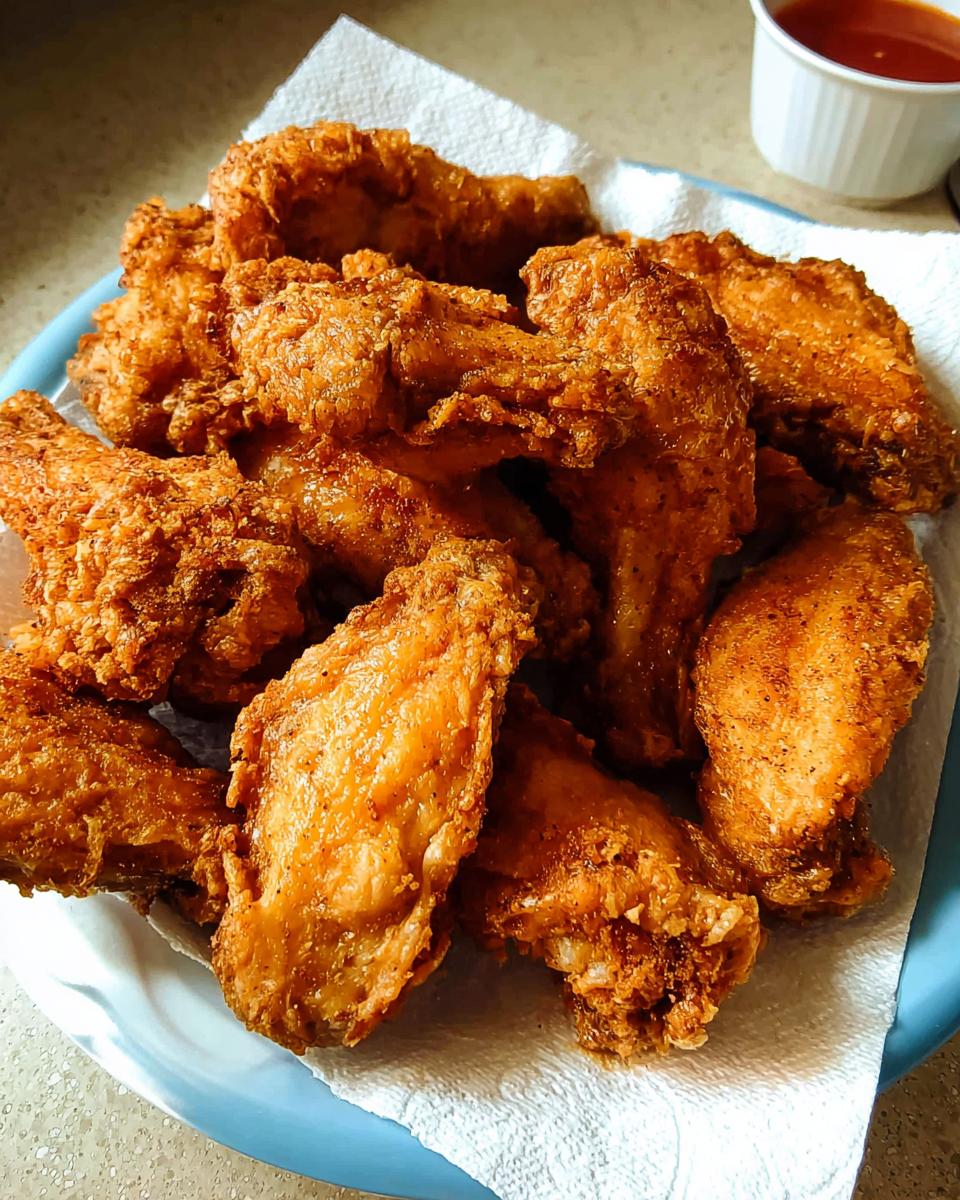
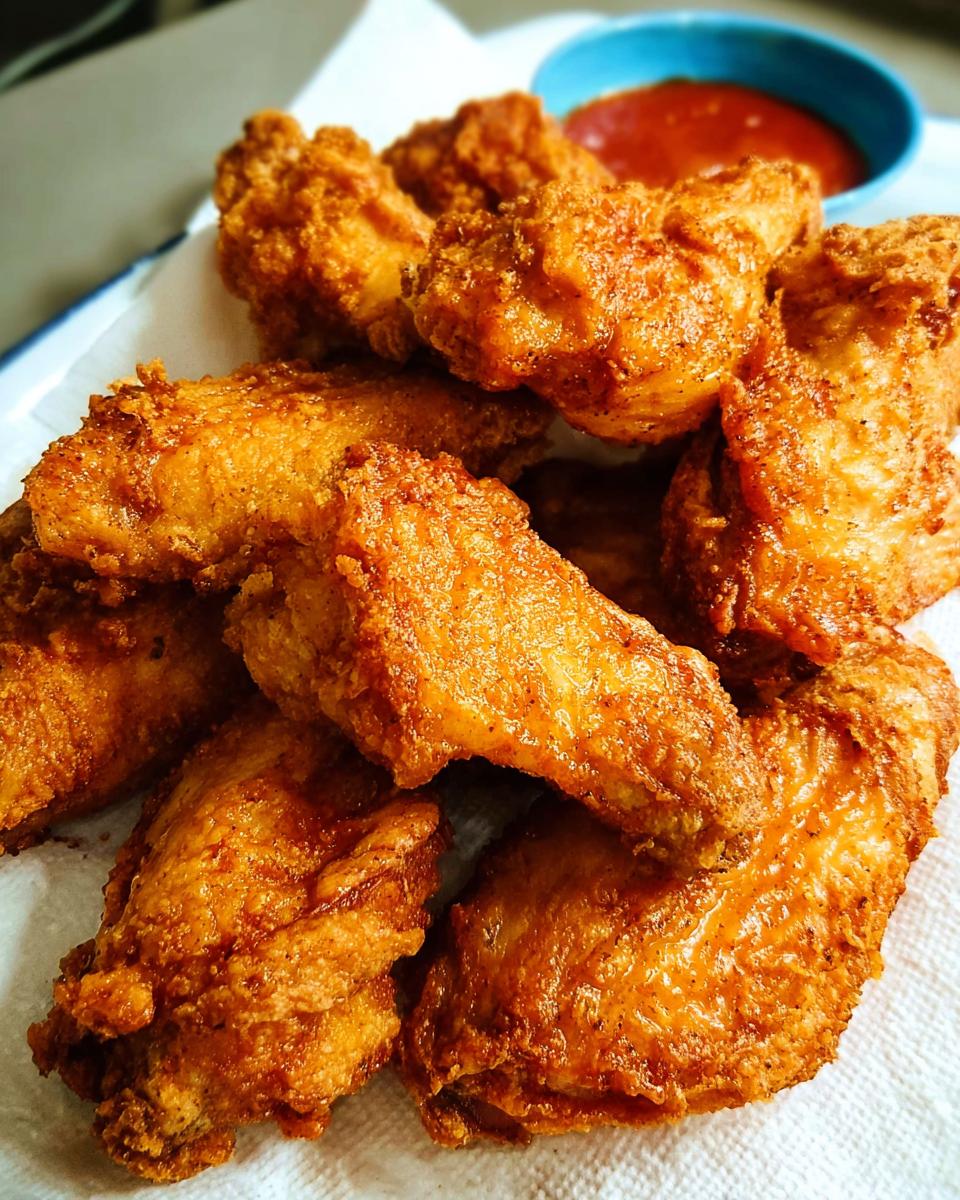
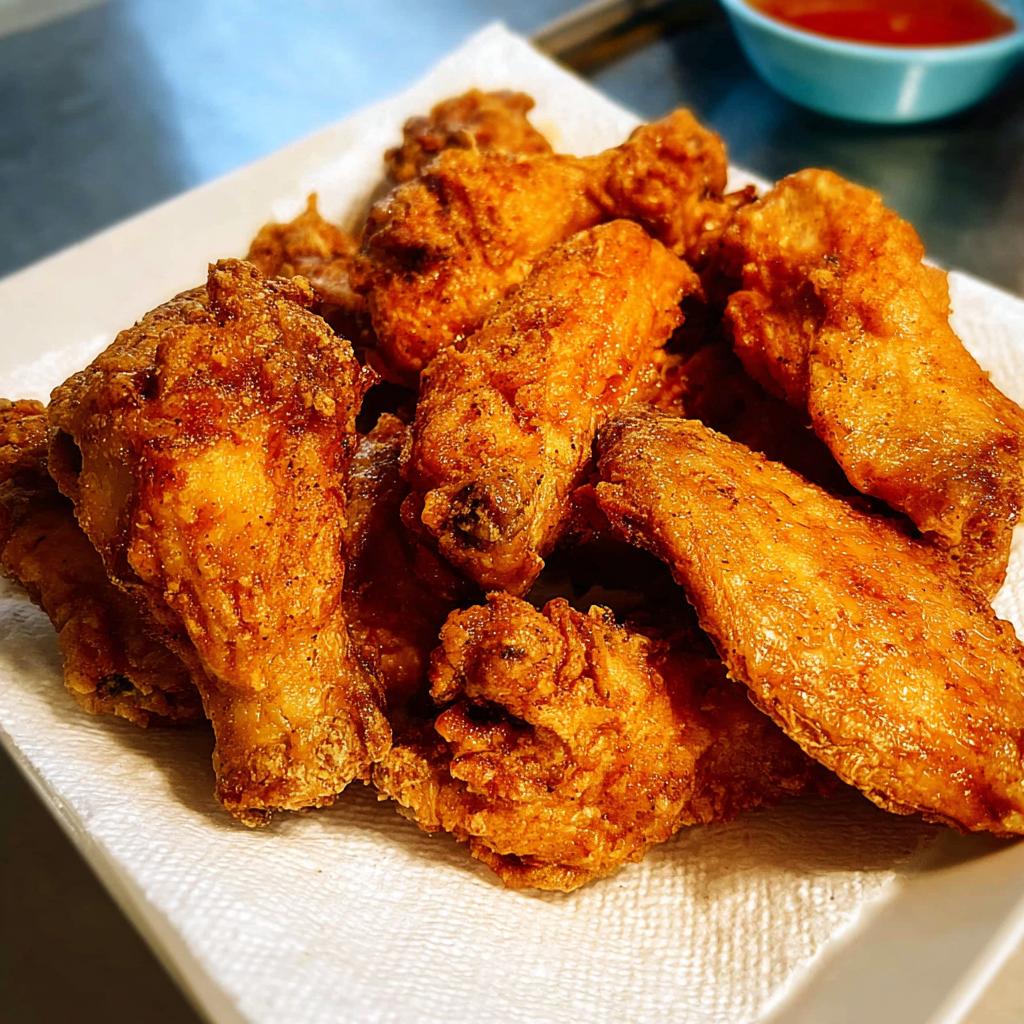
The number one fear everyone has is soggy wings. Nope, not happening here! We handle that fear right at the start. We aren’t using baking powder or any weird tricks. You just need to make sure those wings are bone dry, give them a light dusting of our flour mix, and drop them into oil that’s exactly 350 degrees. That initial shock in clean, hot oil seals everything in and creates that signature crunch. That’s the magic behind The Ultimate Chicken Wings Recipes Guide for Beginners!
Essential Equipment for The Ultimate Chicken Wings Recipes Guide for Beginners
We are keeping things simple, which means you probably already own most of what you need! Organization is half the battle when frying, so having your tools ready before the oil starts heating up makes everything flow smoothly. This preparation style is key to making my recipes successful, even for someone who is just getting started with deep-frying. This setup is perfect for a quick batch for game day.
Key Tools for Crispy Chicken Wings
You only need four main things to get started. Honestly, don’t skip the thermometer; it’s non-negotiable for quality frying! When you look through this list, you’ll see we aren’t talking about specialty gear—just simple kitchen workhorses.
- A big, heavy-bottomed pot or if you have one, a dedicated deep fryer.
- A proper kitchen thermometer to nail that crucial oil temperature. You’ve got to know the heat!
- A large mixing bowl so you can toss those wings without making a mess everywhere.
- A slotted spoon or spider to safely pull the wings out when they are done.
- A wire rack set over a baking sheet—this lets all the extra oil drip off, keeping your wings crispy!
Ingredients Breakdown for The Ultimate Chicken Wings Recipes Guide for Beginners
Okay, let’s get to the heart of it—what you actually need to buy! As a beginner, I always appreciate when recipes show me exactly where every ingredient fits. For this foundation recipe in The Ultimate Chicken Wings Recipes Guide for Beginners, we’ve broken the list into two straightforward groups. Stick to these measurements, and you’ll see why people rave about this simple seasoning blend!
For the frying part, you need plenty of good oil. I always recommend a high smoke point oil like canola because we are frying these up nicely. You’ll need about six cups, but always make sure the oil is deep enough to completely cover your wings when they’re dropped in. Don’t skimp here; it’s what makes them crispy!
The seasoning part is where the flavor really pops! It’s just your standard pantry spices elevated slightly. The only ingredient note you absolutely must pay attention to is the salt—we split it up for a reason, and you’ll see that later when draining the oil. Trust me on the paprika and garlic powder; they give these wings that gorgeous golden color and savory base.
For Frying and Seasoning
Here is your ingredient list for frying, coating, and seasoning these fantastic wings. Remember, the wings need to be totally dry before they ever hit this flour mixture!
- Six cups of canola oil—make sure it’s enough for deep-frying!
- Two pounds of chicken wings—you want them separated into drumettes and flats (that’s about 12 pieces total).
- Three-quarters teaspoon of kosher salt, but remember, this is divided, so keep an eye on that measurement!
- A half cup of all-purpose flour—this is our secret weapon for crispiness.
- One teaspoon of paprika for that classic color.
- A half teaspoon of garlic powder—don’t skip this, it’s essential flavor!
- A quarter teaspoon of onion powder.
- A quarter teaspoon of freshly ground black pepper, plus more for sprinkling later.
- Just an eighth of a teaspoon of cayenne pepper. You won’t truly taste the heat, but it wakes everything up!
Step-by-Step Instructions: Mastering Your Chicken Wings
This is where the magic happens, but don’t let that word scare you! Frying can feel like a big step up when you are just starting out, but honestly, if you follow these steps closely, you’ll feel like you’ve been doing this for years. We are aiming for that perfect, deep golden brown color and an internal temperature that guarantees they are cooked through but still juicy inside. Make sure you have your wire rack ready to go before the oil even starts heating up!
Preparation: Drying and Seasoning for The Ultimate Chicken Wings Recipes Guide for Beginners
The absolute first thing you need to do—and I mean right now, before anything else—is grab a huge wad of paper towels and pat every single chicken wing until it feels dry. I mean *dry*. If there is any surface moisture left, the oil will fight it, and you’ll end up with soft, sad wings instead of the crispy ones you deserve. Moisture is the enemy of crunch!
Once they are dry as a bone, whisk up that spice mix we talked about—the flour, paprika, garlic powder, and all the rest. Toss those wings in there until they look lightly dusted and happy. Give them a little shake to knock off any major clumps of flour clinging on. Following these rules from the start of The Ultimate Chicken Wings Recipes Guide for Beginners is what separates the good wings from the *great* ones.
Frying Technique for Perfect Game Day Chicken Wings
Now for the oil! Get your six cups of canola oil heating up in that heavy pot. You absolutely must hit 350 degrees Fahrenheit. I check it twice! Once it’s there, carefully lower a batch of wings into the oil. Please, *please* do not dump them all in at once; overcrowding cools the oil down instantly, and we risk sogginess. Work in batches!
Let them fry for about 18 to 20 minutes total. Turn them gently halfway through so they brown evenly all over. You are looking for that beautiful golden color. When you think they look done, pull one out and check the temp—it needs to hit 165 degrees Fahrenheit internally. Pull them out, put them on the rack, and hit them immediately with that last bit of salt. These are going to be the star of your next game day!
Expert Tips for The Ultimate Chicken Wings Recipes Guide for Beginners
Now that you know the basic steps for making beautifully fried wings, let me share a couple of tricks I learned after that first frantic game night. These tips take your wings from “good” to “Wait, how did you make these so amazing?” They aren’t hard, but they show you’re thinking like a cook, not just following directions blindly. Mastering these small details is what separates a decent wing from one I’d proudly put in The Ultimate Chicken Wings Recipes Guide for Beginners.
My favorite extension, especially if you want them shatteringly crunchy, is the double-fry method mentioned in the notes. You fry them once until they are just cooked through, pull them out to rest for five minutes—this lets the moisture settle—and then plunge them into hotter oil for just a few more minutes to crisp up the coating. It sounds like extra work, but the difference in texture is *huge*.
Ingredient Notes and Substitutions
When it comes to oil, I really push canola oil because it’s neutral and handles high heat so well without smoking out your kitchen. If you don’t have canola, peanut oil is fantastic too. The one thing you absolutely shouldn’t change is that salt timing! We use half the salt before frying to season the coating, and the rest right after they come out of the fryer, while they are still sizzling hot. This ensures flavor penetrates the crust properly.
If you want a sauce—and who doesn’t?—keep it simple for now. Don’t try to make a complicated reduction! The easiest variation is to take some butter, melt it down, and whisk in your favorite bottled hot sauce, maybe a tiny splash of vinegar, and toss the wings right there in the bowl. If you want something different from the base seasoning, try my Cajun dry rub idea for your next batch! That’s a great place to start playing around with flavor.
Flavor Variations for The Ultimate Chicken Wings Recipes Guide for Beginners
Okay, you nailed the basic crispy, salty wing—fantastic! Now that you’re not scared of the fryer anymore, it’s time to have some real fun. Because this is The Ultimate Chicken Wings Recipes Guide for Beginners, I want to show you how simple it is to switch up the flavor profile using the perfectly cooked wing as your canvas. You don’t need a whole new recipe; you just need a quick toss!
The key is to work fast while the wings are still piping hot from the wire rack. The residual heat helps these new coatings stick beautifully. Here are a few no-fuss variations that I absolutely love when I need something different for a casual weeknight dinner.
Simple Honey BBQ Toss
This is so easy it almost feels like cheating! Take about half a cup of your favorite store-bought BBQ sauce—the sweeter the better for this one. Melt down about two tablespoons of butter in a small saucepan until it’s liquid. Take that BBQ sauce and the melted butter and mix them together until they are smooth; maybe add a tiny splash of cider vinegar if you want it punchy.
Toss your hot, crispy wings right into a large bowl, pour that gorgeous BBQ sauce mixture over them, and toss quickly until every surface is coated. This is great if you are aiming for a sticky, sweet result. If you want to go a step further and try a grilled version later, check out my notes on a Honey BBQ grilled chicken wings recipe, but for now, this toss is perfect!
Zesty Lemon Pepper
If you want sunshine on a wing, this is your flavor! This variation doesn’t require any sauce at all, which keeps cleanup even easier. Right after you take those wings off the fryer and sprinkle them with the base salt, immediately toss them with a generous amount of lemon pepper seasoning blend. I mean, don’t be shy! The heat from the wings helps the powdery seasoning adhere instantly.
This bright, zesty flavor profile is a wonderful contrast to the richness of the fried coating. It’s refreshing and light, which is perfect if you’re serving them alongside heavier dips or snacks.
Garlic Parmesan Power
This one requires just two extra ingredients you might already have: some melted butter (about 1/4 cup) and about 1/2 cup of finely grated Parmesan cheese. Once your wings are fried and salted, toss them in a bowl with the melted butter first. This helps the cheese stick!
Then, sprinkle that Parmesan cheese all over, along with some extra granulated garlic powder if you want an extra punch. That sharp, salty cheese melts ever so slightly onto the hot crust. It’s pure comfort food!
Serving Suggestions and Meal Preparation Ideas
You’ve got these incredible, crispy chicken wings, and now you need to know what to serve them with so the whole meal feels complete! Serving wings is supposed to be fun and casual, especially when you’re hosting for game day. Forget fussy side dishes; we want things that are easy to grab and dip!
For dips, the classic ranch or creamy blue cheese dressing is always the winner. Don’t feel like you need to make them from scratch right away—a good quality store-bought version is totally fine when you’re starting out! I always make sure I have a big bowl of crisp celery sticks and maybe some carrot sticks too. They offer a refreshing, cool crunch that cuts through the spicy, rich flavor of the wing perfectly.
Now, let’s talk about making a big batch. These wings reheat shockingly well, which makes them fantastic for meal prep if you’re smart about it! If you fry a huge batch on Sunday, cool the leftovers completely without sauce (sauce makes them soggy when cold!), then store them in an airtight container in the fridge. You can pull them out for quick lunches throughout the week!
If you are prepping for lunches, I really suggest serving them with a simple grain salad—like a quinoa salad with some chopped cucumbers and a light vinaigrette—instead of creamy dips. The salad holds up better in the fridge, and you can just reheat the wings separately. See? Easy, tasty, and totally manageable even for a beginner cook!
Storing and Reheating Crispy Chicken Wings
So, you made too many—which, let’s be honest, is the only way to make wings, right? Don’t panic about leftovers turning into soggy disappointment tomorrow! The biggest mistake people make when saving wings is letting them sit around soaking in sauce or steam. We are aiming to keep that amazing, hard-earned crispy exterior intact for leftovers!
First things first: if you plan on having leftovers, do not toss them in sauce right after frying! If you know you won’t eat the whole batch immediately, leave about half of them plain. Sauce holds moisture against the crust, and that’s how you lose the crunch.
Storing the Wings Perfectly
When you are ready to store them, the container matters more than you think. You need an airtight container, but here’s the trick: line the bottom of that container with a paper towel first. This little bit of absorbent paper catches any condensation that forms as the wings cool down in the fridge. If the wings are sitting in their own wetness, they definitely won’t be crispy when you reheat them!
Make sure they cool down slightly before you seal up the container too. Putting hot wings directly into a sealed, cold fridge creates a ton of condensation right away. Just let them sit on the rack for about 20 minutes until they are just warm, then seal them up and pop them into the refrigerator. They should last beautifully for about three or four days.
The Secret to Reheating for a Crispy Finish
This is the most important part of the whole leftover process. I know your instinct might be to just throw them in the microwave because it’s fast, but please, don’t do that! Microwaves use steam to heat food, and steam is the absolute enemy of a crispy coating. You’ll end up with chewy, rubbery skin.
You have two amazing options depending on what equipment you have ready.
- The Oven Method (My Top Pick): Set your oven to about 375 degrees Fahrenheit. Lay the wings out on a fresh, clean wire rack set on a baking sheet. Bake them for about 8 to 10 minutes. This dries out the skin again, bringing back that wonderful crunch without needing any oil.
- The Air Fryer Cheat: If you have an air fryer, this is where it really shines! Set it to 350 degrees Fahrenheit and cook the wings for about 5 to 6 minutes, shaking the basket halfway through. The circulating hot air blasts the moisture away and makes them taste almost freshly fried.
Honestly, taking just those extra few minutes to reheat them properly is totally worth the payoff. You get that great texture back, and I promise you won’t even believe they were leftovers!
Frequently Asked Questions About The Ultimate Chicken Wings Recipes Guide for Beginners
I know when you’re just starting out, you have a million little questions brewing! Don’t worry about feeling silly asking them; I probably had the exact same concerns when I first tried making wings for that big game night years ago. We want you to feel totally prepared before you even turn on the stove. Below are some of the things I hear most often from folks diving into The Ultimate Chicken Wings Recipes Guide for Beginners for the first time.
Can I bake these chicken wings instead of frying?
Yes, you absolutely *can* bake them, and it gives you a much hands-off approach! However, I have to be honest: frying gives you that specific, shatteringly-crispy texture that’s the hallmark of this guide. If you must bake, toss those floured wings lightly with a little oil, spread them out on a wire rack set on a baking sheet (don’t let them touch!), and bake them at a high heat, maybe 400 degrees Fahrenheit, for about 35 to 40 minutes, turning them halfway. Just know the fried ones are miles better for that classic crunch!
How do I know when my chicken wings are done?
The biggest mistake rookies make is relying only on color. While golden brown looks great, the only truly reliable way to tell if they are safe and perfectly cooked is using a meat thermometer. You are aiming for an internal temperature of 165 degrees Fahrenheit, or 74 degrees Celsius, right in the thickest part of the drumette. If they hit that number, they are done! Checking the temperature removes all the guesswork for beginners and guarantees juicy meat.
What is the best oil to use for frying chicken wings?
For frying, you need an oil with a high smoke point so it doesn’t break down and smoke up your kitchen when it gets hot. My go-to, and what’s listed in the main recipe, is canola oil. It’s relatively inexpensive, very neutral in flavor, and it handles the necessary 350 degrees Fahrenheit beautifully. You can also use peanut oil or vegetable oil, but please, stay away from lower smoke point oils like extra virgin olive oil—it will smoke badly and ruin the flavor of your lovely wings!
Share Your Success with The Ultimate Chicken Wings Recipes Guide for Beginners
Honestly, you did it! You faced down the hot oil and you made delicious, crispy chicken wings following The Ultimate Chicken Wings Recipes Guide for Beginners. That is huge for anyone starting out in the kitchen, and I am so proud of you!
Now, the best part of sharing recipes is hearing what *you* thought! I would absolutely love it if you took a second to leave a star rating right below the recipe card. Even quick feedback helps other new cooks feel brave enough to try this themselves. Did you stick to the simple salt or try one of the flavor variations we talked about?
And please, don’t hit that close button just yet! If you have one single lingering question—maybe your oil smoked a bit, or you weren’t sure if you battered thin enough—drop it in the comments section. I personally read every single one, and I love getting to chat kitchen technique with you all. I’ve learned so much over the years, including everything that went into this guide, and I built my site as a place for people just like you who want to share their culinary heritage and successes. If you loved this guide, you can learn more about my journey over here!
Go ahead, share your crispy chicken wing photos, tell me what you served them with, and let’s celebrate your new skills!
The Ultimate Chicken Wings Recipes Guide for Beginners
Ingredients
Equipment
Method
- Pat the chicken wings very dry using paper towels. This step helps achieve a crispier exterior.
- In a large bowl, whisk together the flour, paprika, garlic powder, onion powder, 1/4 teaspoon of the kosher salt, black pepper, and cayenne pepper.
- Add the dried chicken wings to the flour mixture. Toss until all pieces are lightly and evenly coated. Shake off any excess flour.
- Pour the canola oil into your deep pot or fryer. Heat the oil over medium-high heat until it reaches 350 degrees Fahrenheit (175 degrees Celsius). Use a thermometer to check the temperature.
- Carefully add the wings to the hot oil in batches, ensuring you do not overcrowd the pot. Overcrowding lowers the oil temperature and results in soggy wings.
- Fry the wings for about 18 to 20 minutes, turning them occasionally, until they are golden brown and cooked through. The internal temperature should reach 165 degrees Fahrenheit (74 degrees Celsius).
- Remove the cooked wings with a slotted spoon and place them on a wire rack set over a baking sheet to drain excess oil. Immediately sprinkle the remaining 1/2 teaspoon of kosher salt over the hot wings.
- Serve the crispy wings immediately. You can toss them in your favorite sauce after frying if desired.
Nutrition
Notes
Tried this recipe?
Let us know how it was!
Gluten-Free Culinary Storyteller & Recipe Heritage Specialist
Getting diagnosed with non-celiac gluten sensitivity in my late twenties felt like losing my Italian identity. Growing up in nonna’s Brooklyn kitchen, learning traditional techniques that suddenly became off-limits—I decided to fight for those family food traditions instead of giving up.
With my food journalism background and European baking training, I became obsessed with recreating authentic flavors in gluten-free formats. I’ve adapted 400+ traditional recipes from various cultures, with my gnocchi recipe winning “Recipe of the Year” from the National Gluten-Free Living Awards in 2022.
I collaborate with the Italian-American Cultural Center to document traditional family recipes and volunteer with the Westchester Celiac Support Group, teaching monthly pasta-making classes.
Food is the heart of family storytelling. No one should sacrifice their cultural heritage due to dietary restrictions.