Oh my goodness, if there is one dish that truly defines the feeling of Thanksgiving, it’s stuffing. Forget the main course for a minute—the aroma of savory herbs mixed with toasted bread is what fills my home with absolute warmth and history. For years, that aroma was sadly missing from my own table after I discovered my gluten sensitivity in my late twenties. I was crushed; how could I enjoy the holidays without my absolute favorite family side?
But I dug my heels in, determined that tradition doesn’t halt for dietary changes! That determination led me down years of testing, failing, and finally succeeding in creating something truly magical. This isn’t just another recipe; I genuinely believe this is The Only Stuffing Recipes Recipe You’ll Need (2025) because it captures that classic, comforting taste exactly right, whether you’re using sourdough like I do now or any other bread.
The look on everyone’s faces the first Thanksgiving I served this new version, without them even realizing it was different, was everything. Sharing that moment showed me that heritage can absolutely adapt and thrive. I’m Elena Brown, your Gluten-Free Culinary Storyteller, and I’m thrilled to rebuild those beautiful food memories right alongside you.

Why ‘The Only Stuffing Recipes Recipe You’ll Need (2025)’ is Your Holiday Essential
Honestly, I wouldn’t bother naming a recipe ‘The Only Stuffing Recipes Recipe You’ll Need (2025)’ if it didn’t deliver on flavor and texture, hands down. This recipe is designed to be the star side you look forward to!
It takes that deeply savory, herby profile we all crave and locks it in. If you’re worried about it turning out like a mushy casserole, please don’t be! The technique here ensures a perfect balance—moist inside, slightly crisp on top. Plus, if you are navigating gluten-free baking like I am, you will find this adaptable base works beautifully with your favorite GF loaf.
Key Benefits of This Stuffing
- It provides that deeply comforting, deeply savory flavor you expect from Thanksgiving.
- The mixture achieves that dreamy texture—not soggy, but perfectly tender.
- It is incredibly easy to adapt this base recipe for different diets or flavor additions.
- It pairs perfectly whether you’re serving it on the bird or baked on its own as a dressing!
Gathering Ingredients for The Only Stuffing Recipes Recipe You’ll Need (2025)
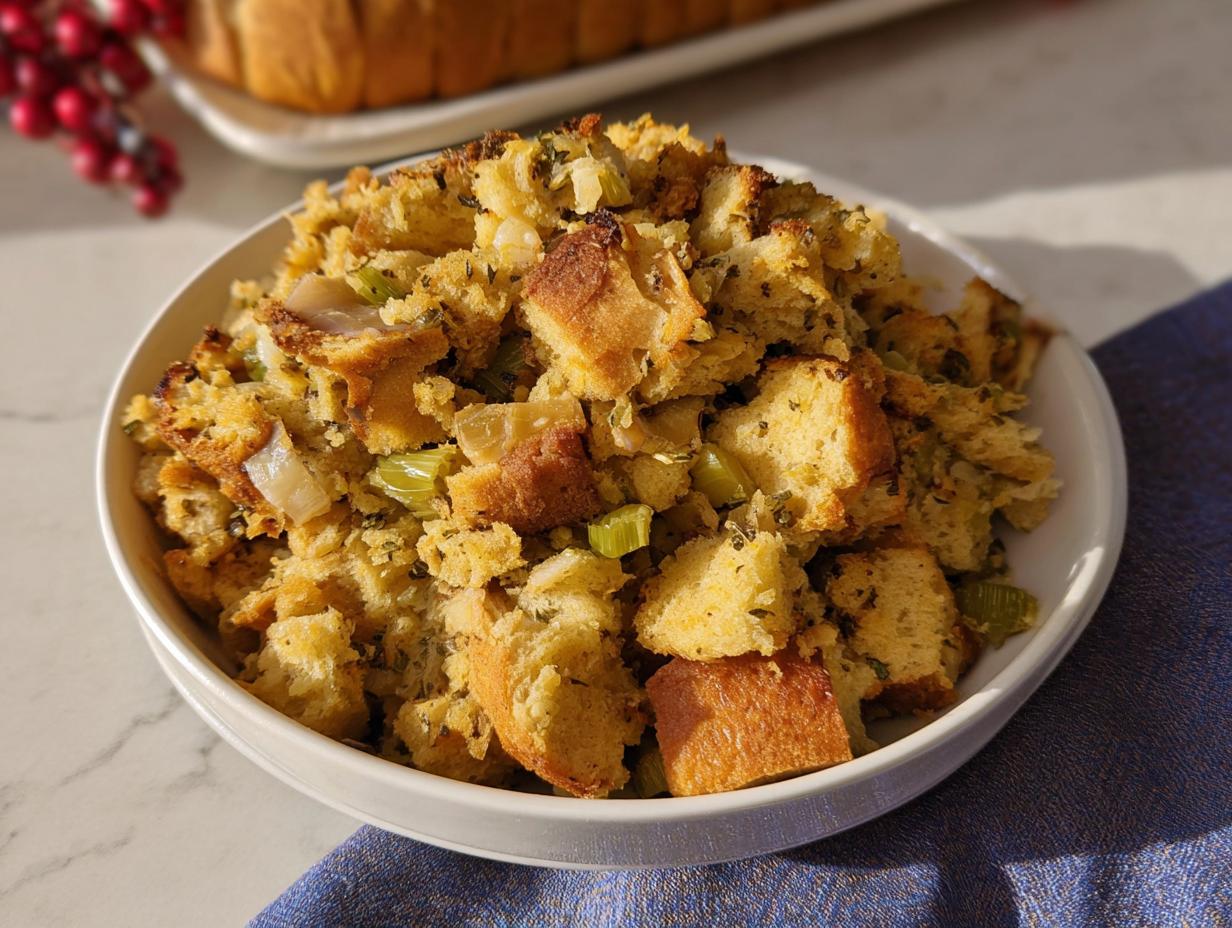
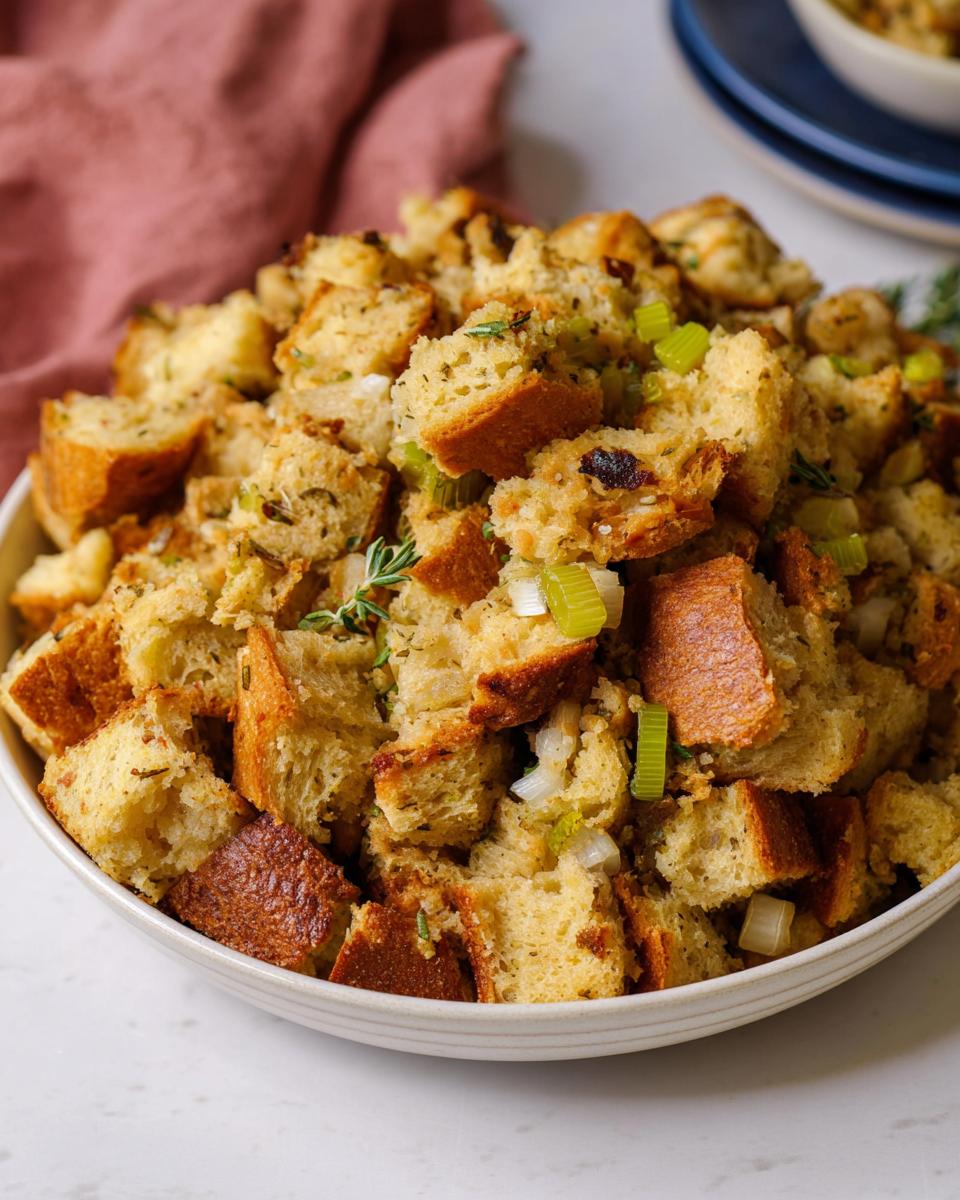
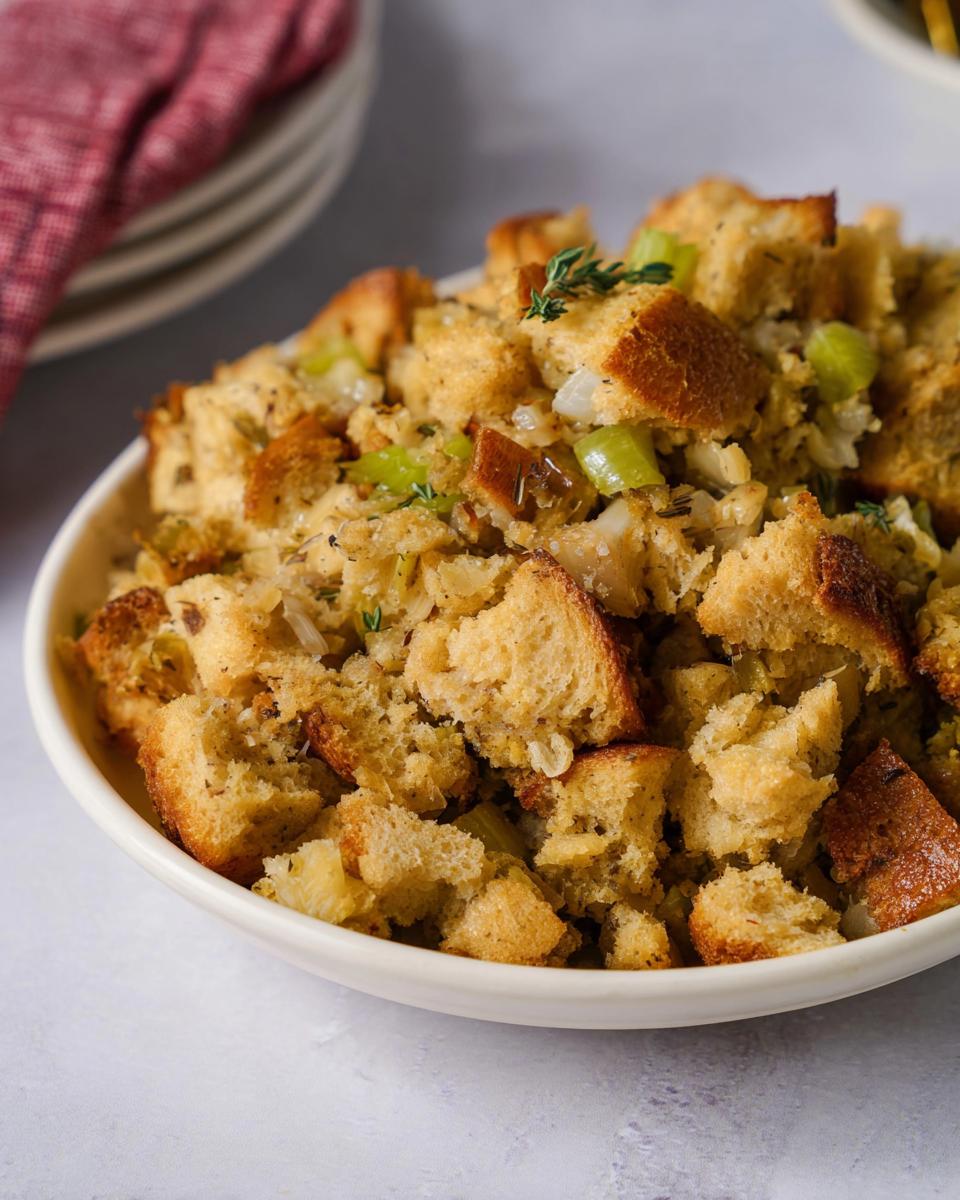
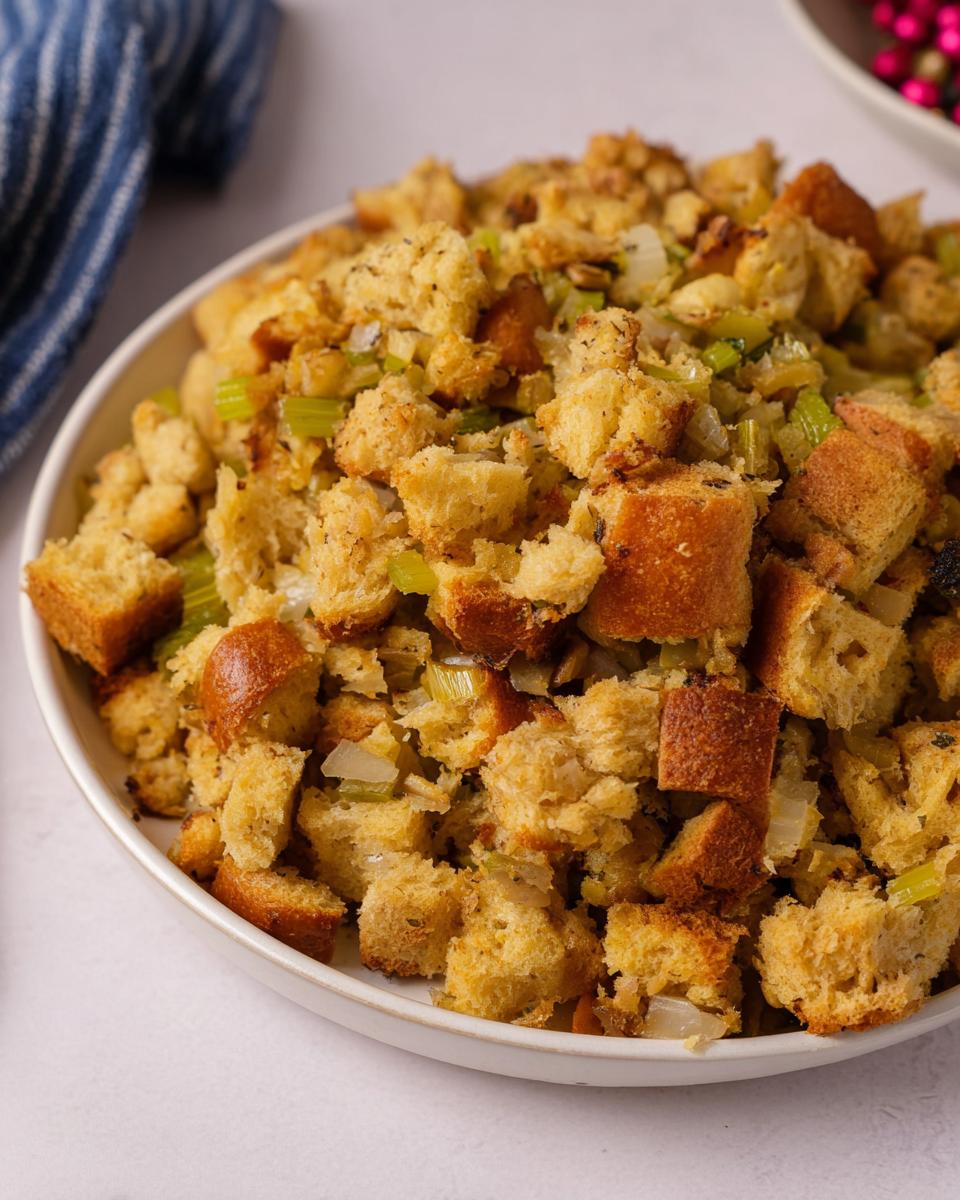
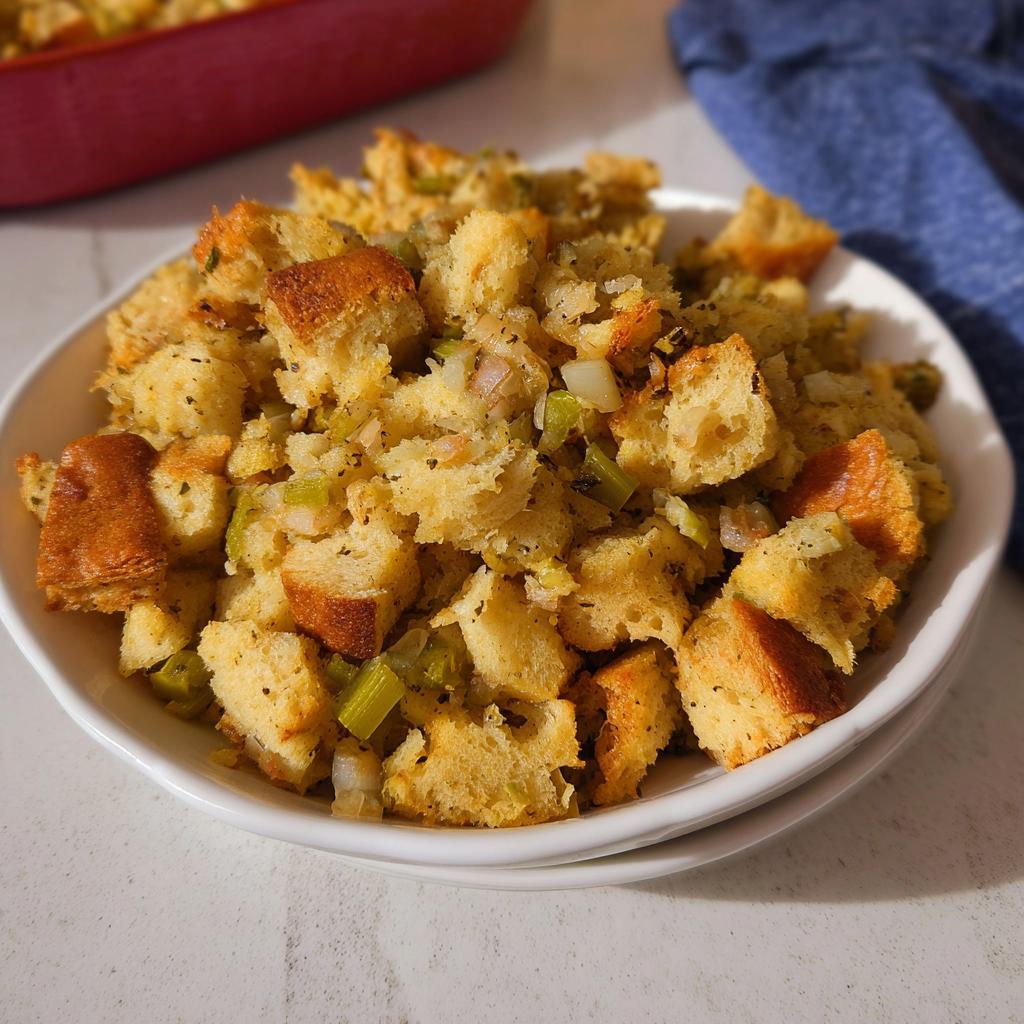
Okay, let’s get into the heart of the matter: the ingredients! Using top-notch components is really what separates a good holiday side from the amazing ones people talk about for the rest of the year. The most crucial element here is your bread. I specify leftover Sourdough Sandwich bread because that slight tang is amazing, but the absolute number one rule for any stuffing is that those bread cubes must be dry. Sad, fresh bread turns into goopy paste when you add all that lovely broth.
Don’t worry if your bread isn’t ready; I’ll show you exactly how to dry it out later. Beyond that, we’re focusing on classic aromatics—real butter, fresh onion, garlic, and celery—which build that foundational savory smell the second they hit the hot skillet. This is the good stuff, the foundation for everything delicious!
For the Stuffing:
Grab your measuring cups because here is what you’ll need for 8 people to have plenty:
- 6 tbsp unsalted butter
- 1 tsp minced garlic
- 1/2 yellow onion, finely chopped
- 2 celery sticks, diced
- 6 cups dried bread cubes (leftover Sourdough Sandwich bread is my go-to!)
- 1 tsp dried rosemary
- 1 tsp dried thyme
- 1 tbsp fresh parsley
- 1 tsp fine sea salt
- 1/4 tsp ground pepper
- 2 cups vegetable broth (you might not use it all!)
If you’re looking for more inspiration on great holiday recipes, check out what my fellow recipe explorers are sharing on my site, or sometimes I just love seeing what others are flipping in the oven, like this great recipe over here!
Expert Tips for Drying Bread for The Only Stuffing Recipes Recipe You’ll Need (2025)
This is where we talk about texture, folks. Soggy stuffing is the enemy! If you grab bread straight from the bag, even if it’s a day old, it’s going to absorb liquid way too fast and turn into mush when baked. That’s why our preparation time includes 8 minutes dedicated just to drying the cubes.
If you realize an hour before dinner that your bread isn’t firm enough, don’t panic! Just cube it up, spread it on a sheet pan just like you would for baking, and pop it into your 350-degree oven for about 8 minutes. This slow drying process lets the bread release moisture gradually, making those cubes sturdy enough to hold onto the vegetable mixture and broth without dissolving. Trust me, this one little step is the key to getting that delightful, craggy top texture we all want!
Step-by-Step Instructions for The Only Stuffing Recipes Recipe You’ll Need (2025)
Now for the fun part—bringing all those beautiful, dry bread crumbs to life! You’ll need your large skillet, mixing bowl, and cookie sheet ready to go. Remember what I said about paying attention to time and temperature? It matters here!
Preparing the Base Vegetables
First things first, get that oven humming at 350 degrees F! That’s the baking station ready for action. Next, grab your large skillet and melt those 6 tablespoons of unsalted butter over medium heat. Once it’s shimmering, toss in the minced garlic, your finely chopped yellow onion, and the diced celery sticks. We want to cook these aromatics slowly until they start getting soft and totally fragrant—this usually takes about 5 minutes. You are building the flavor foundation right here, so don’t rush warming up those veggies!
Combining and Moistening the Stuffing
Once your skillet vegetables are tender, dump the entire mixture right into your big mixing bowl over the 6 cups of dried bread cubes. Now, sprinkle in all the flavor boosters: the rosemary, thyme, parsley, salt, and pepper. Toss it all together until you see those wonderful herbs coating every piece of bread. Here comes the balancing act: pour in 1 cup of your vegetable broth and gently stir. Keep adding the remaining broth, just a quarter cup at a time, stirring between each addition. Stop adding liquid the *second* the bread is moist all the way through. You might need less than 2 cups, and that’s perfect!
Baking for Perfect Texture
We don’t want this baked in a deep dish; we want edges! Grease up that cookie sheet and spread the entire stuffing mixture out in an even layer. Cover the whole thing securely with foil—this holds the steam in so the inside softens up nicely. Bake this wonderful creation for 35 minutes in that 350-degree oven. That foil comes off after 35 minutes, but for this exact recipe, we are just baking it covered per my notes! If you wanted a crispier top, you’d remove the foil for the last 10 minutes, but this version focuses on being wonderfully moist throughout. Then, pull it out and let it rest for five minutes before serving!
You can find more of my foundational baking ideas, including different ways to achieve that perfect gluten-free crumb, over at my recipe index.
Ingredient Notes and Substitutions for This Stuffing Recipe
I know when you look at a holiday recipe, your brain immediately starts doing inventory, and maybe you’re short on something. Don’t stress! The beauty of making my stuffing recipe is that it’s built on familiar flavors, making substitutions pretty painless.
Let’s talk broth first. I use vegetable broth because I often make this entirely vegetarian, but honestly, if you have leftover turkey carcass broth or good quality chicken broth, use that! It just adds an extra layer of savory depth that is intoxicating. Just remember to check the sodium content, since homemade broths vary wildly.
Herbs are another area where you can play a little. I love dried rosemary and thyme because they’re sturdy enough to hold up during the mixing and baking process. If you have fresh rosemary on hand, use about twice the amount of dried, but make sure to chop it really fine—nobody wants a giant piece of thyme sticking out!
And for my fellow gluten-free bakers out there—yes, this recipe works perfectly for us! Just swap out the standard Sourdough Sandwich bread for 6 cups of your favorite good-quality, firm gluten-free bread cubes. Because GF bread can sometimes be more delicate, make sure those cubes are extra dry before you start mixing everything up. That way, we keep that beautiful texture even when accommodating different needs at the table!
Serving Suggestions for The Only Stuffing Recipes Recipe You’ll Need (2025)
When you pull this gorgeous stuffing out of the oven, the smell alone should get everyone excited for the meal! It’s designed to be the ultimate holiday side dish, but presentation really does matter.
Of course, the classic pairing is roast turkey, ideally baked right alongside the bird if you’re stuffing it, or simply served right next to it if you baked it separately as a dressing, like we do. Make sure you have plenty of rich gravy ready to drizzle over the top—it just soaks right into those savory bread edges!
But I love experimenting a little. Since this stuffing has such a clear savory herb profile, it’s fantastic with creamy mashed potatoes, or even as a topping for savory baked mac and cheese. It adds such a comforting texture! If you are looking for some quick inspiration on how to elevate your side dish plate, you can always check out some of the presentation tips I’ve gathered over at my recipe index.
This stuffing is hearty enough that it stands up well to rich flavors, so don’t be afraid to serve it with roasted root vegetables tossed in simple butter and salt. It just makes the whole plate feel more complete and cozy.
Storing and Reheating Your Stuffing
Okay, you made the absolute best stuffing of the year, and now you have leftovers—lucky you! The good news is this savory dressing holds up beautifully, provided you store it right. The key to keeping that beautiful texture we worked so hard for is to treat it properly right away.
Once the stuffing has cooled down completely—and I mean truly cool, not lukewarm, because warm stuffing creates steam and ruins the texture—transfer it to an airtight container. Don’t just cover the pan with foil; seal it up tight. You can keep this in the refrigerator for about three to four days. Any longer than that, and the herbs just don’t taste as bright, you know?
When it’s time to bring it back to life, you have two main paths, and your choice really depends on how much time you have. If it’s the next day and you want that original, slightly crispy edge back, the oven is your absolute best friend.
For reheating in the oven, place the desired amount in a baking dish. Here’s my trick: I always add just a tiny splash—maybe a tablespoon—of extra vegetable broth right over the top before I cover it loosely with foil. Pop it into a 325-degree oven for about 15 to 20 minutes, or until it’s steaming hot all the way through. Then, if you have 5 extra minutes, take the foil off and bake it uncovered for about five minutes to crisp up the top layer again. It’s like magic, bringing back that fresh-baked flavor!
Now, if you’re in a rush—maybe you need a quick side before bed—the microwave works in a pinch. Just place a small portion in a microwave-safe bowl and heat it in short 30-second bursts, stirring in between. Just be warned: microwaving tends to make stuffing softer overall, so you lose some of that desired crunch. It’s better for texture preservation to use the oven method, but speed wins sometimes, right?
Frequently Asked Questions About This Stuffing
It’s funny how many questions pop up when we start fiddling with our most treasured holiday recipes! I get it; we want perfection for Thanksgiving. Here are a few things I hear most often about getting this stuffing just right.
Can I make this stuffing ahead of time for a quick finish on Thanksgiving?
Oh yes, you absolutely can! This is one of my favorite tricks for keeping my own stress levels low on the holiday morning. You can mix up the entire stuffing—up to the point of adding the liquid, or mixed completely—and store it in the refrigerator for up to two days. If you mix it all the way, just put it in your baking dish, cover it tightly, and chill.
When you’re ready to bake, I suggest adding an extra splash, maybe 1/4 cup, of warm broth before you cover it with foil, as the bread might have absorbed a little more while resting overnight. This helps ensure a perfect finish for a quick start to your baking schedule!
What are some simple breakfast ideas if I have leftover stuffing?
Leftover stuffing for breakfast? My new favorite holiday tradition! It feels so decadent! If you have any stuffing left over—and you should, because it’s that good—don’t just reheat it plain. Think savory hash!
Here are some simple ideas: Crumble up cold stuffing into a skillet with a little butter, toss in some diced sweet potatoes or squash if you have it, and then fry it until it gets those nice crispy edges. The best part? Top that hash with a perfectly fried or poached egg. The runny yolk mixes right into the savory stuffing base. It’s not just a good breakfast; it’s the best use of leftovers, period!
How do I ensure my stuffing stays moist but not soggy?
This is the million-dollar question, isn’t it? The secret is all about the broth control during Step 3 of the instructions! When you pour the vegetable broth in, you must add it slowly, a little at a time, and stir well between additions. You are aiming for ‘moist’ bread cubes, not bread that is floating in liquid.
The dried bread needs just enough moisture to soften beautifully in the oven, but not so much that it collapses on itself. Stop adding broth the moment you can toss the mixture and see that practically every cube is coated and looks damp, but there’s no standing pool of liquid at the bottom of the bowl. That intentional restraint keeps the final dish light and fluffy rather than dense and wet!
Share Your Experience with The Only Stuffing Recipes Recipe You’ll Need (2025)
Oh, I truly can’t wait to see what you all create with this recipe! For me, food is so much more than just fuel; it’s about the moments we share around the table, and this stuffing is steeped in those cozy, nostalgic feelings.
I’ve given you my very best tips and my family’s go-to method for The Only Stuffing Recipes Recipe You’ll Need (2025). Now it’s your turn to make it yours! Did you stick to the sourdough? Did you sneak in some dried cranberries? Did you manage to get those perfect brown, crispy edges on top?
Please, please leave me a rating below—it helps other bakers feel confident trying new holiday sides! And if you have a sweet holiday memory tied to a great side dish, I would absolutely love to read it in the comments. Sharing those stories is honestly the best part of this whole experience.
If you take a photo of your incredible, perfectly moist stuffing, I’d be thrilled if you shared it on social media and tagged me! You can always reach out directly if you have tricky questions or just want to share a general culinary quest over on my contact page. Happy cooking, and I truly hope this recipe brings as much warmth to your table as it does to mine!
The Only Stuffing Recipes Recipe You’ll Need (2025)
Ingredients
Equipment
Method
- Preheat your oven to 350 degrees F.
- Melt 6 tbsp unsalted butter in a large skillet.
- Add the minced garlic, chopped yellow onion, and diced celery to the melted butter. Cook until the vegetables are tender, about 5 minutes.
- Place 6 cups of dried bread cubes in a large mixing bowl. Pour the buttered vegetable mixture over the bread. Add the rosemary, thyme, fresh parsley, salt, and ground pepper. Toss everything to combine.
- Add 1 cup of vegetable broth and stir to combine. Add the remaining vegetable broth 1/4 cup at a time, stopping when all the bread is moist. You might not use the full 2 cups.
- Spread the stuffing mixture onto a greased cookie sheet and cover it with foil. Bake in the oven for 35 minutes.
Nutrition
Notes
Tried this recipe?
Let us know how it was!
Gluten-Free Culinary Storyteller & Recipe Heritage Specialist
Getting diagnosed with non-celiac gluten sensitivity in my late twenties felt like losing my Italian identity. Growing up in nonna’s Brooklyn kitchen, learning traditional techniques that suddenly became off-limits—I decided to fight for those family food traditions instead of giving up.
With my food journalism background and European baking training, I became obsessed with recreating authentic flavors in gluten-free formats. I’ve adapted 400+ traditional recipes from various cultures, with my gnocchi recipe winning “Recipe of the Year” from the National Gluten-Free Living Awards in 2022.
I collaborate with the Italian-American Cultural Center to document traditional family recipes and volunteer with the Westchester Celiac Support Group, teaching monthly pasta-making classes.
Food is the heart of family storytelling. No one should sacrifice their cultural heritage due to dietary restrictions.