Oh, friends, let’s talk about stuffing. I swear, making fantastic Stuffing Recipes Meal Prep That Actually Tastes Great feels like cheating, but I promise it’s not! We all know the big day can get chaotic, but worrying about dry, bland side dishes is officially over because we are prepping this flavor-packed stuffing ahead of time.
I learned this lesson the hard way when my youngest, Marco, was diagnosed with celiac disease right before Thanksgiving. I was determined that meal wouldn’t miss out on Grandma’s tradition, so I adapted her classic recipe using gluten-free bread. Watching him enjoy that savory dish, full of fresh herbs, felt like the biggest win. It showed me that even classic recipes can be reimagined to bring everyone together.
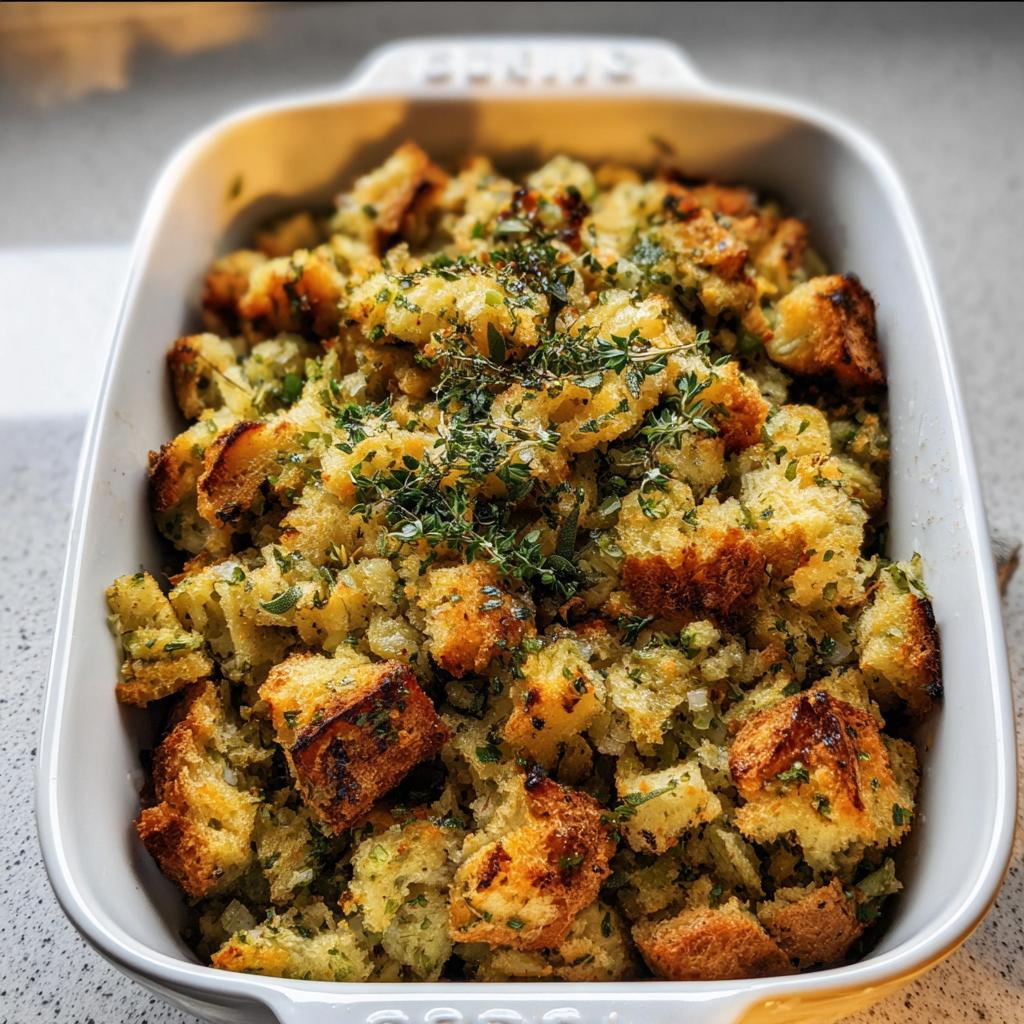
This recipe keeps all that holiday magic, trust me. It stays wonderfully textured, savory, and moist even after chilling and reheating. It’s my proudest kitchen accomplishment!
Why This is One of the Best Stuffing Recipes Meal Prep That Actually Tastes Great
You need a recipe that tastes like you spent all day stirring, even if you didn’t! The beauty of this approach is that you bake it once, and then you’re just reheating later. It’s all about minimizing stress on the big day, especially when it comes to beloved sides like this.
- Flavor Retention: The savory vegetables and those vibrant herbs somehow taste even better the next day!
- Seamless Prep: You combine everything, bake it until golden, and you are done until serving time.
- Fantastic Reheat: It comes out perfectly moist, not dry and crumbly like some make-ahead dishes tend to do.
Flavor Profile: Mastering Thanksgiving Herbs
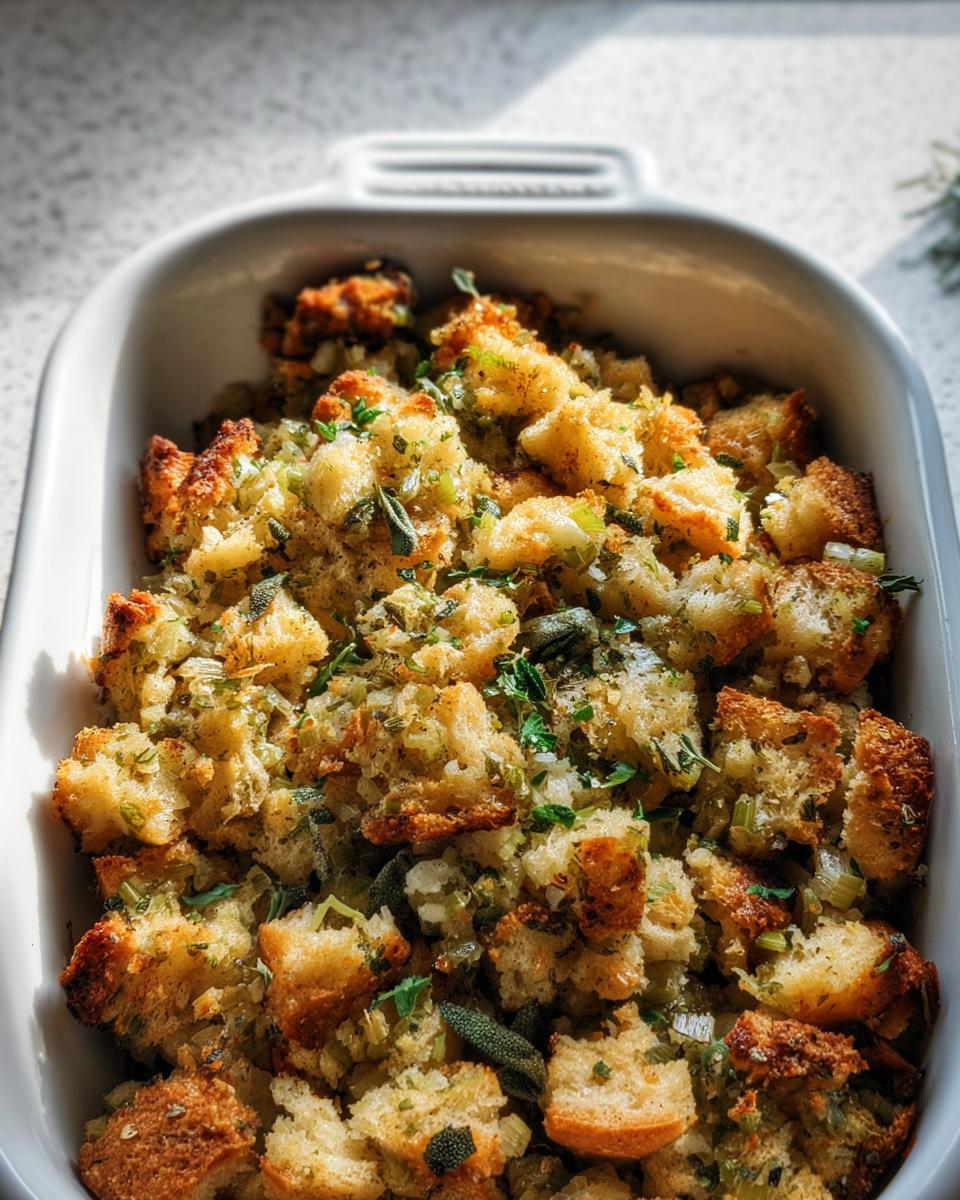
Honestly, you cannot fake the taste of fresh when it comes to Thanksgiving. Using heaps of fresh sage, rosemary, and parsley is what separates a good stuffing from one people talk about for years. These robust herbs infuse the butter and onions beautifully during the initial cooking phase.
Because we cook them down before mixing everything, that deep, earthy flavor locks right into the bread cubes. When you reheat it later, those complex aromatic layers don’t disappear; they just get a little richer, which is exactly what we want!
Texture Control: Preventing Soggy Stuffing
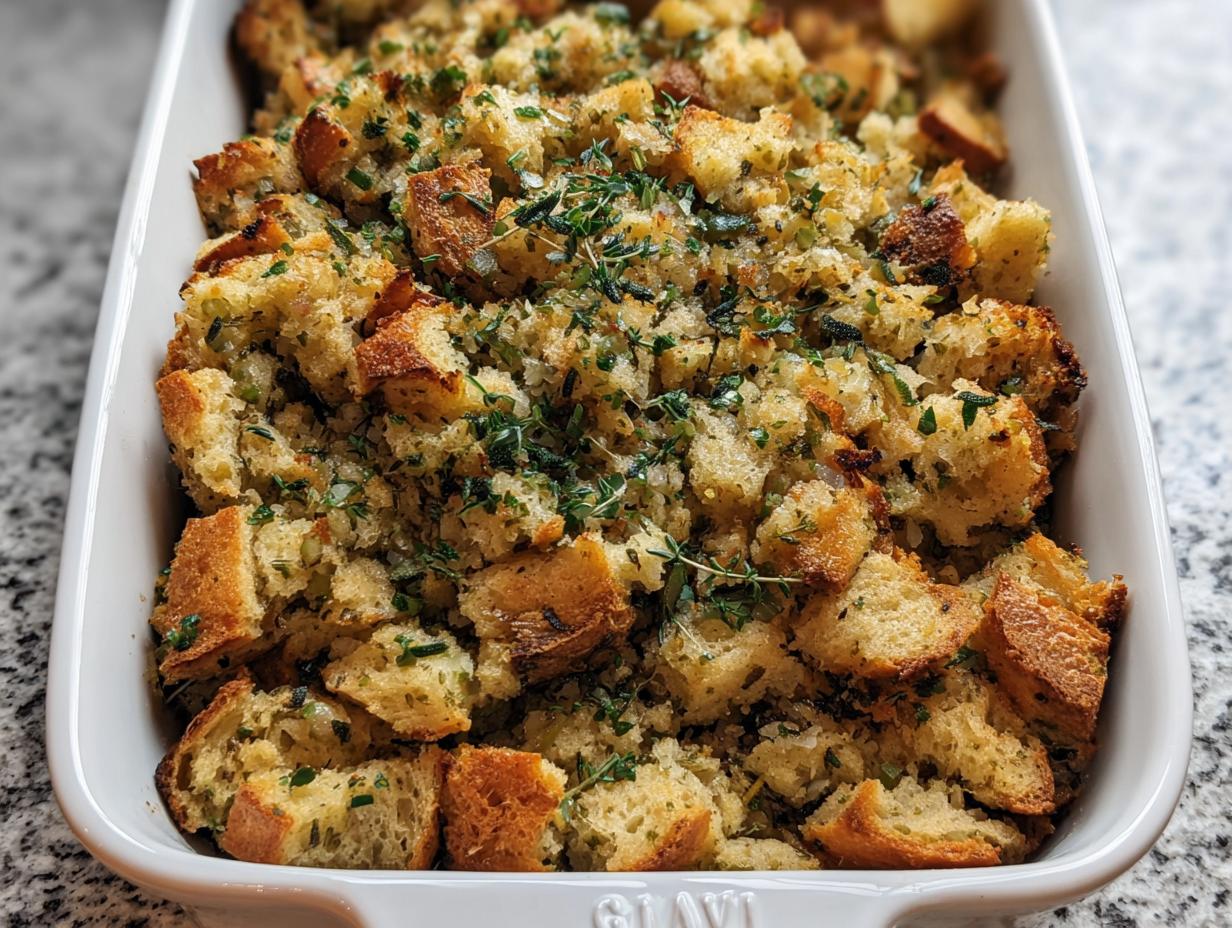
Soggy stuffing is a tragedy I want everyone to avoid! The biggest secret to making sure this holds up to meal prep is toasting your bread first—and I mean really toasting it. We want cubes that are almost like croutons!

When you start with dry bread, it acts like a sponge when you add the stock and eggs. It soaks up the moisture perfectly without dissolving. This structure is the secret weapon that keeps your baked stuffing light and fluffy after refrigeration and reheating, not heavy like a brick.
Ingredients for Stuffing Recipes Meal Prep That Actually Tastes Great
Okay, look at this ingredient list. It seems long, but honestly, it’s just building layers of flavor that make your meal prep worth it! Don’t let the fresh herbs scare you; they are the key to making this ahead of time taste better, not worse.
If you are interested in making your own bread base, especially if you need a gluten-free bread recipe, that’s where you start the planning!
For the Stuffing Base:
- 18 ounces bread cubes (Preferably toasted or stale, about 12 to 14 cups)
- 1 cup unsalted butter
- 3 cups diced sweet onion (Roughly 2 large onions)
- 2 cups diced celery
- 6 garlic cloves (minced)
- 1 teaspoon kosher salt (or more to taste)
- 1 teaspoon pepper (or more to taste)
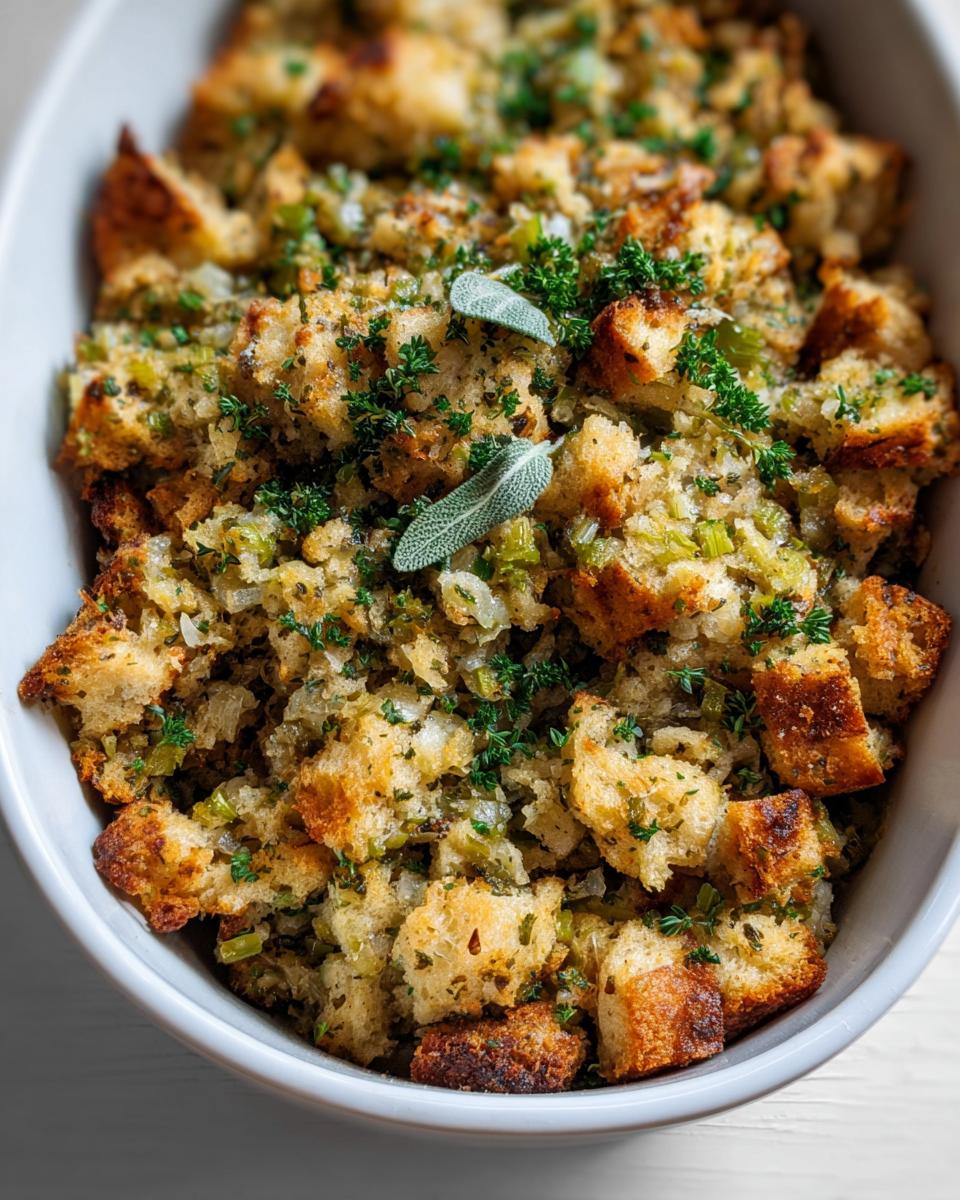
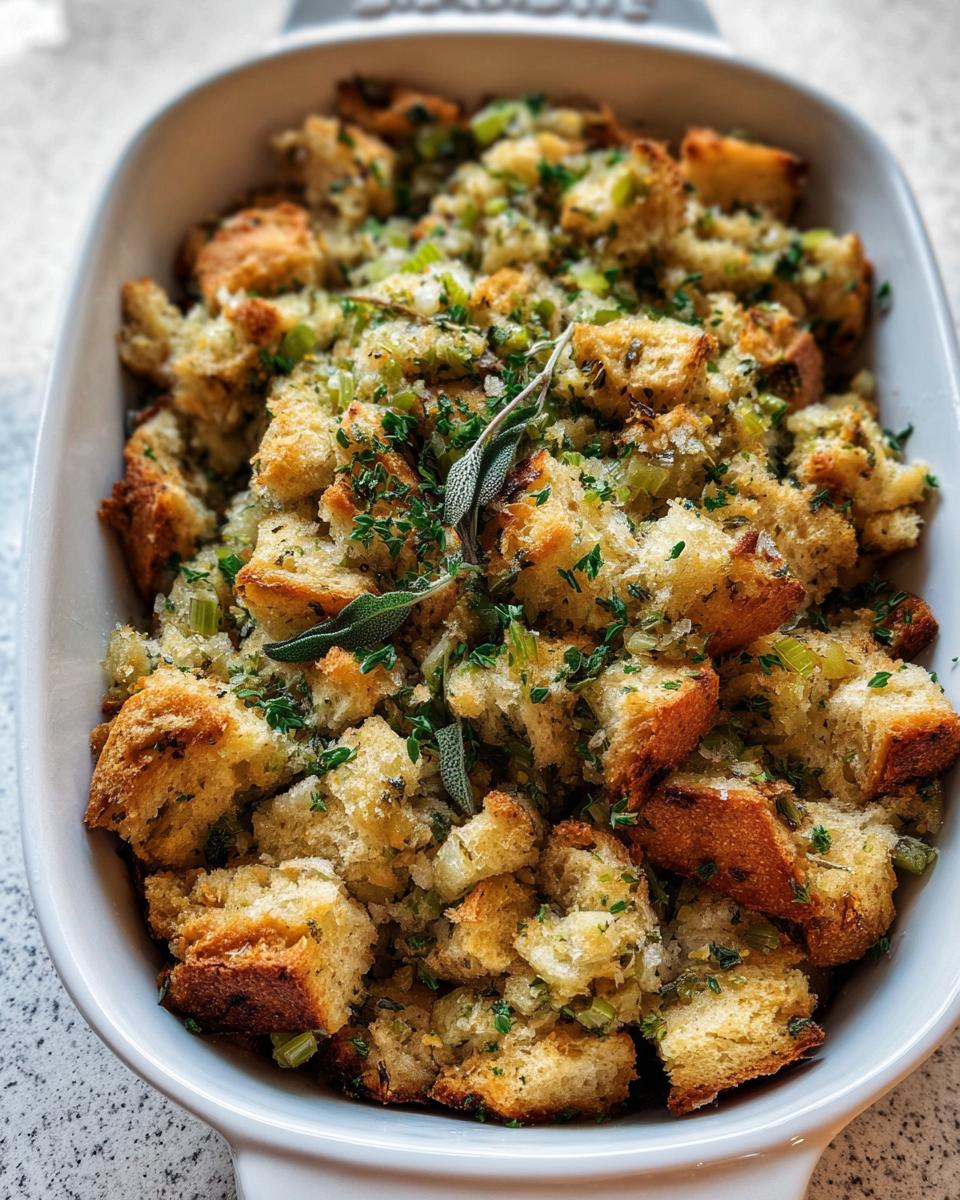
- 3 tablespoons chopped fresh sage
- 3 tablespoons chopped fresh parsley
- 3 tablespoons chopped fresh rosemary
For the Liquid Binder:
- 2 1/2 cups chicken or vegetable stock
- 2 large eggs
- 1 mixture of fresh herbs (for sprinkling)
See? Mostly pantry staples, just jazzed up with the best fresh stuff. This is what ensures fantastic texture even when you reheat it later!
Step-by-Step Instructions for Stuffing Recipes Meal Prep That Actually Tastes Great
Okay, this is where the magic happens! Remember, we are building flavor now so we can just relax later. Make sure you use a big enough bowl for the tossing step—you don’t want to waste any of those amazing butter-soaked bits. Keeping things organized is key for successful meal prep, just like when I made a big batch of healthy granola!
Preparing the Bread Base and Aromatics
- First, you need to get your bread ready! You have to toast those 18 ounces of bread cubes until they are dry, almost like croutons. If you’re planning this ahead for Thanksgiving, you can do this a day early or toast them for about 15 minutes at 350°F.
- Get your 9×13 dish greased up nice and good, and set the oven to heat up to 350 degrees F. Put those dry cubes in your biggest mixing bowl.
- Grab your skillet and melt that full cup of butter over medium heat. Toss in your onions, celery, and that minced garlic. You need to cook this until everything gets soft and sweet—that’s about 8 to 10 minutes of patient stirring.
- Once soft, stir in all those beautiful fresh herbs—your sage, rosemary, and parsley. Let them sizzle for just one minute until you can smell that incredible aroma, then splash in one cup of stock and scrape up any lovely browned bits.
- Finally, pour that hot, flavorful veggie mixture right over your dry bread cubes and toss everything together until the bread starts soaking up that deliciousness evenly.
Binding and Baking for Optimal Texture
Now we stabilize the whole thing so it holds together perfectly when you reheat those stuffing portions later. Don’t skip the egg wash step!
- In a small bowl, whisk together your remaining 1 1/2 cups of stock with the 2 eggs until they are fully combined and slightly frothy. This is your binder!
- Pour this liquid binder over the bread and toss gently but thoroughly. You should see all the cubes getting moistened, but there shouldn’t be any standing liquid left over.
- Spread the mixture into your prepared dish and bake it for about 45 to 50 minutes. I always pull out an instant-read thermometer; you want that internal temp to hit 160 degrees F for safety!
- If the top is getting too dark before it’s cooked through, don’t panic—just loosely drape some foil over the top.
Oh, and here’s the meal prep hint! If you’re cooking this intending to bake it *later*, just cool it completely, cover it tight, and remember to pull it out about 60 minutes before you want to stick it back in the oven. You can check out this other recipe for even more quick cooking ideas!
Mastering Meal Prep: Storing and Reheating Stuffing Recipes Meal Prep That Actually Tastes Great
This is the part where you get to breathe easy! Since we built this stuffing with that lovely toasted base, it handles storage like a champion. Once the stuffing is fully baked, let it cool down completely on the counter. Don’t rush this part, or you might steam up your storage container!
For the fridge, cover your 9×13 dish tightly with plastic wrap or transfer the cooled stuffing into airtight containers. It keeps wonderfully for up to three or four days. If you’re planning way ahead for a later holiday, this freezes like a dream too—just make sure it’s wrapped really well for about a month.
Now, here is the trick about reheating, which is noted in the recipe as that crucial 60-minute resting time. If your stuffing is coming straight from the cold fridge, you absolutely must let it sit on the counter for about an hour before putting it in the oven. This brings the temperature up slowly so it reheats evenly without drying out the edges.
When you finally bake it again, say at 350 degrees F, sprinkle just a tiny splash of extra stock over the top before covering it with foil. That little bit of steam works magic to bring back incredible moisture. You can find more tips on prepping meals for busy times over at my meal prep section!
Tips for Success with Any Stuffing Recipe
Even though this recipe nails the meal prep factor, the fundamental rules of great stuffing still apply! If you want to venture out and try other seasonal ideas, keep these pro tips close by. They are the reason my holiday table always smells amazing, year after year.
First up, let’s talk about the liquid. The recipe calls for 2 1/2 cups of stock, but that’s an estimate, right? We all love our bread cubes a little differently. If you prefer a very moist, almost pudding-like base, you might need an extra quarter cup of stock when you mix everything together. If you like it firmer, pull back a splash. You have to use your hands to feel when it’s right—it should be damp all around, but not soaking wet.
And seriously, please don’t skimp on your stock! This is just as important as using fresh herbs. If you use low-sodium water or a thin, watery broth, that’s exactly what your stuffing will taste like. I always choose a homemade bone broth if I can, but if not, opt for a high-quality, full-flavored chicken or vegetable stock. The stock is the main flavor carrier for everything else!
If you’re hosting folks who love a good potato side dish right next to their stuffing, you might want to check out some fantastic ideas over at my section on potato recipes for inspiration!
Variations for Your Stuffing Recipes Meal Prep That Actually Tastes Great
You know me, I believe in making every recipe my own! While this classic herb version is king for make-ahead convenience, it’s super easy to switch things up when you are planning your big Thanksgiving spread. Don’t feel locked into just one flavor profile just because you are prepping it early!
If you need a vegetarian option, just swap out the chicken stock for a rich vegetable broth—the fresh herbs will still carry all the flavor. For a fun crunch, try tossing in some toasted pecans or walnuts during the final mixing stage. They add such a satisfying bite!
I also love adding dried cranberries or chopped dried apricots for a little burst of sweetness that balances the savory sage. It makes the reheated stuffing feel extra gourmet. If you want to see how I incorporate stuffing-like flavors into other dishes, take a peek at my recipe for stuffed peppers—it’s delicious!
Serving Suggestions for Your Flavorful Stuffing
This amazing, prep-ahead stuffing is ready to shine next to just about anything, which is why it’s a holiday MVP! Since you’ve taken the time to make it taste so wonderfully savory with all those herbs, serve it right alongside a beautiful roast chicken—it’s a classic pairing that never fails. You can find my favorite ways to prepare poultry over at my chicken recipes page!
It also pairs beautifully with savory, slow-cooked meats like pot roast or pork shoulder if you don’t need a full Thanksgiving spread. Honestly, even serving a scoop next to a simple baked salmon makes for a really satisfying chilly-weather dinner. It’s so versatile!
Frequently Asked Questions About Stuffing Recipes Meal Prep That Actually Tastes Great
I get so many questions when people see this recipe, especially about making it ahead of time or adapting it for sensitivities. It’s a tried-and-true classic, but sometimes we need small tweaks! Here are the things I hear most often when folks are planning their meal prep around this stuffing.
Can I make this stuffing completely vegetarian or vegan?
Absolutely, this is one of the great things about this recipe! You swap that cup of butter for a good quality vegan butter stick—it melts down the same way. For the stock, just use a really robust vegetable stock instead of chicken stock. The beautiful fresh herbs we load in there do a fantastic job of carrying the savory flavor profile, making it truly satisfying for vegetarians!
How long can I safely store the prepared (uncooked) stuffing mix?
This is key for planning big holiday dinners! If you’ve finished combining everything—the toasted bread, the aromatics, the egg/stock binder—and you haven’t baked it yet, you can cover that mixture tightly and keep it in the fridge for up to two days. Just make sure the bowl is really sealed up! When baking straight from the fridge, you might need to add about 10 minutes to that bake time.
You can also freeze the unbaked mix for a month! Just thaw it overnight in the fridge before baking as directed.
Share Your Perfect Stuffing Results
I really, truly hope this recipe means less kitchen stress and more time enjoying your loved ones this year! Making great stuffing ahead of time should feel like a superpower, and I know you’ve got this.
Once you whip up this batch, don’t be shy! Please come back here and leave me a star rating so others know how wonderfully the meal prep textures hold up. I especially want to hear about any tweaks you made—did you add smoked paprika? Did you use wild rice instead of half the bread? Spill the beans!
Sharing your experience helps build up my whole community here. If you have questions after you’ve stored it or reheated it, drop those below too! You can always reach out directly through my contact page if you need private advice, but I love troubleshooting right here in the comments.
Happy cooking, and may your holiday table be absolutely stacked with delicious, perfectly textured sides!
Classic Herb Stuffing
Ingredients
Equipment
Method
- Prepare your bread cubes. You can cut 1.5 pounds of bread into cubes and let them sit loosely covered overnight, or toast them at 350 degrees F for about 15 minutes until they resemble croutons. You can also use store-bought toasted cubes.
- Preheat your oven to 350 degrees F. Lightly coat a 9×13 baking dish with melted butter, olive oil, or nonstick spray. Place the bread cubes in a large mixing bowl or the baking dish.
- Melt the butter in a large skillet or dutch oven over medium heat. Add the onion, celery, and garlic along with at least 1/2 to 1 teaspoon each of salt and pepper. Cook until the vegetables soften, about 8 to 10 minutes.
- Stir in the sage, parsley, and rosemary. Cook for one more minute. Add 1 cup of the stock and stir.
- Pour the cooked onion and celery mixture over the bread cubes and toss to coat them evenly.
- In a separate small bowl, whisk together the remaining 1 1/2 cups of stock and the 2 eggs.
- Pour the egg and stock mixture over the bread cubes. Stir and fold the ingredients until everything is combined thoroughly.
- Bake the stuffing for 45 to 50 minutes, or until the internal temperature reaches 160 degrees F. If the top browns too quickly, cover it loosely with foil.
- If you plan to reheat this later, remove the pan from the refrigerator 60 minutes before you plan to put it back in the oven. You can also use this mixture to stuff a bird if you choose.
Notes
Tried this recipe?
Let us know how it was!
Gluten-Free Chef & Latin Cuisine Innovation Specialist
My youngest son’s celiac diagnosis at four changed everything. Suddenly, all those traditional Brazilian and Portuguese recipes from my avó needed to be completely reimagined without losing their soul.
After graduating from Johnson & Wales and working Miami’s Latin fusion scene, my son’s diagnosis became my calling. How do you make gluten-free empanadas that taste like childhood? Over eight years, I’ve developed 320+ gluten-free recipes celebrating authentic Latin flavors using cassava flour and plantain alternatives.
My gluten-free empanada recipe won “Best Appetizer” at the 2023 Miami Gluten-Free Food Festival. I ran “Sabores Sin Gluten,” a catering business serving Miami’s Latino community—quinceañeras, family gatherings, all the celebrations that matter.
Food is culture, and everyone deserves to experience the joy of sharing traditional family meals, regardless of dietary restrictions.