
Oh, home baking! There’s nothing quite like the smell filling your kitchen that just screams comfort, right? For me, that smell always meant banana bread, but when my youngest son was diagnosed with celiac disease, our favorite treat suddenly felt off-limits. I simply refused to give up that simple joy!
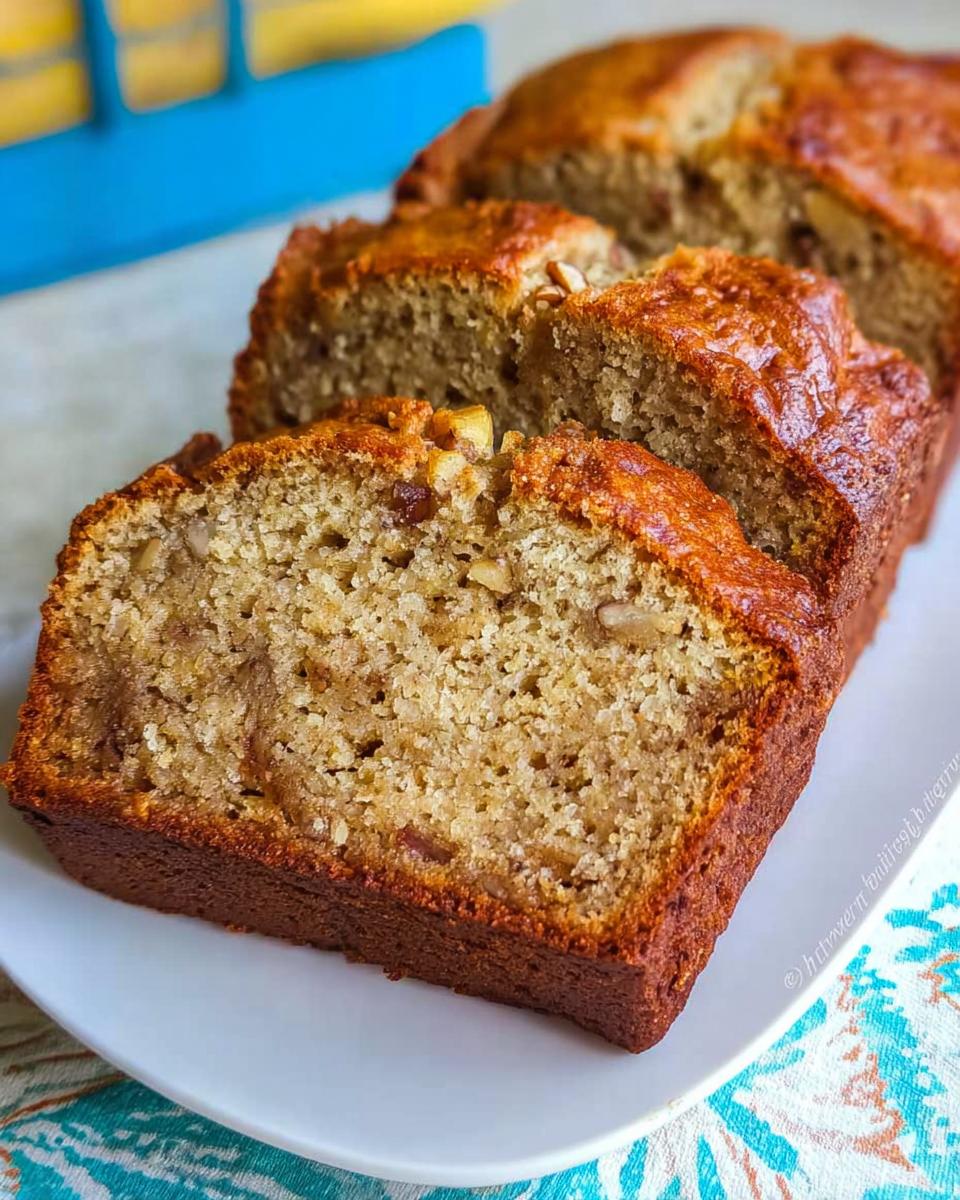
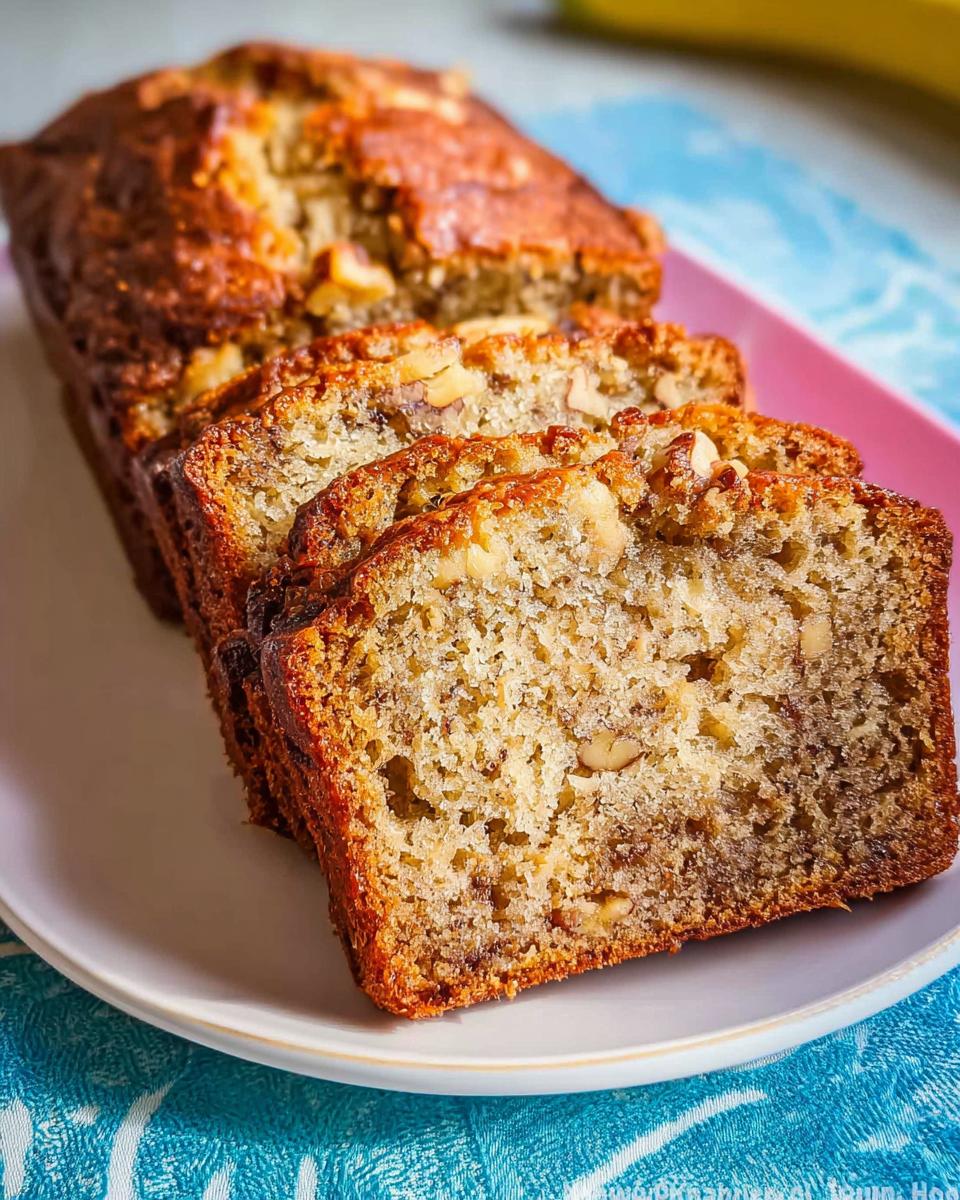
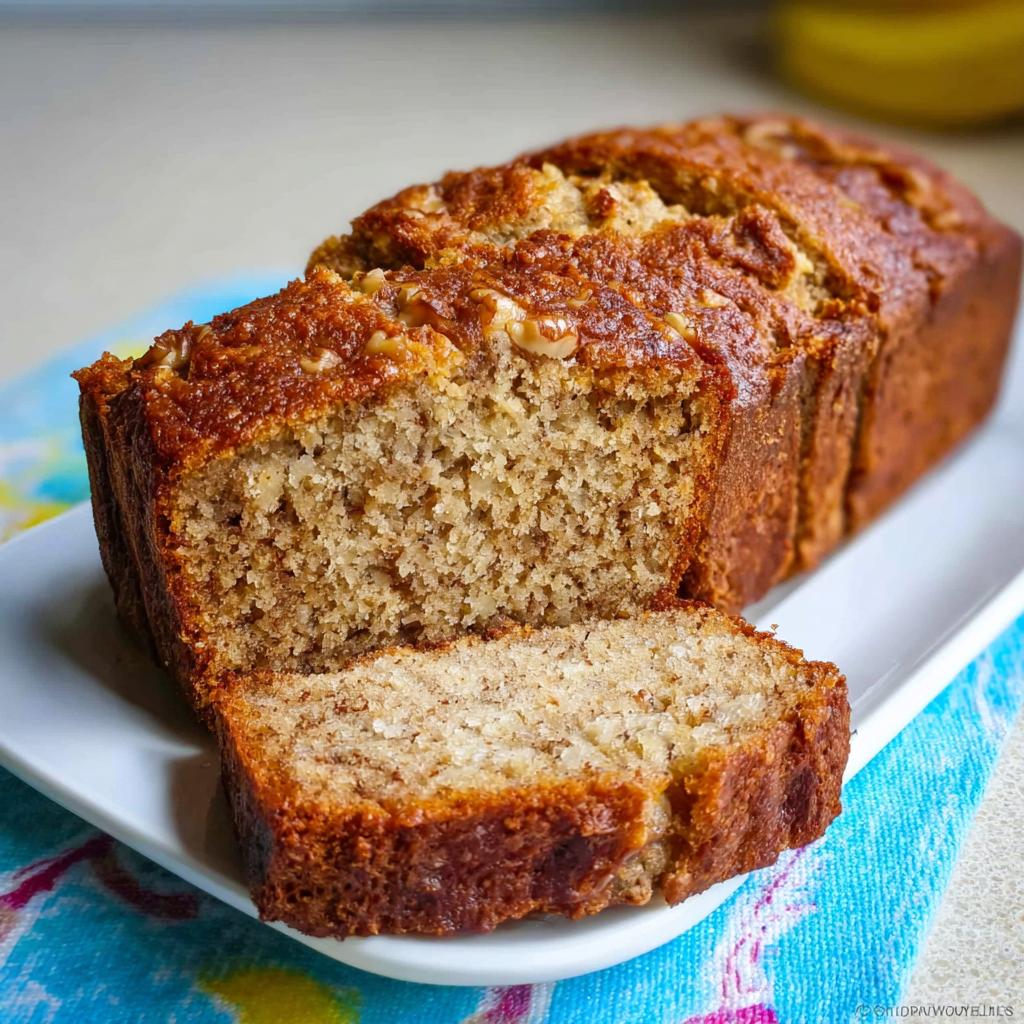
That determination pushed me into the kitchen, and after hours of blending, rising, and sniffing the air, the triumph came. That first bite? Soft, incredibly flavorful, and so unbelievably moist. Trust me, the secret weapon here is sour cream—it makes for the best extra moist banana bread you’ll ever make. This specific Sour Cream Banana Bread recipe isn’t just food; it’s a beautiful memory of overcoming those initial dietary hurdles.
As a Gluten-Free Chef and Latin Cuisine Innovation Specialist, I’ve adapted so many recipes, but this one stays sacred. It’s living proof that dietary needs don’t mean sacrificing the comforting flavors of our best family recipe ideas. You are going to love this process!
Why This Sour Cream Banana Bread is a Family Recipe Idea Staple
You know how some recipes just *feel* like home? This one is that for us. When I look at these ingredients, I see more than just flour and bananas; I see busy weeknights saved and perfect weekend breakfasts ready to go. It’s all about optimizing that incredible texture.
It’s quickly become one of our favorite family recipe ideas because it’s both comforting and practical. We always make two loaves, and here’s why:
- The nostalgia factor is huge. It tastes exactly like the comfort food I grew up with!
- It really does make the extra moist banana bread we crave.

Achieving Extra Moist Banana Bread Texture
The magic truly is in the sour cream baking technique here. That little bit of fat and acidity does wonders! It breaks down the proteins just enough so you don’t get a tough crumb, and it locks in all that lovely moisture from the bananas. It keeps everything tender.
Perfect for Freezer Friendly Loaves
Since this recipe yields two loaves, we always wrap one up tight immediately. They are absolutely freezer friendly loaves! Pop one in the freezer the day after baking, and you always have a delicious, ready-to-go treat next month when life gets chaotic. It thaws perfectly.
If you want to see other ways to get that perfect, soft texture in your breads, check out my article on the best homemade recipes for moist fluffy loaves!
Gathering Ingredients for Your Sour Cream Banana Bread
Alright, let’s talk about the treasures you need! Since we’re making our classic recipe here, you can expect to end up with two gorgeous loaves—plenty for sharing or freezing for later. The key to great banana bread isn’t just the sour cream; it’s starting with bananas that are practically crying out to be mashed. Seriously, the browner the peel, the sweeter the bread!
Essential Ingredients for the Sour Cream Banana Bread
I’ve listed everything below. Remember, the quality of these staples makes all the difference, especially if you’re trying my original method for this Sour Cream Banana Bread!
For the Bread:
- 1/3 cup butter, softened
- 1 1/4 cups white sugar
- 2 eggs
- 4 large very ripe bananas, mashed (if they’re smaller, use 5!)
- 1 cup sour cream
- 1 tsp vanilla extract
- 2 1/2 cups all purpose flour or white whole wheat
- 1 tsp cinnamon
- 2 tsp baking soda
- 1/2 tsp salt
- 1 cup walnuts, chopped, optional (don’t skip if you love that crunch!)
Equipment Needed for Perfect Sour Cream Banana Bread
Before we dive into the magic, let’s make sure your kitchen is ready for action! Getting the right tools out first is such a huge time saver, especially when you’re dealing with batter this good. You don’t need fancy gadgets for this classic loaf, but having the right vessels makes the mixing process so much smoother.
Since we are committed to getting two perfect loaves, we need pans that match that goal. Don’t try to jam all that batter into one standard pan, or it will bake unevenly! Remember, this is about achieving that perfectly even rise.
Here is what you’ll need handy:
- Two 8 1/2 x 4 1/2 inch loaf pans. This is the ideal size to get that beautiful height without the centers sinking.
- A large mixing bowl. You need space to cream that butter and sugar without making a huge mess everywhere.
That’s it! Simple equipment for maximum flavor. Grab your bowls and spoons, and let’s move on to the actual baking steps!
Step-by-Step Instructions for Making Sour Cream Banana Bread
Now we get to the fun part! Making this bread is straightforward, but the sequence matters—we want that gorgeous rise and that signature, decadent texture. I follow these steps religiously because they guarantee wonderful results whether you’re using regular flour or experimenting with gluten-free flour mixes. If you’re looking for more tips on the gluten-free side of things, I break down my favorite flour blends in my guide to making gluten-free bread.
Preparing the Pans and Oven
First things first, let’s get the oven fired up. You absolutely must preheat your oven to 325 degrees F. Don’t trust your oven to heat up while you mix! Next, you need to prepare those two 8 1/2 x 4 1/2 inch loaf pans. I like to be overly generous here—use butter, then dust them thoroughly with flour. Trust me, a stuck banana bread is the saddest thing!
Mixing the Wet and Dry Components of the Sour Cream Banana Bread
This is where we build the flavor base! Start by creaming the softened butter and white sugar together in your big bowl until it looks pale and fluffy. Then, mix in the two eggs until they are totally incorporated. Next, gently stir in the sour cream, those beautifully mashed bananas, and the vanilla extract—just mix until they disappear into that creamy base.
Now, for the dry stuff! In a separate bowl, whisk your flour, cinnamon, baking soda, and salt together. Add the dry mound to the wet mixture all at once. Stop mixing just as soon as you see no more dry streaks of flour—serious warning: overmixing develops gluten and defeats the purpose of this moist bread! Fold in those walnuts now, if you’re using them. I found a great recipe that details how adding too much wetness can ruin the texture, which is why the alternating method works so well; you can read more about it here.
Baking and Testing the Sour Cream Banana Bread
Divide that amazing batter evenly between your two prepared pans. Pop them into the preheated oven. They need about 1 hour to bake through. When that time is up, don’t just guess! Insert a clean toothpick right into the center of one loaf. If it comes out with moist crumbs clinging to it—not wet batter—you’re golden! If it’s wet, give it another 5 or 10 minutes. Let them cool in the pans for about ten minutes before turning them out onto a wire rack.

Tips for Success with Your Sour Cream Banana Bread
Okay, now that you’ve successfully navigated the mixing stage—pat yourself on the back!—I want to share a few last-minute pointers that really take this Sour Cream Banana Bread from good to absolutely unforgettable. A recipe is only as good as the quality of the ingredients you put into it, and knowing how to tweak it when things aren’t quite perfect is what makes you a great baker.
Ingredient Notes and Substitutions
Let’s talk about the flour first. The recipe calls for 2 1/2 cups of either all-purpose flour or white whole wheat. Honestly, they both work beautifully, but the whole wheat adds a tiny bit more heartiness and fiber. If you are substituting for gluten-free flour, remember that those blends usually need a little extra binder, like xanthan gum, to handle this much moisture, so start light!
And about those bananas—I can’t stress this enough: Ripe is an understatement. If you happen to be using smaller bananas from the bunch, don’t just stick to the “4 large” count! You need that volume of fruit. The note in the recipe says if the bananas are smaller, go ahead and use 5 of them. It’s about measuring by feel and sight sometimes, not just the number on the peel. That extra little bit of natural sweetness really helps balance the tanginess from the sour cream. Don’t be shy with those brown spots!
Storing and Reheating Your Extra Moist Banana Bread
Since this recipe is so generous and yields two full loaves of extra moist banana bread, you’ll definitely be thinking about storage right away! You want to protect that amazing texture we worked so hard to achieve, right? Don’t just toss a loaf on the counter uncovered; we need a strategy!
For the loaf you plan to eat within the next couple of days, wrapping it well is your best friend. After cooling completely—and I mean completely, or you’ll trap steam and get gummy spots—wrap each loaf tightly in plastic wrap first. Then, I actually like wrapping that plastic-wrapped loaf in foil. It’s a double layer of protection against air, which is the enemy of freshness!
Keeping the Loaf Extra Moist Overnight
If you store it wrapped tightly on the counter, it should stay wonderfully moist for about three or four days. If you cut into it, don’t worry about the cut end drying out; just place the cut side down against a piece of parchment paper inside the airtight container or plastic wrap. That simple trick keeps the moisture in the crumb where we want it!
Freezing Your Banana Bread for Later
Because these are such fantastic freezer friendly loaves, I usually wrap the second loaf for the deep freeze right away. Wrap it in plastic wrap, then foil, and slide it right into a zip-top freezer bag. It holds up beautifully for three months! When you’re ready to enjoy it, just leave it on the counter for several hours to thaw. Honestly, the texture is still ridiculously moist even after thawing. If you’re in a rush, you can microwave a slice for about 15 seconds for a warm treat!
The Trick to Reheating Single Slices
If you just want one slice warmed up without thawing a whole loaf, I recommend wrapping that slice in a damp paper towel before microwaving for about 20 seconds. That tiny bit of steam works wonders to revive the tenderness right before serving. It’s perfect when you want that warm, fresh-from-the-oven feel!
Frequently Asked Questions About Sour Cream Baking
I get so many wonderful questions whenever I share this recipe!
It’s only natural that you want to tweak things or make sure everything holds up perfectly. Since this Sour Cream Banana Bread is so popular, I’ve gathered the most common things folks ask about, especially concerning texture and planning ahead. If you are interested in other recipe variations I’ve tested, you should check out my main recipe page here!
Can I use Greek Yogurt instead of sour cream in this Sour Cream Banana Bread?
Oh, that’s a great question because Greek yogurt is so handy! Yes, you absolutely can substitute Greek yogurt for the sour cream in this recipe. They are very close cousins in the world of sour cream baking. However, Greek yogurt is typically a little bit thicker than traditional sour cream, so you might need to thin it out just a tiny bit.
I usually add just a teaspoon or two of milk or water to the yogurt to bring it to the consistency of the sour cream. If you don’t thin it, your batter might end up slightly stiffer than intended, which could affect how wonderfully extra moist banana bread this turns out to be. Use the yogurt, but check the consistency first!
How long does this banana bread stay fresh?
Because the sour cream keeps the crumb so well hydrated, this bread stays fantastic for days! If you keep the loaves wrapped tightly (like I showed you earlier with the plastic wrap and foil), they will stay perfectly fresh on the counter at room temperature for about 4 days. Honestly, they taste just as good on day three as they do on day one!
If you know you won’t get through both loaves within four days, remember they make amazing freezer friendly loaves! Wrap tightly and freeze them, and they’ll be good for up to three months. Thawing them low and slow guarantees you keep that incredible moisture locked in.
What if I forget to soften the butter?
Oops! We’ve all been there. If you try to cream rock-hard butter and sugar, you’re just going to end up with crunchy sugar bits instead of fluffy air pockets. Don’t despair! The fastest way to fix this, since you already have your ingredients measured, is to cut the cold butter into really small cubes—like pea-sized pieces.
Place those cubed pieces and the sugar into a microwave-safe bowl (without the eggs yet!). Microwave them on 50% power for about 10-15 seconds at a time, stirring well between each blast. You only want the butter soft enough to squish easily, not melted into a liquid. Once you get it right, you can mix it normally before proceeding with the rest of the recipe!
Nutritional Estimates for Sour Cream Banana Bread
Now, I know we bake this for love, not for the lab report, but it’s always good to have a rough idea of what’s in each slice, especially when dealing with dietary goals! Please remember these numbers are just estimates based on the standard recipe ingredients, and they can shift a bit depending on how ripe your bananas are or if you skip the nuts. For a single serving of this wonderful Sour Cream Banana Bread, here are the rough figures we calculated:
- Calories: 292
- Carbohydrates: 43g
- Protein: 5g
- Fat: 12g (Saturated Fat: 5g)
- Cholesterol: 38mg
- Sugar: 24g
It’s proof that comfort baking can still fit into your week! These figures reflect one slice when the two loaves are cut into standard servings.
Share Your Family Recipe Ideas
I truly hope this Sour Cream Banana Bread brings as much comfort and joy to your table as it does to mine. Baking is about sharing stories and passing down love, right? That’s why I consider this recipe a true treasure trove of family recipe ideas.
Try it out, and I absolutely want to hear what you think! Did you add chocolate chips instead of walnuts? Did you use almond flour? Please, don’t keep those fantastic modifications to yourself!
Leave a rating below—a simple five stars for a perfect loaf, or maybe four stars if you tweaked a little something! It helps other bakers know what works. And if you snapped a picture of your beautiful, extra moist banana bread cooling on the rack, tag me! I love seeing your creations getting made. Happy baking, friends!
Sour Cream Banana Bread
Ingredients
Equipment
Method
- Preheat your oven to 325 degrees F. Generously grease two loaf pans that are approximately 8 1/2 x 4 1/2 inches in size.
- Cream the butter and sugar in a large bowl. Add the eggs and mix them well.
- Add the sour cream, mashed bananas, and vanilla. Stir these ingredients to combine them.
- Add the flour, salt, cinnamon, and baking soda to the wet ingredients. Stir until the mixture is just combined. Fold in the walnuts, if you are using them.
- Divide the batter evenly between the prepared loaf pans. Bake for 1 hour or until a toothpick inserted in the center comes out clean.
Nutrition
Notes
Tried this recipe?
Let us know how it was!
Gluten-Free Chef & Latin Cuisine Innovation Specialist
My youngest son’s celiac diagnosis at four changed everything. Suddenly, all those traditional Brazilian and Portuguese recipes from my avó needed to be completely reimagined without losing their soul.
After graduating from Johnson & Wales and working Miami’s Latin fusion scene, my son’s diagnosis became my calling. How do you make gluten-free empanadas that taste like childhood? Over eight years, I’ve developed 320+ gluten-free recipes celebrating authentic Latin flavors using cassava flour and plantain alternatives.
My gluten-free empanada recipe won “Best Appetizer” at the 2023 Miami Gluten-Free Food Festival. I ran “Sabores Sin Gluten,” a catering business serving Miami’s Latino community—quinceañeras, family gatherings, all the celebrations that matter.
Food is culture, and everyone deserves to experience the joy of sharing traditional family meals, regardless of dietary restrictions.