Ever take one bite of a restaurant dish and immediately think, “I need that flavor in my life right now”? That happened to me! One summer evening, I was dining at this incredible seaside spot, and their shrimp dishes? Oh boy. The perfect marriage of spices, fragrant **garlic**, and fresh herbs—it absolutely transported me.
That evening sparked something in me. I just *had* to figure out how to make that magic happen in my own kitchen. After weeks of testing and tasting, I finally nailed that vibrant flavor explosion we all crave. Now, my family skips the reservations because they know what’s coming! Today, I’m sharing how you can achieve these amazing Restaurant-Style Shrimp Recipes at Home (2025). I’m Marco Santos, your Gluten-Free Chef and Latin Cuisine Innovation Specialist, and trust me, making amazing shrimp doesn’t need to be complicated.
Why You Will Master These Restaurant-Style Shrimp Recipes at Home (2025)
Honestly, I designed this recipe so absolutely anyone can pull it off. Forget those pricey dinner tabs! You’re going to love how simple this is.
- You get that incredible, complex flavor profile you associate with fancy dining.
- It cooks up lightning fast—seriously, perfect for a last-minute quick dinner.
- We keep the ingredient list straightforward, meaning less time shopping and more time enjoying amazing shrimp. Check out some other fast ideas here!
Essential Ingredients for Restaurant-Style Shrimp Recipes at Home (2025)
When recreating restaurant magic, the ingredients have to be on point. Don’t reach for substitutes here—these components are exactly what make the sauce sing! I’ve listed everything you need below. It’s mostly pantry staples, plus the star of the show.
Make sure your **garlic** is the star! You need it finely minced so it releases all that fragrant oil quickly into the skillet. Also, notice the butter—that cold butter cut into small pieces is important later for emulsifying the sauce, so prep that first!
- 1.5 tablespoons of olive oil
- 1 pound of **shrimp**, peeled and deveined
- Salt, just to taste
- 6 cloves of **garlic**, finely minced
- 1/4 teaspoon of red pepper flakes (adjust if you like it hotter!)
- 3 tablespoons of fresh lemon juice
- 1 tablespoon of caper brine (this is a secret weapon!)
- 2 tablespoons of cold butter, cut into 4 equal pieces, divided
- 1/3 cup of chopped flat-leaf parsley, divided
- 1 teaspoon of water, or just a splash as needed
If you’re looking for another amazing recipe that focuses heavily on **garlic** and **shrimp**, you have to check out my recipe for garlic shrimp and asparagus. It uses similar flavor builders!
Equipment Needed for Your Restaurant-Style Shrimp Recipes at Home (2025)
Okay, here’s the good news: you don’t need a whole commercial kitchen setup to fake that restaurant vibe. We’re keeping this super minimal. Having the right tools for this particular sauce build is what makes the difference between a soupy mess and that glossy coating we want!
You only really need two things to nail the actual cooking part of this recipe for four people:
- One sturdy, heavy skillet. This is crucial! A heavier bottom helps distribute that high heat evenly so your **shrimp** cooks fast without sticking or steaming.
- A slotted spoon. This is for scooping the cooked **shrimp** out temporarily so you can focus solely on finishing that beautiful sauce base while keeping the seafood warm.
That’s it! Grab those two pieces of equipment and let’s focus on that intense flavor profile.
Step-by-Step Instructions for Perfect Restaurant-Style Shrimp Recipes at Home (2025)
Remember that seaside flavor I was chasing? It comes down to speed and heat management. We need to move quickly but precisely. Don’t panic, though! This whole process takes less than 25 minutes flat, which makes it perfect for a busy night.
First things first, make sure all your ingredients are prepped and right next to the stove. When you’re cooking **shrimp** this fast, you can’t be running to the spice cabinet mid-sizzle!
Preparing the Pan and Searing the Shrimp
Get your heavy skillet hot—and I mean *hot*! We want that olive oil to just start smoking, that’s how we get that initial sear color. Lay your peeled and deveined **shrimp** down in one even layer across the bottom of the pan. This is critical: let them sit for a full minute without touching them! We are building flavor here, not steaming them.
After that first minute, add your salt and then stir them around until they just start to turn pink on the edges, maybe another minute. They aren’t done yet, but they need that initial hit of heat.
Building the Flavor Base with Garlic and Spices
Now we bring in the heavy aromatic hitters! Toss in your finely minced **garlic** and those red pepper flakes. You only want to cook the **garlic** for about 60 seconds while stirring constantly. If it burns, you’ve ruined the whole dish—that’s why high heat cooking is so quick here. We want fragrant, golden **garlic**, not bitter burnt bits.
In goes the lemon juice and the caper brine, plus one piece of that cold butter. Stir this around until that butter melts completely and everything starts to smell incredible. If you are looking for a similar flavor experience in a pasta dish, I have a fantastic garlic butter shrimp pasta recipe you might want to check out next!
Creating the Restaurant-Quality Sauce Finish
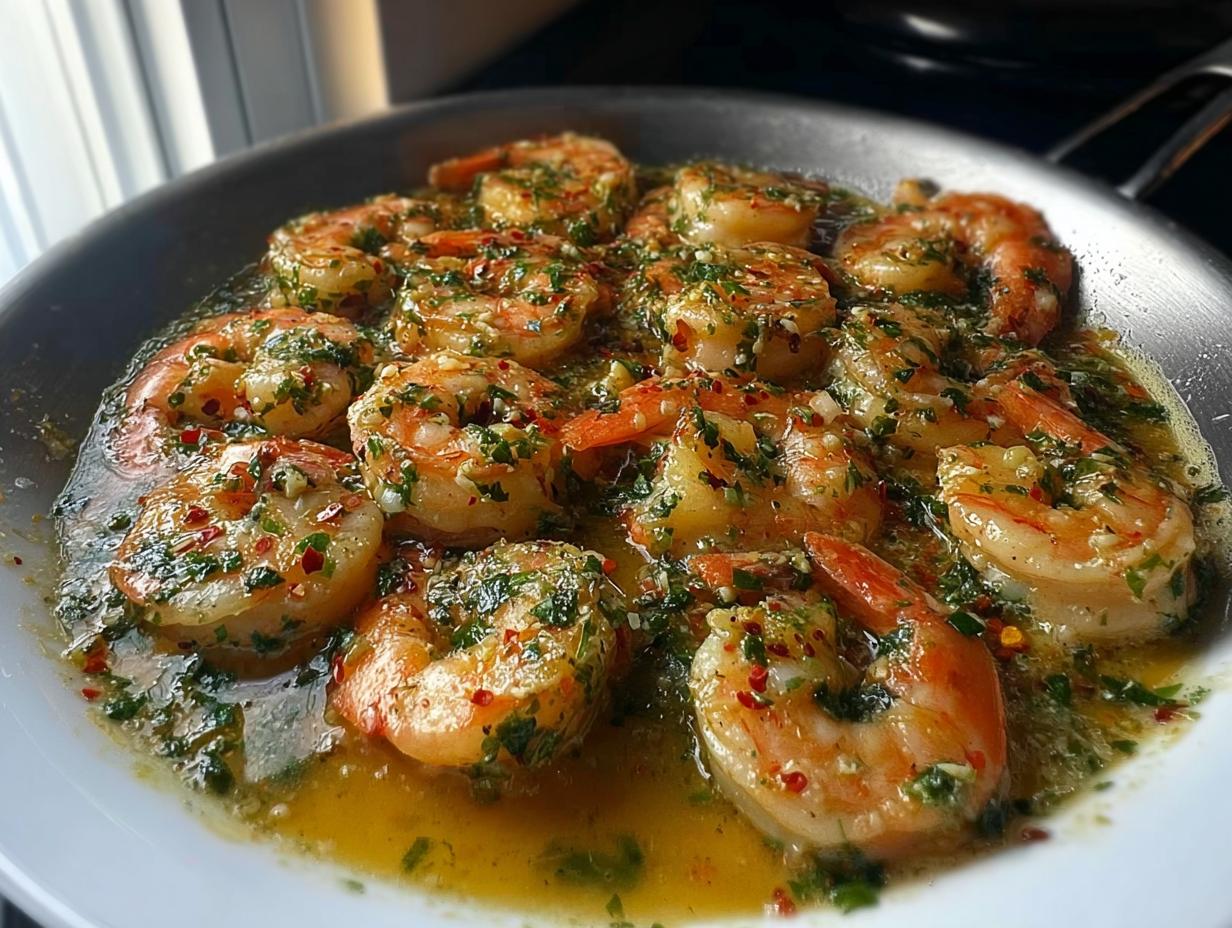
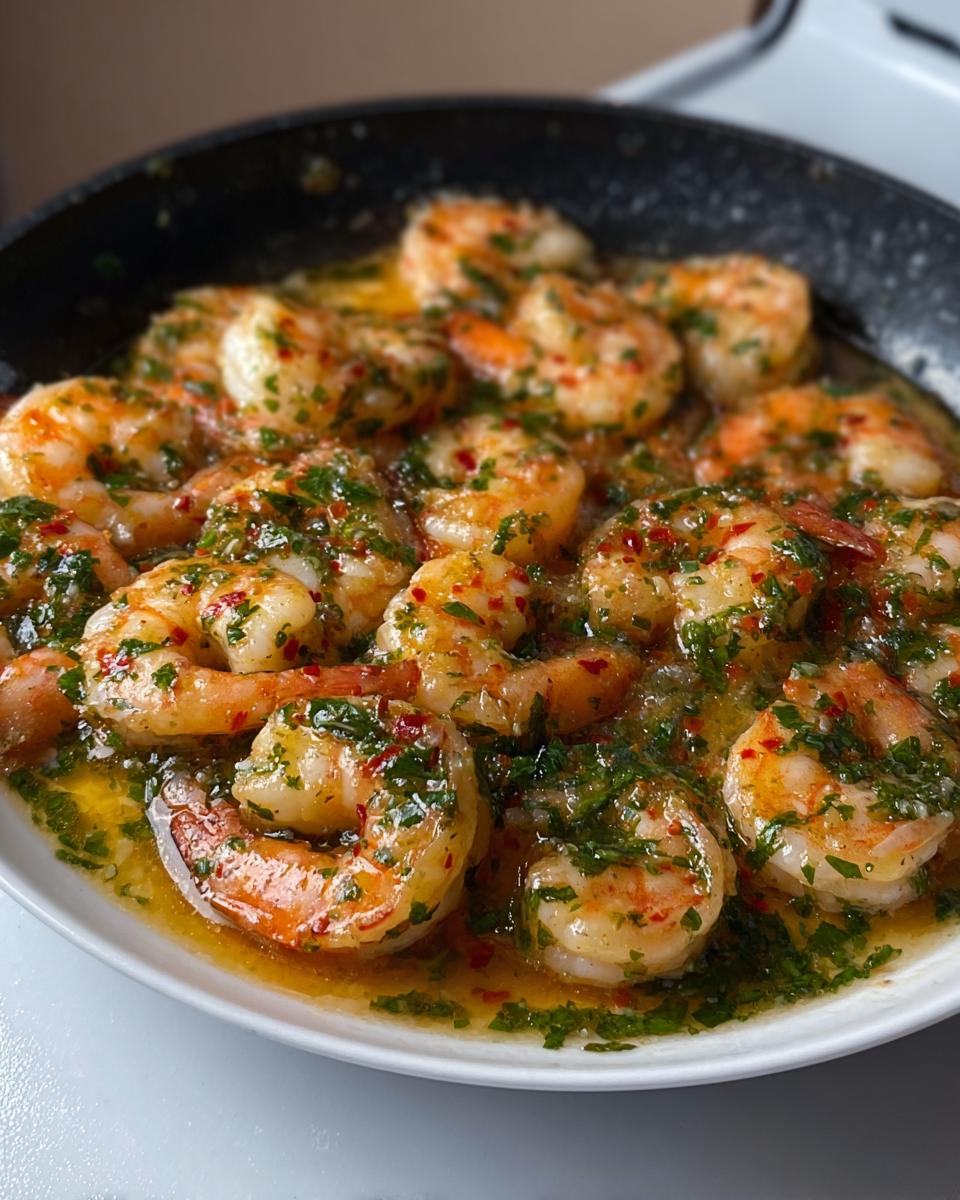
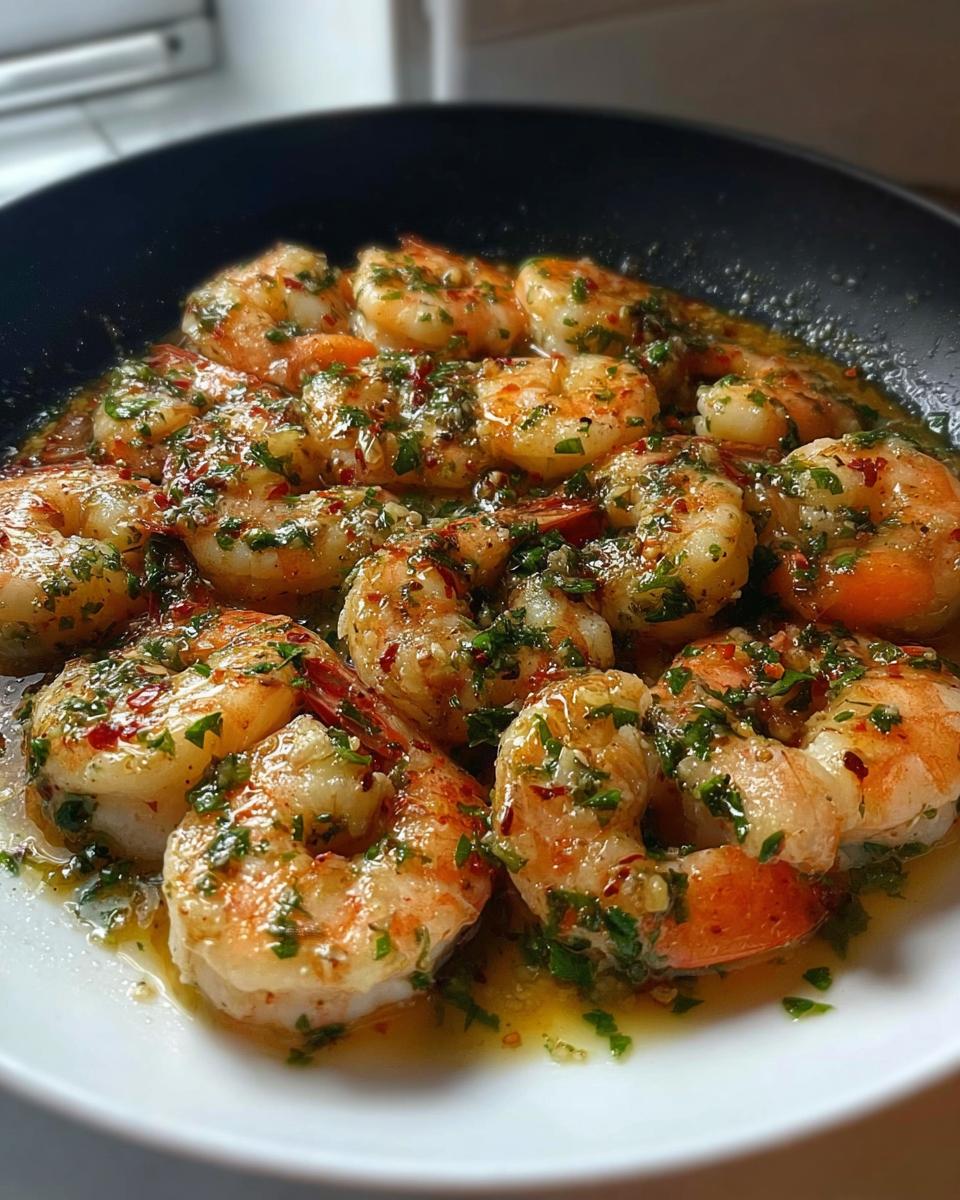
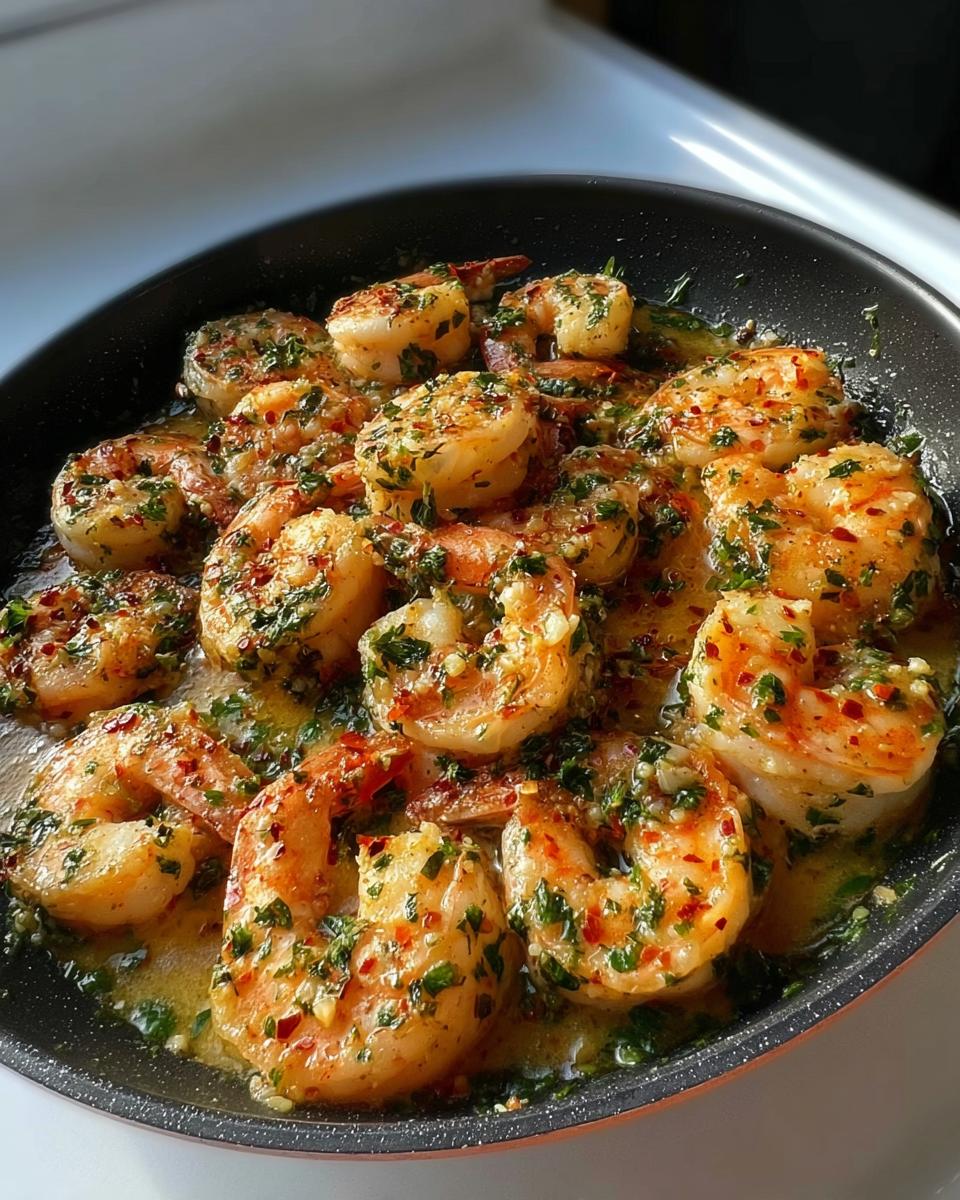
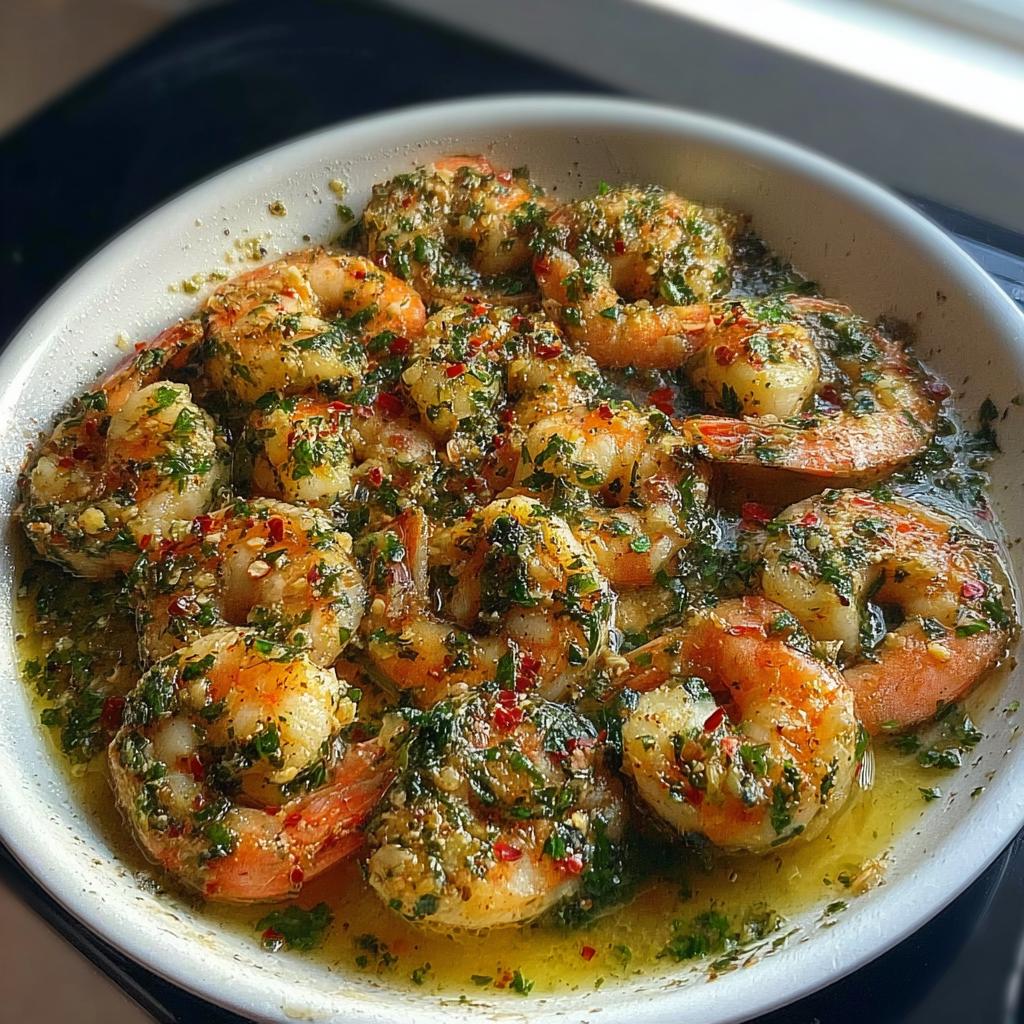
This is where the restaurant texture comes from! Reduce your heat down to low. Now, stir in the remaining three pieces of cold butter, one piece at a time. You are whisking gently until each piece melts and incorporates into the sauce. This emulsifies the fat and liquid, creating that classic, glossy, rich coating that clings perfectly to the **shrimp**.
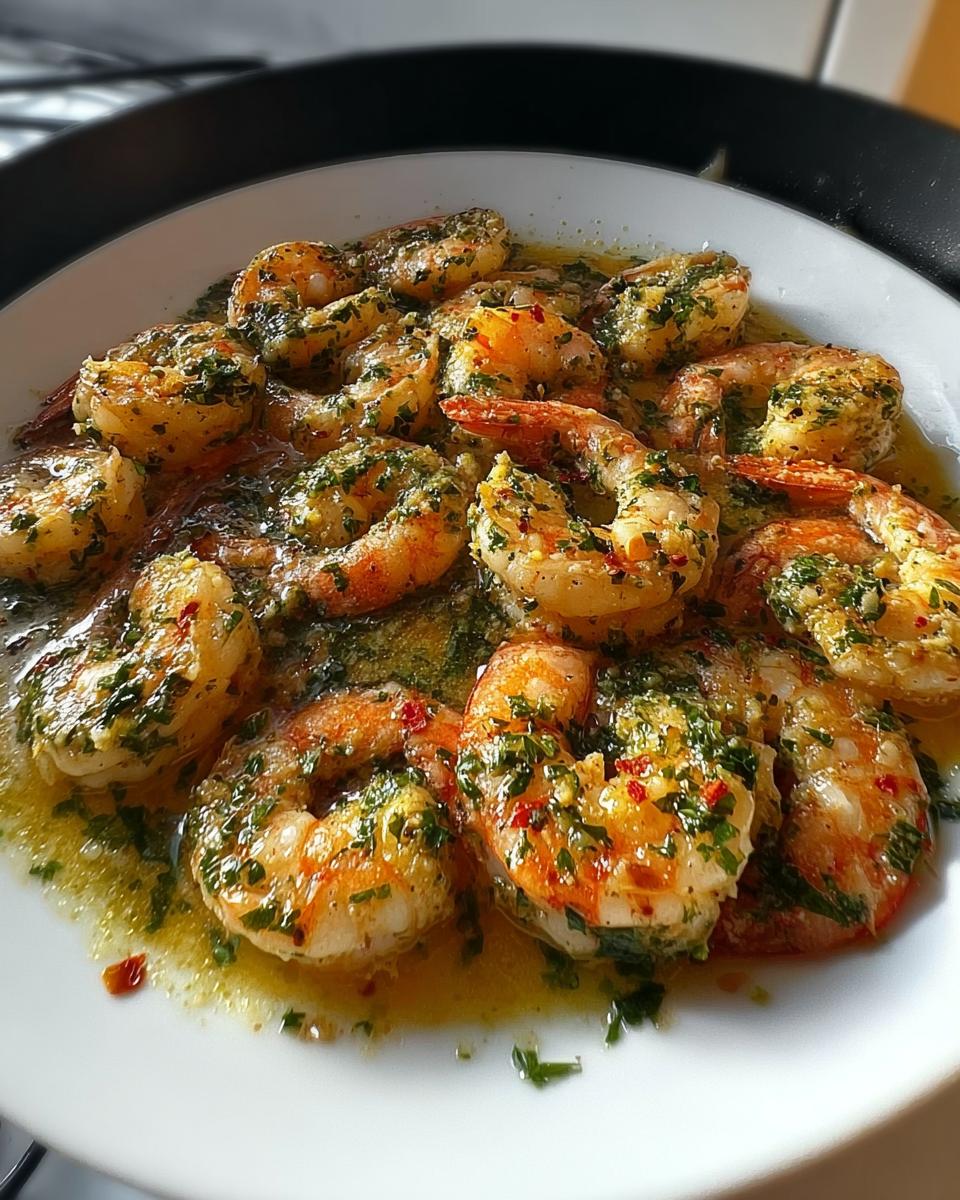
Once the sauce is thick, use your slotted spoon to pull the **shrimp** out into a warm bowl. Keep cooking that sauce for another minute or two, adding a teaspoon of water if it gets too thick to pour. Taste it, add more salt if needed, and then toss everything—sauce and the gorgeous pink **shrimp**—back together with the rest of that fresh parsley. For a different take on simple **garlic shrimp**, try this approach from AllRecipes: Simple Garlic Shrimp.
Expert Tips for Elevating Your Restaurant-Style Shrimp Recipes at Home (2025)
Look, getting that restaurant polish is all about the tiny details, right? These aren’t difficult steps, but they are non-negotiable if you want that sauce to coat everything perfectly.
First, never, ever rinse your **shrimp** after peeling and deveining them! You want a little bit of surface moisture gone, but too much will steam them instead of searing them when they first hit that hot pan. Use paper towels to pat them completely dry.
Second, remember the butter rule: add the first piece *before* the lemon juice, and the rest *after* you’ve pulled the heat down. That initial piece helps carry the acids from the lemon, but the later pieces thicken the sauce beautifully without curdling.
Finally, use fresh **garlic**, and don’t skimp on the parsley garnish at the end. That pop of green brightens the whole rich sauce up. If you love skillet meals incorporating these flavors, you should see my garlic butter shrimp sheet pan idea!
Ingredient Notes and Substitutions for Restaurant-Style Shrimp Recipes at Home (2025)
Look, I know the pantry isn’t always stocked like a high-end restaurant kitchen. Sometimes you’re missing that one specific ingredient, like caper brine. Don’t worry; we can pivot without losing that delicious, bright, salty kick!
The goal is to keep that bright, acidic, slightly salty quality that the brine brings to the sauce. If you’re out of caper brine, try this: use a teaspoon of pickle juice—yes, from your dill pickles! It sounds weird, but that salty vinegar mimics the brine perfectly. If you don’t have pickle juice, then use a teaspoon of standard white vinegar plus a tiny pinch of salt.
What about the lemon juice? If you’re fresh out of lemons for that essential tartness, half a teaspoon of white wine vinegar mixed with the water can work in a pinch. It won’t have that fruity aroma, but it gets the job done for balancing the richness of the butter.
When it comes to the **garlic**, please—and I mean *please*—don’t swap fresh for powdered if you can avoid it. Powdered **garlic** just doesn’t bloom the same way in hot oil. If you absolutely must, use half the amount of powdered garlic and add it later, maybe mixed into the liquid ingredients, not straight into the hot oil, or it’s going to burn fast.
And finally, the butter. If, for some reason, you aren’t using cold butter pieces for the finish (which I highly recommend for that professional sheen), remember that whatever fat you use needs to be added cold. Fats stiffen up better when cold, helping the sauce emulsify rather than just turning into oily liquid. Stick to whole butter if you can; margarine just won’t give you the same velvety texture for this amazing quick dinner!
Serving Suggestions for a Complete Meal
So you’ve got this ridiculously flavorful, garlicky sauce coating perfectly cooked **shrimp**. Amazing! But now you need something to soak up every last drop of that goodness, right? That’s what turns this dish from a tasty snack into a truly satisfying plate.
For an ultra-fast **quick dinner**, you can’t beat serving this over perfectly cooked white rice. Or, if you’re feeling a little fancier, toss this straight into a bowl of your favorite linguine or angel hair pasta. You’ll use that sauce like a fantastic, light pesto!
If you want vegetables, keep them simple so they don’t steal the show. Blanched asparagus or roasted broccoli florets are amazing because they stand up well to the sauce. I really recommend checking out my garlic butter shrimp rice bowl, which is my family’s favorite way to serve this!
Storing and Reheating Restaurant-Style Shrimp Recipes at Home (2025)
Listen, sometimes we cook a little too much because it smells so incredible while it’s cooking! Or maybe you prepped ahead intending for an even faster **quick dinner** tomorrow. That’s smart planning! But here’s the thing about cooked **shrimp**: they are delicate, and you have to treat them gently after the cooking process if you want them to taste fantastic the next day.
The very first step after you serve them is to separate the **shrimp** from the sauce. The sauce itself is luxurious, but the **shrimp** will continue to cook slightly if left sitting in that hot liquid, turning them rubbery fast. Scoop out all the seafood and put it in a clean, airtight container.
You can generally keep leftovers safely in the refrigerator for about two to three days. Don’t push it! While the **garlic** and lemon scent will still be amazing, we don’t want to risk flavor degradation or safety issues.
The Best Way to Reheat Shrimp Without Making Them Tough
This is where most people go wrong when trying to replicate that restaurant quality at home. If you throw cold, cooked **shrimp** into a microwave for a minute, you are going to get tough, bouncy little hockey pucks. We absolutely cannot do that to this beautiful seafood!
You really want to reheat them gently on the stovetop to bring back that fresh texture. Take your reserved sauce—the pan sauce you made, which is full of that amazing **garlic** essence—and put it in a small skillet over very low heat. Just barely warm it up! You don’t want it sizzling.
Once the sauce is warm (not hot!), add the **shrimp** back in. Toss them gently for just 60 seconds, maybe 90 seconds tops, until they are warmed through. The sauce helps keep them moist while the gentle heat avoids overcooking them. Pull them off the heat the second they feel warm to the touch. This method preserves that tender bite we worked so hard to achieve!
Can I Freeze Leftover Shrimp?
If you know you won’t get to the leftovers within three days, freezing is an option, but you’re trading some texture for convenience here. Seafood doesn’t freeze and reheat as perfectly as some other proteins.
If you choose to freeze, store the **shrimp** separately from the sauce. Place them in a freezer-safe bag, pressing out as much air as possible. They are good in the freezer for maybe a month. When you thaw them (preferably overnight in the fridge), reheat them using the low-heat sauce method described above, but expect them to be slightly less firm than when fresh.
Storage Tips for Maximum Freshness
The enemy of leftover **shrimp** is air exposure, which causes dryness and flavor loss. Always use an airtight container, and if you really need to, put a piece of plastic wrap directly pressed onto the surface of the seafood before sealing the lid. This minimizes air contact.
Also, I strongly recommend keeping the leftover parsley separate! Parsley wilts and turns soggy when stored in liquid. Add fresh, chopped parsley right before serving the reheated dish to get that bright green pop back. That little bit of freshness makes the leftovers taste almost as good as the first night!
Frequently Asked Questions About Making Restaurant-Style Shrimp Recipes at Home (2025)
I get tons of questions when people try to replicate a restaurant experience, especially when it comes to seafood! Don’t worry if you’re new to cooking shrimp with this much intensity. These are the things that tripped me up when I was first chasing that perfect restaurant flavor.
Can I prepare the shrimp ahead of time for a quick dinner?
Yes, absolutely! That’s one of the perks of this being a great quick dinner option. You can peel and devein your shrimp up to a day ahead of time and keep them stored properly in the fridge. When you are ready to cook, they just need a quick pat dry before throwing them into the hot oil. This cuts your actual cooking time down even further!
What type of shrimp is best for this recipe?
I strongly prefer using large or jumbo sized **shrimp**, usually labeled 21/25 or 26/30 count per pound. They hold up better to the high heat of the sear without overcooking before the sauce finishes. If you use frozen **shrimp**, make sure you thaw them completely, preferably overnight in the fridge, and then pat them bone dry before they ever hit the pan!
How can I increase the garlic flavor without burning it?
This is such a common worry, especially when using 6 cloves of **garlic**! The trick is timing. You don’t want the **garlic** in the pan while the **shrimp** is searing—that high heat will scorch it instantly. Wait until the **shrimp** is partially pink, then add the **garlic** and immediately follow it up with the lemon juice and caper brine. The liquid hitting the pan right after the **garlic** drops the temperature just enough so it infuses beautifully instead of burning. Want more inspiration? Check out my main recipe hub here!
Share Your Restaurant-Style Shrimp Success!
Whew! Now you have the secrets to taking those humble little bivalves and turning them into a plate that looks like it deserves a white tablecloth. Seriously, that lemon-butter-garlic sauce is something special, and I just can’t wait for you to try it.
I want to hear how it went! Tell me in the comments below: Did you manage to nail that intense, vibrant flavor that made me obsessed after that seaside dinner? Did this become your new go-to **quick dinner**?
Please take a moment to rate the recipe—those stars really help other home cooks feel confident trying something new. And if you snapped a picture of your gorgeous, saucy **shrimp**, I’d absolutely love to see it!
You can share your culinary triumphs or ask follow-up questions over on my contact page: Let’s connect here.
Thank you for cooking along with me today! I’m Marco Santos, and seeing you bring restaurant magic into your own kitchens is what fuels my passion for inventive, gluten-free cooking. Happy cooking, everyone!
Restaurant-Style Shrimp Recipes at Home (2025)
Ingredients
Equipment
Method
- Gather all ingredients.
- Heat olive oil in a heavy skillet over high heat until it just begins to smoke. Place shrimp in an even layer on the bottom of the pan and cook for 1 minute without stirring.
- Season shrimp with salt; cook and stir until shrimp begin to turn pink, about 1 minute.
- Add garlic and red pepper flakes; cook and stir for 1 minute.
- Stir in lemon juice, caper brine, 1 piece of butter, and 1/2 of the parsley; cook until butter has melted, about 1 minute.
- Reduce heat to low and stir in remaining 3 pieces butter. Cook and stir until butter has melted, sauce is thick, and shrimp are pink and opaque, 2 to 3 minutes.
- Remove shrimp with a slotted spoon and transfer to a bowl; continue to cook butter sauce, adding water, 1 teaspoon at a time, if too thick, about 2 minutes.
- Season with salt to taste; serve shrimp topped with the pan sauce and remaining parsley.
Nutrition
Notes
Tried this recipe?
Let us know how it was!
Gluten-Free Chef & Latin Cuisine Innovation Specialist
My youngest son’s celiac diagnosis at four changed everything. Suddenly, all those traditional Brazilian and Portuguese recipes from my avó needed to be completely reimagined without losing their soul.
After graduating from Johnson & Wales and working Miami’s Latin fusion scene, my son’s diagnosis became my calling. How do you make gluten-free empanadas that taste like childhood? Over eight years, I’ve developed 320+ gluten-free recipes celebrating authentic Latin flavors using cassava flour and plantain alternatives.
My gluten-free empanada recipe won “Best Appetizer” at the 2023 Miami Gluten-Free Food Festival. I ran “Sabores Sin Gluten,” a catering business serving Miami’s Latino community—quinceañeras, family gatherings, all the celebrations that matter.
Food is culture, and everyone deserves to experience the joy of sharing traditional family meals, regardless of dietary restrictions.