Hey everyone! If you’re anything like me, you crave those amazing, deep, comforting flavors on a chilly evening, but you just don’t have hours to dedicate to the stove, especially on a Tuesday night. That’s why I’m so excited to share my recipe for Paprika Garlic Baked Chicken Quarters. It’s unbelievably simple, uses budget-friendly cuts, and delivers flavor that punches way above its weight class!
I remember the first time I made this for my family. It was a chilly Sunday, and I was craving a dish that reminded me of the comforting meals my *avó* used to prepare. In my bustling kitchen, I marinated the chicken with smoky paprika and fresh garlic, letting that savory aroma swim through the house as it baked. When I finally unveiled it, my kids’ eyes lit up. That evening, we shared not just a meal but stories and laughter, binding our family through flavors that bridged generations. As Marco Santos, a Gluten-Free Chef, I love adapting these traditions to suit our modern needs without losing any heart.

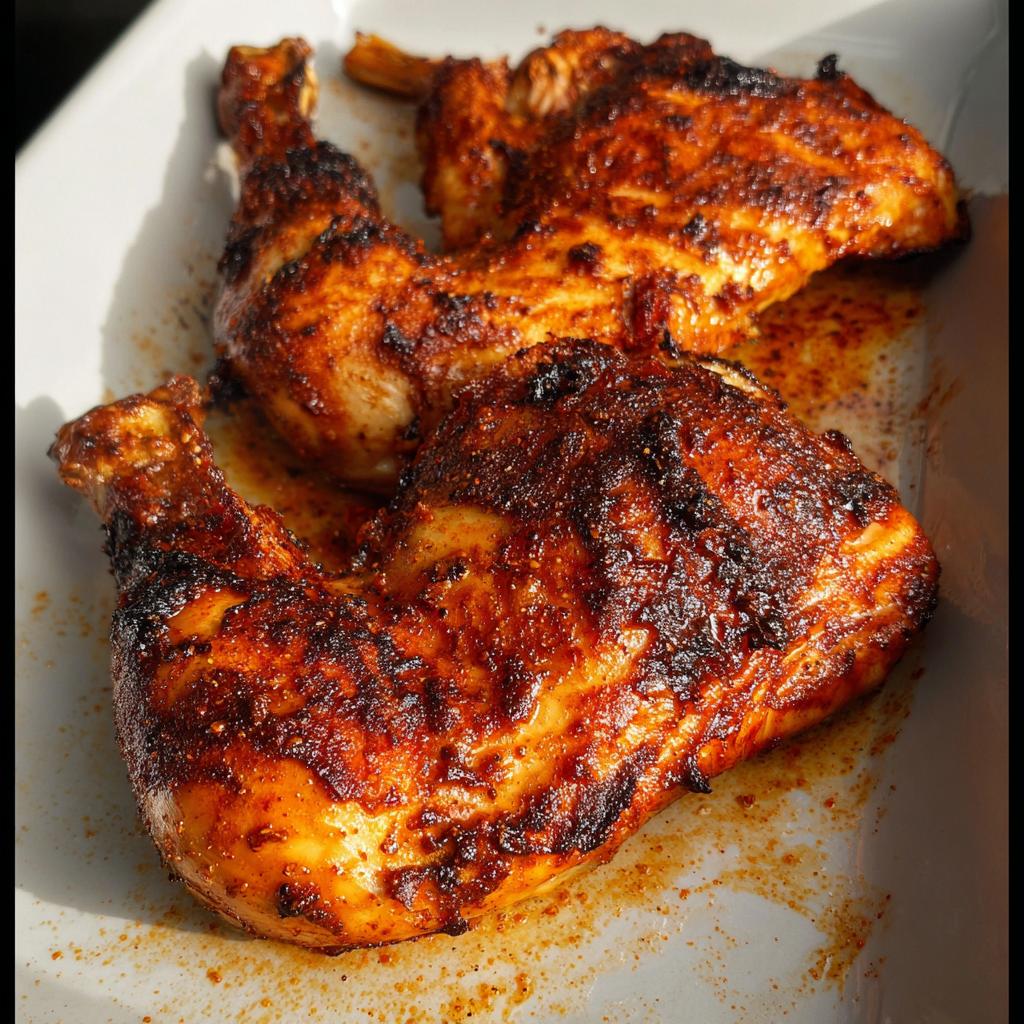
Why You Will Love These Paprika Garlic Baked Chicken Quarters
Honestly, once you try this, it’s going right into your weekly rotation. I promise! Here are just a few reasons why this recipe is a winner in my kitchen:
- It’s the ultimate flavor bomb for minimal effort, perfect for busy weeknight oven recipes.
- The paprika garlic rub seriously coats the chicken beautifully—that smoky, garlicky goodness is incredible!
- Chicken quarters are fantastic because they stay juicy, no matter what happens in the oven.
- It’s one of the easiest ways to serve delicious, satisfying budget dinners without feeling like you skimped on taste.
Essential Ingredients for Paprika Garlic Baked Chicken Quarters
Okay, let’s talk about what you need. It’s funny, sometimes the best meals use the fewest ingredients, and this is definitely one of them! We are focusing on building maximum flavor with this simple paprika garlic rub so that your chicken leg quarters shine. I’ve linked a couple of my favorite general chicken recipe resources here if you need inspiration later!
We use two kinds of paprika, trust me on this one—it adds necessary depth. You’ll see some other recipes use just sweet paprika, but that smoked version makes all the difference. This blend is robust, savory, and exactly what you want for a hearty, satisfying dinner.
Chicken and Paprika Garlic Rub Components
This list is everything you need to make the flavor base for your Paprika Garlic Baked Chicken Quarters. Make sure your spices are fresh; that’s half the battle!
- 5-6 large Chicken Quarters with skin (You want about 1 pound each).
- 2 teaspoons garlic powder (Don’t substitute this for raw garlic in the rub—the powder coats better!).
- 1 teaspoon onion powder.
- 1.5 teaspoons smoked paprika (This is key for that rich color!).
- 1 teaspoon mild paprika.
- 1 teaspoon oregano.
- 1 teaspoon salt.
- 2 tablespoons Oil (any neutral oil works here).
See? It’s simple stuff you probably already have! That exact mix of spices, mixed with the oil to make the thick paprika garlic rub, is what locks in the juices and keeps our chicken quarters moist while baking.
Step-by-Step Instructions for Paprika Garlic Baked Chicken Quarters
Alright, Marco here again! Now that we’ve got our gorgeous spice blend mixed up, let’s get these beauties into the oven. This process is super straightforward, which is why I rely on these weeknight oven recipes when homework is piling up or I’m just tired. Just follow these steps, and you’ll have killer chicken!
Preparing the Chicken and Oven
First things first, get that oven humming! Preheat it to 400 degrees F (or 218 degrees C). Now for the most important texture secret: grab some paper towels and pat those chicken leg quarters as dry as you possibly can. Seriously, dry chicken equals crispy skin every single time. Don’t skip this part!
Creating the Paprika Garlic Rub and Coating
In your large mixing bowl—the one you used to measure the spices earlier—toss in all your powdery magic, the salt, and the two tablespoons of oil. Mix it really well until you have a thick, gorgeous, reddish paste. That’s your signature paprika garlic rub. Pop those dry chicken pieces in and use your hands to massage that rub all over every surface. Make sure every nook and cranny is covered!
Marinating Time for Best Paprika Garlic Baked Chicken Quarters
Here’s where you decide how much time you have. If you can plan ahead, let this sit for an hour at room temperature, or better yet, cover it and stick it in the fridge for up to 24 hours. That marination time lets that garlic and paprika really sink in. If you are cooking immediately, that’s fine too, just make sure to bring it close to room temp for about 20 minutes before it goes into the oven.
Baking and Finishing the Chicken Quarters
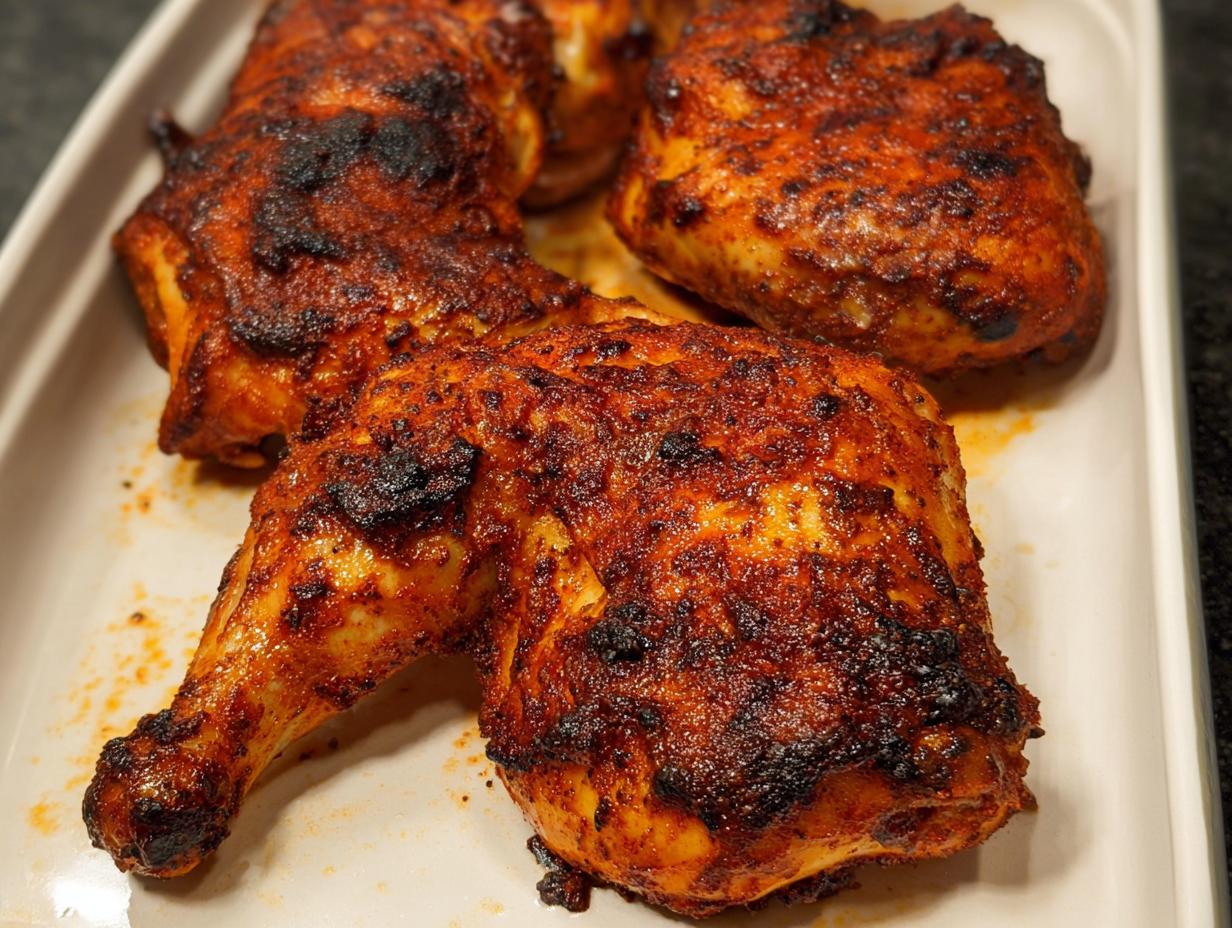
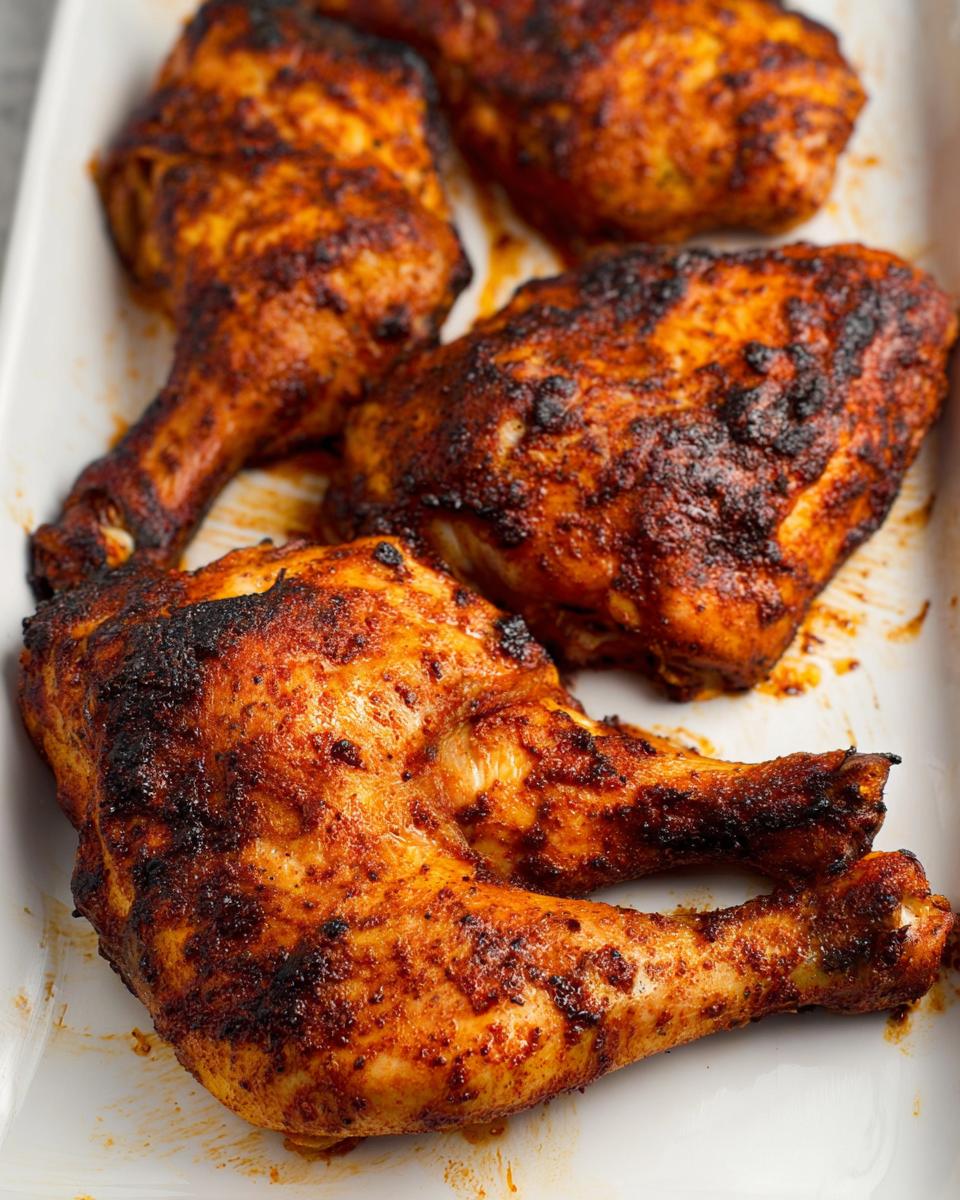
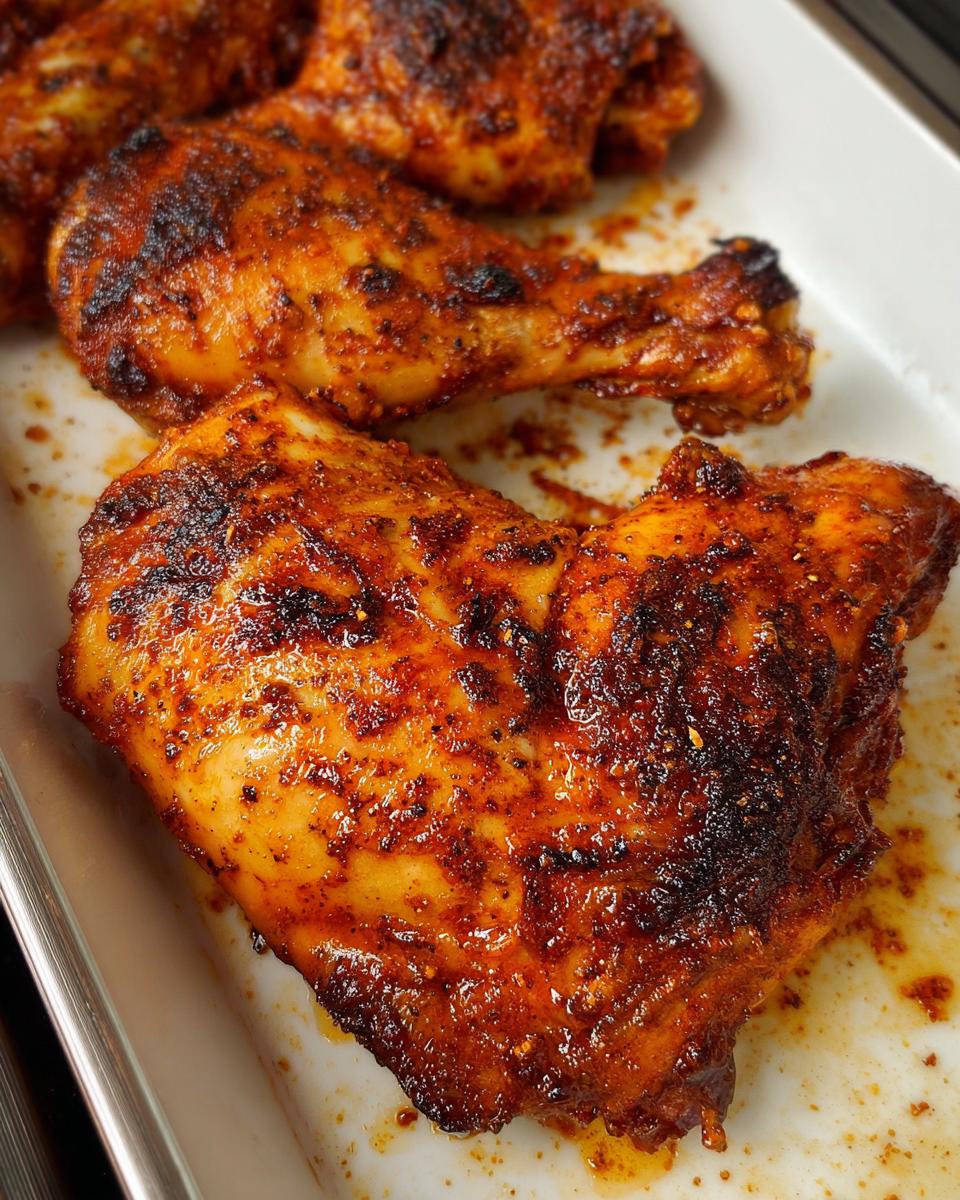
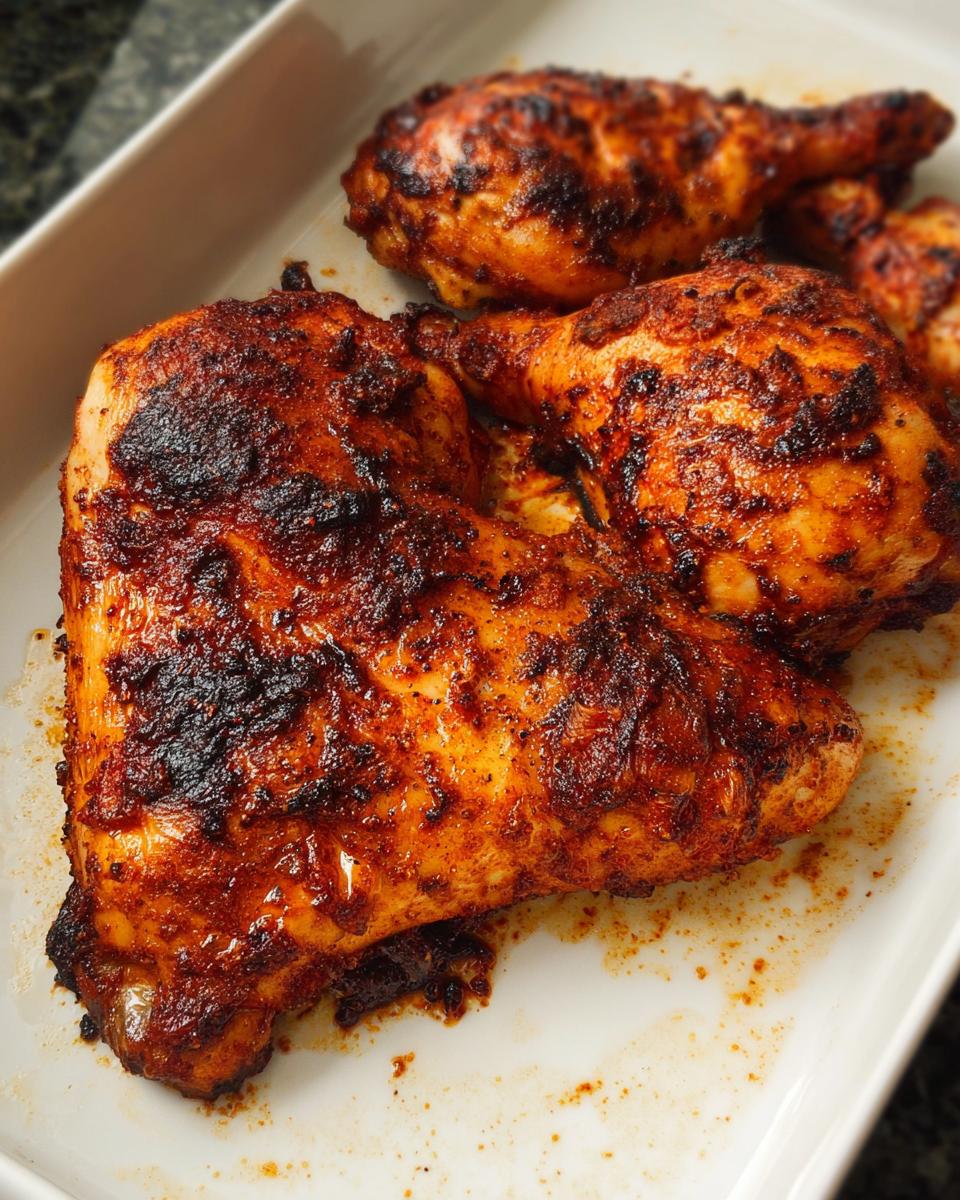
Arrange your coated chicken quarters skin-side up on your baking tray. Pour any remaining rub/oil mixture from the bowl right over the top. Bake this for 35 to 40 minutes. You’re aiming for an internal temperature of 170 degrees F (74 degrees C) when tested with a good thermometer. Want next-level crispy skin? Move the tray to the very top rack and broil for just 2 minutes at the end. Watch it like a hawk, though; that paprika burns fast!
Tips for Perfect Paprika Garlic Baked Chicken Quarters
Now that you have the basic steps down, let me share a few tweaks—little secrets I’ve picked up over the years cooking these for my family—that really kick up the flavor and texture of these Paprika Garlic Baked Chicken Quarters. These tiny adjustments make a huge difference, honestly!
The goal for any baked chicken, especially the bone-in cuts like these chicken leg quarters, is juicy meat and shatteringly crisp skin. Here’s how we guarantee that:
Use High Heat for the Finish: I mentioned the broiling trick, but let’s emphasize it. If your chicken is *almost* done—say, 165°F internally—move it under the hot broiler for about 2 minutes. This flash of intense heat crisps up the skin layers that the initial 400°F bake didn’t quite crisp. Just stand right there! You don’t want that beautiful paprika rub turning black!
Don’t Crowd the Pan: This is crucial for any oven recipe, but especially for getting that gorgeous crackle on the skin. If the quarters are touching each other or bunched up on the tray, they steam instead of bake! Always use a large tray and ensure there’s space around every piece so the hot air can circulate freely. If you have too much chicken, cook it in two batches!
The Oil Matters for the Rub: While the recipe calls for generic “Oil,” I usually go for avocado oil or a light olive oil. Why? Because it has a higher smoke point than extra virgin, which means it handles that mid-to-high baking temperature without smoking out your kitchen. A quality oil helps form that nice, slightly tacky barrier that holds the flavor of the paprika garlic rub right onto the meat.
Resting is Non-Negotiable: After you pull that chicken out (hitting that 170°F mark), don’t slice into it right away! Tent it loosely with foil and let it rest on the cutting board for 10 minutes. This allows the juices, which have rushed to the surface while baking, to redistribute back into the muscle fibers. If you cut too soon, all that beautiful moisture runs right out onto the pan, leaving you with drier quarters.
Ingredient Substitutions for Paprika Garlic Baked Chicken Quarters
Look, I get it. Sometimes you’re staring into the pantry, and you realize you’re out of that one specific thing, or maybe you just prefer a different flavor profile. That’s totally okay! This recipe is built on flavor fundamentals, so we can absolutely swap out a few things without ruining our beautiful Paprika Garlic Baked Chicken Quarters. Cooking should be flexible, right?
When adapting recipes, I always try to keep the core elements of the flavor profile intact. For us, that means keeping the garlic and the savory profile strong. Don’t worry about your chicken leg quarters being slightly different, these tips cover common hiccups.
Here are the swaps I approve of when I’m in a pinch:
Swapping the Paprikas
The most important spice here is the paprika, and we use two types for depth. If you are out of smoked paprika, you can use all mild paprika, but you need to add a little extra something to bring back that smoky undertone. A tiny pinch of cayenne pepper—like a quarter teaspoon—or even a dash of chili powder works wonders for replacing that depth. Just be careful; cayenne adds heat, which the mild paprika doesn’t!
If you prefer zero smoke, just use all mild paprika and maybe toss in a small amount of dried thyme for an herbal lift instead of the smoked version. It changes the profile, but it’s still tasty!
Oil Alternatives
I prefer avocado or light olive oil because of the high heat, but if you only have vegetable oil or canola oil, go for it. They are neutral and do the job perfectly for creating that rub base. The only thing I generally advise against is using butter alone for the coating, because butter solids burn quickly at 400°F, which means your spices will blacken before the chicken is ready.
If You Don’t Have Quarters
What if you just have drumsticks, or maybe you grabbed some thighs or breasts instead? No problem! You just need to watch your cook time more closely. Chicken thighs are a fantastic substitute for the quarters; they are very forgiving and stay juicy, usually taking about the same time, maybe 5 to 10 minutes longer.
Chicken breasts are leaner, so they dry out faster. If you use breasts, I strongly suggest marinating them for the full 24 hours if you can, and then start checking the temperature at the 30-minute mark. They only need to hit 165°F (74°C) internally to be safe. Remember, thicker cuts cook slower, so always trust the thermometer over the timer!
Serving Suggestions for Paprika Garlic Baked Chicken Quarters
Having phenomenal chicken is only half the victory, right? You need something delicious and easy to fill out the rest of the plate! Since these Paprika Garlic Baked Chicken Quarters are so rich and savory with that amazing crust, we want sides that soak up the juices or offer a nice, fresh contrast. Remember, we are doing budget dinners here, so nothing fancy or complicated!
When I served this to my family that first time, I kept it super simple—just like my *avó* would have—but I made sure we had something green. You want sides that are hearty but don’t compete with the bold flavor of the paprika and garlic.
Here are my top three go-to pairings that never fail on a busy night:
Simple Roasted Root Vegetables: This is a fantastic way to use up whatever veggies you have on hand. Carrots, potatoes, maybe some parsnips if you’re feeling fancy? Toss them lightly with olive oil, salt, pepper, and maybe a tiny pinch of that leftover onion powder. Roast them right alongside the chicken for the last 30 minutes of the bake time. They get slightly caramelized and are perfect for catching any tasty drippings left on the pan.
Creamy or Fluffy Rice: You absolutely need a bed for those phenomenal juices! Plain white rice or, even better, a batch of fluffy cilantro-lime rice makes the meal incredibly satisfying. It stretches the meal further, too, making leftovers easy for lunch the next day, which is always a win when you’re cooking for a crew.
Garlicky Green Beans or Asparagus: If you want something green that cooks fast, go for green beans or asparagus. I often use this asparagus recipe, but instead of roasting it alongside the chicken, I steam the beans or lightly sauté the asparagus, then toss them in garlic powder, salt, and a touch of lemon juice right before serving. It adds a bright pop that cuts through the richness of the chicken skin beautifully.
Storage and Reheating Paprika Garlic Baked Chicken Quarters
You made a fantastic, huge batch—because who ever just eats one piece of amazing chicken, right? Now you need to know how to keep those leftovers tasting just as good as they did fresh out of the oven. Storing and reheating these Paprika Garlic Baked Chicken Quarters is super easy, but we have to be smart about reheating them to avoid drying out that tender meat we worked so hard to keep juicy!
I always plan for leftovers because these flavors meld even better the next day, especially after that wonderful spice blend has fully penetrated the meat. Think of it as flavor development happening overnight in the fridge! If you are getting organized for your week, you can check out my tips over on my meal prep page here: simple weekly lunch meal prep.
Storing Your Leftover Chicken Quarters Safely
The number one rule for storage is getting that warmth out quickly. Once the chicken has cooled down reasonably—maybe after dinner and cleaning up the kitchen—transfer any remaining pieces into an airtight container. Seriously, use a good quality one with a firmly sealing lid. If you have tons of leftover rub juices or any side dishes, keep those separate if you can, but the chicken itself should be sealed tight.
In the refrigerator, these leftovers are safe and delicious for about three to four days. Four days is my personal maximum, but honestly, they rarely last that long in my house! Make sure you put them in the fridge within two hours of taking them out of the oven to keep everything food-safe and fresh.
Reheating Tips to Keep the Skin Crispy
Here’s where most people go wrong—they grab the microwave! While the microwave is fast, it makes the skin instantly rubbery because it heats the moisture right inside the meat. We want that texture back, so we need dry heat for reheating our chicken leg quarters.
Oven Method (Best for Crispy Skin): Preheat your oven to a moderate 350°F (175°C). Place the cold chicken quarters directly on a clean baking sheet. You can add a tiny splash of water or broth to the bottom of the pan (not touching the chicken!) to create a little steam environment, which helps keep the meat moist. Bake for 10 to 15 minutes. If the skin still isn’t quite right, you can finish it under the broiler for just 60 seconds, just like we did for the initial cooking!
Air Fryer Method (Fastest & Crispiest): If you have an air fryer, use it! It’s fantastic for reviving leftover chicken. Set the air fryer to 350°F (175°C) and place the pieces in a single layer. Cook for about 5 to 7 minutes, checking after 5. The circulating hot air works magic to crisp the paprika garlic rub coating right back up!
Avoid the microwave unless you really, truly don’t care about the texture—it’s fine for flavor, terrible for mouthfeel, in my opinion!
Frequently Asked Questions About Paprika Garlic Baked Chicken Quarters
It’s funny, cooking is always easier when you know the little tricks that make things foolproof! I get tons of questions about my Paprika Garlic Baked Chicken Quarters, especially from folks trying to get that perfect weeknight bake without stress. Here are some of the questions I hear most often about these lovely chicken leg quarters:
What is the safest internal temperature for chicken leg quarters?
This is the most important question, always! For safety, the USDA officially recommends cooking all poultry, including chicken leg quarters, to an internal temperature of 165°F (74°C). Now, in the recipe, I asked you to bake until 170°F (74°C), which is also perfectly safe but ensures that the darker meat near the bone is absolutely cooked through nicely, since dark meat benefits from a little extra cooking for tenderness. Always use an instant-read thermometer inserted into the thickest part, avoiding the bone!
Can I make the paprika garlic rub ahead of time?
Oh yes, you totally can! And I think you *should*, especially if you are aiming for that full hour of marinating time. You can mix up the entire spice blend—the paprika, garlic powder, everything—and store it in a tiny airtight jar in your pantry for several weeks, maybe even months, provided your spices are fresh to begin with. Don’t mix in the oil, though! The oil should only be added right when you are tossing it with the chicken so you get that beautiful, tacky coating that grabs onto the skin. If you store the dry rub separately, it makes those rushed weeknights even smoother!
Another common question I get is about getting that skin extra crispy. The secret isn’t just the broiling; it’s getting the chicken as dry as possible before applying the paprika garlic rub in the first place. If you dry-brine the chicken (just salting it and leaving it uncovered in the fridge overnight), the skin pulls moisture to the surface where it dries out, giving you that amazing crisp factor when it bakes!
Estimated Nutrition for Paprika Garlic Baked Chicken Quarters
I know many of you are keen on keeping track of what goes into the wonderful meals you make for your family, and that’s smart cooking! Since we’re focusing on wholesome ingredients and simple preparation, these Paprika Garlic Baked Chicken Quarters fit beautifully into many healthy eating plans. This recipe uses rich, but lean, dark meat and relies on spices rather than heavy sauces for flavor, keeping things straightforward.
Based on the ingredients listed for 5 to 6 servings, here is a general breakdown of the estimated nutrition per quarter. As always, these numbers are estimates, right? They can shift depending on the exact size of your chicken quarters and the specific oil you use for your healthy dinner recipes. But this gives you a fantastic baseline!
It’s amazing how much protein you get from such a simple dish!
- Calories: Approximately 468 per quarter.
- Protein: A powerhouse at around 30 grams! Great for keeping us full.
- Fat: Around 37 grams (remember, skin is included here, which is where a lot of that great flavor and crispiness comes from).
- Carbohydrates: Very low, only about 3 grams, which is fantastic if you’re watching your carbs.
- Sodium: Roughly 722 mg (this varies the most based on how much salt you added to your paprika garlic rub!).
We’re also getting a decent dose of iron and Vitamin A from that beautiful smoked paprika coating. Enjoy this knowing you’re serving up something nourishing, flavorful, and truly satisfying for your dinner table!
Paprika Garlic Baked Chicken Quarters
Ingredients
Equipment
Method
- Preheat your oven to 400 degrees F (218 degrees C).
- Pat the chicken quarters dry thoroughly.
- In a large mixing bowl, combine all the spices and oil. Mix them well. Add the chicken pieces and use your hands to coat each piece completely with the mixture.
- For better flavor, let the chicken rest for 1 hour, or marinate it in the refrigerator for up to 24 hours. If you are short on time, you can bake immediately. If you marinated, bring the chicken close to room temperature before baking.
- Arrange the chicken on a baking tray. Apply any remaining marinade from the bowl over the chicken. Bake for 35 to 40 minutes until the internal temperature reaches 170 degrees F (74 degrees C). For crispier skin, move the tray to the uppermost rack and broil for 2 minutes at the end of the cooking time.
Nutrition
Notes
Tried this recipe?
Let us know how it was!
Gluten-Free Chef & Latin Cuisine Innovation Specialist
My youngest son’s celiac diagnosis at four changed everything. Suddenly, all those traditional Brazilian and Portuguese recipes from my avó needed to be completely reimagined without losing their soul.
After graduating from Johnson & Wales and working Miami’s Latin fusion scene, my son’s diagnosis became my calling. How do you make gluten-free empanadas that taste like childhood? Over eight years, I’ve developed 320+ gluten-free recipes celebrating authentic Latin flavors using cassava flour and plantain alternatives.
My gluten-free empanada recipe won “Best Appetizer” at the 2023 Miami Gluten-Free Food Festival. I ran “Sabores Sin Gluten,” a catering business serving Miami’s Latino community—quinceañeras, family gatherings, all the celebrations that matter.
Food is culture, and everyone deserves to experience the joy of sharing traditional family meals, regardless of dietary restrictions.