Don’t you just crave that sound? That perfect, shatteringly crisp crunch you only get when a taco shell is just right, bursting with hot, melty cheese? I swear, good food can fix just about anything, even a long, drawn-out Friday. That’s why I perfected my recipe for Oven-Baked Cheesy Tacos (Crispy & Loaded) You’ll Love; it brings maximum comfort food payoff with minimum fuss.
I remember the first time I made Oven-Baked Cheesy Tacos for my family; it was a chilly Friday night, and I wanted to kick off the weekend with something fun and delicious. I rifled through my pantry, found some gluten-free tortillas, and filled them with a medley of cheese, beans, and the classic taco fixings we all loved. The aroma filled our home as they baked to perfection, crisping up just right. Sitting around the table, we laughed and savored each cheesy bite, feeling like the week’s stresses melted away. That night, I realized how powerful a simple recipe could be in bringing people together and creating cherished moments, proving that food is not just nourishment; it’s a celebration of family. By ELENA BROWN Gluten-Free Culinary Storyteller & Recipe Heritage Specialist, these baked tacos are your new weeknight hero!
Why You’ll Love These Oven-Baked Cheesy Tacos (Crispy & Loaded) You’ll Love
Why bother with frying when the oven does all the heavy lifting? Seriously, the payoff here is huge, making this a weeknight staple, trust me. You can find more comforting dinner ideas over here when you need a new favorite!
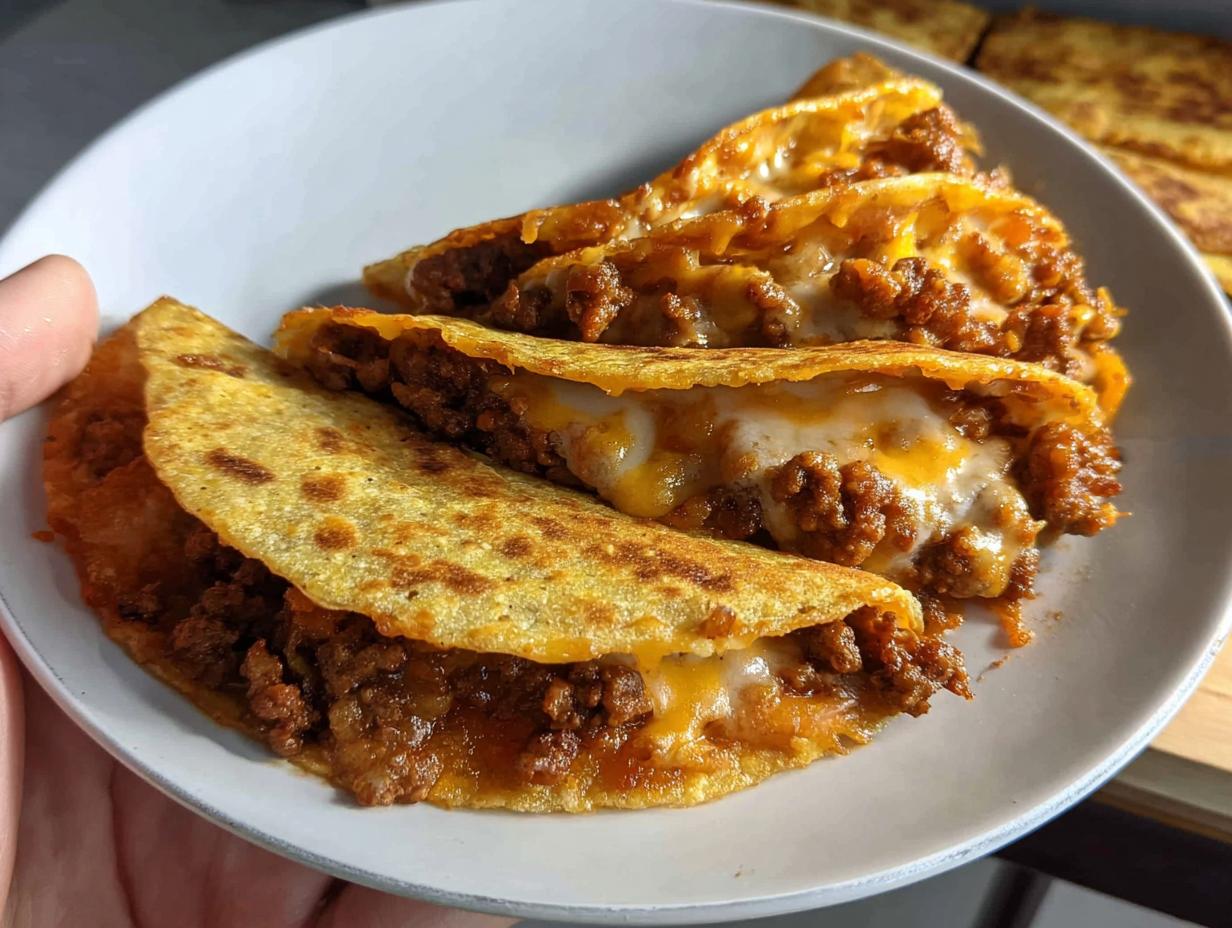
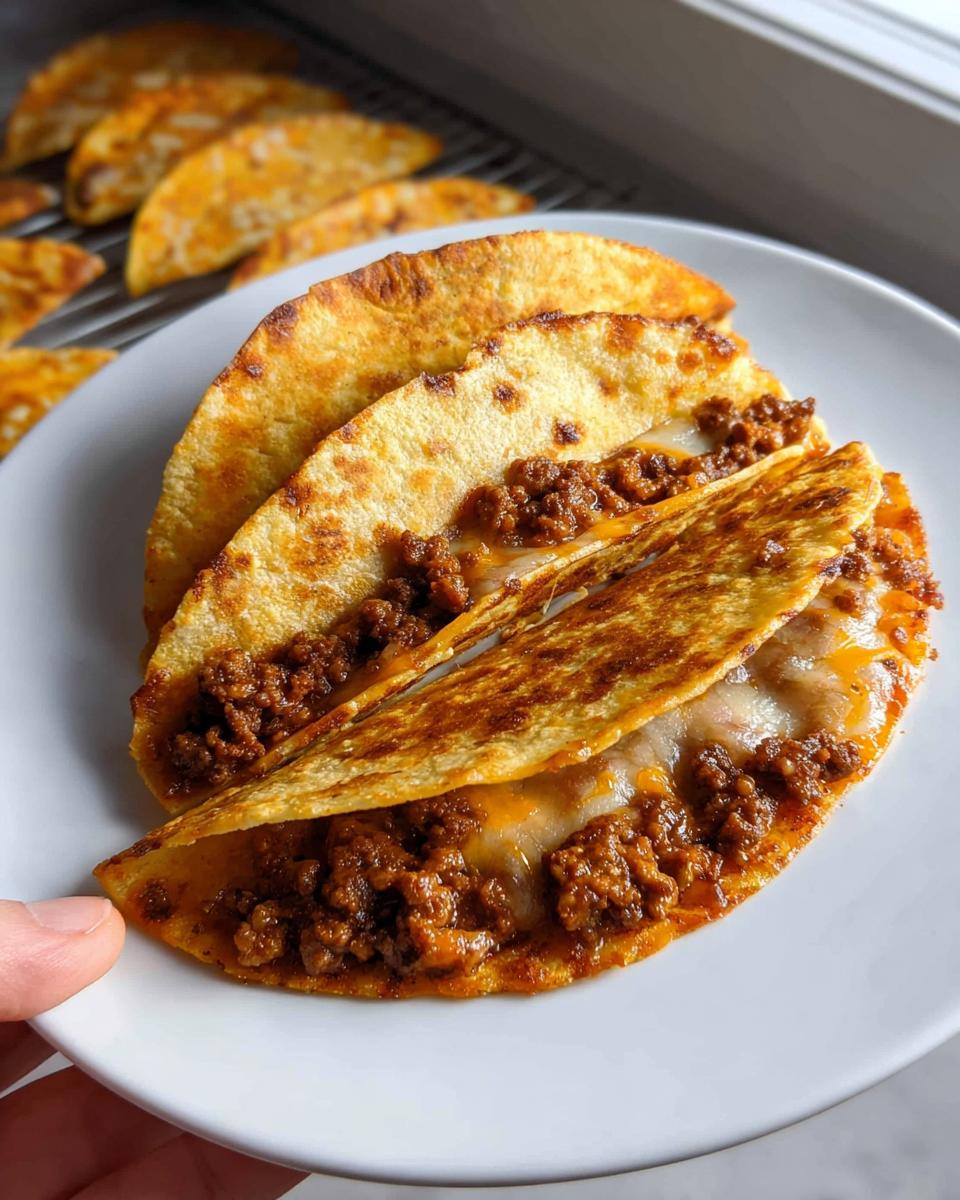
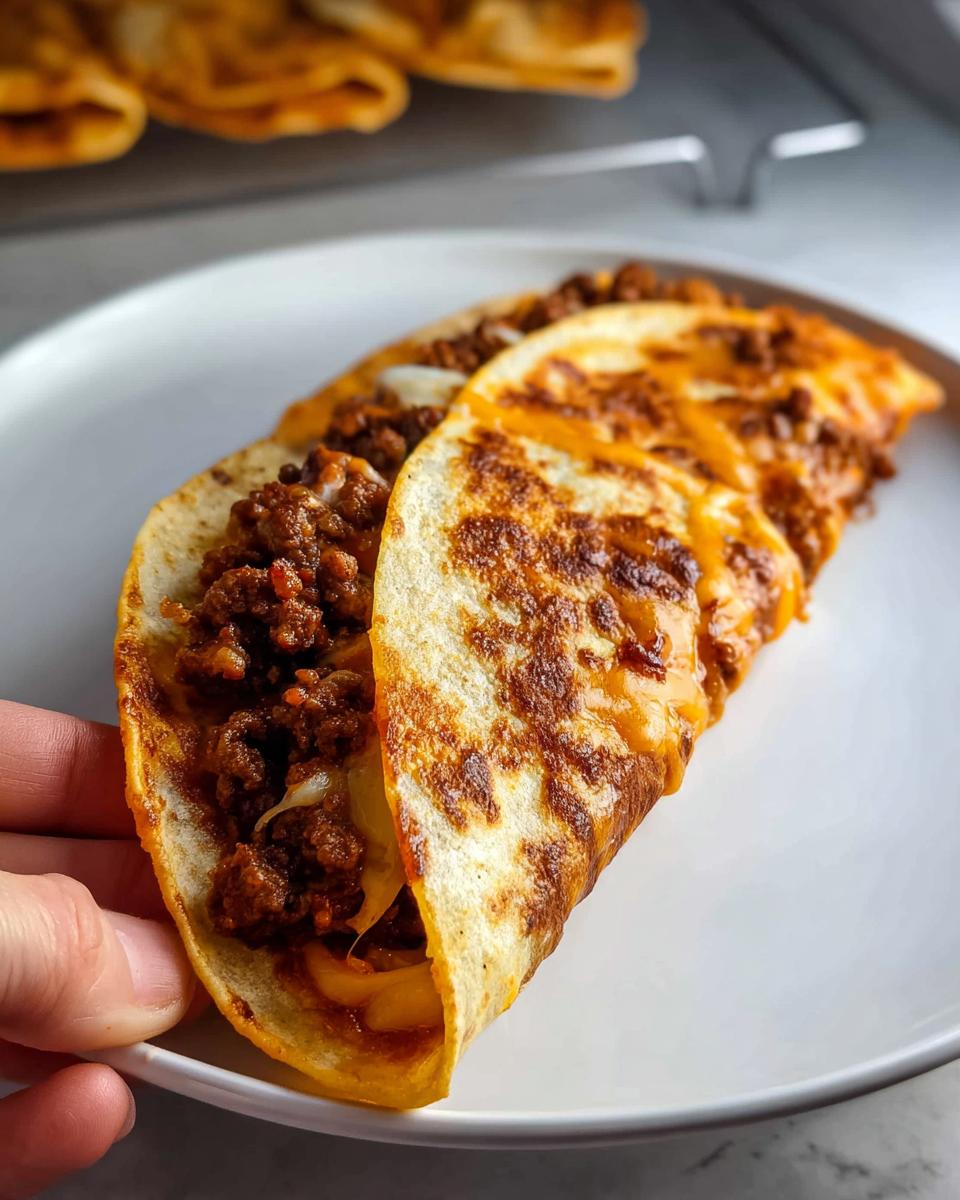
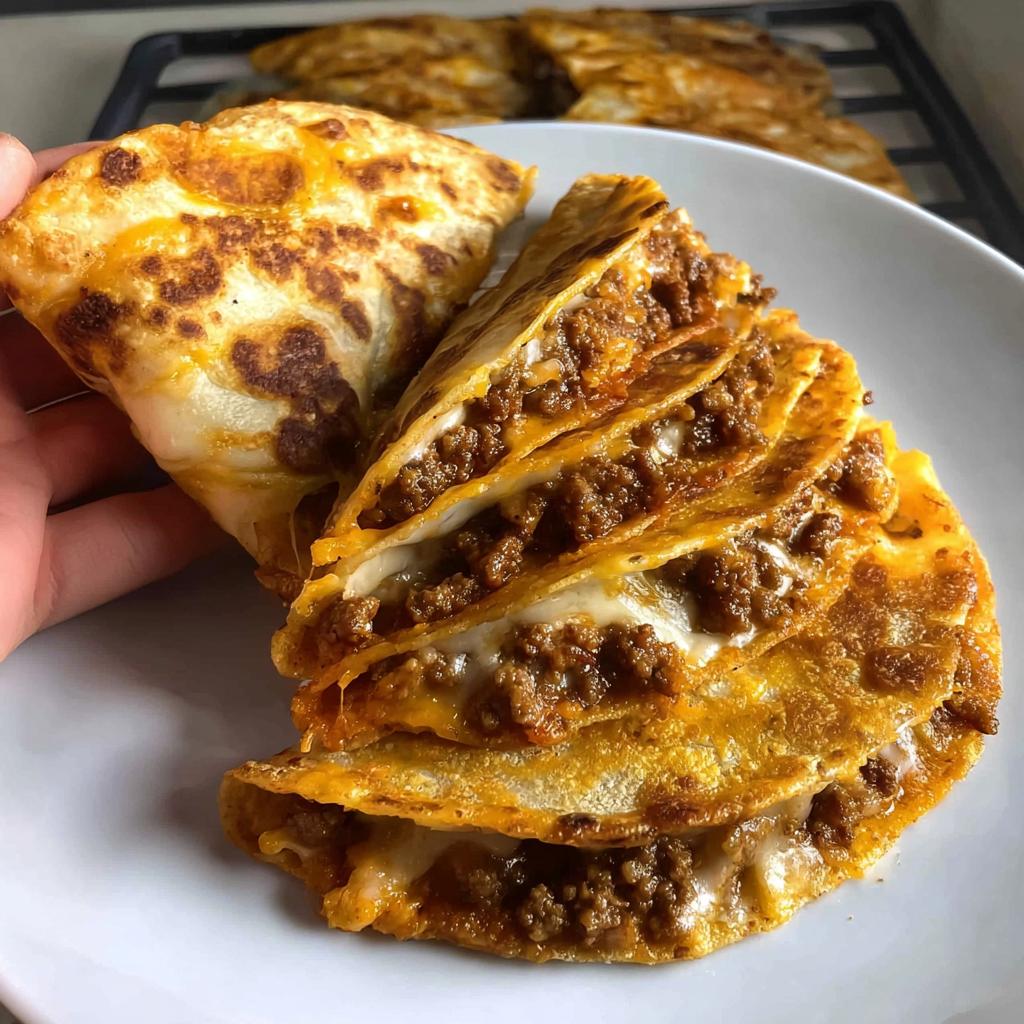
- Ultimate Crisp Factor: Those extra-thin corn tortillas get perfectly crunchy—way better than soft ones, but without the oil splatter of deep frying!
- Cheese Pockets of Joy: We use two kinds of cheese layered right into the fold. It melts beautifully and locks the filling in place. That’s the “cheesy” and “loaded” part!
- So Fast, You Won’t Believe It: Prep is only about 15 minutes, and less than 20 minutes in the oven. We’re talking dinner on the table in under an hour, easily.
- Kid-Approved Flavor: The seasoning is savory but not too spicy (unless you sneak in that chipotle like I did!). This is 100% a kid friendly dinner winner.
- Mess Control: Baking on a rack means the heat circulates all around, drying out any excess moisture and preventing totally soggy bottoms. Magic!
- Minimal Hands-On Time: Once you stuff and fold them, the oven does the work. This frees you up to chop toppings or just put your feet up for a minute.
Essential Equipment for Perfect Oven-Baked Cheesy Tacos (Crispy & Loaded) You’ll Love
You don’t need fancy gadgets for this recipe, but having the right tools makes all the difference between a good taco and an absolutely incredible, crispy taco! We are keeping this super simple, but there’s one item I insist you use if you want that crackle we’re all dreaming about.
Key Tools for Success
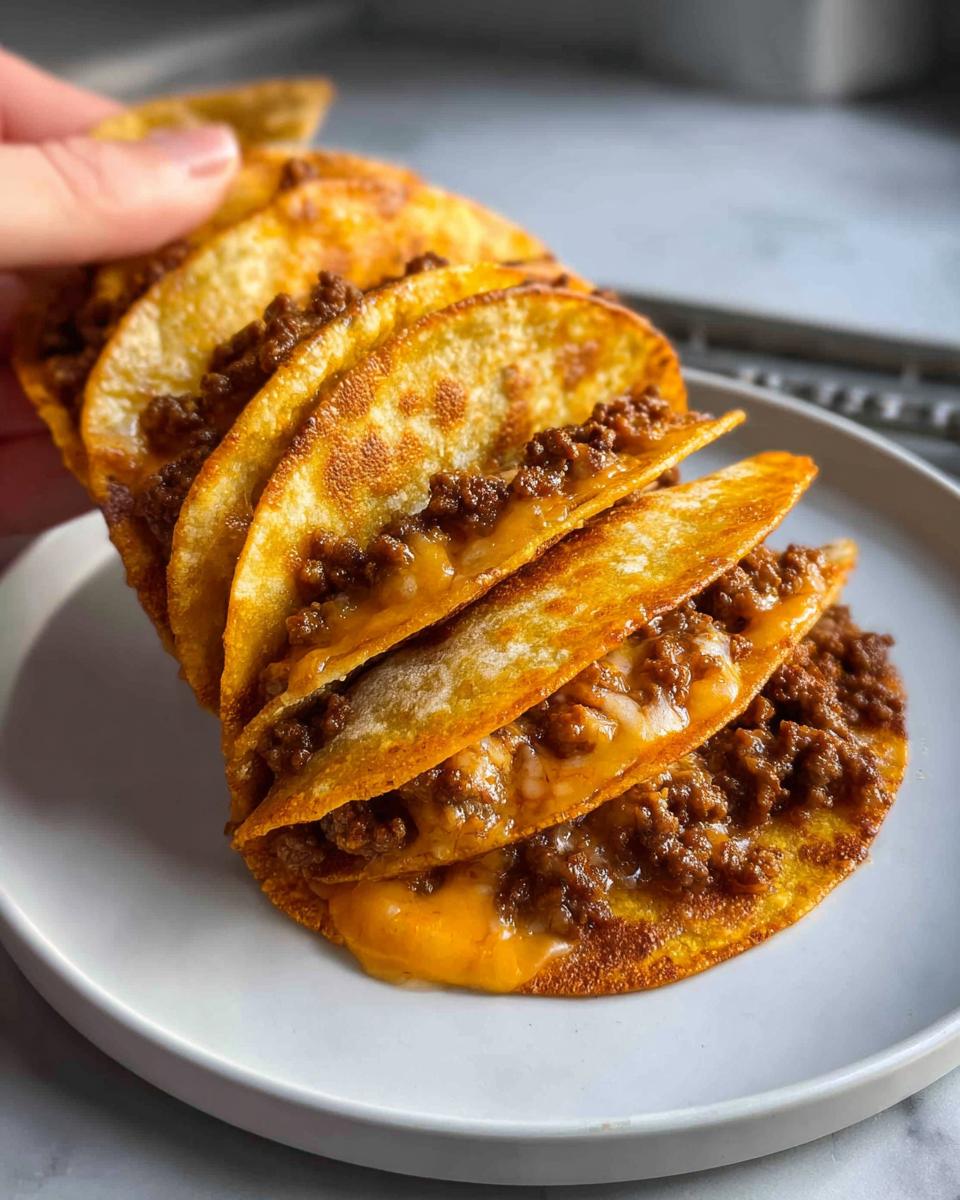
First up, you need your large skillet. That’s where the magic happens when we brown the beef and toast those spices. But the real secret weapon for getting those crispy taco shells? It’s the wire rack set over a baking sheet!
Listen, if you just bake them directly on the sheet pan, the bottoms steam and get soft. By placing the tacos on a wire rack, the heat circulates all around them. That airflow is key! It lets the steam escape, leaving you with perfectly golden and crunchy bites from top to bottom. Don’t skip that setup!
Gathering Ingredients for Oven-Baked Cheesy Tacos (Crispy & Loaded) You’ll Love
Okay, gathering our supplies is always my favorite part—it just feels like gearing up for a culinary adventure! You’ll want to pop over to my collection of hearty ground beef inspiration right here if you’re planning future meals. We’re organizing everything into two simple groups so you don’t miss a thing when it’s time to assemble these beauties.
For the Seasoned Taco Meat
This is where the savory foundation comes from! Make sure your onion is diced nice and small—we want it soft, not crunchy—and mince that garlic until it’s almost a paste so all that flavor blooms while cooking. We use 96/4 ground beef so we don’t drown the tortillas later, plus that tiny bit of Trader Joe’s enchilada sauce really wakes up the spices like paprika and cumin!
- 1 lb Ground Beef, 96/4
- 1 medium (200g) Yellow Onion, diced
- 5 cloves (25g) Garlic, minced
- 2 tsp Paprika
- 1/2 tsp Kosher Salt (or 1/4 tsp table salt)
- 1/2 tsp Black Pepper
- 1/2 tsp Cumin
- 1/2 tsp Crushed Chipotle Pepper (use sparingly if you’re sensitive to heat!)
- 1/2 C (120g) Enchilada Sauce (My recipe called for Trader Joe’s brand)
For Assembling the Crispy Taco Shells
This next part is crucial for that classic crunch. You absolutely must find the Extra Thin Corn Tortillas—the recipe relies on their thin structure to crisp up perfectly in the oven. Mix your cheeses together; I love the combination of creamy mozzarella and sharp cheddar!
- 15 Extra Thin Corn Tortillas (Mission brand worked great for me)
- 1 C (112g) Finely Shredded Mozzarella
- 1/2 C (56g) Finely Shredded Reduced Fat Cheddar
Step-by-Step Instructions: Making Oven-Baked Cheesy Tacos (Crispy & Loaded) You’ll Love
Now for the fun part—putting it all together! Don’t worry about perfectly neat layering; we want these tacos loaded! If you’re using meat that’s higher in fat than what I used, just scoop out any excess grease once it’s cooked before adding the sauce. You can sneak a peek at my favorite gluten-free recipes for more dinner ideas!
Preparing the Flavorful Ground Beef Filling
First things first, we cook! Get your large skillet heating up over medium-high heat. Toss in your ground beef, the diced onion, and that minced garlic. Cook everything down until that beef is totally browned; you don’t want any hint of pink left. While that’s happening, mix up your paprika, salt, pepper, cumin, and chipotle pepper in a little bowl.
Once the meat is cooked, sprinkle your spice blend over it and stir until it smells amazing. Now, reduce that heat down low and pour in the enchilada sauce. Stir constantly until everything comes together nicely and the sauce thickens a bit. Take it off the heat—we’re done with the filling!
Warming and Filling the Tortillas
Time to make those tortillas soft so they don’t crack when you fold them. Preheat your oven right away to 400F (200C)! Take your stack of Mission tortillas and wrap them in a damp paper towel. Pop them in the microwave for a quick 45 to 60 seconds—flipping them halfway through helps them warm evenly. They should be perfectly pliable now.
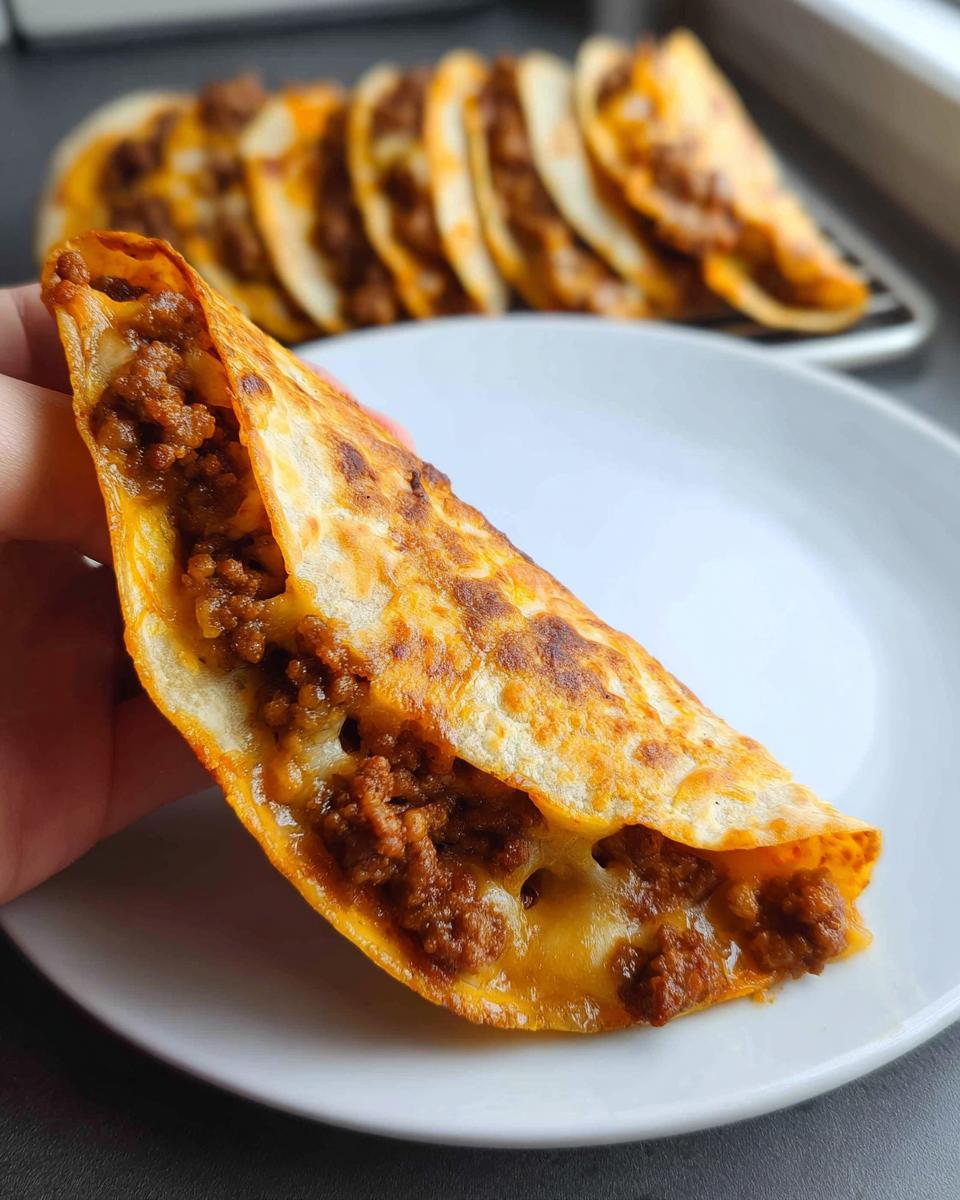
Lay those warm tortillas out. We’re building the core: place a small pinch of mozzarella on one half, pile on a generous spoonful of your savory meat mixture, and top with a pinch of cheddar. Fold them in half, pressing down gently to make sure that cheese starts to hug the filling!
Baking for Maximum Crispness
This step is what makes these Oven-Baked Cheesy Tacos (Crispy & Loaded) You’ll Love totally different! Lightly spray the tops of the folded tacos with cooking spray—this helps them brown evenly. Then, set them up on your wire rack over the baking sheet. Seriously, get that rack in there! For reference, you can see recipes using similar ground beef techniques here.
To make absolutely sure the tacos stay closed and don’t spring open while baking, gently place another baking sheet right on top of them. Slide the whole setup into the hot oven for 14 to 18 minutes. Keep an eye on them, especially near the end! Those extra-thin tortillas can go from golden to dark really fast!
Tips for Perfect Oven-Baked Cheesy Tacos (Crispy & Loaded) You’ll Love
Even though this recipe is super simple, a few tweaks can take these from great to absolutely legendary. If you’re looking for more quick weeknight inspiration, check out some easy chicken ideas right here!
First, let’s talk fat content. If you use fattier ground beef, you absolutely MUST drain off that excess grease after browning. Nobody wants a greasy pool collecting under their crispy taco! Too much liquid, whether it’s fat or sauce, is the enemy of crispiness.
When it comes to cheese, you have choices! I use mozzarella and cheddar because they melt so beautifully together, but feel free to swap them for Monterey Jack or pepper jack if you like a kick. My personal trick is to just quickly microwave the assembled taco for about 10 seconds before putting the cooking spray on. It just starts that melting process so the cheese is gooey right when they come out of the oven.
This recipe is meant to be low-cal, so you can pull back on the cheese quantity if you need to, but honestly, that extra cheese helps hold everything together and keeps the shell from drying out too much during that baking time.
Make-Ahead and Storage for Baked Cheesy Tacos
I totally get it—sometimes you just can’t eat 15 tacos in one night, even if you really try! That’s why planning ahead is so important for busy weeks. Since crispy things tend to go soft overnight, we have to be smart about how we store and reheat these. Planning awesome meals doesn’t have to be stressful; you can check out some game-changing meal prep ideas for help over at my healthy meal prep section when you get a moment.
Storing Leftover Oven-Baked Tacos
The day after these bake up, they are just a little softer than when they come right out of the oven, but I promise they are still delicious! Once they are completely cooled down—and this is important, don’t put warm food in the fridge—I store them in a really good airtight container.
You want to avoid putting too much air in there, which can dry them out faster. I usually layer them between paper towels inside the container, sort of like books on a shelf. They keep just fine in the fridge for about three to four days, which is perfect for quick lunches!
Reheating for That Crispy Texture
This is where we bring back that glorious crunch we worked so hard for! You definitely don’t want to use the microwave unless you enjoy chewy tacos, which, frankly, we don’t. The best way to reheat these baked cheesy tacos is to bring back the dry heat of the oven or, even better, the air fryer!
If you are using your air fryer, pop them in at 400F for maybe 3 to 5 minutes. If you’re sticking to the conventional oven, set it to 400F too, and aim for that same 3 to 5 minute window. Just be careful! If you’re reheating a big batch, they might need a minute or two longer since they are colder in the center. Give them a little peek around the 3-minute mark, and you’ll have that satisfying crispiness back in no time!
Variations and Topping Ideas for Your Baked Cheesy Tacos
Okay, I love keeping things classic, but sometimes you just need to shake things up, right? This recipe is such a great base, and it takes customization like a champ! Whether you’re catering to picky eaters or trying to use up bits and pieces in the fridge, we have so many ways to jazz these up.
If you need a fresh, bright addition after these savory bites, you should definitely check out my amazing guacamole recipe!
Making These a Kid Friendly Dinner Favorite
This is already a big win for the kids because, let’s face it, cheese plus crisp equals happiness. But if your little ones are sensitive, just leave out that crushed chipotle pepper entirely when you make the meat mixture. You want savory, not scary spicy!
The best trick for kids is to make a slightly plainer batch of meat—maybe just cumin, salt, and a little pepper—and sprinkle their cheese on heavy. Watching them devour these crispy taco shells makes all the effort worth it. Because they are baked, cleanup is so much easier than frying, which means more time for family fun after dinner.
Topping Suggestions
Once these beauties come out of the oven—golden, hot, and smelling like heaven—you need some fresh toppings to balance all that rich, cheesy flavor. Since they hold up so well, you can load them up without worrying about them collapsing immediately.
Here are my go-to additions that everyone at our table piles on:
- Classic salsa or pico de gallo, just for that zing!
- A dollop of cool sour cream or plain Greek yogurt.
- Finely shredded crisp lettuce—iceberg works best for crunch factor.
- Chopped fresh cilantro if you’re feeling extra bright.
- Diced avocado or a couple of spoonfuls of my favorite homemade guacamole.
Frequently Asked Questions About Crispy Baked Cheesy Tacos
I know you might have questions! When you move away from frying, people always wonder about texture and prep, but don’t worry; I’ve already wrestled with all these issues so you don’t have to. If you need to reach out for anything else, my contact page is right here!
Can I use flour tortillas instead of corn for these baked cheesy tacos?
This is a tough one, and I hate to say no, but if you want those genuinely satisfyingly crispy taco shells, you really need to stick with corn. Flour tortillas just don’t crisp up the same way in the oven! They tend to soften and get a little chewy when baked like this, kind of like a quesadilla wrapper. The specific process for creating those perfect oven-baked cheesy tacos relies on the structural difference in corn tortillas. Stick to the thin corn ones, I promise you won’t regret that crunch!
How do I prevent the bottom of my crispy taco shells from getting soggy?
Oh, the dreaded soggy bottom! That’s the number one challenge when making baked cheesy tacos, but we solved it right in the instructions! There are two main culprits. First, make sure your ground beef filling isn’t swimming in liquid or excess grease before you stuff the tortillas. If you used a fattier meat, drain it really well before adding that final splash of enchilada sauce!
Second, and this is non-negotiable: use that wire rack! It lifts the tacos off the hot baking sheet, allowing air to circulate underneath them. This lets any steam evaporate outwards instead of soaking back into the shell. That setup is the absolute secret for crispiness all the way around.
Is this recipe suitable for a ground beef taco bake meal prep?
They are certainly *best* eaten fresh, right out of the oven when that cheese is still molten and the shell is screamingly crisp. However, since we are all busy, yes, you can definitely prep components ahead! If you make a huge batch of the ground beef filling, store that separately in the fridge. Then, when you are ready to eat, assemble the raw tacos right then and pop them in the oven, referencing those baking times.
If you want to prep the fully assembled tacos, keep them stored airtight (like we talked about in the storage section) and reheat immediately using the high-heat methods (air fryer or 400F oven). Reheating is key to bringing back that crunch after they sit overnight!
Share Your Oven-Baked Cheesy Tacos (Crispy & Loaded) You’ll Love Experience
Whew! Now that you’ve made these amazing Oven-Baked Cheesy Tacos (Crispy & Loaded) You’ll Love, I want to hear all about it! Did your family devour them? Drop a star rating right below the recipe card so others know how much you loved them!
If you snapped a picture of your perfectly crisp, cheesy creations, tag me on social media—I absolutely love seeing my recipes in your kitchens! And please, don’t hold back; if you have any baking questions or amazing topping discoveries, leave a comment below. I’m always here to chat about food and family!
Head over to my About Page to learn more about my family’s cooking journey!
Oven-Baked Cheesy Tacos (Crispy & Loaded) You’ll Love
Ingredients
Equipment
Method
- Dice the onion and mince the garlic. Add them to a large skillet with the ground beef over medium-high heat.
- Cook the beef until no pink remains. Mix the dry spices for the taco meat while the beef cooks. Add the spices towards the end of cooking and stir well.
- Reduce the heat. Add the enchilada sauce, stirring everything together until the sauce thickens. Remove the meat mixture from the heat.
- Preheat your oven to 400F (200C).
- Wrap the tortillas in a slightly damp paper towel. Microwave for 45 to 60 seconds, flipping halfway through. This makes the tortillas easier to fold. Place the warmed tortillas on a large wire rack or baking sheet.
- Place a generous pinch of cheese on one half of each tortilla. Add the beef mixture, followed by another pinch of cheese. Fold the tortillas in half, pressing down gently to seal them.
- Spray the tops of the tacos with cooking spray. Place a baking sheet on top of the tacos to keep them closed while baking.
- Bake for 14 to 18 minutes, or until the tacos are golden brown and crisp. Check them during baking because the extra-thin tortillas can burn quickly.
Nutrition
Notes
Tried this recipe?
Let us know how it was!
Gluten-Free Culinary Storyteller & Recipe Heritage Specialist
Getting diagnosed with non-celiac gluten sensitivity in my late twenties felt like losing my Italian identity. Growing up in nonna’s Brooklyn kitchen, learning traditional techniques that suddenly became off-limits—I decided to fight for those family food traditions instead of giving up.
With my food journalism background and European baking training, I became obsessed with recreating authentic flavors in gluten-free formats. I’ve adapted 400+ traditional recipes from various cultures, with my gnocchi recipe winning “Recipe of the Year” from the National Gluten-Free Living Awards in 2022.
I collaborate with the Italian-American Cultural Center to document traditional family recipes and volunteer with the Westchester Celiac Support Group, teaching monthly pasta-making classes.
Food is the heart of family storytelling. No one should sacrifice their cultural heritage due to dietary restrictions.