Oh, my friends, are you ready to dive headfirst into something truly sinful? If you’re anything like me, sometimes you just need a dessert that screams indulgence—something rich, creamy, and utterly spectacular. Forget those light, airy things; we’re talking about real comfort food here, baked with love. That’s why mastering the perfect Oreo Cookies and Cream Cheesecake at home is such a major win!
I treasure this recipe because it reminds me of a very special moment. I still remember the first time I made an Oreo Cookies and Cream Cheesecake for my son’s birthday. He had just transitioned to strict gluten-free eating due to his celiac diagnosis, and I wanted to create something special to celebrate him. After experimenting with gluten-free alternatives, I crafted a cheesecake that not only tasted incredible but also brought the whole family together around the table. Watching my son take that first bite and light up with joy reminded me of how powerful food can be in creating shared moments of happiness and celebration, regardless of dietary restrictions.
Why This Oreo Cookies and Cream Cheesecake Recipe Works (Experience & Trust)
Honestly, I’ve tried a million cheesecake recipes, but this Oreo Cookies and Cream Cheesecake just sings! It’s the one that never fails, and here’s why you should trust me with your next baking adventure:
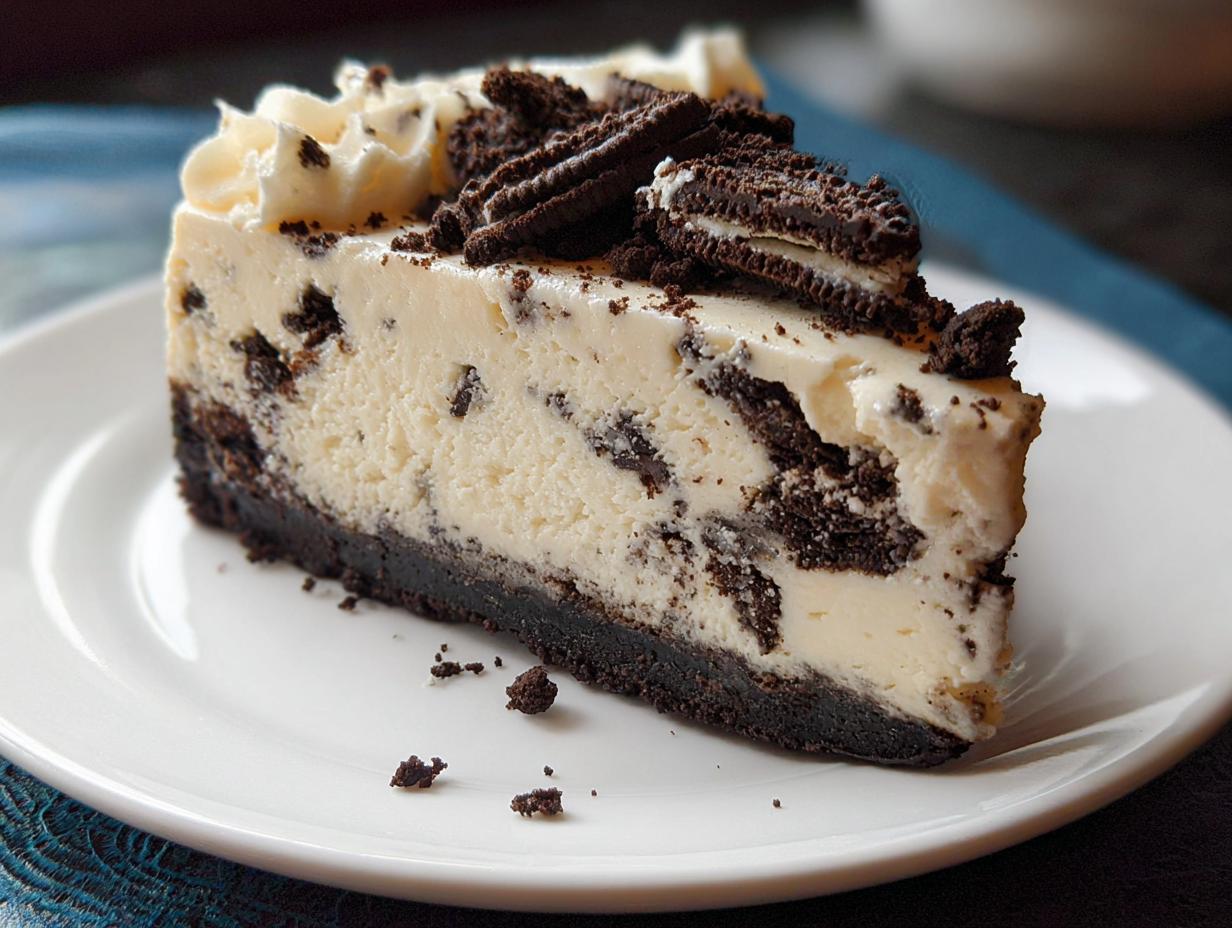
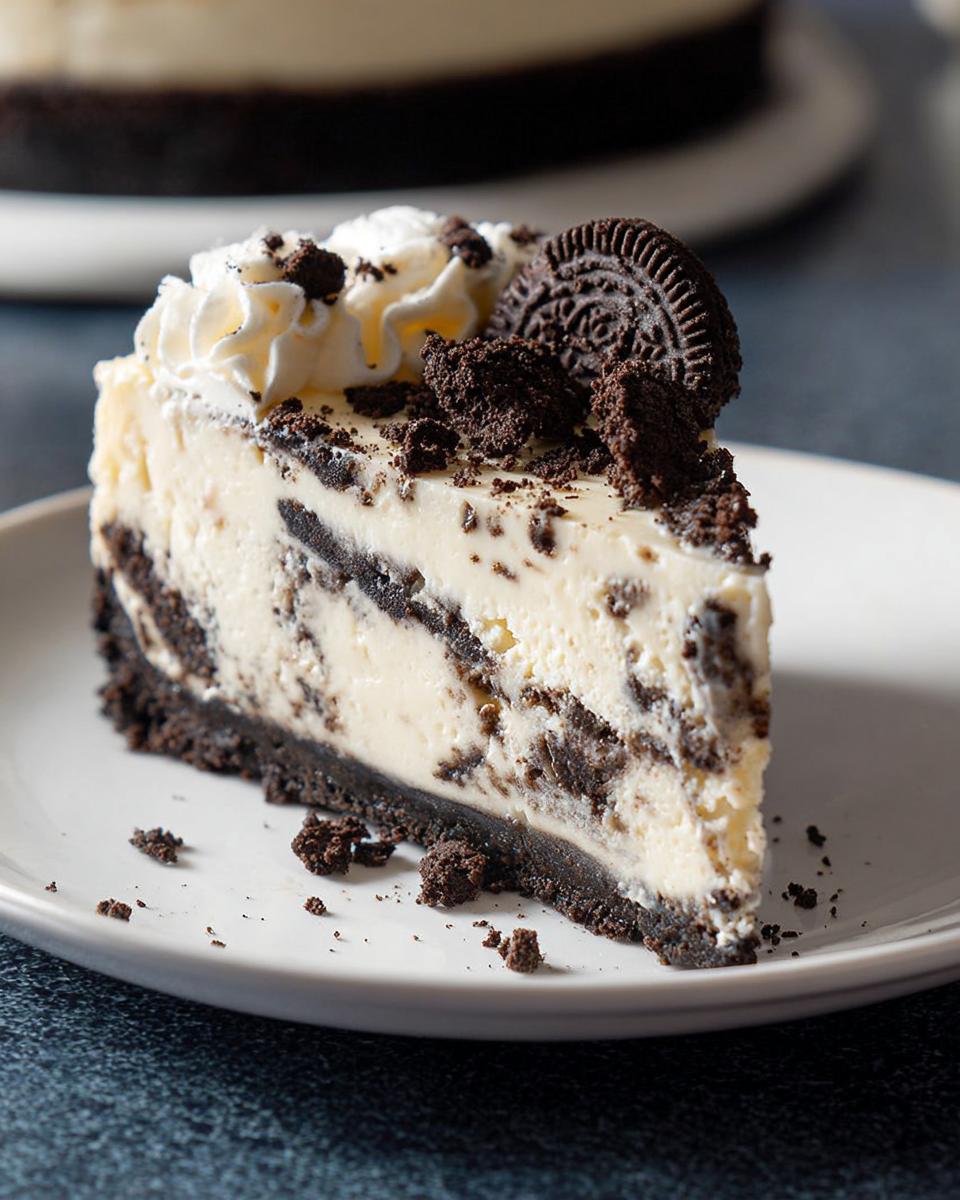
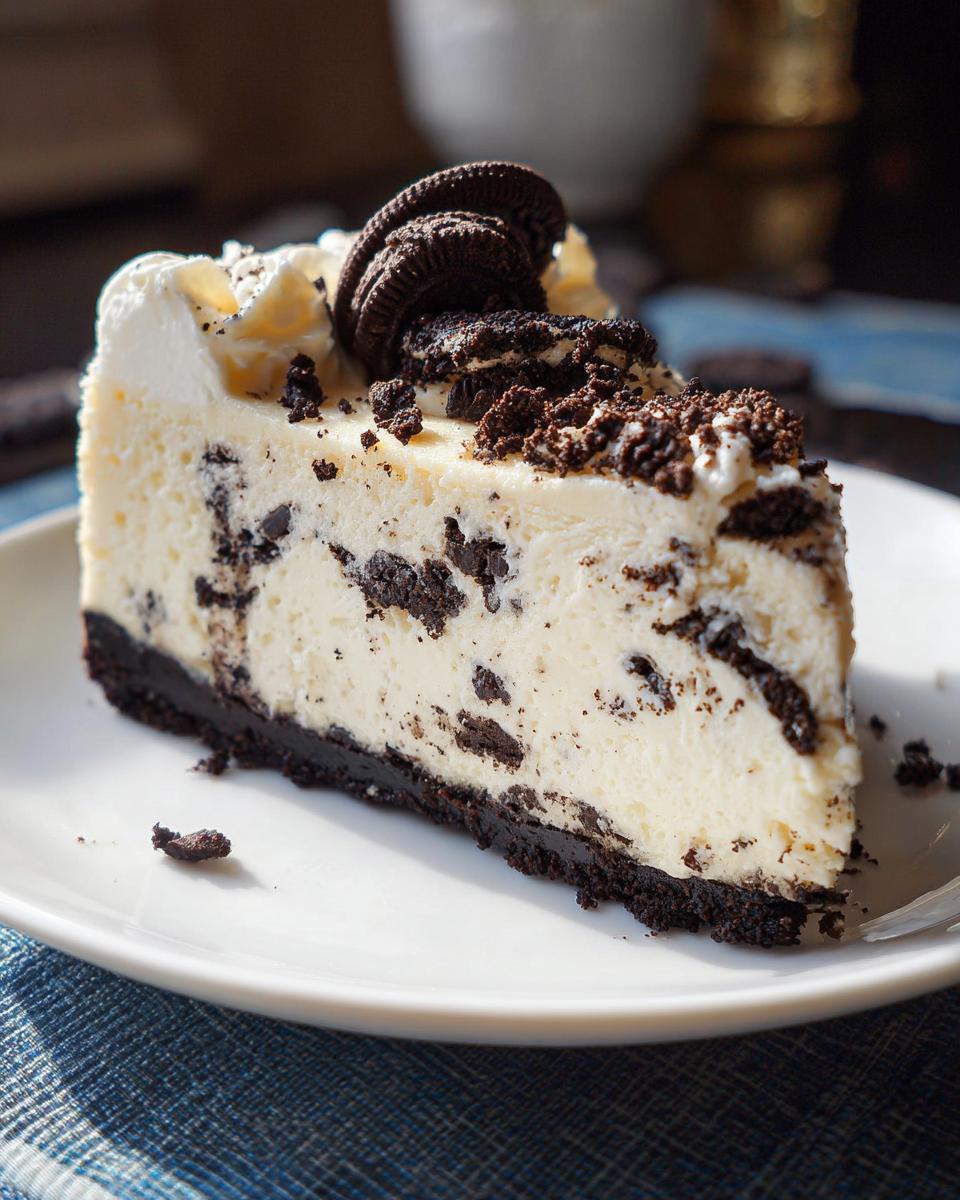
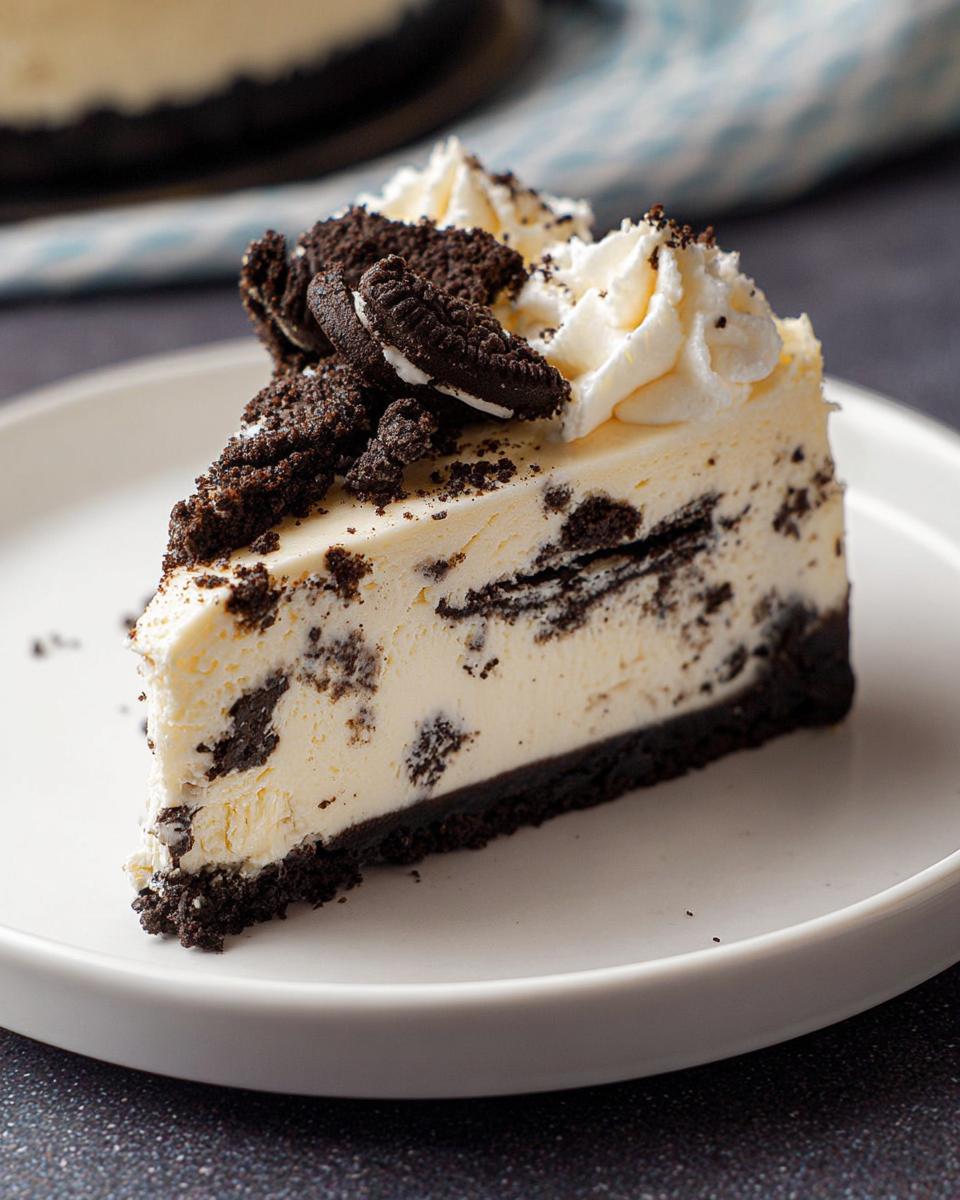
- The crust is pure chocolate crumble—a solid base made from those classic cookies.
- You get that incredible, luxurious smooth texture because we use the water bath trick. No bumps allowed!
- It’s packed with chunks of real Oreos throughout the filling—seriously satisfying.
- It holds together beautifully, making it the perfect showstopper for any get-together.
Gathering Ingredients for Your Oreo Cookies and Cream Cheesecake
Okay, before we get into the magic, let’s talk supplies! Getting your ingredients prepped and ready is half the battle when making any beautiful cheesecake, especially one this loaded. You want everything at the right temperature so it mixes up beautifully on top of that amazing chocolate cookie crust we are making first.
Don’t rush this part—just get your stuff together and make sure your cream cheese is actually softened! Trust me, cold cream cheese causes lumps, and we’re aiming for smooth perfection here.
For the Chocolate Cookie Crust
This is super simple, you only need two things to build our foundation. We need exactly 20 of those regular Oreos, making sure they get crushed up nice and fine. Then, 5 tablespoons of butter—and this absolutely has to be melted down so it binds everything together perfectly!
For the Creamy Filling
Now for the star! You need 24 ounces of cream cheese, and I mean it when I say softened—let it sit out for at least an hour! We’re using one cup of sugar, and for that tangy richness, one cup of sour cream or full-fat yogurt works wonders. Don’t forget the vanilla extract (one tablespoon!). And here’s a critical spot: we need 3 large eggs, added one at a time. Finally, we gently fold in 13 of the Oreos, crumbled up, right before pouring into that crust.
Optional Topping Ingredients
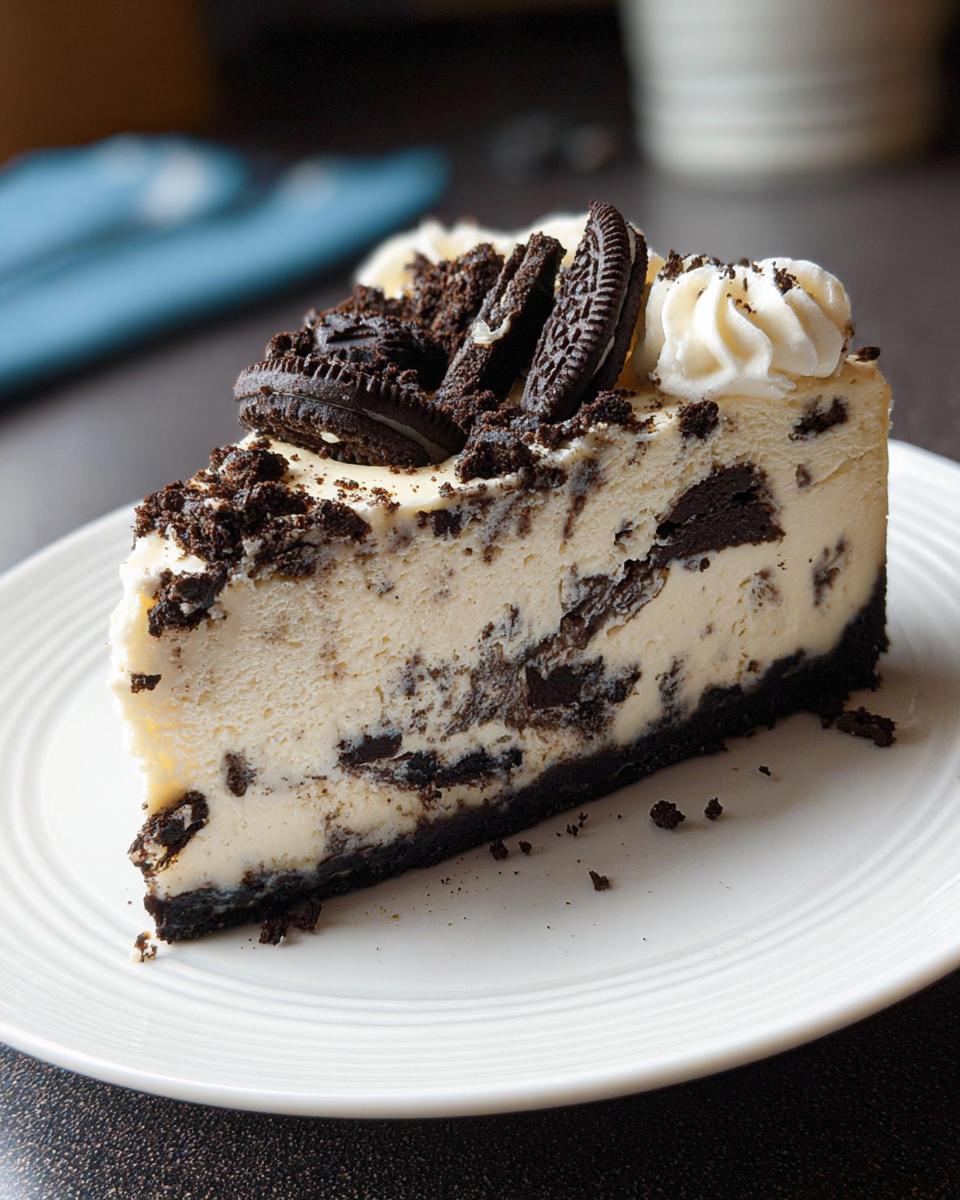
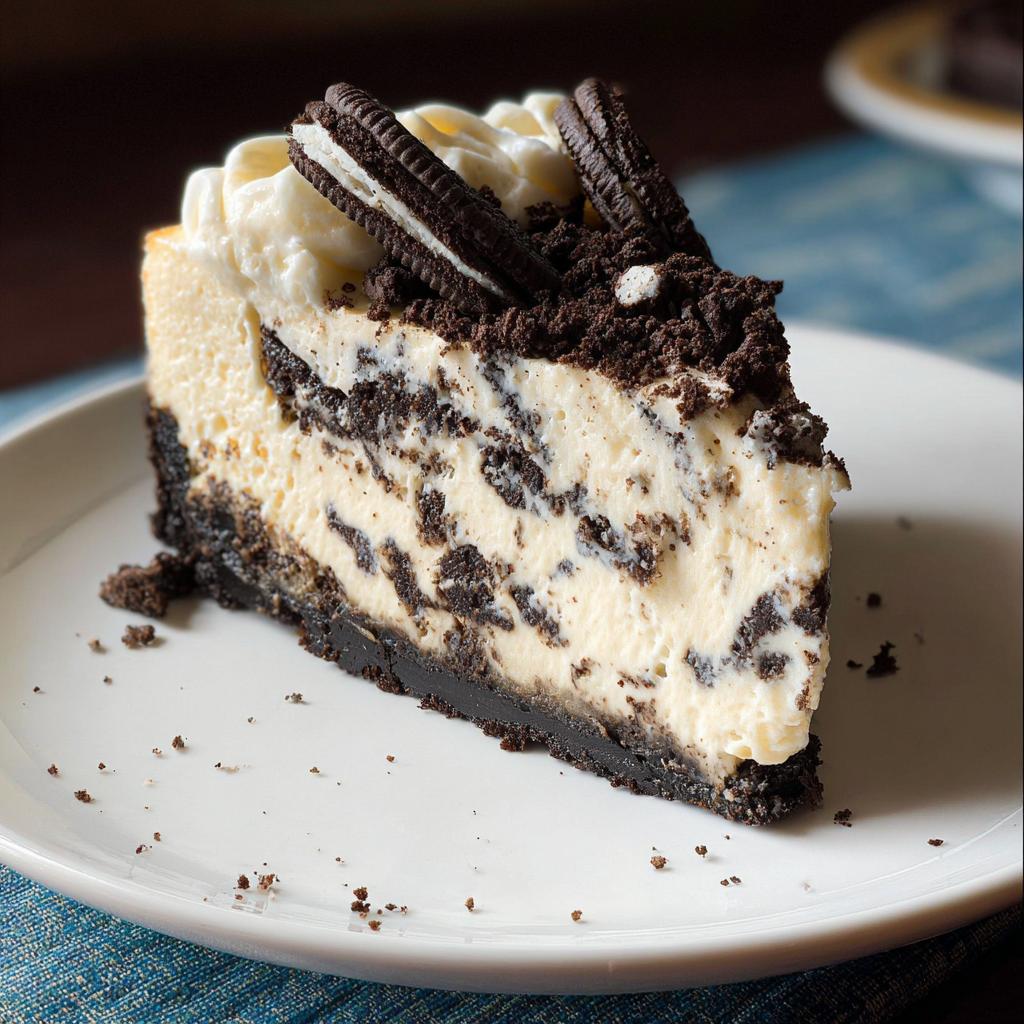
If you want to turn this into an actual celebration centerpiece, you’ll want whipped cream to dollop on top. Also, save those remaining 5 Oreos to crumble right before serving! That final sprinkle makes all the difference.
Step-by-Step Guide to Making the Oreo Cookies and Cream Cheesecake
Alright, deep breaths! You’ve got your ingredients sorted, now let’s get baking. This whole process takes about 30 minutes of active prep and about 70 minutes in the oven, plus that essential rest time. This recipe makes the ultimate of all cookies and cream desserts, so pay attention to the details, especially when setting up the water bath! If you want to see how others approach these beautiful bakes, check out this great guide on cheesecake techniques.
Preparing the Pan and Baking the Chocolate Cookie Crust
First things first: set that oven rack low and fire it up to 350°F (175°C). Before you do anything else, take your springform pan and your big sheet of heavy-duty foil. You need to wrap the outside of that pan—I mean really seal it up tight! This foil is what protects your crust from the water bath later, and honestly, if you tear it, water gets in and you end up with soup, not a crust. Been there, learned the hard way!
Crush those 20 Oreos and mix them with the melted butter. Press it firmly into the bottom of your prepared pan. Pop that crust in the hot oven for just 9 to 10 minutes to set. Let it cool down while you whip up that spectacular filling!
Mixing the Smooth Cheesecake Filling Base
Time for the creamy center! Grab your electric mixer. You must beat the softened cream cheese and the sugar until it’s completely smooth—we’re talking velvety smooth, no graininess allowed. Then, mix in the sour cream and vanilla until just combined.
Now, add those 3 eggs, but here is my biggest tip: add them one at a time, mixing only on the lowest speed until you see it disappear. Over-mixing eggs is the number one cause of cracks! Once the eggs are happy, gently—and I mean use a spatula for this part—fold in those 13 crumbled Oreos. We want pockets of cookie, not dust! For more ideas on great make-ahead desserts, you can always peek at my chocolate mousse recipes.
The Water Bath and Baking Technique for Perfect Oreo Cookies and Cream Cheesecake
Pour your filling right over that cooled crust. Next, place your foil-wrapped pan into a large roasting pan that’s waiting on the oven rack. Now, boil some water! Carefully pour that hot water into the roasting pan until it comes about halfway up the sides of the cheesecake pan. This Bain Marie is the secret weapon!
Bake between 50 and 60 minutes. When the edges look set but the center still has a little wobble, turn the oven OFF. Open the door just a crack and let the cheesecake hang out in that warm environment for a full hour. That gradual cooling trick right there is pure gold for a perfect, crack-free Oreo Cookies and Cream Cheesecake!
Chilling and Final Presentation of Your Oreo Cookies and Cream Cheesecake
Once that hour rest is over, carefully take the cheesecake (still in the roasting pan) out of the oven. Let it cool the rest of the way on the counter, then cover it gently and move it to the fridge. You need a minimum of 4 hours, but trust me, overnight is better for the absolute fudgiest texture.
Before serving, run a thin knife carefully around the edge—this stops sticking! Then, release that springform rim. Top it generously with whipped cream and sprinkle those final 5 remaining Oreos right on top. Dig in!
Tips for a Flawless Oreo Cookies and Cream Cheesecake
Cheesecake panics are real, I know they are! That fear of cracking or having a lumpy center can stop a baker dead in their tracks. But honestly, once you know these three little tricks, making a flawless Oreo Cookies and Cream Cheesecake becomes second nature. These are the secrets I learned that totally changed my game.
First up: Don’t try to speed-chill that thing! I know you just pulled it out of the oven after that one-hour cooldown, and you’re excited, but resist the urge to put it straight into a hot kitchen fridge. The rapid temperature drop is a huge cause of cracks. Let it sit on the counter until it’s just warm to the touch—not hot—then cover it loosely and chill. Patience equals perfection here.
My second piece of advice is about the mixer; you absolutely must use room-temperature ingredients. I stressed the softened cream cheese, but make sure your eggs aren’t cold either! Cold ingredients don’t combine well, forcing you to over-mix to get everything smooth. When everything is soft, it blends beautifully at a low speed, meaning less air gets whipped in, which is what causes those terrible sunken spots in the middle.
Finally, remember the foil integrity I mentioned earlier? That water bath isn’t just for gentle baking; it’s a shield. Before you even touch that pan, double-check your foil wrapping. Use at least two thick layers of heavy-duty foil completely covering the sides and bottom. If you have any doubt at all—if the foil looks weak or thin where it creases—wrap it again! We want zero moisture exchange between the water bath and that gorgeous chocolate cookie crust.
Equipment Needed for This Oreo Cheesecake Recipe
You know, I hate when I get halfway through a recipe only to realize I’m missing that one weird tool! For this decadent Oreo cheesecake, the list is pretty focused on getting that perfect water bath setup and mixing everything just right. Don’t stress if you don’t have fancy gadgets; most of this stuff is standard kitchen gear. But just to make your life easier, here’s what you absolutely need ready before you start on that crust.
If you ever run into trouble or just want to share your magnificent baking results, you can always reach out to me via my contact page!
Here is the lineup of essentials you’ll want:
- You simply must have a 9-inch springform pan. This is non-negotiable for easy removal of the finished cake!
- Make sure you have a really large sheet of heavy-duty aluminum foil. We need tons of it to create that leak-proof blanket for our water bath.
- Grab your electric mixer—either a handheld one or a stand mixer with the paddle attachment. You need that power to cream the cheese really well.
- A large roasting pan is crucial! This will hold the cheesecake and the hot water, protecting it during that long, slow bake.
- For crushing those cookies? A food processor or blender makes quick work of it, saving your arm from endless smashing!
Storage and Reheating Instructions for Leftover Oreo Cookies and Cream Cheesecake
First off, let’s hope you have leftovers! Because honestly, this Oreo Cookies and Cream Cheesecake tastes even better the next day once those flavors have truly melded together. But handling those magnificent leftovers correctly is key to keeping that texture just right.
When it comes to storage, you want cold, protected storage. After you’ve sliced and served the first pieces, cover the remaining cheesecake tightly. I usually cover the exposed cake part directly with plastic wrap before sealing the whole pan (or a large container) with a lid. It stays perfectly happy and edible in the refrigerator for up to 4 days. If you wait longer than that, the chocolate crust can start to get a little soggy, which is a crying shame.
Now, let’s talk about reheating—and this is where I get strict! You absolutely should not microwave or warm up a cheesecake. Seriously, don’t do it! Cheesecakes are meant to be served chilled or at a perfect cool room temperature.
If your cake has been chilling overnight and feels rock-hard straight from the fridge, just pull it out about 20 to 30 minutes before you plan on serving it. That little bit of time on the counter lets the cream cheese soften just enough to regain that perfect, dreamy, melt-in-your-mouth consistency without turning soupy. That’s the pro move for enjoying any leftover slices!
Frequently Asked Questions About Oreo Cheesecake
I get so many messages about cheesecakes—they look intimidating, but I promise you, once you understand a couple of key things, you’ll be churning these babies out every weekend! You’ll find my answers below, and if you want to learn a bit more about my baking journey, feel free to check out my About Me page!
Can I skip the water bath when making this Oreo Cookies and Cream Cheesecake?
Oh, please don’t! You simply cannot skip the water bath, or Bain Marie, for this recipe. I know it seems messy wrapping that pan in foil, but the water bath creates this wonderfully moist, steamy environment inside the oven. This ensures the cheesecake bakes slow and even. Without it, you risk dry edges and major cracks right across the top when it cools. We are aiming for signature creamy texture, and the water bath is the gatekeeper of that creaminess!
How do I ensure my Oreo Cookies and Cream Cheesecake sets properly?
Setting isn’t just about the baking time; it’s about the cool-down! Make sure your oven truly hit that 350°F mark before you put the cake in. If the initial temperature is off, it won’t bake right. But the biggest trick is the chilling time! You must give it a minimum of 4 hours in the fridge, but seriously, overnight is magic. That extended, cold rest time is what transforms the batter from wobbly to firm and sliceable. Don’t rush that final chill!
Is this a good oreo cheesecake recipe for kids?
Is it a good recipe for kids? Are you kidding? This is pure gold! If you’re looking for kid approved recipes, this one is at the top of the list! Kids go absolutely bonkers for the crunchy, chocolaty crust and the big chunks of Oreos throughout the smooth filling. It’s fun, it’s familiar, and it feels like a special treat every single time we make it for family gatherings. They usually help crumble the cookies for the topping—it’s always fun chaos!
Nutritional Estimate for Oreo Cookies and Cream Cheesecake
Okay, let’s talk fuel! I try not to dwell too much on the numbers when I’m baking something this glorious, because honestly, that first bite is pure joy, and that’s what matters, right?
But just so you have the scoop, I pulled the estimates right from the recipe card we used. Remember, because we are working with cookies that can change—and depending on whether you use regular or gluten-free Oreos, or perhaps a different brand of sour cream—these numbers are just a guideline. When I tested this recipe for my son, I used specific brands to keep things consistent, but your results will naturally vary a bit!
Based on the standard recipe, for one rich slice (out of 12 total), here’s what we’re looking at:
- Calories: About 458
- Total Fat: Around 31 grams (Yep, it’s buttery!)
- Carbohydrates: Roughly 39 grams
- Protein: A modest 4 grams
It’s definitely a treat, not an everyday staple, leaning heavy on the fats because of that decadent cream cheese and butter in the crust. But hey, a little indulgence now and then is so necessary for the baking soul! Enjoy every single calorie!
Share Your Decadent Oreo Cookies and Cream Cheesecake Creation
Whew! We made it! Doesn’t that smell incredible? I seriously hope you’re slicing into that gorgeous, towering slice of Oreo Cookies and Cream Cheesecake right now. I truly put everything I have into making sure my recipes work perfectly for you, and honestly, the best reward is seeing your successes!
When you wrap up your baking adventure, I would absolutely love to know how it went down in your kitchen! Did the crust hold firm? Did your son—or whoever the lucky recipient was—ask for seconds?
Don’t be shy! Please drop a comment below. Seriously, tell me what you thought, and if you can, give this recipe a star rating—out of 5 stars, of course! Five stars means you’re ready to bake it again next week, right? I really want to see your masterpiece creations, so if you snapped a photo while you were topping it with whipped cream and cookie crumbles, please share it! It makes my whole day knowing I helped bring a little bit of that nostalgic, creamy joy into your home.
If you’re looking for the ground rules on leaving comments or have general questions about using recipes from this site going forward, you can always take a peek at my terms of service. Happy smashing those Oreos, and I can’t wait to hear all about your dessert success!
Oreo Cookies and Cream Cheesecake
Ingredients
Equipment
Method
- Adjust the oven rack to the lower third position and preheat oven to 350°F (175°C).
- Place a 9-inch springform pan in the center of a large sheet of heavy duty aluminum foil (about 18 by 18-inches). Carefully wrap foil around the sides of the cheesecake pan and spray the inside with non-stick spray.
- In a food processor or blender, pulse 20 Oreos to fine crumbs. In a medium mixing bowl, stir together the Oreo crumbs and melted butter until well combined.
- Press the mixture into an even layer in the bottom of the prepared springform pan. Bake in the preheated oven for 9 to 10 minutes, then allow it to cool while you prepare the filling.
- In a mixing bowl, using a hand-held electric mixer or a stand mixer fitted with a paddle attachment, beat the cream cheese and granulated sugar until smooth and creamy.
- Add the sour cream or yogurt and the vanilla, and mix well. Add eggs one at a time and mix on low speed just until combined.
- Gently fold in 13 crumbled Oreo cookies. Do not over-mix. Pour the filling into the cooled crust.
- Place the springform pan into a large roasting pan and put it in the oven. Fill the roasting pan with hot water until the water level comes about halfway up the outside of the cheesecake pan.
- Bake in the preheated oven for 50 to 60 minutes, or until the center is almost set. Turn the oven off and open the door slightly. Let the cheesecake rest in the oven for 1 hour.
- Remove from the oven and allow it to cool completely at room temperature. Refrigerate for at least 4 hours or overnight.
- Loosen the cheesecake from the rim of the pan and remove the rim. Top with whipped cream, crumble the remaining 5 Oreos, and sprinkle over the cheesecake. Cut into slices and serve chilled.
- Cover the cheesecake and store it in the refrigerator for up to 4 days.
Nutrition
Notes
Tried this recipe?
Let us know how it was!
Gluten-Free Chef & Latin Cuisine Innovation Specialist
My youngest son’s celiac diagnosis at four changed everything. Suddenly, all those traditional Brazilian and Portuguese recipes from my avó needed to be completely reimagined without losing their soul.
After graduating from Johnson & Wales and working Miami’s Latin fusion scene, my son’s diagnosis became my calling. How do you make gluten-free empanadas that taste like childhood? Over eight years, I’ve developed 320+ gluten-free recipes celebrating authentic Latin flavors using cassava flour and plantain alternatives.
My gluten-free empanada recipe won “Best Appetizer” at the 2023 Miami Gluten-Free Food Festival. I ran “Sabores Sin Gluten,” a catering business serving Miami’s Latino community—quinceañeras, family gatherings, all the celebrations that matter.
Food is culture, and everyone deserves to experience the joy of sharing traditional family meals, regardless of dietary restrictions.