Let’s face it, those trips to the coffee shop add up faster than a melting ice cube on a hot day! If you’ve been eyeing those creamy, icy blended drinks but wincing at the bill, I’ve got the answer you need. This is the ultimate Mocha Frappuccino (Budget-Friendly) recipe, designed for maximum flavor with minimum spending. I’ll never forget the first time I tried to recreate one at home. It was one sweltering summer afternoon, and my budget was tight, but my craving for that creamy, coffee-flavored bliss was *strong*. I gathered ingredients I already had—some instant coffee, cocoa powder, and milk—and blended them up with ice, just hoping for the best. As I took that first sip, the rich chocolatey coffee flavor washed over me, and I felt such a wave of delight! That moment birthed my passion for making budget-friendly treats, proving you can create a café experience right in your own kitchen. I’m Marco Santos, by the way—a Gluten-Free Chef & Latin Cuisine Innovation Specialist—and you can read more about my culinary journey here: my culinary journey. I believe great flavor shouldn’t require a second mortgage!
Why This Mocha Frappuccino (Budget-Friendly) Beats the Café
Honestly, why pay $6 for a glass of blended joy when you have a perfectly good freezer? This recipe is all about being smart with what you’ve got. It turns simple pantry items into an amazing Chocolate Drink that satisfies that craving completely. It feels luxurious, but it’s pure practicality!
- You get a giant, creamy Sweet Treat without the sticker shock.
- It’s faster than driving to the store when the craving hits!
- Zero weird additives—just pure coffee, chocolate, and sweetness.
Cost Comparison and Cheap Ingredients for Your Mocha Frappuccino (Budget-Friendly)
The biggest saver here is ditching the espresso machine work. Instead of paying extra for those rich espresso shots, we just brew regular coffee strong and freeze it into cubes. Think about it: you’re using something you already bought for your morning cup! Since we rely on pantry staples like regular sugar and basic cocoa powder, the cost per glass tanks. You’re looking at pennies compared to the drive-thru price. This is peak Budget Recipe living, trust me!
Essential Ingredients for Your Mocha Frappuccino (Budget-Friendly)
Okay, now we get down to the fun part: gathering our supplies! Since this is a Budget Recipe, I’ve kept the list short and focused on things you probably already have in your pantry or can grab easily. We are making enough for two lovely glasses here, so adjust up if you have company! The most important thing? Get those coffee cubes prepped ahead of time—two cups of your strong morning brew, frozen solid, is what we are aiming for. Seriously, that frozen coffee is the backbone of this whole operation!
For the Blended Coffee Base
These ingredients combine for that perfect sweet, creamy, chocolatey coffee flavor. Don’t swap the cocoa powder for a hot chocolate mix, though! Those mixes usually have too much sugar and not enough rich chocolate punch. We want depth here, not just sweetness.
- Strong Brewed Coffee: You need 2 cups, pre-frozen into ice cubes. This is your flavor powerhouse!
- Milk: 1 cup of whatever milk you prefer. Dairy, oat, almond—it all works fine for this simple Blended Coffee creation.
- Sugar: 3 tablespoons. Taste test as you go; you can always add more, but you can’t take it out!
- Cocoa Powder: 1 1/2 tablespoons of unsweetened cocoa powder. Don’t pack it in!
- Vanilla Extract: Just 1/4 teaspoon, but it really rounds out the mocha flavor nicely.
- Salt: A tiny pinch! This is my secret weapon; it wakes up the chocolate flavor instantly.
- Instant Coffee Granules (Optional): If you like it extra punchy, throw in 1 teaspoon. This boosts the coffee note without adding more liquid.
Optional Additions for the Perfect Sweet Treat
If you’re feeling extra indulgent and want this to really feel like a splurge—even though it cost next to nothing—you definitely need a topper. We are keeping it light, just as an option for that final presentation!
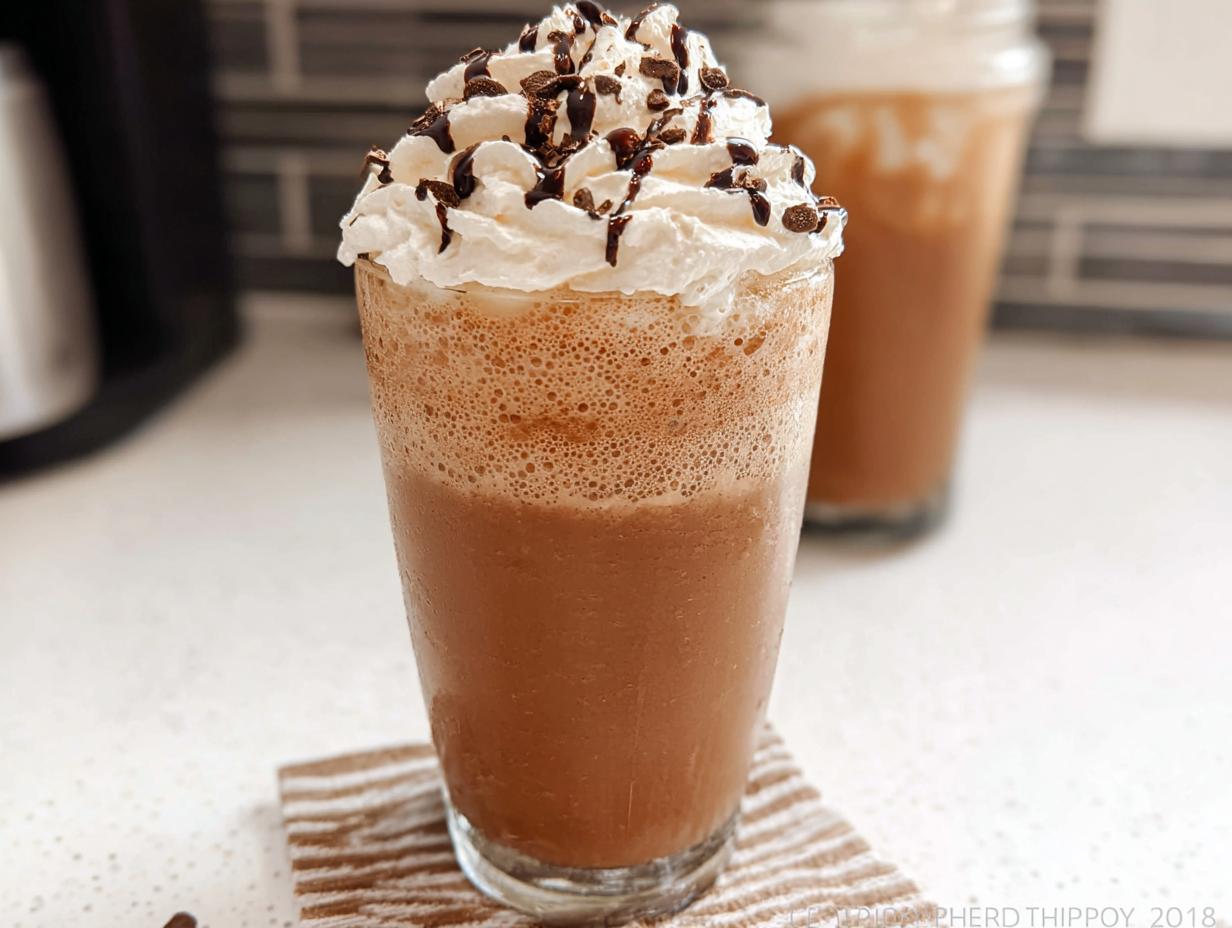
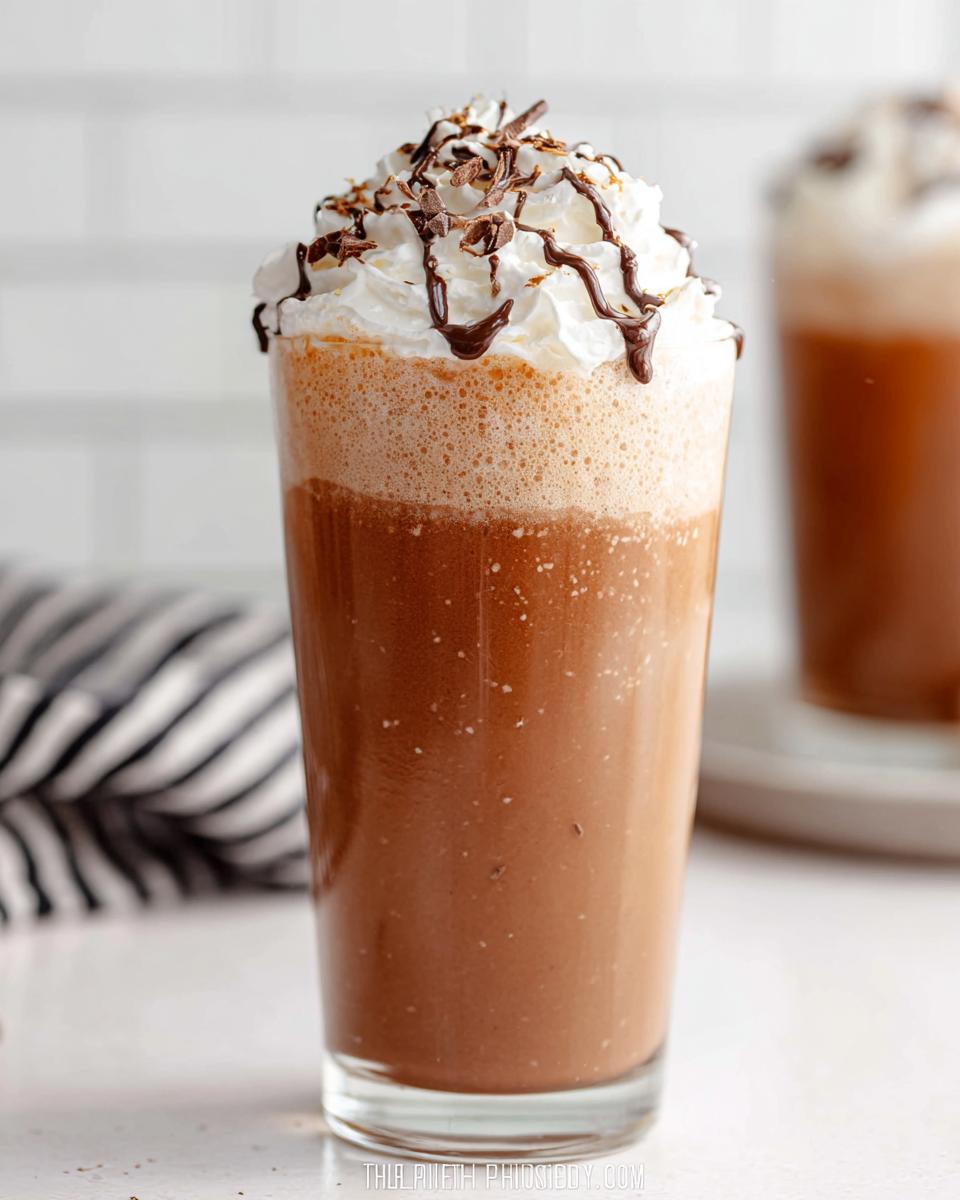
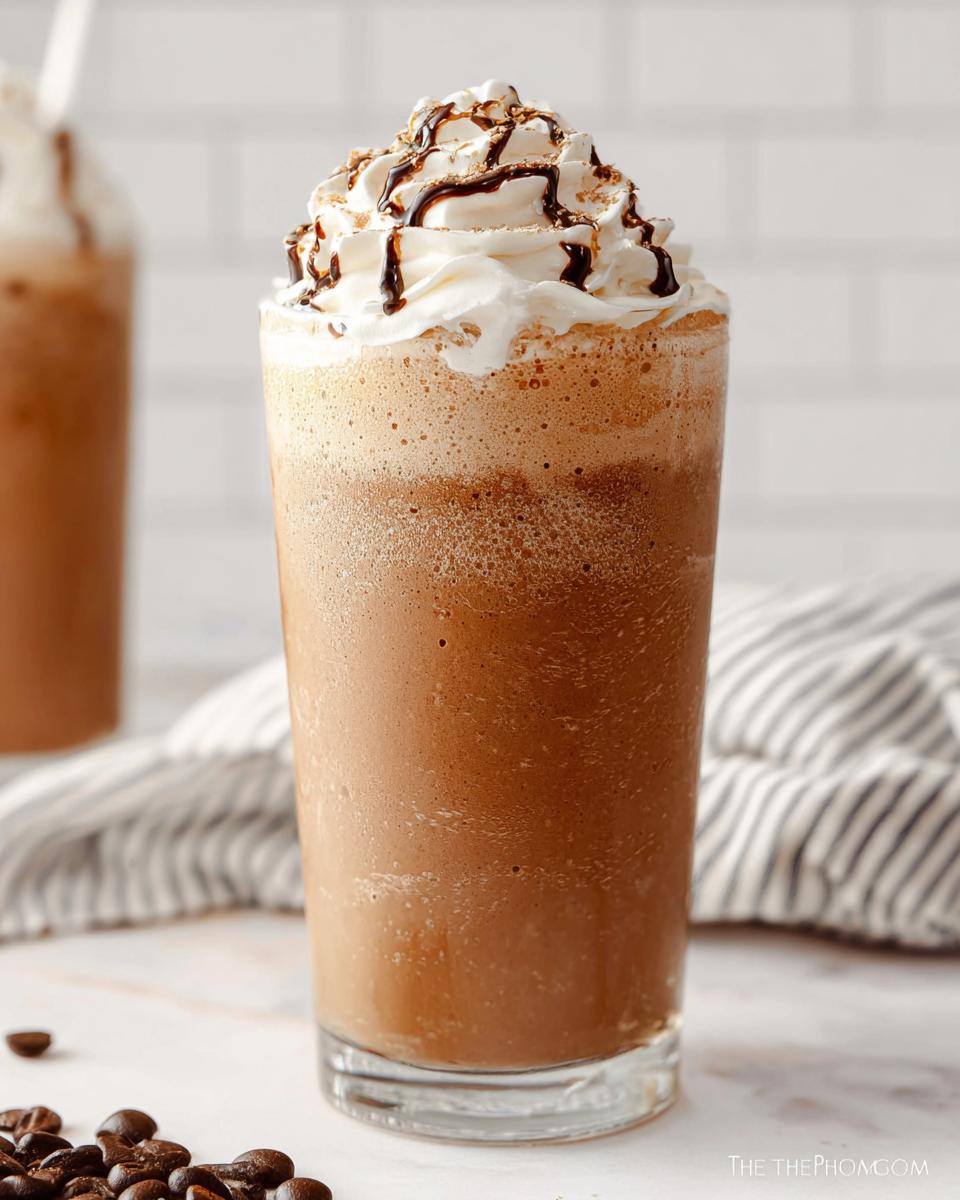
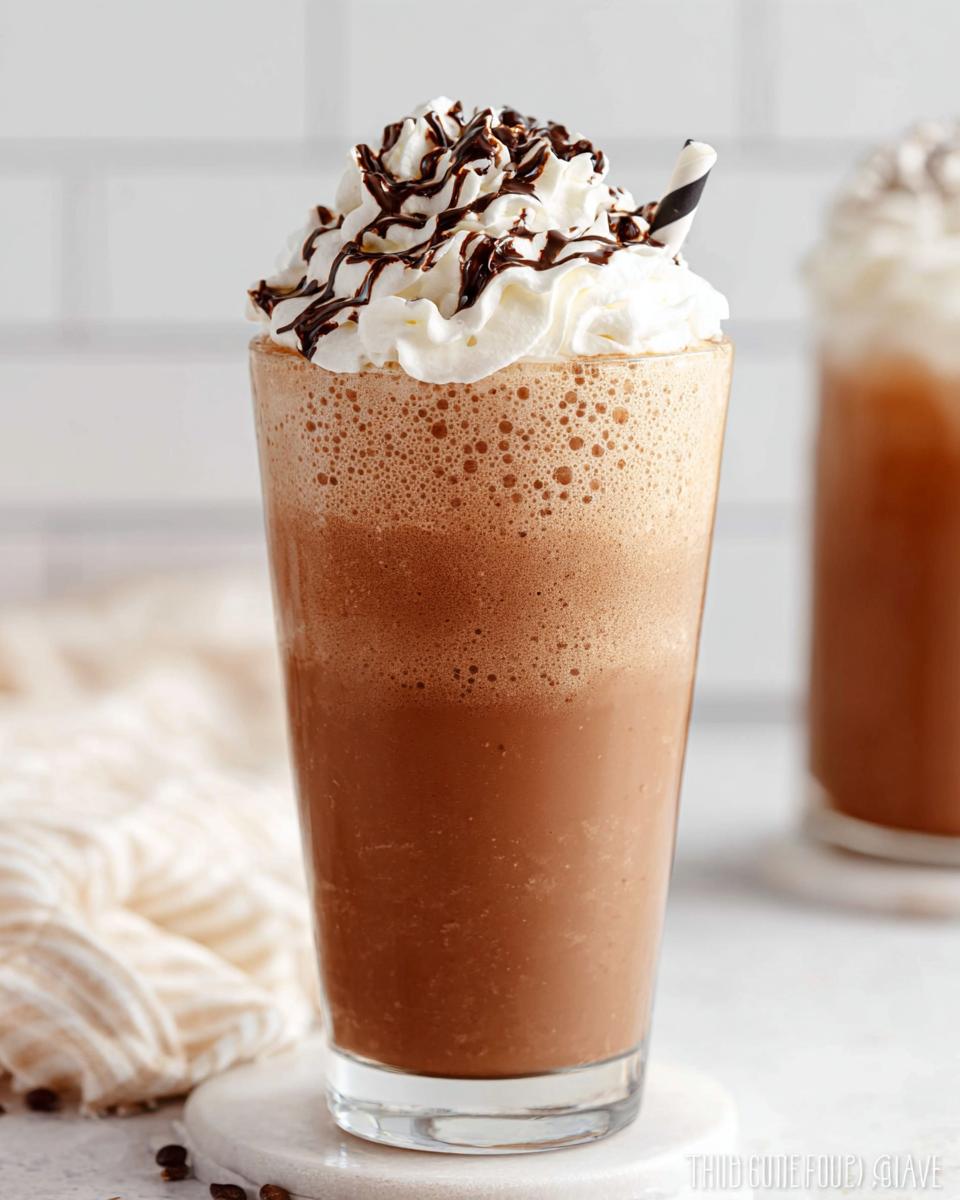
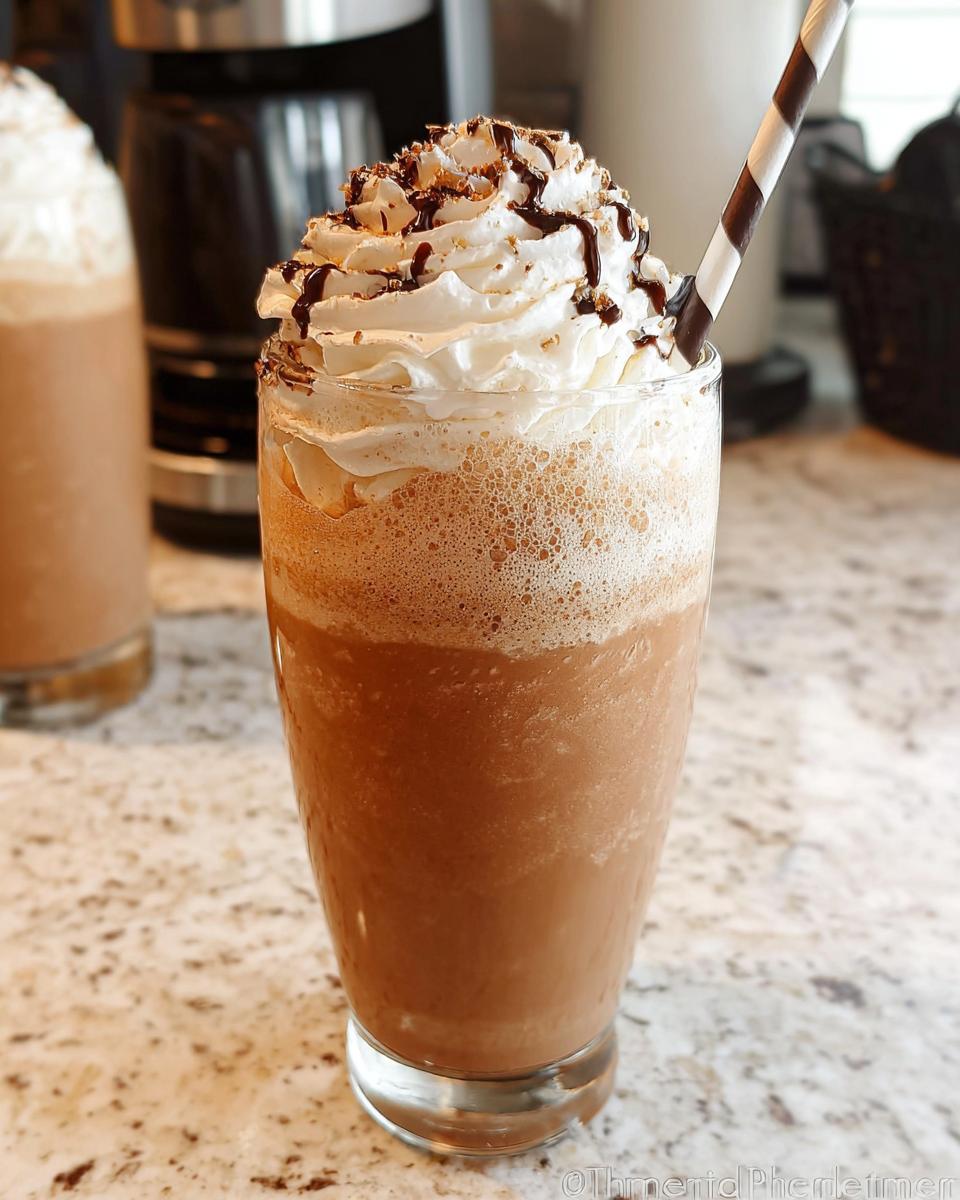
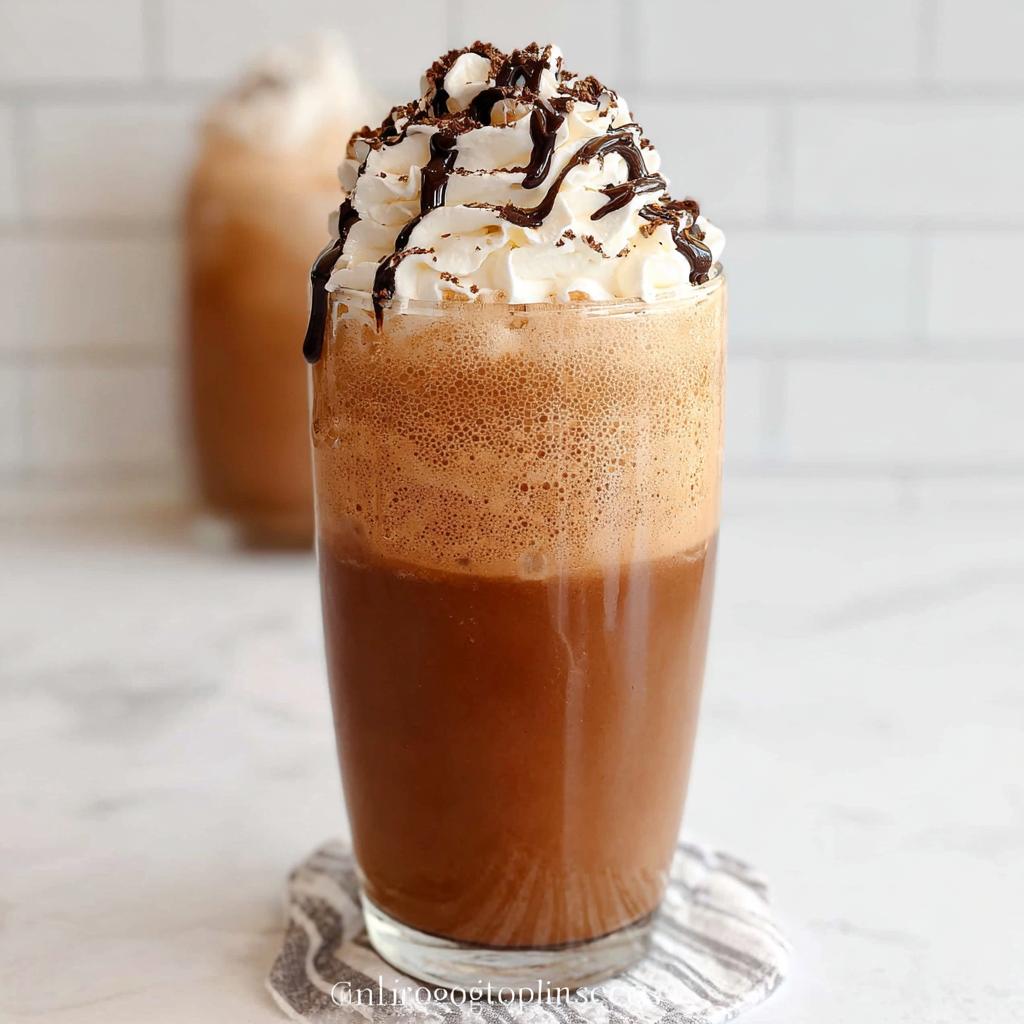
- Whipped Cream: Just 1 serving, dolloped right on top when you serve it up. It makes the whole thing look amazing!
How to Prepare Your Mocha Frappuccino (Budget-Friendly) Step-by-Step
This is shockingly fast to put together, but remember those coffee cubes need to be rock hard for the best results! We need a good, strong blender for this job; cheap ones might struggle against all that frozen coffee. If you’ve got one, you’re halfway there! Seriously, making your own Blended Coffee is almost foolproof once you get into the rhythm of the blending. If you are looking for more great recipe finds, I always have new ideas posted over on my main recipes page!
Blending the Mocha Frappuccino (Budget-Friendly)
It’s so simple, it feels like cheating! Just toss everything that isn’t whipped cream—all those frozen coffee cubes, the milk, the sugar, the cocoa powder, the salt, and the vanilla—right into your high-powered blender. Don’t layer them or do anything fancy; just combine it all. Blitz it on high power until it looks mostly smooth and slushy. It should take less than a minute if your blender is up to the challenge!
Addressing Blender Consistency and Resting Time
Now, sometimes the blender just stalls. It happens! If the ice is battling the blades and you get that horrible grinding sound instead of a smooth whirl, stop the machine. This is where we introduce that crucial 10 minutes of Resting Time. Let the mixture sit for five to ten minutes; this lets the ice cubes soften up just a tiny bit around the edges. Then, try blending again. It will catch! If you need more tips on getting creamy perfection, check out this great resource from a fellow budget enthusiast: easy homemade mocha frappuccino. Once it’s perfect, pour it into your glasses and jump straight to the topping stage!
Tips for Success with a Budget Recipe Mocha Frappuccino
Making a Mocha Frappuccino (Budget-Friendly) is all about smart shortcuts, not sacrifices! I’ve learned a few tricks over the years to make sure that every single batch comes out perfectly smooth and intensely flavored, even when we’re cutting costs. If you’re ever short on time or your blender isn’t exactly top-of-the-line, don’t stress. We’ve got workarounds!
If your blender is fighting your frozen coffee cubes—you know, the ice just won’t catch—take it from me: pop the whole mixture into the microwave for about 45 seconds on the defrost setting. Don’t let it melt into soup! You just want the outside edges of the ice to get a soft halo. That little bit of surface melt is enough to get the blades moving smoothly again. You can find a lot of great tips for copycat style drinks over on my inspiration pages, like my guide to Starbucks drinks copycat recipes inspiration.
Here’s another pro-tip for boosting that chocolate flavor: add a tiny splash of instant coffee granules, even if your coffee cubes are already strong. That little jolt of pure espresso flavor really amplifies the cocoa, making this feel like an expensive Blended Coffee creation instead of a simple budget drink. It’s the little things that make all the difference around here!
Ingredient Notes and Substitutions for Your Mocha Frappuccino
We’re sticking to the basics here for our Mocha Frappuccino (Budget-Friendly), but I know sometimes life means we’re missing one thing or another. That’s okay! Cooking is all about making things work, right? If you don’t have that optional instant coffee, don’t panic; your drink will still taste great because the cocoa powder does most of the heavy lifting for that rich chocolate note. Check out some of my other adaptable ideas in the gluten-free baking category for inspiration!
Now, about thickness: if you want an even creamier texture next time, try this trick! Instead of using all liquid milk, freeze half of your milk into cubes. Next time you make this, swap the fresh milk for frozen milk cubes along with your coffee ice cubes. It adds a wonderful, almost “ice cream” texture to your Blended Coffee without adding any more sugar or needing extra thickeners. It just takes a little advanced planning, but trust me, it’s worth the extra effort for that wonderfully thick result!
Serving Suggestions for This Delicious Chocolate Drink
We’ve done the hard work making this amazing, cheap Chocolate Drink, so don’t let it fall flat in a boring glass! Since we are keeping things budget-friendly, skip the specialty syrups for garnishes. A light dusting of extra cocoa powder over the top of the whipped cream (or just sitting on the foam if you skip the cream) looks so professional. It really enhances that deep mocha aroma!
If you’re making these as an afternoon pick-me-up, I love pairing them with something simple I already had in the oven. Maybe a quick slice of pound cake or even a simple homemade cookie from the bakery section. You can find some fantastic, simple ideas for pairing treats over at my guide to homemade dessert recipes inspiration. Enjoy your luxurious, inexpensive treat!
Storing and Reheating Your Mocha Frappuccino (Budget-Friendly)
Okay, so you made a double batch because you couldn’t help yourself, or maybe you just poured too quickly and have some leftovers. Here’s the real-deal tip for this Mocha Frappuccino (Budget-Friendly): it is best enjoyed the second it comes out of the blender. That perfect icy, slushy texture disappears fast, so if you can drink it immediately, please do!
But if you absolutely must save some, don’t just stick a straw in the glass and walk away! That’s a recipe for watery sadness. You need to treat your leftover blended coffee like a liquid concentrate. Pour any remaining mixture into an airtight container. It will, of course, separate because it’s just coffee, milk, and ice, but that’s fine.
The next time that craving hits, pour the cold concentrate back into the blender—and this is crucial—you must add fresh ice cubes! Don’t add more milk or sugar unless you want a thinner drink. Blend it all up again until it reaches that satisfying, thick consistency. That little bit of extra blending time gets you right back to that delicious, homemade Blended Coffee experience without wasting any of your hard work!
Frequently Asked Questions About Making a Cheap Frappuccino
I totally get it; when you’re trying to stick to a budget, you’re going to have questions! Making a Mocha Frappuccino (Budget-Friendly) is easy, but sometimes readers worry about the texture or the caffeine kick. Don’t worry about a thing! I’ve compiled the things I hear most often from folks trying to nail this recipe for the first time. If you ever have a burning question not covered here, feel free to shoot me a message on my contact page!
Can I make this Mocha Frappuccino (Budget-Friendly) without coffee?
You certainly can try, but I have to warn you: it won’t be a Mocha Frappuccino anymore! If you skip the coffee cubes, you’re essentially making an iced chocolate milk smoothie. If that’s what you want, go for it! Just replace the 2 cups of coffee cubes with 2 cups of your favorite milk and taste it before adding extra sugar, because the milk will naturally be sweeter than the strong, bitter brewed coffee.
How do I make my Blended Coffee thicker?
This is one of my favorite tweaks! If your Blended Coffee turns out a little too watery, it usually means your ice cubes softened too much before blending, or you added too much liquid milk compared to the ice. For next time, use slightly less milk—maybe start with 3/4 cup instead of a full cup. Or my absolute favorite trick? Toss in a small piece of frozen banana (about half a small one) along with the ice. It adds creaminess and amazing thickness without changing the chocolate flavor too much!
Share Your Homemade Mocha Frappuccino (Budget-Friendly) Creation
Now that you’ve whipped up your own café-quality treat for pennies, I absolutely want to hear about it! Seriously, that’s the best part of sharing these resources. Did you save a bundle this week? Did you swap out the sugar for maple syrup? Tell me everything!
Don’t be shy! Head down to the comments below and leave your rating for this Mocha Frappuccino (Budget-Friendly) recipe. I’d love to know exactly how much you managed to save by whipping this up at home instead of running to the drive-thru. Every little bit counts, and seeing your success stories keeps me inspired to share more budget and flavor hacks!
And if you took a gorgeous picture of your creamy, iced creation—especially if you added that whipped cream topping—please share it on social media! Tag me so I can see your masterpiece. It makes my day when I see you guys enjoying these sweet, cool, and cheap drinks. You can also check out my policies here: my privacy policy. Happy blending until next time!
Mocha Frappuccino (Budget-Friendly)
Ingredients
Equipment
Method
- Place all ingredients except the whipped cream in a high-powered blender. Blend until the ice cubes are crushed.
- If the frappe is not thoroughly blended, let it sit for a couple of minutes and try blending again. Letting it sit for 5 to 10 minutes before blending can help.
- Pour into glasses and top with whipped cream, if desired.
Notes
Tried this recipe?
Let us know how it was!
Gluten-Free Chef & Latin Cuisine Innovation Specialist
My youngest son’s celiac diagnosis at four changed everything. Suddenly, all those traditional Brazilian and Portuguese recipes from my avó needed to be completely reimagined without losing their soul.
After graduating from Johnson & Wales and working Miami’s Latin fusion scene, my son’s diagnosis became my calling. How do you make gluten-free empanadas that taste like childhood? Over eight years, I’ve developed 320+ gluten-free recipes celebrating authentic Latin flavors using cassava flour and plantain alternatives.
My gluten-free empanada recipe won “Best Appetizer” at the 2023 Miami Gluten-Free Food Festival. I ran “Sabores Sin Gluten,” a catering business serving Miami’s Latino community—quinceañeras, family gatherings, all the celebrations that matter.
Food is culture, and everyone deserves to experience the joy of sharing traditional family meals, regardless of dietary restrictions.