Oh, Fourth of July! That smell of barbecue smoke, the sparkle of fireworks lighting up the night sky… and of course, the dessert table! Every year, I try to whip up something that feels both special and totally doable, you know? That’s where these little gems come in. My family absolutely adores these Fourth of July desserts for mini tartlets with cream and fruit. They’re just the perfect bite-sized package of creamy, fruity, crunchy goodness. I remember scrambling to make them one year when unexpected guests popped over, and they were a huge hit! Seriously, they look like they took hours, but trust me, they’re surprisingly easy to pull off, even with all the holiday hustle.
Why You’ll Love These Fourth of July Desserts for Mini Tartlets
These little tartlets are just the sweetest addition to any Fourth of July bash, trust me! Here’s why you’ll be making them year after year:
- Effortless Elegance: They look like you spent hours in the kitchen, but the reality is so much simpler! The dough comes together quick, and assembling them is actually fun.
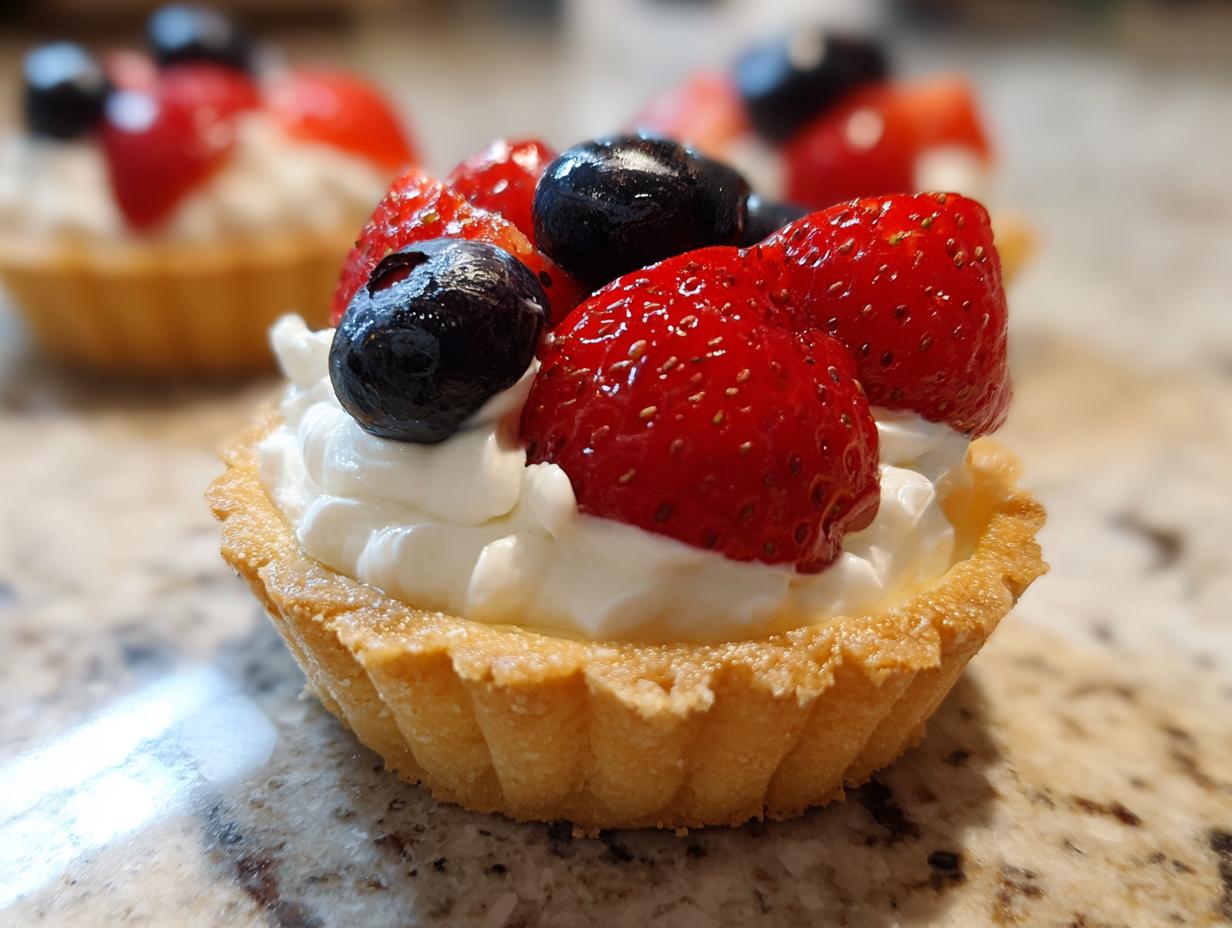
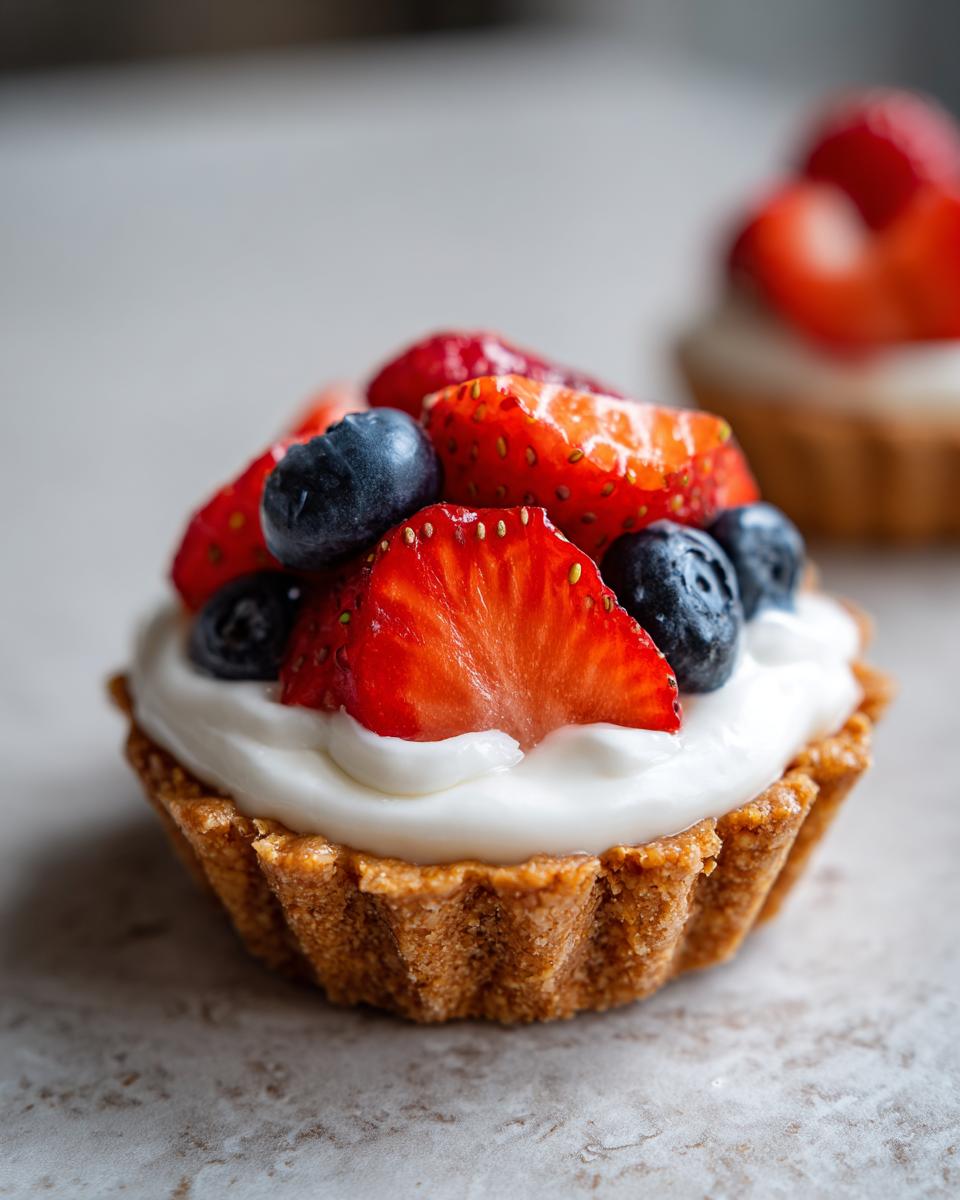
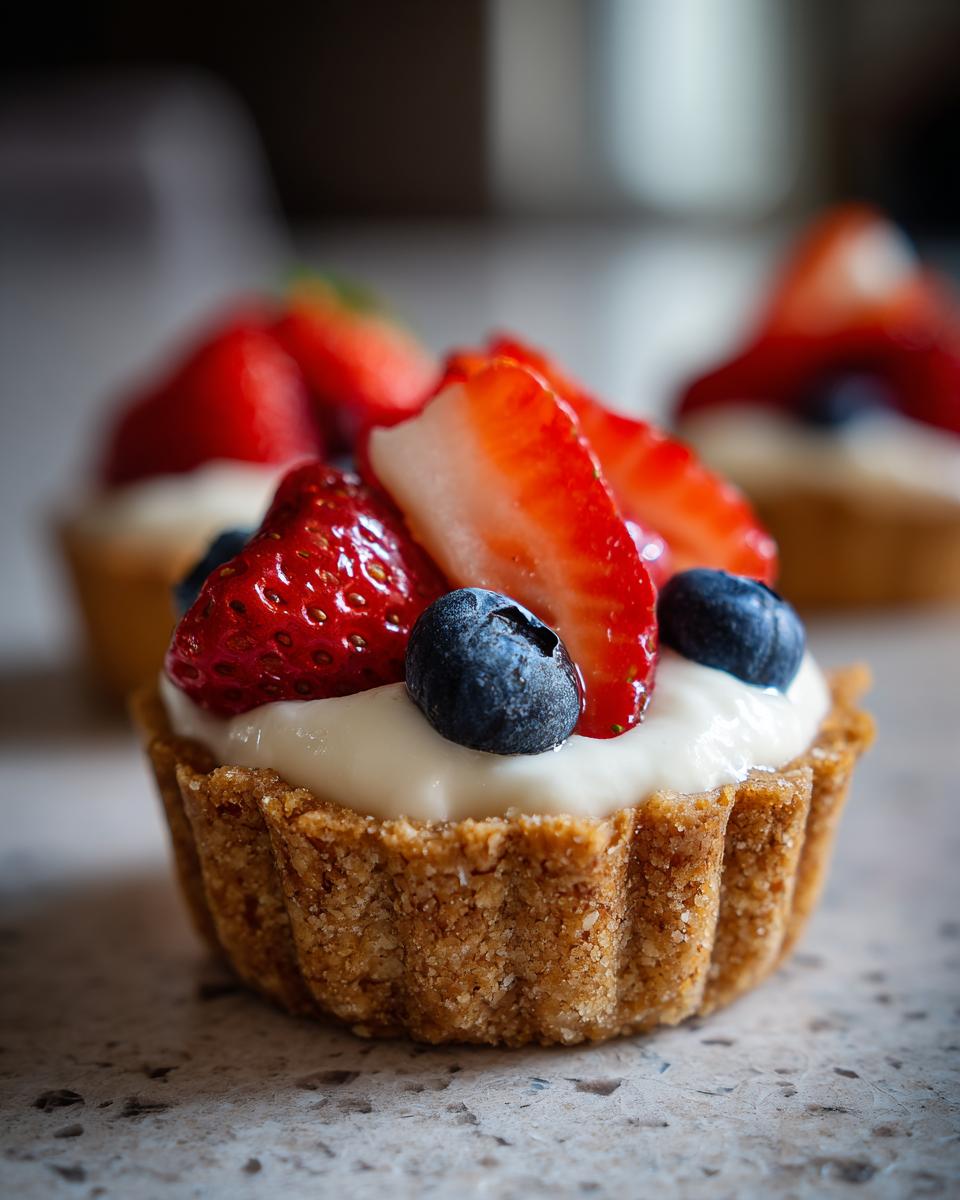
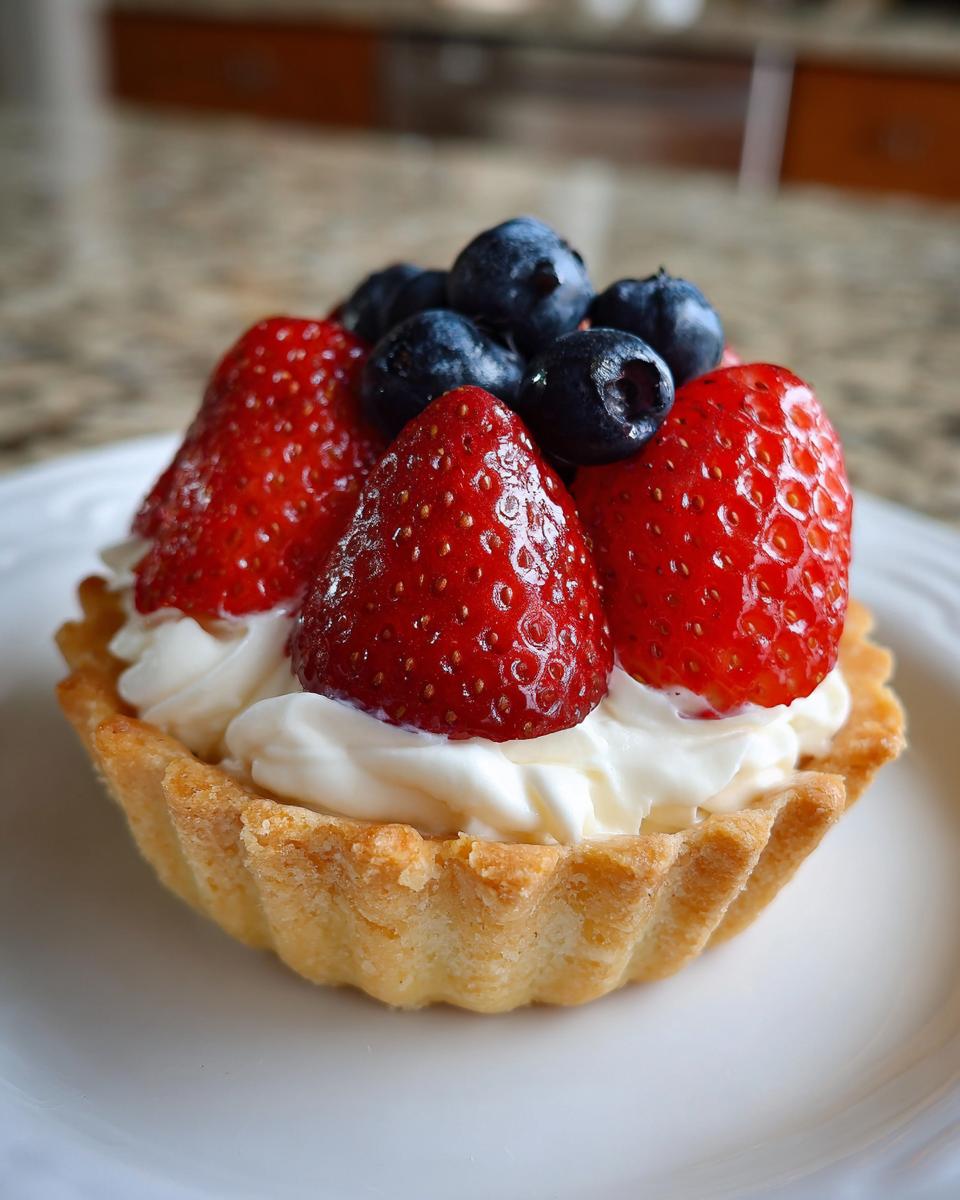
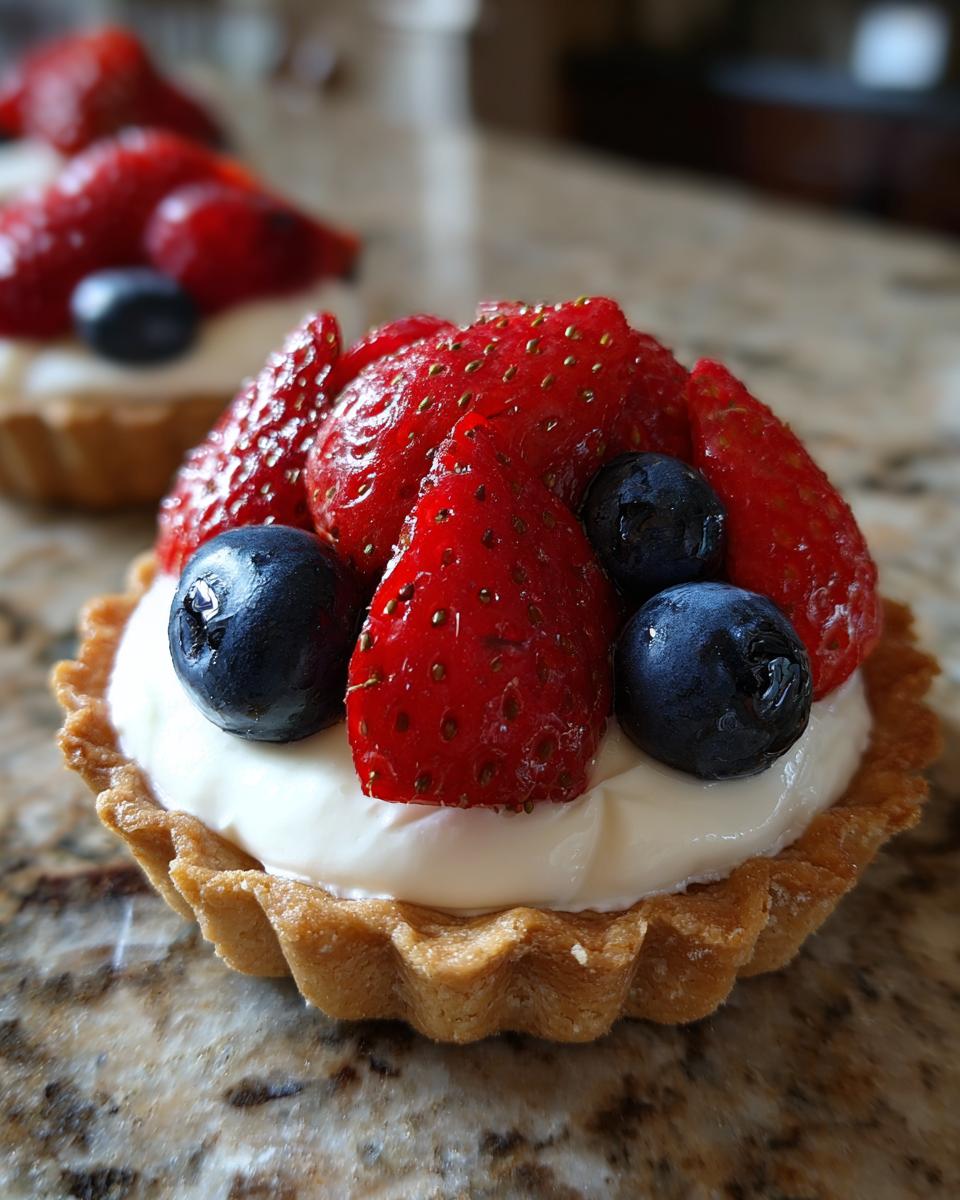
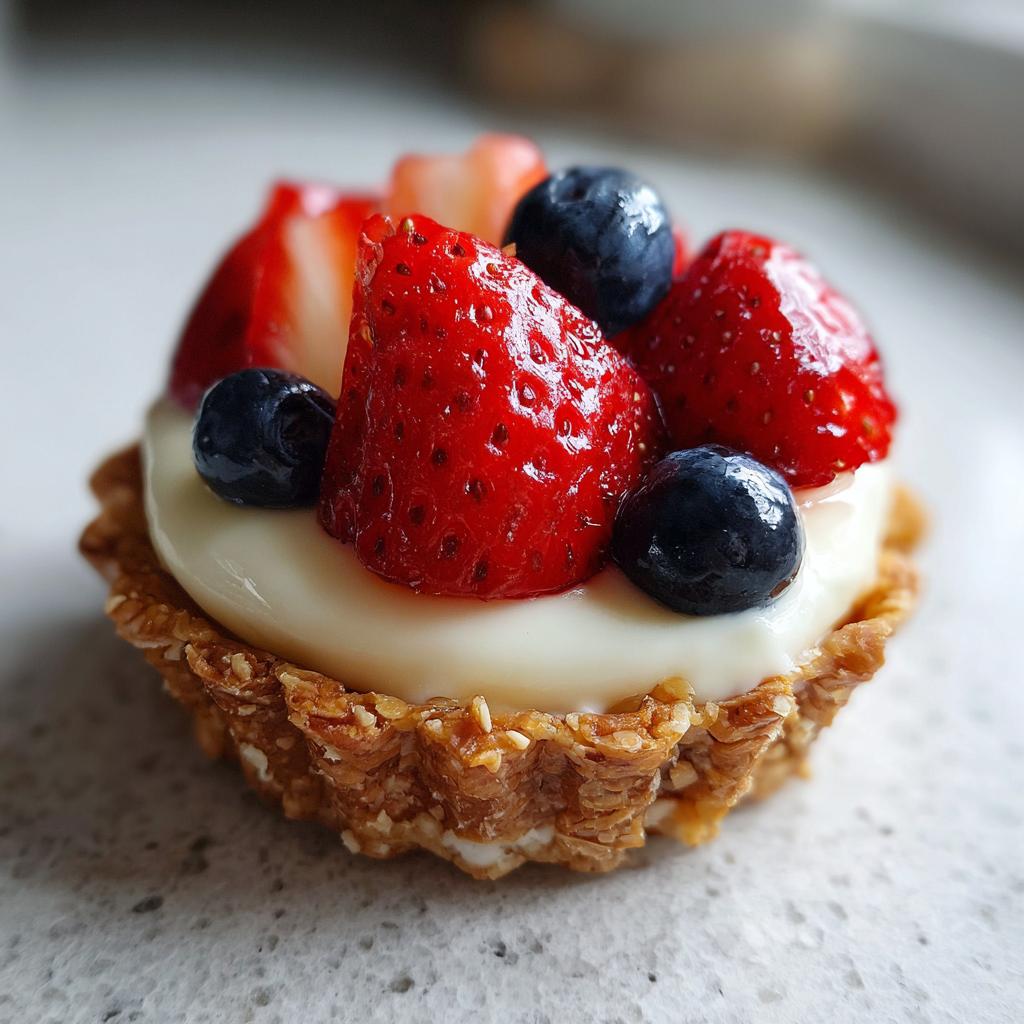
- Picture-Perfect for the 4th: Seriously, the red and blue berries against that creamy white filling in a golden shell? It’s practically begging to be on your holiday table. So festive!
- A Flavor Everyone Loves: You can’t go wrong with a classic combination like crisp pastry, smooth cream, and fresh fruit. It’s a guaranteed hit with both kids and adults.
- Perfectly Portioned: No messy slicing or big serving spoons needed. These are grab-and-go little flavor bombs, perfect for mingling.
- Endless Fruit Fun: Feel free to get creative with the fruit! While berries are amazing, peaches, kiwi, or even a mix of whatever looks good at the market works beautifully.
- Holiday Helper: The best part? You can totally bake the tart shells a day ahead. Just store them airtight, and then you only have the chilling and filling to worry about on the big day!
Ingredients for Your Fourth of July Desserts for Mini Tartlets
Alright, let’s get down to what you’ll need to make these adorable little Fourth of July masterpieces! It’s a pretty straightforward list, and once you have everything prepped, putting them together is a breeze.
For the Tart Shells
These are the crisp little cups that hold all the deliciousness!
- 1.5 cups all-purpose flour
- 0.5 cup unsalted butter, nice and cold, cut into cubes (this is key for flaky pastry!)
- 0.25 cup granulated sugar
- 1 large egg yolk
- 2-3 tbsp ice water (just enough to bring it together)
For the Cream Filling
This is the luscious, dreamy part!
- 1 cup heavy cream, really cold
- 0.25 cup powdered sugar
- 0.5 tsp vanilla extract
For the Topping
Time for those festive colors!
- 1 cup mixed berries (think strawberries, blueberries, raspberries – whatever makes you happy!)
- 2 tbsp apricot jam, warmed, for that pretty glaze (totally optional, but it adds a nice shine!)
Essential Equipment for Making Mini Tartlets
To make these little bursts of Fourth of July joy, you’ll need a few key players in your kitchen. Don’t worry if you don’t have everything, most of these are pretty standard! You’ll want:
- A mini muffin tin – this is what gives our tartlets their cute, perfect little shape.
- A rolling pin to get that dough just right.
- A pastry brush, especially if you decide to go for that shiny jam glaze on top!
- A small saucepan for warming that apricot jam, if you’re using it.
- A trusty whisk for whipping up that fluffy cream filling.
- And hey, a piping bag with a star tip is totally optional, but it makes filling the tartlets look super professional and extra fancy!
Step-by-Step Guide to Perfect Fourth of July Desserts for Mini Tartlets
Alright, let’s get baking! Making these little tartlets is a fun process, kind of like building tiny, edible fireworks. Just follow these steps and you’ll have a showstopper dessert in no time. And hey, if you’re ever looking for more easy baking adventures, check out these easy baked churro bites – they’re a blast!
Preparing the Tart Shells
First things first, we need to get our tart shells ready. Grab a good-sized bowl and toss in your flour and sugar. Then, add in that cold, cubed butter. Now, here’s where it gets a little messy (in the best way!), use your fingertips or a pastry blender to cut the butter into the flour until it looks like coarse crumbs. You want some pea-sized bits of butter still hanging around – that’s what makes them flaky! In a tiny bowl, whisk together the egg yolk and about 2 tablespoons of ice water. Pour this into the flour mixture and gently bring it all together with a fork or your hands until it just starts to form a dough. Don’t overmix it! Wrap that dough up tight and let it chill in the fridge for at least 30 minutes. This is super important, it makes the dough easier to handle and gives you that perfect crisp.
Baking the Tart Shells
Once your dough has had its little nap, it’s time to bake! Preheat your oven to a nice 375°F (190°C) and give your mini muffin tin a light greasing. On a lightly floured counter, roll out your dough to about 1/8-inch thick. It doesn’t have to be perfect! Use a cookie cutter that’s just a smidge bigger than your muffin tin cups to cut out circles. Gently press each circle into the cups, making sure it goes all the way down and up the sides. Now, take a fork and poke a few holes in the bottom of each shell – this stops them from puffing up too much. Pop them into the hot oven and bake for about 12-15 minutes, or until they’re a beautiful golden brown. Let them cool completely in the tin for a bit before you carefully pop them out. Patience here is key so they don’t break!
Making the Cream Filling
While those shells are cooling, let’s whip up that dreamy cream filling. Grab a chilled bowl (seriously, a cold bowl helps things whip up better!) and pour in your cold heavy cream. Add the powdered sugar and that lovely vanilla extract. Now, get your whisk going, or if you have a stand mixer, now’s its time to shine! Whip it all up until you get nice, stiff peaks. You know, when you lift the whisk, the cream should stand straight up like a little mountain. It should be light, fluffy, and absolutely delicious.
Assembling the Mini Tartlets
Okay, the grand finale! Once your tart shells are totally cool, it’s time to make these babies festive. Spoon or pipe that glorious whipped cream right into each cooled tart shell. Don’t be shy, fill them up! Then, artfully arrange your mixed berries on top. Think about those red, white, and blue vibes! If you’re feeling fancy, gently warm up that apricot jam (just a few seconds in the microwave is perfect) and use your pastry brush to give the berries a light, glossy sheen. It makes them look totally professional and adds a tiny hint of fruity sweetness.
Tips for Perfect Fourth of July Desserts for Mini Tartlets
Okay, so you’ve got the recipe, but like any good cook knows, a few little tricks can make all the difference, right? These mini tartlets are pretty forgiving, but trust me, these tips will help you nail them every single time. Preventing a soggy bottom is my biggest pet peeve, so here’s how we tackle that!
First off, make sure those tart shells are *completely* cool before you even think about filling them. Warm shells and cool cream? Not a good combo, and it can make the pastry a bit soft. Also, when you prick the bottoms with a fork before baking, really get in there! Those little holes let steam escape, which is our best defense against a soggy bottom. My grandma always said, “a happy tart has well-pricked feet!”
For getting those uniform shells, using a round cutter that’s just a little bit bigger than your muffin tin cups is key. Don’t stretch the dough too much when you press it in, or it might shrink funny while baking. And for that gorgeous fruit topping? Arrange it so it looks like a little jewel in the center. If you’ve got berries, grouping them by color can look super festive! Oh, and if you’re ever looking for more simple, awesome recipes, you HAVE to check out all the easy ideas over there!
Ingredient Notes and Substitutions
The notes for this recipe are pretty straightforward, but sometimes you might wonder about a swap or a tweak, right? I totally get it! Baking is all about making it work for you. So, let’s chat about a couple of things you might ponder.
What kind of cream should I use?
Always go for heavy cream or whipping cream! You need that higher fat content (at least 30%) to get those lovely stiff peaks when you whip it. Lighter creams just won’t cut it, and you’ll end up with a sad, runny filling. Trust me on this one!
No berries? What else can I use?
Oh, the possibilities! If berries aren’t your jam (pun intended!), no worries. Sliced peaches, plump cherries, chunks of kiwi, or even thin slices of mango would be divine. For a true Fourth of July vibe, if you can find them, try mixing in some star fruit slices – talk about festive! Just make sure whatever fruit you choose is ripe and ready to go.
Frequently Asked Questions About These Fourth of July Desserts for Mini Tartlets
Got some burning questions about whipping up these darling Fourth of July treats? I’ve got you covered! These little guys are super popular, and people always ask me the same things. So, let’s dive in and clear up any doubts, so your dessert game is strong all holiday weekend! If you’re looking for more easy holiday ideas, be sure to check out these easy dinner recipes and some fun breakfast ideas!
Can I make the tart shells ahead of time?
Absolutely! This is my secret weapon for staying sane during the holidays. You can definitely bake the tart shells a day in advance. Just let them cool completely, then pop them into an airtight container at room temperature. They stay nice and crisp!
What other fruits can I use for the topping?
Oh, get creative! While berries are perfect for that red, white, and blue theme, sliced peaches, fresh kiwi, or even small chunks of melon would be delicious. Think about what’s in season or what makes you happy! For a real pop, maybe some pomegranate seeds if you have them!
How should I store leftover mini tartlets?
If you happen to have any leftovers (which is rare in my house!), it’s best to store them unassembled if you can. Keep the cooled tart shells in an airtight container. Store the whipped cream in the fridge in a sealed container for a day at most, and keep the fruit separate. Assemble just before serving to keep everything crisp and fresh!
Nutritional Information
Okay, so these little tartlets are a treat, and when you’re indulging, you probably don’t want a big ol’ lecture on nutrition! But just so you know, each one of these delightful mini Fourth of July desserts for mini tartlets with cream and fruit is roughly around 150-200 calories. You’re looking at about 10-15g of fat, maybe 2-3g of protein, and around 15-20g of carbs. Keep in mind, this is just an estimate, and it can change depending on exactly what you put in!
Mini Fruit and Cream Tartlets
Ingredients
Equipment
Method
- For the tart shells: In a bowl, combine flour and sugar. Cut in the cold butter until the mixture resembles coarse crumbs.
- In a small bowl, whisk the egg yolk with 2 tablespoons of ice water. Add this to the flour mixture and mix until just combined. Add more ice water if needed to form a dough.
- Wrap the dough in plastic wrap and refrigerate for at least 30 minutes.
- Preheat your oven to 375°F (190°C). Lightly grease a mini muffin tin.
- On a lightly floured surface, roll out the dough to about 1/8-inch thickness. Cut out circles using a cookie cutter slightly larger than the muffin tin cups. Press the dough circles into the muffin tin cups.
- Prick the bottom of each tart shell with a fork. Bake for 12-15 minutes, or until golden brown. Let cool completely in the tin before removing.
- For the cream filling: In a chilled bowl, whip the heavy cream with powdered sugar and vanilla extract until stiff peaks form.
- To assemble: Spoon or pipe the whipped cream into the cooled tart shells. Arrange the mixed berries on top of the cream.
- If desired, brush the berries with warmed apricot jam for a glossy finish.