
You know those moments when you want your dinner table to scream “elegance” without actually screaming “I haven’t slept in three days”? I live for those moments! As an entertaining host, I’ve learned that the side dishes are often the real showstoppers, but they can also be the biggest headache when you’re juggling appetizers and the main course.
That’s why I fell head-over-heels for making impressive food that lets me breathe—and that’s exactly what you can do with these Duchess Potatoes (Make Ahead). I still remember the first time I served these at a family gathering. With a busy schedule looming over my head, I decided to pipe them ahead of time. As I piped those gorgeous, swirly mounds onto the baking sheet, I felt an echo of my childhood cooking alongside my nonna in her vibrant Brooklyn kitchen. When they came out of the oven, golden and delicious, the beaming smiles from my family reminded me that food carries not just flavors but stories and memories too. Preparing these make-ahead delights became a cherished tradition for me, Elena Brown, your Culinary Storyteller and Recipe Heritage Specialist, proving that it’s possible to create something special even in the midst of life’s chaos.

Why You Will Love These Duchess Potatoes (Make Ahead)
When you need a side dish that looks like it took hours but actually took minutes of active work, this is the recipe. Trust me, these are winners for any gathering. They totally elevate the whole meal!
- Huge win for meal planning since they are totally Make Ahead Mashed friendly.
- You get that unbelievable presentation with professional Piped Potatoes, no sweat.
- They are perfect for freezing; yes, they are genuinely Freezer Friendly!
- These turn out looking like truly Fancy Sides for any holiday spread.
Check out some of my latest favorites over in my Pinterest trend section for more hosting magic!
Essential Ingredients for Perfect Duchess Potatoes (Make Ahead)
The secret to making these truly elegant potatoes is making sure you use high-quality ingredients. Since texture is everything here—we aren’t just globbing on mashed potatoes; we’re piping them!—the fat and moisture content matter. Don’t skimp, especially on the yolks; they give you that beautiful, sturdy richness needed to hold those peaks when you bake them off.
For the Potatoes
- 2 pounds potatoes, peeled and cut into chunks (I insist on Yukon Golds, they just mash the creamiest!)
- 2 teaspoons salt (only for the boiling water)
- 1/4 cup heavy cream (warm it up first, it mixes in better!)
- 2 tablespoons unsalted butter, softened (for mashing)
- 1/4 teaspoon nutmeg (just a hint of warmth!)
- 1/2 teaspoon black pepper
- 3 large egg yolks (These are crucial for structure, don’t skip them!)
For Finishing
This is what gives you that gorgeous golden color and rich top crust when they hit the heat.
- 2 tablespoons unsalted butter, melted (for brushing the tops)
Equipment Needed for Piped Potatoes
Don’t stress about needing a dozen fancy gadgets for these; you probably already have everything you need! Since we are making Duchess Potatoes (Make Ahead), preparation is key, and having the right tools makes the piping step a breeze. It really helps if you have a couple of heavy-duty bowls ready for mixing.
- A medium to large pot for steaming your potatoes until they are perfectly tender.
- A sturdy colander because draining them well is essential—we want dry potato mash, not watery potato soup!
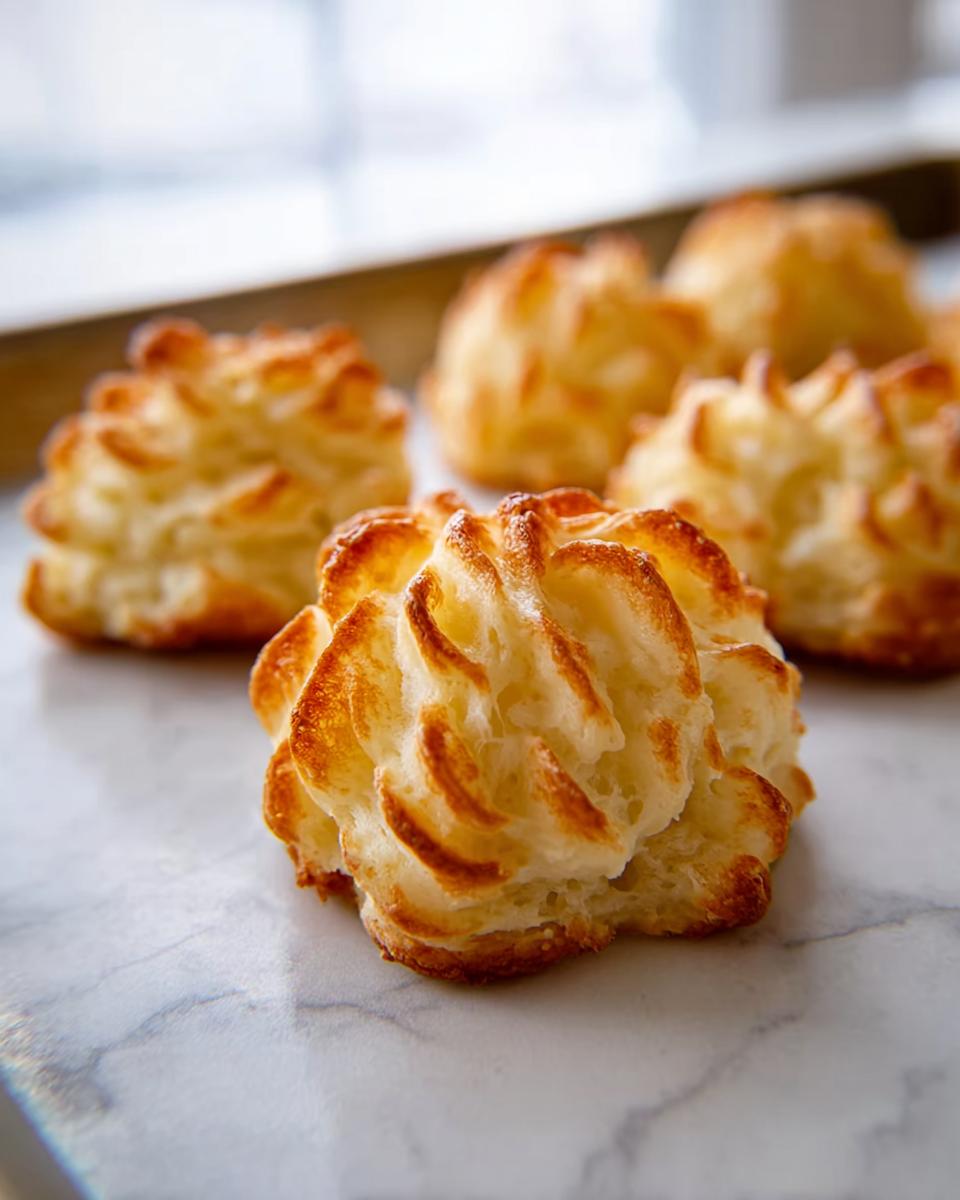
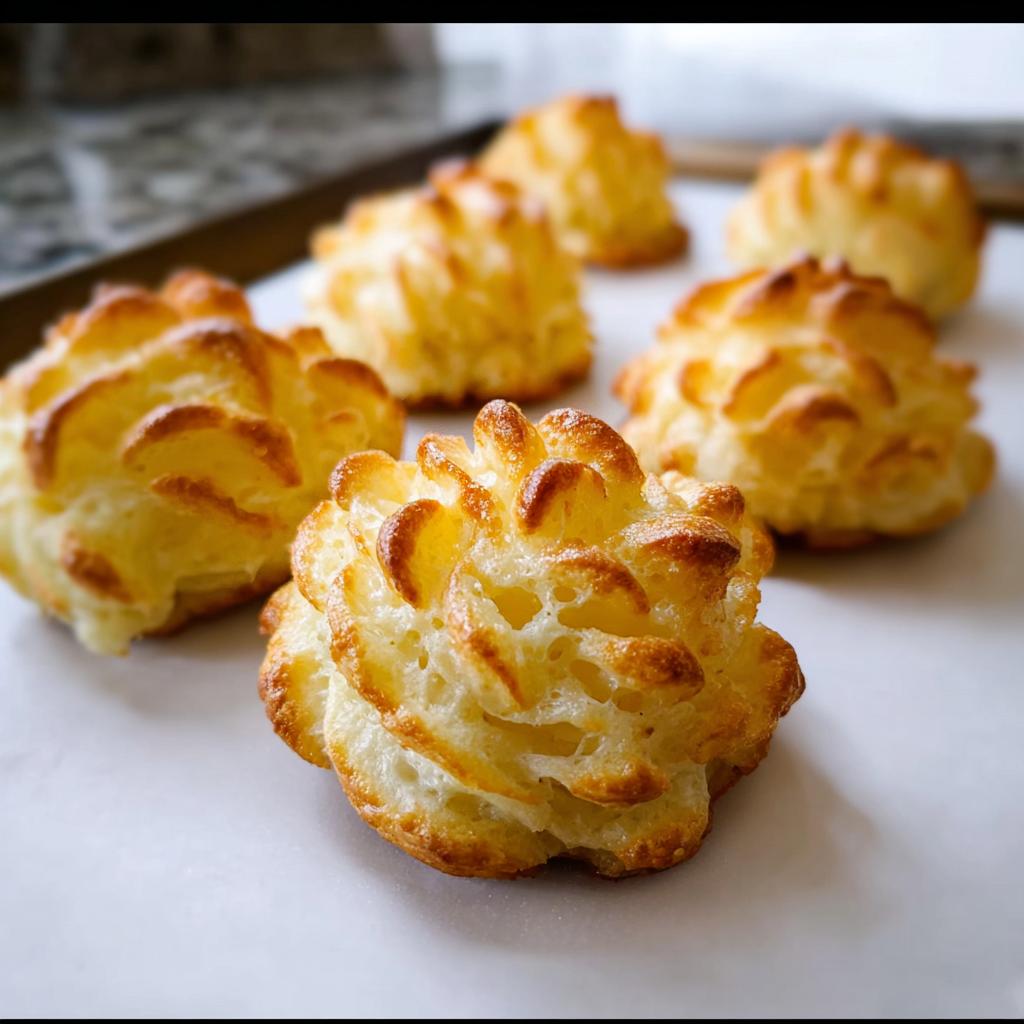
- You absolutely need a piping bag fitted with a star tip. This is non-negotiable for those beautiful, recognizable swirls. Trust me, trying to fake the look with a spoon just doesn’t cut it here!
- A cookie sheet or rimmed baking sheet to pipe your potatoes onto. Make sure it’s large enough to give your little potato mounds some space!
Step-by-Step Instructions for Duchess Potatoes (Make Ahead)
Okay, let’s get cooking! It feels so satisfying when you follow a recipe and the texture is just right. We want decadent, fluffy potatoes here. Follow these steps exactly, and you’ll be whipping up these gorgeous **Piped Potatoes** like a seasoned pro. Don’t forget, you can find the full ingredient list over in my recipe index!
Preparing and Mashing the Potato Base
First things first, get those spuds bubbling! Put your peeled and chunked potatoes into your pot and cover them completely with cold water. Add that teaspoon of salt—salt in the water seasons them from the inside out, which I love. Let them boil away until they are totally fork-tender, which usually takes about 20 to 25 minutes. Once they’re soft, drain them really well in a colander. Heat is your friend here! Put the drained potatoes back into the empty, warm pot and let them sit over very low heat for about a minute. This critical step lets that extra steam escape so your mash isn’t watery. Now, stir in the 2 tablespoons of softened butter until it melts right in. After that, pour in the heavy cream along with the nutmeg and pepper. Mash it all together until it’s smooth enough for you, but stop when it’s *just* combined. Overmixing makes things gummy, and we absolutely do not want gummy potatoes!
Piping and Preparing Duchess Potatoes (Make Ahead)
Time for the fun part! Get your piping bag ready with that star tip. Spoon the warm mash into the bag. Now, you have a choice here. If you’re baking these today, pipe nice mounds onto your baking sheet. If you are using the make-ahead secret, pipe them onto the sheet, cover them tightly with plastic wrap, and pop them straight into the fridge. They can chill for up to two days! If you’re using a casserole dish instead of piping, just spread the mash out and use a fork to create those dramatic peaks and valleys. Before they bake—whether cold or room temperature—brush the tops lightly with the reserved 2 tablespoons of melted butter. Check out the overview of how the whole process flows on this great resource for visual ideas.

Baking for Golden Perfection
Get that oven preheated to a hot 425°F! Bake the potatoes for about 20 minutes. If they came straight from the fridge because you used our **Duchess Potatoes (Make Ahead)** freezer-friendly technique, be prepared to give them an extra 5 to 8 minutes until they look deeply golden and glorious. You are looking for those beautiful peaks to be beautifully browned and slightly crisp on the edges. Serve them piping hot—the payoff is huge!

Expert Tips for Flawless Duchess Potatoes (Make Ahead)
Making **Duchess Potatoes (Make Ahead)** that look perfect requires just a couple of little tricks that elevate them from simple mash to something truly restaurant-worthy. It’s all about managing moisture and respecting the potato structure!
First, and I cannot stress this enough, always use starchy potatoes like Yukon Golds! Russets work okay, but they can sometimes get gluey if you look at them wrong. Yukon Golds keep that fantastic fluffy, buttery texture that holds its shape when piped. If you use waxy potatoes, you’ll end up with a slick, heavy texture rather than those light, airy peaks.
When you are mashing, treat them gently after the initial mixing phase. Once you add the egg yolks, switch to folding rather than aggressive beating. Vigorously mixing the mash once the yolks are in develops the starches too much, and by the time they bake, they’ll look heavy instead of delicate. We want fluff!
For presentation, you need a good, clean star tip—a large one is actually easier to work with than a tiny one because the batter moves through it more smoothly. If your mash is too stiff while piping, don’t add more butter! Just warm up a tablespoon of that leftover heavy cream and gently mix it in until it loosens up just slightly. It keeps the structure perfect for baking.
If you want that fantastic, almost lacelike browning on the edges of your peaks, make sure you brush the tops with melted butter right before they go into that hot, 425°F oven. That fat crisps up beautifully. If you ever need to chat through a baking disaster, you know you can always reach out via my contact page!
Storage and Reheating Instructions for Duchess Potatoes (Make Ahead)
This recipe lives up to its name! The ability to chill these piped potatoes ahead of time is why they are my absolute secret weapon for holiday dinners. You get to enjoy the cooking process over a couple of days instead of trying to do everything at the last minute, which is just chaotic, right?
Refrigerated Storage for Easy Entertaining
When you finish piping your beautiful swirls onto the cookie sheet, don’t bake them! You just need to make sure they are covered securely. Use plastic wrap, pressing it gently over the peaks so it doesn’t deflate them, or use a large gallon-sized Ziploc bag turned inside out over the whole tray. They are good in the fridge for up to two days. When you are ready to serve, preheat that oven to 425°F, brush them with the melted butter, and bake them straight from the chill. They might need about 5 to 8 minutes longer than the recipe states, but they come out just as magnificent!
Going the Freezer Friendly Route
If you need to plan even further ahead, these are surprisingly Freezer Friendly! After piping them onto a baking sheet, place the whole sheet in the freezer until the potatoes are rock solid—this usually takes an hour or two. Once they are hard little potato kisses, transfer them into a heavy-duty freezer bag. You can keep them frozen for about a month. When it’s game time, thaw them in the fridge overnight, then follow the regular baking instructions, adding that extra bake time for a perfectly golden finish. This makes them one of the best sides for meal prepping!
For more tips on how to build your weekly hosting schedule using make-ahead recipes, check out my guide on healthy meal prep recipes inspiration. It really helps streamline the flow!
Serving Suggestions for Your Elegant Duchess Potatoes
Honestly, these beautiful Duchess Potatoes (Make Ahead) deserve a centerpiece meal! Because they look so incredibly fancy, you can use them to instantly upgrade something simple, but they truly shine next to holiday fare.
They are absolutely heavenly alongside a perfectly roasted chicken or a slow-cooked beef tenderloin. If you’re hosting a big gathering, place them right next to your glazed ham or prime rib. They soak up just a tiny bit of jus or gravy, and that texture contrast is everything.
When I make these, I always head over to my holidays category for robust main dish inspiration. These potatoes elevate any special occasion plate!
Frequently Asked Questions About Duchess Potatoes (Make Ahead)
I get so many questions when people first try piping potatoes, and that’s fair! These look complicated, but once you know the texture you are aiming for, they become second nature. Here are the main things I hear from other cooks when making their first batch of these amazing **Make Ahead Mashed** potato swirls.
Can I use different potatoes besides Yukon Golds for Duchess Potatoes (Make Ahead)?
You absolutely can, honey, but it changes the game a tiny bit! Yukon Golds are my favorite because they are naturally buttery and hold shape well without needing a ton of flour. If you use Russets, you need to steam them extra well to get rid of moisture, or you might end up with a looser mash that struggles to hold those sharp points when you pipe them. They’ll still taste great, but perhaps you’ll need to pop them in the fridge a bit longer to firm up before piping!
How long can the piped potatoes safely stay refrigerated before baking?
This is the beauty of the whole technique! Since we add the egg yolks, which act as a natural binder, the piped potatoes are super stable once chilled. I recommend keeping them refrigerated for up to two full days. Just make sure they are covered tightly so they don’t dry out on the edges. Two days ahead of time means you are completely stress-free on the day of your party or big dinner!
What is the secret to getting the perfect golden-brown peaks?
It’s a two-part secret, really. First, you have to use hot, high heat—425°F is what gets those peaks crisping up before the inside over-bakes. Second, the brushing matters! Make sure you are using the melted butter we talked about, or if you want them extra dramatic, use one egg yolk beaten with just a dash of water as a thin wash instead of butter. The sugar in the mash combines with that fat or egg wash in the high heat to create that rich, mahogany brown color you see in fancy steakhouses. It adds so much depth to the whole side dish presentation!
If you are prepping for a big dinner, be sure to look at my recipes for dinner ideas to round out your menu!
Sharing Your Duchess Potatoes (Make Ahead)
When you finally pull that baking sheet out and those stunning Duchess Potatoes (Make Ahead) are golden brown, I want to see them! Seriously, these count as culinary art, and I love seeing how they turn out on your tables.
If you gave this recipe a try—and I hope you did, because they are game-changers for serving Fancy Sides without the all-day stress—please take a quick moment to leave me a rating and a comment down below. Your feedback truly helps me know what recipes to keep fine-tuning!
If you snap a photo of your beautiful piped potatoes, please tag me on Instagram. It makes my entire week when I see your gorgeous creations. I always check in on my privacy policy and social channels to admire your work!
Duchess Potatoes (Make Ahead)
Ingredients
Equipment
Method
- Place potatoes in a pot and cover with cold water. Add salt. Bring to a simmer and cook until fork tender, about 20 to 25 minutes.
- While potatoes boil, melt 2 tablespoons of butter and set aside. Preheat oven to 425°F.
- Drain the cooked potatoes in a colander. Return them to the pot and set over low heat. Let them release steam for about a minute.
- Add 2 tablespoons of butter to the potatoes and mash until incorporated. Add heavy cream, nutmeg, and black pepper, and continue mashing. Add salt to taste, then add egg yolks. Mash until smooth, being careful not to overmash.
- Transfer the mashed potatoes to a piping bag fitted with a star tip and pipe mounds onto a cookie sheet. Alternatively, place the potatoes in a casserole dish and create peaks with a fork. Brush the potatoes with the melted butter.
- Bake at 425°F until nicely browned, about 20 minutes. Serve hot.
Notes
Tried this recipe?
Let us know how it was!
Gluten-Free Culinary Storyteller & Recipe Heritage Specialist
Getting diagnosed with non-celiac gluten sensitivity in my late twenties felt like losing my Italian identity. Growing up in nonna’s Brooklyn kitchen, learning traditional techniques that suddenly became off-limits—I decided to fight for those family food traditions instead of giving up.
With my food journalism background and European baking training, I became obsessed with recreating authentic flavors in gluten-free formats. I’ve adapted 400+ traditional recipes from various cultures, with my gnocchi recipe winning “Recipe of the Year” from the National Gluten-Free Living Awards in 2022.
I collaborate with the Italian-American Cultural Center to document traditional family recipes and volunteer with the Westchester Celiac Support Group, teaching monthly pasta-making classes.
Food is the heart of family storytelling. No one should sacrifice their cultural heritage due to dietary restrictions.