Oh my goodness, get ready for a weeknight dinner that truly slaps! If you are searching for bold flavors and textures that make your mouth sing, you have found your new obsession. We are diving headfirst into making the most outrageously delicious Crispy Chilli Beef Rice. And guess what? I managed to make this shine even brighter by taking on the challenge of making it completely gluten-free. It reminds me of the sizzling sounds from my mother’s kitchen growing up, full of vibrant joy. I even experimented with cassava flour to get that absolutely perfect crisp coating, and my son just declared it his new favorite meal! Food is how we connect, and I want everyone to find that connection in a bowl of this amazing dish.
Why This Crispy Chilli Beef Rice Recipe Works for Everyone
Listen, I know weeknights are crazy, but that doesn’t mean we should settle for boring food! This particular recipe for Crispy Chilli Beef Rice packs a serious flavor punch while still being ready in practically no time. It’s all about maximizing excitement on a tight schedule.
What I love most, and what you’ll love too, is how adaptable it is. You can check out some of my go-to speedy meal prep ideas here: easy dinner recipes for meal prep. Here’s why this dish is a total winner for your table:
- The texture is unbelievable—super crunchy beef coated in that tangy, sweet sauce.
- It checks the box for dietary needs: we nail the crisp exterior using cornflour, making it easily adaptable for gluten-free diets using simple swaps like tamari.
- Total cook time is about 30 minutes, which is perfect when you need a flavorful, restaurant-quality dinner fast!
Essential Ingredients for Perfect Crispy Chilli Beef Rice
When you want that amazing takeaway texture at home, you simply cannot skimp on the ingredients, especially for the beef coating! Trust me, the ratio here is what guarantees the crunch that defines this wonderful Crispy Chilli Beef Rice.
You can find some of my favorite foundational recipes for noodle and rice bowls here: rice bowls recipes. You’ll need to get everything organized before you start frying, because once that oil is hot, things move fast!
For Coating the Beef
This is where the magic happens that makes the beef so wonderfully crisp! You are aiming for a thick, sticky coating.
- We need 360g of thin-cut sirloin steaks, sliced thinly (I usually grab about 3 thin steaks for this).
- One small egg to start everything off.
- A solid 4 tablespoons of cornflour, or cornstarch if you prefer—this is key for the crust!
- Seasoning is simple: 1/4 tsp salt, 1/4 tsp black pepper, and just a tiny pinch, 1/8 tsp, of white pepper.
- For frying, we use 4.5 tablespoons of sunflower oil, but remember this is divided up as we go!
For the Sauce and Vegetables
This combination brings the sweet, spicy, and tangy notes that balance out the rich beef. Watch how quickly the sauce comes together once the beef is frying!
- One medium onion, peeled and sliced into thin strips.
- One bright red chilli, finely sliced (if you don’t want too much heat, skip the seeds!).
- A punch of flavor from 1 tsp minced ginger and 3 minced garlic cloves.
- For the liquid base: 2 tbsp rice vinegar and 3 tbsp dark soy sauce (don’t forget to sub tamari if you’re sticking to gluten-free!).
- For that deep, sweet tang: 2 tbsp tomato puree paste, 6 tbsp caster sugar, 2 tbsp tomato ketchup, and 2 tbsp sweet chilli sauce—I always grab a good Thai-style one!
Step-by-Step Instructions for Crispy Chilli Beef Rice
Okay, buckle up—this is the fun part where we transform simple strips of beef into crunchy flavor bombs! If you want slicing to be a breeze, definitely try my trick: pop the steak in the freezer for about 30 minutes just to firm it up before you cut those thin strips. You can read more about my general rice bowl workflow here: rice bowls recipes. But first, let’s get that beef coated and frying!
Preparing and Coating the Beef
Grab your bowl with those thin steak strips—they need a good egg bath first! Toss them really well so every piece is coated. Next, it’s time for the dry layer. Sprinkle in that cornflour, salt, black and white pepper. Now, you need to toss everything until it looks sticky. Don’t worry if it clumps up a bit; that just means you’ve got enough coating!
Achieving Maximum Crispiness When Frying
This next step demands your full attention! We are aiming for takeout quality, which means high heat. Get about 3 tablespoons of your sunflower oil screaming hot in the wok or large frying pan. Seriously, it needs to shimmer before you even think about adding meat.
Crucially, you must work in two batches! Add half the beef, and spread those pieces out so they aren’t touching much. The secret to crispiness? Don’t touch them for a minute or two to let that crust form. Give them maybe 3 or 4 gentle stirs while they fry for a total of 5 or 6 minutes until they are deeply dark brown and gloriously crispy. Use tongs to pull that beautiful beef out and place it on paper towels to drain. Repeat everything with the last bit of oil and the second batch.
For detailed techniques on achieving perfect frying, sometimes I check out inspiration from folks like Kitchen Sanctuary: crispy chilli beef.
Building the Flavorful Sauce
Once all that incredible crispy beef is resting aside, wipe out any burned bits if you need to, and add that last half tablespoon of oil back into the pan, but drop the heat down to medium now. Toss in your sliced onion and cook it for just 2 minutes until it softens up nicely. Now, drop in your garlic, ginger, and fresh chilli slices. Stir constantly for only 30 seconds because those aromatics burn fast!
Time for the backbone of the sauce! Pour in the rice vinegar, soy sauce, tomato puree, sugar, ketchup, and sweet chilli sauce. Turn that heat *up*! Let this whole mixture bubble hard for a couple of minutes. You want to watch it bubble away gently until it reduces and thickens up just a little bit.
Final Toss and Serving the Crispy Chilli Beef Rice
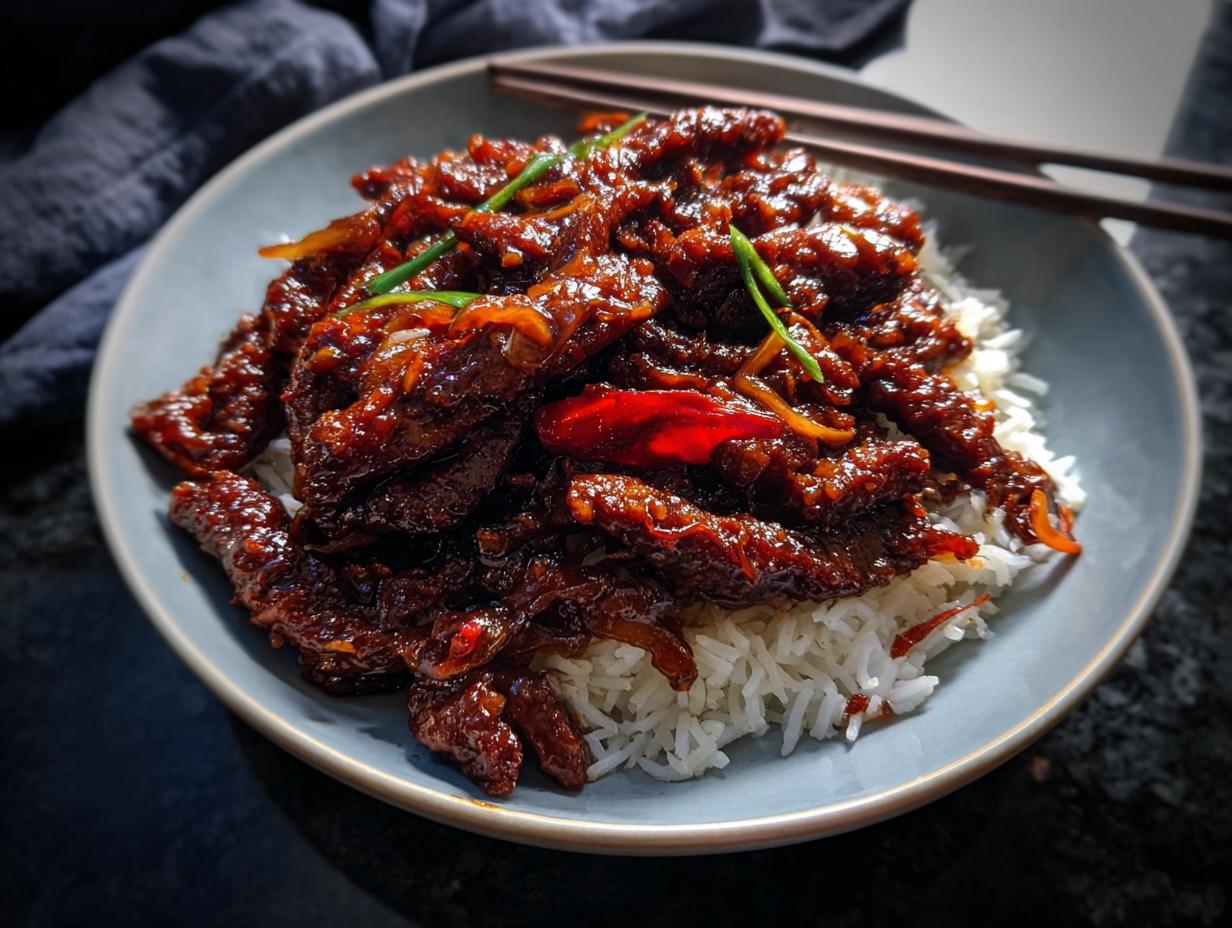
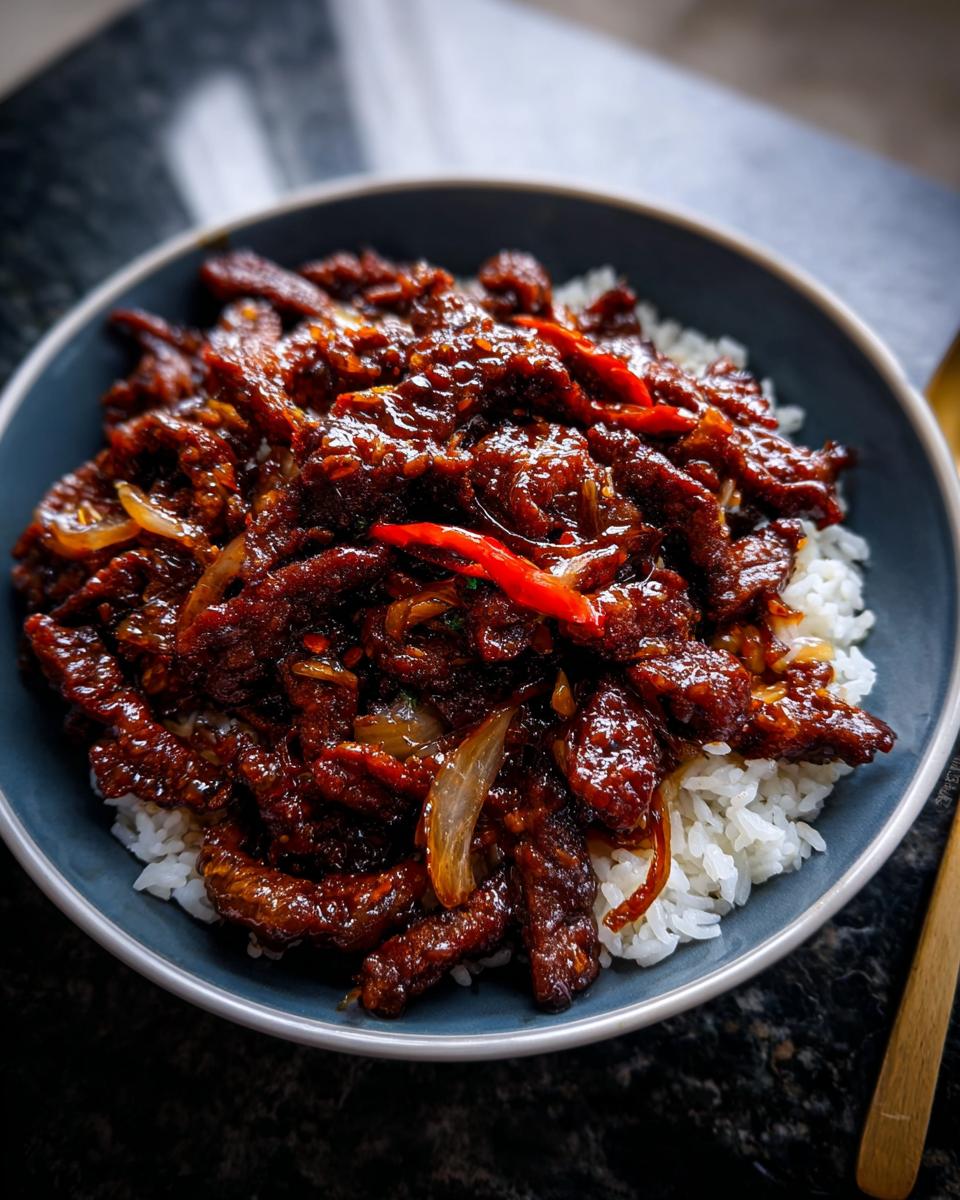
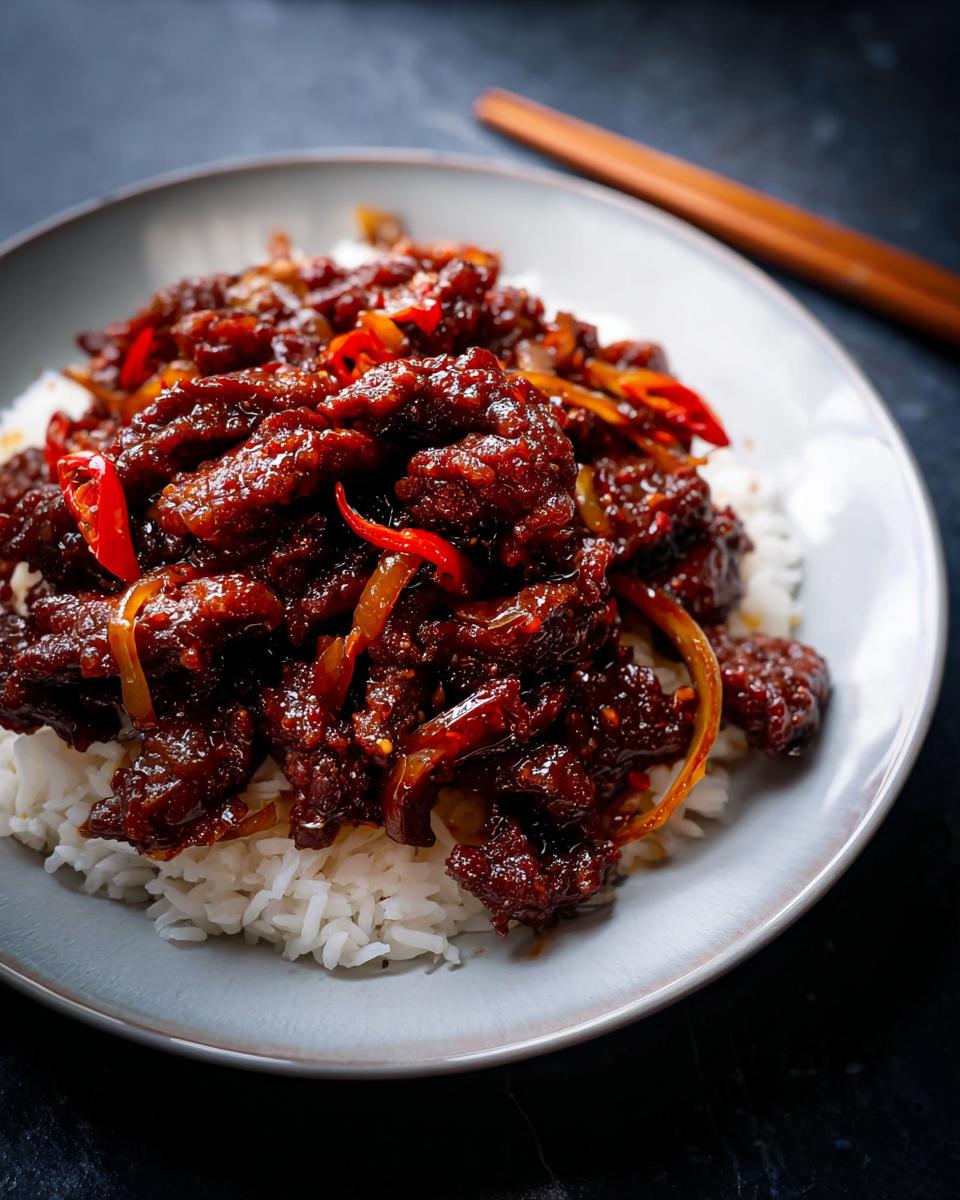
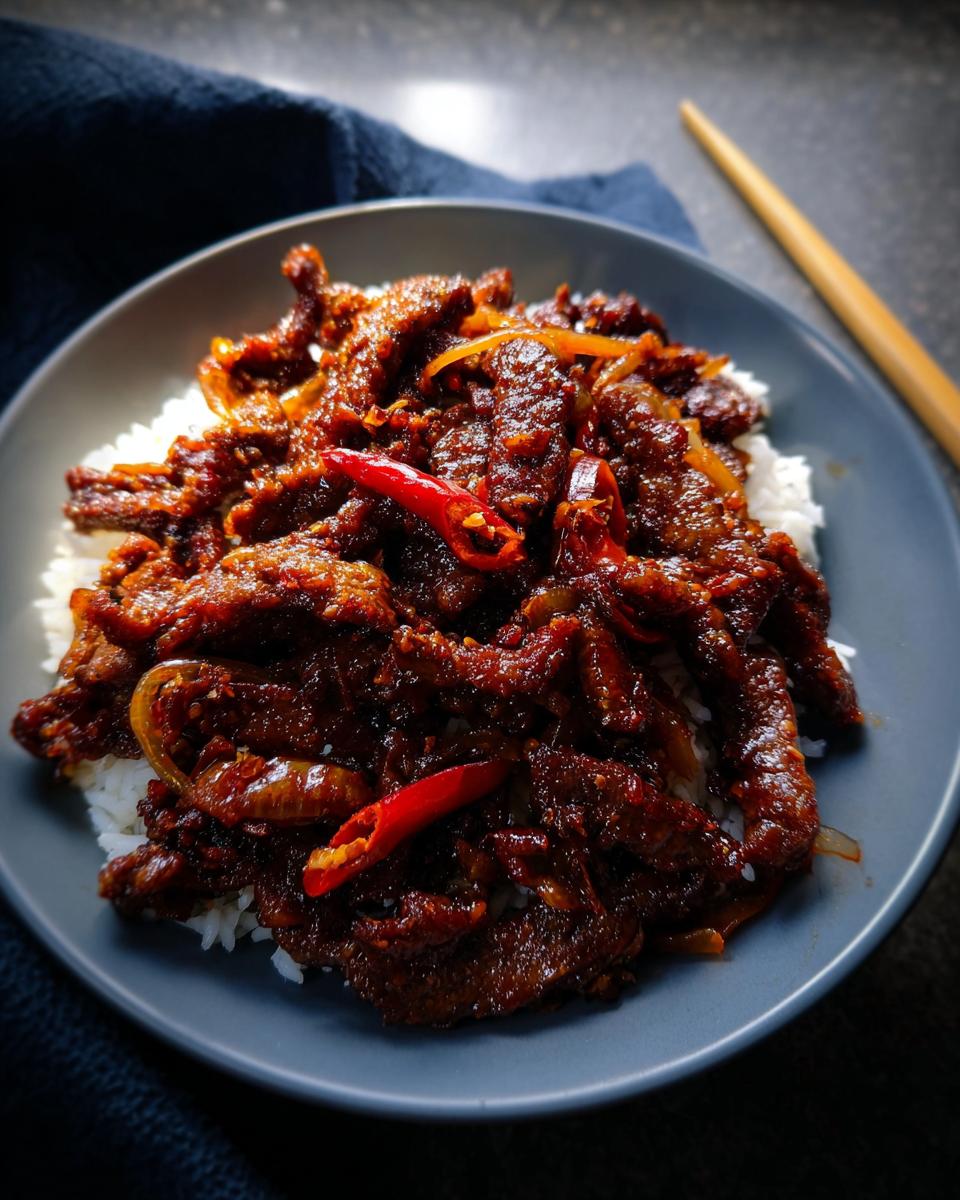
Okay, moment of truth! Take that bowl of perfectly crispy beef and toss it right back into the sauce. Turn the heat back up just a hair and stir everything around for just 1 or 2 quick minutes. We want the beef coated and hot, but not long enough to lose that amazing crunch we worked so hard for!
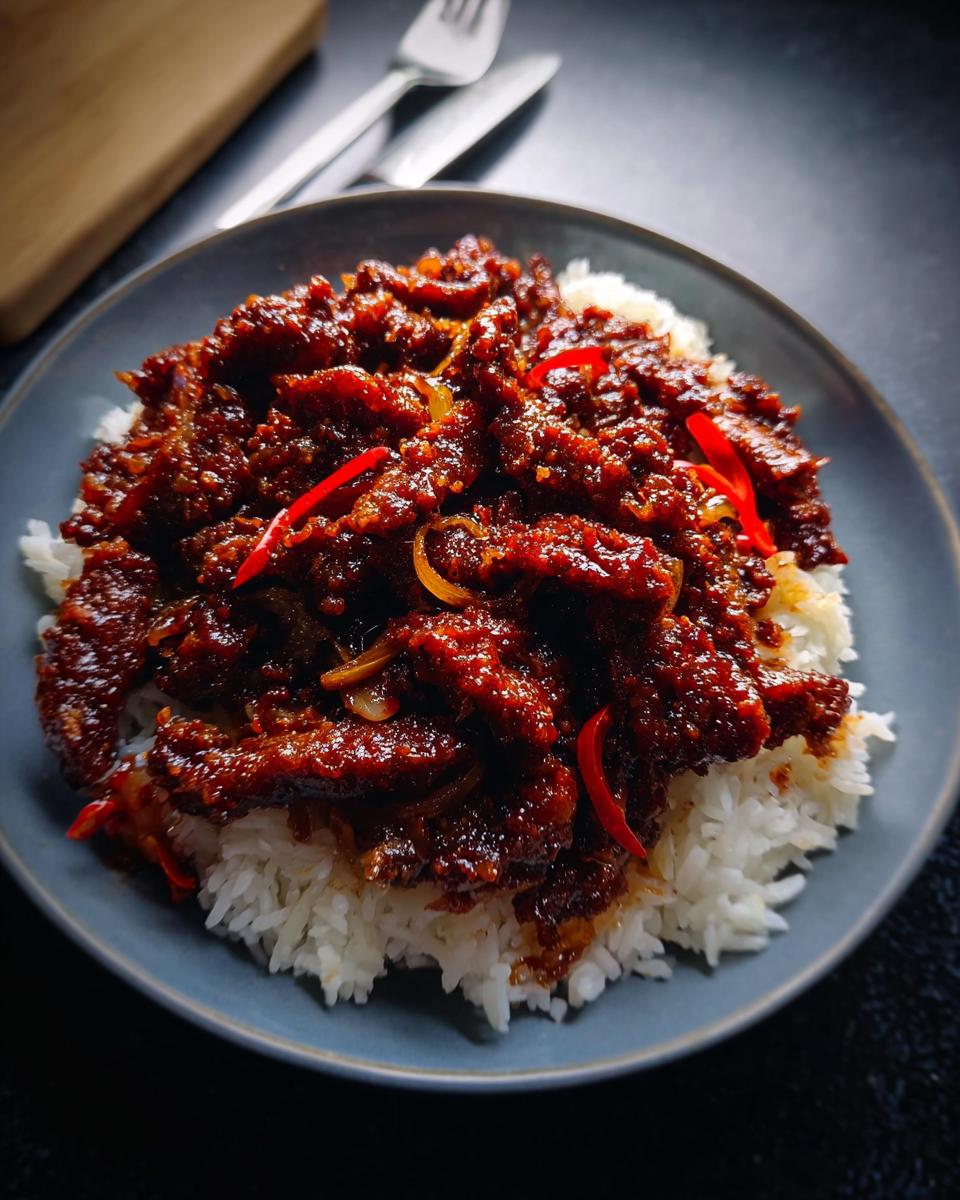
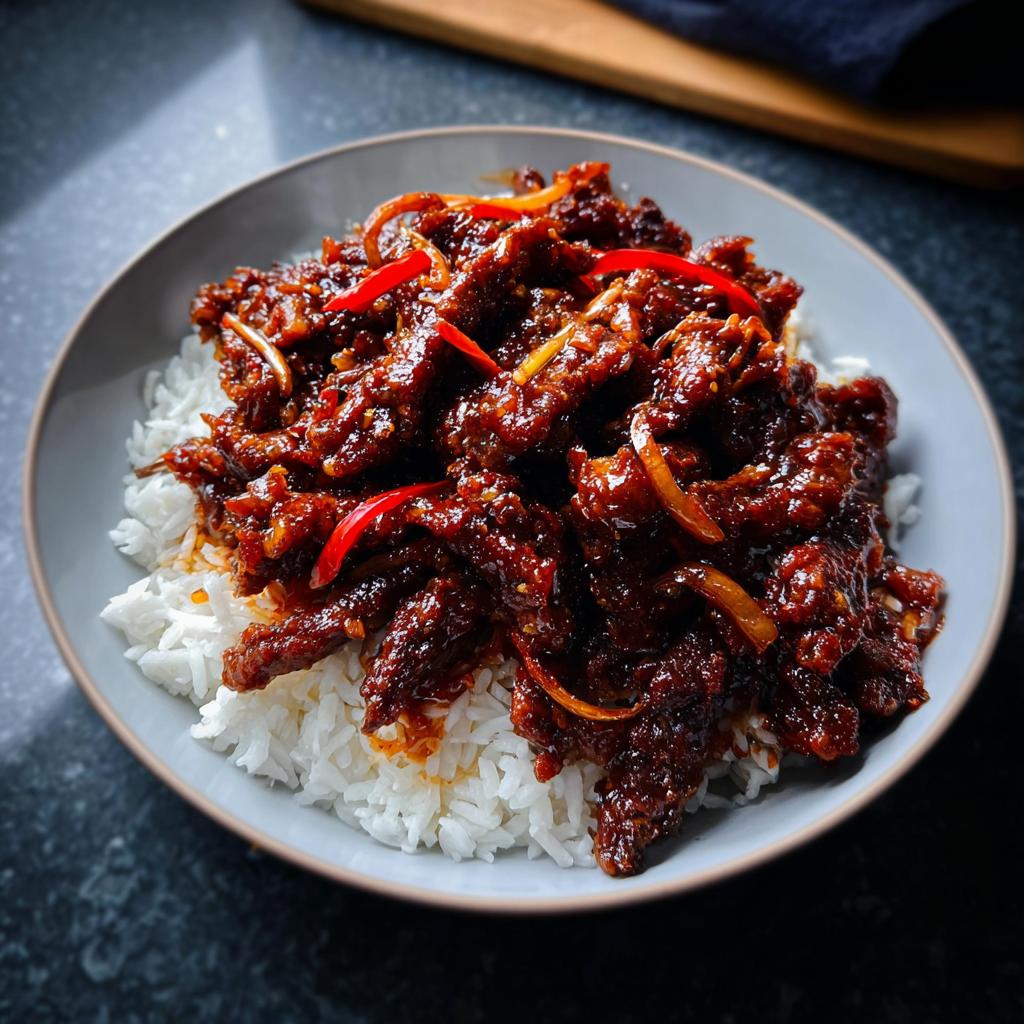
Serve this showstopper immediately over a bed of fluffy rice or maybe some bouncy noodles. This Crispy Chilli Beef Rice flavor explosion is guaranteed to make your weeknight feel like a celebration!
Ingredient Notes and Gluten-Free Substitutions for Crispy Chilli Beef Rice
Look, I know managing dietary needs can feel like a huge hurdle when trying to recreate restaurant favorites, but for this Crispy Chilli Beef Rice, it’s actually super straightforward. Since we rely on cornflour for that fantastic crunch, making it gluten-free is as easy as swapping one key player: ditch the regular soy sauce and use tamari instead!
That’s my top tip for staying GF while keeping that deep, savory flavor base. You can check out more tips on making soups ahead of time, which is handy for quick sides: make ahead tips.
Also, if you can’t find sirloin strips or just want to pivot, this recipe is so robust! You can absolutely use cooked and sliced chicken, roast lamb leftovers, or even duck. The point is that you fry whatever meat you use the same way—it just needs that crispy coating and a bath in the sauce!
Tips for Perfect Crispy Chilli Beef Rice Every Time
Even though the steps are simple, getting that ultimate crisp for your Crispy Chilli Beef Rice sometimes needs a little extra secret knowledge. I’ve learned a few things over my many attempts, usually when the first batch somehow tasted slightly less crunchy than the second batch!
The absolute number one thing is oil temperature. If that oil isn’t hot enough, the cornflour coating just acts like a sponge, turning your beef soggy instead of crisp. Seriously, wait until that oil is shimmering—you need to feel the heat coming off it when you hold your hand a few inches above the pan.
Secondly, when you add the beef strips, you have to be patient! I know you want to stir everything constantly, but resist that urge! Drop them in, spread them out if you can, and let that perfect crust develop untouched for a couple of minutes. You can check out how I organize my whole cooking process here: how to make rice bowls like a pro.
Finally, make sure you use tongs or slotted spoons to get that beef completely out of the oil between batches, draining it well on paper towels. Any residual oil sitting around will immediately turn the next batch soggy when they hit the pan!
Storing Leftovers of Your Crispy Chilli Beef Rice
Now, this is where I need to be honest with you, my friend. This glorious Crispy Chilli Beef Rice is seriously best enjoyed the moment it jumps from the pan onto your plate. It’s made to be eaten fresh!
If you do have leftovers—which happens, I totally get it—store the beef and sauce mixture tightly sealed in the fridge. You can find some great general make-ahead strategies here: easy dinner recipes make ahead tips.
When you reheat it, the flavor profile will still be fantastic—that sweet, tangy sauce holds up beautifully—but yes, that beautiful crispiness on the beef will soften dramatically. It’s just the nature of crunchy coatings mixed with sauce, but don’t let that stop you from enjoying the leftovers!
Serving Suggestions to Complete Your Crispy Chilli Beef Rice Meal
We’ve got the main event sizzling hot, but to truly make this Crispy Chilli Beef Rice feel like a complete, vibrant meal, you need a few fresh partners on the plate. Since the sauce is so rich and bold, I always reach for something green and simple to cut through it all. Think about steaming some bright green broccoli or maybe some crisp green beans—they reheat well and offer a lovely contrast in texture.
And please, please, don’t forget the garnish! A handful of fresh coriander sprinkled right on top brightens everything up. For a little extra zip, I love adding some thinly sliced fresh spring onions too. If you’re interested in other dishes that pair well with bold Asian flavors, check out some of my favorite non-sandwich recipes here: my cookbook ideas. Enjoy building your perfect bowl!
Frequently Asked Questions About Crispy Chilli Beef Rice
I totally get it—sometimes you need a quick tweak before you jump into a new recipe, especially when dealing with spice levels or substituting what you have in the fridge! This section is for all those little details to make sure your Crispy Chilli Beef Rice is exactly what you’re picturing.
For more general inspiration on building perfect rice meals, have a look at my ultimate guide to rice bowls recipes!
How can I reduce the heat in this Crispy Chilli Beef Rice?
That fresh red chilli can pack a serious punch, depending on the variety you grab! If you want that gorgeous color but less fire in your Crispy Chilli Beef Rice, the solution is super simple: just carefully slice the chilli open and scrape out all those tiny white seeds before you slice the flesh. The seeds carry most of the capsaicin, so removing them dials the heat way back.
If you’re still nervous, just use half the amount of fresh chilli the recipe calls for, or even omit it entirely and rely just on the sweet chilli sauce for a tiny bit of background warmth. Delicious either way!
Can I use pre-cooked meat for this Crispy Chilli Beef Rice recipe?
Oh yes, you absolutely can! This is one of the great things about this technique—it’s fantastic for using up leftover roast beef or even rotisserie chicken if you’re in a rush. The preparation steps for the coating—egg, then cornflour—still apply perfectly.
However, I need to stress this point: because the goal is that amazing, authentic texture, you still need to fry the coated pre-cooked meat in that hot oil until it’s deeply golden and crisp, just like we do with the raw steak. It won’t take as long because it’s already cooked through, but that frying step is non-negotiable for that beautiful crispy texture!
What is the best way to thicken the sauce for my Crispy Chilli Beef Rice?
Most of the time, letting the sauce bubble and reduce down naturally does the trick perfectly, especially since you’ve got the tomato puree in there which helps things cling. But hey, if your sauce looks a little too watery or you’re rushing through the cooking process, a quick cornflour slurry will save the day.
Just mix 1 teaspoon of cornflour with about 2 tablespoons of cold water until it’s totally smooth—make sure there are no lumps! Then, while you’re stirring the sauce in the pan, slowly drizzle the slurry in. Let it bubble for about 30 seconds, and you’ll see it instantly thicken up into that gorgeous, glossy coating consistency you want!
Nutritional Estimates for Crispy Chilli Beef Rice
Okay, let’s talk fuel! If you’re tracking macros or just curious about what you’re putting into your body while enjoying this incredible Crispy Chilli Beef Rice, here’s the breakdown. I always look at these numbers as a guide, not a hard rule—we’re cooking for flavor and love, after all!
These estimations are calculated for one serving, based on the amounts listed in the recipe. You can find more ways I balance flavor and nutrition in my clean eating articles, like this one on healthy meals and meal prep.
Per serving (just the beef and sauce component, remember!):
- Calories: 472
- Fat: 26g (with 5g saturated fat)
- Protein: 21g
- Carbohydrates: 37g
- Sugar: 26g (That’s the ketchup, chilli sauce, and sugar doing their happy dance!)
- Sodium: 1141mg (Soy/Tamari adds up quickly, so be mindful if you are watching sodium!)
A quick heads-up: this information does not include the rice or noodles you serve it with, as those amounts can vary wildly depending on how generous you are with your scoops! But even on its own, that crispy coating holds a good amount of good stuff!
Share Your Crispy Chilli Beef Rice Creations
Wow, if you made it this far, you’ve earned yourself a huge pat on the back! I am so excited for you to try this Crispy Chilli Beef Rice. I truly hope it brings as much flavor and joy to your table as it did to mine when I first perfected this gluten-free version.
Now, my favorite part of being in the kitchen is hearing from you all! When you try this recipe, please, please come back here and drop a star rating below. Your feedback means the world to me, Marco, as I keep innovating these Latin-inspired, gluten-free treasures.
And if you snap a photo of that beautiful, glistening, crispy beef tossed in the sauce, tag me on social media! I absolutely love seeing your kitchen adventures. It’s proof that amazing, flavorful meals are accessible to everyone. You can find my community of fellow flavor-seekers here: my favorite rice bowls community. Happy cooking, and enjoy that incredible crunch!
Crispy Chilli Beef Rice
Ingredients
Equipment
Method
- Place the steak strips in a bowl and add the egg. Mix to coat the steak thoroughly in the egg.
- Add the cornflour, salt, black pepper, and white pepper to the bowl. Toss together to coat the steak; the mixture will become sticky.
- Heat 3 tablespoons of the sunflower oil in a large frying pan or wok over high heat until very hot.
- Work in two batches. When the oil is hot, add half the beef, one strip at a time, and spread the pieces out.
- Fry the steak until dark brown and crispy. Avoid moving the meat too much to maintain crispiness. This takes about 5 or 6 minutes, with about 3 or 4 stirs.
- Use a slotted spoon or tongs to remove the beef from the pan and place it in a bowl lined with kitchen roll to absorb excess fat.
- Add another tablespoon of oil and repeat the frying process for the second batch of beef, then place it in the bowl with the first batch.
- Once all the beef is removed, add the remaining 1/2 tablespoon of oil to the pan and reduce the heat to medium.
- Add the sliced onion and cook for 2 minutes until slightly softened.
- Add the finely sliced chilli, minced ginger, and minced garlic. Cook while stirring for 30 seconds.
- Add the rice vinegar, soy sauce, tomato puree, sugar, tomato ketchup, and sweet chilli sauce to the pan.
- Turn up the heat and let the sauce bubble for a couple of minutes until it starts to reduce slightly.
- Return the beef to the pan, stir to coat, and heat through for 1-2 minutes until the beef is hot.
- Serve the dish with rice or noodles.
Nutrition
Notes
Tried this recipe?
Let us know how it was!
Gluten-Free Chef & Latin Cuisine Innovation Specialist
My youngest son’s celiac diagnosis at four changed everything. Suddenly, all those traditional Brazilian and Portuguese recipes from my avó needed to be completely reimagined without losing their soul.
After graduating from Johnson & Wales and working Miami’s Latin fusion scene, my son’s diagnosis became my calling. How do you make gluten-free empanadas that taste like childhood? Over eight years, I’ve developed 320+ gluten-free recipes celebrating authentic Latin flavors using cassava flour and plantain alternatives.
My gluten-free empanada recipe won “Best Appetizer” at the 2023 Miami Gluten-Free Food Festival. I ran “Sabores Sin Gluten,” a catering business serving Miami’s Latino community—quinceañeras, family gatherings, all the celebrations that matter.
Food is culture, and everyone deserves to experience the joy of sharing traditional family meals, regardless of dietary restrictions.