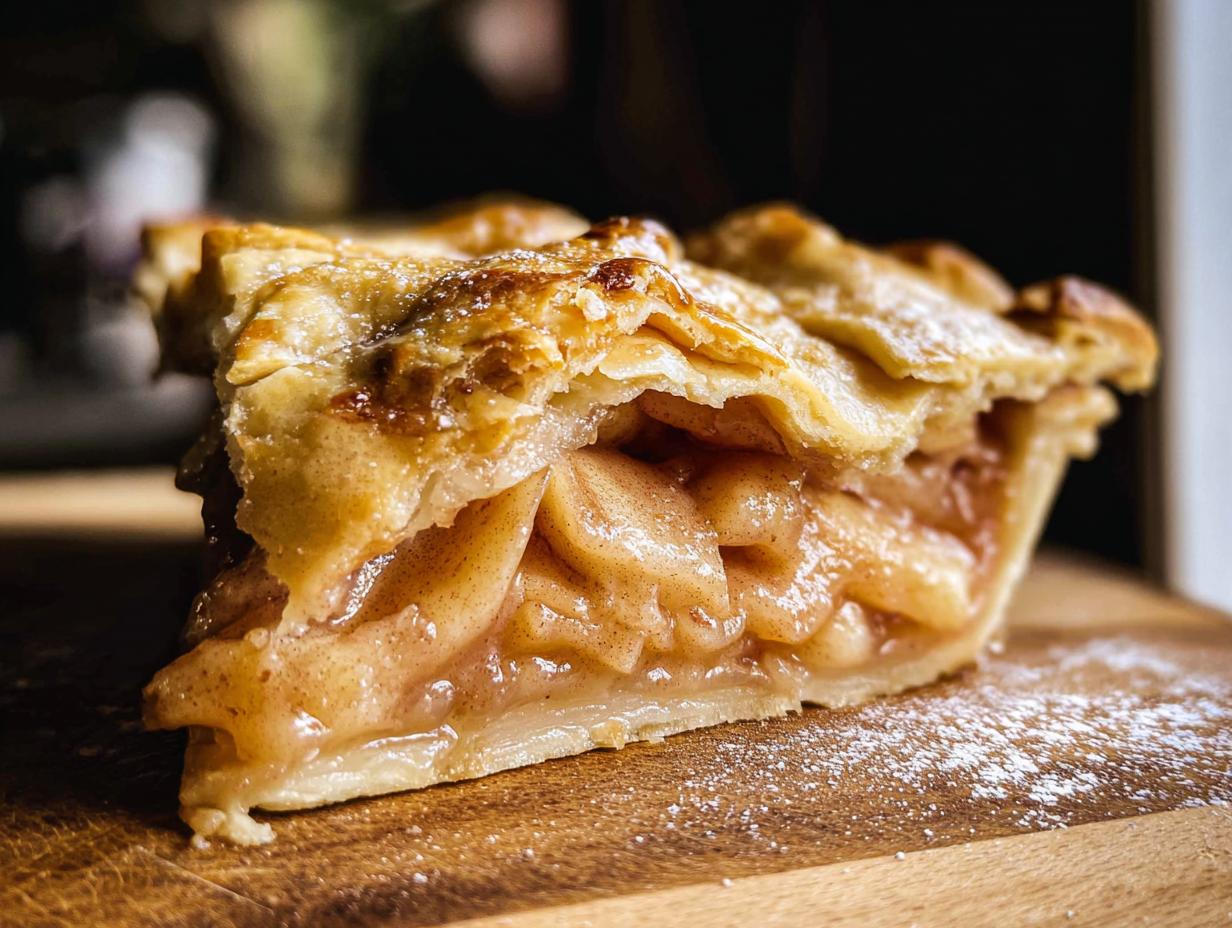
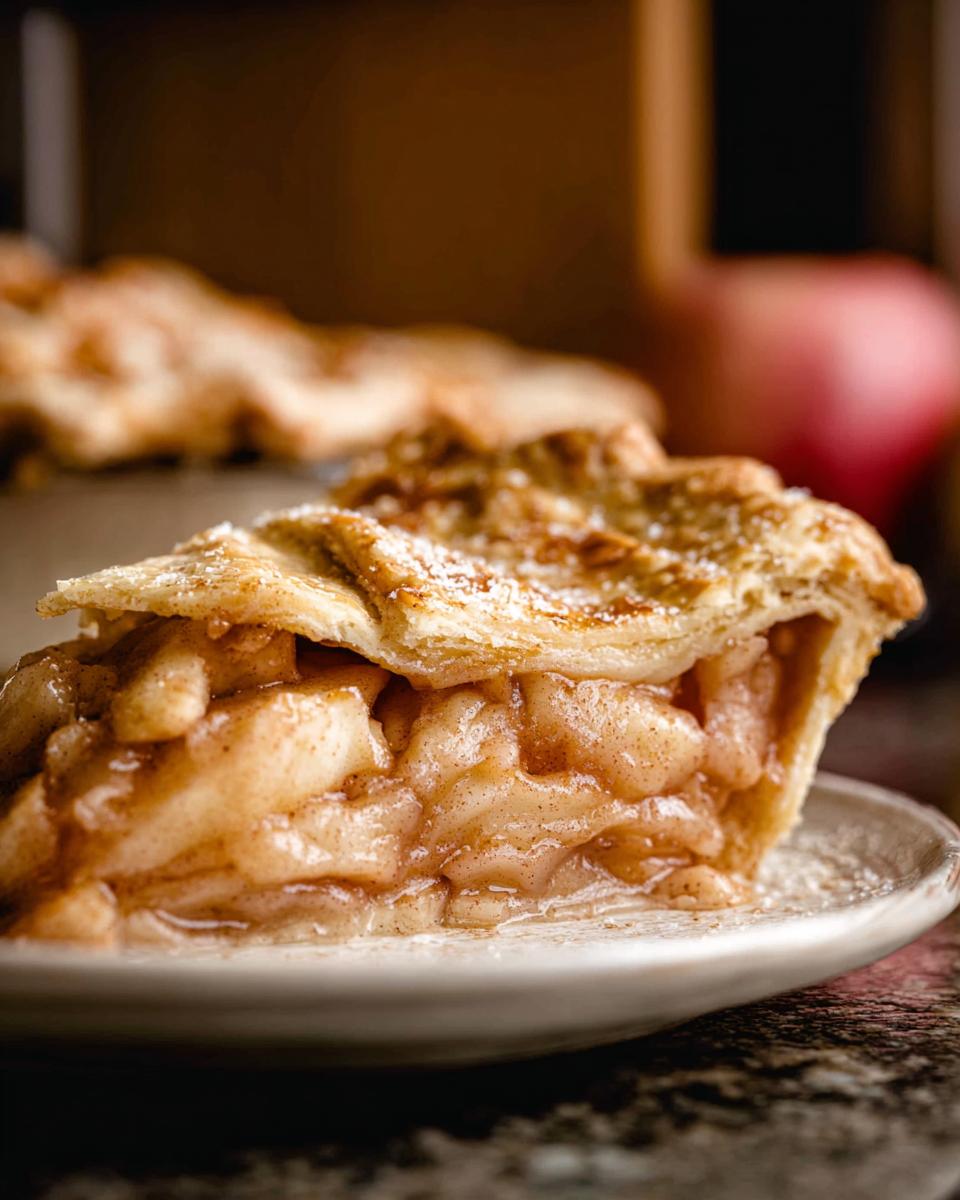
There’s just something about the smell of a baking Classic Apple Pie that screams ‘home,’ isn’t there? It’s that warm, comforting aroma that instantly brings back a flood of cherished memories. I still remember the first time my daughter and I decided to bake one together. She was only seven, and as we peeled and sliced the apples, we laughed and shared stories about her favorite family moments. My heart swelled when she declared the kitchen just smelled like ‘home.’ This simple act of baking transformed into our special Saturday tradition, and it reminded me how food has the power to bring families closer. As a Gluten-Free Nutritionist & Family Meal Planning Expert, I’m so excited to share this truly classic recipe, with notes on how to make it gluten-free, so you can create those beautiful memories too!
Why You’ll Love This Classic Apple Pie
This pie is a winner, and here’s why:
- It’s incredibly easy to make, even with a busy schedule!
- The flavor is pure apple-y goodness, full of warm spices.
- It brings that wonderful feeling of tradition and family togetherness.
- It’s perfect for sharing with loved ones, making any occasion special.
- Plus, it’s super adaptable for gluten-free baking!
Gather Your Ingredients for Classic Apple Pie
Alright, let’s get our kitchen prepped for this amazing Classic Apple Pie! Having all your goodies ready makes the whole process so much smoother. You’ll need:
For the Pie:
- Two 9-inch pie crusts. You can totally make your own, but honestly, good quality store-bought ones are a lifesaver when you’re short on time! Make sure one is for the bottom and one for the top.
- About 7 large Granny Smith apples. I just love Granny Smiths for their tartness that balances the sweet filling. Make sure they’re peeled, the cores are out, and they’re sliced into nice ½ inch pieces.
- ½ cup of granulated sugar.
- ½ cup of light brown sugar, loosely packed. It gives such a lovely caramel note!
- 2 tablespoons of all-purpose flour. This helps thicken up all those yummy apple juices.
- 1 teaspoon of ground cinnamon – this is non-negotiable for that classic apple pie smell!
- Just a tiny pinch, ⅛ teaspoon, of ground nutmeg. It adds a little warmth.
- And a tablespoon of fresh lemon juice, plus the zest of half a lemon. This brightens everything up and stops the apples from browning too fast!
For the Egg Wash (and optional sparkle!):
- 1 large egg, just lightly beaten in a little bowl.
- 2 tablespoons of sanding sugar, if you want those extra pretty sugar crystals on top!
Essential Equipment for Your Classic Apple Pie
To bake up this perfect pie, you’ll want to have these items handy:
- Two 9-inch pie crusts (homemade or store-bought!)
- A trusty pie plate
- A baking sheet to catch any drips
- A big bowl for mixing the filling
- A small bowl for your egg wash
- A sharp knife
- And a pie shield or some foil to protect those crust edges!
Step-by-Step Guide to Making Classic Apple Pie
Alright, let’s get our hands a little floury and bring this delicious Classic Apple Pie to life! Making pie from scratch is one of those rewarding kitchen moments, and this recipe makes it totally doable. Trust me, the smell alone is worth it!
1. Prep Your Crusts: If you’re making your own dough, get those two 9-inch pie crusts ready and let them chill for at least an hour. That rest time is super important for a flaky crust! Or, if you’re using store-bought, just follow the package directions. It’s all about what works best for you!
2. Preheat the Oven: Get your oven humming along at 400°F (204°C). Pop an oven rack right in the middle – that’s the sweet spot for most pies.
3. Mix the Filling: Grab a big bowl and toss in your sliced Granny Smith apples. Add the granulated sugar, that lovely light brown sugar, the flour, cinnamon, nutmeg, and that pop of lemon juice and zest. Give it a good, gentle stir until all those apple slices are beautifully coated. Oh, the aroma is already starting!
4. Line the Pie Plate: Let your pie crust dough rest at room temperature for just about 5-10 minutes – it makes rolling so much easier. On a lightly floured surface, roll out one disc into a 12-inch circle, about ⅛ inch thick. Then, carefully drape this beauty into your deep-dish pie plate. Gently press it down into the corners.
5. Add the Apple Goodness: Now, spoon all that delicious apple filling right into the bottom crust. Try to get most of the apples in there and discard any extra juicy bits pooled in the bowl – we want a pie, not a soup! Now, roll out your second crust disc, same size and thickness as the first.
6. Top It Off: Carefully place the second crust over the apple filling. Trim off any extra dough hanging over the edge of your pie plate with a sharp knife. Then, pinch the edges of the top and bottom crusts together to seal them up. You can fold them under a bit and crimp them for that classic look. Don’t forget to cut about 4 little slits in the top crust – this is crucial for letting steam escape as your pie bakes. Pop the whole pie onto a baking sheet. This catches any bubbling drips and makes moving it in and out of the oven a breeze.
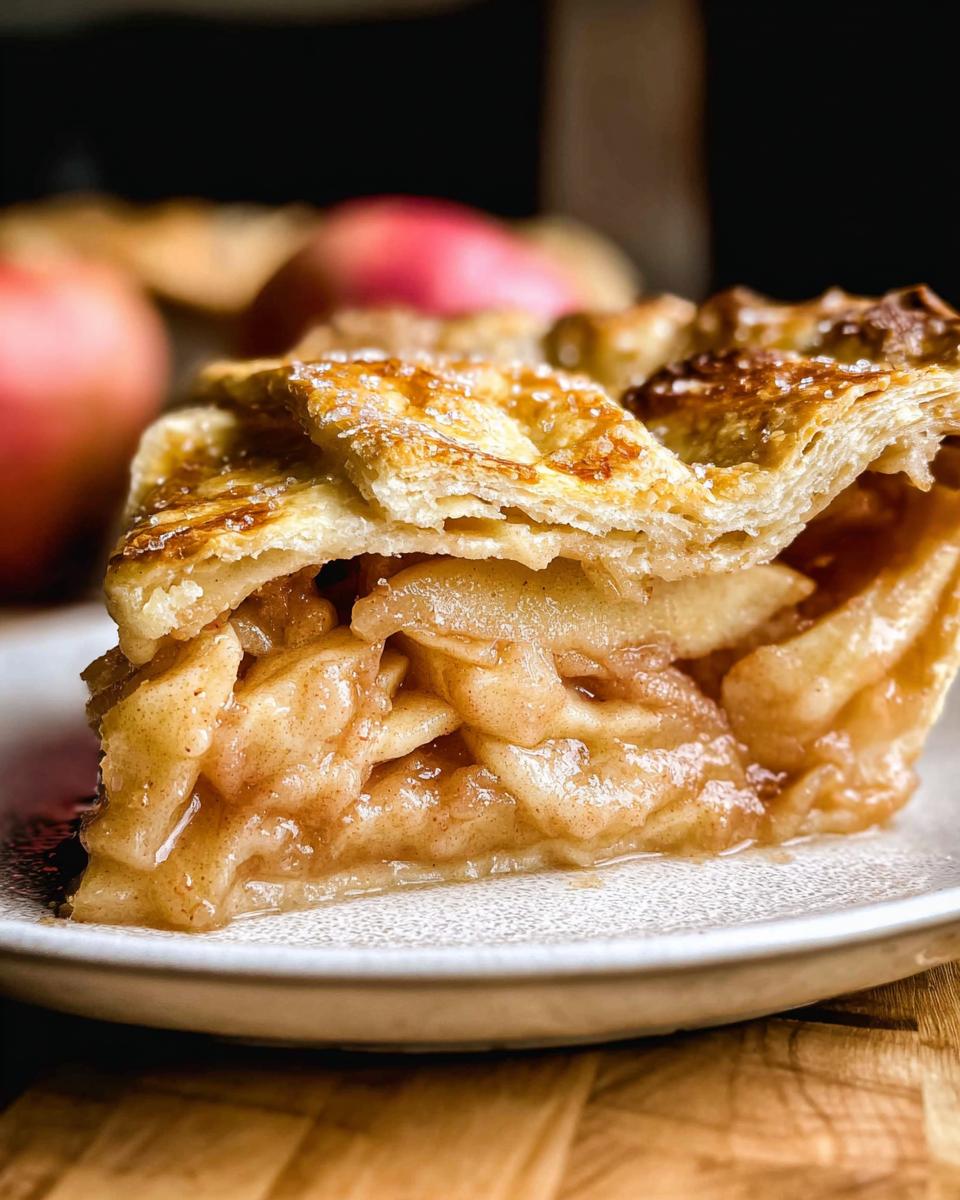
7. Egg Wash & Sugar: Brush the top crust all over with your lightly beaten egg. This gives it that gorgeous golden shine. If you’re feeling fancy, sprinkle with sanding sugar now for a little sparkle and crunch!
8. Blind Bake the Edges: Here’s a little trick: cover just the edges of your pie with a pie shield or some aluminum foil. This stops them from getting too dark before the rest of the pie is done. Bake it like this for the first 25 minutes.
9. Finish Baking: After 25 minutes, carefully remove the pie shield or foil. Now, reduce your oven temperature down to 375°F (190°C). Let it bake for another 30-35 minutes. You’re looking for a golden brown crust and filling that’s happily bubbling away. You can also check out this recipe for visual cues on doneness. Finally, let that amazing pie cool completely on a wire rack for at least 3 hours before you even think about slicing it. This part is tough, I know, but it’s essential for the filling to set properly!
Tips for a Perfect Classic Apple Pie
Oh, baking a truly spectacular Classic Apple Pie is all about a few little secrets! To make sure yours turns out just right, here are some things I’ve learned over the years:
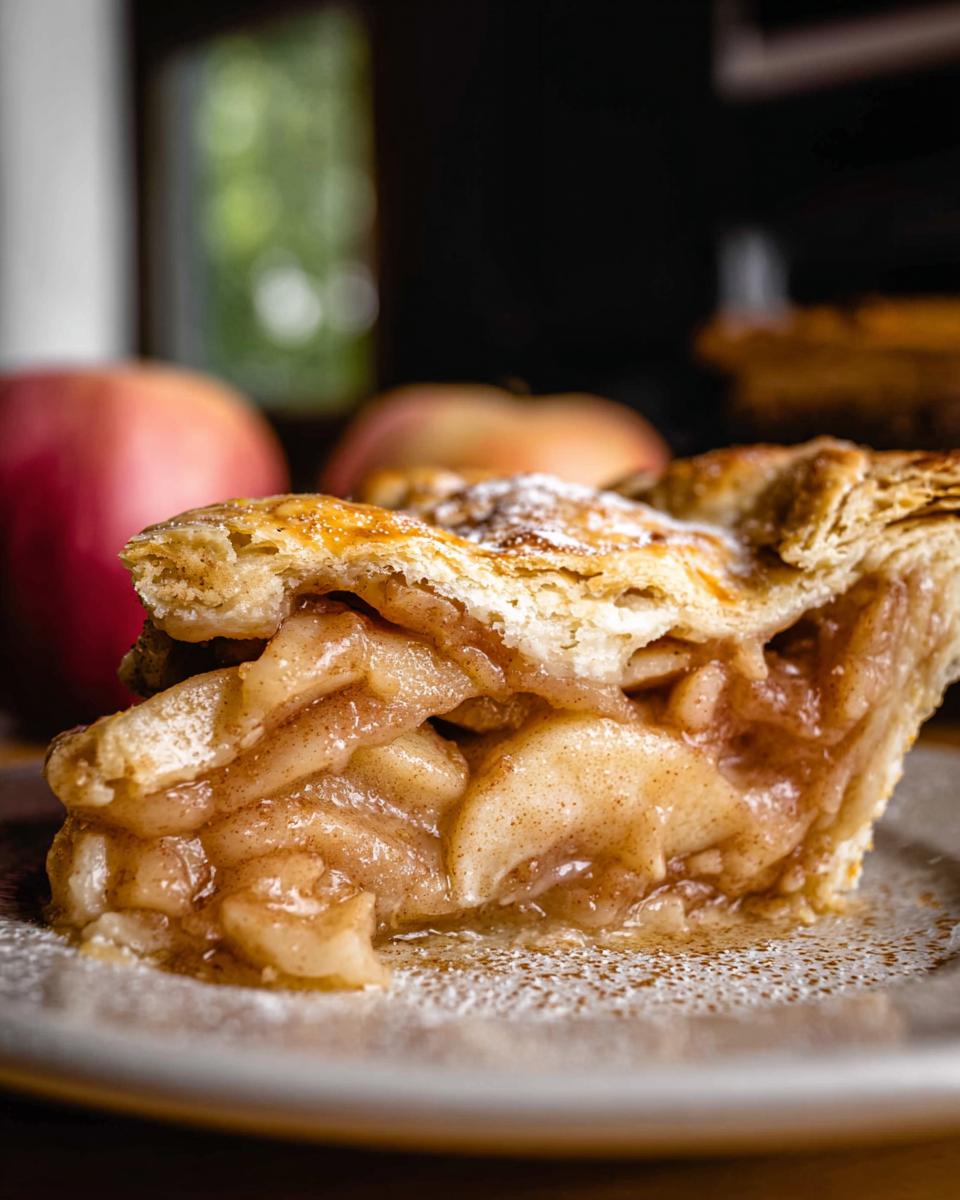
First off, apple choice is key! I love Granny Smith because they hold their shape and have that perfect sweet-tart balance. Don’t be afraid to mix them with other apples like Honeycrisp or Fuji for more complex flavor!
For that dreamy crust, make sure it’s nice and cold when you’re working with it. If it gets too warm, pop it back in the fridge for a bit. And to keep the bottom from getting soggy, bake your pie on a hot baking sheet or even a pizza stone. It helps cook the bottom crust faster. And remember to let it cool completely – I know, it’s SO hard!
Ingredient Notes and Substitutions for Your Pie
Let’s chat about making this pie perfect for *you*! When it comes to apples, Granny Smith are my go-to for that classic tartness, but feel free to mix them up! Try adding some Honeycrisp or Fuji for a bit more sweetness and a different texture. Just aim for apples that hold their shape well when baked.
If you’re looking to make this a gluten-free delight, you’ll want to use your favorite gluten-free pie crust recipe or a good store-bought blend. You can find tons of amazing gluten-free baking resources here if you need inspiration! For the sugars, the mix gives a lovely depth, but you can use all granulated or all brown sugar in a pinch. Just remember that brown sugar adds a bit more moisture!
Serving and Storing Your Classic Apple Pie
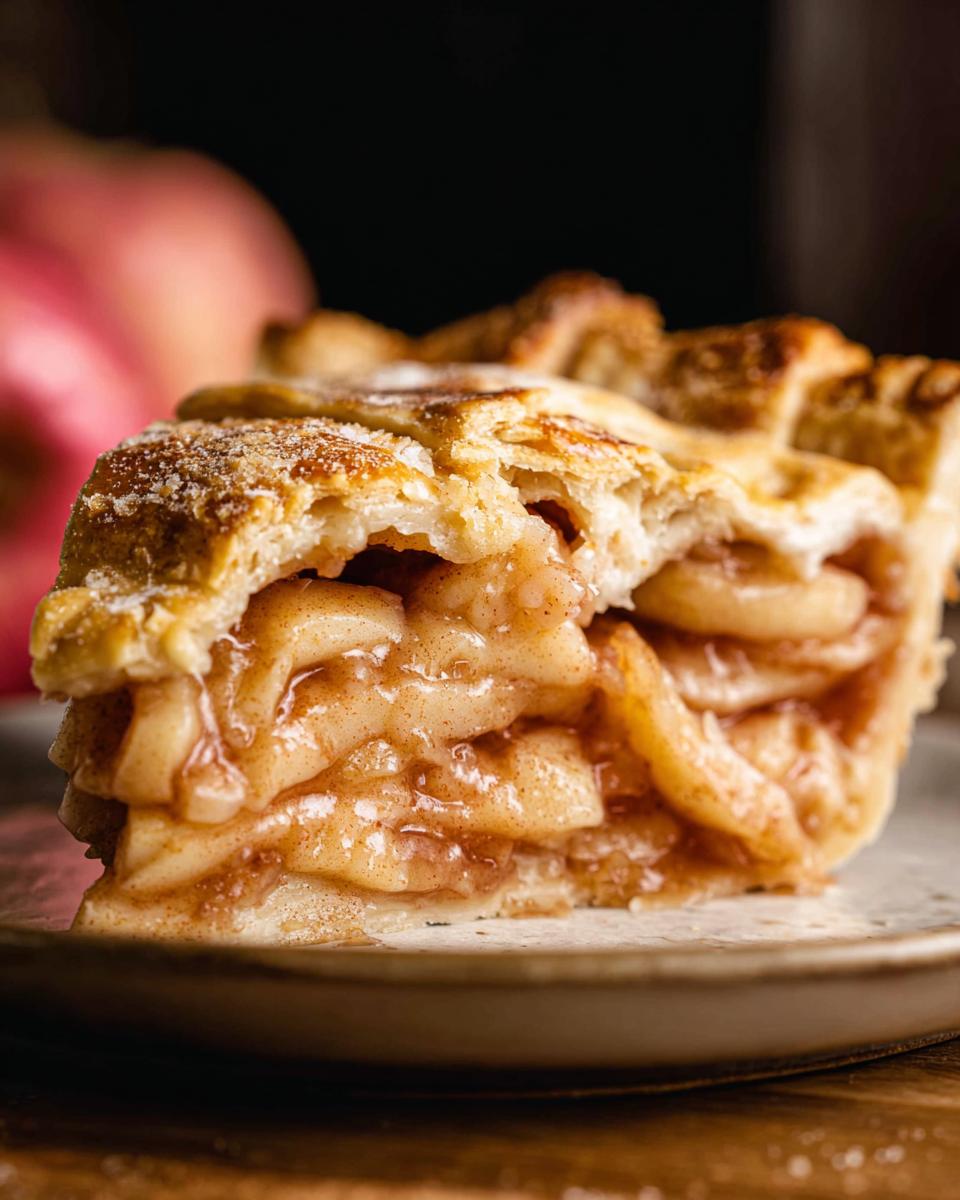
This gorgeous Classic Apple Pie is absolutely divine served warm, maybe with a scoop of vanilla ice cream or a dollop of freshly whipped cream. If you happen to have any leftovers (highly unlikely!), just wrap it up well in plastic wrap or pop it into an airtight container. It should stay fresh at room temperature for about two days, or in the fridge for up to four. Reheat slices gently in a low oven or microwave until warm and gooey again! Check out more great meal types for more inspiration!
Why You’ll Love This Classic Apple Pie
This pie is a winner, and here’s why:
- It’s incredibly easy to make, even with a busy schedule!
- The flavor is pure apple-y goodness, full of warm spices.
- It brings that wonderful feeling of tradition and family togetherness.
- It’s perfect for sharing with loved ones, making any occasion special.
- Plus, it’s super adaptable for gluten-free baking!
Gather Your Ingredients for Classic Apple Pie
Alright, let’s get our kitchen prepped for this amazing Classic Apple Pie! Having all your goodies ready makes the whole process so much smoother. You’ll need:
For the Pie:
- Two 9-inch pie crusts. You can totally make your own, but honestly, good quality store-bought ones are a lifesaver when you’re short on time! Make sure one is for the bottom and one for the top.
- About 7 large Granny Smith apples. I just love Granny Smiths for their tartness that balances the sweet filling. Make sure they’re peeled, the cores are out, and they’re sliced into nice ½ inch pieces.
- ½ cup of granulated sugar.
- ½ cup of light brown sugar, loosely packed. It gives such a lovely caramel note!
- 2 tablespoons of all-purpose flour. This helps thicken up all those yummy apple juices.
- 1 teaspoon of ground cinnamon – this is non-negotiable for that classic apple pie smell!
- Just a tiny pinch, ⅛ teaspoon, of ground nutmeg. It adds a little warmth.
- And a tablespoon of fresh lemon juice, plus the zest of half a lemon. This brightens everything up and stops the apples from browning too fast!
For the Egg Wash (and optional sparkle!):
- 1 large egg, just lightly beaten in a little bowl.
- 2 tablespoons of sanding sugar, if you want those extra pretty sugar crystals on top!
Essential Equipment for Your Classic Apple Pie
To bake up this perfect pie, you’ll want to have these items handy:
- Two 9-inch pie crusts (homemade or store-bought!)
- A trusty pie plate
- A baking sheet to catch any drips
- A big bowl for mixing the filling
- A small bowl for your egg wash
- A sharp knife
- And a pie shield or some foil to protect those crust edges!
Step-by-Step Guide to Making Classic Apple Pie
Alright, let’s get our hands a little floury and bring this delicious Classic Apple Pie to life! Making pie from scratch is one of those rewarding kitchen moments, and this recipe makes it totally doable. Trust me, the smell alone is worth it!
1. Prep Your Crusts: If you’re making your own dough, get those two 9-inch pie crusts ready and let them chill for at least an hour. That rest time is super important for a flaky crust! Or, if you’re using store-bought, just follow the package directions. It’s all about what works best for you!
2. Preheat the Oven: Get your oven humming along at 400°F (204°C). Pop an oven rack right in the middle – that’s the sweet spot for most pies.
3. Mix the Filling: Grab a big bowl and toss in your sliced Granny Smith apples. Add the granulated sugar, that lovely light brown sugar, the flour, cinnamon, nutmeg, and that pop of lemon juice and zest. Give it a good, gentle stir until all those apple slices are beautifully coated. Oh, the aroma is already starting!
4. Line the Pie Plate: Let your pie crust dough rest at room temperature for just about 5-10 minutes – it makes rolling so much easier. On a lightly floured surface, roll out one disc into a 12-inch circle, about ⅛ inch thick. Then, carefully drape this beauty into your deep-dish pie plate. Gently press it down into the corners.
5. Add the Apple Goodness: Now, spoon all that delicious apple filling right into the bottom crust. Try to get most of the apples in there and discard any extra juicy bits pooled in the bowl – we want a pie, not a soup! Now, roll out your second crust disc, same size and thickness as the first.
6. Top It Off: Carefully place the second crust over the apple filling. Trim off any extra dough hanging over the edge of your pie plate with a sharp knife. Then, pinch the edges of the top and bottom crusts together to seal them up. You can fold them under a bit and crimp them for that classic look. Don’t forget to cut about 4 little slits in the top crust – this is crucial for letting steam escape as your pie bakes. Pop the whole pie onto a baking sheet. This catches any bubbling drips and makes moving it in and out of the oven a breeze.
7. Egg Wash & Sugar: Brush the top crust all over with your lightly beaten egg. This gives it that gorgeous golden shine. If you’re feeling fancy, sprinkle with sanding sugar now for a little sparkle and crunch!
8. Blind Bake the Edges: Here’s a little trick: cover just the edges of your pie with a pie shield or some aluminum foil. This stops them from getting too dark before the rest of the pie is done. Bake it like this for the first 25 minutes.
9. Finish Baking: After 25 minutes, carefully remove the pie shield or foil. Now, reduce your oven temperature down to 375°F (190°C). Let it bake for another 30-35 minutes. You’re looking for a golden brown crust and filling that’s happily bubbling away. You can also check out this recipe for visual cues on doneness. Finally, let that amazing pie cool completely on a wire rack for at least 3 hours before you even think about slicing it. This part is tough, I know, but it’s essential for the filling to set properly!
Tips for a Perfect Classic Apple Pie
Oh, baking a truly spectacular Classic Apple Pie is all about a few little secrets! To make sure yours turns out just right, here are some things I’ve learned over the years:
First off, apple choice is key! I love Granny Smith because they hold their shape and have that perfect sweet-tart balance. Don’t be afraid to mix them with other apples like Honeycrisp or Fuji for more complex flavor!
For that dreamy crust, make sure it’s nice and cold when you’re working with it. If it gets too warm, pop it back in the fridge for a bit. And to keep the bottom from getting soggy, bake your pie on a hot baking sheet or even a pizza stone. It helps cook the bottom crust faster. And remember to let it cool completely – I know, it’s SO hard!
Ingredient Notes and Substitutions for Your Pie
Let’s chat about making this pie perfect for *you*! When it comes to apples, Granny Smith are my go-to for that classic tartness, but feel free to mix them up! Try adding some Honeycrisp or Fuji for a bit more sweetness and a different texture. Just aim for apples that hold their shape well when baked.
If you’re looking to make this a gluten-free delight, you’ll want to use your favorite gluten-free pie crust recipe or a good store-bought blend. You can find tons of amazing gluten-free baking resources here if you need inspiration! For the sugars, the mix gives a lovely depth, but you can use all granulated or all brown sugar in a pinch. Just remember that brown sugar adds a bit more moisture!
Serving and Storing Your Classic Apple Pie
This gorgeous Classic Apple Pie is absolutely divine served warm, maybe with a scoop of vanilla ice cream or a dollop of freshly whipped cream. If you happen to have any leftovers (highly unlikely!), just wrap it up well in plastic wrap or pop it into an airtight container. It should stay fresh at room temperature for about two days, or in the fridge for up to four. Reheat slices gently in a low oven or microwave until warm and gooey again! Check out more great meal types for more inspiration!
Frequently Asked Questions About Classic Apple Pie
Can I use other types of apples for this pie?
Absolutely! While Granny Smith apples give you that perfect tartness that balances the sweetness, mixing them with other varieties like Honeycrisp, Fuji, or Gala can add even more depth and flavor. Just try to pick apples that hold their shape well when baked so you don’t end up with mush!
How do I prevent my pie crust from getting soggy on the bottom?
This is such a common worry! A few tricks help: make sure your oven is fully preheated, and bake the pie on a preheated baking sheet or even a pizza stone. This extra heat from the bottom helps cook the crust through. Also, don’t skip letting the pie cool completely before slicing – this allows the juices to thicken up properly!
What’s the best way to cool an apple pie?
Patience is key here! The best way to cool your apple pie is on a wire rack at room temperature for at least 3 hours. This lets the steam escape and the filling set up perfectly. Trying to slice it too soon will usually result in a runny filling, and nobody wants that!
How can I make an apple pie without using flour?
If you need to avoid traditional flour for thickening, you’ve got options! You can use cornstarch or arrowroot powder – start with about 2 tablespoons for cornstarch or 3 tablespoons for arrowroot, mixed with a little water before adding to the apples. These work really well as gluten-free thickeners.
Nutritional Information for Classic Apple Pie
Here’s an estimated nutritional breakdown per serving (about 1/8th of the pie): Calories: 417, Carbohydrates: 77g, Protein: 4g, Fat: 12g. Please remember, these are just estimates, and actual values can vary based on your specific ingredients and preparation!
Share Your Baking Creations!
I just LOVE seeing your baking adventures! If you make this pie, please let me know how it turned out in the comments below. I’d be thrilled if you shared a photo with me on social media, too! Come on over and say hi on my About page!
Nutritional Information for Classic Apple Pie
Here’s an estimated nutritional breakdown per serving (about 1/8th of the pie): Calories: 417, Carbohydrates: 77g, Protein: 4g, Fat: 12g. Please remember, these are just estimates, and actual values can vary based on your specific ingredients and preparation!
Share Your Baking Creations!
I just LOVE seeing your baking adventures! If you make this pie, please let me know how it turned out in the comments below. I’d be thrilled if you shared a photo with me on social media, too! Come on over and say hi on my Contact page!
Classic Apple Pie
Ingredients
Equipment
Method
- Prepare your pie crusts. You will need two 9-inch crusts, one for the bottom and one for the top. The dough needs to chill for at least 1 hour. Alternatively, use store-bought pie crusts according to package directions.
- Preheat your oven to 400°F (204°C). Place an oven rack in the center position.
- In a large bowl, combine the sliced apples, granulated sugar, light brown sugar, flour, cinnamon, nutmeg, and lemon juice with zest. Toss everything together until the apples are evenly coated.
- Let the pie crust dough rest at room temperature for 5-10 minutes. On a lightly floured surface, roll one disc into a 12-inch circle, about ⅛ inch thick. Carefully place this crust into the bottom of a deep-dish pie plate.
- Spoon the apple filling into the bottom crust. Discard any excess juice from the bowl. Roll out the second disc of pie crust until it is ⅛ inch thick and place it over the apple filling.
- Trim the excess dough along the edge of the pie plate using a sharp knife. Gently press the edges of the top and bottom crusts together to seal, then fold them under. Rotate the pie plate and repeat this process until the edges are neatly tucked. Cut 4 slits in the top crust to allow steam to escape. Place the pie on a baking sheet.
- Brush the top crust with the beaten egg wash and sprinkle with sanding sugar, if using. Cover the edges of the pie with a pie shield or foil to prevent them from browning too quickly during the first 25 minutes of baking.
- Bake at 400°F (204°C) for 25 minutes. Carefully remove the pie shield. Reduce the oven temperature to 375°F (190°C) and continue to bake for another 30-35 minutes, or until the crust is golden brown and the filling is bubbly. Let the pie cool completely at room temperature for at least 3 hours before serving.
Nutrition
Notes
Tried this recipe?
Let us know how it was!
Gluten-Free Nutritionist & Family Meal Planning Expert
Working as a pediatric dietitian at Children’s Hospital of Denver, I kept meeting families overwhelmed by managing their children’s celiac disease. Parents stressed, kids frustrated, everyone eating bland boxed “gluten-free” products.
That’s when I realized my calling: creating practical, balanced gluten-free solutions for real families with busy schedules. I’ve developed 375+ family-friendly recipes focusing on lunch boxes, after-school snacks, and make-ahead dinners that actually work.
My meal planning system was featured in Parents Magazine, and I presented research at the Rocky Mountain Pediatric Nutrition Conference. My evidence-based approach ensures recipes meet both taste and health standards—families need solutions that work in the real world, not just perfect test kitchens.