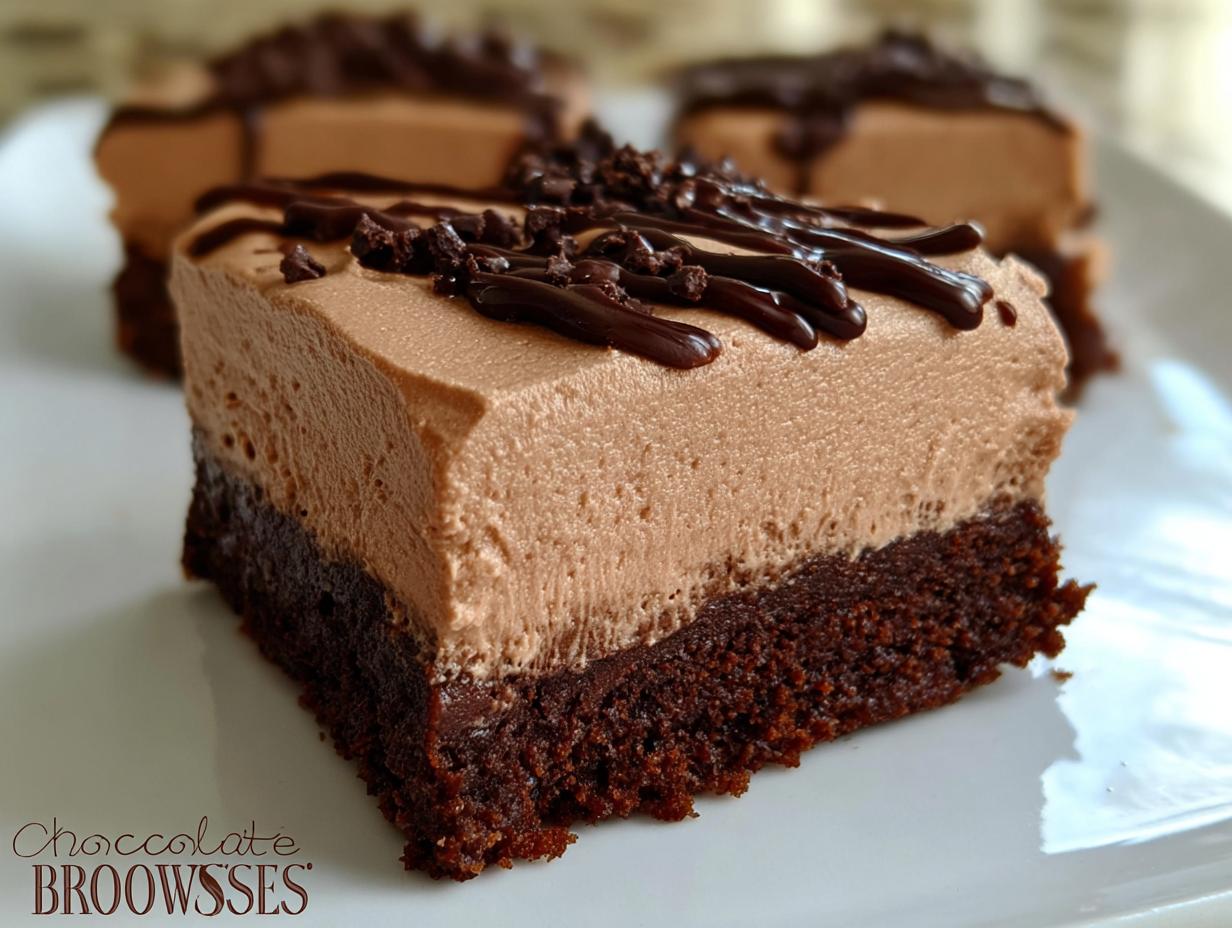
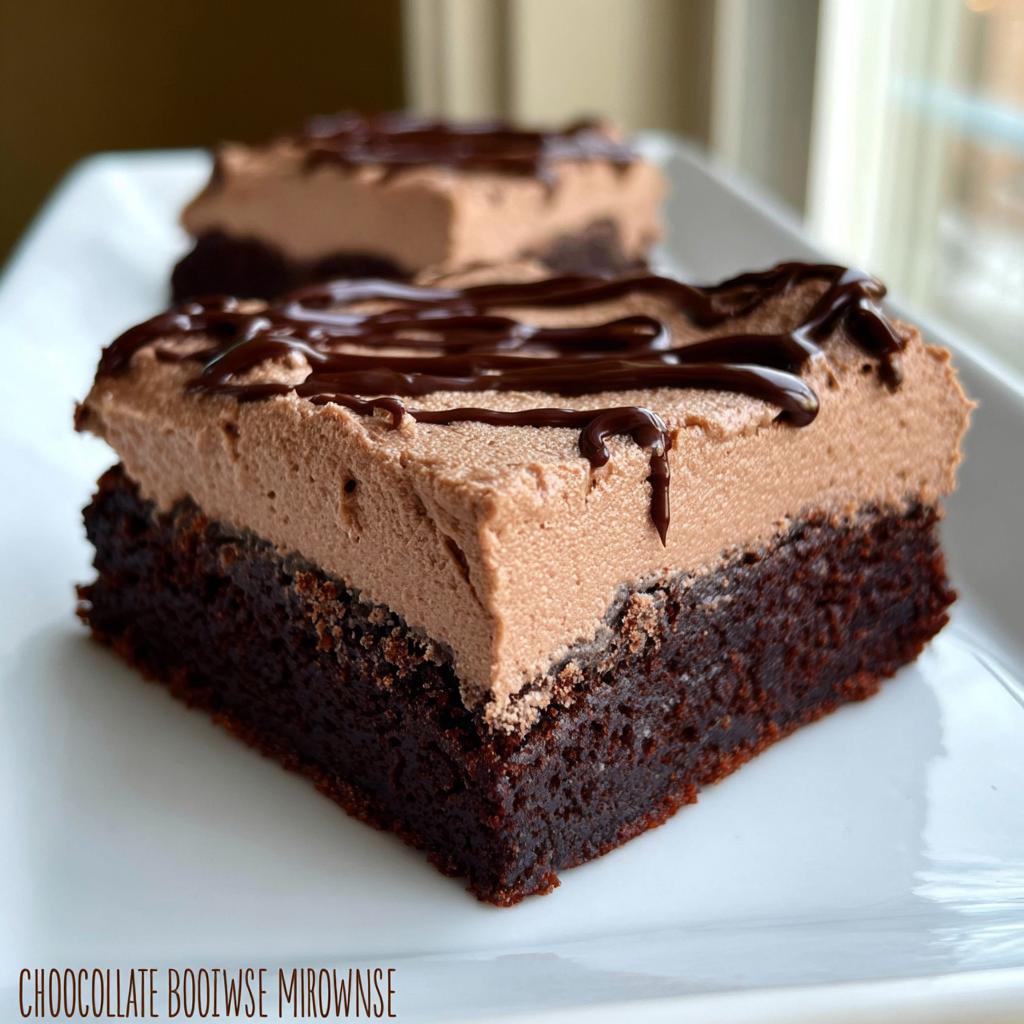
Some days, you just need a dessert that screams indulgence, right? We aren’t talking about a polite little cookie; we need something rich, deep, and unapologetically chocolate. That’s exactly what these **Chocolate Mousse Brownies** deliver—the perfect marriage of a dense, fudgy bottom layer hugged by the lightest, silkiest chocolate mousse top. When I was first navigating my gluten sensitivity diagnosis, I missed my Nonna’s chocolate desserts terribly. I was determined to bring those cherished Italian flavors back to my table. These brownies, born from that necessity, became my showstopper. Velvety, pillowy, and intensely chocolatey, they prove that giving up gluten doesn’t mean saying goodbye to the best treats.
Why You Will Love These Chocolate Mousse Brownies
Honestly, you are going to want to make these just for the texture combination alone. They aren’t just brownies; they are an experience! You get that super satisfying, dense chew from the bottom layer, which is my absolute favorite part. Then, BAM! You hit the light, airy mousse on top.
- The intense, rich chocolate flavor hits every single craving.
- You get both a fudgy base and a dreamy, velvety topping in one square.
- It looks incredibly fancy, but I promise the assembly is quicker than you think!
It’s a total showstopper without demanding hours in the kitchen. Trust me on this one!
Essential Equipment for Perfect Chocolate Mousse Brownies
You don’t need a million fancy gadgets, but having the right tools makes things so much smoother, especially when dealing with two different textures like this. First off, grab your 9×9 inch square baking pan; this size is crucial for getting the right brownie thickness.
You’ll need a sturdy large bowl for the brownie batter, and definitely a large saucepan for melting the chocolate and marshmallows for the mousse base. A stand mixer isn’t strictly necessary, but whipping the heavy cream by hand is a workout, so your mixer will be your best friend for achieving those stiff peaks!
Ingredients for Rich Chocolate Mousse Brownies
Okay, let’s talk ingredients! This recipe is a two-parter, so we treat the brownie base and the mousse topping like they are cousins—they look different but taste amazing together. Don’t skimp here; these are rich, decadent treats, and the ingredients need to hold up their end of the bargain.
Ingredient Notes and Substitutions
Since I developed this recipe as my first foray back into baking after learning about my gluten sensitivity, I know you might be thinking about swaps. For the brownie layer, I use regular all-purpose flour, but please, if you’re strictly gluten-free, grab a quality 1:1 GF baking blend. It works beautifully as a direct swap, trust me; you won’t miss a thing!
For the chocolate choice, I specified semi-sweet because it balances the sweetness of the marshmallows in the mousse perfectly. However, if you prefer things super dark, you can certainly chop up a good quality bittersweet bar instead. Just know the mousse will be less sweet!
FOR BROWNIES
- 3/4 cup butter, melted
- 1 1/2 cups sugar
- 1 tsp vanilla extract
- 2 eggs
- 1/2 cup cocoa powder
- 1/2 tsp salt
- 3/4 cup all-purpose flour
FOR MOUSSE
- 3/4 cup miniature marshmallows
- 4 oz semi-sweet chocolate, chopped (1 bar)
- 1/4 cup milk
- 1 cup heavy whipping cream
- Chocolate ganache for drizzling (optional)
Step-by-Step Instructions to Make Chocolate Mousse Brownies
Time to get messy! The beauty of these **Chocolate Mousse Brownies** is that the instructions are broken down into two simple jobs: baking the base and whipping the topping. First things first, line that 9×9 pan with foil, making sure you leave some overhang—that’s your built-in handle later for lifting the whole glorious slab out. Spray the foil lightly so nothing sticks!
For the brownie layer, it’s all about simple mixing. Melt that butter, whisk in the sugar until it looks smooth, and then beat in the eggs one by one. Don’t rush that egg step; you want it incorporated well before you add the dry things like the cocoa powder and flour. You’re looking for a soft, almost pudding-like batter, not a stiff dough.
Bake that base at 350 degrees F for about 22 to 25 minutes. Patience is key here, as you need that base completely cool before anything else happens. Once it’s done, pull it out and let it sit. We have to prep the mousse while this cools down a bit, but we can’t add the mousse until the brownie layer is genuinely cool to the touch.
Now for the mousse magic! Melt down your chocolate, milk, and those tiny marshmallows gently over low heat. Stir constantly—we don’t want scorched chocolate, that ruins everything! The most important part here is the cooling time after you take it off the heat—give it a good 15 to 20 minutes to come down from ‘molten lava’ to ‘lukewarm.’ If you fold hot chocolate into whipped cream, you just deflate all the air we worked so hard to put in!
While the chocolate cools, whip your heavy cream until you get those gorgeous, stiff peaks. Think of peaks that stand straight up when you lift the whisk straight out of them. Then, gently, gently, fold that cooled chocolate mixture into the whipped cream. I use a rubber spatula and cut down the center and sweep around the edge of the bowl—that’s how you keep the air in.
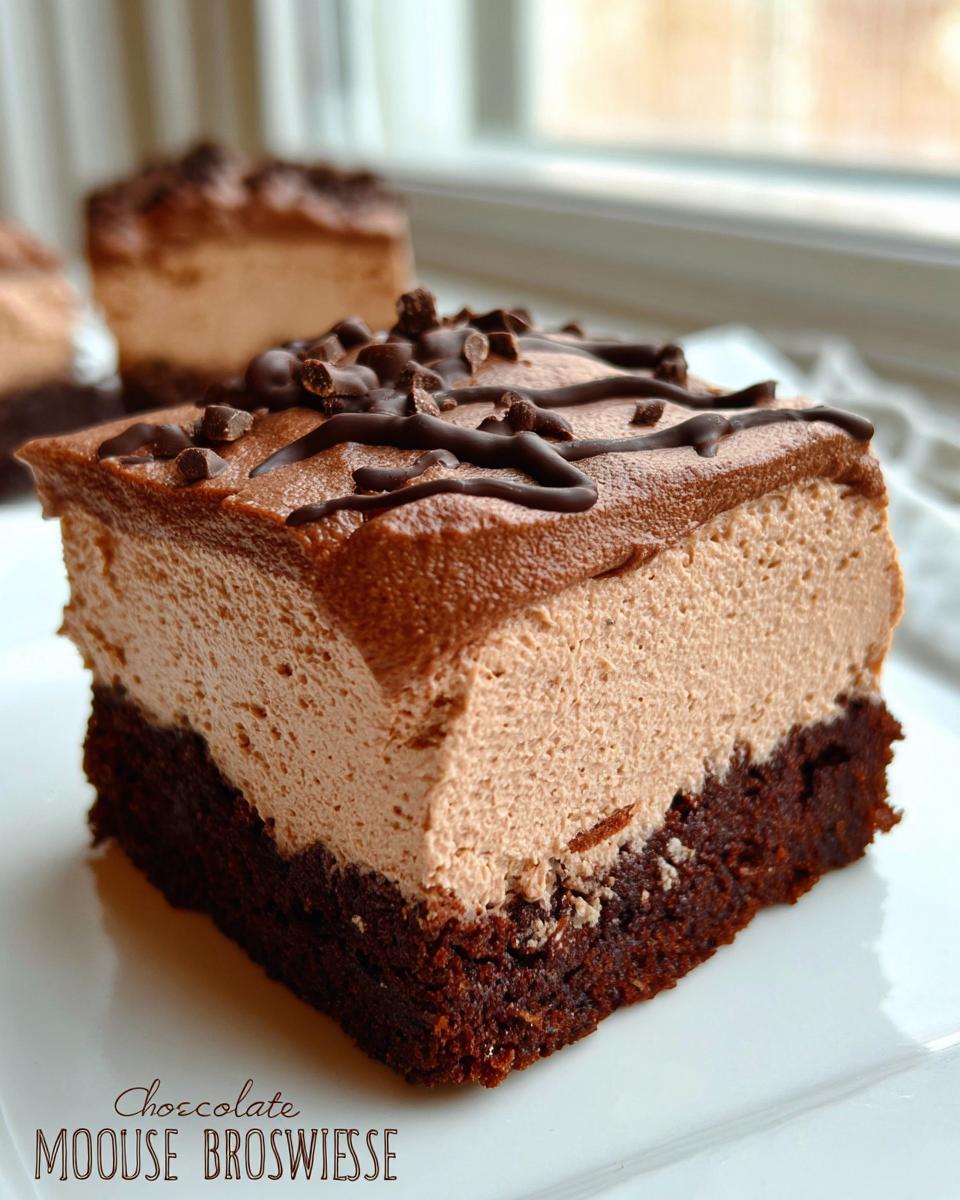
Spread that glorious mousse over your fully cooled brownies. Then, we enter the final waiting game: setting. Pop it in the fridge for at least 60 minutes. This chilling time makes the mousse firm up so you can cut beautiful squares. If you skip this, you’ll just scoop messy chocolate soup! I often use the ganache here for a dramatic drizzle on top, but honestly, a plain slab of this is amazing too. You can see a sneak peek of my fudgier brownie technique over here: fudgy dark chocolate brownies recipe. For more inspiration on rich chocolate bakes, I always love looking at what others have done, like this take on chocolate mousse brownies!
Baking Tips for the Brownie Base
Listen, the key to making this *not* a cakey brownie is pulling it just before you think it’s done. If you stick a toothpick in and it comes out totally dry, you’ve gone too far and you’ve got a dry brownie, which is tragic. You want moist crumbs clinging to that toothpick! That slight wetness ensures the brownie stays wonderfully dense and fudgy once it cools down completely.
Also, don’t overmix once the flour goes in. Mix just until you don’t see any more white streaks. Overmixing develops gluten, and we want the fudgiest, most tender base possible, not something chewy like bread!
Achieving the Perfect Mousse Topping for Chocolate Mousse Brownies
The mousse layer is almost like a stabilized whipped cream, so technique matters big time here. When you whip the heavy cream, you stop right when you hit stiff peaks. If you keep going, you end up with butter when you’re trying to make dessert! Stiff peaks mean the cream is holding its shape beautifully and won’t collapse when you fold in the other stuff.
And I cannot stress this enough: the melted chocolate component MUST be room temperature or cooler before you introduce it to the whipped cream. If it’s warm, it melts the air right out of the cream, and all your hard whipping work turns into a puddle. Be patient during that cooling phase; it’s worth the wait for that light texture!
Storage and Make-Ahead Tips for Your Chocolate Mousse Brownies
Because we are dealing with a glorious, dairy-rich mousse topping, storage is handled a little differently than a standard pan of brownies. You absolutely must keep these in the refrigerator. Seriously, don’t try leaving them out on the counter for too long; that mousse layer will start weeping and struggling.
I always store mine tightly covered in that same 9×9 pan, usually with the foil flaps tucked right over the top. They hold up beautifully chilled for about four to five days. The cold actually firms up the brownie base just a tiny bit, making them even easier to slice cleanly!
Now, can you prep ahead? Yes, you totally can! I often bake the brownie layer the day before I plan to serve them. Once the brownie base is completely cool, I wrap it snugly in plastic wrap and leave it right there on the counter overnight. The next day, I whip up the mousse, spread it on, chill it, and serve. It breaks up the work nicely, which is super helpful when you’re making dessert for a crowd. If you ever need more tips on planning ahead for treats like this, I’ve shared some of my favorite strategies here: make-ahead tips for busy days!

Just remember the golden rule: full assembly requires refrigeration time before slicing. You want those squares to hold their shape so everyone gets that perfect brownie-and-mousse ratio!
Variations on Classic Chocolate Mousse Brownies
Part of the fun of baking is making a classic recipe uniquely *yours*, right? These **Chocolate Mousse Brownies** are fantastic on their own, but they are also simply begging to be customized. Since you have two distinct layers, you have double the opportunity to play around with flavors!
For a really fun winter twist, you can switch out the vanilla extract in the brownie layer for a teaspoon of peppermint extract. Just imagine that dark, rich brownie paired with a cool, minty mousse—it turns it into a seasonal showstopper! Remember, only swap out the vanilla; too much extract can make things taste bitter, so be gentle.
If you aren’t feeling the drizzled ganache, try some textural toppings instead! Coarsely chopping some toasted pecans or walnuts and scattering them over the mousse right before chilling adds a fantastic crunch that cuts through the softness. It’s lovely.
Another simple change that makes a huge impact is using chocolate chips in the mousse topping instead of a chopped bar. If you want to amp up the intensity, swap the semi-sweet chips for dark chocolate chips—about 60% cacao—that gives the mousse a much deeper, less sweet flavor profile that adults adore.
I’ve tried switching up the flavor even more by adding a tiny bit of espresso powder right into that warm chocolate mixture when I melt it down. It doesn’t make the brownies taste like coffee, but it seriously deepens the overall chocolate flavor—it’s like secret sauce! You can find some more amazing recipe ideas over here that might spark your creativity even further: fun cake and recipe ideas!
Serving Suggestions for Decadent Chocolate Mousse Brownies
The hardest part is over—you baked them! Now we need to plate these beauties up so they look as jaw-dropping as they taste. Because these **Chocolate Mousse Brownies** are so intensely rich, you don’t need much fuss, but a little bit of thoughtful presentation goes a long way.
My absolute favorite way to serve these is right out of the fridge, cold and firm, often paired with something slightly tart or bright to cut through all that glorious chocolate fat. A few fresh raspberries scattered around the plate instantly make it feel fancy, and raspberries and dark chocolate are just soulmates, you know?
If you’re taking these to a party, skip the fancy slicing until you get there, if you can manage it. Keep them chilled in the pan until the last minute, then cut them into neat squares. You can use a hot knife—running a long, sharp knife under very hot water and drying it quickly between cuts—for the cleanest lines possible.
For an extra classic touch, a light dusting of good quality cocoa powder over the top just before serving is perfect. It gives a lovely matte contrast to the slight sheen of the mousse. If you’re serving them warm—which you can technically do if you skip the full 60-minute chill time—you *must* have a scoop of high-quality vanilla bean ice cream melting next to it. That combination of hot, dense brownie, cold, silky mousse, and melting ice cream? That’s pure heaven right there.
Frequently Asked Questions About Chocolate Mousse Brownies
I totally get it; every baker has questions before diving into a new recipe, especially when it combines two different wonderful things like mousse and brownies! I’ve gathered up the main things people ask me when they’re preparing these decadent **Chocolate Mousse Brownies**.
Can I substitute the all-purpose flour in the brownie layer?
That’s a great question, especially for those of us navigating gluten restrictions! Yes, you absolutely can. Like I mentioned earlier when discussing ingredient swaps, if you need to make these entirely gluten-free, just swap the 3/4 cup of AP flour for a good quality 1:1 gluten-free baking blend. Make sure it already contains a binder like xanthan gum, because that helps keep things together when we bake the fudgy base. If you use a blend without it, you might need to add about 1/4 teaspoon of xanthan gum yourself. It works like a charm and keeps the texture spot on!
Is the chilling time absolutely necessary for these Chocolate Mousse Brownies?
Oh, if you think you can skip that 60 minutes of chilling time, I have to stop you right there! That chilling time isn’t just a suggestion; it’s crucial for the structure of the mousse layer. Remember, the mousse is essentially just whipped, stabilized cream holding melted chocolate.
If you try to slice it while it’s warm, the mousse will just smear everywhere, and your beautiful squares will turn into a giant chocolate puddle. Chilling solidifies that rich topping so you can use a hot knife to get those sharp, clean edges. It makes all the difference in presentation!
If you need to get in touch with me about recipe adjustments or anything else, you know I love hearing from my readers! Just head over to my contact page.
Estimated Nutritional Snapshot
Now, let’s be real for a second. When a dessert is this gloriously rich—combining a dense fudgy brownie with a light, airy mousse—it’s not exactly going to be a light snack! These **Chocolate Mousse Brownies** are pure indulgence, designed for those special moments when you just deserve something decadent.
Based on the ingredients in the recipe and dividing everything into 9 squares, here is a generous estimate of what you’re looking at per serving. Take this as a general guide, because the exact type of chocolate or butter you use can shift the numbers slightly.
- Calories: Roughly 380 – 420 kcal
- Total Fat: About 24g – 27g
- Protein: Around 4g – 5g
- Total Carbohydrates: Approximately 40g – 45g
I always tell people to think of this as a beautiful treat, not an everyday affair! We aren’t optimizing for low-calorie here; we are optimizing for maximum chocolate joy. If you’re worried about substitutions affecting nutrition, I always recommend plugging your primary ingredients into your favorite tracking apps, but for standard baking ingredients, these numbers should give you a solid ballpark idea of the delight you’re about to enjoy!
Chocolate Mousse Brownies
Ingredients
Equipment
Method
- Preheat your oven to 350 degrees F. Line a 9×9 inch square baking pan with foil, letting the foil extend over the edges. Spray the foil with cooking spray, then set the pan aside.
- In a large bowl, mix the melted butter and sugar until the mixture is smooth. Add the eggs one at a time, stirring well after each addition, then stir in the vanilla. Finally, mix in the cocoa powder, salt, and flour until you have a soft batter.
- Pour the batter into the prepared pan and spread it into an even layer. Bake for 22 to 25 minutes, or until a toothpick inserted near the center comes out clean or with moist crumbs. Let the brownies cool completely.
- To make the mousse, combine the miniature marshmallows, chopped chocolate bar, and milk in a large saucepan over LOW heat. Stir often to melt the ingredients together. Once melted and smooth, remove from heat and let it cool completely, which takes about 15 to 20 minutes.
- After the chocolate mixture has cooled, whip the heavy whipping cream in a stand mixer until stiff peaks form. Fold the cooled chocolate mixture into the whipped cream to combine. Spread this mousse over the cooled brownies in an even layer. Refrigerate for at least 1 hour for the mousse to set.
- Drizzle with chocolate ganache just before serving, if you choose. Store any leftovers in the refrigerator.
Notes
Tried this recipe?
Let us know how it was!
Gluten-Free Chef & Latin Cuisine Innovation Specialist
My youngest son’s celiac diagnosis at four changed everything. Suddenly, all those traditional Brazilian and Portuguese recipes from my avó needed to be completely reimagined without losing their soul.
After graduating from Johnson & Wales and working Miami’s Latin fusion scene, my son’s diagnosis became my calling. How do you make gluten-free empanadas that taste like childhood? Over eight years, I’ve developed 320+ gluten-free recipes celebrating authentic Latin flavors using cassava flour and plantain alternatives.
My gluten-free empanada recipe won “Best Appetizer” at the 2023 Miami Gluten-Free Food Festival. I ran “Sabores Sin Gluten,” a catering business serving Miami’s Latino community—quinceañeras, family gatherings, all the celebrations that matter.
Food is culture, and everyone deserves to experience the joy of sharing traditional family meals, regardless of dietary restrictions.