Listen, I get it. Meal prepping is supposed to save time, but sometimes the flavor just vanishes by Wednesday, right? Especially with chicken wings! I spent ages looking for Chicken Wings Recipes Meal Prep That Actually Tastes Great, and honestly, most fell flat or turned into sad, soggy piles.
That all changed when my youngest son was diagnosed with celiac disease, right before our big annual game day party. The thought of him missing out on our favorite sticky wings broke my heart. So, I dove into the kitchen, determined to craft a recipe that was both perfectly crispy and reliably gluten-free.
This method is my secret weapon now. These wings stay flavorful all week long, and everyone—celiac or not—devours them. We’re talking real, honest-to-goodness wings you’ll look forward to eating come Thursday lunch!
Why This is the Best of Chicken Wings Recipes Meal Prep That Actually Tastes Great
I know you’ve tried meal prepping other wing recipes and ended up with freezer-burned sadness. Not here! These results are superior because the cooking method seals the deal perfectly for future meals. It’s all about robust flavor that doesn’t quit. If you want to try another favorite of mine, check out this Cajun Dry Rub Chicken Wings Recipe for variety!
- The dual-step process ensures you get a fantastic result that microwaves or reheats beautifully, unlike thin, flimsy wings.
- You can easily switch out ingredients to keep things interesting when you prep a big batch.
- We use simple flour coating that makes it super easy to adapt this recipe to be completely gluten-free—no complicated substitutes needed!
Flavor That Lasts All Week
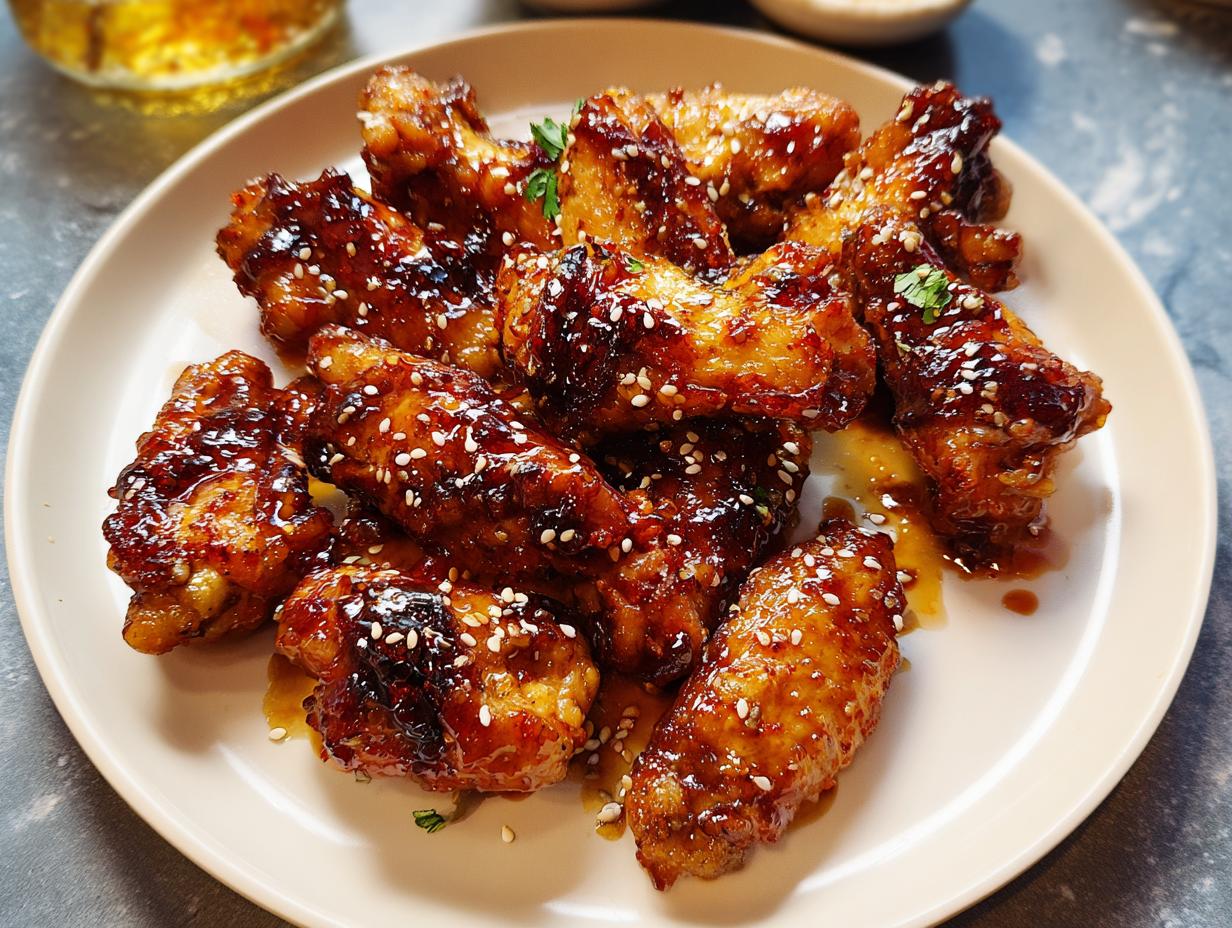
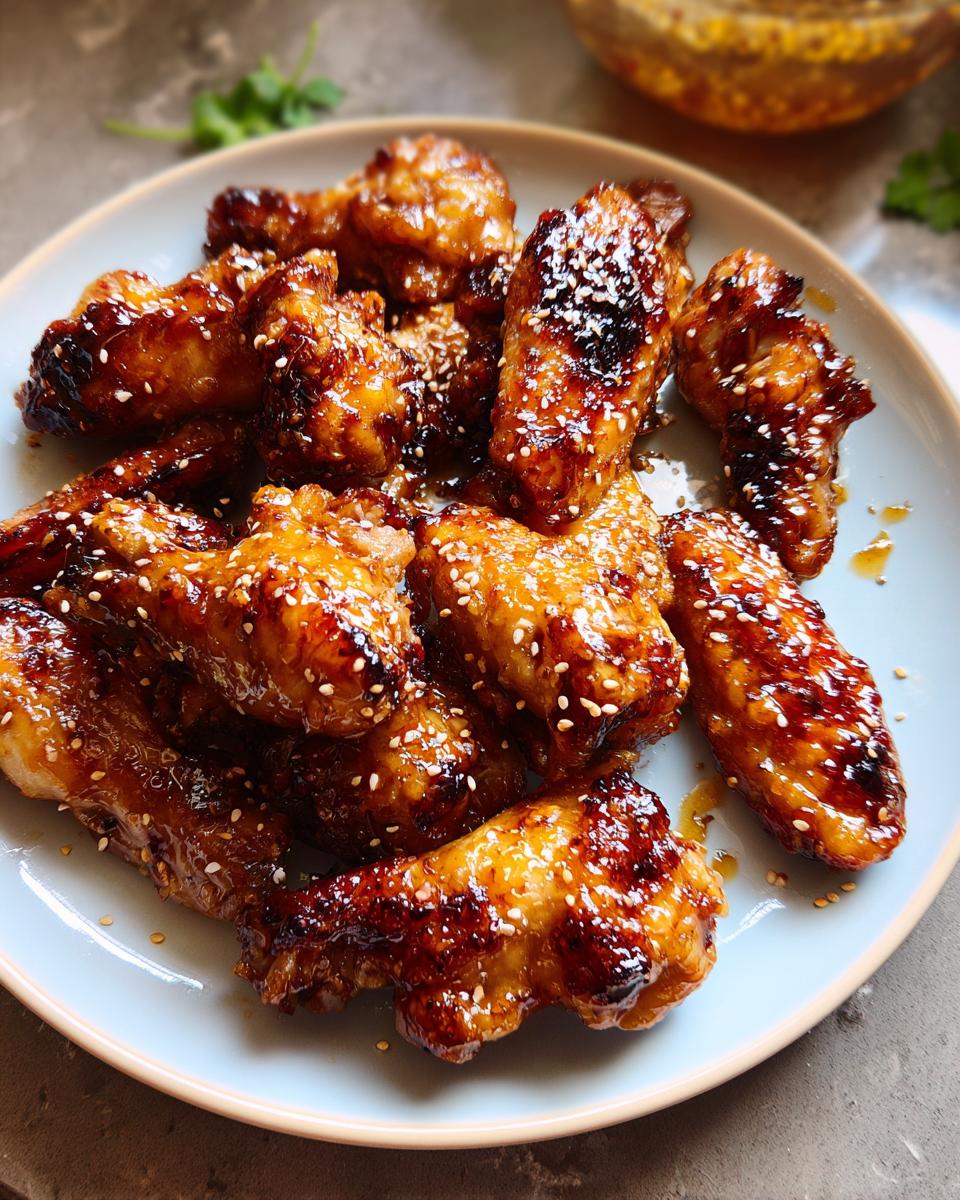
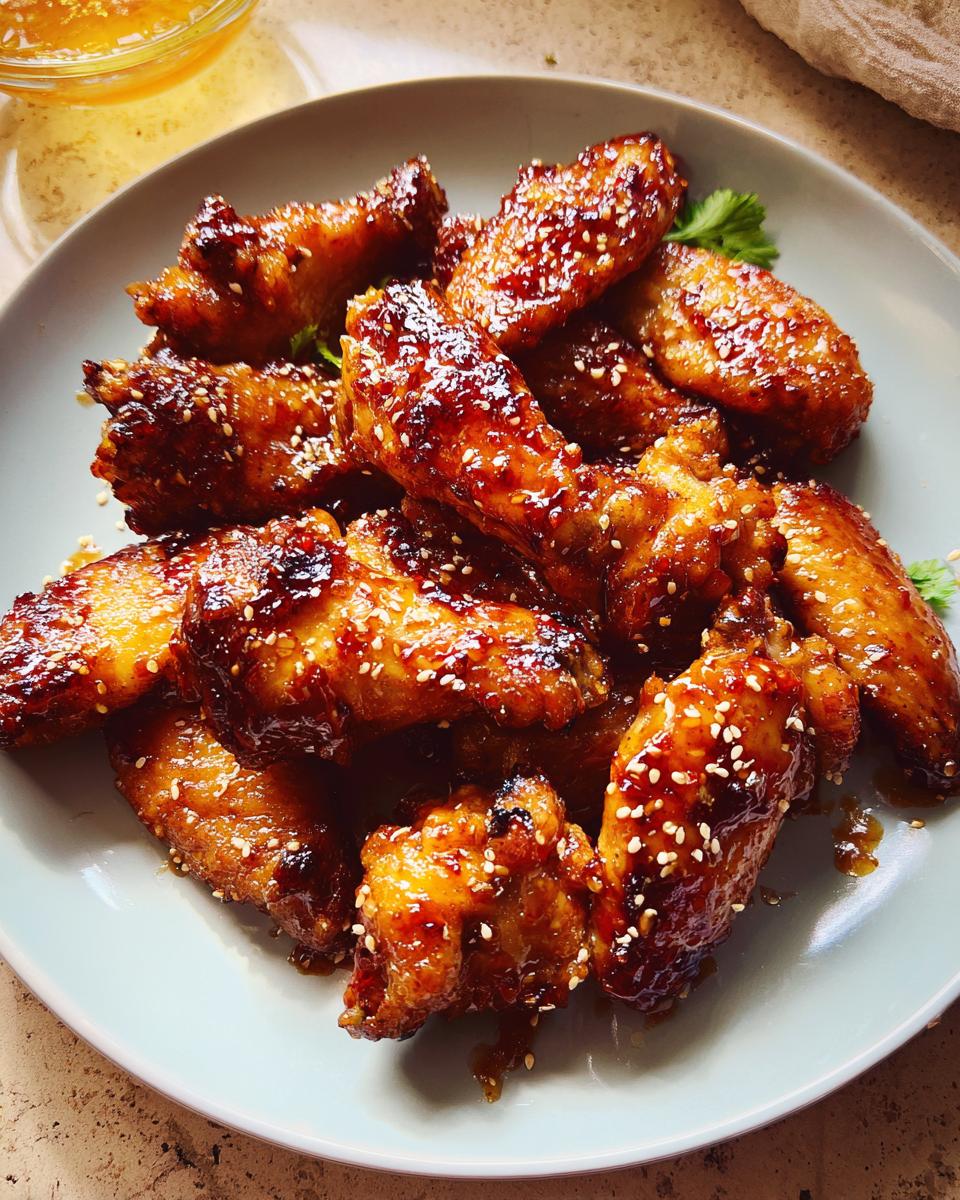
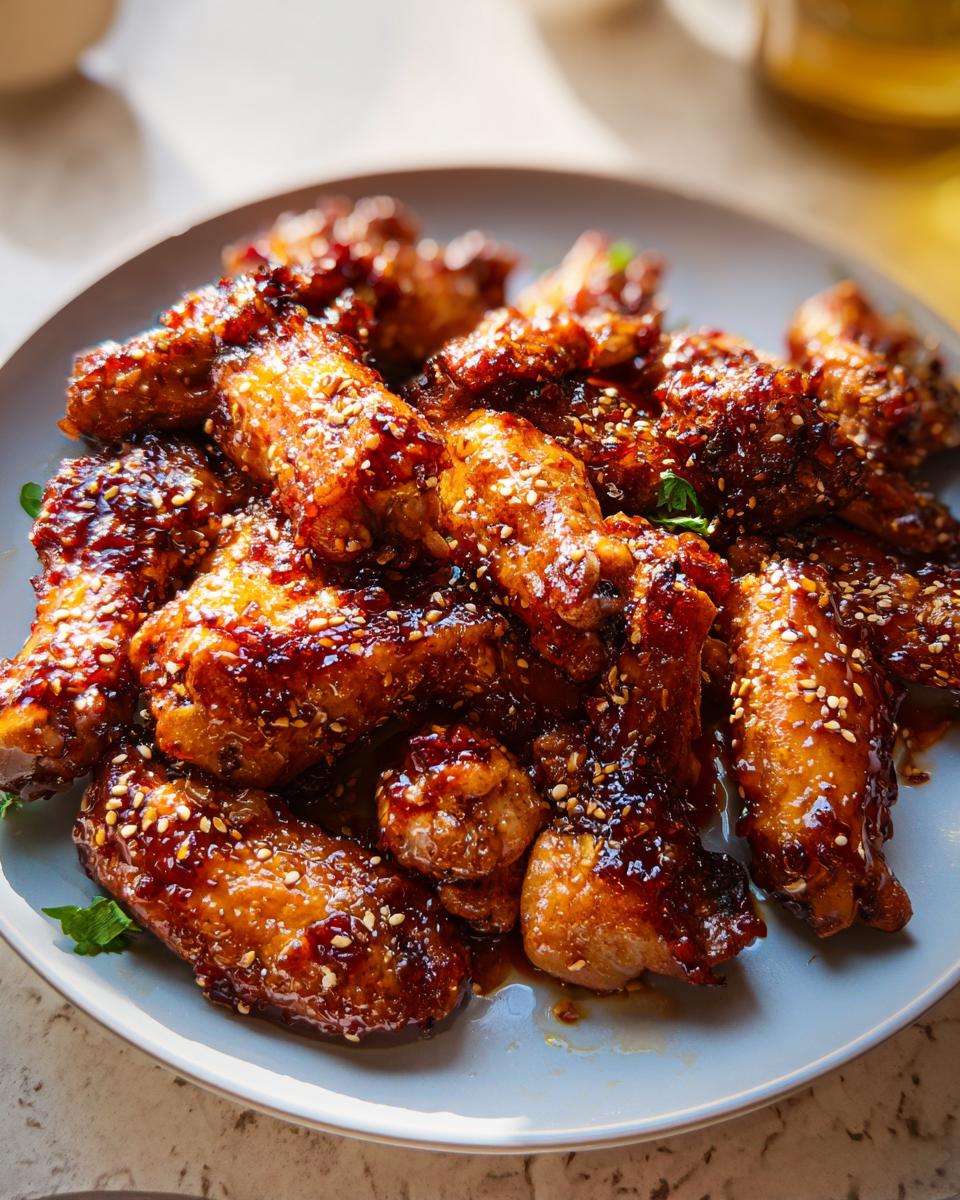
We bake them bare first, then sauce them right before cooling them down for storage. This locks the savory, honey-garlic goodness inside the meat instead of having it evaporate or turn gummy in the fridge. You get that fresh-tasting glaze every time you reheat.
Crispy Texture Maintained
That flour coating isn’t just for looks, trust me! It creates a barrier against moisture during storage. When you bake them again or hit them with the broiler, that flaky coating gives you that essential satisfying crunch that separates good wings from great, meal-prepped wings.
Gathering Ingredients for Chicken Wings Recipes Meal Prep That Actually Tastes Great
Okay, getting the right stuff is half the battle when you want great chicken wings that actually hold up to fridge storage. I’ve broken down exactly what you need for the wings themselves and that incredible honey-garlic glaze. Remember, precision matters here for that perfect crisp finish!
If you want to check out a different flavor profile while you’re gathering supplies, this archive of other wing recipes might inspire your next batch.
For the Chicken Wings Coating
We keep the coating simple so the flavor of the sauce shines through later. Just make sure you have about 2.5 pounds of wings handy!
- 2.5 Pounds Chicken Wings (that’s roughly two dozen pieces, depending on how your butcher cuts them).
- 1/4 Cup Flour, or if you’re keeping it gluten-free like me, use your GF flour blend!
- Sea Salt and Black Pepper, seasoned generously to taste.
- Olive Oil or Avocado Oil Spray—you’ll need just enough to help that flour stick.
For the Flavorful Sauce
This sauce is where the magic lives! It’s sweet, garlicky, and has just the right zing. For my dietary needs, I always swap the soy sauce for coconut aminos. You might not even notice the difference, but it keeps the whole dish safe for my son.
- 1/2 Cup Honey.
- 1/3 Cup Soy Sauce (or Coconut Aminos for gluten-free).
- 4 Cloves of Garlic, mashed really well—we want the flavor, not big chunks!
- 2 Tablespoons fresh Ginger, grated finely.
- 1 Tablespoon Tapioca Flour, Arrowroot Starch, or Corn Starch to help it thicken up nicely.
- 1/2 Teaspoon Crushed Red Pepper Flakes—adjust this if you like it spicier!
Optional Garnishes
These sweet sesame seeds are totally up to you, but they add a nice visual pop for your meal prep containers, making your lunch exciting!
- 1 Tablespoon Sesame Seeds.
Step-by-Step Instructions for Perfect Chicken Wings Recipes Meal Prep That Actually Tastes Great
Now for the fun part! This process might seem like many small steps, but honestly, it flows really quickly once you get going. You’ll need about an hour total, but most of that is just hands-off baking time. You can check out this fantastic guide on how to make crispy oven-baked chicken wings for inspiration, though this method is optimized for meal prep!
Preparing and Coating the Chicken
First things first: crank up that oven to a hot 425 F. You absolutely have to dry your chicken wings off with paper towels. I mean, really dry! Any surface moisture is the enemy of crispy skin. Once they are bone-dry, toss them in a bowl with your flour, salt, and pepper. Make sure every single wing is coated before you spray them lightly with oil.
Baking for Maximum Crispness
Arrange those floured beauties on a baking sheet—line it with foil and parchment if you want zero cleanup! Pop them in the hot oven for 30 minutes. When time’s up, flip every single wing over and bake for another 20 minutes. This is where the magic starts to happen for that crispy texture. For another great take on baked wings, see what I love over at Kalejunkie!
Here’s the pro tip for that perfect final look: turn the broiler on high for just 2 minutes when the time is up. You have to watch these like a hawk—they go from golden brown to burnt in seconds! Pull them out right when they look beautifully browned from the broiler.
Making the Sticky Glaze
While the wings are finishing up their bake, get that sauce going right on the stove. Throw the honey, soy sauce (or coconut aminos!), mashed garlic, grated ginger, starch, and pepper flakes into a small saucepan. Heat it over medium heat, stirring constantly for about 6 or 7 minutes. That little bit of starch is going to help the sauce cling gorgeously; it should look noticeably thicker when it’s done and ready to coat our wings.
Saucing and Finishing
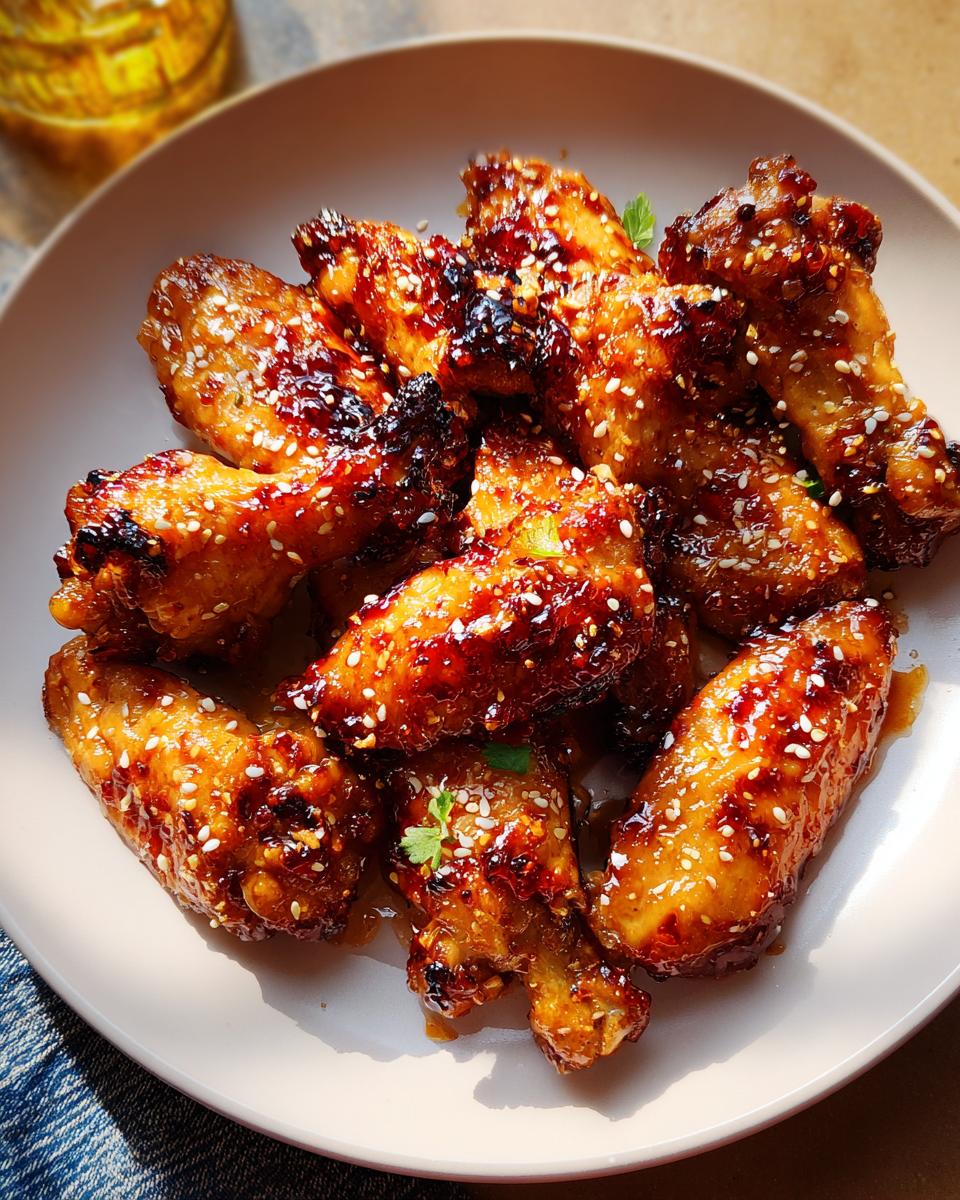
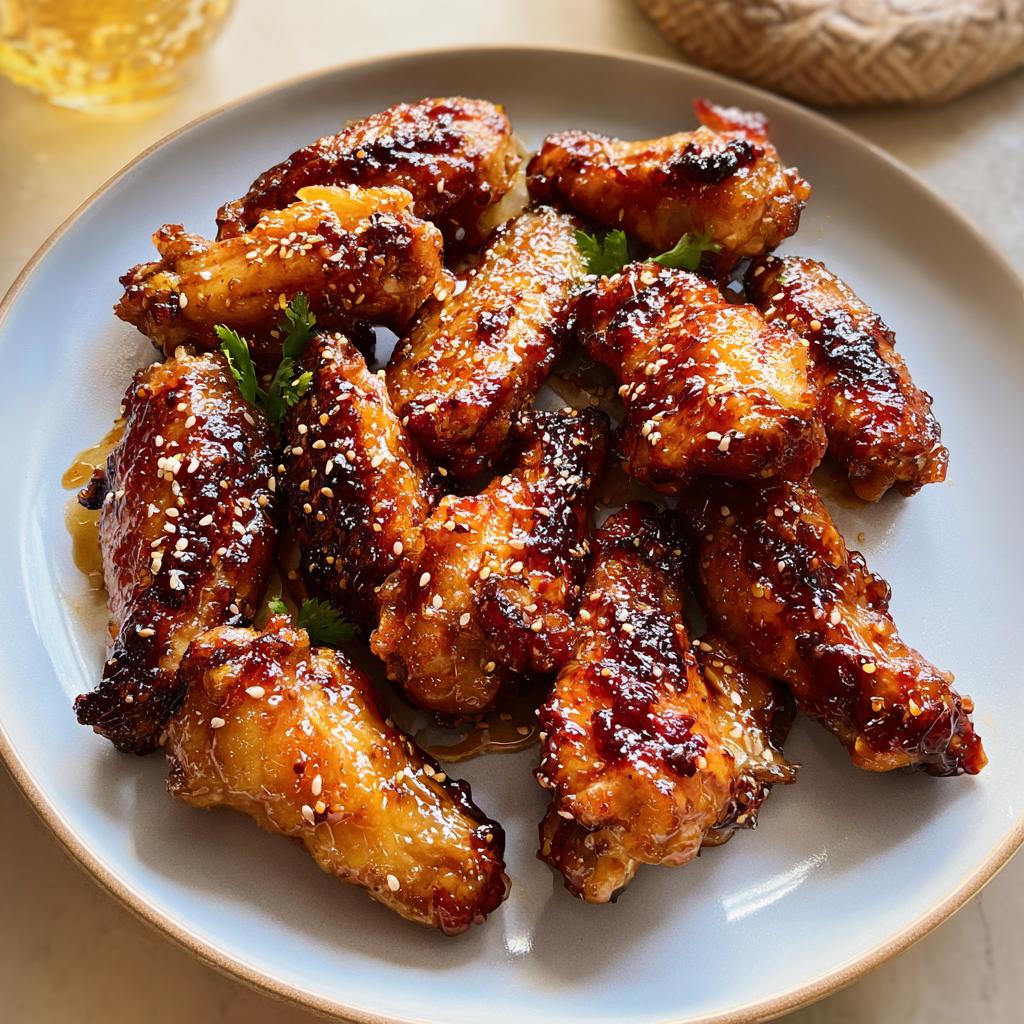
As soon as the wings come out of that brief broiler session, get them into a large bowl—don’t let them cool too much! Pour all that warm, sticky glaze right over the top. Grab your tongs—your hands might get sticky—and toss them until every surface of every wing is glistening and coated beautifully. Sprinkle those optional sesame seeds on top, and boom! Perfectly prepped wings are ready to cool down for storage.
Step-by-Step Instructions for Perfect Chicken Wings Recipes Meal Prep That Actually Tastes Great
Now for the fun part! This process might seem like many small steps, but honestly, it flows really quickly once you get going. You’ll need about an hour total, but most of that is just hands-off baking time. You can check out this fantastic guide on how to make crispy oven-baked chicken wings for inspiration, though this method is optimized for meal prep!
Preparing and Coating the Chicken
First things first: crank up that oven to a hot 425 F. You absolutely have to dry your chicken wings off with paper towels. I mean, really dry! Any surface moisture is the enemy of crispy skin.
Once they are bone-dry, toss them in a bowl with your flour, salt, and pepper. Make sure every single wing is coated before you spray them lightly with oil. That light coating is what helps everything adhere beautifully.
Baking for Maximum Crispness
Arrange those floured beauties on a baking sheet—line it with foil and parchment if you want zero cleanup! Pop them in the hot oven for 30 minutes. When time’s up, flip every single wing over and bake for another 20 minutes. This is where the magic starts to happen for that crispy texture.
Here’s the pro tip for that perfect final look: turn the broiler on high for just 2 minutes when the time is up. You have to watch these like a hawk—they go from golden brown to burnt in seconds! Pull them out right when they look beautifully browned from the broiler. For another great take on baked wings, see what I love over at Kalejunkie!
Making the Sticky Glaze
While the wings are finishing up their bake, get that sauce going right on the stove. Throw the honey, soy sauce (or coconut aminos!), mashed garlic, grated ginger, starch, and pepper flakes into a small saucepan. Heat it over medium heat, stirring constantly for about 6 or 7 minutes.
That little bit of starch is going to help the sauce cling gorgeously; it should look noticeably thicker and glossy when it’s done and ready to coat our wings.
Saucing and Finishing
As soon as the wings come out of that brief broiler session, get them into a large bowl—don’t let them cool too much! Pour all that warm, sticky glaze right over the top.
Grab your tongs—your hands might get sticky—and toss them until every surface of every wing is glistening and coated beautifully. Sprinkle those optional sesame seeds on top, and boom! Perfectly prepped wings are ready to cool down for storage.
Tips for Success in Your Chicken Wings Recipes Meal Prep That Actually Tastes Great
We want these wings to taste like they just came out of the oven when you pull them out of the fridge four days later, right? That takes a little more than just following the steps; it takes a few insider tricks that seasoned cooks know. It’s all about managing moisture ahead of time!
I’ve learned a lot through all my experimenting, especially when trying to make sure my gluten-free versions were just as good as the original, which you can see more of in my easy chicken recipes inspiration section.
The Secret to Crispy Wings Every Time
I can’t stress this enough: you have to start with bone-dry wings. If you can see any moisture, wipe it off with paper towels. No excuses! That moisture steams in the oven, and steaming is the enemy of crispness. You want dry surfaces so that flour coating can actually adhere and crisp up.
Now, here’s a trick I sometimes use if I’m having a really humid week: add about a teaspoon of baking powder to your flour mixture. It helps dry out the skin even more, giving you an almost unbelievable crunch once they’re baked. It’s not in the main recipe because we don’t always need the extra help, but it’s my secret weapon for really tough challenges!
Sauce Application Timing
This is crucial for meal prep longevity. You have two options, and you need to decide before you even start storing them. Option one is what I did for this recipe: sauce them all right after they come out of the oven. This is great if you plan to eat them within two or three days, as the sauce helps keep them moist as they sit.
However, for longer meal prep—say, four or five days—I sometimes keep about a third of the wings plain (just baked and cooled). Then, I store the sauce in a separate small container. When I reheat the plain wings, I toss them with a small amount of warm sauce. That way, they taste incredibly fresh because you haven’t had the sauce sitting on the skin oxidizing in the fridge, which can sometimes make the coating a little soft.
Storage and Reheating for Meal Prepped Chicken Wings Recipes Meal Prep That Actually Tastes Great
Storing these beauties properly is key to enjoying them later. I always use sturdy, airtight containers for my batches. You can safely keep these flavorful chicken wings in the fridge for up to four days. Trust me on the reheating method, though—skip the microwave if you can!
If you want that original crunch back, hit them quickly in a 375 F oven or, even better, pop them into your air fryer for about five minutes. That blast of dry heat brings back that great texture we worked so hard for. If you’re looking for more ways to organize your cooking schedule, check out some tips on healthy meal prep inspiration!
Variations on These Tasty Chicken Wings Recipes For Meal Prep
Once you nail this base recipe—the one that makes up our special Chicken Wings Recipes Meal Prep That Actually Tastes Great—you absolutely have to start playing around with the flavor profiles. Meal prep is about efficiency, but efficiency doesn’t mean boring food! I always try to prep two different flavor coatings for the week so my family doesn’t get tired of the honey-garlic by Wednesday.
If you are looking for another fantastic honey-based wing recipe, you should absolutely bookmark this Honey BBQ Grilled Chicken Wings Recipe for summer grilling days! But for meal prep sticking to the oven method, here are my favorite easy swaps.
Spice Level Adjustments
The recipe calls for half a teaspoon of red pepper flakes, which gives a nice, gentle warmth—perfect for picky eaters. If you want these wings to really sing, or if you’re battling a cold and need that sinus clear, don’t be shy! Bump that up to a full teaspoon or even a tablespoon if you’re brave.
On the flip side, if you’re making these for a super sensitive crowd or kids who hate heat, just leave the crushed red pepper flakes out entirely. You’ll still get amazing flavor from the ginger and garlic. They won’t be spicy at all, but they keep that sticky glaze texture.
Alternative Glazes
My favorite variation for meal prep involves skipping the wet sauce entirely for one batch. Instead of making the honey glaze, just replace the sauce ingredients with 3 tablespoons of smoked paprika, 1 tablespoon of onion powder, 1 tablespoon of brown sugar, and 1 teaspoon of garlic powder.
Toss the baked wings in a large bowl with that dry rub *right after* they come out of the oven and before you sauce the honey batch. This dry-rubbed version reheats amazingly well and tends to stay a bit crispier than the wet sauce version, which is a huge win for multi-day meal prep!
Serving Suggestions for Game Day or Weeknight Chicken Wings Recipes Meal Prep That Actually Tastes Great
Even the best, meatiest, most flavorful chicken wings need a good sidekick, right? When you’re doing meal prep, you want sides that are just as easy to store and reheat as the wings themselves. These wings are perfect for those big game day spreads, but they are my go-to for quick weeknight dinners too when I don’t want to cook from scratch!
Keep it simple so you can focus on enjoying your victory (or just surviving Tuesday!). A classic pairing always wins, but I also love throwing in something fresh to cut through that incredible sticky sweetness of the honey glaze.
For a side that reheats nearly as well as the wings, you absolutely need to try these Roasted Ranch Seasoned Potato Wedges. They are fantastic!
Here are a few ideas for what to serve alongside your perfectly prepped wings:
- Quick & Crunchy Celery and Carrot Sticks: The simplest thing in the world! They are great cold and add a necessary clean snap to balance the richness when you are enjoying these on game day.
- Simple Rice Base: Cook a big batch of white rice or brown rice at the beginning of the week. When you reheat your wings, put a handful of rice on the plate first, and then spoon the saucy wings over it. It stretches the meal, so you need fewer wings per serving!
- Quick Three-Bean Salad: If you like a little tang, a simple canned bean salad (canned kidney beans, chickpeas, green beans tossed with a quick cider vinegar dressing) keeps well in the fridge for days and requires zero reheating.
- Steamed Green Veggies: Broccoli or green beans tossed with a little lemon juice and salt straight out of the steamer basket are fast, healthy, and don’t interfere with the wing’s flavor profile at all.
Honestly, whether it’s a massive crowd for the championship or just me needing a satisfying lunch, a big container of these wings with some ranch-seasoned potatoes on the side makes me feel like I won the week!
Frequently Asked Questions About Chicken Wings Recipes Meal Prep
FAQ time! I always get the same questions when people try this recipe for the first time, especially about keeping that glorious crunch alive after storage. We’re talking about the best chicken wings recipes here, so we want every bite to be perfect, whether it’s for a Tuesday lunch or a big game day event. You can find more general guidance on my other chicken recipes if you need more ideas!
Can I make these wings in an air fryer instead of the oven?
Oh yes, absolutely! I love my air fryer for getting things extra crispy. You skip the broiler step entirely. Just bake those coated wings at 400 F for about 20–22 minutes, flipping them halfway through. Because the air fryer circulates heat so intensely, they crisp up beautifully and fast—perfect for a quick reheat!
How long do these *chicken wings* stay good for meal prep?
If you refrigerate them in an airtight container right after cooling from the initial sauce toss, they are perfectly flavorful and safe to eat for up to four days. Honestly, they taste best between day one and day three, but four days is my limit for the sauce adherence to stay spot-on.
Is the flour coating truly necessary for flavor?
That coating is less about the flavor of the flour itself, and more about structure, honey! It serves two big jobs: first, it helps create that delightful crispy texture we are chasing, and second, it acts like glue. It gives the sticky honey-garlic glaze something wonderful to cling to, ensuring the flavor stays right on the wing when you reheat it.
Estimated Nutritional Data for This Meal Prep Recipe
Alright, let’s talk numbers! When you’re doing serious meal prep, you have to keep track of what you’re eating, even when the food tastes this ridiculously good. I ran these ingredients through one of those online trackers just to give us a ballpark idea of what we’re looking at per serving. Remember, we are making six generous servings from this batch.
If you’re trying to fit these into a specific diet plan, you can dive deeper into general nutrition on my main recipe index page, but take these figures with a grain of salt!
Since we’re using honey and oil, these are decadent, but I think the protein hit makes them totally worthwhile for a busy week!
- Calories: Estimated around 450-500 per serving
- Fat: Roughly 22-25 grams (thanks to the chicken skin and oil!)
- Protein: High! Around 35-40 grams (a serious boost for your workday lunch)
- Carbohydrates: About 30 grams (mostly coming from that delicious honey glaze)
Seriously, this is just an estimate. If you use less honey, or swap the oil for a lighter spray, you’ll shift those numbers around. But for a big, satisfying portion of flavor-packed wings, I think those numbers are pretty fantastic for a make-ahead meal!
Share Your Flavorful Meal Prep Creations
Okay, my friends, that’s it! You now have the blueprint for the absolute best Chicken Wings Recipes Meal Prep That Actually Tastes Great in your arsenal. I’m so excited for you to get these into your oven this week. I truly hope they bring the same joy and easy lunches to your family that they bring to mine!
I live for hearing about your kitchen adventures. Did you manage to keep them super crispy upon reheating? Did you try that dry rub variation I mentioned, or stick with the honey garlic classics? Don’t be shy!
Please take a minute right after you’ve taste-tested your first reheated batch—I’m begging you—to leave a star rating for the recipe right down below in the comments section. It genuinely helps me know what’s working for you folks!
And hey, if you experimented while making them gluten-free, I especially want to hear what worked best in your kitchen! Use the contact form if you have deep questions, or better yet, snap a picture and tag me on social media so I can cheer you on. Let’s keep sharing flavor one meal prep container at a time. You can always reach out via my contact page!
Chicken Wings Recipes Meal Prep That Actually Tastes Great
Ingredients
Equipment
Method
- Preheat your oven to 425 F.
- Dry the chicken wings well using a paper towel. This step helps make them crispy.
- Add the dried wings to a bowl with the flour, sea salt, and black pepper. Toss each wing until it is fully coated in the flour mixture.
- Transfer the coated wings to a baking sheet lined with foil or parchment paper. You can layer foil first, then parchment paper to keep the baking sheets clean. You might need more than one baking sheet depending on the size of your wings.
- Spray the coated wings with oil and bake them in the oven for 30 minutes. Flip the wings and bake them for an additional 20 minutes.
- While the wings bake, prepare the sauce. Add all sauce ingredients to a small saucepan or pot on the stove.
- Heat the sauce mixture over medium heat, stirring for 6-7 minutes until the sauce thickens. Remove the sauce from the heat and set it aside until the wings finish cooking.
- After the 20 minutes of the second bake time are complete, turn the broiler on for 2 minutes to give the wings a brown color. Watch them closely to prevent burning.
- Remove the wings from the oven when they are done.
- Pour the sauce over the wings and use tongs or your hands to coat them completely in the sauce.
- Top with sesame seeds if you want them, then serve.
Notes
Tried this recipe?
Let us know how it was!
Gluten-Free Chef & Latin Cuisine Innovation Specialist
My youngest son’s celiac diagnosis at four changed everything. Suddenly, all those traditional Brazilian and Portuguese recipes from my avó needed to be completely reimagined without losing their soul.
After graduating from Johnson & Wales and working Miami’s Latin fusion scene, my son’s diagnosis became my calling. How do you make gluten-free empanadas that taste like childhood? Over eight years, I’ve developed 320+ gluten-free recipes celebrating authentic Latin flavors using cassava flour and plantain alternatives.
My gluten-free empanada recipe won “Best Appetizer” at the 2023 Miami Gluten-Free Food Festival. I ran “Sabores Sin Gluten,” a catering business serving Miami’s Latino community—quinceañeras, family gatherings, all the celebrations that matter.
Food is culture, and everyone deserves to experience the joy of sharing traditional family meals, regardless of dietary restrictions.