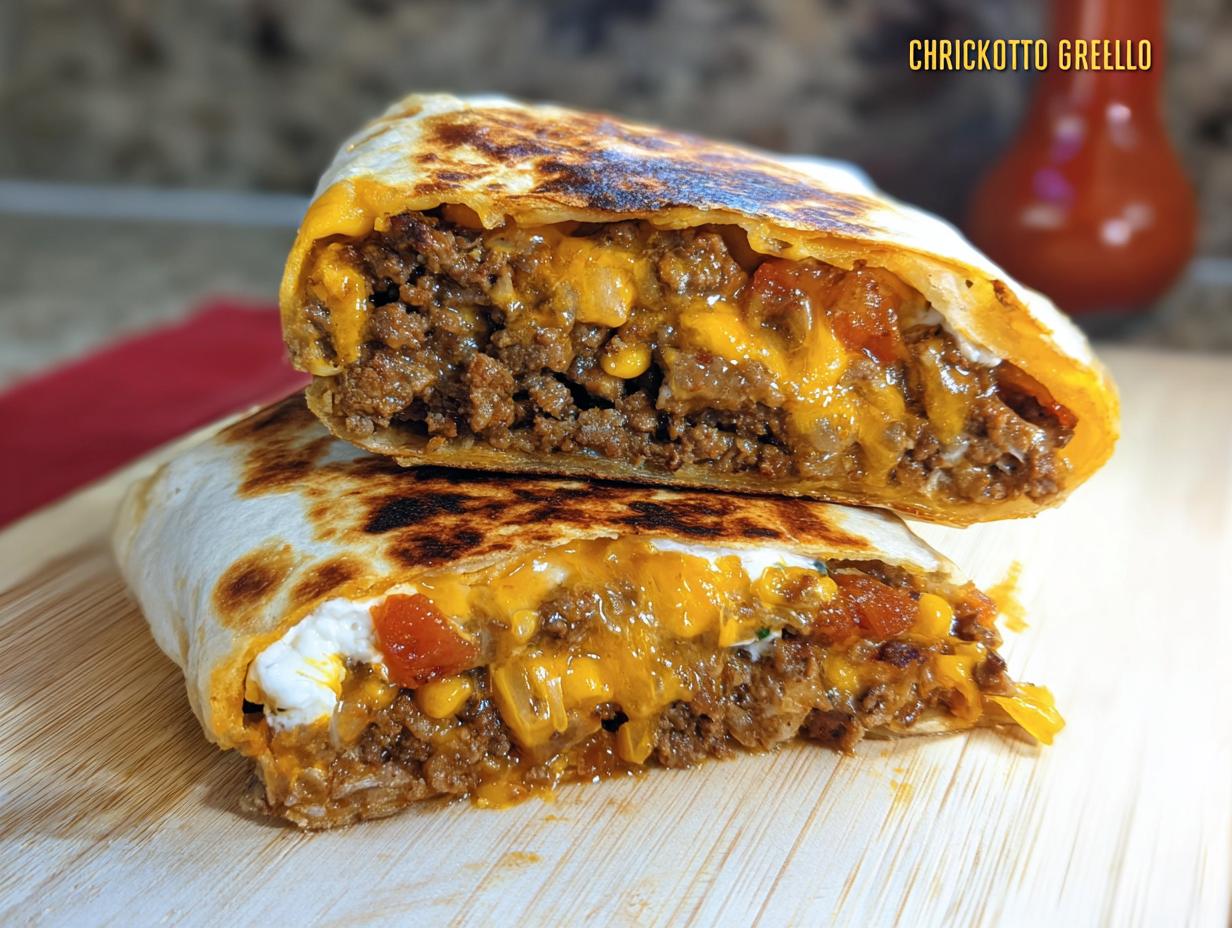
You know how sometimes you just crave that specific fast-food magic, that perfect handheld crunch, but your dietary needs just won’t allow it? Well, I tackled that problem head-on for my family! This recipe is my quick, satisfying, and completely gluten-free version of that wildly popular item, the Chicken Crunch Wrap. Trust me, you won’t miss a thing.
I remember the day I first made this for my son after his celiac diagnosis. He was having such a hard time feeling left out at mealtimes. It was a Saturday afternoon, and I decided to just go for it—seasoning chicken, piling on the fresh toppings, and sealing it up tight in a gluten-free tortilla. When I handed him that crisp, warm parcel, his eyes just lit up! That first bite was huge for us; he felt totally included. That’s why this recipe is so special to our kitchen.
Why This Gluten-Free Chicken Crunch Wrap Recipe Works (Total Time: 35 Minutes)
Look, nobody has time for complicated dinners during the week, right? That’s why I love this wrap so much. It genuinely comes together in about 35 minutes total, and you get four huge, satisfying wraps—perfect for that busy family lunch or a quick dinner spread. We’re focusing on getting maximum flavor with minimal fuss.
Since we’re already in that zone, I wanted to share some prep tips over on my other post about easy meal prep and great-tasting dinners, but for now, let’s look at what makes this specific recipe a winner.
Key Benefits of Our Chicken Crunch Wrap
- It sails through the dietary minefield—totally safe and delicious for our gluten-free eaters!
- Speed is key; you’re looking at less than 40 minutes from start to that first crispy bite.
- It packs perfectly, which means leftovers are great for lunchboxes the next day.
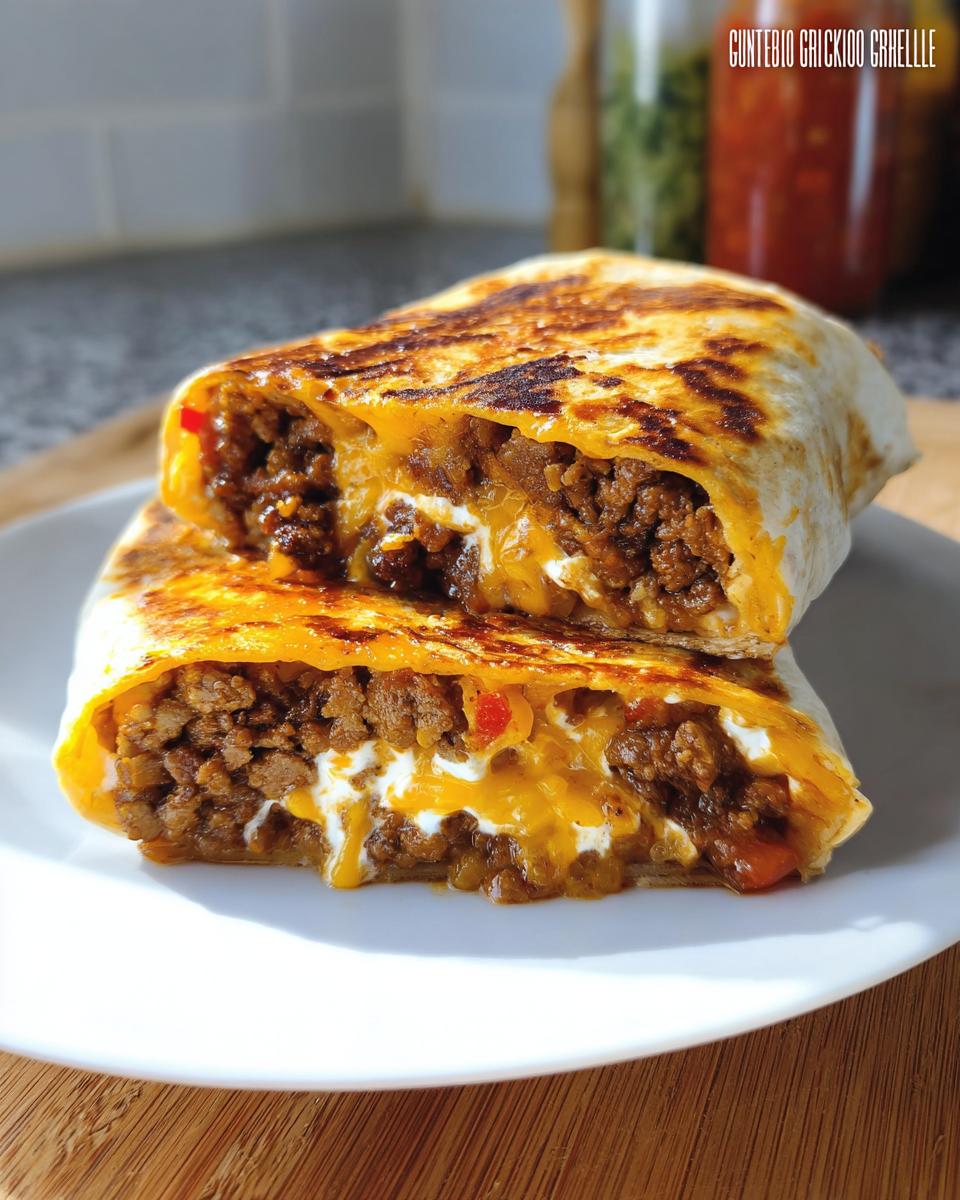
- The texture payoff is huge—that crispy grilled exterior and creamy interior are everything.
Essential Ingredients for Your Chicken Crunch Wrap
Okay, getting the right stuff is half the battle, right? Since this is built around that amazing flavor profile, we need quality components. Don’t worry if you prefer chicken over beef for your Chicken Crunch Wrap; just use ground chicken seasoned the same way!
For the Filling Components
- One pound of your meat—I used ground beef here, but seasoned ground chicken is fantastic too!
- One packet of your favorite taco seasoning, store-bought or homemade works fine.
- One cup of seasoned rice. I really recommend Spanish rice for that authentic flavor pop.
- One cup of a nice shredded cheese blend. Cheddar, Jack, and Mozzarella mixed together is my go-to.
- Half a cup of nacho cheese sauce. Heat this up slightly so it spreads nice and smooth.
- A quarter cup of that smoky chipotle sauce for a little kick.
- A small dollop of sour cream—reduced fat is totally acceptable here!
- And for the essential crunch? One cup of those glorious tortilla strips—the red crunchy ones are the best.
For Assembly of the Chicken Crunch Wrap
- Four large flour tortillas, this is crucial: you need the big burrito size, about 10 to 12 inches wide. Remember, we’re aiming for gluten-free, so grab those lovely GF versions!
- Two tablespoons of plain unsalted butter, just for grilling the outside until it’s golden and crispy.
Step-by-Step Instructions to Make the Chicken Crunch Wrap
This is where the magic happens, friends! Don’t be intimidated by the wrapping part; it’s actually super satisfying once you get the rhythm. We’re going to build this flavor bomb layer by layer. It all starts on the stovetop, so get your skillet heating up over medium heat now. If you’re looking for some great ideas on how that relates to overall meal planning, check out my post on easy meal prep for dinner!
Preparing the Flavorful Chicken Filling
We start by tossing that ground beef (or chicken!) into the hot skillet. You want it fully browned, and this is important: make sure that if you used beef, you drain off every drop of grease! Nobody wants a soggy wrap from extra fat. Once it’s well-drained, stir in the taco seasoning following the packet directions. Let that simmer just for a few minutes until the sauce thickens up around the meat—that concentrates the flavor beautifully.
Now, pull that skillet off the burner. We need to cool things down just a touch before adding our cheese. Stir in the cooked rice and half of your shredded cheese blend. Mix it all up until everything is hugging the meat mixture. That’s our base!
Assembling Your Perfect Chicken Crunch Wrap Layers
Time to build! Lay one of those big tortillas flat on a clean counter. See the center of the tortilla? We’re working in the middle third only. Start by smoothing the warm nacho cheese sauce right down that strip. On top of the cheese, layer down your fantastic meat and rice mixture. Sprinkle that remaining cheese blend right over the meat. Don’t go too close to the edges, or things get messy later!
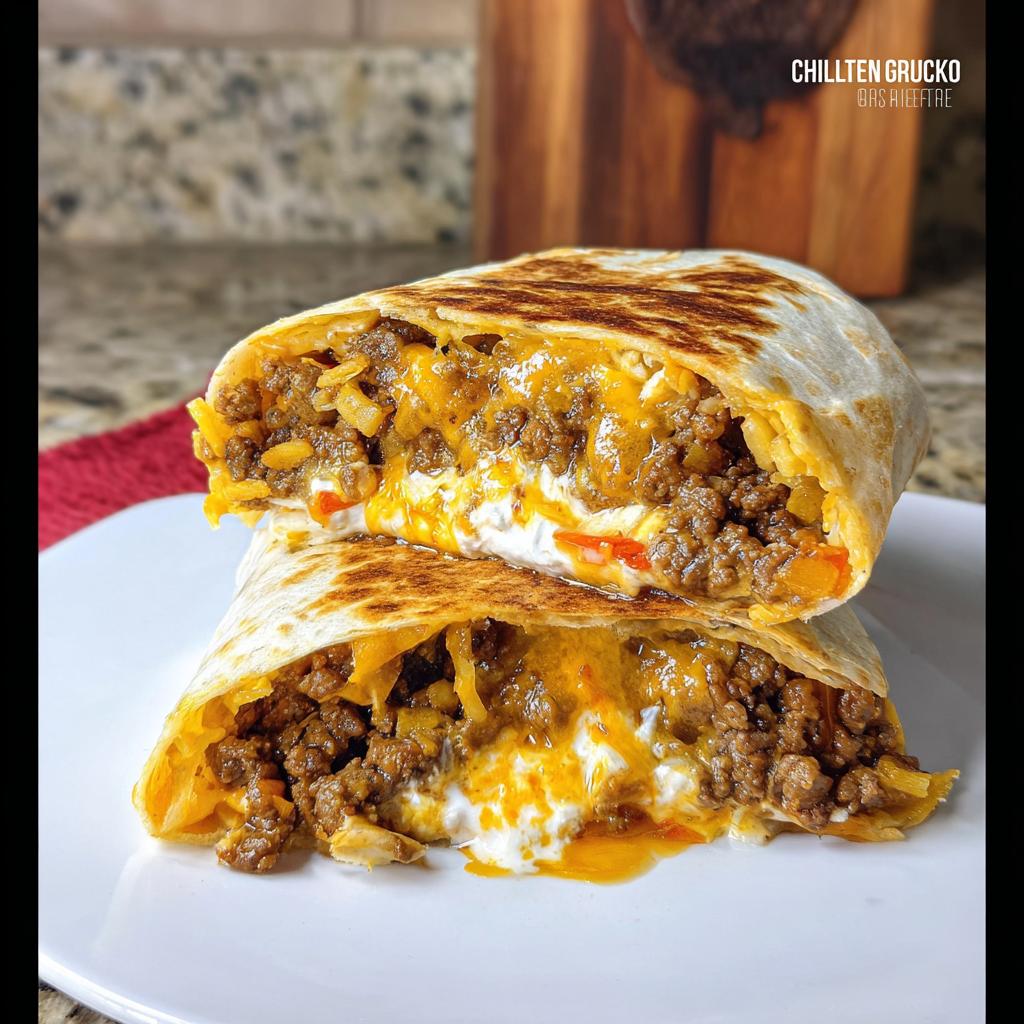
Next up are the texture and spice elements. Drizzle your sour cream, spoon on the chipotle sauce, and then—here comes the crunch!—sprinkle those tortilla strips right across the top of the layers. That crunch has to be in the middle so it stays protected while grilling.
Folding and Grilling the Chicken Crunch Wrap
This folding takes a little finesse, but you’ve got this. First, fold the left and right sides of the tortilla inward to meet in the middle over the filling. Then, take the bottom edge, fold it up over the center pile, and tuck it in tight. Now, roll the whole package upward really snugly until you’ve created that familiar compact square shape. You want it tight!
Melt your butter in that same skillet—medium heat is perfect now. Place the whole wrap seam-side down into the hot butter. Use your spatula to gently press down on it as it cooks for about two or three minutes per side until it’s golden brown and super crispy everywhere. Once it’s done, slice it in half right away with a sharp knife.
 You can check out a great tip for getting grilled sandwiches perfect over at this other site if you want more grilling wisdom!
Tips for the Best Ever Chicken Crunch Wrap
Okay, we made it through the main assembly, but I want to share a couple of tricks I learned the hard way. Getting that ultimate texture means paying attention to the final crush when you grill it. If you’re looking for more ways to jazz up your taco nights now that you’ve mastered this, check out my thoughts on restaurant-style taco Tuesday recipes!
Achieving Maximum Crunch in Your Chicken Crunch Wrap
The secret to the crunch isn’t just the tortilla strips inside; it’s the outside sizzle! Make sure your skillet is seriously hot before that butter goes in. You need that butter to foam up immediately when the wrap hits the pan. Also, don’t rush the press! Use your spatula—gently but firmly—to create real contact between the tortilla and the hot metal. If you try to cram too much filling in there, the center won’t heat through, and the outside won’t crisp up right. A snug wrap is a crispy wrap, trust me.
Ingredient Substitutions for Your Chicken Crunch Wrap
This recipe is super flexible, which I love for busy evenings. If you ran out of ground beef, just use seasoned ground chicken; it works beautifully since we’re using all those bold taco spices anyway. For the sauces, if chipotle isn’t your style, try a little drizzle of your favorite mild salsa or even some creamy avocado ranch for a different vibe. Sometimes I swap the sour cream for plain Greek yogurt just to cut a little fat, and honestly, you can’t even tell the difference in the final product!
Serving Suggestions for Your Chicken Crunch Wrap Meal
I always treat the Chicken Crunch Wrap like the main event because it’s so hearty, but every good main needs a little friend on the side, right? We want fresh, bright sides to cut through the richness of the cheese and meat. Honestly, a simple bowl of fresh sliced avocado with a squeeze of lime is perfection for a quick bite.
If you’re looking to bulk up the meal without adding tons of cooking time, try a side of simple black beans seasoned with cumin. Or, if you want something green and zingy, I’ve put together some fantastic ideas over in my beginner’s guide to veggie side dishes that go great with any sort of Tex-Mex dinner!
Storage and Reheating Instructions for Leftover Chicken Crunch Wrap
Sometimes we just can’t finish all four wraps, which is a dilemma, but easily solved! If you have any leftover Chicken Crunch Wrap, wrap them tightly in plastic wrap or foil before placing them in the fridge. They usually hold up well for about two or three days like that. You can find some great make-ahead tips, including how to store components separately, over on my post about make-ahead tips for easy dinners.
Now, about reheating—this is important to keep the texture! Microwaving these is a no-go; you’ll lose all that beautiful crispness immediately. I highly recommend dusting off your air fryer if you have one; 350 degrees for about 6 minutes is usually perfect to bring back that outside crunch. If you don’t have an air fryer, just pop it in a dry, medium-hot skillet for a couple of minutes per side until heated through!
Common Questions About Making the Chicken Crunch Wrap
I always get so many questions when folks first try this recipe! It’s a bit different because of the GF tortillas and all those layers, but once you nail the folding, you’re gold. I’ve collected the most common things I hear from readers, especially since we’re dealing with dietary restrictions now. Honestly, if you want more inspiration on how to spice up your weeknight tacos, check out my post on those taco Tuesday cravings!
What are the Calories In Chicken Crunch Wrap?
That’s a great question for anyone tracking things closely! Based on the general ingredients list I provided, our estimate lands right around 550 calories per wrap. Now, remember, this is an estimate! If you ditch the ground beef for leaner chicken and use a lighter cheese blend, that number is going to shift a little. But as a satisfying, full meal, I think that’s a fantastic number.
Can I use pre-cooked chicken for this Chicken Crunch Wrap?
Absolutely, you can totally use pre-cooked chicken! That cuts down on your cook time even more. If you’re using plain rotisserie chicken or leftover shredded pieces, my only suggestion is this: don’t skip the seasoning! Mix your shredded chicken right into the pan with a splash of water, heat it up, and stir in the taco seasoning packet so the flavor really clings to the meat before you assemble the wrap.
What are some easy Chicken Crunch Wrap Meal Ideas?
Since the wrap itself is such a rich, handheld bomb of goodness, easy is the way to go for sides! Think simple pairings for a complete quick dinner. I usually throw together some speedy guacamole and chips, or maybe a quick side of black beans topped with fresh cilantro. For something slightly healthier, a simple green salad with a bright citrus vinaigrette is perfect balance for four wraps!
Nutritional Estimates for This Chicken Crunch Wrap
So many of you ask about the numbers when you’re cooking for the family, and I totally get it! While I’m no nutritionist, I put together the estimates based on the ingredients I listed for four wraps. Just remember that these are just estimates—if you swap out reduced-fat sour cream for full-fat, or use a different cheese blend, those numbers will nudge up or down a bit!
- Calories: About 550 per wrap
- Carbohydrates: 45g
- Protein: 35g
- Total Fat: 28g
- Sodium: 750mg (Use low-sodium seasoning if you’re watching salt!)
Share Your Homemade Chicken Crunch Wrap Experience
Now that you know all my secrets—from the seasoning blend to the perfect folding technique—I desperately want to see your results! Seriously, don’t you ever hide your kitchen creations from me!
Did your gluten-free tortillas crisp up beautifully on the outside? Did your family even notice the difference? Head down to the comments below and give this Chicken Crunch Wrap recipe a star rating. Even one star lets me know what you thought, but I’m hoping for all five!
If you snap a picture of those gorgeous, golden-brown squares, tag me on social media! Sharing those wins—especially when we nail a tricky dietary swap—is my favorite part of doing this whole cooking thing. You can learn a little more about my journey over on my About Me page, but really, the best way to connect is right here in the comments below with your feedback!
Chicken Crunch Wrap
Ingredients
Equipment
Method
- Cook the ground beef in a skillet over medium heat until fully browned. Drain any excess fat from the pan.
- Stir the taco seasoning and water into the cooked ground beef according to the seasoning packet directions. Simmer for a few minutes until the sauce thickens slightly.
- Remove the skillet from the heat. Stir in the cooked rice and half of the shredded cheese blend into the meat mixture. Mix until combined.
- Lay out one large flour tortilla on a clean surface. Spread a layer of nacho cheese sauce down the center third of the tortilla.
- On top of the nacho cheese, layer a portion of the meat and rice mixture down the center. Top the meat mixture with a sprinkle of the remaining shredded cheese.
- Next, layer the sour cream, chipotle sauce, and tortilla strips over the cheese layer.
- Fold the left and right sides of the tortilla inward over the center filling. Then, fold the bottom edge up over the filling and roll the entire wrap tightly upward to seal it into a compact square shape.
- Melt the butter in the same skillet over medium heat. Place the wrapped burrito seam-side down in the hot buttered skillet.
- Grill the wrap for 2 to 3 minutes per side, pressing down gently with a spatula, until the tortilla is golden brown and crispy on all sides. Slice in half and serve immediately.
Nutrition
Notes
Tried this recipe?
Let us know how it was!
Gluten-Free Nutritionist & Family Meal Planning Expert
Working as a pediatric dietitian at Children’s Hospital of Denver, I kept meeting families overwhelmed by managing their children’s celiac disease. Parents stressed, kids frustrated, everyone eating bland boxed “gluten-free” products.
That’s when I realized my calling: creating practical, balanced gluten-free solutions for real families with busy schedules. I’ve developed 375+ family-friendly recipes focusing on lunch boxes, after-school snacks, and make-ahead dinners that actually work.
My meal planning system was featured in Parents Magazine, and I presented research at the Rocky Mountain Pediatric Nutrition Conference. My evidence-based approach ensures recipes meet both taste and health standards—families need solutions that work in the real world, not just perfect test kitchens.