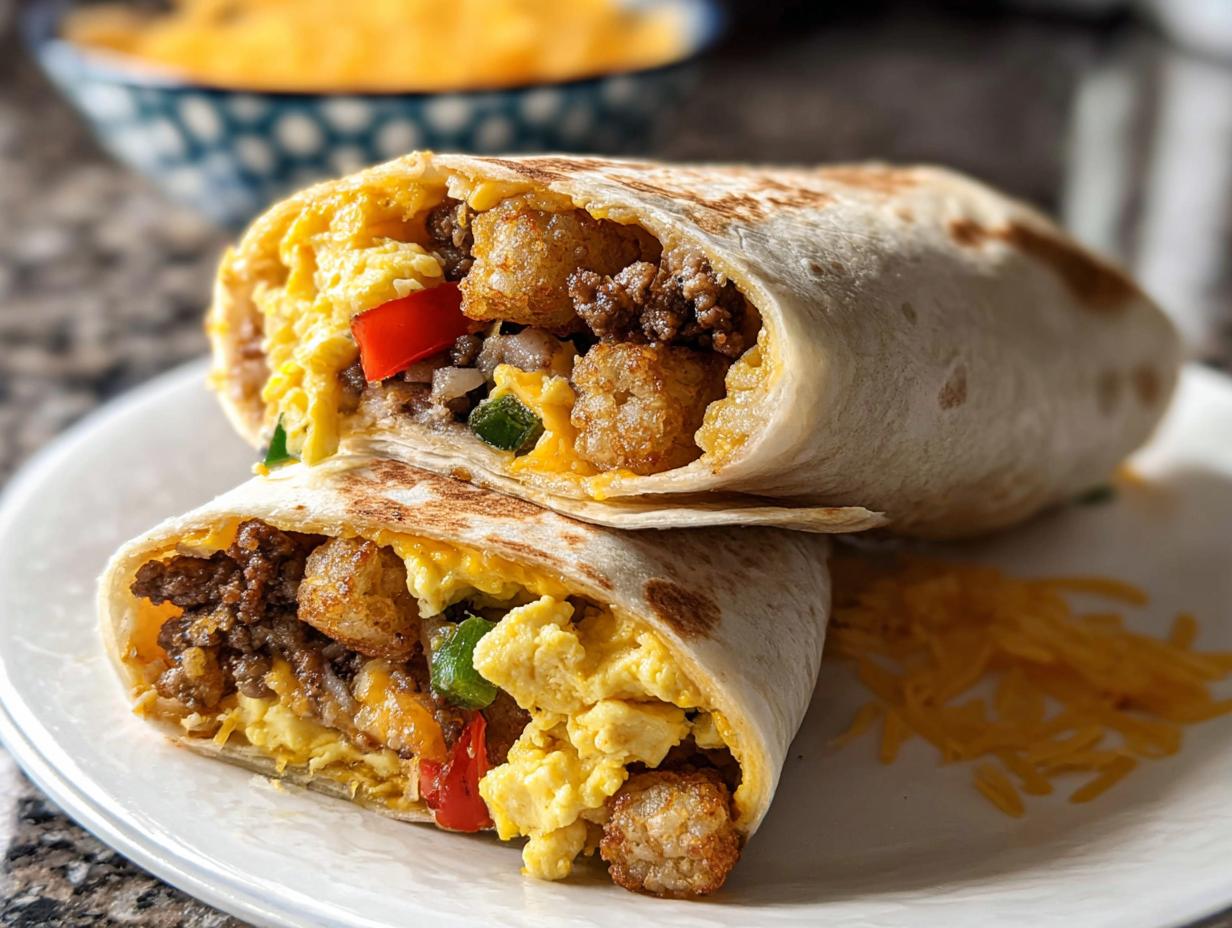
Oh, friends, do you remember those mornings? You know the ones—when the alarm goes off and you instantly think, “We simply do not have time to make a decent breakfast!” I used to dread getting my kids out the door; it was chaos, and honestly, the breakfasts were usually boring. That all changed the minute I whipped up my first batch of Protein-Packed Breakfast Burritos (Meal Prep).
Seriously, these things are lifesavers for busy families like mine. They’re packed with protein to keep everyone full, they freeze like a dream, and they are the ultimate grab-and-go solution. As a Gluten-Free Nutritionist and someone who lives and breathes family meal planning, which you can read more about on my About Page, I can tell you these burritos are what peace of mind tastes like. I developed them out of sheer morning desperation, and now they’re a staple that turns that early-morning scramble into a breeze. You absolutely have to try them!
Why You Will Love These Protein-Packed Breakfast Burritos (Meal Prep)
I know you’re busy, so let’s skip the fluff! These burritos are designed for real life. I promise they don’t taste like something rushed together, either. Here are the major reasons why they just became your new favorite weeknight cooking project:
- They are genuinely Grab & Go—just pull the foil off, microwave for a minute or two, and you’re out the door. No crumbs, no mess!
- Super High Protein thanks to the eggs and sausage; they keep little stomachs (and grown-up ones!) satisfied all morning long.
- They are completely Freezer Friendly. I make a double batch every other week, wrap them up, and we’re set for solid breakfasts for weeks.
- You control the fillings! This flexibility means you can sneak in extra veggies or swap sausage for black beans easily. Check out more of my easy breakfast ideas for inspiration.
- They taste fantastic, even when reheated. That’s the goal, right? A satisfying, savory flavor that doesn’t taste cardboard-y later.
- Perfect for portion control since you pre-fill them to a standard size. It makes counting macros super simple if that’s your jam!
Essential Ingredients for Your Protein-Packed Breakfast Burritos (Meal Prep)
When you’re meal prepping for the week, the ingredient list has to be solid. We aren’t just throwing stuff in a tortilla here; we are building a perfectly balanced, freezer-ready meal! For this recipe, precision matters so everything freezes and reheats correctly. We’re using specific amounts of yummy filling—we need enough substance to make these things satisfyingly Protein Packed, but not so much that they burst when you try to roll them tightly.
You’ll need your basics like the ground turkey or sausage, eggs, and veggies, but pay close attention to the details on the tortillas. If you’re planning on going gluten-free, you’ll need to source a specific type of wrap, which I talk more about down below. Trust me, using the right size tortilla (we need those big 10-inch ones!) is half the battle won!
Ingredient Notes and Substitutions
Okay, let’s talk substitutions, because I know everyone’s pantry looks a little different! The biggest thing here is maintaining that protein punch and structure. If you go gluten-free, you absolutely must use those larger, sturdy gluten-free tortillas—the really flimsy ones will crack when frozen or reheated. I often grab the Siete brand wraps if I know I’m making these for the week, which you can read about in my general meal prep categories.
If you have to skip the cheese for dairy-free needs, no worries! Just omit it, or use a plant-based cheddar substitute. It won’t affect the structure much. Also, you can totally swap that ground turkey for pork breakfast sausage if you like a richer flavor, but make sure to drain off any excess grease after cooking that meat!
Step-by-Step Instructions for Making Protein-Packed Breakfast Burritos (Meal Prep)
Okay, deep breath! Making ten burritos at once sounds like a lot, but if you work in stages, this prep time flies by faster than you think. The key here is using two skillets simultaneously where you can, because timing is everything when you’re cooking meat, veggies, and eggs all at once!
Preparing the Base Components
First things first: get those tater tots in the oven and baked according to their box. While they crisp up, tackle the meat. Get your skillet hot, add that breakfast sausage, and use a spatula to break it up into the tiniest little crumbles you can manage. Cook it until it’s browned perfectly, then pull it out and set it on some paper towels to drain; we don’t want soggy burritos!
Next, use that same skillet (or a second one—I won’t judge!) to sauté your diced bell pepper and onion in a splash of oil until they are nice and tender. That should take about six minutes. In a separate bowl, give those 12 eggs a good, vigorous whisking!
Pour your eggs right into the hot veggies. Push them around gently as they set up—we want tender scrambled eggs, not rubbery hockey pucks! Once the eggs are cooked through, gently fold in that ground sausage you set aside. Take this mixture right off the heat and let it chill out for about ten minutes so it’s easier to handle when rolling.
Assembling Your Protein-Packed Breakfast Burritos (Meal Prep)
Before you roll, you absolutely must make your tortillas soft! Wrap them in a slightly damp paper towel and microwave them for about 20 seconds. This makes them pliable so they don’t crack when you fold them.
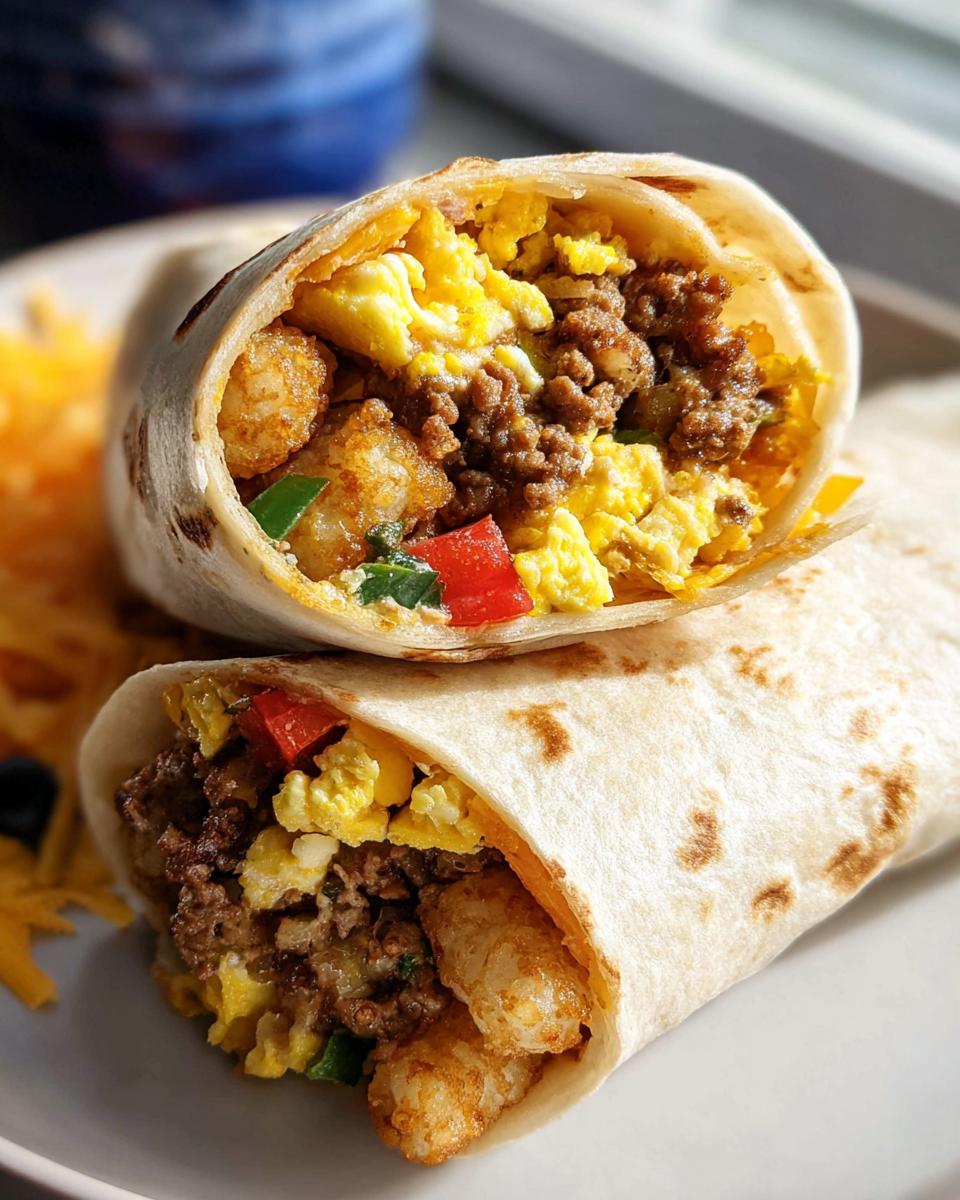
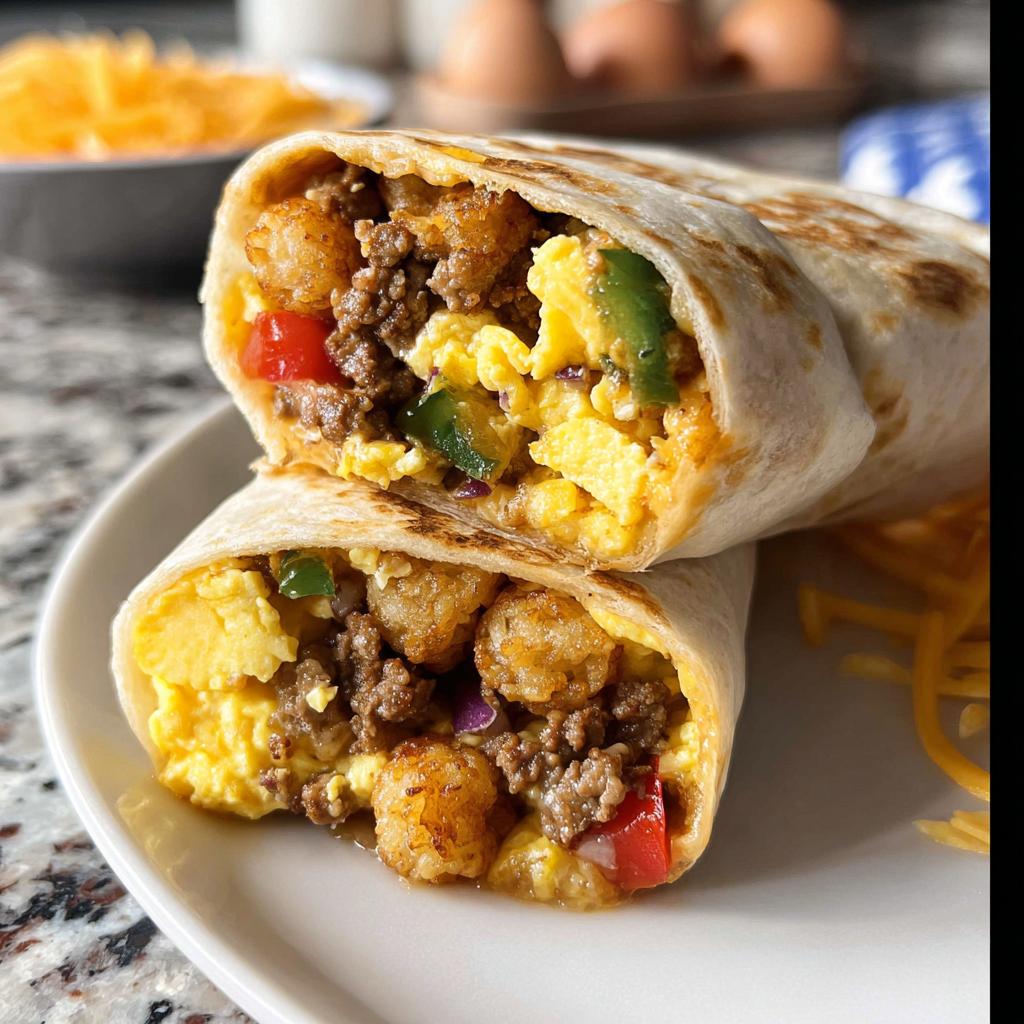
Now for the fun part! Lay out your warm, soft tortilla. Scoop about one cup of that filling—the meat, egg, and veggie mix—right into the center. Add precisely four tater tots, because that gives a good little potato hit in every bite, and a tablespoon or two of cheese. Pull the edge closest to you up and over the filling, tucking it in tight. Fold those sides in neatly, and roll it up tightly like a present! You want that roll to be snug so nothing leaks out when you reheat it later. Place the finished burrito seam-side down while you make the rest!
Check out some of my favorite meal prep inspiration if you need ideas for your next batch!
Expert Tips for Perfect Protein-Packed Breakfast Burritos (Meal Prep)
We’ve got the assembly down, but when you are making ten or twenty of these for the freezer, a few little tricks can seriously elevate them from “fine” to “Oh my gosh, what did you put in these?!” These tips are things I learned the hard way after realizing that simply following the instructions wasn’t enough sometimes.
Here are my non-negotiable rules for maximizing flavor and texture in your Protein-Packed Breakfast Burritos (Meal Prep):
- Don’t Skip the Double Drain: After cooking your ground meat—whether it’s turkey or sausage—let it drain on paper towels, absolutely. But here’s the extra step: when you fold the meat into the eggs, the eggs will absorb some of that fat. For maximum texture insurance, I actually blot the cooked sausage with a clean paper towel *one more time* right before I fold it into the eggs. It seems fussy, but it keeps the filling from getting greasy or separating!
- Toast Your Tortillas Before Filling: See how we microwave them to make them pliable? That works fine, but for true perfection, heat your 10-inch tortillas one by one in a dry skillet for about 15 seconds per side until they puff up a little. That slight toasting creates a better seal against moisture, dramatically reducing the chance of sogginess once they are frozen and reheated. It adds maybe three minutes total to your prep time, but it’s worth it for the sturdy roll!
- Keep Fillings Cool Before Rolling: This is huge, especially when using foil for storage. If you roll up piping hot filling, the condensation immediately gets trapped when you wrap them. You saw in the instructions that we cool the mixture for 10 minutes, but if you can, spread the filling on a large baking sheet to cool for another 5 minutes before rolling. That slightly cooled, thicker filling rolls up neater and freezes cleaner.
- Season the Eggs Boldly: Since flavors can mute slightly when frozen and reheated, don’t be shy with salt and pepper in the egg bowl. I also sneak in a tiny pinch of garlic powder when whisking the eggs. You won’t taste it distinctly, but it adds a background savory depth that makes these feel more like a restaurant burrito. If you need more flavor ideas, check out my other breakfast ideas for spice swaps!
Freezer Friendly Storage for Your Protein-Packed Breakfast Burritos (Meal Prep)
Making these Protein-Packed Breakfast Burritos (Meal Prep) is only half the battle! The real magic, the thing that saves my sanity, is knowing I have ten breakfasts chilling in the freezer ready for action. Storing them correctly is non-negotiable if you want that perfect, hearty texture when you reheat them later. Don’t just toss them in a single plastic bag—that’s a recipe for freezer burn and uneven thawing!
When they are fully assembled and slightly cooled, we use a two-step wrapping method to protect them. First, wrap each individual burrito tightly in a sheet of parchment paper. This layer keeps the foil from sticking directly to the tortilla, which is crucial later! After the parchment, wrap that burrito again snugly in aluminum foil. This double layer locks everything in and protects them for the long haul.
You can keep these beauties tucked away safely in the freezer for up to three months. I try to make a rule to eat them within eight weeks, just to be safe, but honestly, even the three-month-old ones taste amazing if they were wrapped tightly!
If you’re looking for more ways to streamline your week, you might want to check out my ideas for easy lunchbox fillers, which often start with leftovers from my big prep days!
Reheating Instructions: Grab & Go Style
This is where you get your reward! When that hectic morning hits, you just grab one, unwrap it from the foil and parchment, and choose your reheating adventure. The goal is hot filling and a soft, ready-to-eat tortilla.
For Super Fast Reheating (Microwave): This is my go-to when I’m truly running late. Place the unwrapped burrito on a microwave-safe plate. Heat on high for 60 to 90 seconds. For the best results, stop the microwave halfway through (around 45 seconds) and flip the burrito over. This helps it heat evenly so you don’t end up with hot edges and a lukewarm middle. Total time: about 90 seconds.
For Better Texture (Oven or Toaster Oven): If you have an extra five minutes and want that wrapper to feel almost freshly made, use the oven. Preheat your oven or toaster oven to 350°F (175°C). Place the foil-wrapped burrito directly on the oven rack or a baking sheet. Heat for about 15 to 20 minutes. Unwrap it carefully—it will be hot! This method gives you a slightly crispier exterior without drying out the filling, which I personally love. If you’re interested in why frozen food textures change, other great cooks have covered some similar techniques over at The Real Food Dietitians.
Making Protein-Packed Breakfast Burritos (Meal Prep) Gluten-Free
Since I deal with dietary restrictions every day as a nutritionist, I know that going gluten-free can sometimes feel like you have to totally rebuild a recipe from scratch. That’s not the case here! These Protein-Packed Breakfast Burritos (Meal Prep) adapt beautifully, but you do need to pay attention to one ingredient: the tortilla wrap itself.
The standard flour tortillas we use in the main recipe work great because they stretch and seal so nicely when warmed. Gluten-free tortillas, whether they are single-ingredient alternatives or blends, are often a bit more delicate. They can crack easily when you fold them tightly, and they can get surprisingly dry or chewy when reheated if you aren’t careful!
When buying your GF wraps, size and pliability are your biggest concerns. Skip the small taco size; you need those big 10-inch burrito wrappers so you have enough surface area to overlap and seal everything in. If you look at my tips for great texture in my gluten-free baking category, you’ll know that controlling moisture is key.
To make sure your gluten-free burrito holds up to freezing and reheating, you must dedicate time to warming that wrapper until it’s super soft before you even think about adding the filling. Microwave it until it flops over easily, or use the dry skillet method I mentioned earlier. A gentle hand during assembly is also crucial—roll it snugly, but don’t squeeze so hard that the structure splits. If you do that, these meal-prepped beauties will be just as delicious for your grab-and-go mornings as the traditional ones!
Frequently Asked Questions About Protein-Packed Breakfast Burritos (Meal Prep)
I’ve seen so many questions pop up when folks start making these for the first time, and that’s wonderful! It means you’re thinking ahead about making your mornings easier. Since these are designed to be Grab & Go superstars, the storage part is super important. Here are the things I get asked most often about making these Protein Packed and truly Freezer Friendly.
Can I add beans or vegetables to these Protein Packed Breakfast Burritos?
Yes, you totally can! I love adding black beans or sweet potatoes for extra fiber, but you have to remember that beans and veggies have extra water content, which hates being frozen. If you add them, you must pre-cook them completely, and then I highly suggest you cook the mixture down *longer* than I listed in the main instructions. You want to reduce any free moisture as much as possible—think thick and slightly dry before you roll. If they’re too wet when they go into the freezer, they steam themselves into a soggy mess upon reheating!
How long are these Grab & Go burritos good for in the refrigerator?
Because we are using eggs and meat, you need to be careful with refrigerator storage compared to the freezer. If you aren’t planning to freeze them right away—maybe you just made a small batch for the next day—they will keep well in *tightly sealed* foil or zip-top bags in the fridge for up to 3 days. I would still recommend the freezer for anything longer than that, just because cooked eggs really lose their best texture after day three in the fridge unless they are packed down super well. Always reheat refrigerator burritos until steaming hot, too!
What if I want to skip the tater tots?
That’s totally fine! The tater tots are there just to add some nice starch and texture that makes it feel like a complete meal, plus they absorb a tiny bit of any residual moisture. If you skip them, you’re cutting down a little on carbs and calories, which is great if that’s your goal. Just make sure you don’t overfill the burrito with the egg and sausage mixture to make up the volume, because then it might get bulky and hard to roll tightly! Contact me on my contact page if you have specific questions about scaling the fillings down!
Estimated Nutritional Snapshot Per Serving
I always get asked about the numbers, and honestly, I love that you all are tracking your fuel! When you’re prepping meals like these Protein-Packed Breakfast Burritos (Meal Prep), knowing what’s inside helps you plan the rest of your day. Keeping protein high is my background mission!
Based on the recipe serving 10 burritos, here is what you can generally expect per serving:
- Calories: 530
- Protein: 21g
- Fat: 30g
- Carbohydrates: 44g
Now, quick word of advice from a nutritionist, okay? These numbers are estimates, and they are based on specific ingredient choices—like the fat content of the sausage and whether you used full-fat cheddar. If you swap out turkey for leaner chicken, or use gluten-free tortillas that are less dense, these values will shift a little. So, take these figures as a fantastic baseline for your Grab & Go planning, but know that your specific brands might make them slightly higher or lower!
Share Your Success with These Meal Prep Burritos
Honestly, seeing you all conquer those crazy weekday mornings with a freezer full of these burritos is the best part of sharing my kitchen secrets! I really hope these turned out just right for you and have brought some calm chaos back into your routines.
When you make these Protein-Packed Breakfast Burritos (Meal Prep), please, please come back and tell me how it went! Drop a star rating right at the top of the recipe so other busy parents know they can trust this method. I want to know what you modified!
Did you sneak in some spinach? Did you try a totally different type of sausage in there? Maybe you found a gluten-free tortilla that’s even better than the one I mentioned? Drop all your favorite additions and modifications down in the comments below. I love collecting new ideas, and the community really benefits when we share what works best in our own kitchens. You can always browse all my favorite kitchen creations over at my main recipe index!
Happy cooking, friends, and enjoy those stress-free mornings!
Protein-Packed Breakfast Burritos (Meal Prep)
Ingredients
Equipment
Method
- Preheat your oven and bake tater tots according to package directions. You will need 40 tots (4 per burrito). If you use the full pound, you will have some leftover tots.
- Place a medium skillet over medium-high heat. Add the breakfast sausage, stirring to break it up and crumble. Cook until the meat is cooked through, about 7 minutes. Remove the cooked sausage to a paper towel-lined plate and set aside.
- While the sausage cooks, place a separate large skillet over medium heat. When hot, add the olive oil, bell pepper, and onion. Sauté until the vegetables are tender, stirring often, about 6 minutes.
- While the vegetables and meat are cooking, place the eggs in a medium bowl and whisk well.
- Pour the eggs into the large skillet with the peppers and onions. Push the eggs around with a spatula as they cook. Cook until the eggs are set, about 3-5 minutes.
- Gently fold the cooked sausage into the cooked egg mixture. Remove from heat and allow to cool for about 10 minutes.
- To prepare the tortillas, wrap them in damp paper towels and microwave for 15-20 seconds to make them pliable.
- For burrito assembly, scoop about a 1-cup measure of the egg-sausage-veggie mixture into the center of each tortilla. Add 4 tater tots and about 1 to 2 tablespoons of cheese. Fold one edge of the tortilla up and over the filling, pulling it tightly toward the center. Fold in the sides of the tortilla and continue to roll. Place the wrapped burritos on a baking sheet while you assemble the rest.
- To prepare burritos for the freezer, wrap each burrito in a sheet of parchment paper, then wrap again in a square sheet of aluminum foil. Label the burritos and place them in the freezer for up to 3 months.
Nutrition
Notes
Tried this recipe?
Let us know how it was!
Gluten-Free Nutritionist & Family Meal Planning Expert
Working as a pediatric dietitian at Children’s Hospital of Denver, I kept meeting families overwhelmed by managing their children’s celiac disease. Parents stressed, kids frustrated, everyone eating bland boxed “gluten-free” products.
That’s when I realized my calling: creating practical, balanced gluten-free solutions for real families with busy schedules. I’ve developed 375+ family-friendly recipes focusing on lunch boxes, after-school snacks, and make-ahead dinners that actually work.
My meal planning system was featured in Parents Magazine, and I presented research at the Rocky Mountain Pediatric Nutrition Conference. My evidence-based approach ensures recipes meet both taste and health standards—families need solutions that work in the real world, not just perfect test kitchens.