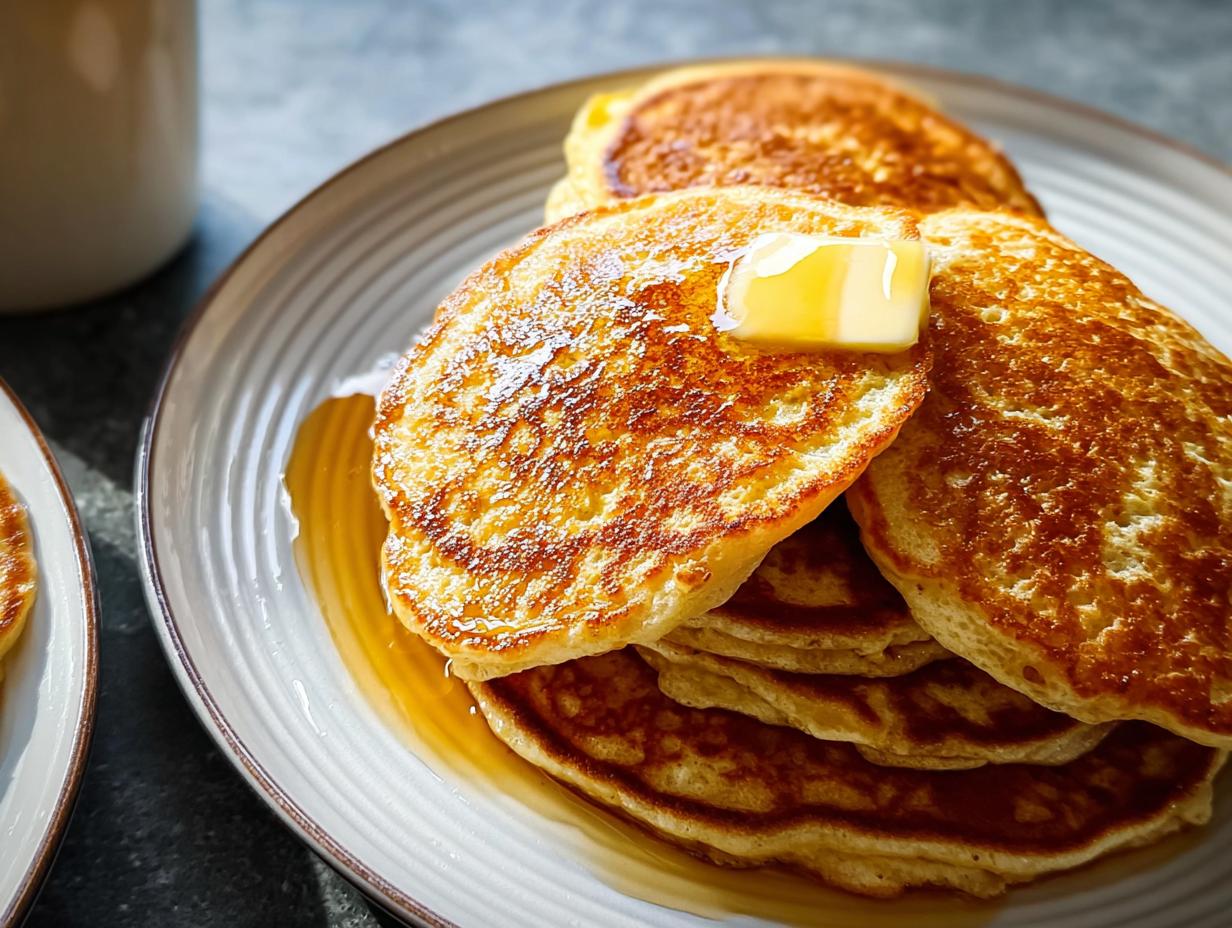
There’s truly nothing that shouts ‘comfort’ louder than a towering stack of warm, golden pancakes waiting for a river of maple syrup. We all crave that comforting, classic breakfast feeling, and honestly, getting that perfect lift can feel like a culinary battle! But don’t you worry, because I cracked the code to making the fluffiest Fluffy Buttermilk Pancakes (Classic) you’ll ever taste, thanks to a little secret involving buttermilk and separated eggs.

I still remember those lazy Sunday mornings of my childhood when my mother would whip up her famous pancakes. The smell of butter and vanilla wafting through our home was like a warm hug, inviting everyone to gather ’round the table. Fast forward a bit, and my journey as a gluten-free chef meant one of my greatest challenges was recreating those cherished Fluffy Buttermilk Pancakes (Classic) without the gluten. After a few funny mishaps—seriously, I made some frisbee-flat disappointments—I finally perfected a recipe that brings back that same pure joy. Trust me, this recipe gets that cloud-like texture just right, and you can find out more about my baking journey here!
Why This Fluffy Buttermilk Pancakes (Classic) Recipe Works
This isn’t just another pancake recipe, folks; this is the blueprint for achieving that diner-quality height we all chase! When you make these Fluffy Buttermilk Pancakes (Classic), you’re tapping into some fun kitchen science. I learned early on that if you want lift, you have to work with acids and bases. That’s exactly what we’re doing here.
The Science Behind Truly Fluffy Pancakes
It all comes down to two things: tang and air. The buttermilk is acidic, right? When it hits the baking soda and the baking powder—which are bases—they create carbon dioxide bubbles immediately. These bubbles get trapped in the batter, giving you that incredible fluff.
- Buttermilk is Key: It tenderizes the gluten, keeping the final product soft, not chewy.
- Separated Eggs: The egg whites are whipped up separately until stiff. Folding those airy whites in at the very end is what creates those big, beautiful, airy pockets we want. It’s like sleeping on a cloud, but for your stomach!
Essential Ingredients for Fluffy Buttermilk Pancakes (Classic)
You can’t cheat these babies! To lock in that amazing texture for your Fluffy Buttermilk Pancakes (Classic), you need to be precise with your measurements. I’ve broken this down so you can see what goes into the foundational mix and what gets added right before cooking. Don’t skimp on checking your baking soda—if it’s old, your fluff factor drops immediately!
We are making a large batch here, enough for a hungry family breakfast. Remember, these ingredients are chosen for maximum rise and tenderness. You’ll need the flour, the leaveners, the sugar for balance, and, of course, the magic liquids.
Ingredient Notes and Substitutions for Your Buttermilk Recipe
Let’s talk about those tricky bits! First up, buttermilk. If you don’t have any on hand, don’t panic. You can make a quick sub by adding a tablespoon of white vinegar or lemon juice to regular milk and letting it sit for five minutes until it curdles slightly. That acid is what we need!
Also, please, please, please use room-temperature buttermilk. Cold ingredients fight each other in the batter and won’t activate the leavening agents nearly as well. For the sour cream, the recipe notes you can swap it out for plain Greek yogurt if you prefer a slightly tangier profile. Honestly, Greek yogurt makes these pancakes feel lighter somehow, which is great for an extra fluffy result!
- Basic Dry Pancake Mix: 10 ounces all-purpose flour (about 2 cups), 1 teaspoon baking powder, 1/2 teaspoon baking soda, 1 teaspoon kosher salt, 1 tablespoon sugar.
- For Each Batch of Pancakes: 2 large eggs (separated!), 1 1/2 cups buttermilk (about 12 ounces), 1 cup sour cream, 4 tablespoons unsalted butter (melted, plus more for serving), 1 cup warm maple syrup (for serving).
Equipment Needed for Perfect Fluffy Buttermilk Pancakes (Classic)
You don’t need fancy gadgets for these, thank goodness! Cooking is better when we keep the tool list simple. If you’ve got basic bowls and something to stir with, you’re 90% of the way there. Having the right equipment just makes the process smoother so you can focus on that beautiful batter separation.
For this very classic breakfast, I use my grandmother’s heavy-bottomed cast iron pan, but any good griddle or frying pan will do the trick. Just make sure it heats evenly! Here is the list of things you’ll definitely want ready before you start whisking:
- Mixing bowls: Make sure you have at least three—one for dry, one for wet yolks, and a clean, grease-free one for the egg whites!
- Whisk: Important for getting those egg whites nice and airy!
- Measuring cups and spoons: Precision matters when you’re balancing acids and bases, so grab those tools.
- Griddle or frying pan: Get this preheating while the batter rests.
- Spatula: A thin, wide one is best for getting under the pancake without tearing it up when you flip.
Step-by-Step Instructions for Fluffy Buttermilk Pancakes (Classic)
Alright, here is where the magic really happens to get those beautiful Fluffy Buttermilk Pancakes (Classic). Remember, a gentle hand during mixing is your best friend. We are building air pockets, not kneading dough! Follow these steps exactly, and you’ll be amazed at how tall they get. If you’re looking for more fantastic breakfast ideas, bookmark my category page!
Mixing the Dry and Wet Components for Fluffy Pancakes
First, get your dry ingredients totally mixed up in the big bowl. You want the leaveners—the baking powder and soda—to be evenly distributed so every part of the batter rises equally. No clumps allowed!
Next, in a separate bowl, whisk the egg yolks, buttermilk, and that wonderful sour cream right together. Now, the big secret: take your egg whites and beat them separately until they form stiff, proud peaks. Don’t stop too soon, those peaks are what give you the altitude.
Pour those wet yolk ingredients right into the dry stuff. Mix it up just until everything is married—I mean it—you should still see a few streaks of flour. If you mix until it’s perfectly smooth, you’ll get flat, tough pancakes. Trust me on this part!
Cooking Your Fluffy Buttermilk Pancakes (Classic) to Golden Perfection
After you mix, stick that batter in the fridge or just set it on the counter for about 10 minutes. This rest time lets the gluten relax and the leaveners start doing their thing quietly. Now wipe down your griddle and set it to medium-high heat. It needs to be hot enough that a drop of water sizzles right away.
This is the step where you gently fold in those beautiful, stiff egg whites. Use a rubber spatula and go slowly—cut down the center and sweep up around the side. We want to treat those whites like delicate treasures!
Pour about 1/4 cup of batter per pancake onto that hot surface. You’ll know it’s time to flip your Fluffy Buttermilk Pancakes (Classic) when you see lots and lots of bubbles pop up on the surface and the edges look set, usually about 2 to 3 minutes. Flip quickly, cook for another minute or two until golden brown, and get ready to eat! If you want more tips on getting the best surface temperature, check out this great article on pancake heat control.
- Combine wet yolks mix with dry ingredients until *just* combined.
- Gently fold in the whipped egg whites last.
- Let batter rest for 10 minutes before cooking.
- Cook on medium-high heat until bubbles form, then flip!
Tips for Success Making Fluffy Buttermilk Pancakes (Classic)
Okay, now that we’ve covered the steps, I want to share the accumulated wisdom from all those slightly-too-flat pancake attempts I made. Getting these Fluffy Buttermilk Pancakes (Classic) right is about managing small details. If you nail these points, you’ll never look back!
Seriously, these aren’t revolutionary secrets, they are just the things folks skip when they’re rushing their weekend breakfast. Pay attention to the heat, the mixing, and the rest time, and I promise you a perfect stack every time.
Here are my top tips for peak fluffiness and flavor:
- NEVER Overmix: I know I said it before, but I must repeat it! Overmixing develops the gluten in the flour, and that creates a tough, flat pancake. Stop mixing as soon as the streaks disappear—that little lumpiness is perfection. We want tender, not tenacious crumbs!
- Temperature Check Your Cook Surface: You need consistent medium-high heat. Too low, and the pancakes soak up butter and cook slowly, resulting in density. Too high, and they burn before the inside bubbles can set. Give your griddle about five full minutes to come completely up to temp before the first ladle hits the surface.
- The Rest is Mandatory: That 10 minutes of resting time the recipe calls for isn’t fluff—it’s necessary! It lets the acid in the buttermilk start activating those baking soda bubbles right there in the batter, giving the mixture a head start before the heat even hits it. If I’m feeling ambitious, I’ll let it rest for 15 minutes.
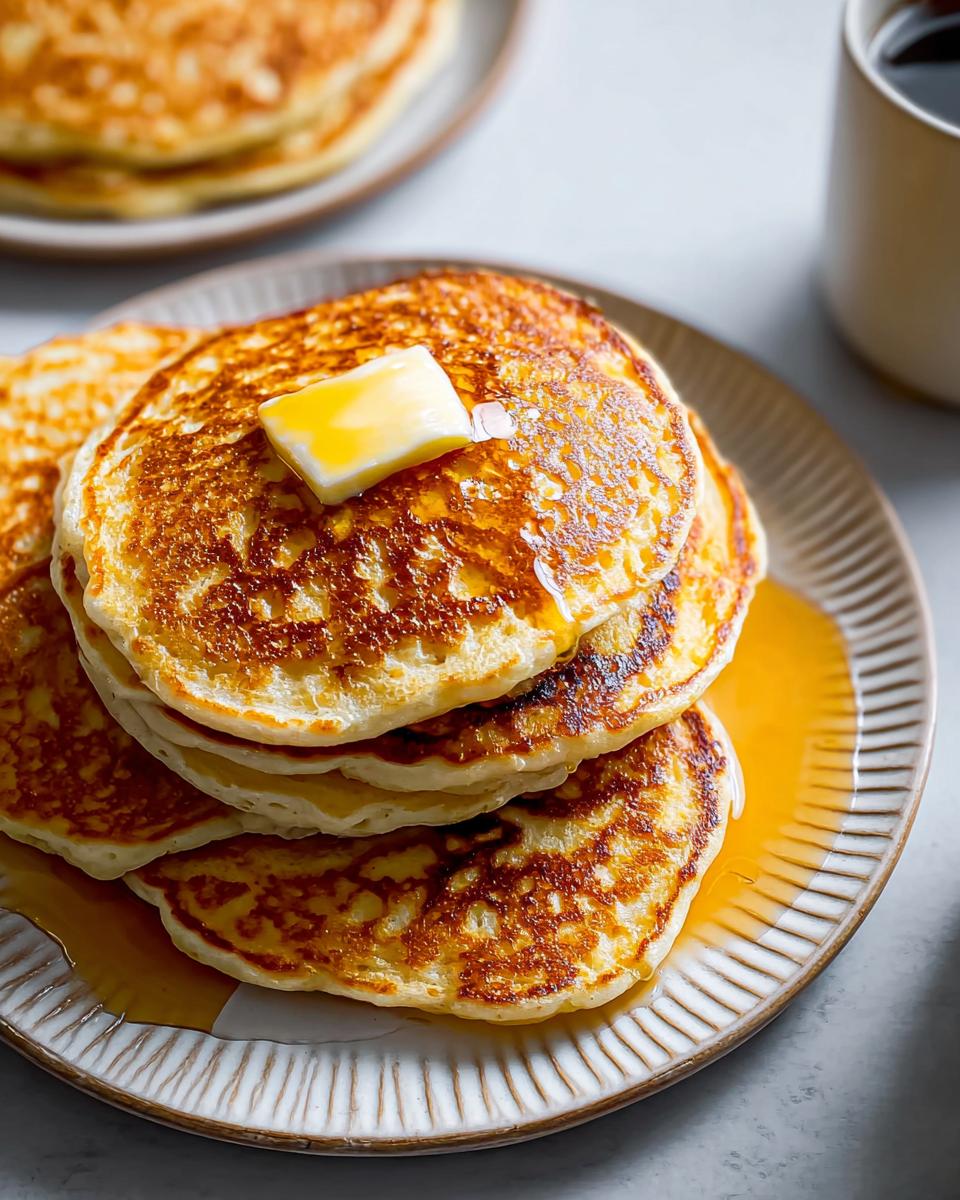
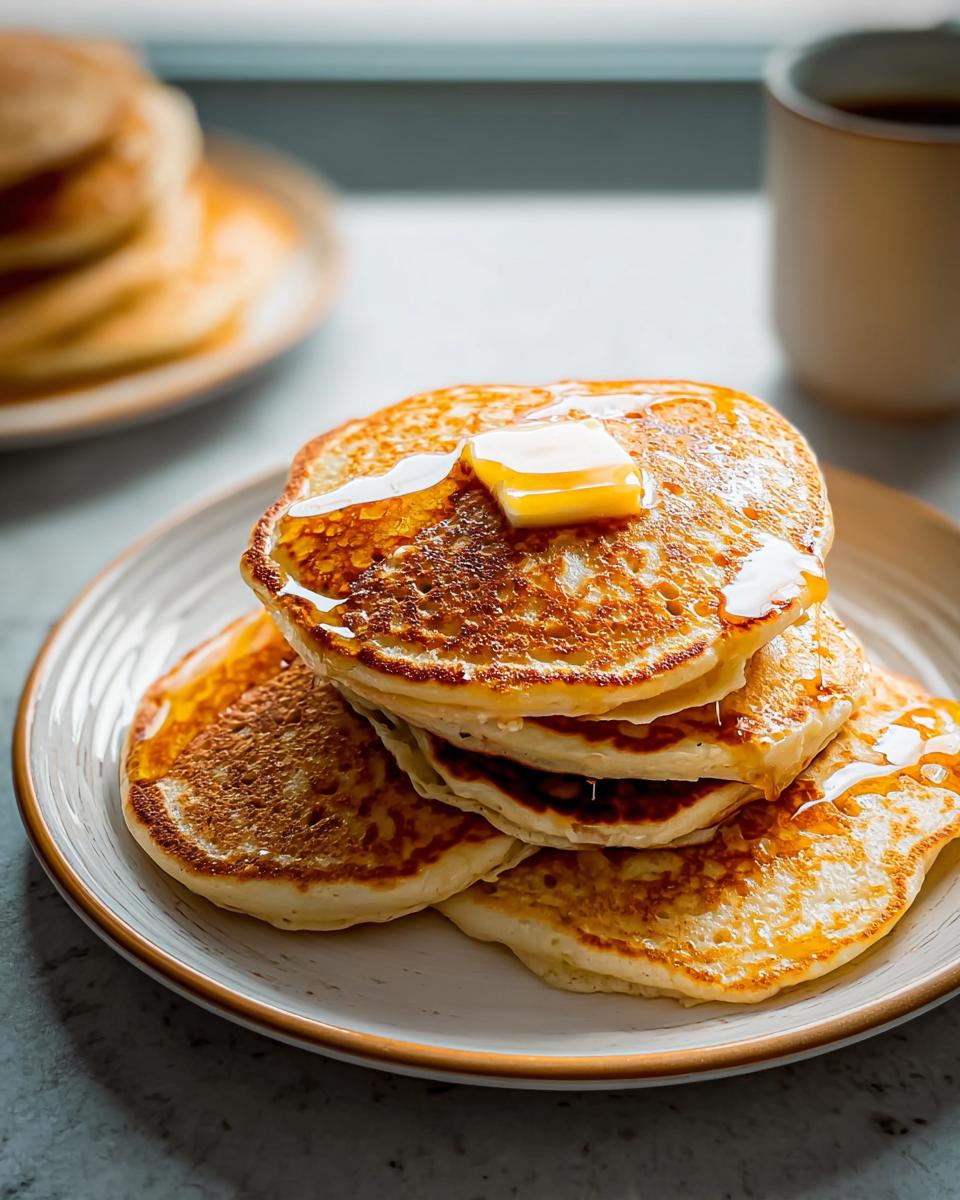
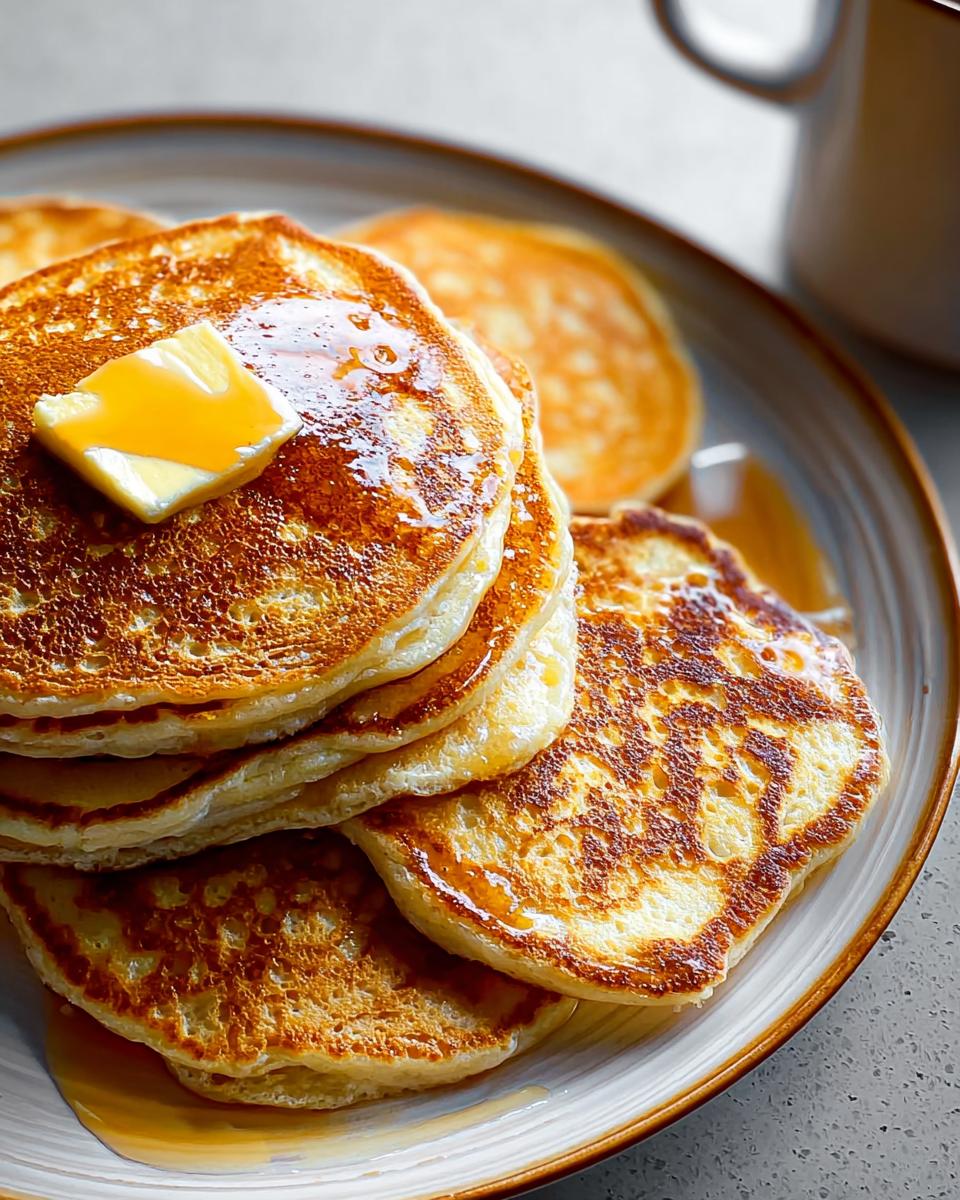
- Serving Strategy: These Fluffy Buttermilk Pancakes (Classic) are best eaten immediately. They start to deflate slightly as they cool down because of all that trapped air. If you’re making a huge batch, keep the finished pancakes on a wire rack set over a baking sheet in a very low oven (about 200°F) just to keep them warm, but don’t stack them until they hit the plate!
Making a truly classic breakfast that tastes this good should make you feel accomplished, not stressed. For more ideas on how to elevate your morning routine, check out my inspiration page on fun breakfast trends!
Serving Suggestions for Your Classic Breakfast
Now that you have achieved the perfect, cloud-like stack, the real fun begins: the toppings! These Fluffy Pancakes are built to soak up all the good stuff. While this is a classic breakfast, that doesn’t mean we can’t have fun piling things high. Part of the joy of making pancakes from scratch is customizing every plate!
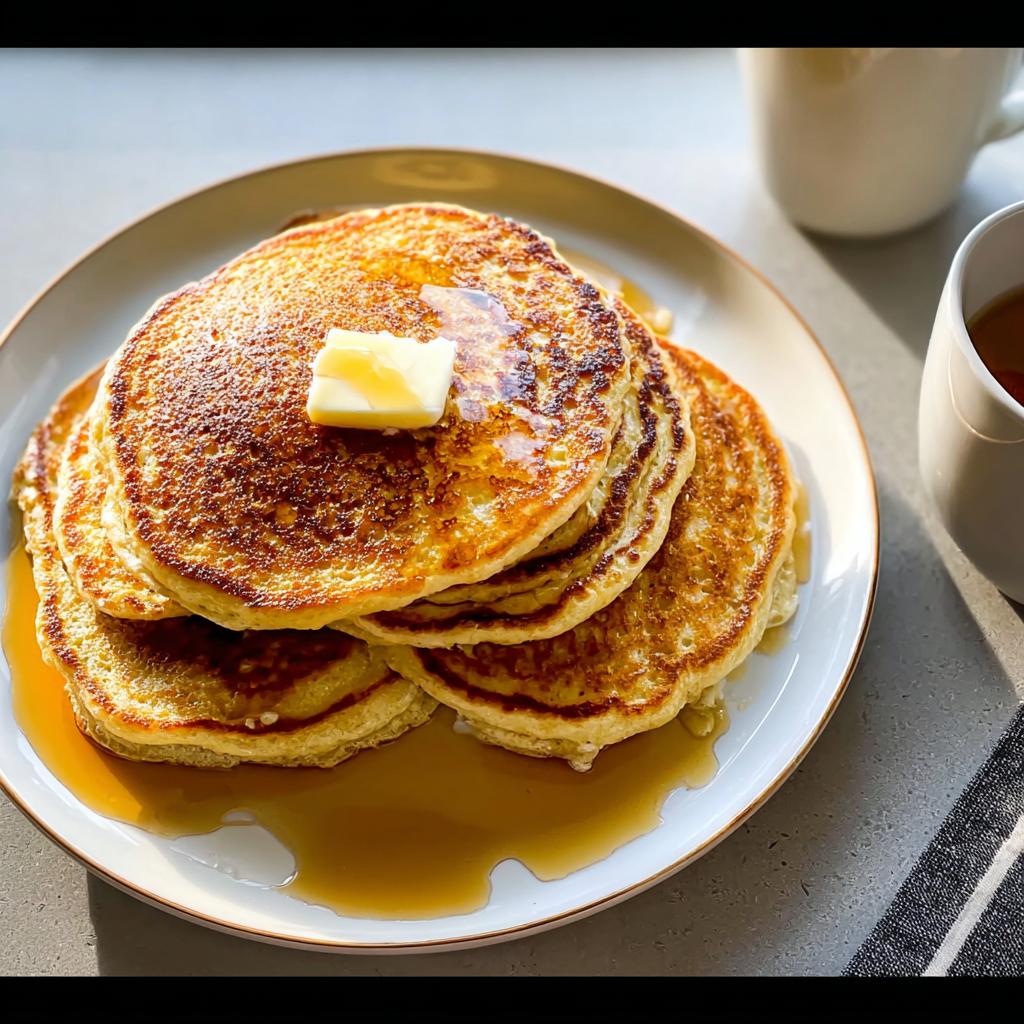
Obviously, the warm maple syrup and a pat of melting butter are non-negotiable starting points. That combination is what makes any pancake a true classic. But if you’re serving these up on a weekend where you want to impress, here are a few simple ways my family likes to dress them up:
- The Berry Brightener: Nothing cuts through the richness of the buttermilk and sour cream like fresh, slightly tart berries. A mix of raspberries and blueberries is my go-to. If you macerate them—that means tossing them with a tiny sprinkle of sugar for about 15 minutes—they release beautiful little tart juices that are divine drizzled over the stack.
- Citrus Zest Finish: This is one of those unexpected pops of flavor that makes everyone ask, “What did you put in this?” Before serving, grate just a tiny bit of fresh orange or lemon zest over the top of the buttered pancakes. The oil from the zest smells incredible and brightens the whole flavor profile.
- A Little Crunch: If you need a textural counterpoint, skip the standard chocolate chips inside the batter (which can sometimes weigh them down). Instead, sprinkle toasted pecans or walnuts right on top of the syrup layer. It gives you that satisfying *crunch* between the soft pancake and the sticky syrup.
- Keep it Simple: Sometimes, you just need to savor the buttermilk flavor! In that case, a simple dusting of powdered sugar is all you need. It looks beautiful sprinkled over the top and offers just a touch more sweetness without altering the texture.
Whatever you choose, serve them immediately. These pancakes don’t wait for an audience; they demand to be enjoyed piping hot!
Storing and Reheating Fluffy Buttermilk Pancakes (Classic)
Even the most epic breakfast eventually ends, and you’ll always hope for leftovers! Luckily, these Fluffy Buttermilk Pancakes (Classic) store surprisingly well, which is great news because you’ll definitely want an easy reheat option for a quick weekday breakfast.
The challenge with any fluffy pancake is keeping that airiness when you warm them up again. If you just toss them in the microwave, you might end up with something closer to a lukewarm sponge, and we absolutely cannot have that happening to our beautiful work. We need texture preservation!
Here’s how I manage my leftovers so they taste almost as good as the fresh batch. If you’re always looking for new ways to enjoy your breakfasts, check out my general recipe index for later inspiration!
Keeping Leftover Fluffy Buttermilk Pancakes (Classic) Fresh
Whether you plan to eat them tomorrow or next month, layering is the key to preventing them from sticking together and getting gummy. Once the pancakes have completely cooled down—letting them cool fully is important to prevent steam from making them soggy—lay them out on a baking sheet.
Once cooled, stack them up, but slip a small piece of parchment paper or wax paper between each one. This separates the surface layers so when you go to freeze or refrigerate, they come apart easily later without tearing.
- Short-Term (3-4 Days): Place the parchment-layered stack into an airtight container or a heavy-duty zip-top bag and keep them in the refrigerator.
- Long-Term (Up to 3 Months): Place the layered stack directly into a freezer-safe zip-top bag. Squeeze out as much air as possible before sealing. They freeze beautifully!
Reheating for Maximum Fluff
Forget the soggy microwave reheating method unless you are truly desperate! To bring back the true glory of your Fluffy Buttermilk Pancakes (Classic), we need dry heat. This helps re-crisp the edges and gently warm the center without turning them rubbery.
My favorite way, especially if they are frozen, is using a toaster oven or a regular oven. Set your oven to about 350°F (175°C). Lay the pancakes out in a single layer on a baking sheet—again, no stacking while heating!
Heat them for about 8 to 10 minutes total, flipping halfway through if they look like they are crisping too fast on one side. They warm right through while maintaining that tender, fluffy crumb we worked so hard for! If you’re reheating something straight from the fridge, start with 5 minutes and test one before subjecting the rest to the full cycle.
Sometimes I’ll quickly toast a frozen pancake in the toaster slot, but only if it’s thin. These thick, fluffy ones do much better in the oven to protect that loft. Enjoy your fast classic breakfast!
Frequently Asked Questions About This Buttermilk Recipe
I get so many messages about this recipe—and that’s fantastic! It usually means readers are gathering their ingredients and getting ready to make their own amazing stacks. If you’re feeling nervous about using sour cream or buttermilk, or if you’re just wondering why these are so much better than the boxed variety, you came to the right place. Let’s clear up any final doubts!
Here are some of the questions I hear most often when people are diving into this classic breakfast approach.
Can I make Fluffy Pancakes without Buttermilk?
Oh, absolutely you can! Honestly, I use buttermilk because it reacts perfectly with the baking soda we use, which makes those bubbles form faster and stay stronger, leading to that superior fluff. But if you look in my fridge and see regular milk instead of buttermilk, I have a super easy fix for you!
You just need to add the acid back in yourself. For the 1 1/2 cups of regular milk the recipe calls for instead of buttermilk, just stir in 1 1/2 tablespoons of white vinegar or fresh lemon juice. Give it a gentle stir and let it chill out on the counter for five to ten minutes. It’ll look a little curdled, and that’s exactly what you want! That acidity is what activates the baking soda. Don’t strain out the curds; that’s where the good stuff is hiding!
How do I know if my baking soda is active?
This is such a smart question because old baking soda or powder is the number one reason pancakes fall flat! If your leavening agents have been sitting in the back of your cupboard since the last millennium, they might not have enough lift left. It’s a safety and texture issue!
To test them, take just a tiny pinch of the baking soda and drop it into a little bit of hot water. If it fizzes up right away—a good, lively fizz—it’s ready to go! If it just sits there looking sad, toss it out immediately and grab a fresh container. You need that reaction to happen fast when it hits the buttermilk.
What makes these pancakes a ‘Classic Breakfast’?
What makes them a classic is the simplicity and the foundational technique. A true classic breakfast recipe is one that has stood the test of time, usually relying on pantry staples rather than super-trendy add-ins. This recipe hits all the high notes of old-school diner pancakes: that slight tang from the fermented dairy, the gentle sweetness, and most importantly, the airy texture achieved by whipping the egg whites separately.
It’s the method, not just the ingredients, that seals the deal. We aren’t using pancake mix; we are building the structure from scratch, which results in something that tastes rich and homemade every single time. It’s the taste of Saturday morning before schedules got complicated, you know?
Why do you use both baking soda AND baking powder?
Because we are using buttermilk, which is acidic, we need the baking soda to create that initial, powerful lift. Baking powder, though, has its own internal acid stabilizer. Think of it as insurance! The baking soda gets a huge kick from the buttermilk instantly, but the baking powder provides a secondary, slower lift as the batter heats up on the griddle.
Using both ensures you get a great immediate rise when you pour the batter, and then you sustain that gorgeous fluff while the pancake cooks all the way through. It’s how we guarantee a thick, tender result instead of a flat disk!
Share Your Fluffy Buttermilk Pancakes (Classic) Creations
I’ve shared all my secrets, from separating the eggs to the crucial 10-minute resting period, to make sure your stack of Fluffy Buttermilk Pancakes (Classic) is the best you’ve ever made. Now, it’s your turn to join the fun! Cooking should always be a conversation, and I genuinely want to see what you whip up in your kitchen!
Did you try the Greek yogurt substitution? Did you add a sprinkle of citrus zest? Don’t be shy! I absolutely love seeing your gorgeous morning tablescapes. Sharing what works (and what maybe didn’t quite work out the first time—we’ve all been there!) is how we all get better at this wonderful craft of home cooking.
If you made this recipe, please do me a huge favor and leave a rating right down below. Five stars mean the world to me, but an honest review helps other cooks feel confident trying out this fantastic buttermilk recipe!
- Rate It! Let me know how high those pancakes stacked up in the rating system.
- Share a Photo: If you snap a picture, I’d love for you to tag me on social media—there’s nothing better than seeing a tall, golden stack of Fluffy Buttermilk Pancakes (Classic) shared online!
- Ask Me Anything: If you ran into trouble, or if you have an idea for a new variation, drop a question in the comments. If you need to reach out personally about something sensitive, you can always use my contact form, though I usually answer questions right here on the recipe post!
Thank you so much for trusting me with your weekend treat preparation. Happy flipping!
Fluffy Buttermilk Pancakes (Classic)
Ingredients
Equipment
Method
- In a large bowl, whisk together the flour, baking powder, baking soda, salt, and sugar.
- In a separate bowl, whisk together the egg yolks, buttermilk, and sour cream.
- In another small bowl, beat the egg whites until stiff peaks form.
- Pour the wet ingredients into the dry ingredients and mix until just combined. Do not overmix.
- Gently fold in the beaten egg whites.
- Let the batter rest for about 10 minutes.
- Heat a lightly oiled griddle or frying pan over medium-high heat.
- Pour about 1/4 cup of batter onto the hot griddle for each pancake.
- Cook for about 2-3 minutes per side, or until golden brown and cooked through.
- Serve immediately with melted butter and warm maple syrup.
Notes
Tried this recipe?
Let us know how it was!
Gluten-Free Chef & Latin Cuisine Innovation Specialist
My youngest son’s celiac diagnosis at four changed everything. Suddenly, all those traditional Brazilian and Portuguese recipes from my avó needed to be completely reimagined without losing their soul.
After graduating from Johnson & Wales and working Miami’s Latin fusion scene, my son’s diagnosis became my calling. How do you make gluten-free empanadas that taste like childhood? Over eight years, I’ve developed 320+ gluten-free recipes celebrating authentic Latin flavors using cassava flour and plantain alternatives.
My gluten-free empanada recipe won “Best Appetizer” at the 2023 Miami Gluten-Free Food Festival. I ran “Sabores Sin Gluten,” a catering business serving Miami’s Latino community—quinceañeras, family gatherings, all the celebrations that matter.
Food is culture, and everyone deserves to experience the joy of sharing traditional family meals, regardless of dietary restrictions.