
You know those days when the afternoon slump hits hard and you just need something simple, sweet, and kid-approved? Those days were tough when my son first started going gluten-free. I worried constantly about him missing out on fun treats at parties or school. That’s why I poured all my energy into creating the perfect little safe haven in a loaf—the glorious Banana Bread Minis (Snack-Size). I still vividly remember the first batch I baked for him; the whole house smelled amazing, and seeing his face light up when he got his own little portion made all that mixing worth it! These aren’t just quick treats; they are a joy-filled, gluten-free possibility made real in your own kitchen.
Trust me, these little loaves are the answer to all your busy-parent packing needs. They come together so fast, and just knowing they are wholesome makes me feel like a superhero parent, even if I’m just wiping down the counters! You can find out a bit more about my philosophy on family eating over on my About Page, but let’s get baking!
Why These Banana Bread Minis (Snack-Size) Are Perfect for Families
Honestly, these little guys solve so many problems once you get them in your rotation. They hit that sweet spot for busy parents who need something reliable. Because they are a Quick Bake, I can whip up a batch while the kids are doing homework. And the best part? They’re fantastic for making ahead! Store them in an airtight container, and you have instant snacks ready all week long.
Plus, for families navigating food sensitivities, these are a lifesaver. They turn into the perfect Lunchbox Treat that everyone can enjoy, no worrying about cross-contamination or buying expensive pre-packaged stuff. You can check out some other great options for school days right here.
The Appeal of Snack Size
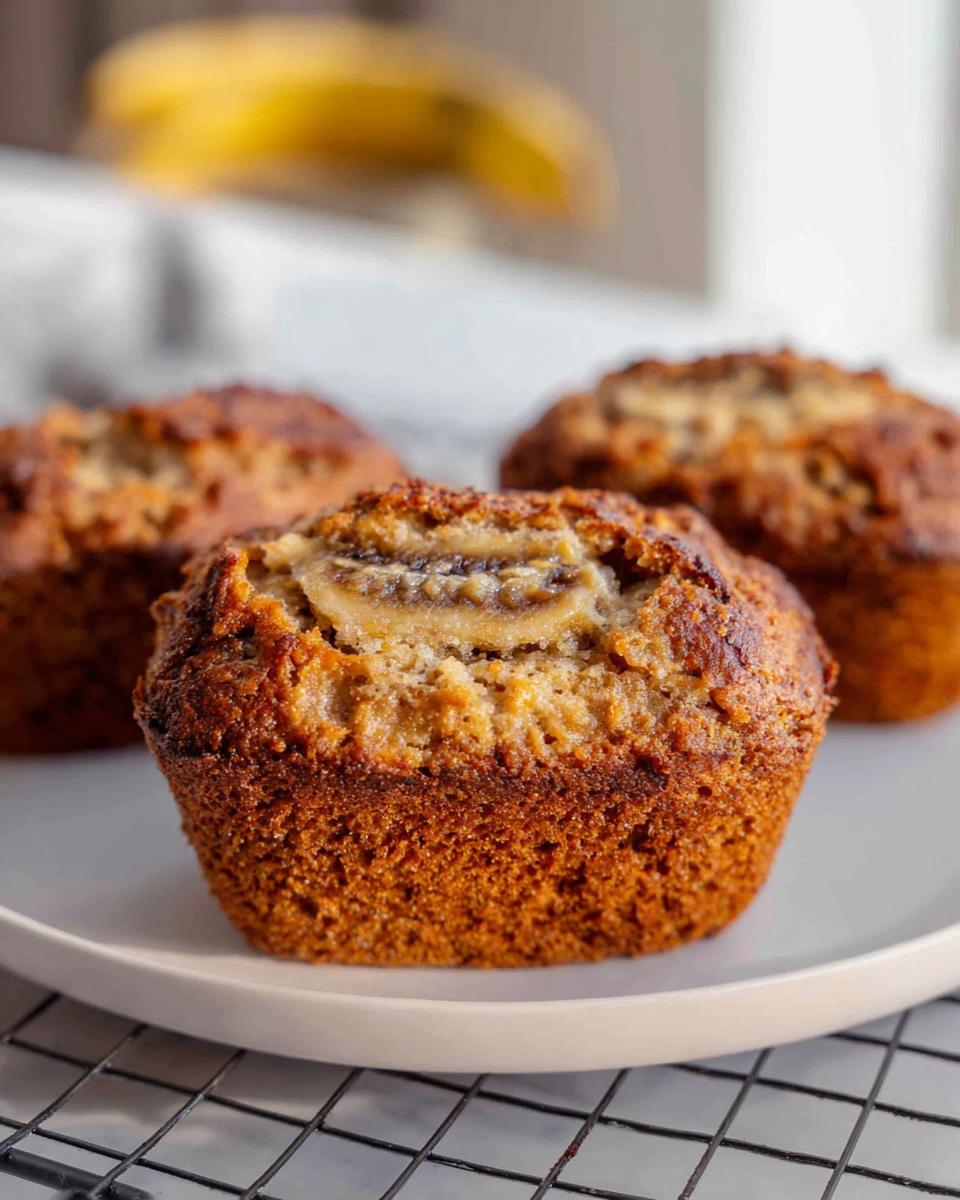
The size is everything! These little loafs are just right for small hands—no huge mess trying to cut a slice from a big loaf. Portion control is easy, and they’re sturdy enough to toss right into a lunch bag without turning into crumbs. They feel like a real cupcake but have all the goodness of banana bread!
Gathering Ingredients for Your Banana Bread Minis (Snack-Size)
Okay, you’re ready to bake, and the first step is always the ingredient stash, right? Since these are healthier and more concentrated versions of the classic, we only need a few simple things. Remember, when you’re aiming for that perfect quick bake, ingredient quality matters! We’re keeping it streamlined, which is why I love this recipe for those busy afternoons. Don’t forget, if you’re deep into gluten-free life, you can check out my resources on all things GF baking!
For the Banana Bread
This ingredient list is surprisingly short, but don’t let that fool you—the flavor payoff is huge!
- 1 small (6-7”) over-ripe banana, mashed into a puree
- 3 tablespoons unsalted butter, at room temperature/ very soft, plus extra for pan
- 3 tablespoons sugar
- 2 tablespoons honey
- 1 large egg yolk
- 1/2 cup flour
- 1 tablespoon wheat germ (optional)
- 1/4 + 1/8 teaspoon baking soda
- pinch salt
- 2 tablespoons finely chopped pecans (optional)
Essential Equipment for Making Banana Bread Minis (Snack-Size)
You don’t need a whole suite of fancy gadgets for this recipe, which is another reason I love it for an afternoon bake! We’re keeping things super simple. Having the right pan, however, is non-negotiable, otherwise, you won’t get that perfect little shape we’re aiming for.
The star here is definitely the pan. Since we are aiming for Snack Size, you’ll need a mini loaf pan. If you happen to have one meant for six small loaves, that’s ideal, but one that makes three or four works just fine, you might just have to bake in batches if you double the recipe!
Here’s what you should gather before you even think about mashing those bananas:
- Mini loaf pan (Look for one that yields small loaves, approximately 5 3/4” x 3” x 2” is what I use!)
- A sturdy mixing bowl—we’re mixing by hand here, so grab one that won’t slide around
- A simple fork for perfectly mashing that over-ripe banana into a smooth puree
- Your oven, of course—preheated!
- A wire rack for cooling, so those bottoms don’t get soggy while the center finishes setting up.
That’s it! No fancy stand mixers required. I love that I can pull this equipment out of the drawer and be baking inside of ten minutes. It’s efficiency at its best for busy parents!
Step-by-Step Instructions for Your Quick Bake Banana Bread Minis (Snack-Size)
This is where the magic really happens, and it happens fast! Because these are smaller, they bake much quicker than a full loaf, which is such a blessing when you’ve got hungry little ones waiting. First things first—get that oven yelling hot at 350°F (175°C). You also need to butter your mini loaf pan really well. I mean, slather it on! Since these are small, they can stick easily if you skimp on the grease.
We mix in stages. You’ll use a fork to mash that banana until it looks like baby food. Then, stir in the soft butter, sugar, and honey. Once that looks smooth, mix in the egg yolk. This creates the base of our moist little loaves. You can sneak a peek at some other great breakfast ideas you can whip up fast here.

Mixing the Wet and Dry Components
Now for the most crucial part if you want a tender crumb! You’re going to sprinkle in the flour, the optional wheat germ, baking soda, and salt over the wet mixture. Pay close attention here: just stir until you see the flour streaks mostly disappear. Seriously, stop mixing! If you overmix, even with gluten-free flour, you’ll end up with dense little hockey pucks, and we want soft Mini Banana Breads.
If you’re using almonds, toss in those chopped pecans now and give it just one or two final gentle folds to distribute everything evenly. Pour that beautiful, thick batter into your buttered mini pans.
Baking and Cooling Time
Pop those pans right into your preheated oven. They generally need about 35 to 40 minutes. You’ll know they’re done when you stick a toothpick right in the center and it pops out clean—not wet batter, just maybe a few moist crumbs clinging on. That means they’ve set up perfectly!
Resist the urge to immediately yank them out! Let them hang out in that warm pan for about five minutes. After that short rest, carefully turn them out onto a wire rack. They need to cool completely on that rack, or condensation will make the bottoms soggy. Once they are cool, snack time is officially open!
Tips for Success with Gluten-Free Banana Bread Minis (Snack-Size)
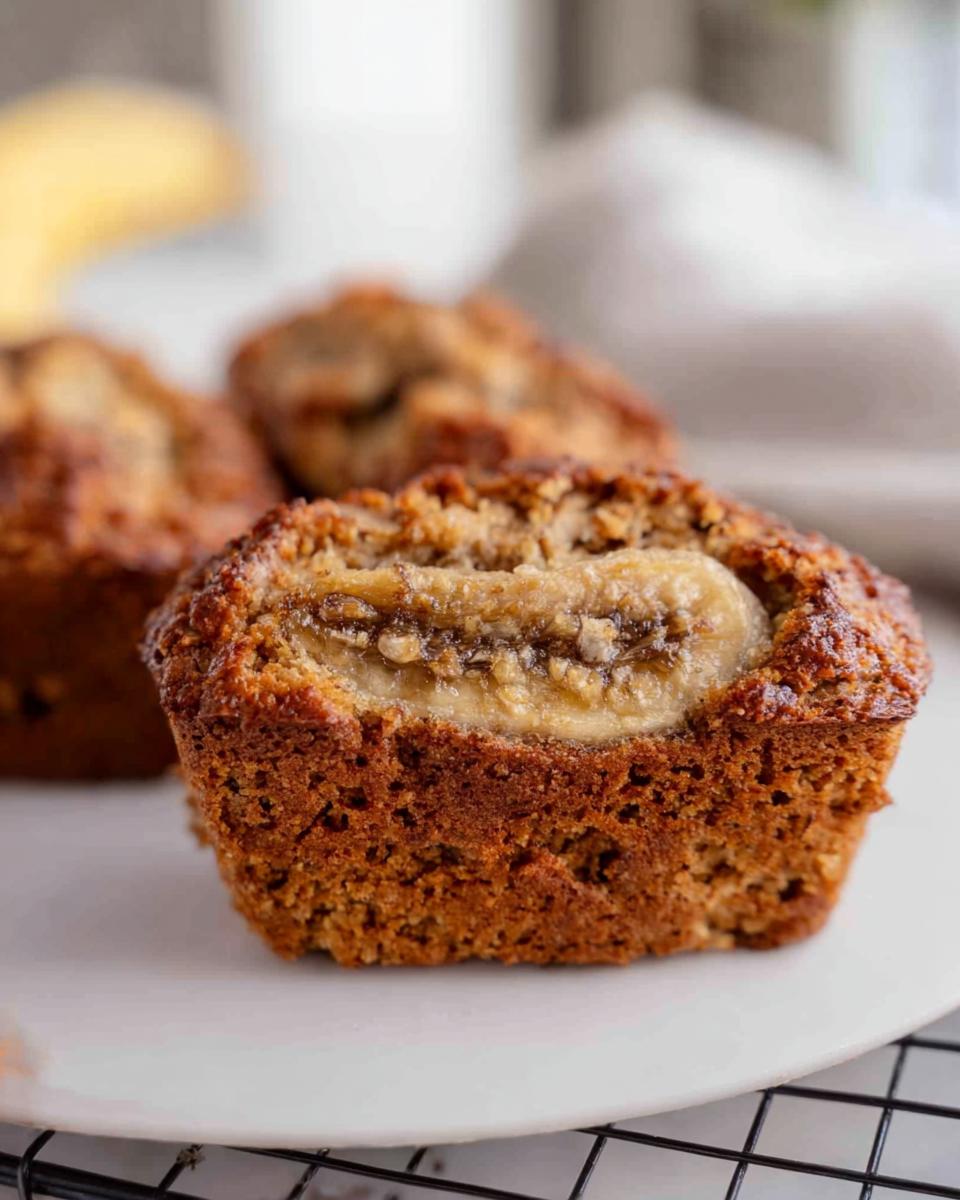
Even though this recipe is so straightforward, working with bananas and gluten-free flour means we have a few little tricks up our sleeve to guarantee these turn out like little slices of heaven every single time. If you haven’t mastered using super ripe bananas, don’t worry! That deep black color is pure gold—it means maximum natural sugar and moisture, which is essential when we are keeping the added sugar low.
When I first started experimenting with these little loaves for my son, I learned the hard way that the texture hinges on the fruit! If your bananas aren’t quite mushy enough, the final product can be a bit heavy. I always keep a bag of blackened bananas in the freezer just for this reason; when I need them, I just microwave one for about 30 seconds until it’s easy to mash. It’s my secret weapon for those spur-of-the-moment bakes!
You can stop by here to see how I manage other tricky GF textures, but these tips specifically nail the banana bread.
Ingredient Notes and Substitutions
Let’s talk about those optional bits and pieces that make a difference. The wheat germ is totally optional, but I highly recommend including it! It adds a tiny bit of nutty complexity and a small boost of nutrition without changing the flavor much. If you skip it, no worries at all.
The pecans, if you use them, should be finely chopped, otherwise, they might throw off the delicate balance of batter in these tiny molds. If you are baking for someone with nut allergies but you still want that little textural crunch, try using toasted sunflower seeds instead. They provide a great pop!
Now, about the flour. The recipe calls for basic flour, but if you’re working strictly gluten-free, you absolutely must swap this out! I’ve had the best texture using a high-quality 1-to-1 gluten-free blend that already contains xanthan gum. If your blend doesn’t have it, quickly whisk in about 1/4 teaspoon of xanthan gum yourself. This replaces the structure you lose when removing wheat, ensuring your Mini Banana Breads hold together like a dream. For general GF guidance, I always recommend checking resources like this article when substituting ingredients!
Storage and Make Ahead Options for Snack Size Treats
Because these are Banana Bread Minis (Snack-Size), they are inherently designed for making ahead, which is a lifesaver for me! There’s nothing better than grabbing a perfect, ready-to-go snack from the counter mid-morning rush. Since these are quite moist from that ripe banana, storage is a little important to keep them tasting fresh and not getting gummy or drying out.
The main thing you need to remember is airtightness. You don’t want them exposed to air if you want to enjoy them later in the week. For shorter storage, the counter is fine, but if you’re planning on keeping them for the kids’ lunches all week, the fridge is your safest bet.
If you want to get really organized, you can absolutely bake these over the weekend for the whole week ahead. You can find some great ideas on streamlining your weekly routine on my meal prep inspiration page!
Here’s the breakdown:
- Room Temperature: Keep them tightly sealed an airtight container on your counter for up to three days. They stay beautifully soft this way.
- Refrigerator Storage: Seal them in an airtight container, and they should keep wonderfully for a full week. They might firm up just a tiny bit when cold, but they’re still delicious!
- Freezing Success: If you need them to last longer, wrap each mini loaf individually in plastic wrap first, then place them all into a sturdy freezer bag. They freeze beautifully for up to three months! Just let them thaw overnight on the counter when you need one.
I always make a double batch just to pop half straight into the freezer. It’s the ultimate Make Ahead victory!
Serving Suggestions for Your Banana Bread Minis
Finding ways to serve these little golden beauties is half the fun! Since these are designed to be a super simple Snack Size option, you don’t need fancy garnishes or complicated setups. Remember, the goal is quick, healthy, and appealing for busy kids—or quick fuel for you!
I always find that a little presentation goes a long way, especially if you’re packing them up to look exciting in a bento box later. You can see all my favorite quick ideas on my main recipe hub.
Lunchbox Delight
This is their main gig, really! I usually just wrap one snugly in parchment paper or a silicone liner. If you’re packing them the night before, just let them cool completely first. They look fantastic tucked alongside some sliced apples or cheese cubes. They are dense enough that they don’t crumble under the weight of a juice box, which is a major parent win.
Warm Snack Seconds
If you happen to be at home when you pull these out of the oven, try serving them slightly warm. Just let them cool enough so you don’t burn yourself! A tiny smear of almond butter on top while they are still steamy is incredible—it melts right in and adds healthy fats for lasting energy. It’s decadent but still feels homemade and wholesome.
Dipping Station Fun
For an exciting afternoon snack twist, set up a little dipping station. Kids love dipping things! You can offer small bowls of Greek yogurt (thicker is better) or maybe even a drizzle of melted dark chocolate—use sparingly, though! This turns a simple bite into a fun activity. It works great for kids learning to feed themselves, too.
The Morning Boost
Don’t save them just for the afternoon slump! Honestly, these bake up perfectly firm in the morning. If you need an extremely fast breakfast, grab one of these Mini Banana Breads and a quick pour of milk. It’s way better than a sugary cereal, and it takes zero effort since they are already perfectly portioned and ready to go!
Frequently Asked Questions About Banana Bread Minis (Snack-Size)
I know when you’re baking for kids, especially when you’re trying to manage dietary needs, questions pop up fast! I’ve gathered the ones I get most often about these little treats. Hopefully, this helps you nail that Quick Bake every time!
Can I make these without the honey?
That’s a great question about making these even simpler! Yes, you absolutely can skip the honey. Since the banana is bringing a lot of natural sweetness, you might not even miss it. If you feel like it’s getting too bland without it, try swapping the honey for the same amount of maple syrup, or just add an extra teaspoon of sugar to your mix. But honestly, with a really ripe banana, you might be surprised how sweet they are already!
How long do these Mini Banana Breads stay fresh?
These are fantastic for making ahead, remember? Since they are Snack Size, they don’t stay as moist as a huge loaf, so you want to keep them sealed up good. If you keep them tightly sealed in an airtight container at room temperature, they are perfect for about three days. If you need them to last longer, pop them in the fridge; they stay great there for a full week. Storing them properly is key if you want them to be the perfect Lunchbox Treat later in the week!
Is wheat germ absolutely necessary for structure?
Nope, it’s not mandatory, even if I highly recommend it for that little nutritional bump! If you are avoiding it or just don’t have it on hand, you can leave it out completely. Just know that if you leave out the wheat germ *and* you are using a gluten-free flour blend, make sure that blend already has xanthan gum in it. The wheat germ offers a little bit of structure, so without it, you want that gum substitute to keep your Mini Banana Breads from crumbling apart when you handle them!
Can I use frozen bananas instead of fresh ripe ones?
Oh, absolutely! In fact, I often prefer them frozen because they get so mushy when they thaw, which makes mashing much easier. Just make sure you thaw them completely first and drain off any significant liquid that pools in the bowl after defrosting. Too much liquid can throw off the moisture balance for these small bakes. When they thaw, they become the perfect puree for this recipe!
If you need any other quick tips or just want to chat about recipe modifications, don’t hesitate to reach out to me through my contact page!
Estimated Nutritional Information for Snack Size Baking
Okay, listen up—since these are smaller and use whole ingredients, they are definitely a better choice for a quick bite than grabbing something processed, but we still need to be realistic about the numbers, right? This is for my piece of mind, and maybe yours too, especially when trying to balance out school lunches.
I ran the numbers for one of these little loaves based on the core ingredients listed—that means I didn’t count the optional wheat germ or pecans here. This information is based on standard measurements, so please keep that in mind!
Here is what you can generally expect per single serving (that’s one mini loaf):
- Calories: Approximately 130-150 kcal
- Fat: Roughly 6-8g
- Protein: About 2-3g
- Carbohydrates: Around 16-20g (lots of natural sugar from the banana!)
Now, a super important note, because I want to be totally transparent with you: these values are just an estimate! If you use brown sugar instead of white sugar, or if your banana was gigantic, the numbers shift a little. If you add those optional pecans next door, you are definitely adding a few more grams of fat and maybe 25 more calories. Think of this as a helpful guideline for your snack size planning, not a strict lab result!
Share Your Banana Bread Minis (Snack-Size) Creations
I’ve shared all my secrets, the personal history, and every little tip I have for turning those sad-looking bananas into the most delightful Banana Bread Minis (Snack-Size) you can imagine. But honestly, the best part of sharing a recipe is hearing from you! I truly want to know how they turned out for your family.
Did they vanish the second they cooled down? Did your picky eater actually try one? Don’t keep that success story to yourself!
Please, take a moment after you bake them to come back here and leave a star rating for the recipe. It helps other busy parents looking for reliable, feel-good baking land on the right page. You can easily drop your ratings and thoughts right in the comments section below, and I promise I read every single one!
Also, if you managed to snap a picture of your golden little loaves—especially if you packed them artfully into a lunchbox or put them on display—I would absolutely love to see them! Tag me on social media! Sharing our kitchen wins, especially when they are gluten-free and kid-approved, makes all the testing and stirring worthwhile. Let’s keep sharing those simple, joyful baking ideas over on my Pinterest boards for ongoing inspiration!

Banana Bread Minis (Snack-Size)
Ingredients
Equipment
Method
- Preheat your oven to 350°F (175°C). Grease a mini loaf pan (approximately 5 3/4” x 3” x 2”) with extra butter.
- In a medium bowl, mash the banana into a puree using a fork.
- Add the butter, sugar, and honey to the mashed banana and stir well. Stir in the egg yolk until combined.
- Sprinkle in the flour, wheat germ (if using), baking soda, and salt. Stir until just combined. If using pecans, stir them in now.
- Pour the batter into the prepared mini loaf pan. Bake for 35-40 minutes, or until a toothpick inserted into the center comes out clean.
- Let the mini banana bread cool in the pan for a few minutes before carefully transferring it to a wire rack to cool completely.
Notes
Tried this recipe?
Let us know how it was!
Gluten-Free Nutritionist & Family Meal Planning Expert
Working as a pediatric dietitian at Children’s Hospital of Denver, I kept meeting families overwhelmed by managing their children’s celiac disease. Parents stressed, kids frustrated, everyone eating bland boxed “gluten-free” products.
That’s when I realized my calling: creating practical, balanced gluten-free solutions for real families with busy schedules. I’ve developed 375+ family-friendly recipes focusing on lunch boxes, after-school snacks, and make-ahead dinners that actually work.
My meal planning system was featured in Parents Magazine, and I presented research at the Rocky Mountain Pediatric Nutrition Conference. My evidence-based approach ensures recipes meet both taste and health standards—families need solutions that work in the real world, not just perfect test kitchens.