
Oh, finding truly moist banana bread is like hunting for culinary gold, isn’t it? So many recipes promise richness but end up dry and crumbly by the time you get to the end pieces. I spent years fighting that battle, especially after my daughter received her celiac diagnosis. She was so down about missing out on bakery favorites, but that challenge actually birthed our keeper—the Best Ever Banana Bread (Moist & Easy).
I vividly remember that first batch. As we mashed those perfectly spotty bananas together, her giggles filled our kitchen. That rich, sweet aroma wafted through the house, a wonderful reminder that special moments didn’t have to stop just because we had new dietary needs. That first slice we shared, warm with just a smear of butter, was pure magic for us. It brought smiles back instantly!
This recipe isn’t just for those of us navigating gluten-free lifestyles, though! If you’re a busy parent trying to whip up something delicious using ingredients already sitting in your pantry, this is for you. We’re talking super tender, wonderfully simple, and ready before you know it. Trust me, this one hits all the right notes for snacks, lunchboxes, and family gatherings. If you want to hear more about my journey figuring out family meals, you can always pop over to see my little corner of the internet!
Why This is the Best Ever Banana Bread (Moist & Easy)
I know, I use ‘best ever’ a lot, but honestly, this one lives up to the hype. For the families out there juggling school runs and after-school activities, convenience is key, but never at the expense of flavor. This recipe delivers on all fronts. You can explore more of my philosophy on easy baking over in my baking category.
- It promises a truly Moist And Tender crumb every single time.
- It’s a simple One Bowl recipe, meaning cleanup is minimal!
- It’s an incredibly Easy Bake, perfect for new bakers or tired parents.
Achieving Truly Moist And Tender Banana Bread
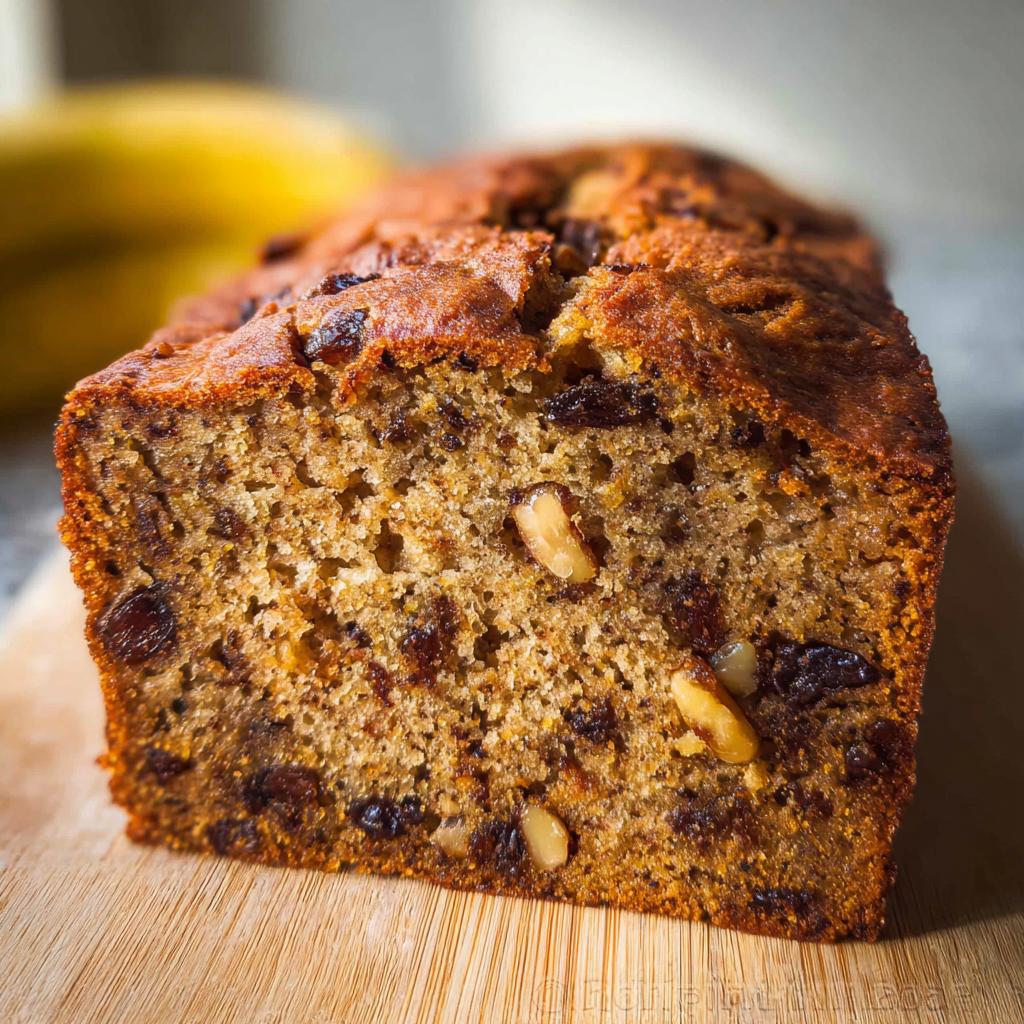
The secret sauce—besides having bananas that are practically black, of course—is the balance between the mashed fruit and the fat. We’re liberal with the softened butter, which locks in moisture. Plus, we incorporate the dry ingredients quickly after the eggs are mixed in. This keeps gluten development (even in regular flour versions) to a minimum, meaning you get that soft, almost melt-in-your-mouth texture.
The One Bowl Method for the Best Ever Banana Bread (Moist & Easy)
Who has time to wash three different bowls for one loaf? Not me! The Best Ever Banana Bread (Moist & Easy) is designed around speed. You mix the wet ingredients, toss in the dry stuff, stir until just shy of combined, add your mix-ins, and boom—batter is ready. It’s the ultimate Easy Bake solution for busy weeknights.
Gathering Pantry Ingredients for Your Best Ever Banana Bread (Moist & Easy)
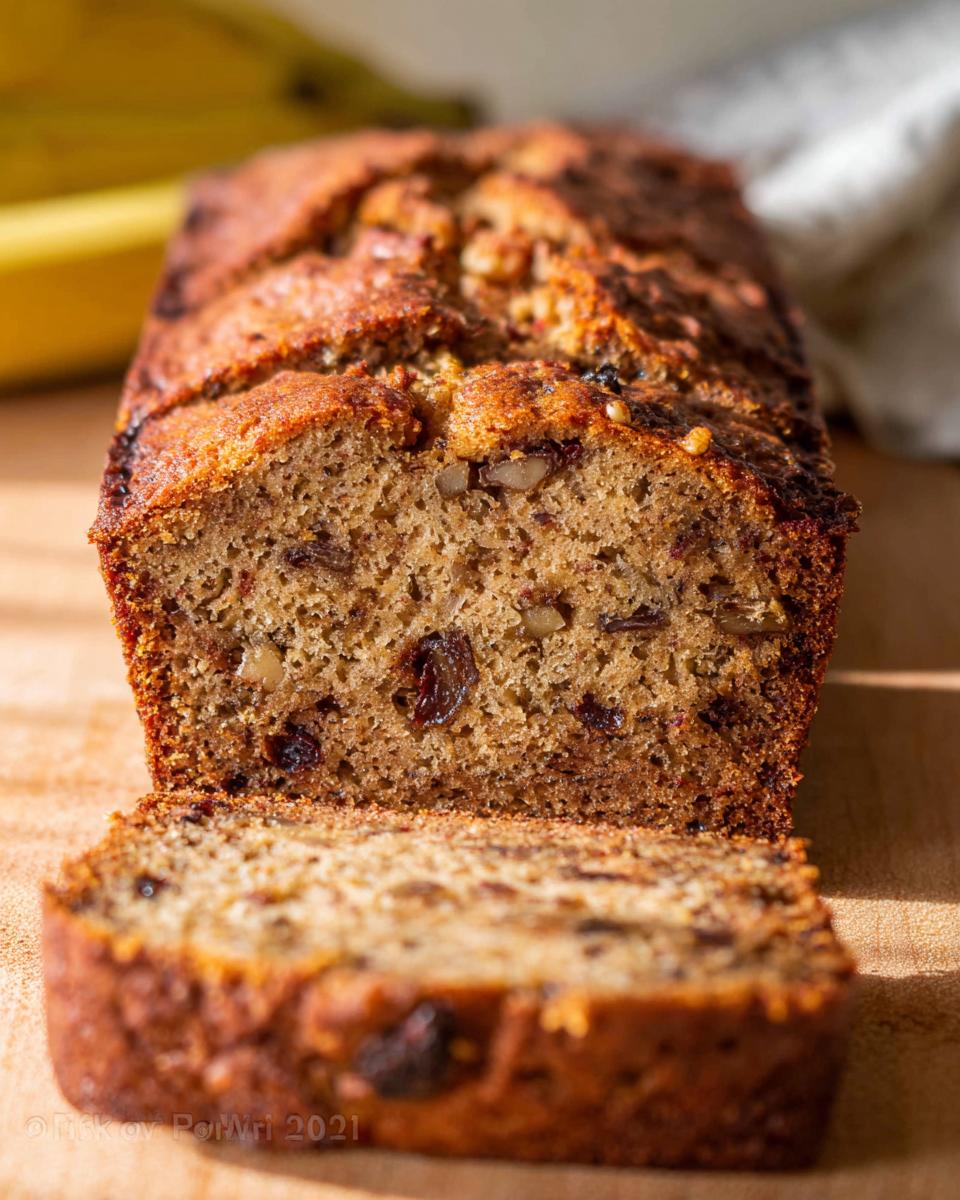
Look, the beauty of this Best Ever Banana Bread (Moist & Easy) is that 99% of what you need is probably already sitting on your counter waiting for you. No last-minute trips to the store! Except, maybe those bananas—they have to be perfectly spotty, right? They are the star of the show. When you check your list against mine, make sure you grab everything so we can get this wonderful Moist And Tender loaf baked up quickly!
Essential Ingredients for Moist Banana Bread
Let’s get organized here. I’ve broken down exactly what you need for the batter. Remember, for the deepest flavor, you really want those bananas to look like they’ve been forgotten for a few extra days—that intense natural sweetness is what keeps the loaf so Moist And Tender.
- For the Banana Bread:
- You need 3 very ripe bananas (medium/large size is perfect).
- 8 Tbsp unsalted butter, making sure it’s softened up nicely.
- 3/4 cup granulated sugar (or, hey, use honey if that’s what you have!).
- 2 large eggs that you’ve lightly beaten beforehand.
- 1 1/2 cups all-purpose flour.
- 1 tsp baking soda for that lift.
- 1/2 tsp salt to balance everything out.
- 1/2 tsp vanilla extract—don’t skip this little flavor booster!
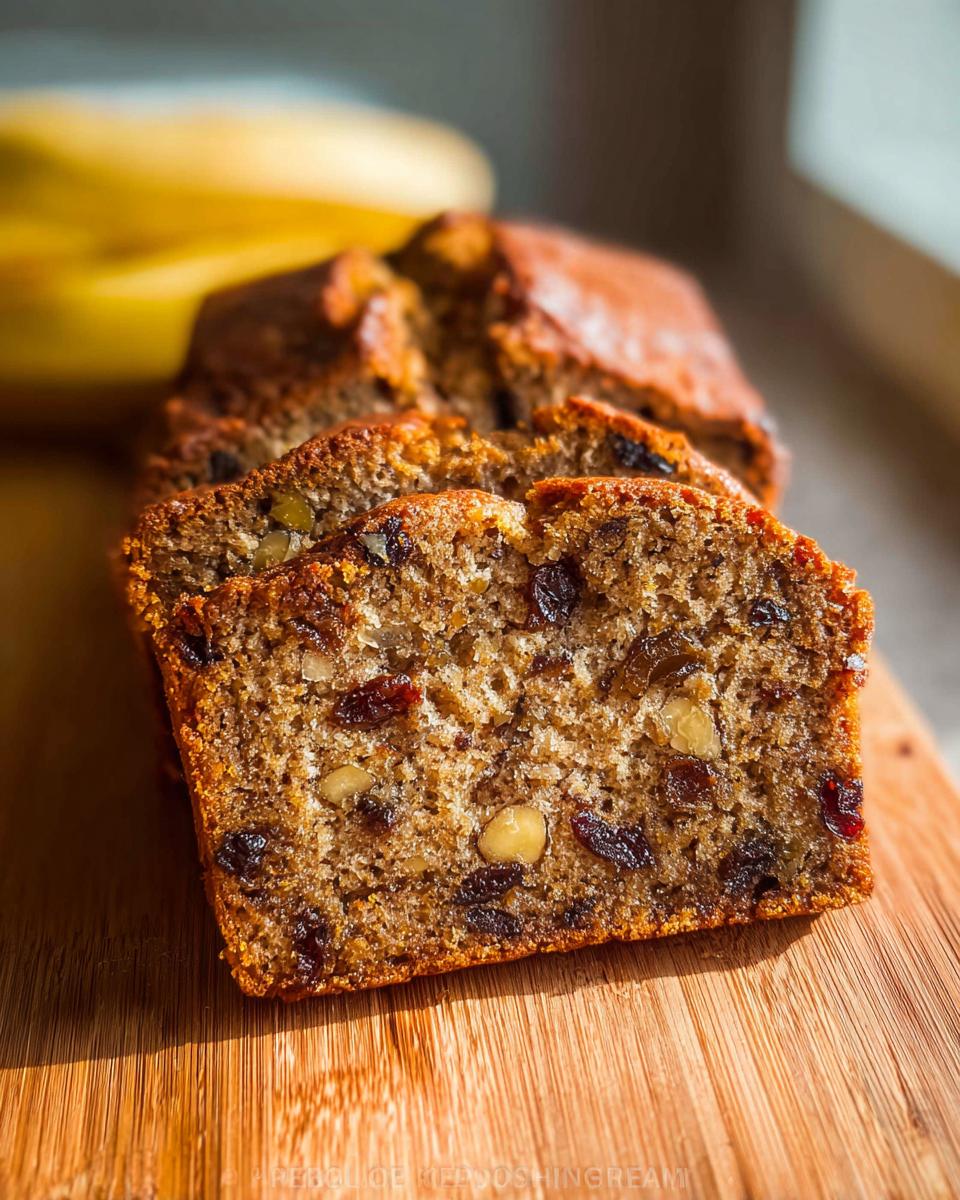
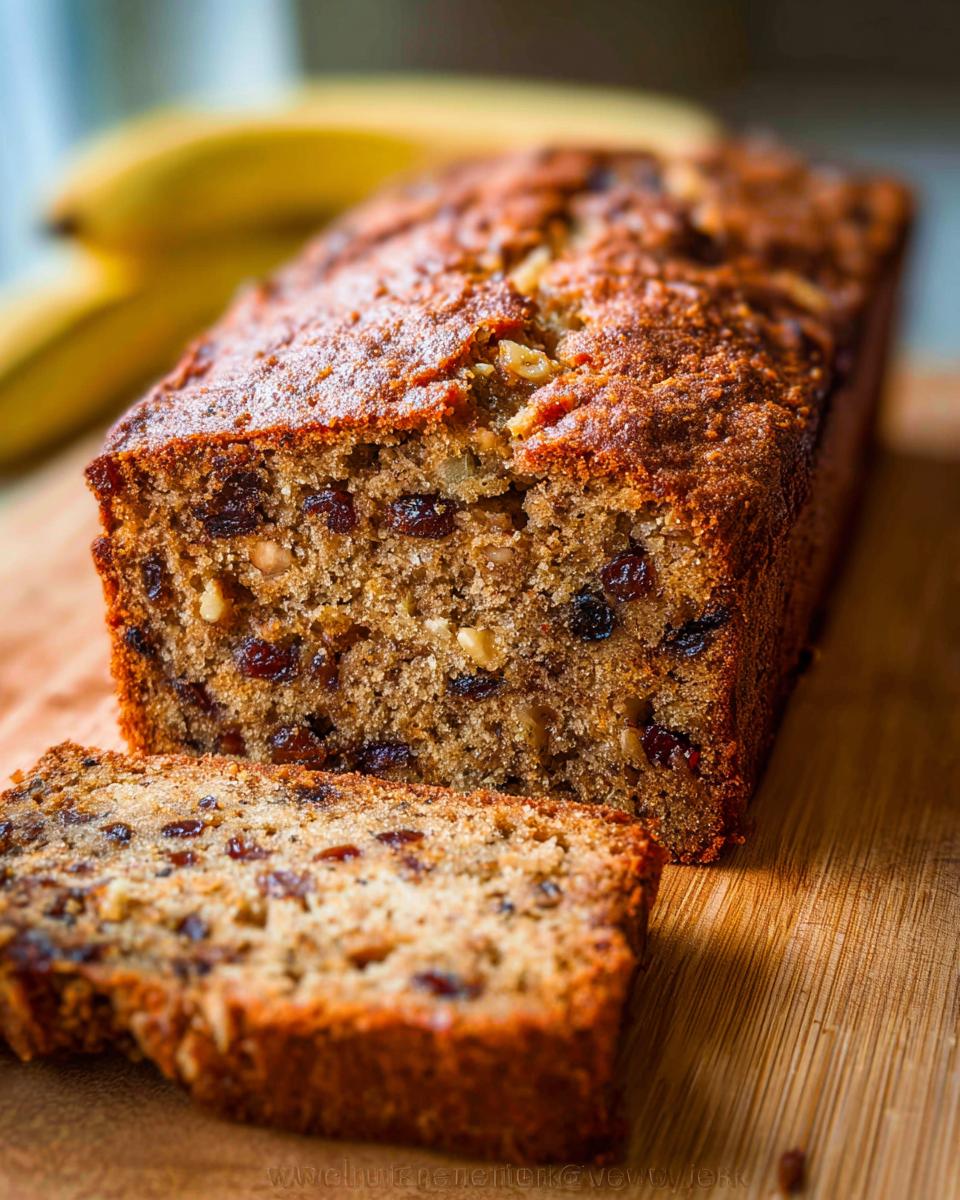
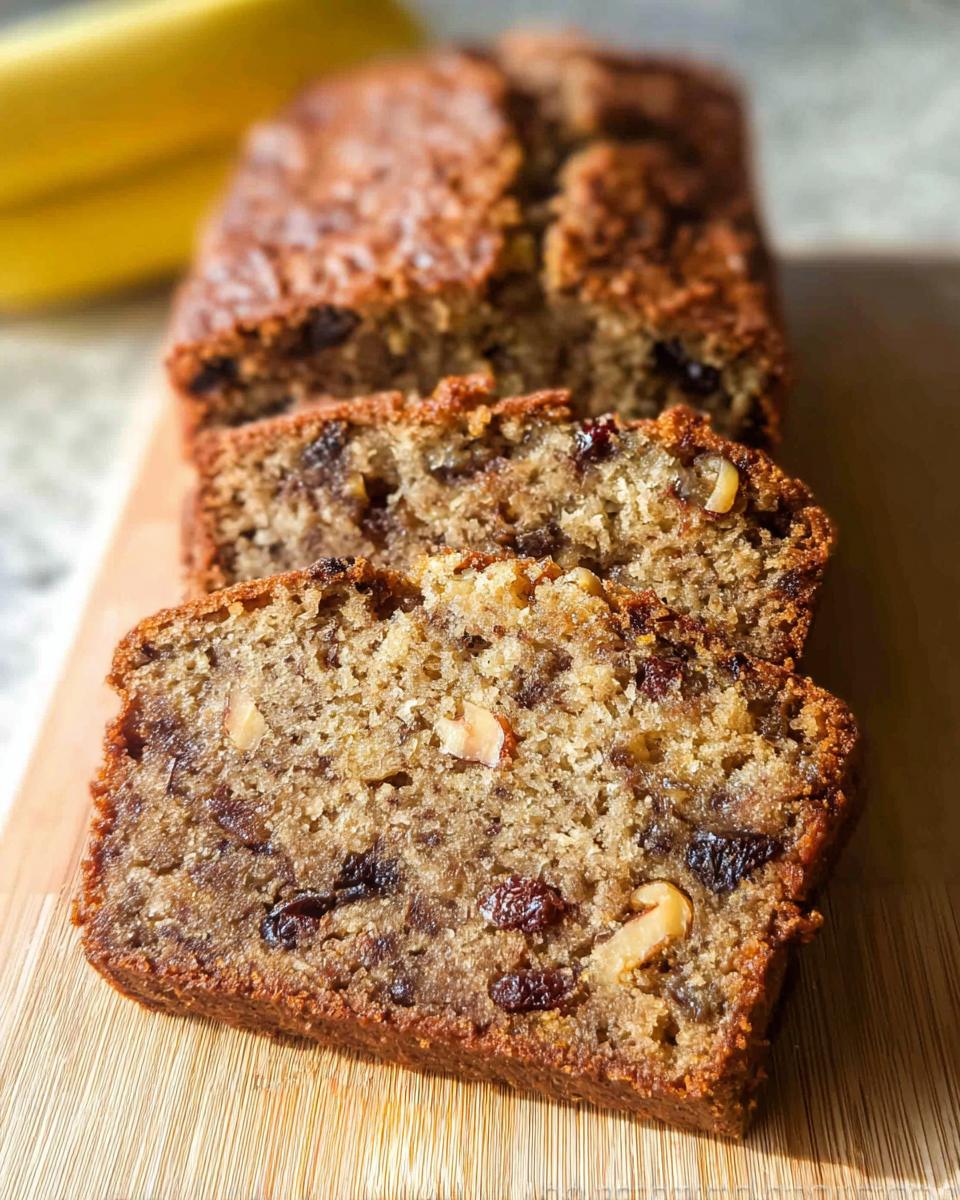
- 1 cup walnuts, chopped (don’t forget to toast these!).
- And 1/2 cup raisins, because sometimes texture surprises are the best surprises!
Step-by-Step Instructions: How to Make the Best Ever Banana Bread (Moist & Easy)
Okay, this is where the magic happens! Remember I told you this is an Easy Bake? It really is. We’re looking at about 15 minutes total prep time, plus a short rest before it goes in the oven. We need about 60 minutes baking time, and then that crucial 10 minutes resting time before it cools completely. Let’s follow along so we get that perfect, Moist And Tender result every time for our Best Ever Banana Bread (Moist & Easy).
Preparation and Mixing Steps for Easy Bake Banana Bread
First things first, let’s get the oven ready. You want to preheat it to 350°F (175°C). While that’s warming up, take your 9×5 inch loaf pan and grease it well, then dust it lightly with flour. I usually use baking spray and then a light sift of flour, just to be safe!
Now, here’s a little pro tip for texture: toast your nuts! Lightly toast the chopped walnuts in a dry little skillet over medium heat. You only need a few minutes—just until they smell gloriously nutty. Don’t walk away, though, they burn fast! Let them cool down afterwards.
Time to mix! Grab that big bowl. Cream your softened butter and sugar together until they look smooth and happy. Then, mash those ridiculously ripe bananas with a fork until they’re about the consistency of chunky applesauce. Add that to the butter and sugar mix, along with your lightly beaten eggs. Stir it gently until it’s just combined. We’re keeping things light here!
In a separate little dish (okay, sometimes my one-bowl theory takes small breaks for accuracy!), whisk your flour, baking soda, and salt. Now, add this dry stuff to your wet ingredients. This is important: stir it until *just* combined. Seriously, stop stirring when you still see a few streaks of flour. Overmixing is the enemy of tender banana bread!
Finally, stir in that vanilla extract, those toasted walnuts, and the raisins. That’s it—your batter is ready to pour! If you want to see how others are baking theirs, you can always check out some great tutorials like Natasha’s excellent videos for technique inspiration!
Baking and Cooling the Best Ever Banana Bread (Moist & Easy)
Pour all that beautiful, thick batter right into your prepared loaf pan and smooth the top gently. Pop it into that 350°F oven and let it bake for about 55 to 60 minutes. You’re looking for that moment when a toothpick inserted right into the center comes out clean—no wet batter clinging to it!
This next period is crucial for getting that Moist And Tender slice of Best Ever Banana Bread (Moist & Easy). After you pull it out, let it sit right there in the hot pan for a solid 10 minutes. Resist the urge to flip it out immediately! That short rest lets the structure set up perfectly.
After those 10 minutes, gently transfer the loaf onto a wire rack. It needs to cool fully there before you slice it, but honestly? Slicing it warm (after that 10-minute rest) is worth the slight risk of leaning towers! You can find more tips and tricks for all sorts of baking projects in my recipe archive.
Tips for Success When Baking Moist Banana Bread
Even though this recipe is so forgiving, I have a few secrets I always use to guarantee that incredible texture. Remember, baking is chemistry, but it should feel like fun, not homework!
First off, those spotty bananas? They can’t be anything less than covered in brown spots. That’s pure, concentrated sugar we need for moisture! Don’t even think about using yellow ones—they just won’t give you that deep flavor.
Second tip, and this is small: when you fold in the flour mixture, treat it gently. I mean, seriously gentle. Over-stirring is what tightens up the bread and makes it tough. Stop as soon as you stop seeing white powder. It’s okay if the batter looks a tiny bit lumpy!
Also, if you’re worried about sticking (which happens, especially with high-sugar recipes!), use the cake goop trick, or at least be really generous with your grease and flour step. Nobody likes having to chisel the bottom half of their beautiful loaf out of the pan. You can check out my favorites for muffins and cupcakes for more tips on pan prep over here!
Ingredient Notes and Substitutions for Your Banana Bread
One of the things I love most about this recipe is how flexible it is when you’re working with what you have on hand. Life happens, and sometimes the pantry is looking a little picked over! We designed this to be super dependable, but swaps are totally doable.
If you’re out of the granulated sugar, don’t panic! I noted that you can easily swap in honey. Start with about 2/3 cup of honey for the 3/4 cup of sugar, and remember that honey adds a little extra liquid, so you might notice the batter seems slightly wetter—that’s fine!
What about the mix-ins? The walnuts and raisins pair so well with the banana flavor, but if nuts aren’t your thing or you have allergies, just skip them! You can substitute the walnuts with chocolate chips for a totally different, but equally fantastic, treat. Or, if you skip both, you might want to add an extra teaspoon of vanilla for depth.
If you need anything clarified about ingredient swaps or want to run a substitution idea past me, feel free to reach out via my contact page. Happy baking!
Storing and Serving the Best Ever Banana Bread (Moist & Easy)
This incredible loaf is truly perfect for making ahead, which is a lifesaver for busy families! Finding the right way to store it means you get to enjoy the perfect slice of the Best Ever Banana Bread (Moist & Easy) days later, not just on baking day.
For general storage, if you plan on eating the loaf within three days, just keep it wrapped tightly at room temperature. Wrap it securely in plastic wrap or foil—this stops air from getting to it and drying out that precious moist crumb we worked so hard to achieve. If your kitchen is super warm or humid, you might want to pop it in the fridge, but maybe give it a quick 15-second zap in the microwave before eating.
If you need to keep it longer, say for lunchboxes next week, freezing is your best bet! Slice the loaf first—this is so much easier than trying to cut a frozen block later. Wrap each individual slice well, and they will actually keep beautifully for up to three months. When you want one, just unwrap it and let it thaw on the counter for an hour, or zap it instantly!
Now, serving suggestions! My favorite way, as I mentioned, is warm with a generous spread of real butter melting right into the top. It releases all those wonderful banana and vanilla aromas again, making it smell like you just pulled it out of the oven! But honestly, this bread is already so good, it’s fantastic just on its own, packed up tight for lunchboxes or an after-school snack. You can find some great ideas for packing lunchbox treats right here in my special occasions section!
Common Questions About Making Moist Banana Bread
It’s totally normal to have questions, especially when trying a new favorite recipe! Baking should be fun, not mysterious, so let’s clear up some of the things I hear most often from folks trying to achieve that perfectly Moist And Tender result. Remember, we want this to be your go-to recipe, perfect for those everyday breakfasts or when you need a fast snack!
I’ve gathered a few of the most frequent chats we’ve had over on social media. If you’re just looking for quick inspiration for breakfast ideas, check out what others are loving in this round-up!
Can I make this recipe Gluten-Free?
Oh, absolutely, you can! Since our family manages gluten sensitivities now, I’ve tested this quite a bit. If you swap the all-purpose flour for a good quality 1:1 gluten-free baking blend—the kind with xanthan gum already mixed in—it works like a dream. You get all the tenderness and moisture without any of the worries. I actually started perfecting this loaf when we had to make that switch, so it’s near and dear to my heart!
How do I know if my banana bread is done?
The toothpick test is your best friend here, but don’t rely on just that! When the toothpick comes out with only moist crumbs clinging to it—not sticky, wet batter—you are close. I also look for the edges of the loaf to slightly pull away from the sides of the pan. If the surface looks perfectly golden brown but the center seems sunken, it probably needs another five minutes. We are aiming for done, but never dry!
My bananas weren’t spotty enough, will it still work?
It *will* work, but I am going to be honest with you: it won’t be the *best* version. If your bananas are still mostly yellow, you’ll get a lighter flavor and potentially a slightly drier texture because the sugar content isn’t maximized. If you’re stuck, try adding an extra tablespoon of that softened butter just to compensate for the missing moisture and sweetness!
Nutritional Estimate for Best Ever Banana Bread (Moist & Easy)
Now, I know some of you are counting calories, and some of us (like me!) just count chocolate chips, but it’s always good to have a ballpark idea of what’s in a slice of this amazing Best Ever Banana Bread (Moist & Easy). This is an estimates section, so keep that in mind!
Because we use real butter and sugar, it’s certainly a treat, but we kept things reasonable by focusing on pantry staples and not overloading it with extra frosting or glaze. These estimates are based on the standard recipe divided into 10 servings, and you can always adjust them yourselves based on what you use!
For a single serving of this wonderful loaf, here’s what we are generally looking at. If you’re looking for more specific nutritional breakdowns for different meal planning needs, check out my resources in the meal type section.
- Calories: Approximately 350
- Fat: Around 18 grams
- Carbohydrates: About 45 grams
- Protein: Roughly 5 grams
Please remember, these numbers are just guides!
If you decide to swap out the regular all-purpose flour for a gluten-free blend (which works great, by the way!), the carb count can shift just a bit. And if you use honey instead of sugar, that changes things too. But honestly, when you taste how incredibly soft and Moist And Tender this Best Ever Banana Bread (Moist & Easy) turns out, worrying about the exact count is nearly impossible!
Share Your Baking Experience
Well, that’s it! You now have my absolute favorite, tried-and-true recipe for the most reliably Moist And Tender banana bread out there. I really hope this loaf becomes a staple in your house like it has in mine, bringing smiles during busy afternoons or quiet mornings.
I genuinely want to hear how it turned out for you! If you loved the simplicity and the texture, please take a moment to drop a star rating right at the top of this post. It really helps other busy families find this recipe!
Did you try using honey instead of sugar? Did you throw in chocolate chips instead of walnuts? I absolutely love seeing your creative twists! Share all your results, questions, or any little adjustments you made in the comments below. We’re all learning together!
And just so you know, I take your privacy seriously—you can always check out my full policy here if you’re curious.
Happy baking, friends!
Best Ever Banana Bread (Moist & Easy)
Ingredients
Equipment
Method
- Preheat your oven to 350°F (175°C). Grease and flour a 9×5 inch loaf pan.
- Lightly toast the walnuts in a dry skillet over medium heat, stirring constantly, until fragrant. Let them cool, then chop them coarsely.
- In a large mixing bowl, cream together the softened butter and sugar until smooth.
- Mash the ripe bananas with a fork until they have a chunky applesauce consistency. Add the mashed bananas and the lightly beaten eggs to the butter mixture. Mix until just combined.
- In a separate bowl, whisk together the flour, baking soda, and salt. Add this dry mixture to the wet ingredients and stir until just combined. Do not overmix.
- Stir in the vanilla extract, chopped walnuts, and raisins.
- Pour the batter into the prepared loaf pan and spread it evenly.
- Bake for 55-60 minutes, or until a toothpick inserted into the center of the bread comes out clean.
- Let the banana bread cool in the pan for 10 minutes before transferring it to a wire rack to cool completely.
Nutrition
Notes
Tried this recipe?
Let us know how it was!
Gluten-Free Nutritionist & Family Meal Planning Expert
Working as a pediatric dietitian at Children’s Hospital of Denver, I kept meeting families overwhelmed by managing their children’s celiac disease. Parents stressed, kids frustrated, everyone eating bland boxed “gluten-free” products.
That’s when I realized my calling: creating practical, balanced gluten-free solutions for real families with busy schedules. I’ve developed 375+ family-friendly recipes focusing on lunch boxes, after-school snacks, and make-ahead dinners that actually work.
My meal planning system was featured in Parents Magazine, and I presented research at the Rocky Mountain Pediatric Nutrition Conference. My evidence-based approach ensures recipes meet both taste and health standards—families need solutions that work in the real world, not just perfect test kitchens.