
Is there anything better than that perfect weekend breakfast scent wafting through the house? For so long, my family connection to that smell was broken because of a simple ingredient restriction. I still remember the first time I made Hash Browns (Crispy Skillet) for my family after my youngest son was diagnosed with celiac disease. I wanted to recreate that crispy, golden breakfast staple that had always been a weekend favorite in our house.
It took some tweaking, but I finally cracked the code! I gathered my ingredients, made sure everything was certified gluten-free, and heated up the skillet. As those potatoes sizzled away, the familiar, comforting smell filled our kitchen, transporting me back to carefree mornings spent around the breakfast table. If you want to know more about my journey in the kitchen, you can check out my About page.
When I served those beautifully crispy hash browns, I watched my son’s eyes light up—he was experiencing a childhood favorite once again. That moment taught me that even with dietary restrictions, we can hold onto cherished memories and flavors, one delicious, crispy bite at a time. Trust me, you won’t miss a thing with this recipe!
Why You Will Love These Hash Browns (Crispy Skillet)
Honestly, these aren’t just any breakfast potatoes; they are family magic made easier! You are going to adore making these for so many reasons. They hit all the right notes:
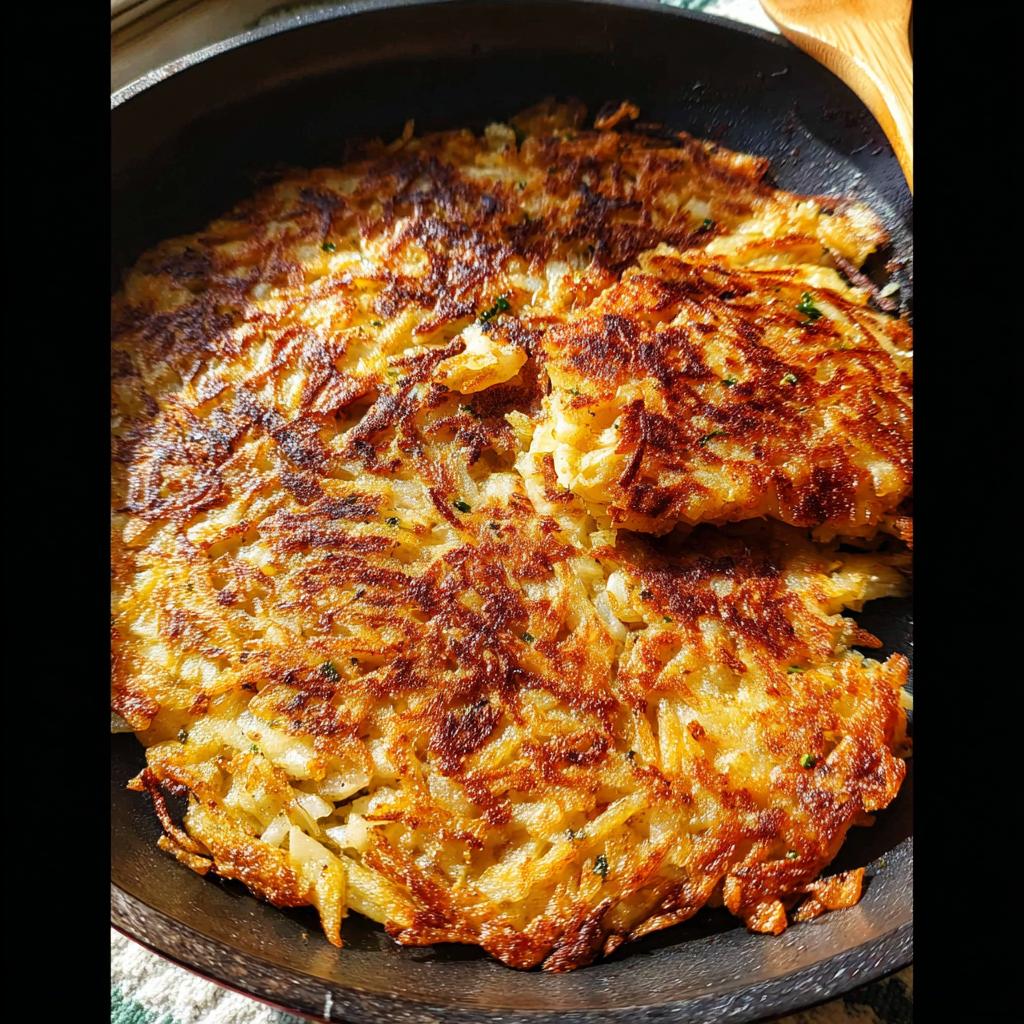
- Ultimate Crunch: We achieve that deep, golden crunch that makes the best Hash Browns (Crispy Skillet), seriously!
- Totally Safe: They are completely gluten-free, so everyone at the table—even those with dietary needs—can enjoy them worry-free.
- Quick Fix: They come together so fast, making even busy weekday mornings feel like a real treat.
- Family Favorite: The smell alone brings everyone running to the kitchen, ready for a hug and a hearty meal.
Essential Ingredients for Perfect Hash Browns (Crispy Skillet)
You don’t need a million fancy things for incredible Hash Browns (Crispy Skillet)! The beauty here is simplicity, but you must use the right potatoes. I insist on Russets—we need about a pound and a quarter of them, which usually means two good-sized spuds. They have the starch we need for a crispy exterior, trust me.
For flavor, we’re keeping it classic. We’re hitting those shredded potatoes with just a little bit of onion powder, some fine sea salt, and fresh black pepper to taste.
Now for the real star of the sizzle: the fat! We use a combination because that mix gives you the best flavor and heat stability. You’ll need one tablespoon of light olive oil—or, if you’re feeling truly traditional and want that deep flavor, use bacon grease! That gets mixed with one tablespoon of good butter. Make sure you split those fats up, as we add a bit before the first side cooks and the rest before we flip. Simple, right?
Expert Tips for Achieving Crispy Skillet Hash Browns
Making hash browns that actually taste like they came from a great diner—not like clumps of soggy potato—is all about following a couple of non-negotiable rules. I’ve learned these the hard way, so you don’t have to make the same mistakes I did when I first started making these breakfast favorites.
If you have one, pull out your cast-iron skillet! Seriously, it distributes heat so evenly, which is exactly what we need to get that deep, even golden color on the bottom of the potatoes without burning the edges. It’s my secret weapon for anything that needs a hard, crispy sear.
The Secret to Dry Shredded Potatoes for Hash Browns (Crispy Skillet)
Listen to me: this is the most important part of the whole process, bar none. If you skip squeezing the water out, you are going to end up with pale, steamed breakfast potatoes. We need crispness, and water actively fights crispness!
After shredding your Russets, you must get them into a clean, thin kitchen towel or even a couple of layers of really strong paper towels. Wring that towel out over the sink—I mean really wring it! You’ll be amazed how much clear liquid comes out. Those potatoes need to feel almost dry to the touch before they even think about hitting the hot pan.
Managing Heat for Perfect Breakfast Potatoes
Once your potatoes are dry, you set that skillet over medium-high heat. If the heat is too low, the fat soaks in before the crust can form, and that’s bad news. If it’s too high? You burn the outside before the inside even warms up. It’s a delicate dance!
When you lay the shredded potatoes down in that shimmering fat, press them gently but firmly with your spatula. Don’t poke, don’t stir, don’t move them around for at least eight whole minutes. Let them sit there and sizzle and form that beautiful crust. If you start fussing with them too soon, you tear that crust, and then you’re back to eating mushy breakfast potatoes. Be patient! The sizzling sound is your assurance that everything is working perfectly.
Step-by-Step Instructions for Hash Browns (Crispy Skillet)
Okay, let’s get these potatoes frying! Since you’ve already done the hard work of drying them out—which, remember, is the key to amazing Hash Browns (Crispy Skillet)—the rest is just following the heat.
First things first, get your dry, seasoned potatoes ready. Now, take that 10-inch skillet—I hope you grabbed your cast iron—and set it over medium-high heat. We need that pan properly warmed up before anything hits it. Add the first half of your fat: one tablespoon of oil/grease and one tablespoon of butter.
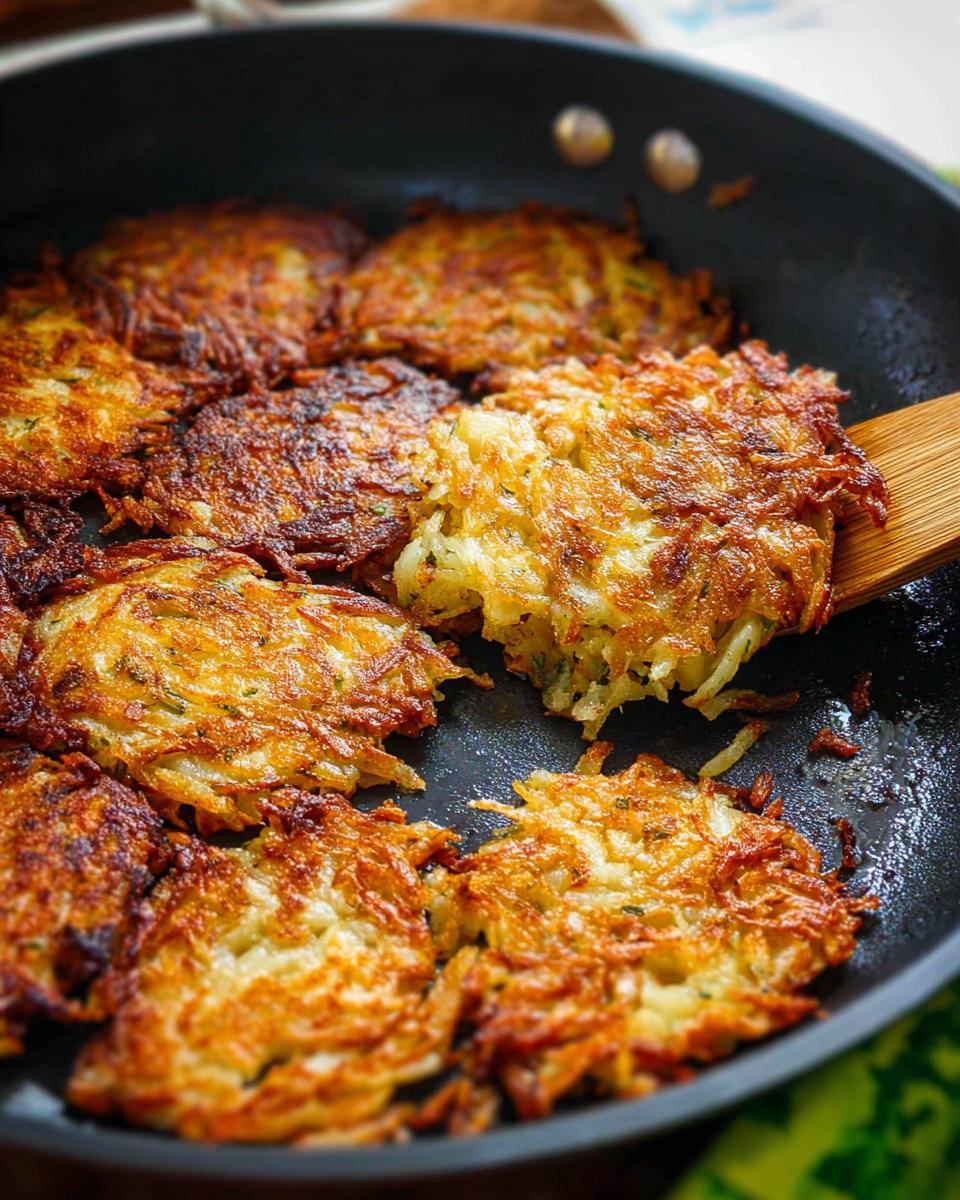
Wait until that fat is shimmering and looks happy. Then, you’ll carefully add all your seasoned, shredded potatoes to the skillet. Spread them into one nice, even layer. Use your spatula to press them down—we want contact with the hot surface! Now, this is the quiet part where you just watch and wait patiently. Cook them undisturbed for about 8 to 10 minutes.
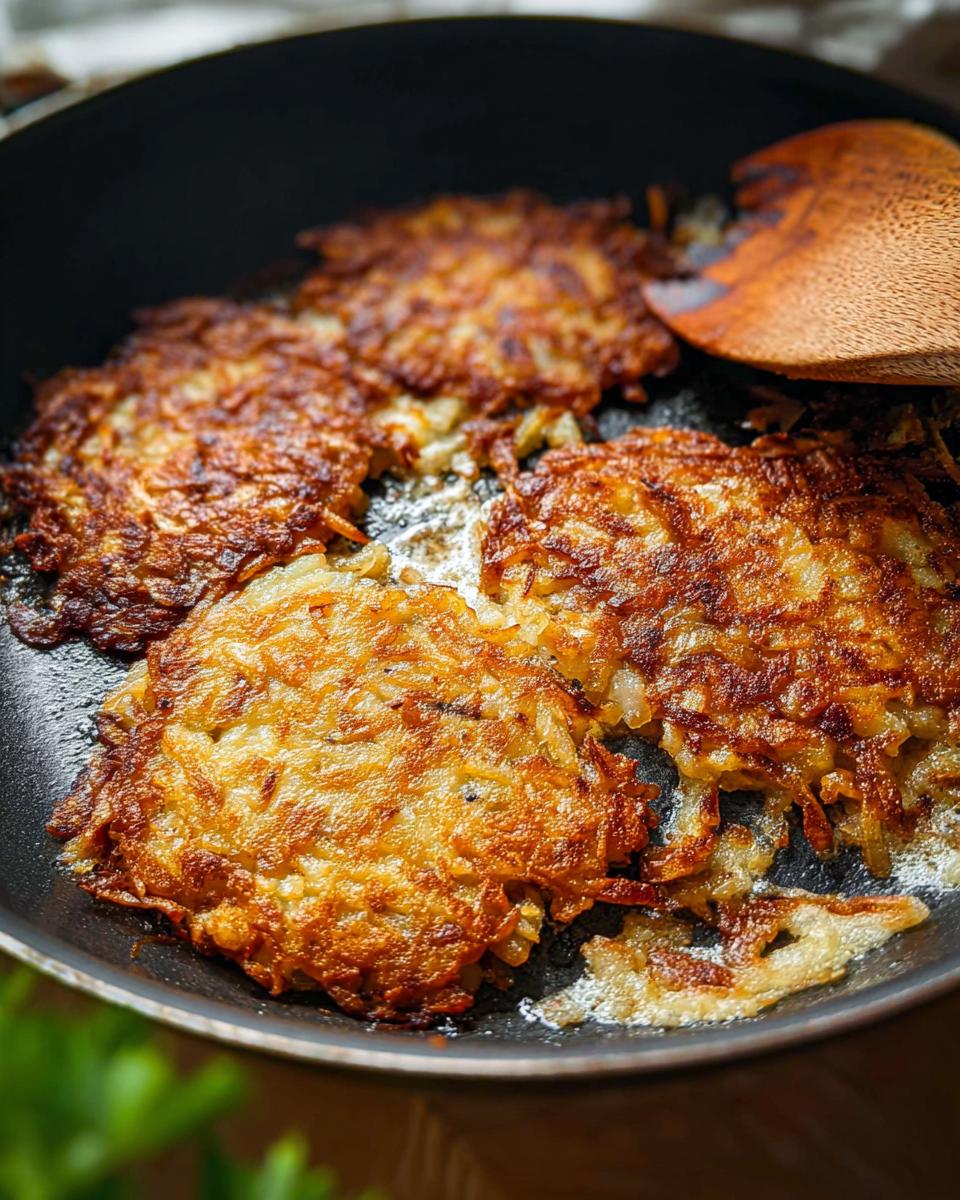
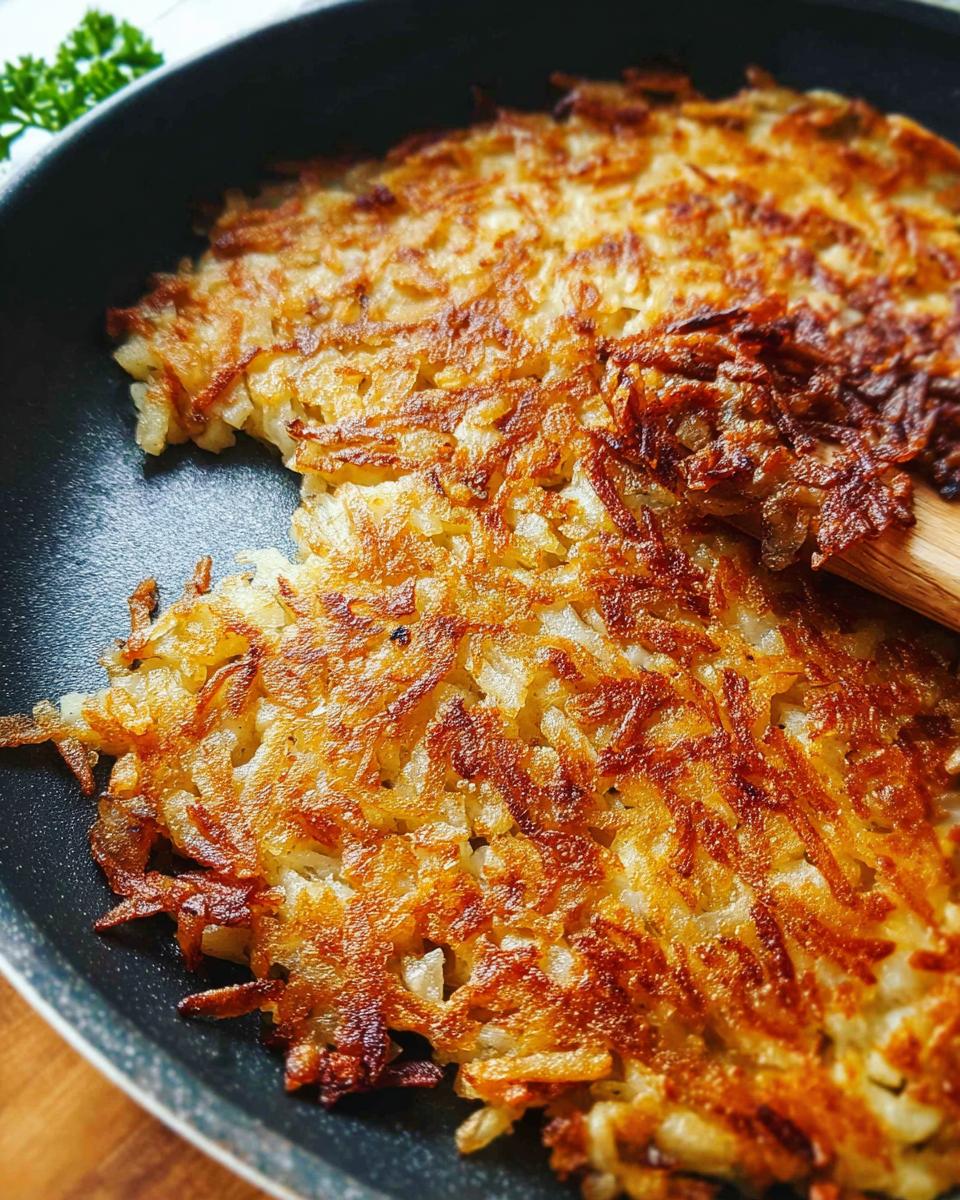
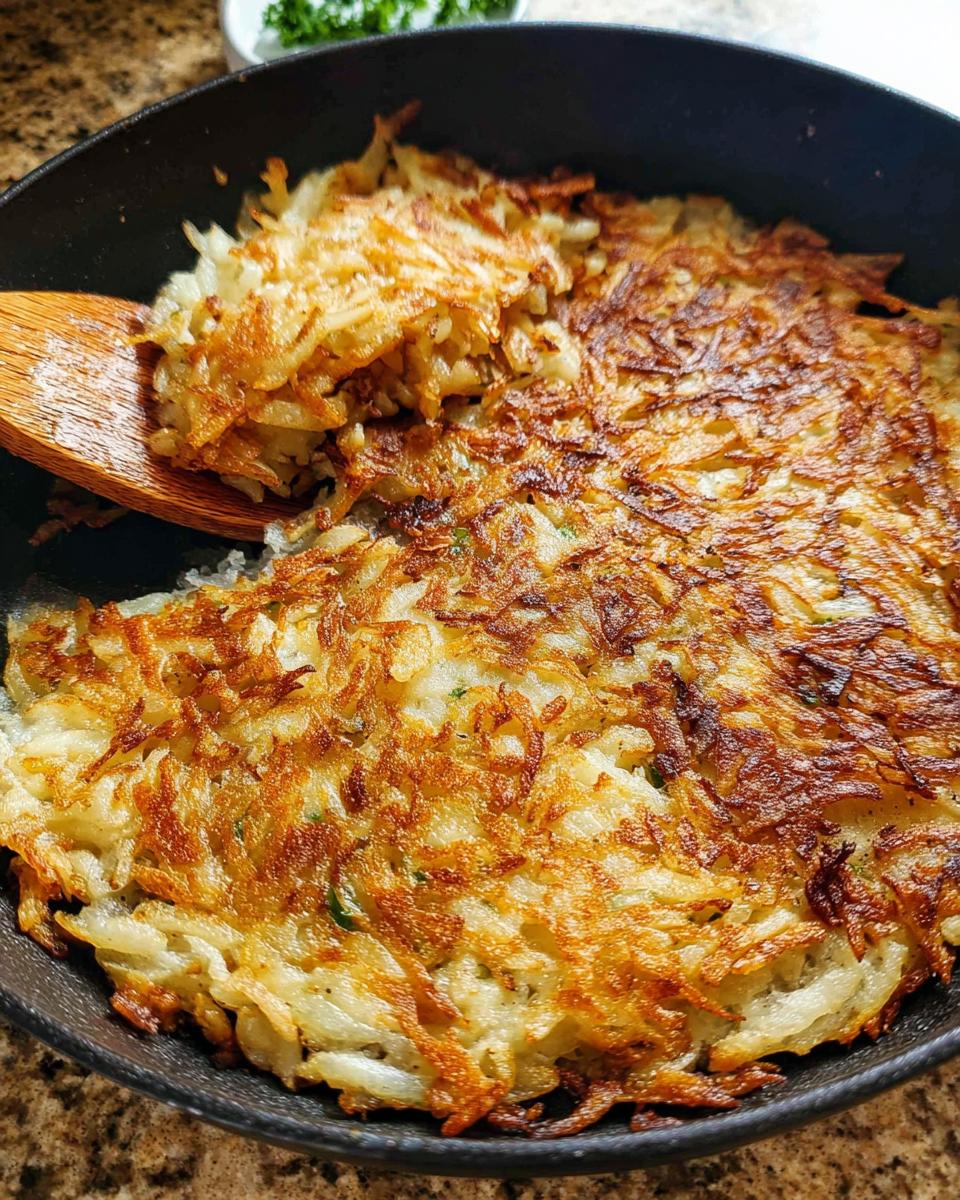
You’ll know the first side is ready when you peek underneath and see that deep, glorious golden-brown color. When it’s time to flip those Hash Browns (Crispy Skillet), be brave! You can either flip them in sections if you’re nervous, or flip the whole beautiful cake over at once. Add the remaining tablespoon of oil and butter to whatever spots look a little dry.
Cook the second side for another 8 to 10 minutes until it matches the first side in crispness. If you want smaller pieces, you can break them up now. Finally, transfer them onto a paper towel-lined plate to rest for five minutes—this gives them one last chance to crisp up and drains any extra grease. If you’re looking for more family-friendly recipes just like this, be sure to check out the recipe index!
Ingredient Notes and Substitutions for Hash Browns
I designed this recipe for Hash Browns (Crispy Skillet) around russets because, truly, nothing beats their texture when they’re shredded. But I know life happens! If you have Yukon Golds on hand, they will work, but they tend to be a bit waxier, so you have to squeeze out even more moisture.
Let’s talk fat because that changes the flavor profile significantly. I love that 50/50 mix of olive oil and butter for taste, but if you’re dairy-free or just avoiding butter for some reason, go ahead and use all light olive oil or avocado oil. Or, if you want that smokiness I mentioned earlier, crank up the bacon grease—just remember, too much fat can make them greasy instead of crispy!
If you are exploring more dishes perfect for your morning routine, take a gander at my full collection of breakfast ideas. These adaptable notes should help you master your Hash Browns (Crispy Skillet) no matter what’s in your pantry!
Storage and Reheating Crispy Skillet Hash Browns
Even the absolute best breakfast potatoes are always better fresh, but leftovers happen! Store any leftover hash browns—or breakfast potatoes as I sometimes call them when I’m feeling fancy—in an airtight container in the fridge. They’ll keep well for about three days, though they lose their crunch fairly quickly.
The microwave is forbidden here! It just turns them soft and sad. If you want to bring back that glorious crisp, you have two amazing options. Pop them onto a baking sheet in the toaster oven or a regular oven set to 400 degrees Fahrenheit until hot and crunchy again. Better yet, toss them in an air fryer for about 5 to 7 minutes. That’s the quickest way to bring back that perfect skillet sear!
Serving Suggestions for Your Hash Browns (Crispy Skillet)
Once you have these perfectly golden Hash Browns (Crispy Skillet) cooling for just a minute, you’ll need something amazing to put them next to! They are the ultimate brunch side, honestly. I love keeping things simple for my family.
Of course, they are divine next to scrambled eggs or a fluffy omelet. If you are going big for a weekend brunch, try pairing them with some smoked salmon and cream cheese. They’re also fantastic tucked under crispy bacon or alongside homemade baked beans. If you’re looking for more comforting ideas that fit well with weekend cooking, you can always browse my comforting recipe inspiration!
Frequently Asked Questions About Hash Browns (Crispy Skillet)
I hear from so many people who love this recipe but sometimes run into little snags, naturally! Here are the answers to some of the most common questions I get about making perfect Hash Browns (Crispy Skillet) so you can skip the guesswork.
Can I use pre-shredded potatoes for this recipe?
Oh, friend, I strongly advise against it! While I know the convenience is tempting, pre-shredded potatoes are already kind of dried out or sometimes even pre-treated. For these beautiful breakfast potatoes to get that ultimate exterior crunch, you absolutely must start with raw potatoes that you peel and shred yourself. Remember, most of the cooking time is spent cooking out the moisture!
How do I prevent my hash browns from sticking to the pan?
Sticking usually means the pan wasn’t hot enough, or you didn’t use enough fat! Make sure your skillet is fully heated over medium-high heat before adding the oil and butter. Getting that fat shimmering first creates a protective barrier. And if you’re worried, using a cast iron skillet really helps minimize sticking compared to non-stick options sometimes.
What is the best way to handle the shredded potatoes after grating?
The best method is grabbing a clean kitchen towel and squeezing! You want those shredded potatoes almost completely dry. If they are damp, they steam instead of fry, and you get soft potatoes instead of crispy ones. After squeezing, mix in your seasoning right away before they go into the hot fat!
Why do you use both oil and butter?
It’s all about getting the best of both worlds! The oil (or bacon grease) lets you cook at a higher temperature without burning, making sure you get that crispness. The butter gets added later, and it’s what gives these Hash Browns (Crispy Skillet) that rich, irresistible, nutty flavor that makes them so comforting. Don’t skip that combo!
If you ever have more questions that I haven’t covered here, please don’t hesitate to reach out to me on my contact page. Happy cooking!
Estimated Nutritional Data for Hash Browns (Crispy Skillet)
Now, I always say that when we’re making something this delicious and comforting like these Hash Browns (Crispy Skillet), we aren’t counting every little thing! But just for reference, these estimates cover one of four servings based on the ingredients listed.
You’re looking at about 180 calories, 7 grams of fat, 3 grams of protein, and around 26 grams of carbohydrates per serving. Remember, these numbers change depending on whether you use bacon grease or olive oil, so think of this as a happy starting point!
Hash Browns (Crispy Skillet)
Ingredients
Equipment
Method
- Peel and shred the potatoes. Place shredded potatoes in a clean kitchen towel or paper towels and squeeze out as much moisture as possible. This step is crucial for crispy hash browns.
- In a bowl, combine the shredded potatoes with onion powder, salt, and pepper. Toss to coat evenly.
- Heat 1 tablespoon of olive oil or bacon grease and 1 tablespoon of butter in a 10-inch skillet over medium-high heat until shimmering.
- Add the shredded potatoes to the skillet in an even layer. Press down gently with a spatula.
- Cook for about 8-10 minutes without disturbing, until the bottom is golden brown and crispy.
- Flip the hash browns in sections or as one large cake. Add the remaining 1 tablespoon of olive oil or bacon grease and 1 tablespoon of butter to the skillet.
- Cook for another 8-10 minutes, until the other side is golden brown and crispy. You can break it into smaller pieces if preferred.
- Transfer the hash browns to a plate lined with paper towels to drain any excess grease. Let them rest for about 5 minutes.
- Garnish with chives, if desired, and serve immediately.
Nutrition
Notes
Tried this recipe?
Let us know how it was!
Gluten-Free Chef & Latin Cuisine Innovation Specialist
My youngest son’s celiac diagnosis at four changed everything. Suddenly, all those traditional Brazilian and Portuguese recipes from my avó needed to be completely reimagined without losing their soul.
After graduating from Johnson & Wales and working Miami’s Latin fusion scene, my son’s diagnosis became my calling. How do you make gluten-free empanadas that taste like childhood? Over eight years, I’ve developed 320+ gluten-free recipes celebrating authentic Latin flavors using cassava flour and plantain alternatives.
My gluten-free empanada recipe won “Best Appetizer” at the 2023 Miami Gluten-Free Food Festival. I ran “Sabores Sin Gluten,” a catering business serving Miami’s Latino community—quinceañeras, family gatherings, all the celebrations that matter.
Food is culture, and everyone deserves to experience the joy of sharing traditional family meals, regardless of dietary restrictions.