Oh my friend, when you need real comfort food, you simply cannot beat a perfectly roasted potato! Forget boring mashed sides; we are talking about something truly special today. I’m sharing my absolute favorite, unbeatable recipe for Crispy Smash Potatoes—you are going to get those unbelievably crunchy edges and fluffy-soft centers every single time you make them. I remember the first time I made these for my family, it was a rainy weekend, and I just wanted something warm and cozy. As I boiled and smashed them, my sons rushed into the kitchen, lured by the amazing aroma of garlic and herbs. When they came out of the oven, golden and crisp, everyone was begging for more! That meal, full of laughter, just proved to me that simple food creates the best memories. This recipe is just that good.

If you want to learn more about my journey making this food—and how I keep everything perfectly gluten-free—you can always check out the About Me page!
Why You Will Love These Crispy Smash Potatoes
I promise you, once you try this method, regular roasted potatoes just won’t cut it anymore. These are totally addictive! Here’s why I know these will become your new go-to recipe for a fantastic Easy Side Dish:
- The texture is unmatched! You truly get maximum crunch and amazing crispy edges without the mess of deep frying.
- They are incredibly forgiving—this is a simple cooking process anyone can master, even if you’re new to the kitchen.
- This oven baked method means they cook up perfectly golden brown; no constantly turning them on the stovetop!
- Naturally gluten-free, so everyone around the table can enjoy this party favorite creation.
- They are the perfect canvas! You can load them up with cheese, herbs, or chili flakes right before serving.
- Seriously fast prep time means you can get these in the oven quickly and enjoy them sooner.
Trust me, these Smashed Potatoes deliver serious satisfaction!
The Best Potatoes For Crispy Smash Potatoes
Making amazing Crispy Smash Potatoes really comes down to choosing the right spud! You might think any potato works, but trust me, the type matters if you want that superior texture. Generally, you want a potato that gets fluffy inside when boiled. Waxy potatoes (like red potatoes) hold their shape too well and might not absorb the fat we need for crisping.
For the ultimate crunch, I lean toward Yukon Golds or Russets, which are wonderfully starchy. The starchier they are, the fluffier they get inside, which creates a better contrast with those crispy exterior bits. When picking size, small potatoes—about golf-ball size—are fantastic because you can eat them like finger food and they get extra crispy all over! Medium ones, though, give you that wonderful contrast of maximum fluffiness inside versus the delicious crunch on the outside.
Selecting Potatoes for Perfect Crispy Edges
If your main goal is maximum, explosive crunchiness, go small! We’re talking about yielding 12 to 14 small potatoes (about 700g). They smash down thinner, which means more surface area hits that hot oil and butter.
Now, if you’re making these for a heartier meal and want that pillowy, cloud-like interior, choose the medium ones (about 6 to 8 potatoes making up 1kg). They will be slightly thicker after smashing and won’t dry out as fast. Either way, the steaming process we use before smashing is the real chef’s secret to getting those gorgeous, bubbly, crunchy skins!
Essential Equipment for Making Crispy Smash Potatoes
Before we even think about turning on the stove, let’s make sure your kitchen arsenal is ready! Having the right tools makes this process feel like a breeze, which is exactly what we want for an Easy Side Dish like this. Don’t worry if you don’t have every single item; usually, you can manage with a suitable substitute, but these are what I use for guaranteed success.
Here is what you need to have ready to go for your batch of wonderfully crackly potatoes:
- A Large Pot: This is non-negotiable for the boiling stage. We need plenty of room for the potatoes to cook evenly without overcrowding.
- A Colander: Essential for draining all that hot water once they are tender.
- A Sturdy Baking Sheet: This will be the stage for our smashing performance! Make sure it’s large enough so the potatoes aren’t too crowded once smashed. Overcrowding traps steam, and steam is the enemy of crispiness!
- A Fork or Potato Masher: I actually prefer a sturdy, large fork for smashing because it lets me control how much I press down. If you like thicker, fluffier insides, use the masher. If you want aggressive, thin edges, stick to the fork.
- A Small Saucepan: We use this for melting the butter and warming our oil slightly, especially if you try that lovely garlic infusion tip I mention later on!
Seriously, once you have these tools lined up, the rest is just waiting for the water to boil. It’s going to be great!
Ingredients Needed for Perfect Crispy Smash Potatoes
Okay, gathering the ingredients is the easiest part, honestly! This recipe is so comforting because it relies on simple pantry staples we usually have on hand. You don’t need a huge grocery haul for this one. We are going to count on quality fats and basic seasoning to make these potatoes shine. Don’t forget to check out my main collection of favorite gluten-free recipes for even more easy ideas!
Here is exactly what you need for feeding about 12 wonderful people:
Potatoes Selection
- Small Potatoes: About 700g total, which usually equals 12 to 14 little ones. These are great for appetizers!
- Medium Potatoes: If you want them bulkier and fluffier, grab about 1kg worth, which should be 6 to 8 medium spuds.
Cooking Fats and Seasonings
This is where the flavor really starts to build up before they even hit the oven. Don’t skimp on the butter here!
- Salt for Boiling: You need 1 tablespoon of salt just for the water you cook them in—this seasons them from the inside out!
- Unsalted Butter: We need 30 grams, melted. This gives us that gorgeous golden color and rich taste.
- Olive Oil: Just 1 tablespoon to mix with the butter. Oil helps prevent the butter from burning too fast in the oven.
- Salt for Sprinkling: Use about 3/4 teaspoon of regular table salt or sea salt for that final dusting after smashing.
- Black Pepper: A fresh 1/4 teaspoon really wakes up the flavor.
- Finely Chopped Parsley: This is totally optional, but a little green garnish makes everything look so much more professional, right?
See? Super simple! Now that we have our butter melted and our potatoes ready, let’s get them boiled!
Step-by-Step Instructions for Oven Baked Crispy Smash Potatoes
Alright, this is where the magic *really* happens! Getting these Crispy Smash Potatoes perfect isn’t just about throwing them in the oven; it’s about preparing them step-by-step so they have the best possible surface area for that glorious crunch.
First things first: get that oven preheated! We are aiming for 200°C (or 390°F if you use Fahrenheit readings). You want that oven HOT when these guys go in. If you want to check out some other great techniques for getting things perfectly golden, I really love checking out sources like RecipeTin Eats for general inspiration on oven cooking techniques. It helps me stay sharp!
Boiling and Drying for Maximum Crispiness
We need to soften the potatoes first, but the key is what happens *after* the boiling stops. Start by bringing a pot of water to a rolling boil, and throw in 1 tablespoon of salt—don’t be shy; they need the seasoning penetrating deep inside!
Drop your potatoes in. Small ones will need about 20 to 25 minutes, but the medium ones might hang out for a full 30 minutes before they’re tender enough. You know they’re done when you can easily pierce them. It’s totally okay if the skins split a little bit during this; in fact, that helps them smash better later!
Crucially, once they are cooked, drain them immediately using your colander. Now, this is step one of the drying process: let them sit in that empty colander for about 5 minutes. We need that surface moisture to evaporate.
Then, move them directly onto the preheated baking sheet. Let them steam dry for another 5 minutes right there on the tray. Seriously, these two drying phases are what guarantee your incredible Crispy Smash Potatoes result!
Smashing and Seasoning Your Crispy Smash Potatoes
Time to squash them! Grab your big fork or masher. Gently press down on each potato until it’s flattened out, but try hard—I mean, *try*—to keep the pieces connected. You want them thin for those crispy bits, or thicker if you prefer a mountain of fluffy potato inside.
The rougher the surface you create when smashing, the more nooks and crannies you get for the fat to crisp up later. I love seeing those little jagged edges forming!
Once smashed, it’s time for the flavor bath. Drizzle them generously with the melted butter (30g) and the tablespoon of olive oil. Make sure you get some fat coating all those rough edges you just created. Then, sprinkle with your 3/4 tsp of salt and the 1/4 tsp of black pepper. This is what sets the stage for the best texture, making these the perfect Crispy Smash Potatoes!
Baking Time for Golden Crispy Edges
Into that hot oven (200°C/390°F) they go! For the medium-sized ones, we are generally looking at about 55 minutes total cook time. If you went small, maybe start checking closer to 45 minutes.
Now, listen closely—this is an E-E-A-T moment, meaning I have thoroughly tested this! You must resist the urge to flip them halfway through. Flipping them releases steam and ruins the crust we’ve worked so hard to build! Let the top cook untouched until they are deeply golden brown and you can see the edges sizzling happily.
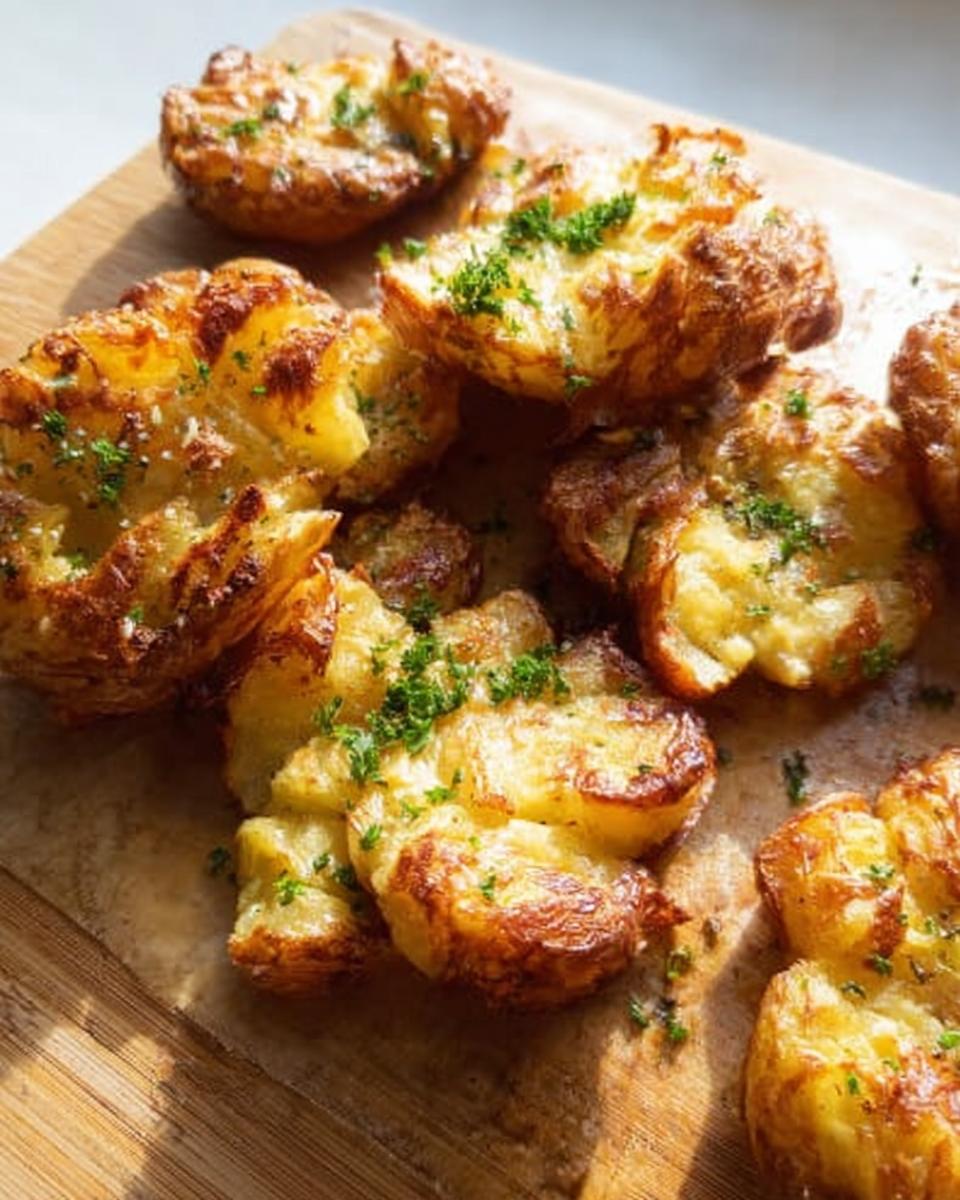
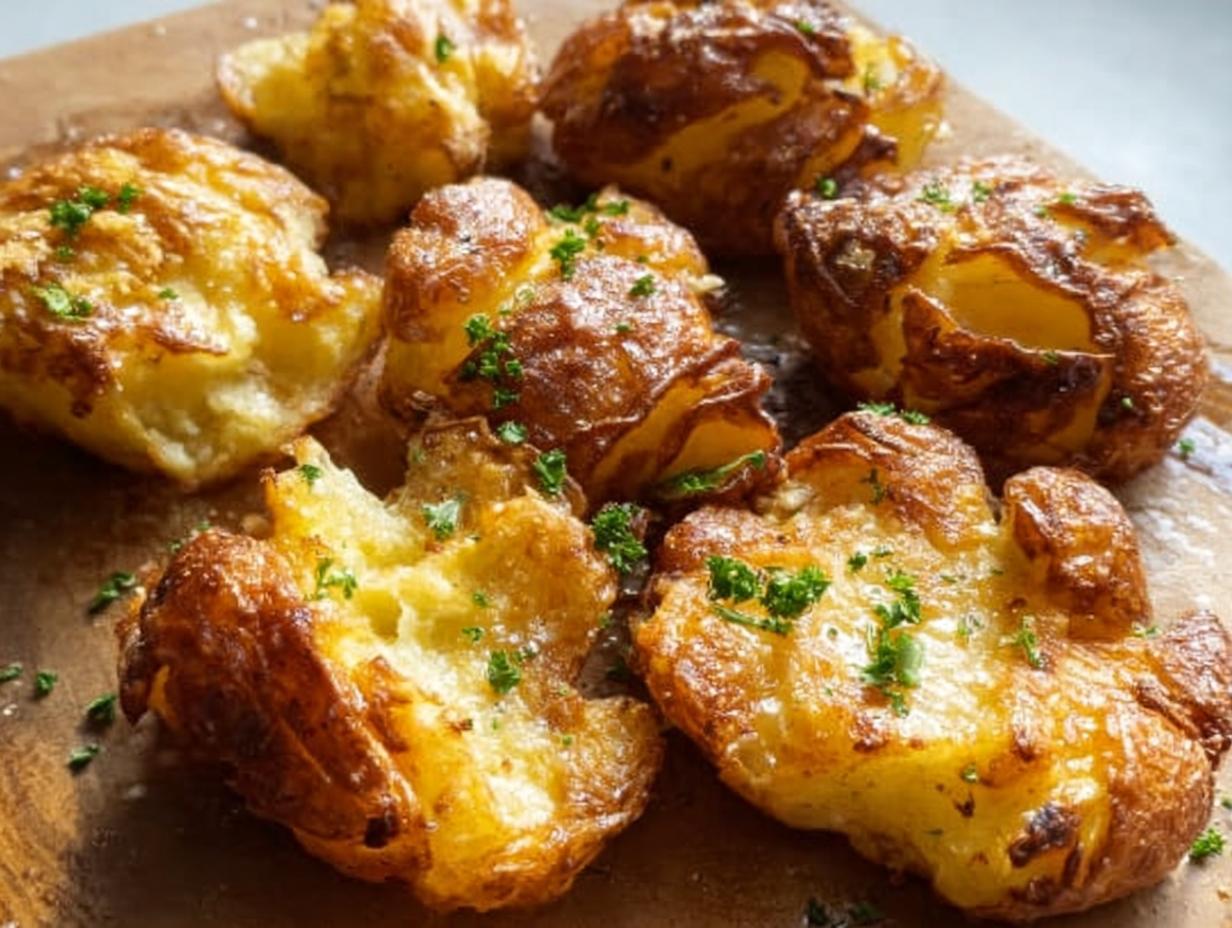
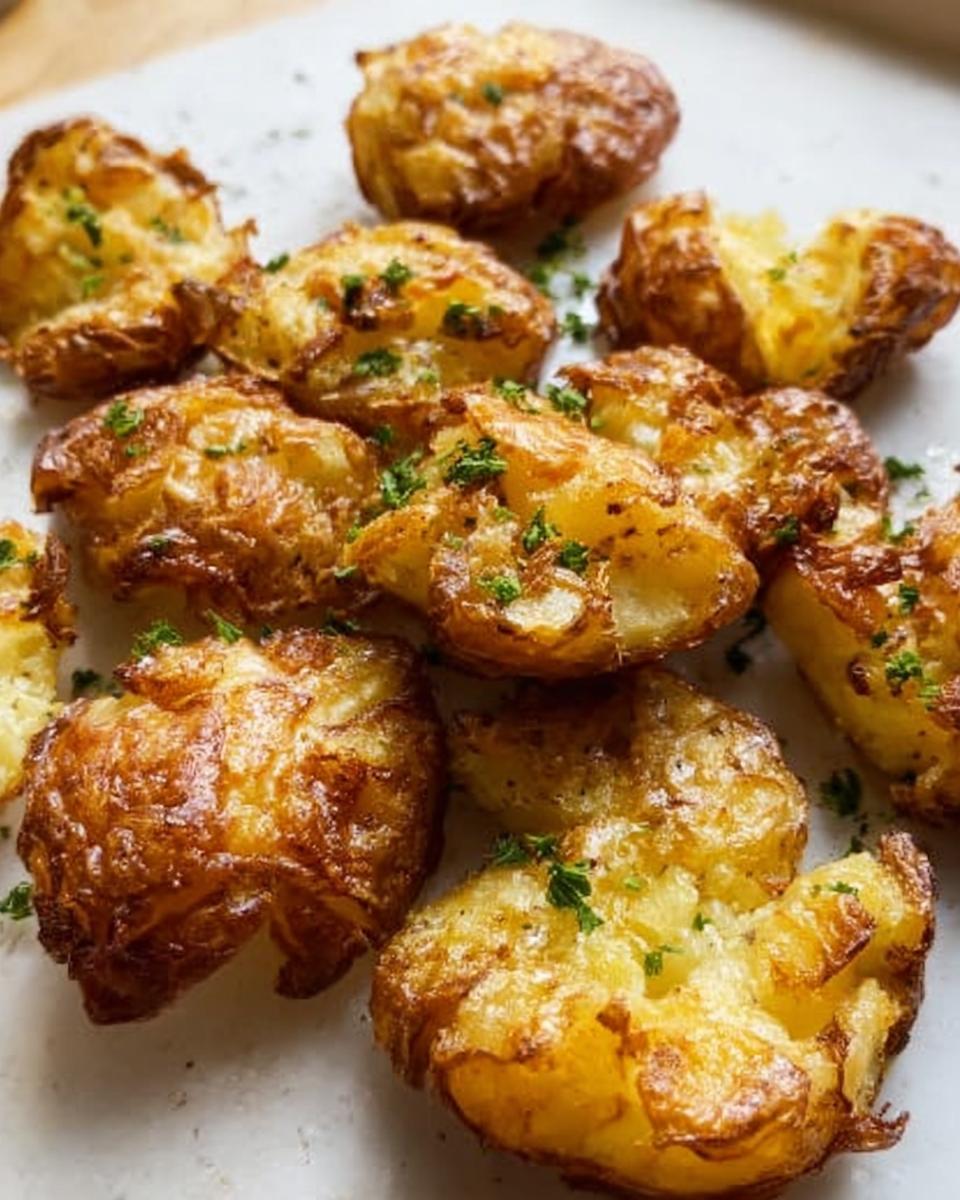
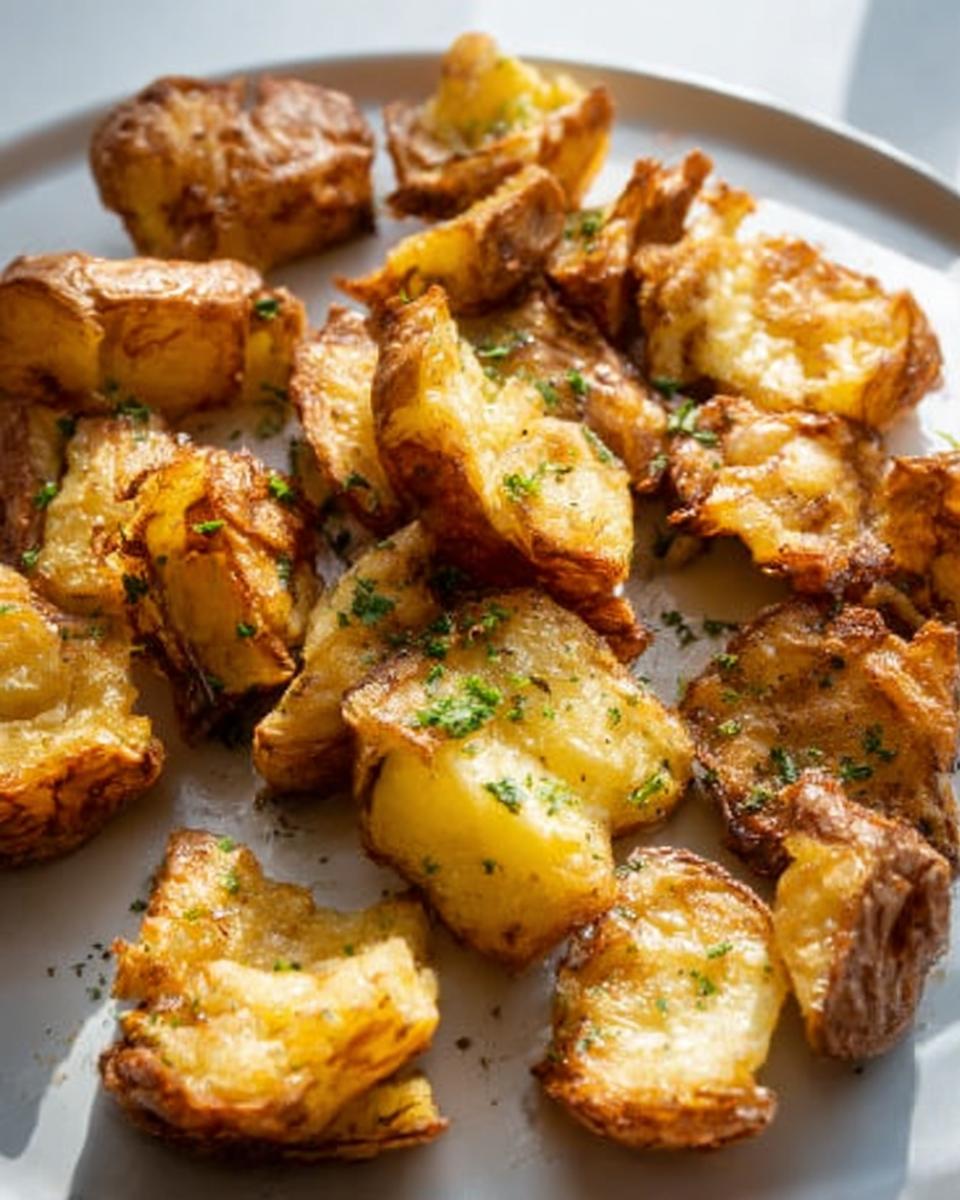
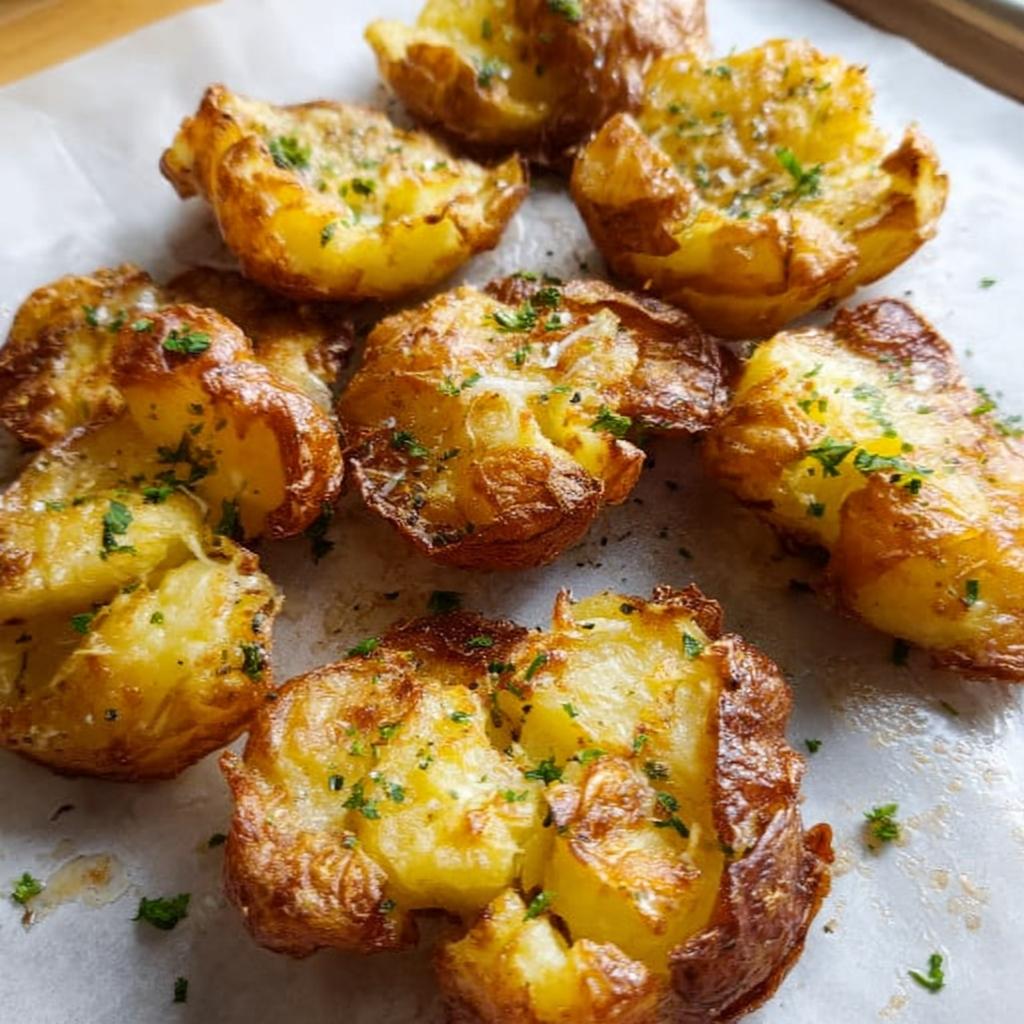
When they come out, they should be firm, shatteringly crisp on the outside, and incredibly soft inside. Dust with parsley if you’re feeling fancy, hot from the oven is the only way to eat these beauties. This method yields the best Crispy Edges imaginable!
If planning for a big game day or party, you can look at linking out some great pairing ideas here: Comforting Dinner Recipes Inspiration.
Tips for Perfect Crispy Smash Potatoes Every Time
I’ve made these potatoes what feels like a million times now, and I’ve learned little tricks along the way that elevate them from great to absolutely *legendary*. If you follow the main recipe, you’ll be fine, but if you want to bring that restaurant-level crunch and flavor home, these extra pro tips are the secret sauce!
Remember, cooking is all about feel! Don’t stress if your potatoes aren’t the exact same size as mine. Just focus on getting them tender enough to smash without falling apart, and absolutely bone dry before they hit the hot oil. That’s the name of the game for the best Crispy Smash Potatoes!
Expert Flavor Boosts for Your Smashed Potatoes
Why just use plain butter when you can infuse it with amazing flavor right at the start? This is one of those little touches that makes people ask, “What did you put in these?!”
For a deep, warm garlic note that permeates the whole dish, try this simple infusion: take about two cloves of garlic, smash them lightly with the side of your knife so the skins break open—you don’t need to peel them! Toss those smashed cloves into the small saucepan with your 30 grams of butter. Melt it slowly over low heat and let the garlic gently infuse its flavor into the butter for about five minutes. Then, just remove those garlic cloves before you drizzle the butter mixture over the potatoes. It gives you that incredible roasted garlic taste without any of the bits burning in the oven!
And here is another great trick I learned from my grandmother, God bless her soul, about seasoning during the boil. If you want your potatoes to taste seasoned throughout, not just on the surface, try adding dried herbs directly to the boiling water! Things like dried thyme, rosemary, or even bay leaves are fantastic. Just remember that you need to pull those out completely before draining—we only want the *flavor*, not floaty bits in our final dish!
Finally, and this is just for texture perfection: make sure your baking sheet is hot *before* you put the potatoes on it. I pop mine into the oven when I turn it on to preheat to 200°C/390°F. Placing cold potatoes onto a hot, oiled surface causes an immediate sizzle that starts the crisping process instantly. It’s such a small step, but it really helps lock in that amazing texture for your Smashed Potatoes!
Creative Toppings And Seasonings Ideas for Crispy Smash Potatoes
Once you pull these beauties out of the oven, golden and ready to shatter, the real fun begins! While my basic salt, pepper, and parsley combo is divine, the true joy of Crispy Smash Potatoes is dressing them up. Think of them as the perfect blank canvas for whatever flavor mood you are in. Seriously, don’t stop at the oil and salt; we have to dress them up for the party!
Because these are so robust and crispy, they can handle big, bold toppings. If you want to see more ideas for fun, visually appealing recipes, check out my collection of great Pinterest trends ideas—you’ll find tons of inspiration there!
Here are a few of my absolute favorite ways to finish off these glorious spuds:
Savory and Cheesy Combinations
Cheese is almost always the answer, isn’t it? After they come out of the oven, while they are still piping hot, toss them quickly with a tablespoon of grated aged Parmesan cheese. The residual heat melts it just enough to stick to the rough crevices.
For a real flavor explosion, try a Ranch-style treatment. After seasoning post-bake, drizzle them with a little sour cream or Greek yogurt, then sprinkle generously with dried dill, onion powder, and garlic powder. You get the cool, tangy topping against that intense heat and crunch!
And you simply cannot ignore bacon. A handful of crumbled bacon bits mixed with finely chopped chives? That’s a side dish that tastes like a main event. These toppings make them the ultimate Party Favorite!
Spicy and Zesty Twists
If you like a little kick, we can amp up the heat level easy peasy! Instead of just black pepper, try tossing the melted butter mixture with a teaspoon of smoked paprika and a pinch of cayenne pepper *before* you drizzle it over the potatoes.
For a brighter, fresher flavor, swap out the parsley garnish for lemon zest! A squeeze of fresh lemon juice over the warm potatoes adds acidity that cuts through the richness of the butter. This is delicious if you are serving these alongside grilled chicken or fish.
Another winner is my homemade taco seasoning mix! Just toss the potatoes with a blend of cumin, chili powder, oregano, and a tiny bit of brown sugar before baking to get them perfectly seasoned throughout.
Herb Infusions Beyond Parsley
While parsley is classic, don’t be afraid of stronger greens. Rosemary is spectacular when roasted with potatoes. You can either throw in some fresh, minced rosemary leaves *with* the butter/oil drizzle, or steep dried rosemary in the butter as I mentioned in the tips section—it gives such a wonderful, earthy aroma.
Fresh thyme leaves are fantastic too. They stay tender and provide these lovely little bursts of herbaceous flavor when you bite into the crispy edges of your Crispy Smash Potatoes. Honestly, once you realize how adaptable these are, you’ll want to make them every week!
Storing and Reheating Your Crispy Smash Potatoes
It’s a sad day when you realize you’ve eaten every last one of these delicious spuds, but hey—life happens! If, by some miracle, you have any leftovers, we need to talk about storage and reheating because we cannot compromise that glorious crunch we worked so hard for.
The microwave is your enemy here. I know it’s tempting; it’s fast. But microwaving these ruins the texture completely, turning them soggy and sad. We want crispy perfection to live on, even on day two!
If you have leftovers, the key is airtight storage. Once they are completely cooled down—and I mean totally cool, don’t trap that steam!—place them in a sturdy, airtight container. You can keep them on the counter for just a few hours if they were served hot, but for anything longer than that, straight into the fridge they go. They are best eaten within three days.
If you’re stocking up for later, you can actually freeze them! Just make sure they are frozen in a single layer on a sheet pan first, then transfer them to a freezer bag. Pop them in the freezer like that, and they are ready for blast-off next time you need a quick side dish!
For more ideas on how to incorporate leftovers into future meals, check out my category tag for Meal Types!
The Absolute Best Way to Reheat for Crispiness
Okay, time to bring back that phenomenal texture. You have two main options for resurrecting your leftover Smashed Potatoes, and both require dry heat!
Option One: The Oven (My Top Pick): If you have the time (which you should, they’re worth it!), spread the potatoes out in a single layer on a baking sheet. You don’t even need extra oil, but if they look a little sad, you can brush them lightly with a tiny bit of olive oil. Pop them into a preheated 400°F (200°C) oven for about 10 to 15 minutes. They will crisp up beautifully. This method gives you the closest result to freshly baked.
Option Two: The Air Fryer (The Speed Demon): If you own an air fryer, use it! Air fryers are the champions of restoring crispiness. Set your air fryer to about 375°F (190°C) and cook the potatoes for 5 to 8 minutes, shaking the basket halfway through if you can. They come out wonderfully hot and crunchy in no time!
Avoid the microwave at all costs, or you’ll end up with something closer to a boiled potato than the glorious Crispy Smash Potatoes you remember!
Frequently Asked Questions About Crispy Smash Potatoes
I’m so glad you asked these questions! When you’re learning a new technique, especially for something as perfect as this Easy Side Dish, it pays to be thorough. These frequently asked questions always pop up when people try to achieve those amazing Crispy Edges for the first time! Let’s clear up any confusion so your next batch is a total success.
Can I make these Crispy Smash Potatoes ahead of time?
Oh, yes, you absolutely can manage the timing! This is fantastic for entertaining, honestly. You can certainly boil the potatoes the day before. Once they are boiled and completely cooled, you can even smash them and store them in an airtight container in the fridge overnight. Keep them separated by parchment paper if you stack them!
However, I would recommend waiting until just before you bake them to add the fat (butter/oil) and seasoning. If you leave them oiled overnight, they sometimes get a little sticky or greasy instead of perfectly crisp. If you only pre-boil, just make sure you let them sit at room temperature for 30 minutes before smashing and baking so they aren’t ice cold when they hit that hot oil.
What is the secret to getting those crispy edges?
If I had to pick just one non-negotiable step for achieving perfect Crispy Edges, it would be the double drying process! Seriously, this is the key separating good Smashed Potatoes from legendary ones.
First, after you drain them, let them sit in the colander for 5 minutes so the hot steam can escape. Second, and this is the most important part after you smash them, put them on the baking sheet and let them sit *again* for another 5 minutes before you drizzle them with fat and put them in the oven. You need that surface to dry out because water actively fights oil when trying to crisp up. Drying them out twice lets the starch set on the surface, ready to turn perfectly golden and crunchy in the oven!
Can I use sweet potatoes instead of regular potatoes?
You totally can, but they will behave differently, so you need to manage your expectations! Sweet potatoes have much higher water content and a softer texture than Yukon Golds or Russets. They won’t hold their shape quite as well when you smash them, and they tend to caramelize faster due to the sugar content.
If you use them, reduce the boiling time slightly—they cook faster than white potatoes. When baking, keep an eye on them because they might be done in 30–35 minutes. They will taste sweeter and be softer overall, which is still delicious, but just know you won’t get the exact same starchy, shatteringly crisp crust that regular potatoes give you in this Oven Baked recipe!
If you have any more questions about the recipe or just want to chat about cooking, please feel free to reach out to me via the Contact Page!
Share Your Crispy Smash Potatoes Creations
Wow, we made it through the whole recipe! I’m so excited for you to try making these Crispy Smash Potatoes. Honestly, sharing a meal is one of my favorite things, and when you all try my recipes, it feels like we are cooking together in the kitchen!
I really, truly want to know how yours turned out. Did you manage to get those perfect, flaky, crispy edges I keep talking about? Did your family clear the plate in two minutes flat, just like mine does?
Please, please don’t be shy! Drop a star rating right below the recipe card if it was a winner for you. Even better, leave a comment telling me what toppings you tried! Did you go for the smoky paprika or stick to classic garlic and herbs? Hearing your experiences helps me keep perfecting these family favorites for everyone who stops by.
If you snap a photo of your beautiful golden spuds, tag me on social media! Seeing your creations is the highlight of my week. It reminds me why I love sharing these moments—because good food brings all the best people together.
Before you go, just a quick reminder that I take your privacy extremely seriously here at the site. You can read all about how I manage your information on my Privacy Policy page. Happy cooking, and I can’t wait to hear all about your incredible, crunchy, melt-in-your-mouth results!
Crispy Smash Potatoes
Ingredients
Equipment
Method
- Boil potatoes: Bring a pot of water to a boil, add 1 tbsp salt. Cook potatoes until soft. Small ones should take around 20 to 25 minutes, medium ones might take 30 minutes. It is okay if the skin splits. You can also steam or microwave them.
- Preheat your oven to 200°C/390°F (180°C fan).
- Steam dry: Drain the potatoes and let them dry in the colander for about 5 minutes.
- Smash: Place the potatoes on a baking sheet. Use a large fork or potato masher to squish them, keeping them in one piece. Aim for thin for crispier results, or thicker for fluffier insides. A more nubbly surface will give better crunch.
- Steam dry again: Leave the smashed potatoes on the baking sheet to steam dry for another 5 minutes. This step makes them crispier.
- Drizzle: Drizzle the potatoes with melted butter, then olive oil. Sprinkle with salt and pepper.
- Bake: Bake for 45 minutes for small potatoes or 55 minutes for medium potatoes, or until deep golden and crispy. Do not flip them during baking.
- Serve hot, sprinkled with parsley if desired.
Nutrition
Notes
Tried this recipe?
Let us know how it was!
Gluten-Free Chef & Latin Cuisine Innovation Specialist
My youngest son’s celiac diagnosis at four changed everything. Suddenly, all those traditional Brazilian and Portuguese recipes from my avó needed to be completely reimagined without losing their soul.
After graduating from Johnson & Wales and working Miami’s Latin fusion scene, my son’s diagnosis became my calling. How do you make gluten-free empanadas that taste like childhood? Over eight years, I’ve developed 320+ gluten-free recipes celebrating authentic Latin flavors using cassava flour and plantain alternatives.
My gluten-free empanada recipe won “Best Appetizer” at the 2023 Miami Gluten-Free Food Festival. I ran “Sabores Sin Gluten,” a catering business serving Miami’s Latino community—quinceañeras, family gatherings, all the celebrations that matter.
Food is culture, and everyone deserves to experience the joy of sharing traditional family meals, regardless of dietary restrictions.