Oh, isn’t it the truth? Every great main course—a tender roast chicken, a hearty stew—deserves a side dish that truly sings. We all know the tragedy of soggy, lackluster spuds staring up from the plate. It just ruins the whole vibe, right? Well, trust me when I say I cracked the code after lots of messy, flour-dusted failures. This method I use guarantees you’ll achieve genuinely Crispy Roasted Potatoes (Perfect Every Time).
I still remember the first time I nailed these. It was a chilly fall evening, and I’d invited friends over, really hoping to impress them with my culinary skills. After a real trial-and-error journey in my kitchen, I finally found that perfect blend—using the right potatoes, a screaming-hot oven, and just the right amount of oil. The second I pulled that golden batch out, the crispy little edges were calling my name! When I served them, laughter just filled the room. It really cemented for me that food is all about shared joy. Since that evening, these potatoes have become my absolute staple, always reminding me of how simple comfort can be the best thing on the table.
I’m Marco Santos, and after years of tinkering, I promise this technique will deliver that ultimate texture boost you’ve been looking for. You won’t be disappointed!
Why You Will Achieve Crispy Roasted Potatoes (Perfect Every Time)
Look, everyone wants that restaurant-quality crunch at home, and this isn’t just luck—it’s science, folks! When you follow these steps, you’re guaranteed to get the best Crispy Roasted Potatoes (Perfect Every Time). I’ve tested countless methods, and this combination is the winner!
- You get amazing crunch without deep-frying.
- The potatoes stay fluffy inside, not dead and dense.
- You’ll feel like a total baking genius, seriously.
Foolproof Technique for Golden Brown Results
The real secret sauce here, besides the garlic blend we add later, is preparing those potatoes *before* they even see the oven! Boiling them first—that parboiling step—starts to gelatinize the starch. And adding a little baking soda to that hot water? Wow! It helps break down the outer layer just enough so when they hit that hot sheet pan, they puff up and maximize their surface area for blistering.
Essential Ingredients for Crispy Roasted Potatoes (Perfect Every Time)
When you want truly amazing Crispy Roasted Potatoes (Perfect Every Time), you can’t just grab any old spud! Trust me on this one: the potato type and the fat you use make a huge difference in achieving that signature golden-brown crust we’re after. We’re keeping things simple with just a few core items, but their quality counts!
Here’s what you’ll need:
For the Potatoes
- 3 pounds russet potatoes, peeled and cut into 1-inch pieces—these hold up best!
- 1/2 teaspoon baking soda—don’t skip this!
- 3 tablespoons melted ghee or olive oil, divided.
For the Garlic Mixture
- 2-4 cloves garlic, grated or minced—we want flavor here!
- 2 tablespoons melted ghee or olive oil
- 1 tablespoon minced parsley
- 1/4 teaspoon dried thyme (if you like a little herb complexity)
Ingredient Notes and Substitutions for Roasted Potatoes
So, let’s talk about that baking soda. It sounds weird, right? But it’s magic! It slightly raises the water’s pH level when boiling, which helps break down those starches so you get a fluffy interior and an extra craggy, crisp exterior when roasting. If you skip it, your potatoes will still be good, but they won’t hit that top-tier crunch volume.
Russets are my number one pick because they are starchy and dry out perfectly. If you’re out, Yukon Golds are a decent backup, but they tend to be a bit creamier rather than purely starchy and crisp. And for the fat, ghee gives a wonderful nutty flavor, but good old olive oil works just fine too. We divide it up because we use some in the boil and some for that initial roast!
Equipment Needed for Sheet Pan Side Success
Now, sometimes people think you need a dozen specialized gadgets for perfect potatoes, but honestly, we just need a few good workhorses in the kitchen. Having the right tools ready means less stress when things are sizzling! For this particular method, which involves boiling before roasting, we need a few sturdy items.
First up, you absolutely need something large enough to boil those three pounds of potatoes comfortably. I usually grab my trusty old Dutch oven for this, but any heavy-bottomed stock pot works perfectly fine. We need that even heat distribution!
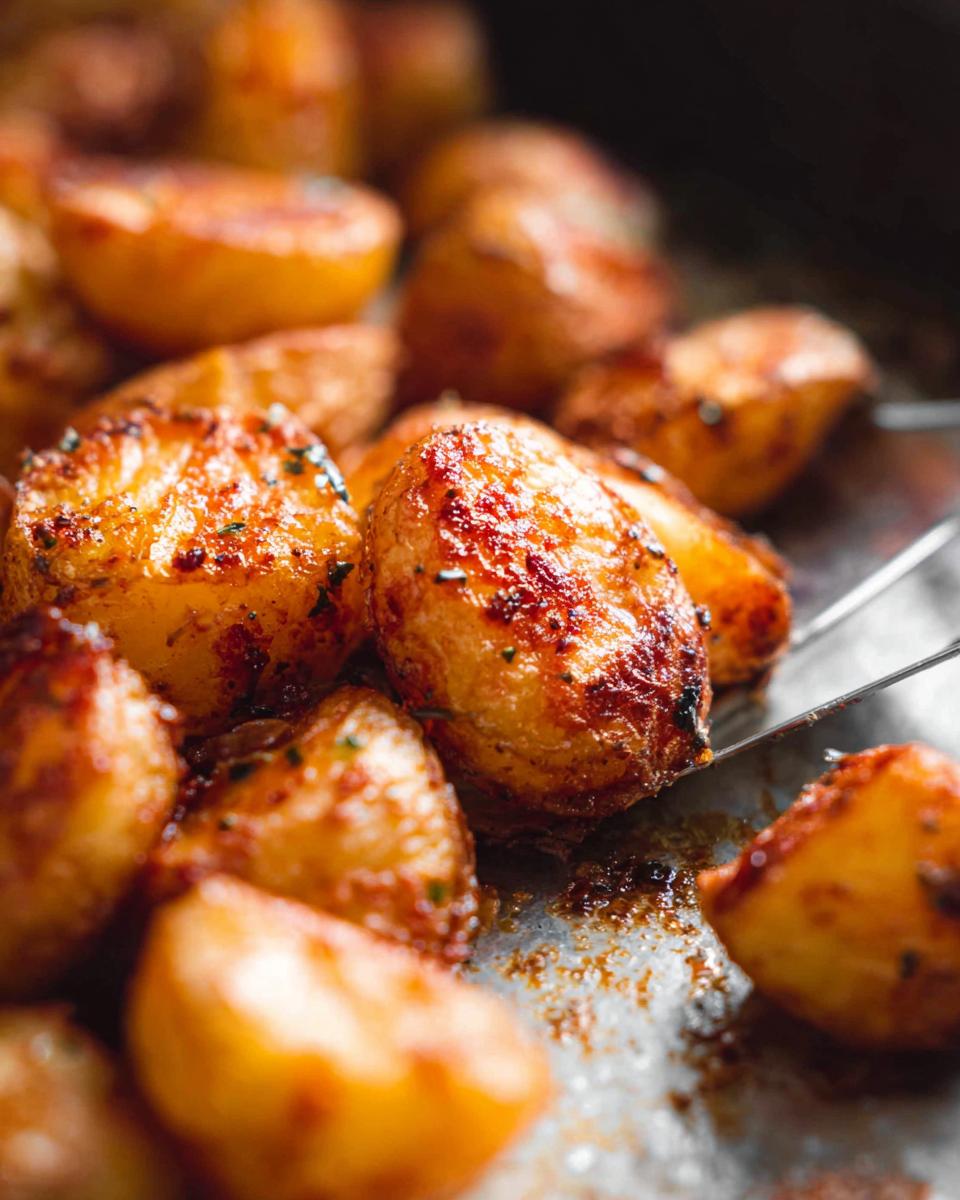
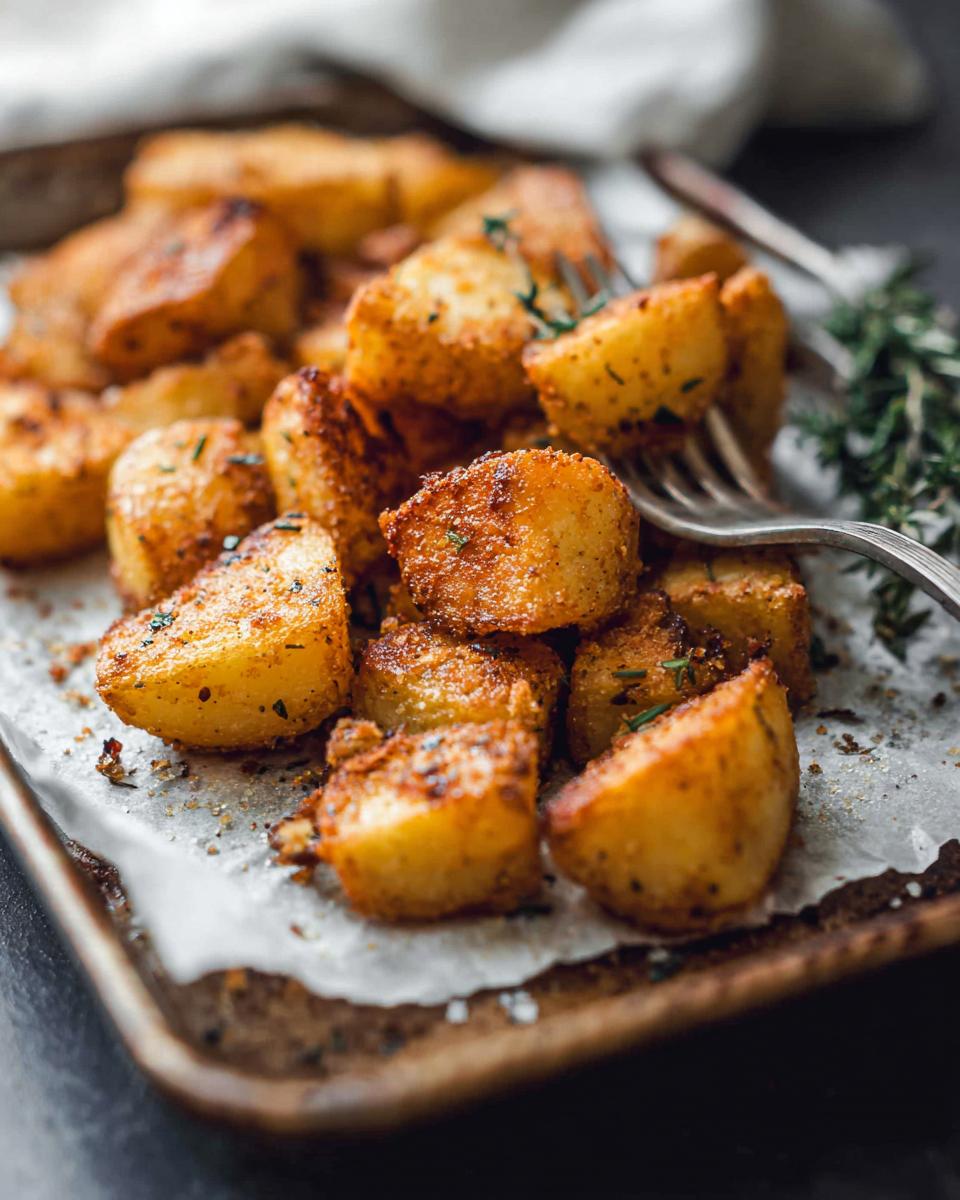
Next, you’ll want a large rimmed baking sheet—the bigger, the better, honestly. We need space for those potatoes to breathe and crisp up. And finally, when it comes time to flip them during roasting, ditch the flimsy wooden spoon! A good, sturdy fish spatula is my secret weapon for flipping without smashing all those gorgeous, crisp edges we worked so hard to create!
Step-by-Step Guide to Crispy Roasted Potatoes (Perfect Every Time)
Okay, friend, this is where the magic really happens, but you have to be quick! Getting that ultimate texture for your Crispy Roasted Potatoes (Perfect Every Time) relies heavily on timing and high heat. Remember what I said about getting that preheat done? Make sure your oven is blazing hot at 425ºF before you even think about touching those potatoes. We want instant searing action!
We need to get the prep moving efficiently now. Make sure you have your Dutch oven or stock pot ready on the stove.
Parboiling Potatoes with Simple Spices for Texture
Toss your cut potatoes into that big pot. Now, grab your kosher salt—don’t be shy with it; we’re seasoning the inside now!—and sprinkle in that half teaspoon of baking soda. I pour in enough water to cover everything completely, then bring it up to a rolling boil. You’re only looking for about 8 to 10 minutes here. The goal isn’t mush! You want them firm enough that a knife still offers some real resistance when you pierce them. They should be maybe halfway cooked. Drain them really well and put them right back into the warm, empty pot.
Achieving the Initial Roast for Crispy Roasted Potatoes (Perfect Every Time)
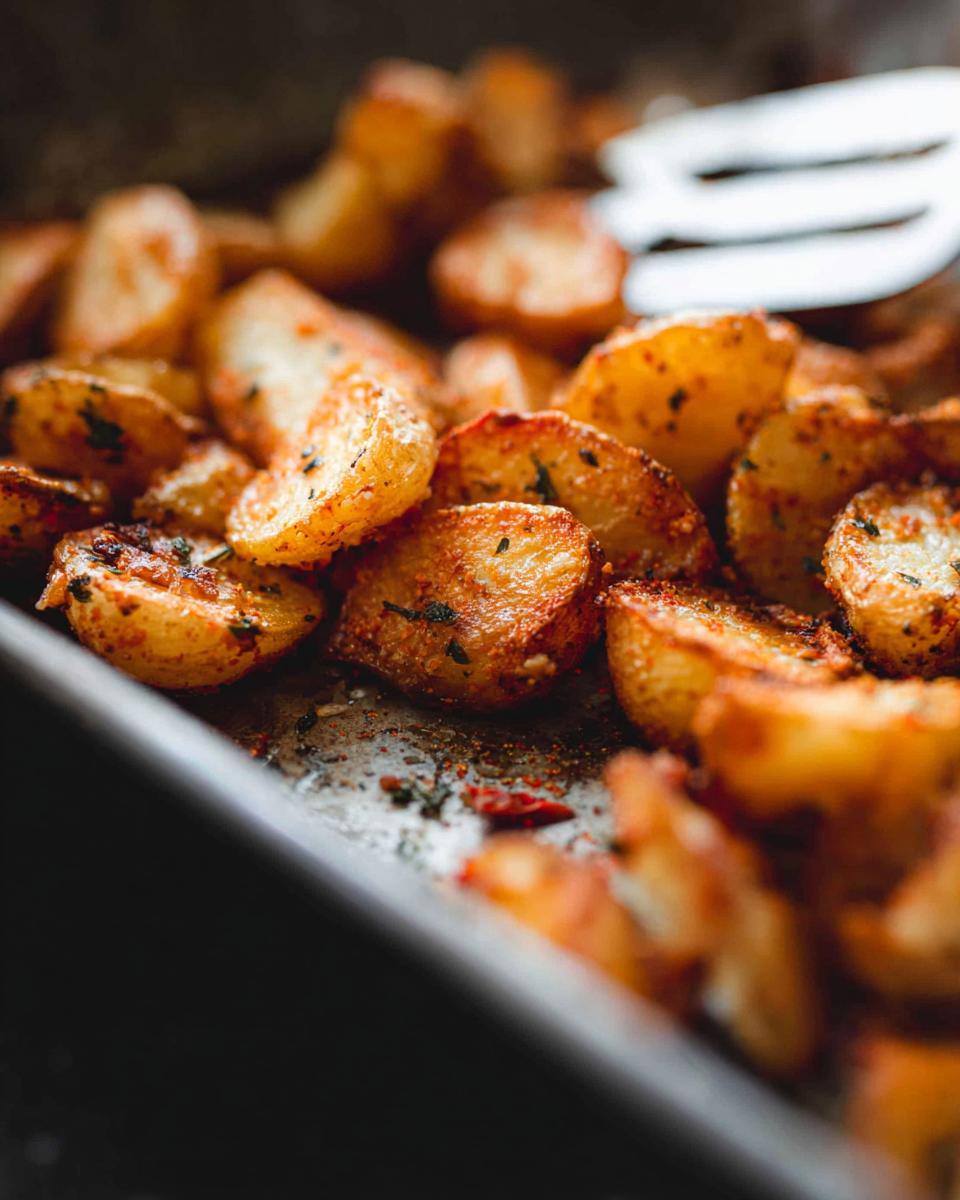
While those potatoes are boiling, quickly whisk together that minced garlic, the second dose of oil, parsley, and thyme in a little bowl. Once the potatoes are drained, drizzle the remaining 3 tablespoons of oil (ghee or olive oil works) over them right in the pot and give them a good shake so they are all coated. Now listen: spread them out onto that hot baking sheet. They *must* be in a single layer if you want Crispy Roasted Potatoes (Perfect Every Time). An overcrowded pan equals steamed potatoes, and we are boycotting steam! Pop them in the hot oven for 20 to 25 minutes, giving the pan a good shake halfway through to jostle them into new positions.
Finishing the Potatoes with Garlic Mixture
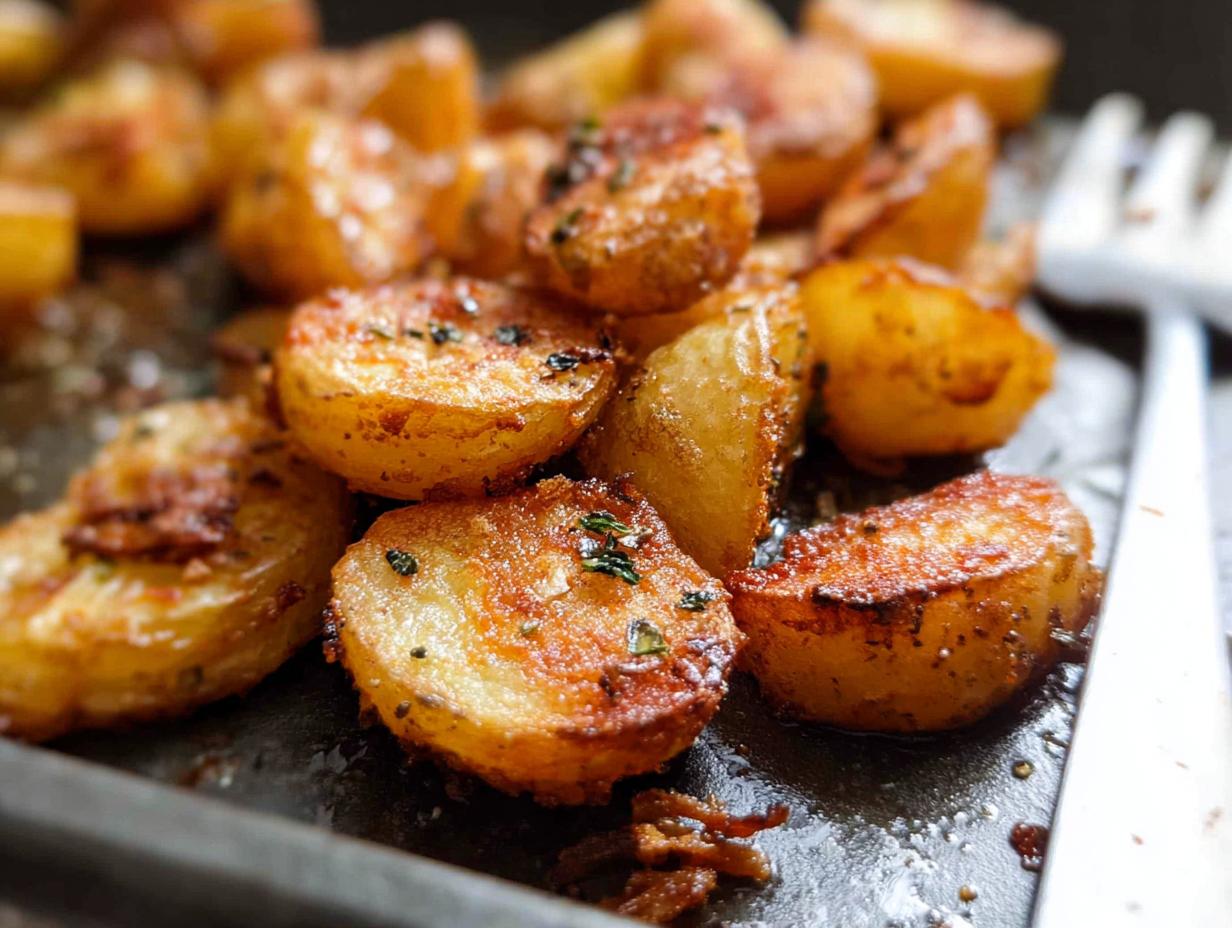
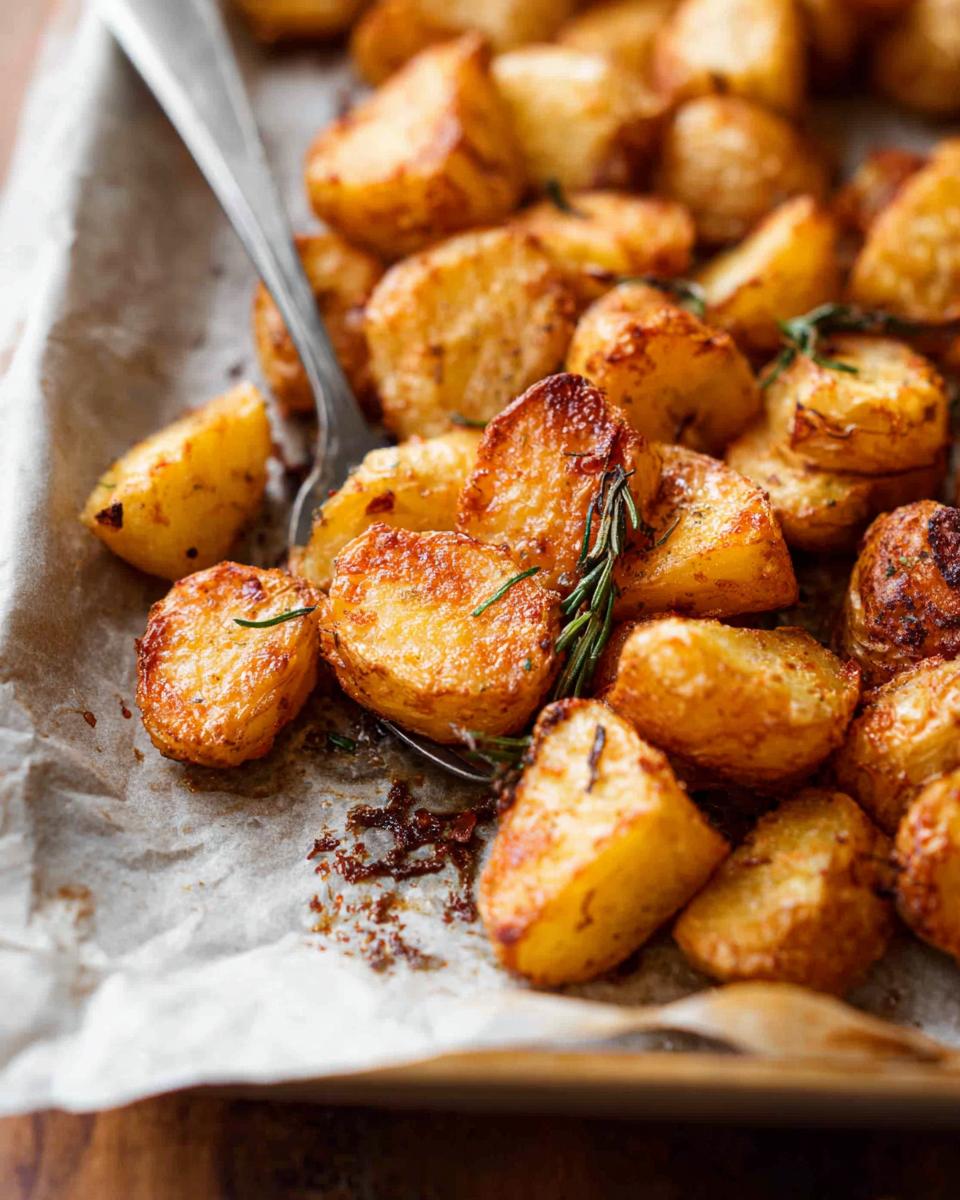
Once they look like they’re just starting to get those lovely little edges of brown, pull them out! Use that handy fish spatula—it’s perfect for flipping them gently so you don’t ruin the rough texture you’ve built. Drizzle that fragrant garlic mix evenly over everything. Back into the heat they go for just another 10 to 15 minutes! This final blast of heat will set that gorgeous golden brown color and make them utterly shatteringly crisp. Let them cool for just a couple of minutes, and then dig in!
If you want more inspiration on easy weeknight sides, check out some of my favorites here!
Tips for Making Truly Crispy Potatoes
After all the work we put into the boiling and seasoning, the final roasting stage is where folks sometimes accidentally lose that crunch. I learned the hard way that the key isn’t fancy ingredients; it’s physics! If you want potatoes that snap when you bite them, you have to honor the heat and the space around the potato.
My biggest piece of hard-won advice? Do *not* overcrowd the pan. I can’t stress this enough! When I first tried making these, I’d dump all the potatoes onto one sheet pan, and they’d steam each other into soft submission. You need space—I mean real, visible space—between every single potato so that the hot air can rush around them. That’s what creates those brittle edges. If you need to, just grab a second baking sheet! It’s better to use two pans than to have one pan of soggy potatoes.
Also, keep that oven temperature cranked up! We start high for a reason. That jump to 425ºF is what blasts the outside into crispiness while the inside finishes cooking. If you try roasting them low and slow, you’re just baking them into a dense cube. High heat equals maximum crispness. Keep practicing these little details, and soon you’ll be whipping up perfect roasted potatoes that will impress everyone at the table!
Serving Suggestions for Your Crispy Roasted Potatoes (Perfect Every Time)
Honestly, half the fun of cooking is figuring out what delicious main dish deserves this beautiful side! Once you’ve mastered these Crispy Roasted Potatoes (Perfect Every Time), the pairing options become endless. They are so versatile, which is why I always make a double batch during my weekly meal prep—you never know when you’ll need that perfect golden brown side!
For a classic weeknight meal, these potatoes are fantastic alongside something simple, like a lemon-herb roasted chicken. The bright citrus cuts right through the richness of the ghee and garlic we used. If you’re serving them as a comforting dinner staple, they pair surprisingly well with leaner cuts of steak or even baked salmon, which you can find inspiration for here.
But let’s be real—these shine brightest during the holidays! Forget wrestling with a complicated main dish; these potatoes are the star supporting player. They go beautifully with slow-cooked pot roast, or imagine them piled high next to a glazed ham or turkey. They hold up so well that even if they sit out a little while, they don’t get soggy, which is crucial when you’re serving a large crowd during holiday gatherings. They absorb gravy like champs, too!
When planning your menu, think about contrasting textures. Since the potatoes are crunchy and savory, pair them with something creamy or something leafy to balance the plate. I usually serve them with a side of bright green steamed asparagus or maybe some roasted Brussels sprouts tossed lightly in balsamic.
Storage and Reheating for Leftover Roasted Potatoes
Okay, let’s talk about the morning after! Sometimes, making a huge batch of these potatoes is just part of the plan, especially when you’re meal prepping for the week. The great news is that leftovers are totally possible, even with something prized for its crispness. But you have to treat them right, or you’ll end up with sad, soft lumps!
For storage, the rule is to make sure they’re completely cool before they go into the fridge. If you seal them up warm, all that trapped steam is going to turn your beautiful crunchy exterior into a wet mess overnight. So, let them sit on the counter until they reach room temperature. Once they’re cool, transfer them into an airtight container. I try not to pack them too tightly, maybe just one layer if possible, and into the refrigerator they go. They hold up really well for about three to four days this way.
Reheating for Maximum Crispness
Now, here is the absolute, non-negotiable part: Don’t, I repeat, *don’t* use the microwave! The microwave is the crispiest-destroyer supreme. It just steams everything inside out. Trust me, you want to bring back that golden-brown perfection we worked so hard for.
Your best bet is getting them back into a hot oven. Spread the leftover potatoes back out on a baking sheet—again, that single-layer requirement is critical! Pop them into an oven already heated to about 400ºF. They only need about 8 to 10 minutes if they were fully cooled before storing.
If you happen to have an air fryer, well, you’re in luck! That’s my favorite way to reheat them. They regain their exterior crunch in literally 5 minutes at 375ºF. Use this method, and honestly, they taste almost as good as they did straight out of the oven the night before. Happy snacking!
Frequently Asked Questions About Crispy Roasted Potatoes (Perfect Every Time)
I get so many questions after people try this recipe for Crispy Roasted Potatoes (Perfect Every Time). It’s such an exciting dish, and I love hearing how everyone adapts it! Here are a few of the most common things folks ask me when they are aiming for that perfect side dish experience.
Can I use sweet potatoes instead of russets for this recipe?
That’s a great question! You absolutely *can* use sweet potatoes, but I have to warn you they bake up differently. Sweet potatoes have much more natural sugar and moisture than Russets. Because of this, they tend to caramelize faster and they don’t create that same starchy, aggressively crisp exterior that Russets give you. If you switch them out, you’ll definitely want to drop your parboiling time down slightly—maybe just 5 or 6 minutes. Keep an eye on them during the roasting phase too, as they might need a couple of minutes less overall heat time, but they will still be delicious!
What is the secret to getting potatoes truly Golden Brown?
If you want that deep, magnificent golden brown color on your Roasted Potatoes, you have to focus on two things: heat and space. Seriously, this is the non-negotiable part of achieving beautiful results! First, your oven must be hot—425ºF is the minimum temperature I recommend for starting the roasting process, because you need that high heat to drive out moisture and start crisping rapidly.
Second, and this is huge, you cannot overcrowd the pan. If the potatoes are touching too much, they steam instead of roast, and steam equals soft potatoes. Make sure every single piece has direct contact with the hot metal of the baking sheet, even if it means using two sheets! That surface contact is precisely what helps them develop that amazing crust and that rich, satisfying golden brown finish. It’s all about creating maximum surface area for that high heat to work its magic!
If you have any other burning questions about technique or want to share how your batch turned out, please don’t hesitate to reach out to me on my contact page! I love trouble-shooting with my cooking buddies.
Estimated Nutritional Information for This Sheet Pan Side
Now, I know we’re here for flavor and crunch, not counting every single calorie, but sometimes it’s helpful to have a rough idea of what’s going into the meal, especially when you are planning out your week! This recipe is designed to be a hearty, satisfying side dish for six people, and it uses standard measuring practices.
Keep in mind that because we are using ghee or oil for the crisping process, the fat content is naturally on the higher side—but hey, that’s what makes them taste so unbelievably good, right? This is just an estimate based on using standard russet potatoes and a middle-of-the-road amount of oil. If you go heavy on the ghee, bump those numbers up a touch!
Here’s what you can generally expect per serving (based on 6 servings):
- Calories: Around 280-310 kcal
- Total Fat: Approximately 15g
- Protein: About 5g
- Total Carbohydrates: Roughly 35g
This information is just a guideline to help you plan things like your main course pairing. For more ideas on fitting this into your weekly dinner rotation, you can explore my thoughts on meal planning here! Enjoy your delicious, perfectly crispy potatoes!
Share Your Experience Making Crispy Roasted Potatoes (Perfect Every Time)
Now that you have the secret to achieving ultimate crunch, I really, truly want to know how they turned out for you! Cooking is a shared journey, and seeing your successes—especially when it comes to tricky textures like crispy potatoes—is the best part of doing this whole blog thing.
Did you manage to get that stunning golden brown finish all around? What main dish did you serve them with? Were they the perfect Crispy Roasted Potatoes (Perfect Every Time) that lived up to the hype?
Please drop a rating down below—five stars if they snapped when you bit them! And if you snapped a quick picture of your beautiful batch, I absolutely love seeing them in action. You can follow along and tag me in your pictures over on my social channels!
Your feedback not only makes my day but also helps other home cooks feel confident about trying this technique. Don’t be shy; let’s celebrate those crunchy spuds together!

Crispy Roasted Potatoes (Perfect Every Time)
Ingredients
Equipment
Method
- Preheat your oven to 425ºF with a rack in the center.
- Add the cut potatoes to a large dutch oven or stock pot. Season with about 1 ½ tablespoons of kosher salt and the baking soda. Stir to combine. Add water to cover the potatoes and bring to a boil. Cook for 8-10 minutes, until the potatoes are halfway cooked through. They should offer some resistance when pierced with a knife. Drain the potatoes and return them to the same pot.
- While the potatoes are parboiling, prepare the garlic mixture. In a small bowl, combine the grated garlic, 2 tablespoons of oil, minced parsley, and optional thyme. Microwave for 30 seconds, or until just heated through.
- Add the remaining 3 tablespoons of ghee or olive oil to the pot with the drained potatoes. Toss to coat. Spread the potatoes in a single layer on a baking sheet. Roast for 20-25 minutes, shaking the pan halfway through, until they begin to brown.
- Remove the potatoes from the oven. Use a fish spatula to help turn them over, ensuring they are all loose. Drizzle the prepared garlic mixture over the potatoes and toss to coat evenly. Return the potatoes to the oven for another 10-15 minutes, or until they are golden brown and crispy.
- Let the potatoes cool for a few minutes before serving immediately.
Notes
Tried this recipe?
Let us know how it was!
Gluten-Free Chef & Latin Cuisine Innovation Specialist
My youngest son’s celiac diagnosis at four changed everything. Suddenly, all those traditional Brazilian and Portuguese recipes from my avó needed to be completely reimagined without losing their soul.
After graduating from Johnson & Wales and working Miami’s Latin fusion scene, my son’s diagnosis became my calling. How do you make gluten-free empanadas that taste like childhood? Over eight years, I’ve developed 320+ gluten-free recipes celebrating authentic Latin flavors using cassava flour and plantain alternatives.
My gluten-free empanada recipe won “Best Appetizer” at the 2023 Miami Gluten-Free Food Festival. I ran “Sabores Sin Gluten,” a catering business serving Miami’s Latino community—quinceañeras, family gatherings, all the celebrations that matter.
Food is culture, and everyone deserves to experience the joy of sharing traditional family meals, regardless of dietary restrictions.