Oh, you know those evenings when the clock is moving way too fast, and you still have to wrestle dinner onto the table? I live for those moments because they force me to get creative! I still remember the first time I introduced my family to Chicken Avocado Ranch Burritos. It was a hectic weekday, honestly, and I was yearning for a meal that could satisfy my kids’ bottomless appetites while also being nutritious enough that I wouldn’t feel guilty serve it.
As I sautéed the chicken and mixed in that tangy ranch dressing, the aroma filled our kitchen, and the kids came running—their curiosity totally piqued. Watching them devour those burritos, wrapped in warm tortillas and packed with fresh avocado, was pure bliss. This recipe became a cherished family favorite right then and there, proving that wholesome meals can absolutely be fun and incredibly delicious. You’re going to love how easy these are!
Why This Recipe for Chicken Avocado Ranch Burritos is a Weeknight Winner
When you’re fighting the clock after soccer practice or a long day at work, you need winners in your rotation. This recipe delivers big flavor without chaining you to the stove for hours! It’s designed for real life—the one where you need something tasty *now*. Honestly, this is one of my go-to recipes for days when I’m too exhausted to think, but still want a healthy dinner on the table.
These fantastic burritos also make lunch prep a breeze. If you love having food ready to go, check out my thoughts on making dinners that taste great all week long.
Here’s why these keep making the weekly rotation:
- It comes together incredibly fast when you need speed most.
- It’s packed with kid-friendly flavors that even picky eaters will dive into.
- The fresh elements keep it feeling light, even though it’s super satisfying.
Quick Assembly for Busy Schedules
You’re only looking at about 15 minutes of hands-on prep here, which is amazing for a dinner that tastes like it took three times as long! Since we are using cooked, shredded chicken (or leftovers!), you skip the biggest time sink. You just mix everything up, stuff it, roll it, and put it in the oven to get just a little crispy on the outside. It’s almost entirely hands-off!
Family-Approved Flavor Profile of Chicken Avocado Ranch Burritos
This is where the magic really happens. Traditional chicken dinners can sometimes fall flat with my youngest, but the creamy coolness of the ranch mixed with bright, fresh avocado? Total game changer! Everyone loves it. The combination used in these Chicken Avocado Ranch Burritos hits all the right notes—savory, cool, and deeply satisfying. It’s the ultimate crowd-pleaser for little palates and grown-up ones!
Essential Equipment for Perfect Chicken Avocado Ranch Burritos
Okay, so you don’t need a whole arsenal of specialty gadgets for this recipe, which I love for easy clean-up! But having the right tools makes the process go smoother, especially when you’re trying to rush dinner out before everyone gets grumpy.
For the loaf base itself, the equipment list is quick and essential. You absolutely need a large mixing bowl ready to go. I mean, when you’re combining ground chicken, eggs, and flavors, you need room to work without making a huge mess! Trust me, trying to mix it all in a tiny bowl just ends in splatter.
You will definitely need a 9x5x2-inch loaf pan. This gives the filling just the right structure so it bakes evenly. I actually prefer using a metal one because it conducts heat nicely, but glass works if that’s what you have on hand.
Here are the few absolute must-haves:
- A trusty large mixing bowl for combining all the delicious loaf bits.
- One 9x5x2-inch loaf pan to give your chicken flavor structure while it bakes.
- A good spatula or spoon for folding everything together gently.
- A sharp knife and cutting board, because those onions and garlic won’t mince themselves!
Gathering Ingredients for Your Chicken Avocado Ranch Burritos
Okay, let’s talk about what goes inside! Even though we are making the filling for what will eventually become the star of our Chicken Avocado Ranch Burritos, the preparation process starts right here with these base ingredients. Getting this right means we have incredible flavor for wrapping later. Don’t skip the fresh parsley; it really brightens things up!
Because this recipe is so versatile, I always encourage people to think about how they can pivot the base—maybe try different cheeses or herbs. If you’re interested in tweaking things even further, I have a few ideas about mixing up the core components in my post about seven-ingredient egg recipes that might spark some creativity!
For the Chicken Loaf Base
This is the meat and flavor foundation. Make sure your onion and garlic are minced nicely so they blend right in and don’t cause any unexpected texture issues in the final loaf.
- 1.5 pounds ground chicken—I try to get a good quality batch, it makes a difference!
- 3/4 cup Italian breadcrumbs or plain breadcrumbs
- 1/2 cup grated Parmesan cheese
- 1/3 cup minced yellow onion
- 4 cloves minced garlic
- 1 large egg, just to bind it all together
- 1/4 cup whole milk
- 2 tablespoons chopped parsley (This is the initial amount!)
- 1 teaspoon salt
- 1/2 teaspoon black pepper
For the Finishing Topping
This part is totally optional, especially if you’re on the go, but I strongly recommend it. That little bit of extra cheese melting on top while it broils just takes the whole experience up a notch before we wrap things up!
- 1/2 cup shredded parmesan cheese
- 1 tablespoon fresh chopped parsley (Don’t confuse this with the 2 tablespoons we used inside!)
Step-by-Step Instructions: How To Make Chicken Avocado Ranch Burritos At Home
Now for the fun part—putting this amazing filling together! Even though the final dish is a burrito, the secret to the flavor explosion lives right here in the loaf assembly. We’re taking these components and making a hearty, savory base that tastes incredible stuffed into a warm tortilla. If you’re looking for lightning-fast weeknight fixes, this method is what you need. You can see more of my speedy approaches when you check out my favorite 25-minute dinner ideas!
Preparing the Oven and Pan
First things first, get your oven hot and ready! We need it to be at 350°F for the main cook time. Once that’s going, you have to prep your pan. You’ll be using that 9x5x2-inch loaf pan, so give it a really good spray with nonstick cooking spray. Cooking lean ground chicken can sometimes be tricky because it likes to stick, so don’t be shy with the spray!
Mixing the Chicken Avocado Ranch Burritos Filling
Grab your largest mixing bowl—you’ll need the space, trust me! Toss in that ground chicken, the breadcrumbs, the grated Parmesan, your minced onion and garlic, the egg, the milk, the first measure of parsley, salt, and pepper. Now, gently mix everything. I use my hands for this part because you need to feel when it’s just combined. Seriously, stop mixing as soon as you don’t see any dry pockets of breadcrumbs! Overmixing ground meat like this makes the final product tough, and nobody wants tough meat in their Chicken Avocado Ranch Burritos.
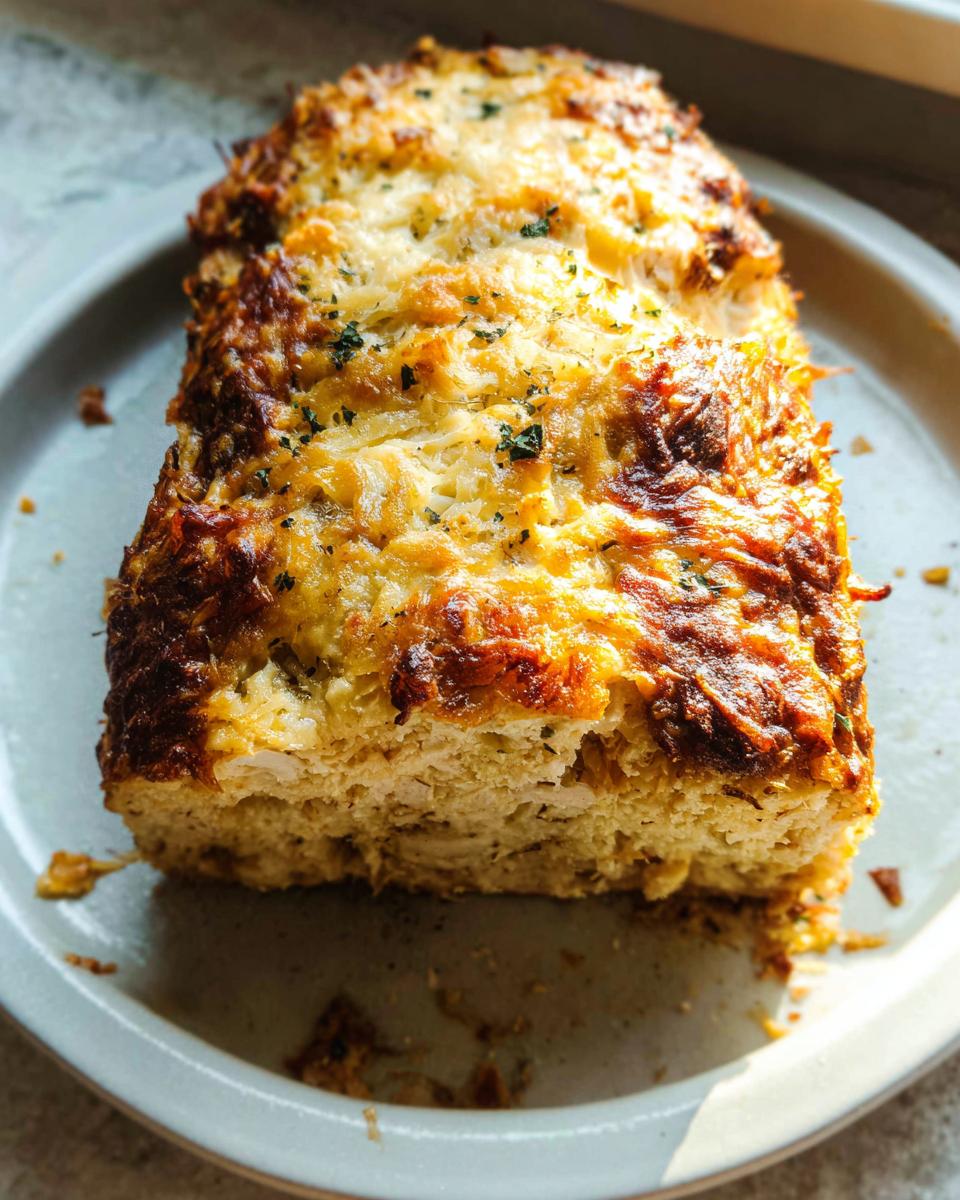
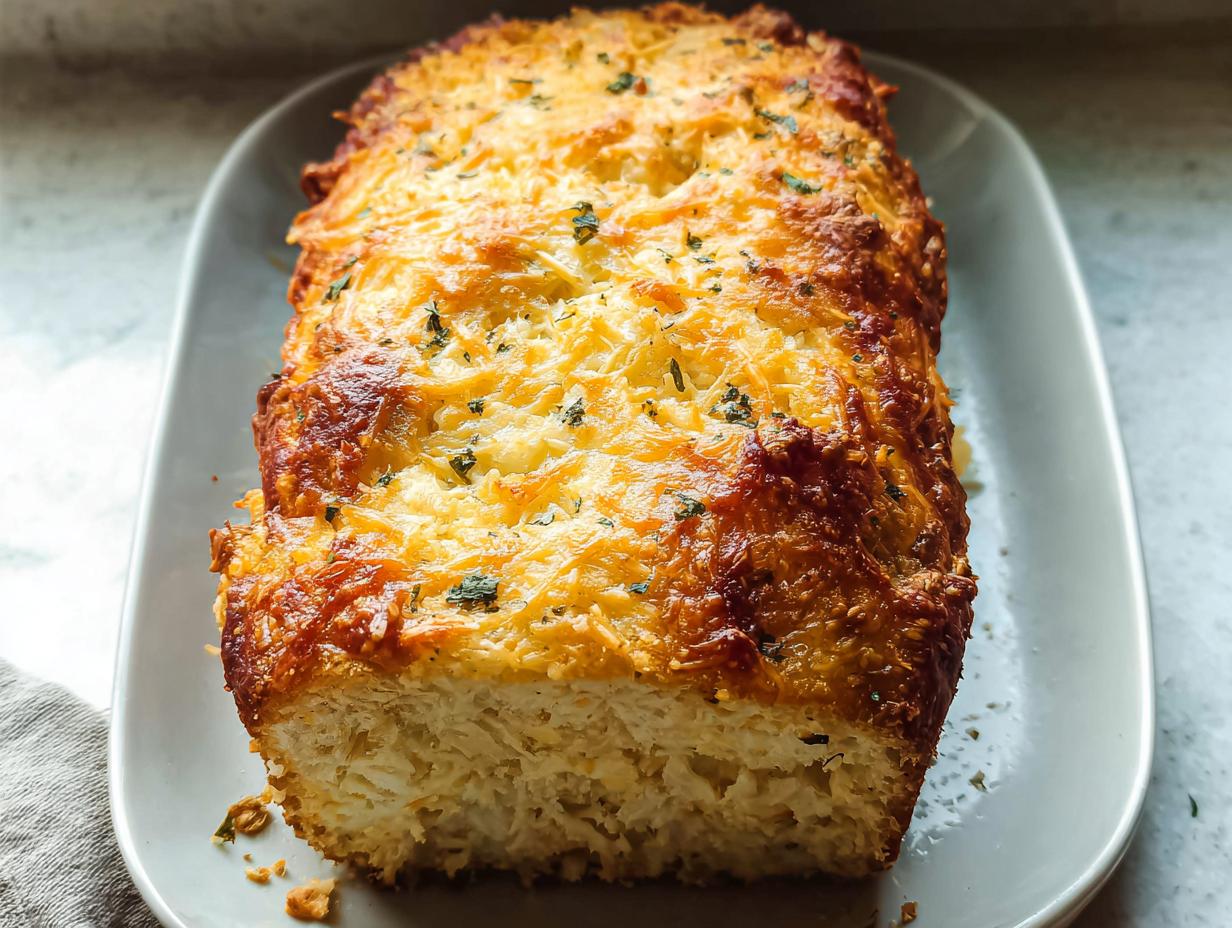
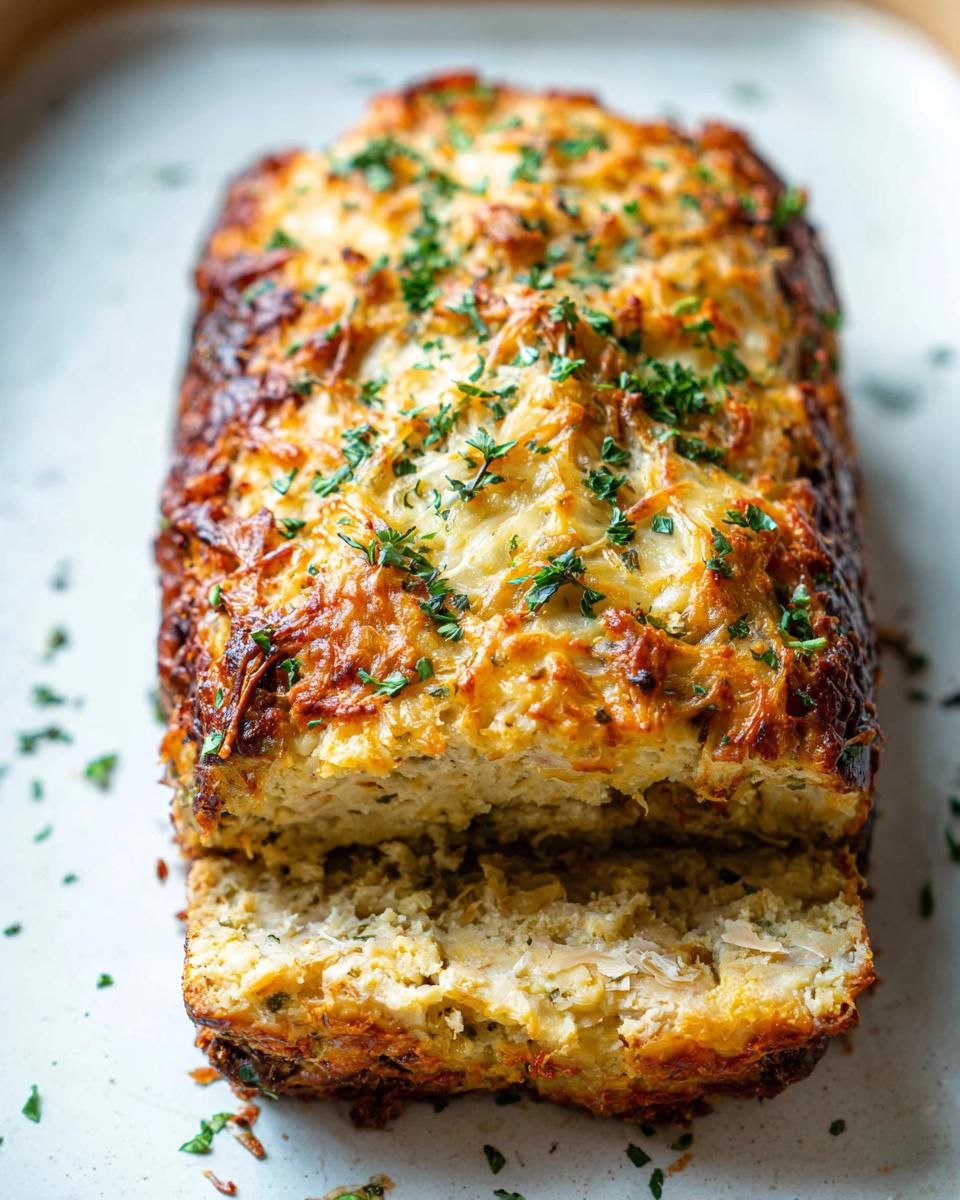
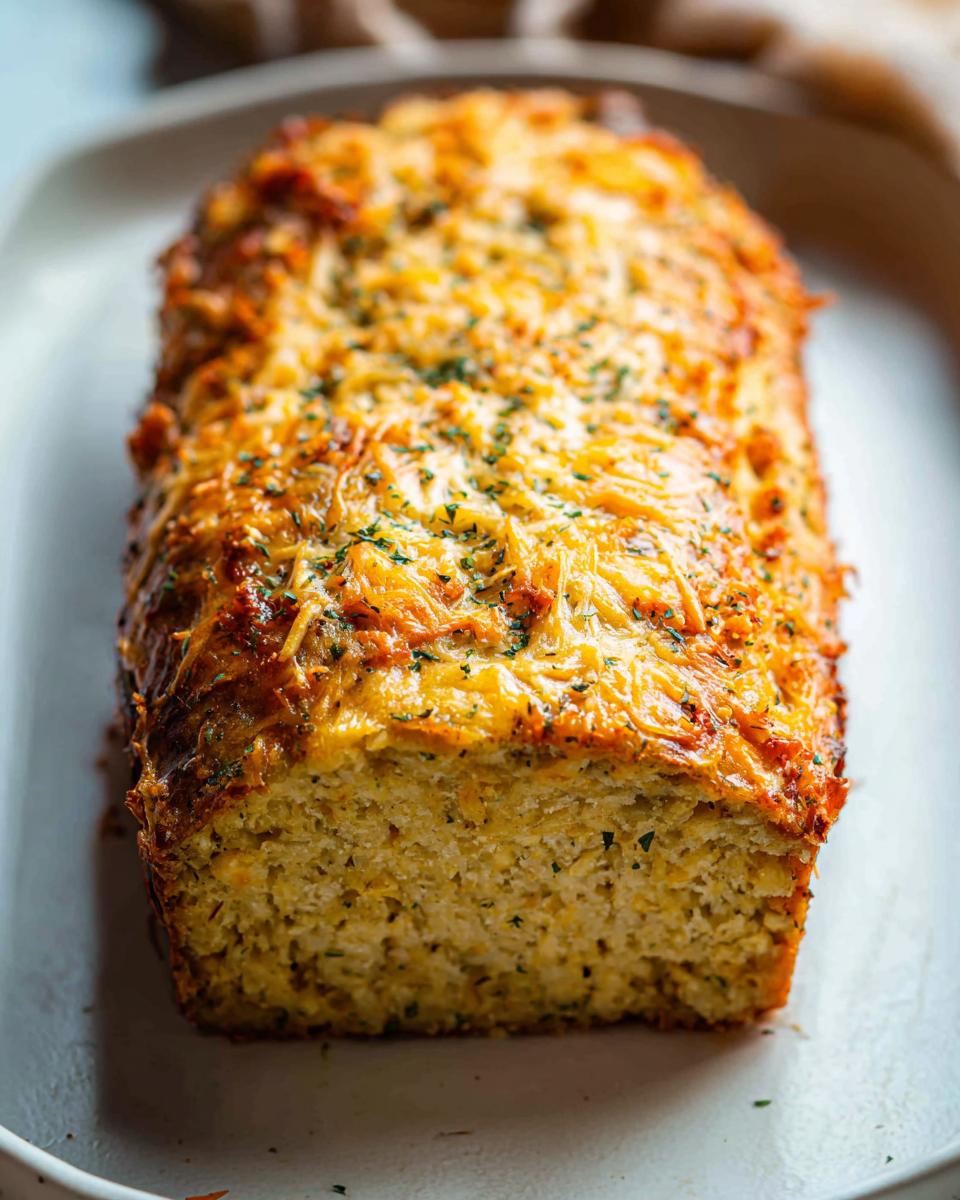
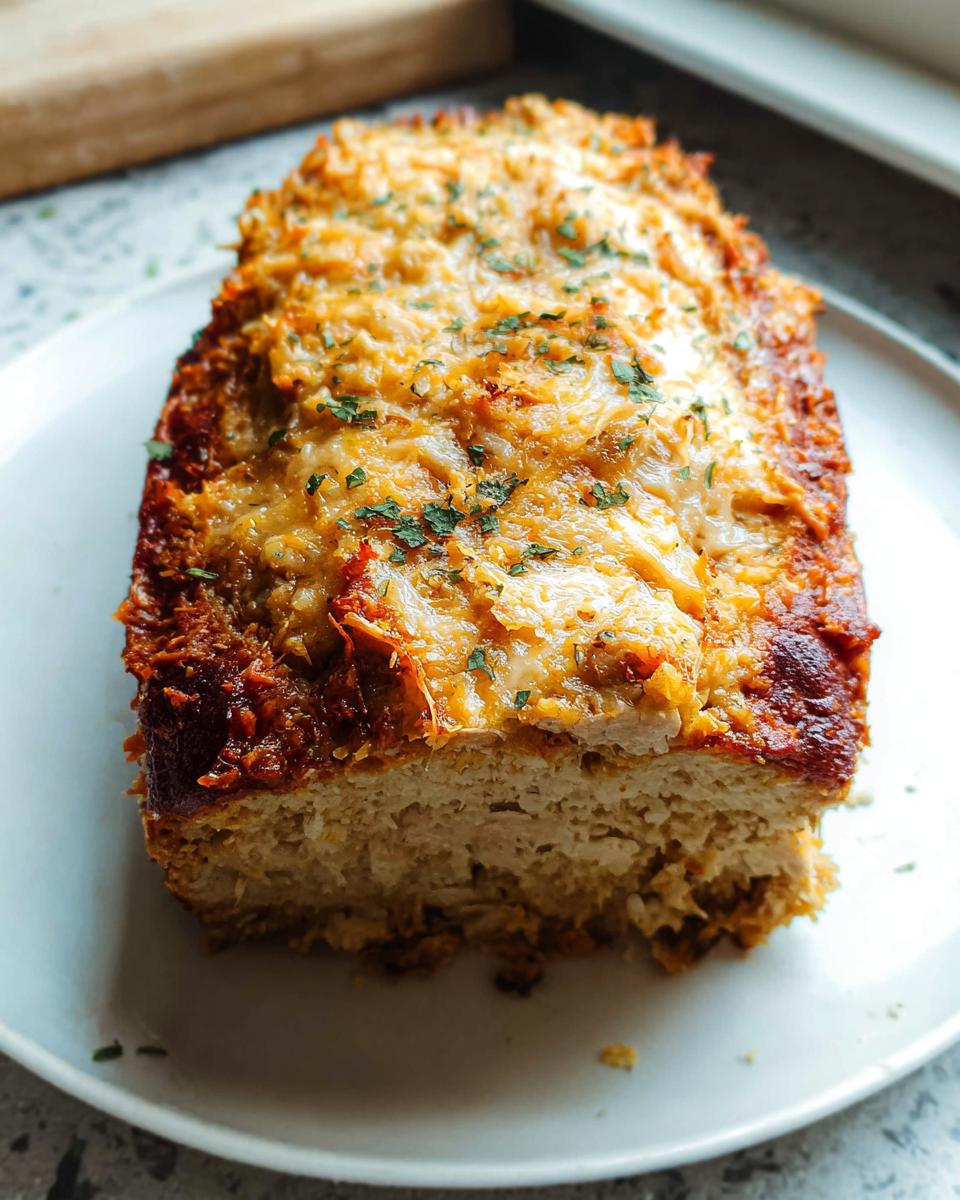
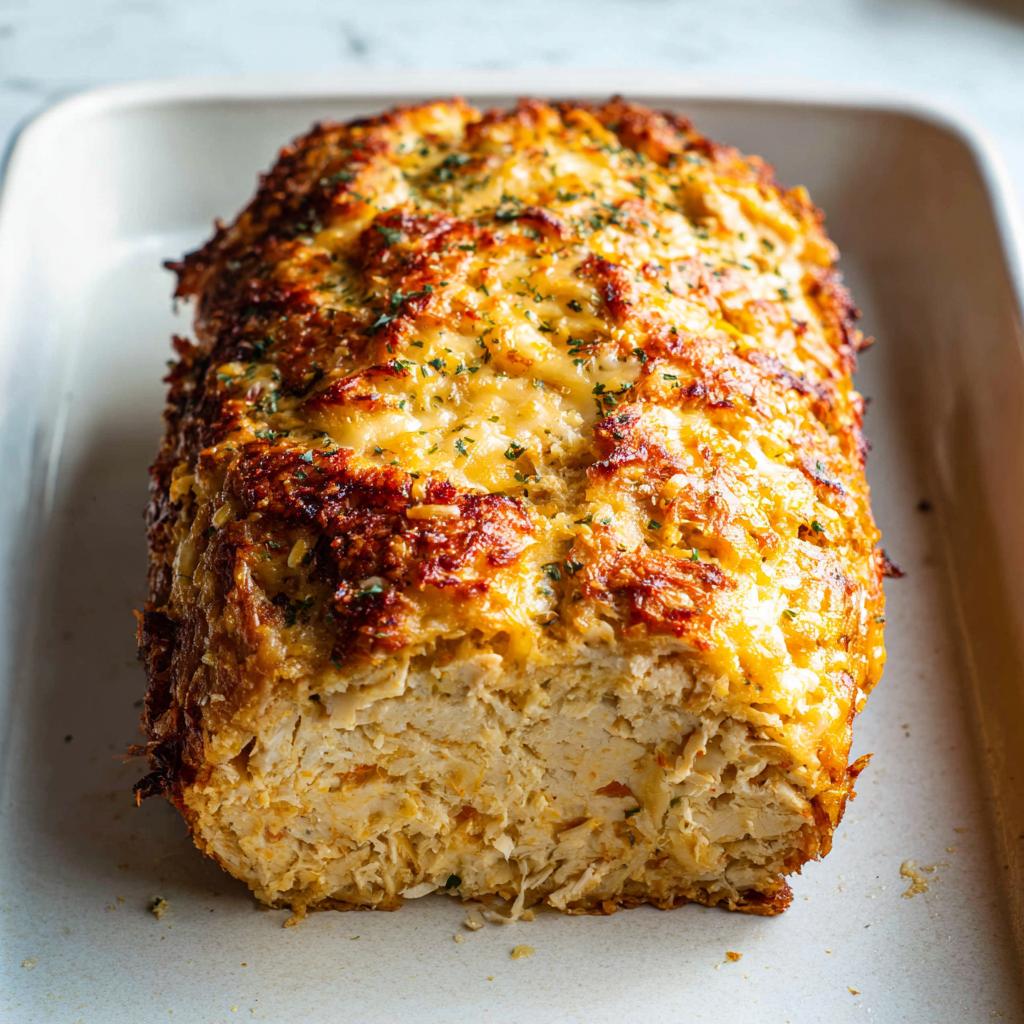
Baking and Finishing the Loaf
Once it’s just combined, form that mixture into a nice, even loaf shape right inside your prepared pan. Don’t squish it down too hard! Now, sprinkle that shredded Parmesan on top and finish it off with the remaining tablespoon of fresh parsley. Pop it into the 350°F oven and set your timer for a full hour—that’s what it needs to cook through safely. After that hour, here comes the best part: you’re going to switch your oven to broil. This part only lasts 2 minutes, but you have to watch it like a hawk! You want that cheese topping to get golden brown and crispy, but it burns fast. If you need a great reference for flavor profiles on the meatball/loaf side, you could check out this great loaf recipe for inspiration on seasoning!
Tips for Success When Making Chicken Avocado Ranch Burritos
You’ve got your loaf baked and cooled—yay! But I want to give you a few little insider tricks that I learned through trial and definite error over the years. These small tweaks are what take your filling from good to absolutely unforgettable. They really help ensure that your meat stays juicy, which is key since we are using lean ground chicken!
My absolute favorite tip involves the cooling process. Don’t rush to mash up that hot loaf! You must let it cool slightly before you start pulling it apart or chopping it up for the burrito filling. If you try to shred it while it’s piping hot, the proteins seize up, and you end up with dry little bits rather than savory, moist shreds.
When it comes to the ranch flavor, don’t just dump in the dry seasoning mix! I always recommend using a really good quality liquid ranch dressing (the creamy stuff you put on salads). It adds essential fat and moisture back into the ground chicken mixture, preventing that crumbly texture we talked about earlier. It just makes the whole filling sing, honestly.
Speaking of moisture, if you find your ground chicken is leaner than usual or seems dry during mixing—don’t panic! Add an extra splash of milk, or if you have it on hand, stir in a tablespoon of mayonnaise. It sounds weird, but it totally disappears into the bake and results in that ridiculously tender texture I always chase. It’s a trick I picked up from my auntie for making sure chicken recipes turn out perfect every time. For more tips on mastering chicken like a pro, check out my guide here!
Finally, always, always taste before you bake! Have a tiny, tiny taste of the raw mix (since we used egg, just be careful!). If it tastes bland raw, it will taste bland baked. Usually, this means adding just a tiny pinch more salt or a quick grind of black pepper before it heads into the oven. It’s your last chance to boost the flavor profile!
Storing and Reheating Your Chicken Avocado Ranch Burritos Meal Prep
This recipe is seriously my secret weapon for surviving busy weeks, because leftovers are my best friend! Making a big batch of that savory chicken filling means you aren’t starting from scratch every evening. Whether you’re prepping for lunches or just making dinner easier tomorrow, proper storage is key to keeping those flavors vibrant for your Chicken Avocado Ranch Burritos.
If you’re planning on eating this throughout the week, refrigerating is the way to go. Once that loaf cools down completely—and I mean *completely*—wrap it up tight. I usually wrap mine in plastic wrap first, and then tuck it into an airtight container just to be safe. This keeps the moisture in. You can safely keep this in the fridge for about three to four days. I like to check my containers every Sunday when I plan out my week; you can find some great inspiration for organized cooking over here!
Freezing Extras for Later
If you made a massive batch because you know you’ll want it months down the line, you can absolutely freeze the cooked loaf. Just make sure it’s cold before you wrap it. Use a double layer of protection: tightly wrap it in plastic wrap first, and then seal that in aluminum foil. Don’t forget to label it with the date! It freezes beautifully for about two to three months.
When you’re ready to eat, the fridge is your friend for thawing overnight. Don’t try to rush it on the countertop; just move the foil-wrapped loaf to the fridge the night before you need the filling.
Reheating Methods for Fresh Flavor
Reheating is simple, but the method changes based on how much you are eating. For just one or two burritos, I usually just slice off what I need and microwave it for about 1 to 2 minutes until it’s steaming hot all the way through. That’s the quickest route!
If you want to reheat a larger hunk of the loaf, or if you want to bring back that great texture we worked so hard for, use the oven. Set your oven to 350°F and bake the portion you want for about 15 minutes. It warms through evenly, and the exterior gets that nice little texture back, making your reheated Chicken Avocado Ranch Burritos taste almost as good as new!
Variations on Chicken Avocado Ranch Burritos
Sometimes I get asked if you have to stick strictly to the ranch and Parmesan combo, and the answer is a resounding no! While I stand by the original flavor base—it’s a classic for a reason—tinkering with ingredients is part of the fun in the kitchen. Mixing things up is how we keep family meals exciting!
If you’re tired of the standard flavors but still need that quick assembly, try these simple swaps. We aren’t changing the core steps; we’re just swapping out some star players in the filling mixture. Want more ideas for making chicken shine on busy nights? I compiled some of my best suggestions right here!
Spice Swap: Bringing the Heat
If your family likes a little kick—and mine certainly does on Pizza night—you can easily inject some smoky warmth into the loaf base. Instead of relying only on salt and pepper, ditch the Italian breadcrumbs and use Panko, but add in about a teaspoon of smoked paprika and half a teaspoon of cumin when mixing your ground chicken. It gives the loaf a fantastic Southwestern whisper that totally changes the profile!
Cheese Diversification
The Parmesan cheese is fantastic for its salty, nutty flavor, but what if you want something meltier? Try swapping out half of the grated Parmesan in the filling for a sharp, good-quality Monterey Jack or even a Mexican blend cheese. When you use Monterey Jack, you get a beautiful, stringy melt inside the burrito wrap. For the topping, instead of Parmesan, you could use Pepper Jack right before the broil if you want that heat to really pack a punch on the crust!
Dressing Alternatives to Ranch
Ranch dressing is creamy and tangy, which works perfectly with avocado, but if you’re all out or just want a change, there are great creamy substitutions. If you have Greek yogurt on hand, you can use that mixed with a dash of dill, garlic powder, and onion powder for a healthier, bright, homemade “dill dip” flavor that binds things together just as well. Another killer option is using half the amount of sour cream mixed with a teaspoon of taco seasoning. That mixture blends beautifully with the chicken and takes the whole filling in a different, but equally delicious, direction!
Chicken Avocado Ranch Burritos Nutrition Information (Estimated)
I always get asked about the nutritional breakdown for this one, which totally makes sense! We all want that satisfying dinner without feeling weighed down afterwards. Because we’re using lean ground chicken and focusing on fresh elements like avocado (which brings in healthy fats, by the way!), this recipe is a really solid option for a weeknight meal, especially if you’re trying to hit protein goals.
Now, you have to remember, these numbers are just a general guide, okay? They are estimates based on standard ingredient measurements. If you use extra-creamy ranch or a richer brand of Parmesan cheese, those values will definitely shift a little bit. I always say, consider these great figures just for direction. For a deeper dive into making your whole menu healthier, you can look at some wonderful ideas in my guide here!
Based on the filling recipe alone (not including the tortilla, toppings, or the actual avocado you add in the burrito assembly stage!), here’s roughly what one serving—or one-sixth of the loaf—offers:
- Calories: Around 313
- Fat: About 16 grams
- Protein: A whopping 29 grams! Love that for us.
- Carbohydrates: Roughly 14 grams
See? That’s a fantastic, protein-heavy base ready to be wrapped up. When you add in a warm, whole-wheat tortilla, some fresh avocado slices, and maybe a dollop of Greek yogurt instead of sour cream, you’ve got a powerhouse dinner that still feels like a treat rather than a chore. I think that balance is what makes this recipe a true keeper for busy families!
Share Your Chicken Avocado Ranch Burritos Creations
I truly hope that filling made its way into your next weeknight rotation! Honestly, seeing pictures of you all enjoying these recipes is what makes all the hours I spend testing and writing totally worth it. I love hearing how your family reacted to the ranch and avocado combination—did your kids surprise you?
If you made these fantastic Chicken Avocado Ranch Burritos, please don’t be shy! Head down to the comments section right now and let me know what you thought. Was the 2-minute broil perfectly crispy for you? Did you use one of the suggested variations? Drop a rating, too, so other busy parents know this recipe is a guaranteed winner!
Tell Me What You Thought!
Your feedback helps me so much in perfecting these family recipes. Even small notes help me adjust things for future readers. If you made an awesome substitution for the ranch, shout it out so we can all share the knowledge! I read every single comment, I promise.
Snap a Photo and Tag Me!
Whenever you wrap up those savory chicken and avocado treasures, grab a picture! I live on Instagram for those little kitchen peeks. Tag me in your best assembly shots! Seriously, seeing those golden-brown wraps stuffed with goodness brightens my whole week. I always try to share reader photos on my stories.
Remember, sharing food traditions makes them stronger, and I’m so happy that my little weekday fix has become something you’re trying in your home. Happy rolling!
Chicken Avocado Ranch Burritos
Ingredients
Equipment
Method
- Preheat your oven to 350°F. Spray a 9x5x2-inch loaf pan with nonstick cooking spray.
- In a large mixing bowl, combine the ground chicken, Italian breadcrumbs, grated Parmesan cheese, minced yellow onion, minced garlic, egg, whole milk, 2 tablespoons of chopped parsley, salt, and black pepper.
- Use clean hands or a large spoon to mix the ingredients until they are well combined.
- Form the meat mixture into a loaf shape and place it into the prepared loaf pan. Top the loaf with the shredded parmesan cheese and the remaining 1 tablespoon of fresh chopped parsley.
- Bake in the preheated oven for 1 hour. Broil for the last 2 minutes to make the top golden brown. Watch the broiler closely during this time.
Nutrition
Notes
Tried this recipe?
Let us know how it was!
Gluten-Free Chef & Latin Cuisine Innovation Specialist
My youngest son’s celiac diagnosis at four changed everything. Suddenly, all those traditional Brazilian and Portuguese recipes from my avó needed to be completely reimagined without losing their soul.
After graduating from Johnson & Wales and working Miami’s Latin fusion scene, my son’s diagnosis became my calling. How do you make gluten-free empanadas that taste like childhood? Over eight years, I’ve developed 320+ gluten-free recipes celebrating authentic Latin flavors using cassava flour and plantain alternatives.
My gluten-free empanada recipe won “Best Appetizer” at the 2023 Miami Gluten-Free Food Festival. I ran “Sabores Sin Gluten,” a catering business serving Miami’s Latino community—quinceañeras, family gatherings, all the celebrations that matter.
Food is culture, and everyone deserves to experience the joy of sharing traditional family meals, regardless of dietary restrictions.