Okay, let’s talk about the best kind of night: Pizza Night! Honestly, nothing beats that feeling when the oven is hot, the house smells incredible, and everyone is gathered around, eager to customize their own perfect slice. For years, I thought making homemade pizza was this huge, complicated event, especially once my youngest was diagnosed with celiac disease and the gluten-free pizza world seemed impossible.
But that night, digging through my pantry and experimenting until we got a perfect, soft GF crust, changed everything for us. We had flour flying everywhere, but the look on my son’s face when he took that first bite? Wow. That memory is why I put together The Ultimate Pizza Night Recipes Guide for Beginners. This isn’t just some standard recipe collection; it’s the blueprint for stress-free, fun, and amazing pizzas for your entire family. Trust me, if I can do it, you absolutely can too!
Why This Is The Ultimate Pizza Night Recipes Guide for Beginners (E-E-A-T Focus)
So, why should you trust this guide? Because it focuses on exactly what makes pizza night a huge success without the beginner headaches. My biggest secret weapon is the par-baking step. We lightly cook the crusts first! This stops soggy bottoms, makes handling easy, and it’s fantastic for mixing dough types, even gluten-free ones.
Plus, we set up an assembly line for maximum fun. Everyone gets to customize their own pizza totally guilt-free. It turns dinner preparation into quality family time, which is what it should be all about. This method gives you control, flexibility, and a guaranteed crisp crust every single time.
Meet Your Guide: Marco Santos
Hi! I’m Marco Santos. I bring a little flair to the table as both a Gluten-Free Chef and a Latin Cuisine Innovation Specialist. I specialize in making delicious food accessible for everyone, no matter the dietary need. I’ve tested every trick in the book so you don’t have to!
Essential Equipment for The Ultimate Pizza Night Recipes Guide for Beginners
You don’t need a fancy wood-fired oven to make amazing pizza, but having the right tools makes things so much smoother for beginners. We need equipment to handle the dough and the high heat. Don’t panic if you don’t have everything—some items are truly optional!
For success, you absolutely need a way to cook it hot, whether that’s your standard grill or the oven. A rolling pin is great for shaping when you’re first starting out. If you have a pizza stone or a peel, those are wonderful for getting that professional crust crispness, but honestly, a simple sheet pan works just fine if that’s what you have in your kitchen right now!
- Grill or Oven (Your Heat Source!)
- Rolling pin
- Pastry brush
- Pizza stone (Optional, but fun!)
- Pizza peel (Optional, for sliding pizzas)
Gathering Ingredients for The Ultimate Pizza Night Recipes Guide for Beginners
I know the ingredient list looks long, but don’t freak out! This is where the magic of customization happens. We organize everything into groups so you can easily prep ahead of time. Seriously, spending 30 minutes in the morning prepping toppings makes the actual pizza night assembly line a breeze. We’re talking about transforming simple dough into endless possibilities here!
If you are looking for some inspiration on different ways to combine flavors, you might want to check out some other fun recipes I love over here.
For the Crusts: Foundation of Your Pizza Night
We start simple with the dough. Remember, you need about 1 pound of dough for every two pizzas you plan on making, so grab enough for the whole family! The dough is key, especially if you’re trying different types like the gluten-free options I mentioned. Just make sure you let that dough rest after your first roll—it needs a little break before you can stretch it to that perfect 10-inch round. That resting period makes all the difference!
- Pizza dough (1 lb for every 2 pizzas. Gluten-free dough can be substituted.)
- Olive oil
- Kosher salt
- Semolina flour or cornmeal (For dusting the pan or peel.)
Sauce Ideas to Kickstart Your Pizza Night
This is a fantastic opportunity to move beyond boring red sauce! Since you’re making individual pizzas, everyone can pick their poison. I love seeing people get creative with their bases. Don’t be afraid to try coating the crust edge with an olive oil and garlic mix before you even touch the main sauce!
- Pizza sauce (1/4 cup per pizza)
- Minced garlic and olive oil mixture
- Pesto
- Alfredo sauce
- Buffalo sauce (Frank’s recommended, of course!)
- Cheese sauce
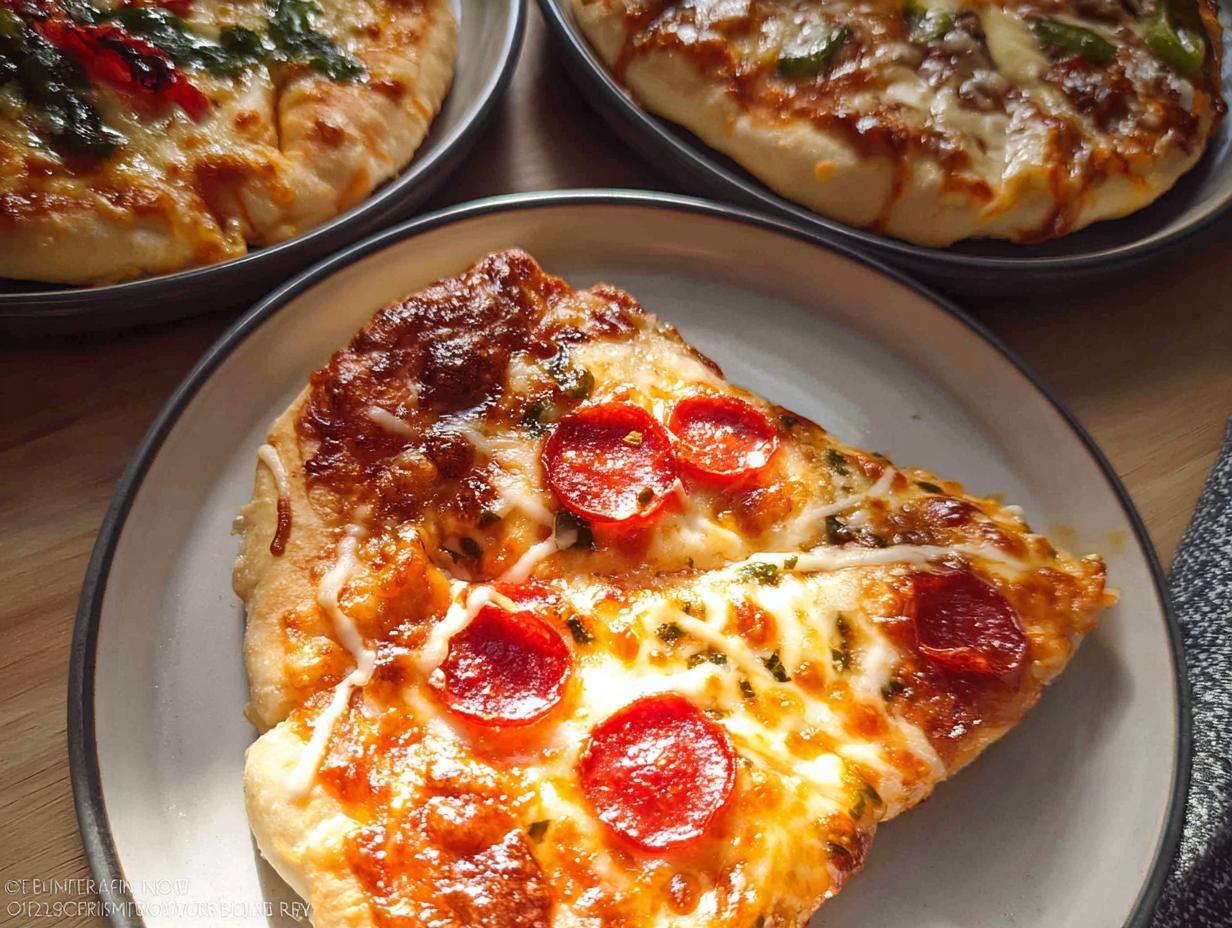
Topping Ideas: Cheese, Meats, and Fresh Produce
The most important rule for toppings is this: all meats must be cooked before they hit the deck. We don’t want salmonella sneaking into the oven with our mozzarella! Prep your sausage, cook your bacon, and have everything ready to go. For the veggies, slice them thinly so they cook through nicely during the final bake. If you want to see what combinations others are loving, this guide on pizza building is hugely inspirational!
Cheese Ideas: shredded mozzarella (about 1 cup per pizza), fresh mozzarella (sliced), Blue cheese, Ricotta cheese.
Meat Ideas: Pepperoni or turkey pepperoni, Italian sausage (Cooked and crumbled), Ham or Canadian bacon, Bacon (Cooked and crumbled), Cooked chicken (Diced), Chicken apple sausage, Meatballs (Cooked and sliced), Shaved steak (Cooked).
Fresh Produce Ideas: Red or green bell pepper (Cut into strips), Red or white onion (Julienned), Mushrooms (Sliced), Roma tomato (Sliced or diced), Spinach, Kale (Thick stems removed, cut into bite sized pieces), Fennel bulb (Sliced thinly), Pineapple (Diced), Basil.
Canned/Jarred Ideas: Olives (Black, green (without pimentos), or Kalamata (pitted)), Roasted red pepper strips (Drained and patted dry), Jalapeño peppers.
Step-by-Step Instructions for The Ultimate Pizza Night Recipes Guide for Beginners
Alright, let’s get this party started! This process might seem like a few steps, but trust me, it’s all about setting yourself up for success so that pizza night is relaxed, not rushed. We are going to par-bake everything first. This simple trick keeps your crust from getting soggy under all those wonderful toppings. When you’re ready to bake, all the action happens quickly!
Preheat and Par-Bake the Dough
First things first: heat! You need that cooking surface screaming hot. Place your pizza stone on the grill or crank your oven up to 450°F. You should let this preheat for a good long while—at least 30 minutes is ideal. While that’s heating, grab your dough balls. Roll or press them out into about 10-inch circles. If the dough fights you and shrinks back, just let it chill out for five minutes, then try rolling again.
Now for the non-stick secret! If you’re using a pan, dust it well with semolina or cornmeal and place your crust there. If you’re using a peel to transfer to a stone, sprinkle that peel heavily. You need to check that it slides freely! Then, bake that naked crust for just 2 or 3 minutes until it loses that raw dough feel. You can stack these par-cooked shells, separated by parchment, and refrigerate them until you’re ready for the main event.
Preparing Toppings and Setting Up the Assembly Line
This prep work should definitely happen in the morning or early afternoon—it’s the key to enjoying the evening. Remember, all your meats absolutely must be cooked before they even see the dough. Drain any jarred items well, and slice or dice all your fresh stuff.
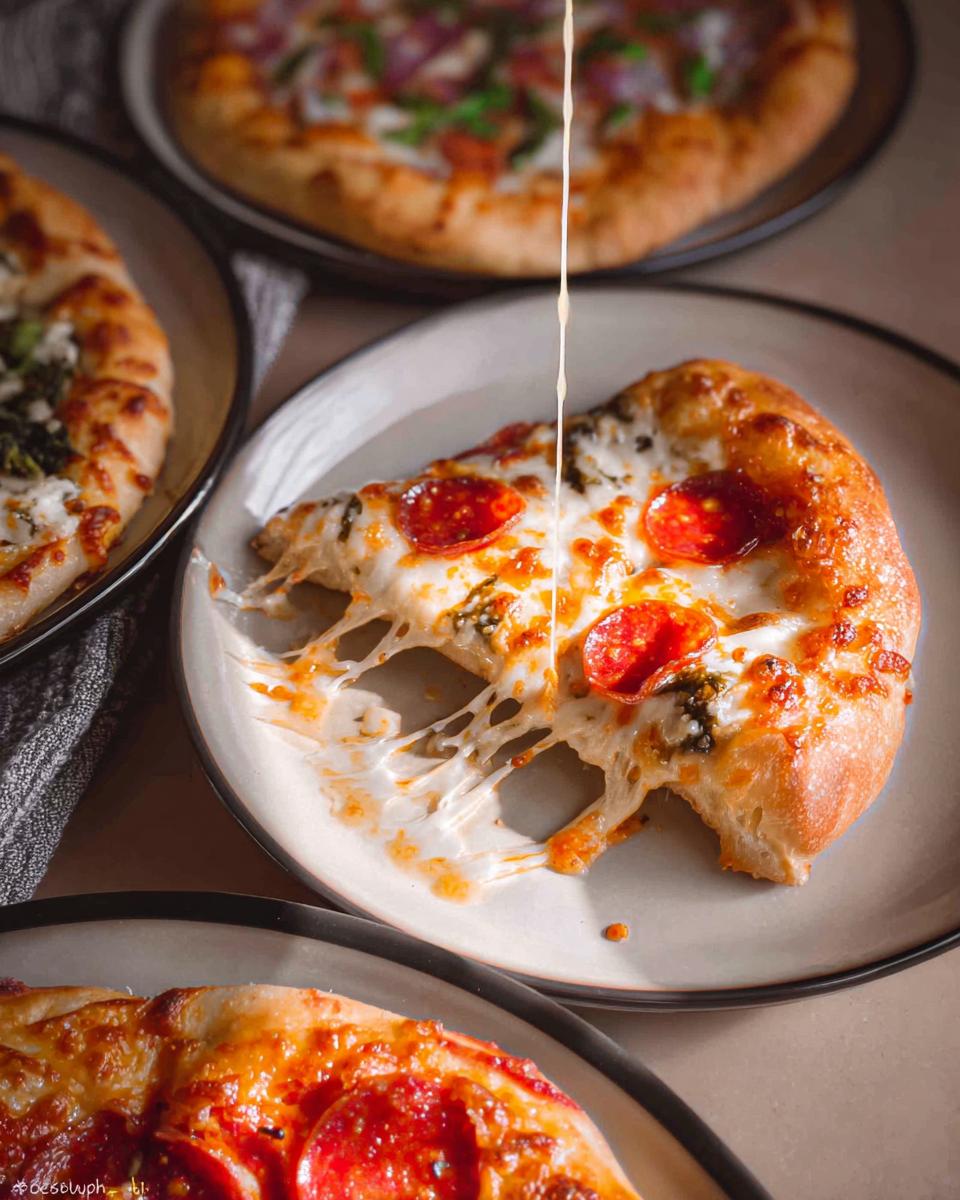
When it’s time to eat, set up your line like an actual cafeteria! Plates first, then your par-cooked crusts. After that, set out the olive oil and salt (keep that pastry brush handy!), then all your sauce options, followed by *all* the cheeses, and then every single topping. We want a clear, easy flow so nobody has to reach over someone else’s pepperoni to grab olives! If you need some quick, no-fuss dinner ideas while you’re prepping, I always share some simple recipes right here.
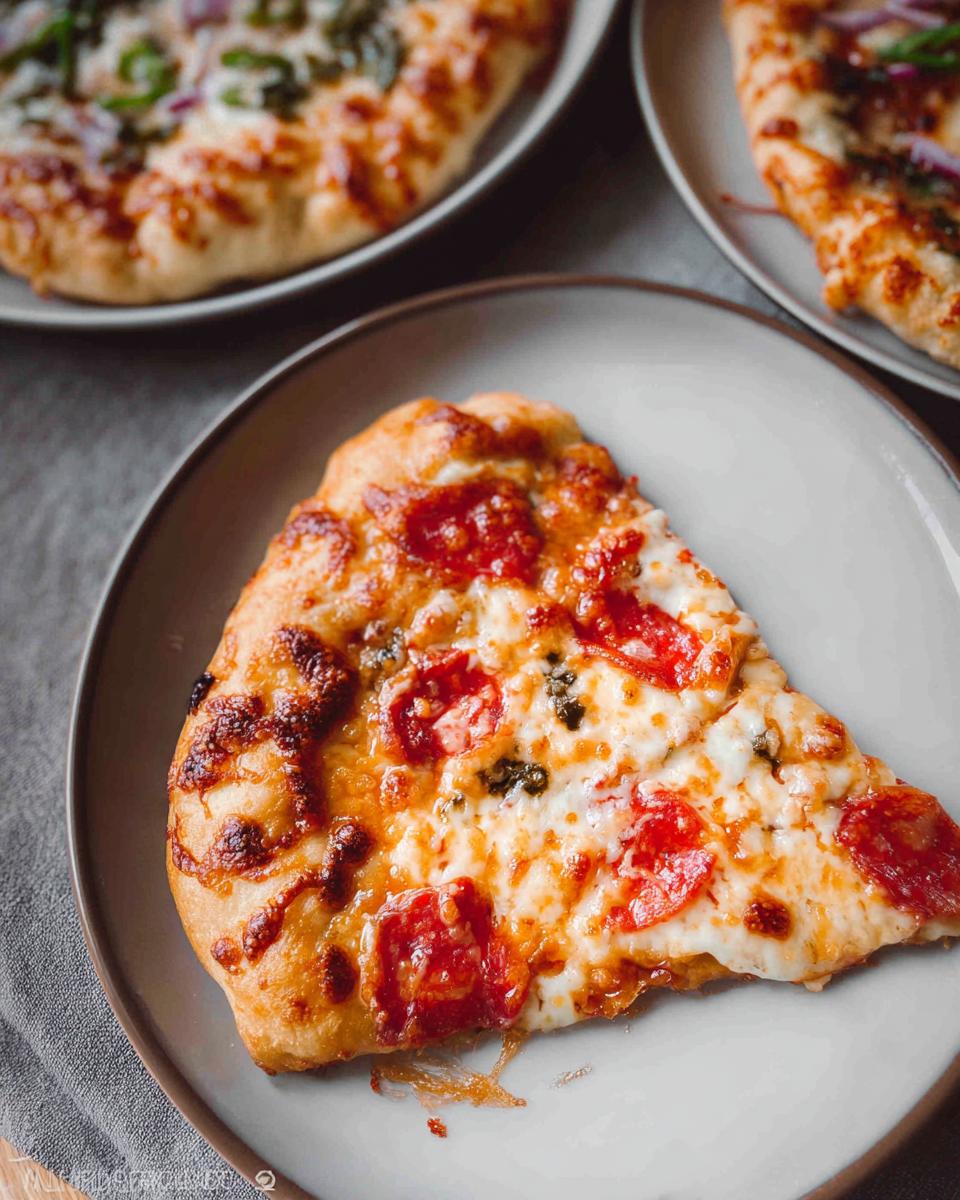
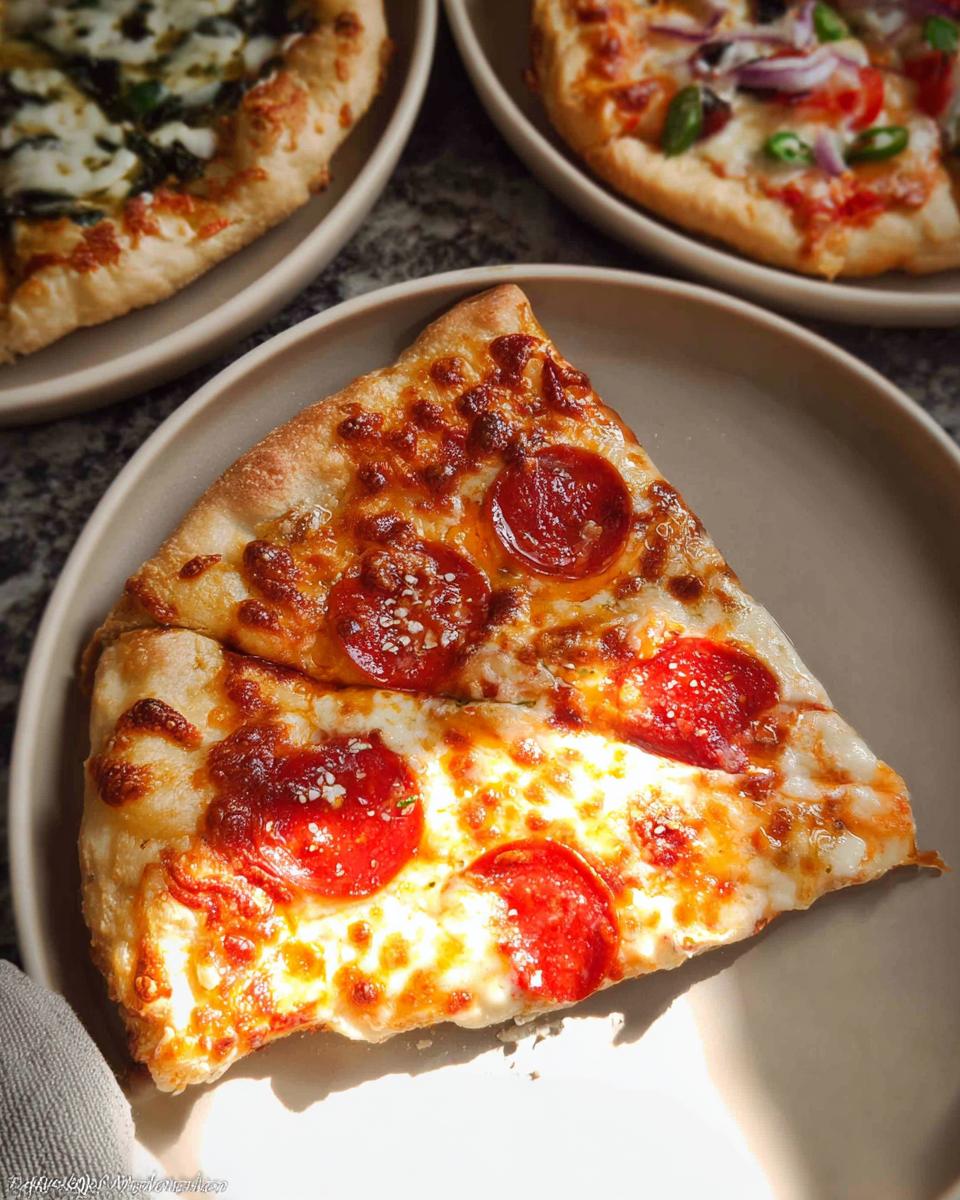
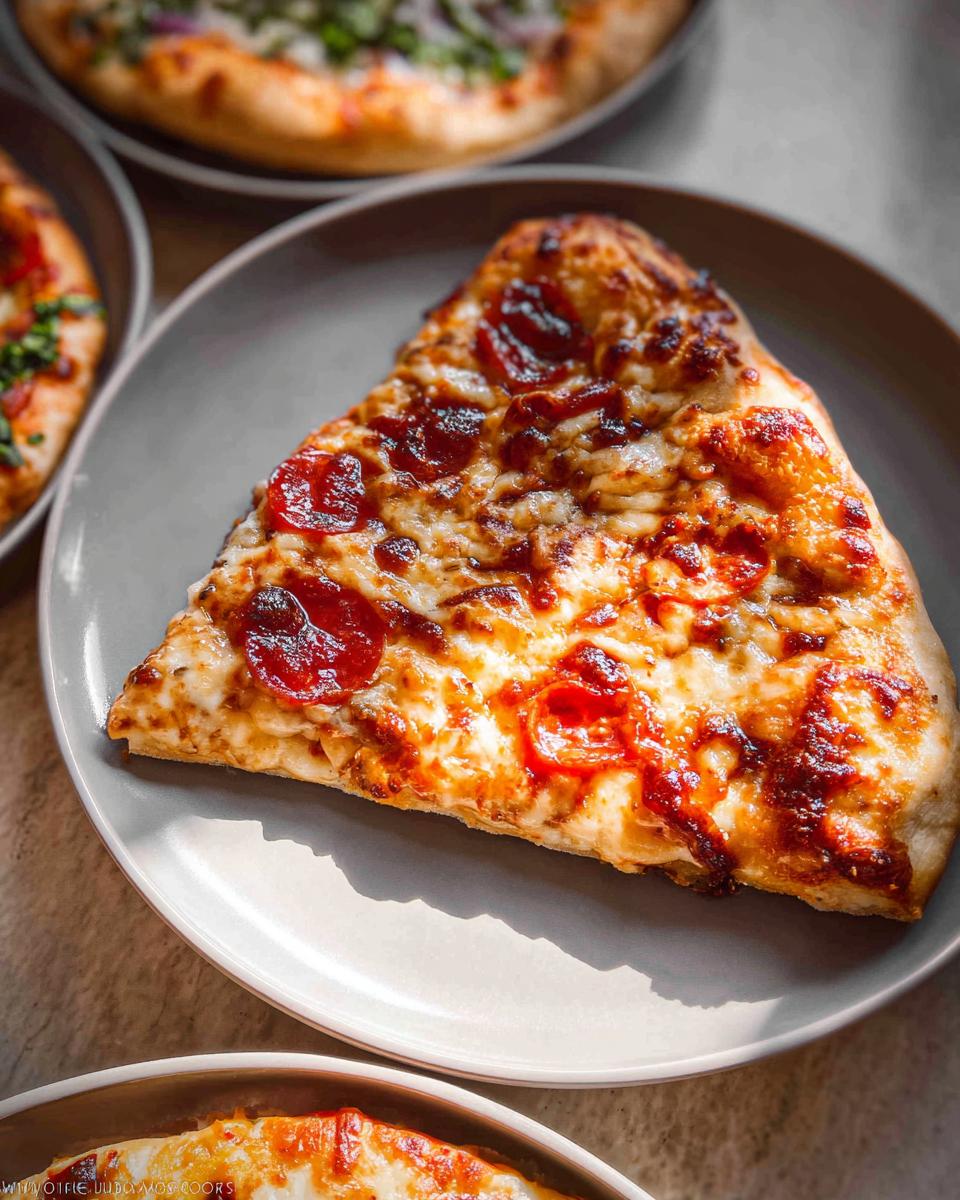
Assembling and Final Bake for Perfect Pizza Night
Once everything is lined up, re-crank that oven or grill heat back up to the max temperature—we want that stone blazing hot again for the final bake. Start by letting the kids assemble first, as they need the most help managing the toppings! Everyone should brush their crust edge with that seasoned olive oil before topping.
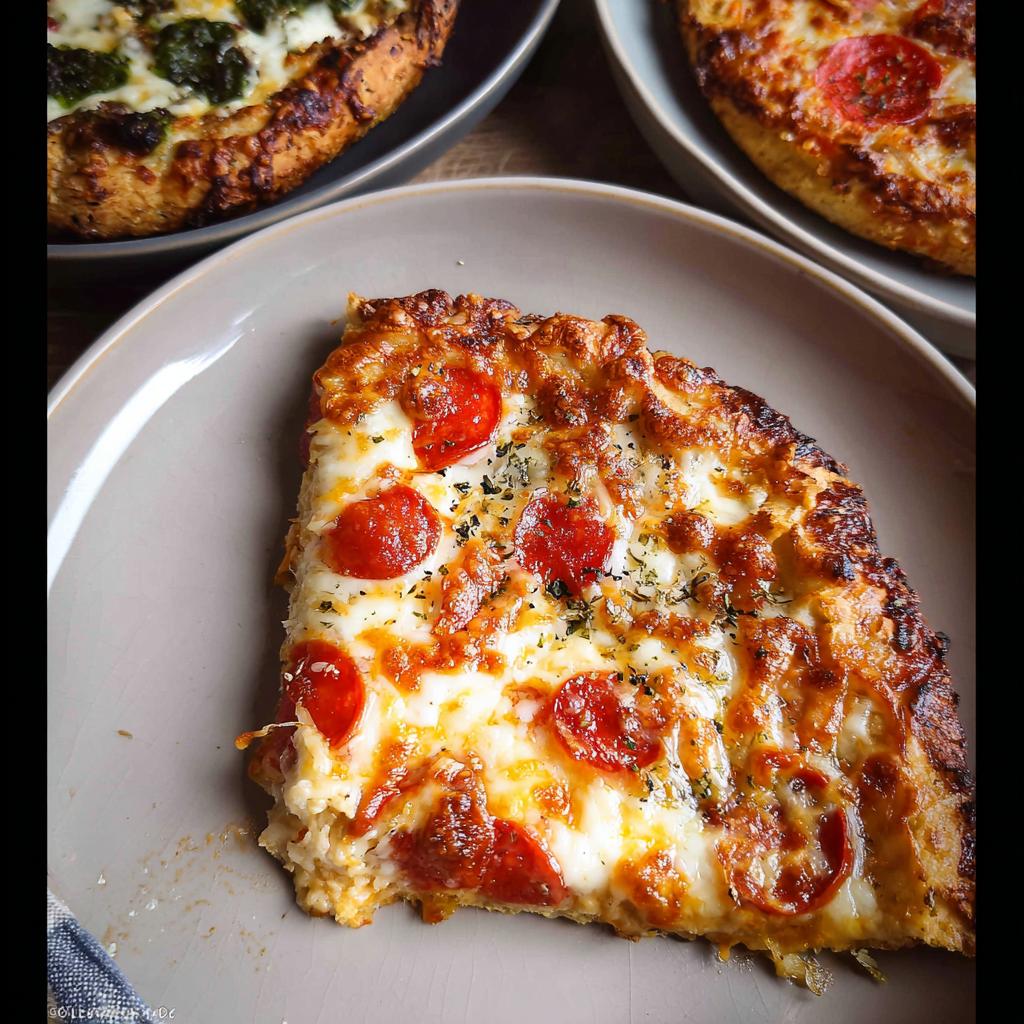
Slide that creation onto the hot stone. If you’re on the grill, keep the lid closed tight. You are looking for about 7 to 10 minutes on the grill, or 12 to 14 minutes in the oven. You know it’s done when the cheese bubbles beautifully and that crust edge looks gloriously golden brown. Slice it up, and enjoy the fruits of your perfectly organized labor!
Tips for Success in The Ultimate Pizza Night Recipes Guide for Beginners
If you want this pizza night to sing, it all comes down to respecting those early steps! The par-baking step isn’t just there to look fancy; it’s your insurance policy against a droopy, undercooked center. Seriously, please don’t skip that first short blast in the high heat!
Also, when you’re stretching that dough, be generous with the semolina or cornmeal underneath, especially if you’re using a pizza peel. That constant shaking test is crucial—if it drags, you need more dust before it touches the stone! A little extra sprinkling saves you from a major meltdown when trying to slide it off.
And speaking of heat, make sure that stone is blazing hot before anything touches it. You want an instant, aggressive start to the cook. If you’re looking for ideas on how to integrate quick proteins into your rotation to make your prep easier, check out some of my favorite quick chicken recipes nearby!
Making Your Pizza Night Fun: Serving Suggestions
The fun doesn’t stop once those pizzas come out of the oven! Since everyone built their own masterpiece, make the presentation part of the experience. Name them! Give each person’s creation a silly title based on their toppings—My Supreme disaster or The Vegetarian Mystery, for example.
We always serve ours on colorful cutting boards instead of just plain plates. It looks great and makes passing them around the table easy. For the kids, having little individual pizzas makes them feel so special. It’s these tiny touches that separate a good meal from a genuinely fun family tradition. If you’re trying to find ways to make other meals kid-friendly, I have some cute lunchbox inspiration right here!
Storage and Leftover Management for The Ultimate Pizza Night Recipes Guide for Beginners
Okay, you survived the assembly line chaos, and now you have leftovers, which is the best kind of problem to have! We need to talk about how to store that amazing dough you held back and, of course, the finished pizza.
What to Do with Leftover Par-Baked Crusts
If you have any of those par-cooked crusts left in the fridge, they are golden! They will keep perfectly fine for about two days, maybe three if you are lucky. Just make sure they are sealed super tight in plastic wrap or stuck in an airtight container. When you pull one out later that week, you skip all the initial rolling and high-heat stretching; you just dress it and bake it!
If you want to keep them longer, slicing them up and freezing them works wonders. They become awesome homemade pizza snacks later on. Stack them with parchment paper circles between each one, wrap everything tightly, and they’ll be good for a month or two.
Storing Finished Pizza Safely
Finished pizza should never sit out for more than two hours, so don’t leave those glorious leftovers on the counter!
- The best way to store slices is to layer them in a container with parchment or wax paper between each piece. This stops the cheese and toppings from melting into a giant, sad clump.
- If you’re meal-prepping these, I’ve got loads of tips for making great meals ahead of time that can help you save time later.
Reheating for That Fresh-From-The-Oven Taste
Microwaving pizza is a crime, I won’t lie. It gets chewy and sad. If you want it tasting almost as good as when it came out of the oven, you have to use dry heat. Pop your slices directly onto a sheet pan—no covering needed—and bake them in a 350°F oven for about eight minutes. The crust crisps up again, and the cheese loosens up without getting oily. It takes longer than the microwave, but come on, no one wants soggy pizza!
Frequently Asked Questions About Your Pizza Night
It’s totally normal to have little questions when you’re diving into homemade pizza for the first time. We all start somewhere! I’ve gathered up the most common things folks ask me when they try out this guide to make sure your first pizza night is a huge win for the whole family.
Can I skip the par-baking step entirely?
You absolutely *can*, but I highly, highly recommend you don’t if you are a beginner! Skipping that 2 or 3-minute pre-bake often leads to a thick, doughy center when you load it up with too many toppings. The par-bake sets the structure, ensuring a crisp bottom crust that can handle sauce and cheese without collapsing when you transfer it to the hot stone. It’s the beginner’s secret weapon for avoiding sogginess!
What is the absolute best cheese blend for flavor?
For that classic, comforting, cheesy pull, you need a good mix. I love pairing 2 parts high-quality shredded low-moisture mozzarella with 1 part fresh mozzarella, sliced thin. The low-moisture one melts smoothly, but the fresh one pockets out those wonderful creamy pools of white cheese. For a little tang that elevates everything, try scattering over some creamy ricotta dollops before the final bake. It’s amazing how much flavor cheese brings to the party!
Is store-bought dough okay to use?
Yes, yes, and a thousand times yes! Please don’t feel like you have to make the dough from scratch if you are just starting out. Store-bought dough is totally fine, especially since the real fun in this guide comes from the *topping* assembly line we set up. Just remember that different brands might behave differently, so let that dough come to room temperature for at least 30 minutes before you try stretching it. It’ll be much less springy!
My toppings are too watery! What did I do wrong?
This is super common, especially with mushrooms, tomatoes, or jarred peppers. Watery toppings equal a soupy pizza base! The fix is simple: make sure you rigorously pat down anything coming from a can or jar—use paper towels until they feel nearly dry. For fresh mushrooms, I sometimes sauté them quickly in a dry pan first to release some moisture right before I slice and add them to the assembly line setup.
How can I sneak veggies in for picky eaters?
I totally get that! If you have some skeptical eaters in the family, try using some of the non-red sauces. For example, a white pizza with Alfredo sauce, ricotta, and finely chopped spinach blends right in. Or, if you are using tomato sauce, grate raw carrots or zucchini very finely using the smallest side of the box grater and mix them *into* the sauce before you spread it. They disappear completely, but they add moisture and nutrients! For more ways to get quick nutrients in, check out my quick chicken recipes that are real crowd-pleasers.
Next Steps After Mastering The Ultimate Pizza Night Recipes Guide for Beginners
Wow, you’ve done it! You’ve navigated your way through dough prep, mastered the par-bake, and hosted a fantastic, stress-free pizza night. I’m just so proud of you for diving into homemade pizza. Now that you’ve made the best pizza you ever thought possible for your family, I really want to hear all about it!
Did you try the Buffalo sauce base? Did the kids go crazy for the pesto? Please, please drop a comment down below and let me know how things went for you. Sharing your successes (and any funny little kitchen mishaps!) helps the next beginner cook feel brave enough to try!
If you think this method was a game-changer for your dinner routine, I’d be thrilled if you jumped over and gave the recipe a star rating. That feedback seriously helps me keep creating these guides!
And if you ever have a burning pizza question that I didn’t cover here, or if you just want to chat more about gluten-free baking adventures, don’t hesitate to reach out directly. You can find my contact info right here. Happy cooking, friend, and here’s to many more pizzas in your future!
The Ultimate Pizza Night Recipes Guide for Beginners
Ingredients
Equipment
Method
- Place a pizza stone on your grill or in your oven. Preheat the grill on high or the oven to 450℉F. This step can be done up to one day ahead.
- Cut each pound of dough into two equal pieces and shape each into a ball. Roll or press each ball into a circle using a rolling pin or your hands. Let the dough rest for 5 minutes, then roll it again. You can also stretch the dough by picking it up and pulling from underneath with two fists. Repeat this process until you have 10-inch rounds that do not shrink back.
- If you are baking on a sheet pan or pizza pan, sprinkle the pan with semolina flour and place the crust on top. Bake for 2-3 minutes until the exterior of the crust no longer looks raw or doughy.
- If you are baking on a pizza stone, sprinkle the pizza peel liberally with semolina flour and lay the crust on top. Shake the peel to check for sticking. Add more semolina flour underneath any sticking spots until the crust slides smoothly.
- Slide each crust onto your pizza stone, close the grill lid or oven door, and cook for 1-2 minutes until the exterior of the crust does not feel doughy anymore. Stack the parcooked crusts on a plate, placing parchment paper sheets between them. Cover with plastic wrap and store them in the refrigerator.
- Prepare your toppings in the morning. Cook any raw meats, slice or dice fresh ingredients, and drain jarred items. Store these prepared items in baggies or small bowls in the refrigerator.
- Before serving time, arrange all ingredients in an assembly line order: empty plates, parcooked crusts, olive oil and salt (with a pastry brush), sauces, cheeses, and toppings. Remind everyone to brush the edges of their crust with olive oil and sprinkle with salt before adding toppings.
- Preheat the pizza stone on the grill on high heat or your oven to 450 degrees again.
- Begin by assembling kids’ pizzas and any large shareable pizzas. Then, allow other diners to assemble their own pizzas.
- Transfer each assembled pizza onto the pizza stone (or onto a baking sheet for the oven). Close the grill cover or oven door. Bake for 7-10 minutes on the grill or 12-14 minutes in the oven. The cheese should be melted and the crust golden brown.
- Cut the pizzas into slices and serve them.
Notes
Tried this recipe?
Let us know how it was!
Gluten-Free Chef & Latin Cuisine Innovation Specialist
My youngest son’s celiac diagnosis at four changed everything. Suddenly, all those traditional Brazilian and Portuguese recipes from my avó needed to be completely reimagined without losing their soul.
After graduating from Johnson & Wales and working Miami’s Latin fusion scene, my son’s diagnosis became my calling. How do you make gluten-free empanadas that taste like childhood? Over eight years, I’ve developed 320+ gluten-free recipes celebrating authentic Latin flavors using cassava flour and plantain alternatives.
My gluten-free empanada recipe won “Best Appetizer” at the 2023 Miami Gluten-Free Food Festival. I ran “Sabores Sin Gluten,” a catering business serving Miami’s Latino community—quinceañeras, family gatherings, all the celebrations that matter.
Food is culture, and everyone deserves to experience the joy of sharing traditional family meals, regardless of dietary restrictions.