Oh, you know that moment when you bite into a slice of perfect, blistered, piping-hot restaurant pizza? That incredible crust that snaps just right? Well, that used to feel impossible to nail here in my own kitchen, especially after my own dietary curveballs came along. Trust me, getting that authentic chew and that slightly charred bottom is totally achievable!
I’ll never forget the first Pizza Night my family organized after my gluten sensitivity diagnosis. Armed with great recipes, I wanted to bring back the cozy family gatherings we used to have around our favorite pizzeria’s table. As my kitchen filled with laughter and flour, I watched my children playfully toss ingredients, each adding their own twist to their pizzas. That night, the aroma of bubbling cheese and seasoned toppings wafted through our home, reminding me that food—no matter the restrictions—can still bring us together.

Since then, Pizza Night has become our cherished tradition, proving that every slice can hold a memory. I’m Elena Brown, your Recipe Heritage Specialist, and this entire guide will walk you through making incredible Restaurant-Style Pizza Night Recipes at Home (2025) that will seriously impress your whole family. Let’s get that oven hot!
Why You Will Master Restaurant-Style Pizza Night Recipes at Home (2025)
Honestly, folks, if my slightly chaotic kitchen can pull this off, yours absolutely can too! Forget takeout menus! This process is designed to be so straightforward that it turns baking into the main event. This isn’t just about eating; it’s about making incredible memories during your family pizza night.
- The dough recipe is unbelievably foolproof; you’ll wonder why you ever bought frozen crusts.
- It truly becomes a fantastic, hands-on activity that the entire family loves—maximum fun, minimum fuss!
- You get total control over the quality—from the sauce right down to that perfect amount of cheese melt.
Quick Tips for an Authentic Restaurant-Style Pizza Night
The secret to skipping the standard floppy home pizza is pure, blazing heat. You *have* to get your oven as hot as it will go—we’re talking 500 degrees here! That means your baking surface, whether it’s a steel or even a sturdy baking sheet flipped upside down, needs a full hour to catch up to that temperature. That intense heat is what creates the proper blistering on the crust. Oh, and don’t forget that stand mixer; it does all the heavy lifting on the kneading!
Essential Ingredients for Restaurant-Style Pizza Night Recipes at Home (2025)
Okay, the heart of any amazing pizza—the part that really separates your casual weeknight bake from true restaurant style—is the ingredients. Don’t skip out here; a few high-quality items make things taste incredible. We need to treat the dough right first, and then we layer on the flavor for the toppings. If you’re looking for deep dives on making your own sauces or doughs from scratch, check out some of my other baking adventures!
For the Pizza Dough
This is where we wake up the yeast! You need active dry yeast, about two and a quarter teaspoons of it, mixed with 2 teaspoons of sugar. The water is crucial: it *must* be warm, between 90 and 100 degrees—too cold and the yeast sleeps, too hot and you kill it! We use 4 cups of all-purpose flour and a good pinch of kosher salt (2.25 teaspoons). Don’t forget the olive oil; we use 2 tablespoons total, divided, which helps keep the dough soft even when we blast it in the hot oven.
For the Toppings
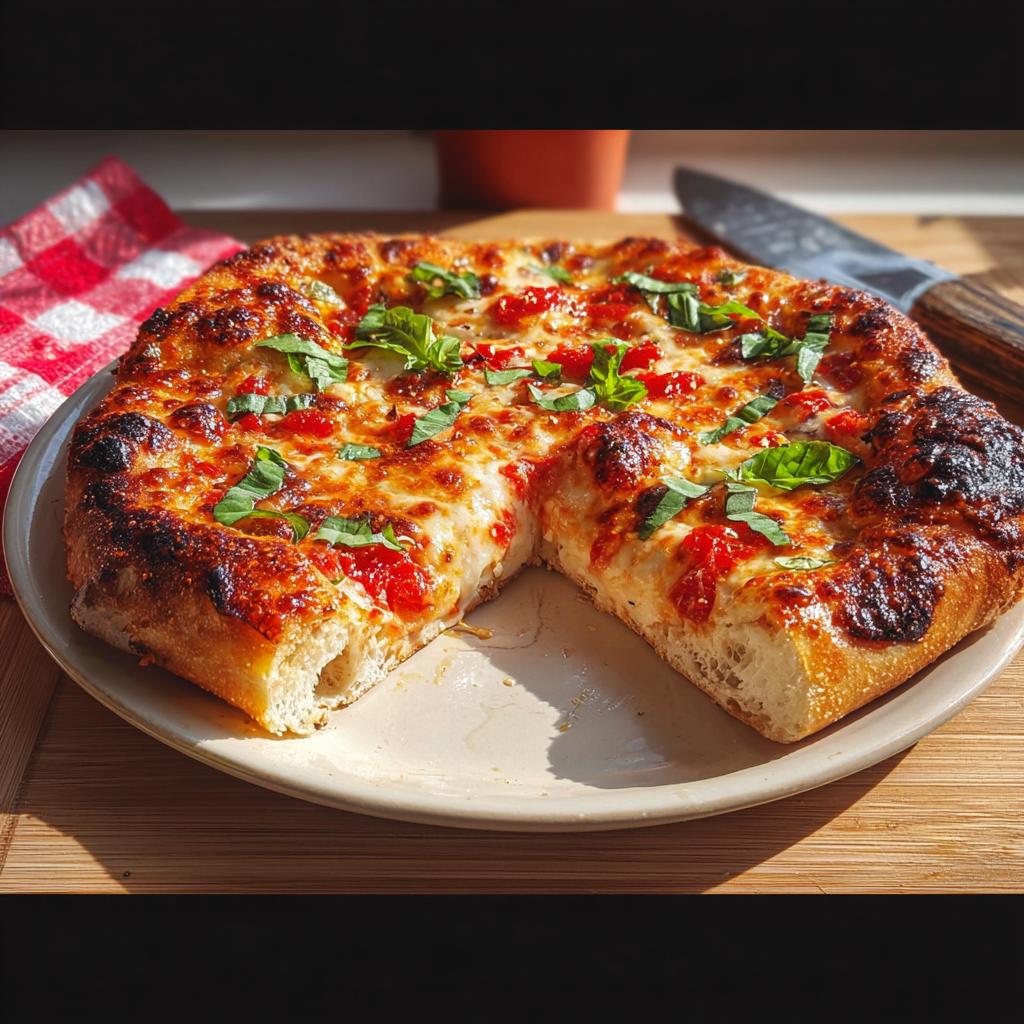
This topping combo gives you that perfect mix of stretch and creaminess. First, we need the flavor boost: a scattering of grated Parmesan cheese, reserving some for later. Then comes the sauce, about 1 cup of your favorite homemade pizza sauce—you can’t beat that fresh flavor! For the cheese, you need two kinds, which is absolutely key for that restaurant texture. You’ll use 3 cups of low-moisture mozzarella (this melts beautifully without releasing too much water) and 1 cup of fresh mozzarella, cubed. And of course, no pizza is complete without a little fresh basil sprinkled on top right at the end!
Equipment Needed for Restaurant-Style Pizza Night Recipes at Home (2025)
You don’t need a wood-fired oven, truthfully, but you do need a few specific players in your kitchen for this to feel like the real deal. Think of this equipment as your secret weapon against soggy bottoms!
First thing’s first: a stand mixer with a dough hook. While you *can* mix this by hand, trying to knead this much dough by hand is a workout, and we want maximum elasticity which the mixer manages so beautifully.
Next, and this is non-negotiable for that crispy bottom, we need something to mimic the stone floor of a pizzeria. I love using a pizza steel, but a heavy-duty pizza stone works great too. If you don’t have either? Don’t panic! Just flip a sturdy, half-sheet baking pan upside down and use that—it creates a fantastic hot surface. You will also need some heavy-duty foil and a rubber spatula for handling the dough transfer, plus a simple cooling rack for after the bake.
Step-by-Step Instructions for Restaurant-Style Pizza Night Recipes at Home (2025)
Alright, let’s get those hands floury! This is the fun part, but it involves a little patience during the rise time. Remember how I mentioned chilling the dough later on? If you can manage it, letting the dough balls rest in the fridge for a day or two before you use them develops even *more* incredible flavor. Just remember to pull them out about 30 minutes before you start shaping so they aren’t too tight!
Making and Rising the Dough
First things first, we need happy yeast! Get that warm water ready—it should feel like a warm bath, not hot—and sprinkle your yeast and sugar right on top. Give it a quick whisk and just let it chill for about five minutes. You’re waiting for bubbles; that’s the yeast saying, “I’m awake and ready to work!”
Once you see that foam, toss in your flour, 1 tablespoon of olive oil, and the salt into the mixer bowl. Start slow until it clumps together. Then, kick the speed up just a notch until the dough is sticky and cooperating. Now for the coat of armor: drizzle that last tablespoon of oil over the dough ball and flip it around so it’s coated everywhere. Cover the bowl tightly with plastic wrap. This needs a long nap—about 1 hour and 30 minutes—until it’s doubled up in size. Don’t rush this rise; it’s where the texture starts!
Preparing the Oven and Shaping the Dough
While the dough is sleeping, we heat the heck out of the oven! Place your pizza stone, steel, or upside-down baking sheet on the upper-third rack. Crank that oven up to 500 degrees Fahrenheit. Seriously, you need this thing to be ripping hot, so give it a full hour to preheat properly.
After the rise, gently punch the air out—no need to get aggressive!—and divide that beautiful dough into two equal halves. Make them into tight little rounds; I like to flip them over and use the counter to create surface tension before letting them rest a second time.
Next, get your foil ready on that inverted half-sheet pan. Dust your surface well with flour. Now, instead of rolling it out like a cookie, you want to press it into an 8-inch circle with a nice, puffy lip. Then, gently lift that dough. Hold the lip of the crust between your fingers and rotate your hands, letting gravity do the stretching work until you hit about a 12-inch circle. Transfer this carefully onto your prepared foil. If you are working on a gluten-free loaf, check out my tips over at easy dinner recipes for alternative bases!
Assembling and Baking Your Pizza
We build this layer by layer for that authentic crust flavor. First, sprinkle just the base of the pizza with a couple of tablespoons of that grated Parmesan. This acts like a moisture barrier! Then, spread half a cup of sauce evenly, leaving that 1-inch border.
Layer on the cheeses next: use 1.5 cups of the shredded low-moisture mozzarella and half a cup of the cubed fresh mozzarella. They melt differently and give you that gorgeous variation in color and chew.
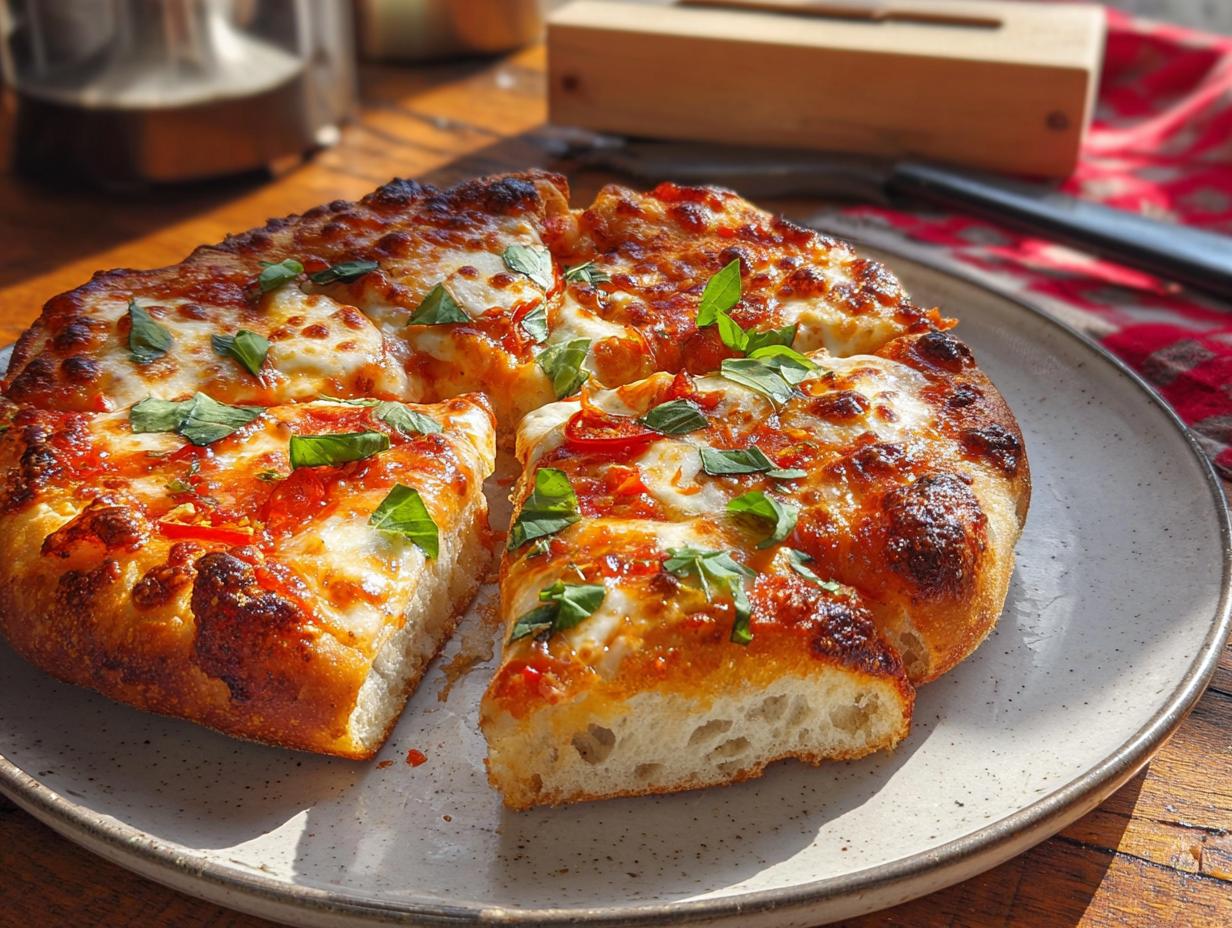
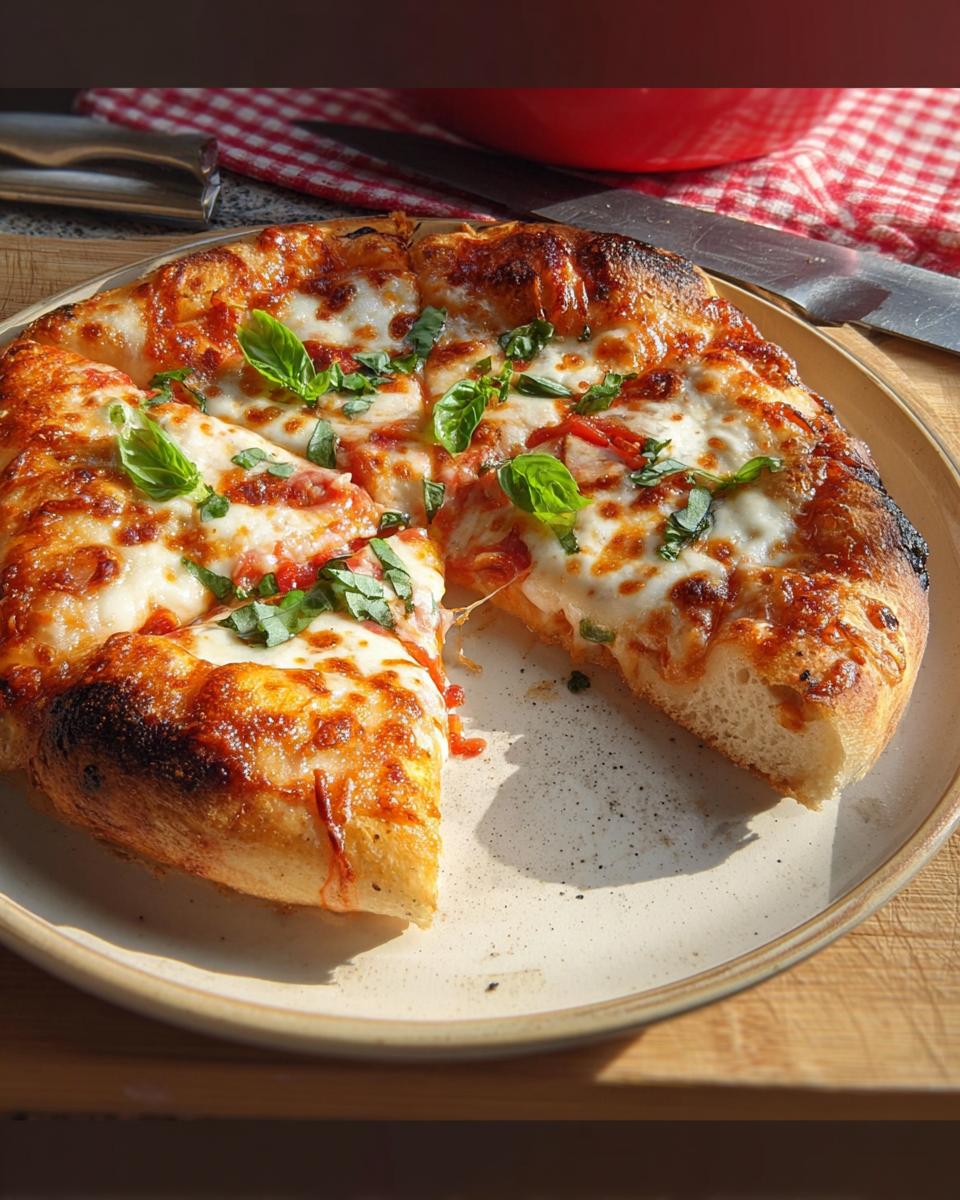
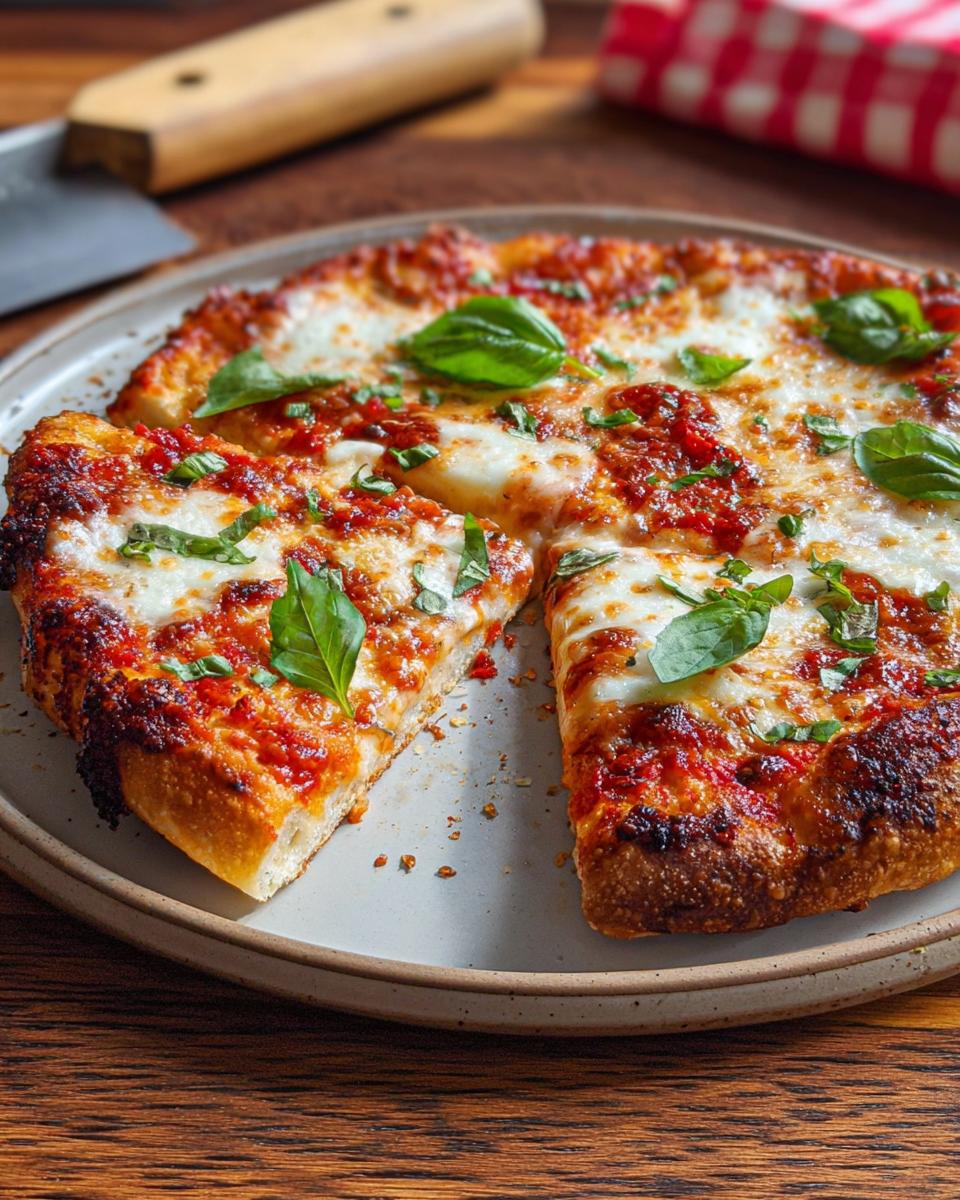
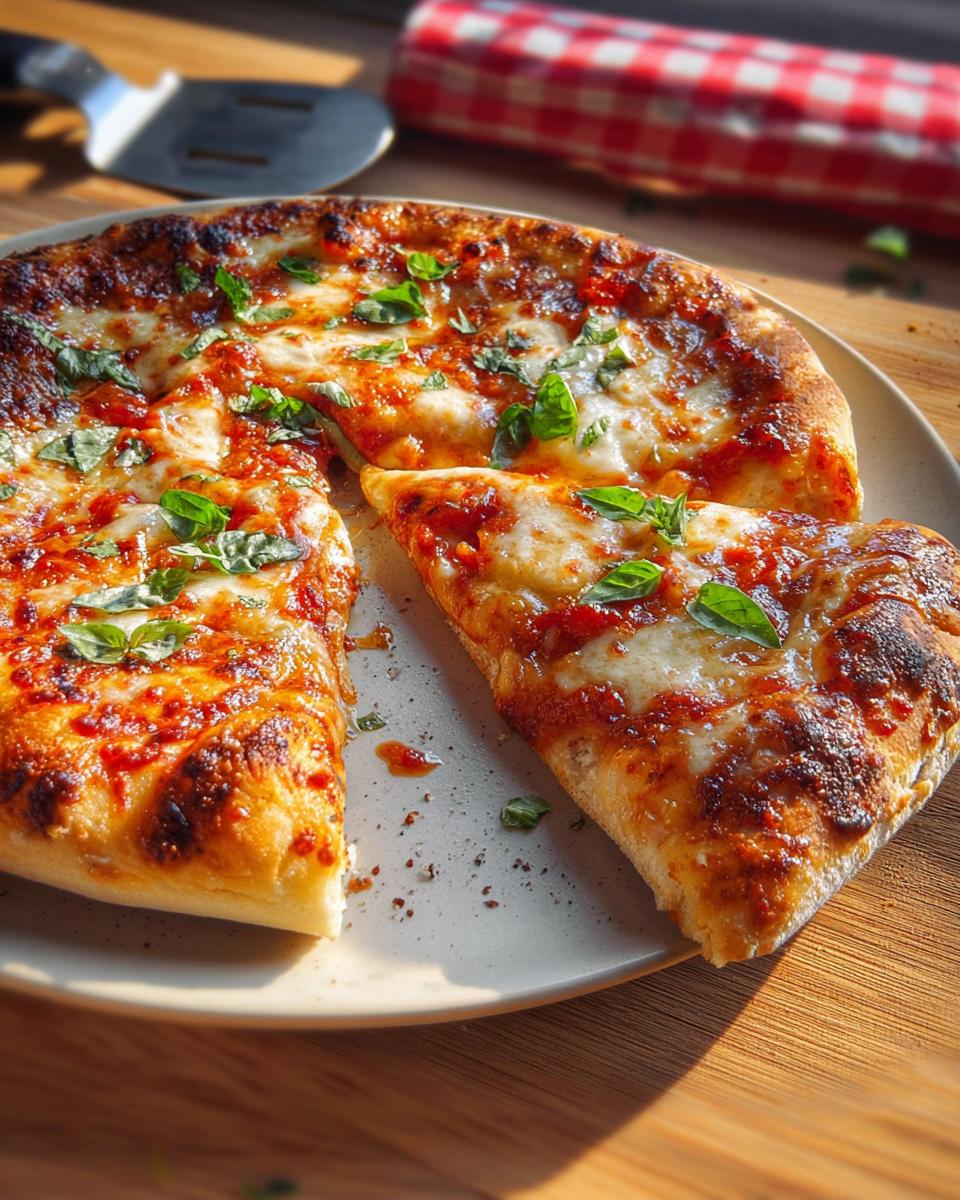
Now for the transfer! Carefully slide that whole foil and pizza situation right onto your screaming-hot stone or steel using the upside-down sheet pan as a peel. Bake this beauty for about 12 to 14 minutes, keeping an eye on it until that crust is golden and the cheese is bubbly and spotted just right. When it’s done, pull it out and slide the pizza off the foil and onto a cooling rack—this keeps the bottom from steaming! Brush the crust edge with a tiny bit of olive oil and sprinkle on fresh basil leaves before you slice and serve while it’s smoking hot.
Tips for a Successful Family Pizza Night
Listen, if you’re making this for your crew, you absolutely have to lean into the chaos and make it fun! The best part of this whole process is watching your family get involved. Don’t stress about perfection; stretch the dough a bit unevenly if that’s what happens—it adds character!
Kids absolutely love the topping stage. Why not set up a toppings bar? Have little bowls of pre-sliced peppers, different cheeses, olives, and pepperoni ready to go. They feel so proud when they build their own masterpiece, even if one pizza ends up looking like a colorful abstract painting. This whole exercise creates such a great atmosphere for a relaxed family pizza night.
Also, here’s a pro-tip for cleanup: line your counter heavily with parchment paper before you start stretching and topping. Once the pizza is transferred to the oven, you can just roll up the edges of the parchment and toss it—way easier than scrubbing flour and dried sauce off the countertop later! For more ideas on making mealtime fun for everyone, you can peek at my breakfast ideas inspiration for other times of the day!
Storing and Reheating Restaurant-Style Pizza Night Recipes at Home (2025)
Even the most amazing homemade pizza sometimes leaves us with leftovers, which are honestly still pretty fantastic the next day! Once your pizza has cooled down completely, slice up the rest and store those pieces in a sealed, airtight container. Pop that container right in the fridge—it keeps well for about three days total.
Now, for reheating: please, please, don’t even think about the microwave unless you absolutely must! The microwave turns that beautiful, crisp restaurant crust into a sad, chewy texture. The very best way to bring back that snap is by using a low oven or, if you have one, your air fryer! Set your oven to about 350 degrees, place the slice directly on a rack, and give it about 8 minutes. It comes out almost as good as fresh!
Variations for Your Next Pizza Night
Once you’ve mastered the basic technique, you have to start experimenting! That’s what makes pizza night so enduringly fun for the family. You can swap out the sauce entirely—try whipping up a vibrant homemade pesto for something bright and herby; it works amazingly well with those fresh mozzarella cubes.
For a richer, more savory profile, swap the cured meats! Prosciutto draped over after the bake, or maybe some spicy soppressata added before baking, really ups the ante. If you’re feeling adventurous, try swapping cheeses—a little smoked provolone blended with the mozzarella adds incredible depth. We’ve got all sorts of flavor profiles detailed over on my pasta recipes section that could easily inspire a new non-traditional pizza topping!
Frequently Asked Questions About Restaurant-Style Pizza Night Recipes at Home (2025)
I know when you’re trying to pull off a true restaurant experience, questions pop up. That’s totally normal! I’ve gathered the ones I usually get asked about trying to bring this amazing pizza fun into the family schedule. Don’t worry, we’ve got answers for everything!
Can I make the dough ahead of time for my pizza night?
Oh yes, absolutely! This is my top tip for making pizza night less stressful. You can totally make those dough balls and let them rest in the refrigerator for up to two days. Just remember the key: once you pull them out, let them sit on the counter for about 30 minutes until they aren’t hockey pucks anymore. That little bit of temperature time lets the gluten relax so you can actually stretch them out easily!
What is the best substitute for a pizza stone?
If you haven’t invested in a pizza stone or a baking steel yet, don’t sweat it! The goal is just a very, very hot, flat surface that conducts heat well. The best substitute we found is simply taking a heavy-duty, rimmed baking sheet and flipping it upside down. Make sure it’s on the upper rack and pre-heating with the oven for that full hour. It transfers heat beautifully and gives you that crispy base that the restaurant has!
How do I keep the pizza fun for young kids?
This is what makes it such a great family activity! The most important strategy for keeping it fun and keeping everyone engaged is assigning topping territories. Once the dough is shaped and placed on the transfer surface, let each child in the family decorate their own half—or if they are very little, let them drop pre-approved toppings onto their quadrant. When they get to eat something they assembled themselves, they think it’s the best thing ever. It turns dinner into a creative hour, and that’s pure family fun!
Got more questions about crust hydration or sauce acidity? Feel free to reach out to me through my contact page!
Share Your Restaurant-Style Pizza Night Recipes at Home (2025) Success
Wow, we made it! I am so proud of you for tackling this technique. Now that the aroma of incredible pizza is fading and you’ve all had your fill, I really, really want to hear about your experience!
Did you manage to get that perfect char on your toppings? Which toppings did your family vote as the best combination? Don’t be shy! Head down to the comments section and let me know how your **Restaurant-Style Pizza Night Recipes at Home (2025)** turned out. I love reading all your stories about the **family** and the **fun** you had putting these together.
If you loved this recipe and want to see more heritage cooking ideas that bring everyone together around the stove, please give this recipe a rating above! And if you snap a picture of your beautiful homemade creation, tag me on social media—I always check in on my readers’ masterpieces. You can learn more about my mission to document beloved family techniques over on my About Page!
Restaurant-Style Pizza Night Recipes at Home (2025)
Ingredients
Equipment
Method
- Sprinkle the yeast and sugar over the warm water (90 to 100°) in the bowl of a stand mixer. Whisk to combine and let sit until bubbles form on the top, about 5 minutes.
- Add the flour, 1 tablespoon of olive oil, and salt. Mix with the dough hook on low speed until the dough comes together, about 2 minutes. Scrape the bottoms and sides of the bowl.
- Increase the speed to medium-low until everything is well incorporated and the dough is sticky, 2 to 3 minutes more.
- Drizzle the remaining 1 tablespoon of olive oil over the top of the dough and down the sides of the bowl. Use a rubber spatula to flip the dough to coat it in the oil. Cover the bowl with plastic wrap and let it rise until doubled, about 1 hour and 30 minutes.
- About 1 hour before you plan to make pizza, place a pizza stone, steel, or an upside-down baking sheet on the upper third rack of the oven. Preheat the oven to 500°.
- On a lightly floured work surface, cut the dough in half and form into tight rounds. To form a round, flatten the dough into a circle and fold all the edges into the center. Flip it over and gently pull the round against the counter to form a taut ball. Place the rounds on a lightly floured baking sheet with space for them to rise.
- Place a 14-inch piece of heavy-duty foil on top of an upside-down half-sheet pan. Lightly brush the foil with oil and dust with flour. Work with one round of dough while keeping the other covered with plastic wrap.
- On a well-floured surface, press 1 piece of dough into an 8-inch round with a 1-inch outer lip. Carefully lift the dough, cupping the lip to keep from flattening it. Rotate the edge of the dough through your hands clockwise, allowing gravity to stretch it into a round shape. Place the dough back on the flour and stretch it into a 12-inch circle. Transfer it to the prepared foil.
- Sprinkle the pizza surface with 2 tablespoons of grated parmesan. Spread 1/2 cup Homemade Pizza Sauce over the parmesan, leaving a 1-inch border. Sprinkle the pizza with 1 1/2 cups of low-moisture mozzarella and 1/2 cup of cubed fresh mozzarella.
- Use the upside-down baking sheet as a pizza peel to transfer the pizza with the foil to the preheated baking stone. Bake until the crust is browned and the cheese is bubbling, 12 to 14 minutes. Transfer the pizza from the foil to a cooling rack. Brush the crust with olive oil, sprinkle the surface with basil leaves, and serve hot.
- Repeat the process with the remaining dough, sauce, and cheese. Assemble the pizza right before it goes into the oven.
Notes
Tried this recipe?
Let us know how it was!
Gluten-Free Culinary Storyteller & Recipe Heritage Specialist
Getting diagnosed with non-celiac gluten sensitivity in my late twenties felt like losing my Italian identity. Growing up in nonna’s Brooklyn kitchen, learning traditional techniques that suddenly became off-limits—I decided to fight for those family food traditions instead of giving up.
With my food journalism background and European baking training, I became obsessed with recreating authentic flavors in gluten-free formats. I’ve adapted 400+ traditional recipes from various cultures, with my gnocchi recipe winning “Recipe of the Year” from the National Gluten-Free Living Awards in 2022.
I collaborate with the Italian-American Cultural Center to document traditional family recipes and volunteer with the Westchester Celiac Support Group, teaching monthly pasta-making classes.
Food is the heart of family storytelling. No one should sacrifice their cultural heritage due to dietary restrictions.