Oh, there is just nothing, absolutely nothing, like a steaming bowl of homemade soup when the weather turns chilly or life gets a little too hectic. That wonderful aroma that fills the house? It’s instant peace, isn’t it? If the idea of cooking a real, from-scratch soup seems like something only professional chefs tackle, I promise you, you are in exactly the right place. I’m including this recipe as the foundation of The Ultimate Soup Recipes Guide for Beginners because it proves you don’t need fancy techniques to create magic.
I still remember the first time I made soup for my family; it was a rainy afternoon, and I had just transitioned to cooking gluten-free recipes for my kids. Armed with a handful of fresh vegetables, some broth, and a determination to create something comforting, I let the ingredients simmer together. As the aroma filled my home, my kids came running, and when they tasted that first bowl, their smiles made it all worthwhile. It was in that moment I realized that soup could be more than just a meal; it could be a cozy experience that brought us closer together, especially during busy weeks filled with activities.
By Sophie Williams Gluten-Free Nutritionist & Family Meal Planning Expert
Why This Black-Eyed Pea Soup is The Ultimate Soup Recipes Guide for Beginners Choice
When I first decided to conquer the world of homemade soup, I needed something that wouldn’t leave me stressed out in the kitchen. This black-eyed pea recipe is pure, unadulterated country comfort food, and it’s so straightforward! You mostly just let things simmer away while you go about your life. Honestly, if you can chop a few veggies and own a big pot, you’ve already won half the battle.
It’s nourishing, tastes incredible, and smells like a warm hug on a cold day. Trust me, making this recipe will instantly boost your cooking confidence. We want you to feel good about cooking from scratch, and this is where we start!
Quick Overview: Time and Yield for The Ultimate Soup Recipes Guide for Beginners
Don’t let the prep time scare you! Most of that 180 minutes is hands-off soaking time for those dried peas, which is huge for beginners because it means less active standing over the stove.
- Total Time: 225 minutes (That’s just under 4 hours, but it’s mostly waiting!)
- Active Prep Time: About 30 minutes of chopping and initial frying.
- Cook Time: A quick 45 minutes of simmering.
- Yields: Generous servings for 6 hungry bowls.
If you’re curious about other easy vegetable-forward meals, you should check out my roasted butternut squash and apple soup next! That one is fantastic too.
Essential Components for The Ultimate Soup Recipes Guide for Beginners
Alright, let’s get organized! Nothing throws a new cook off track faster than realizing halfway through that you’re missing a key ingredient. For this glorious black-eyed pea soup, we keep things simple but precise. Accuracy matters here, especially since we are dealing with dried beans that expand!
I’ve broken down everything you need into three handy little groups. Don’t skip the notes, especially concerning the ham hocks—a good, smoky ham hock is what kicks this recipe up from ‘good’ to ‘cozy comfort food’ heaven.
If you’re already feeling ambitious after this one, peek at my rustic Tuscan white bean and kale soup for something a little different!
Ingredients for the Black-Eyed Peas Base
We start simple here! You need:
- 1 pound dried black-eyed peas. Remember, these soak up a ton of water, so make sure they go into that soaking bowl early in the day! That soaking time is your friend; it’s not active cooking time at all.
Meat and Aromatics for Rich Flavor in Your The Ultimate Soup Recipes Guide for Beginners
This is where the deep flavor starts building, so put on some good music while you chop!
- 4 slices thick bacon, chopped up nice and small
- 0.5 pound smoked ham hocks—if you can’t find those, smoked turkey works beautifully as a swap!
- 1 large onion, diced evenly
- 2 stalks celery, diced just like the onion
- 1 tablespoon garlic, minced finely
- 2 teaspoons fresh thyme, minced (fresh is always better in soup, seriously!)
- 2 bay leaves
Make sure your veggies are chopped about the same size so they cook down tender at the same speed. Uniformity helps everything blend perfectly in the end.
Liquid and Seasoning for The Ultimate Soup Recipes Guide for Beginners
These are the elements that bring the whole pot to life:
- 6 cups chicken broth (or just plain water if you want a less salty base to start)
- 2 teaspoons Creole seasoning (use your favorite brand!)
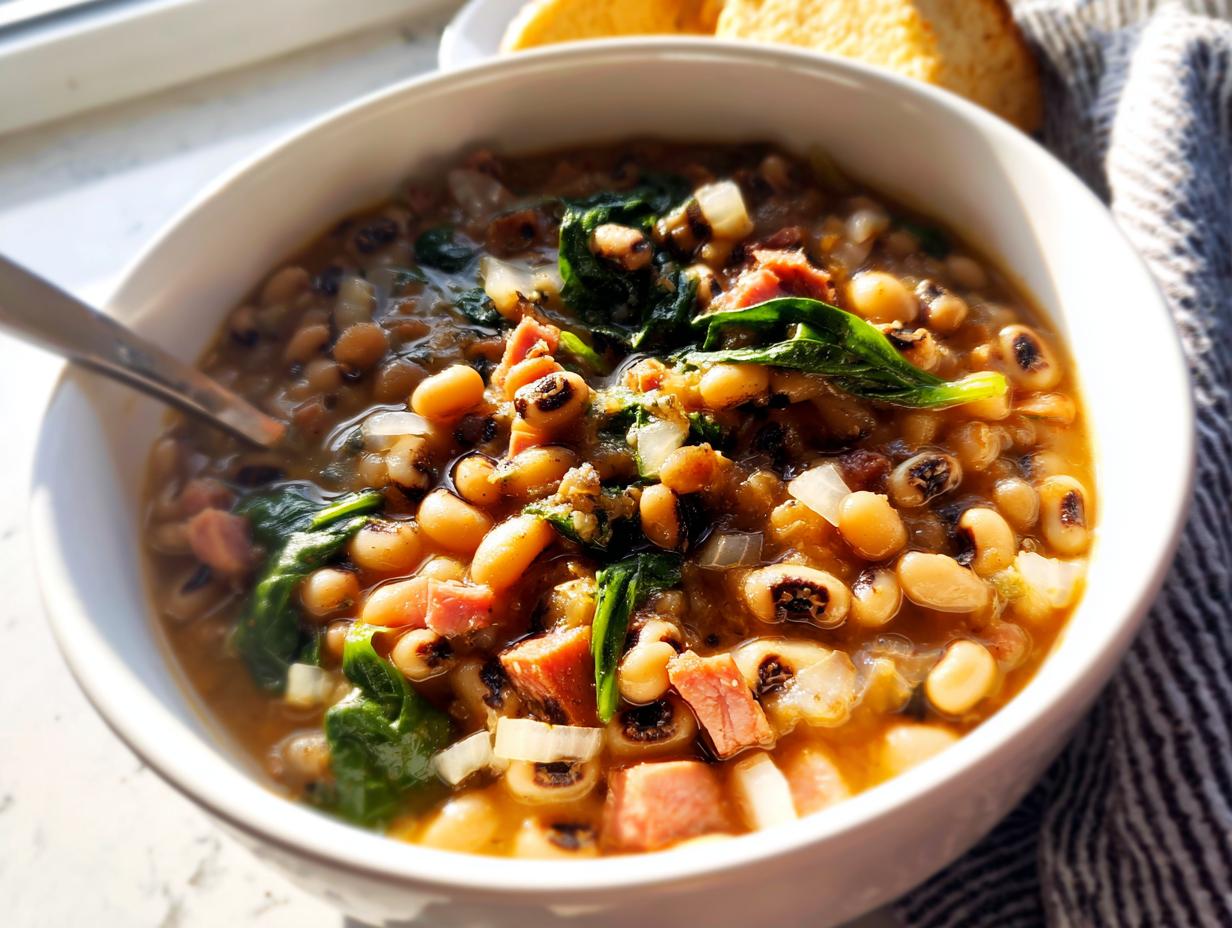
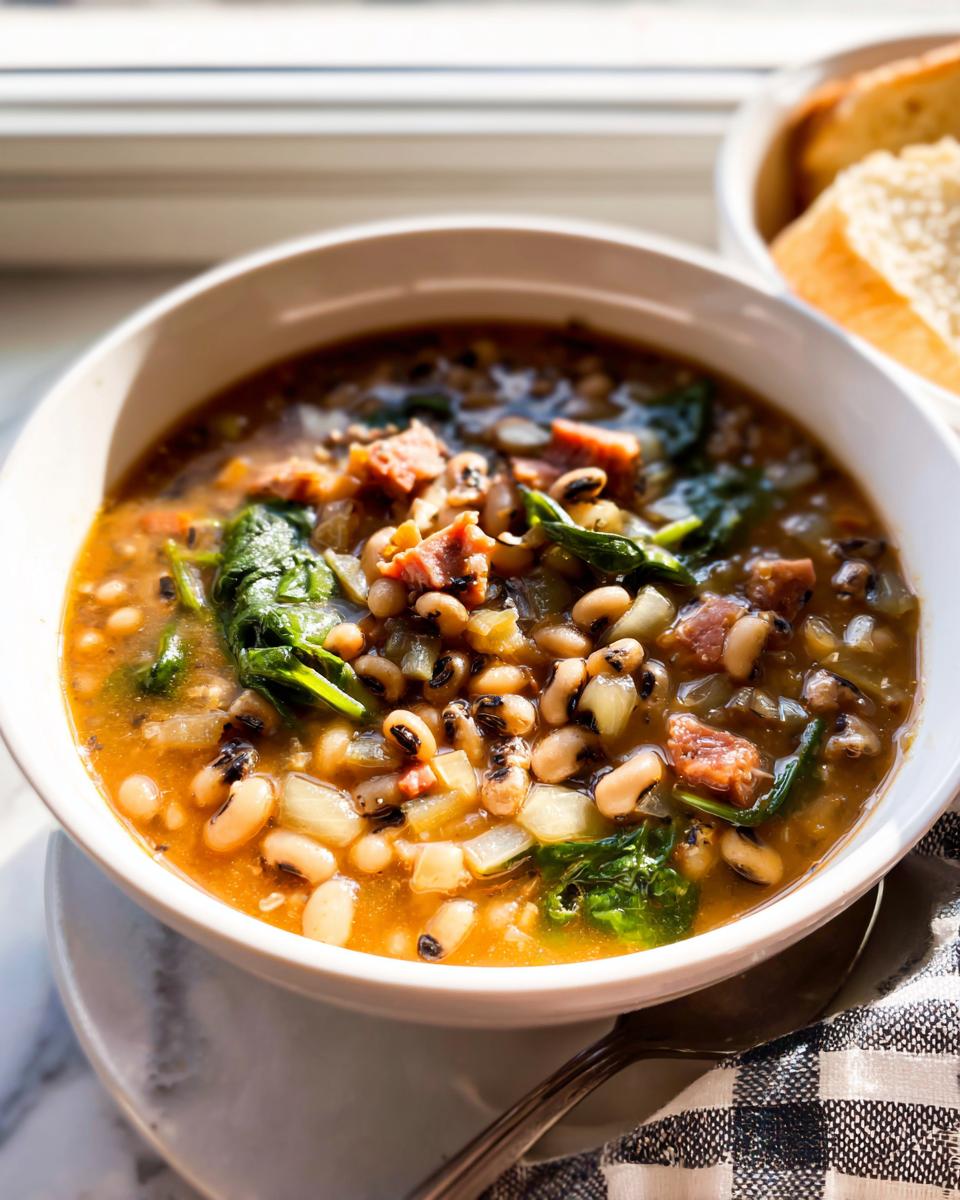
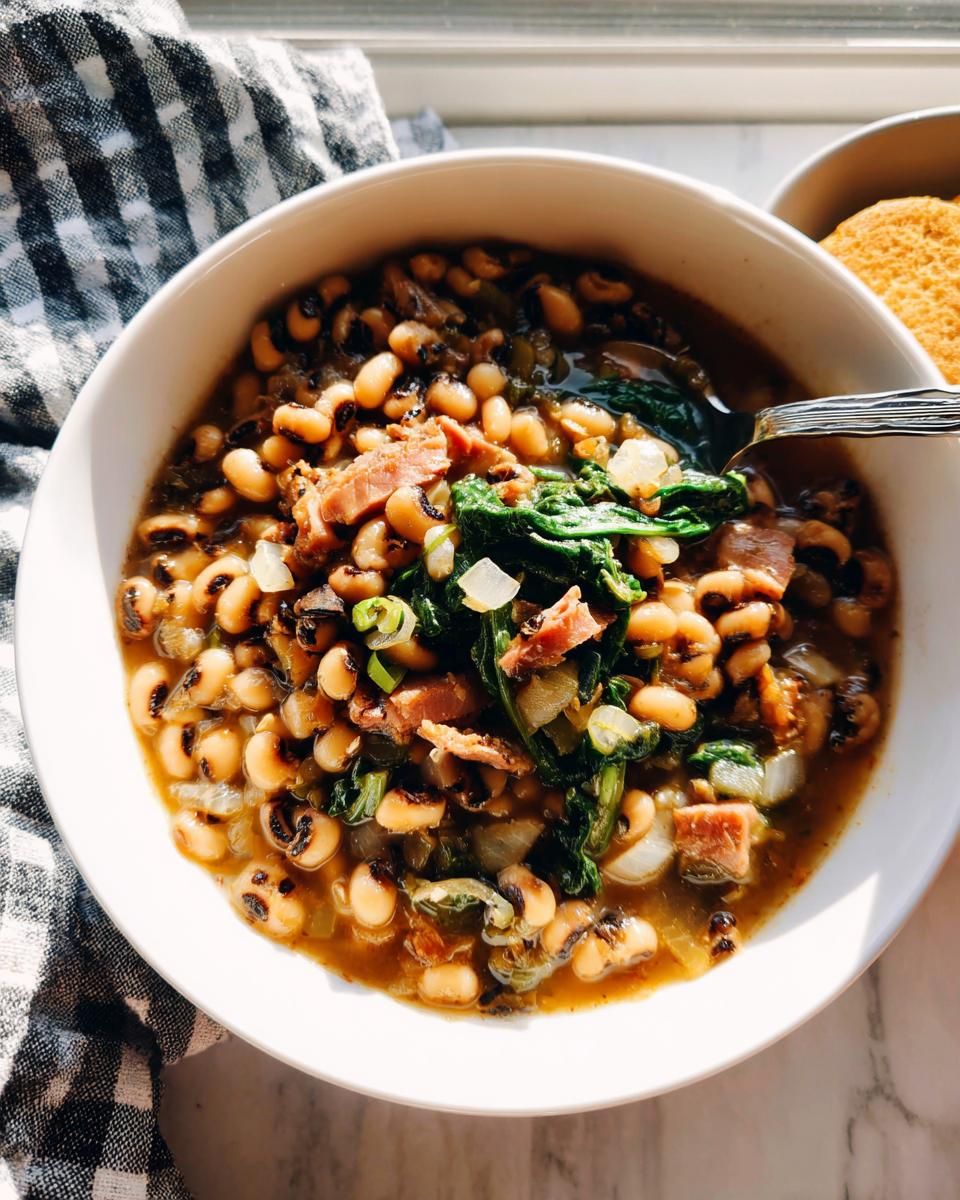
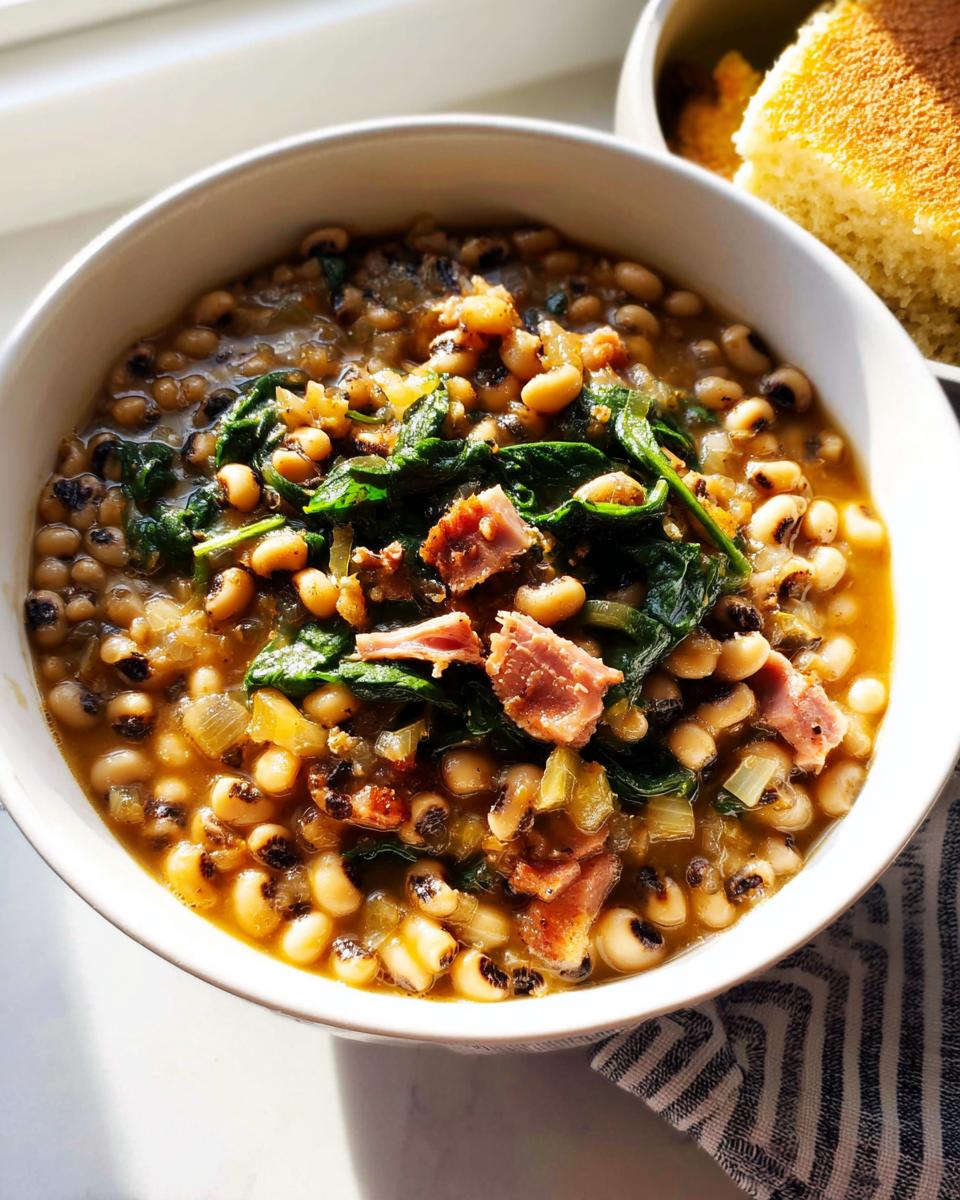
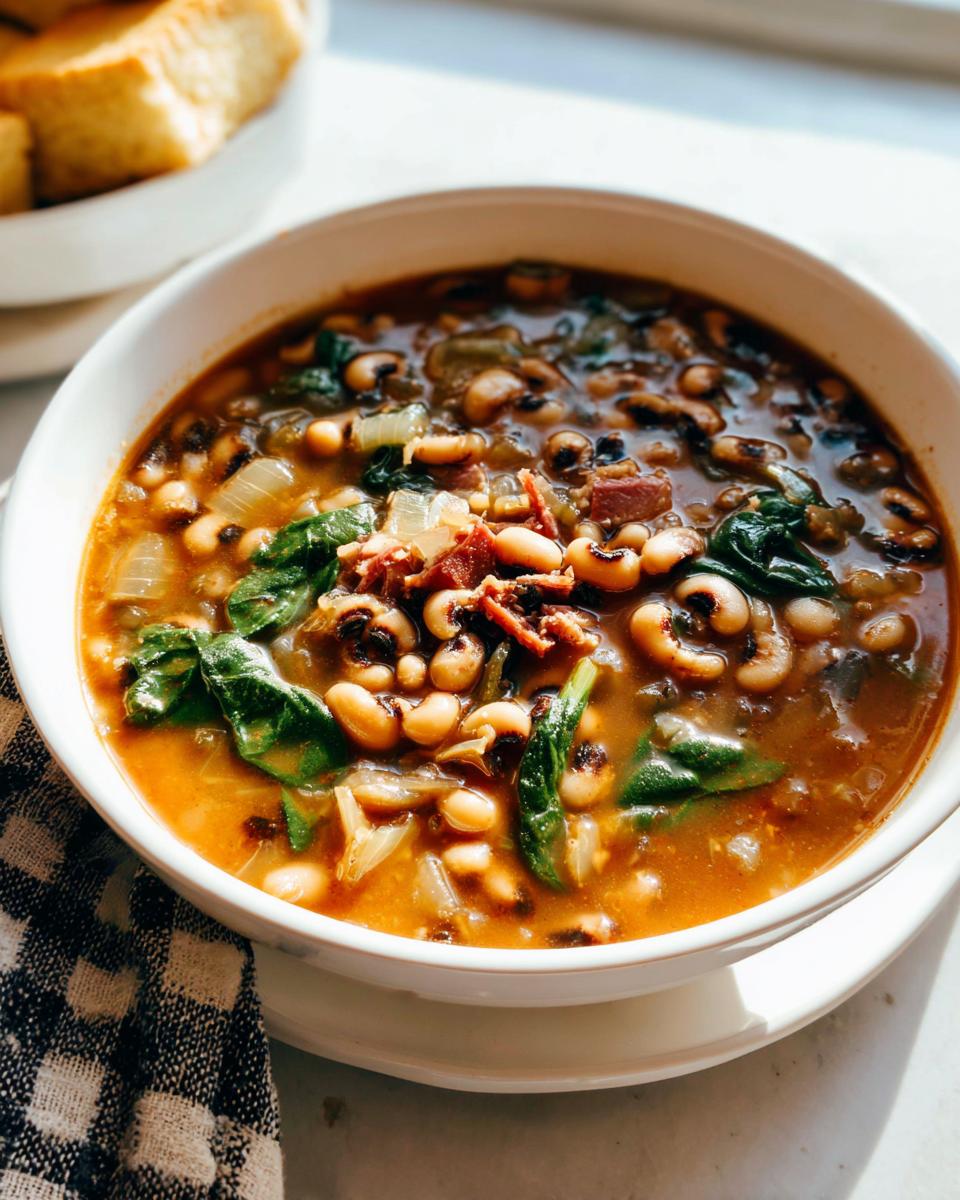
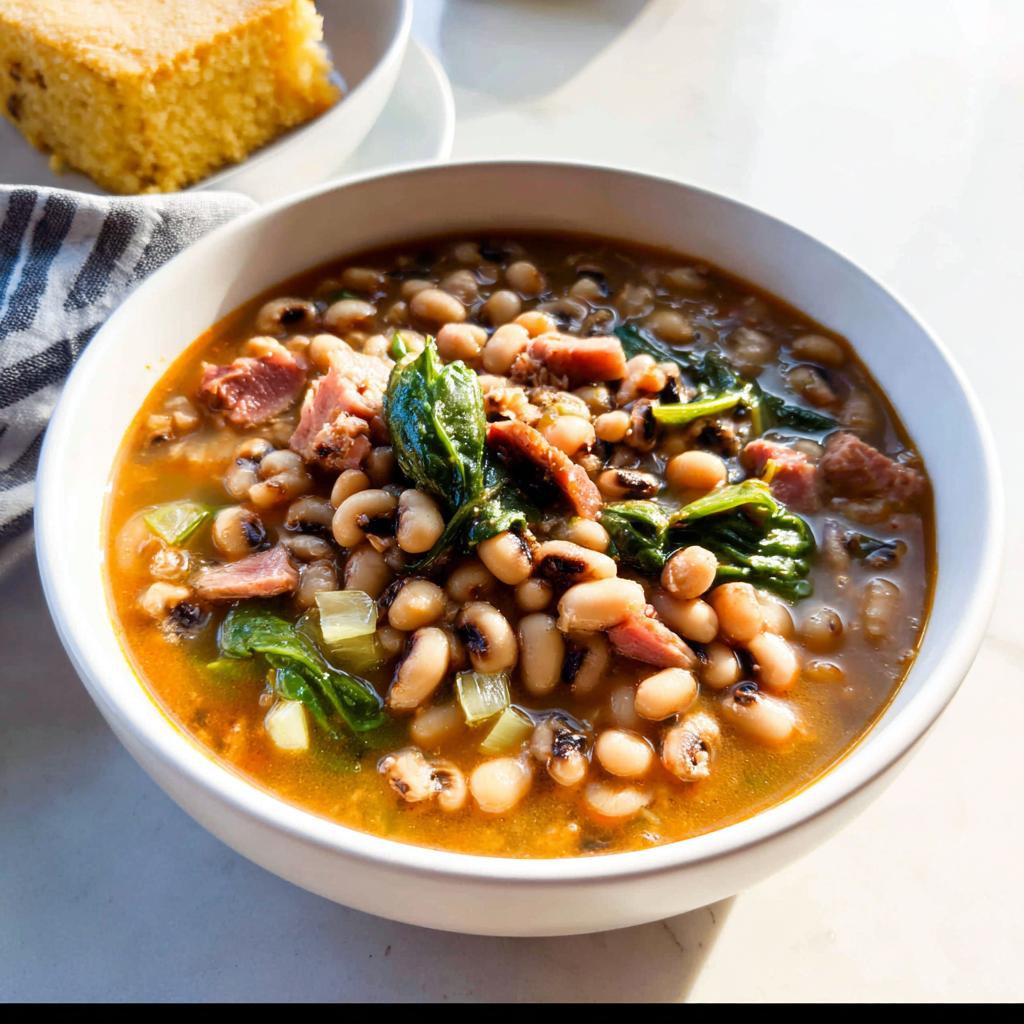
- 1.5 cup fresh spinach, roughly chopped
- Salt and pepper, just to taste at the very end
We add the salt and pepper near the end because the ham hocks and Creole seasoning already bring tons of flavor, and we don’t want to overdo it!
Step-by-Step Instructions for The Ultimate Soup Recipes Guide for Beginners
This is where the magic happens! Don’t rush this part, but remember that most of the time is hands-off. For those of you who like to peek ahead, yes, you can check out my favorite classic homestyle chicken noodle soup once you master this one!
Pre-Cooking Preparation: Soaking the Peas
First things first: the peas need a bath! We need to soften them up so they cook evenly. Take your pound of dried black-eyed peas, dump them in a big bowl, and cover them completely with cold water. You want about two inches of water over the top because they will swell up! Let them sit there happily for a good 2 to 3 hours. Seriously, let them soak; it makes cooking time so much better later on.
Building the Flavor Base: Cooking Meat and Sautéing Aromatics
Now we cook! Grab your large, heavy pan—that heavy bottom is important for even heating. Start by tossing in your chopped bacon and cooking it over medium heat until it gets nice and crispy, which usually takes about 5 to 6 minutes. Once those bacon bits are looking gorgeous, throw in your ham hocks and let them cook for about 5 minutes so they release some of their smoky goodness into the rendered bacon fat. Now, gently add your diced onions, celery, minced garlic, fresh thyme, and those two bay leaves. Let those aromatics just soften up and smell amazing for about 3 to 5 minutes.
Simmering for Tenderness in The Ultimate Soup Recipes Guide for Beginners
Time to move everything along! Pour in your 6 cups of chicken broth or water. Next, drain and rinse those soaked beans really well, and drop them right into the pot. Add your Creole seasoning, and give everything a good stir. Bring that whole mixture up to a strong boil, and then—this is key—immediately reduce that heat way down low. Cover it up and let it simmer gently for about 30 minutes. Give it a stir every now and then just to make sure nothing is sticking to the bottom while those peas get tender.
Finishing Touches: Spinach and Serving
Once the peas are soft—you can test one easily—it’s time for the green things! Stir in your fresh chopped spinach; it wilts down so fast! If your soup has gotten too thick while simmering (sometimes dried peas are thirsty!), just stir in a little extra stock or water until you hit that perfect soupy consistency you like. Once you’re happy with the texture, fish out those bay leaves—no one wants to bite into those! Do a final taste test and add a pinch of salt and pepper if needed. Serve this cozy soup piping hot with some great bread for dipping!
Expert Tips for Mastering The Ultimate Soup Recipes Guide for Beginners
Now that you’ve made the base, I want to share some secret homework from my own testing notes. These little tricks, pulled straight from the handwritten recipe card, are what separate a good pot of soup from a great one. You want that smooth, deeply flavorful result every single time you make this cozy dish, right?
My favorite trick for handling dried beans is actually soaking them with some salt—even before they hit the heat! If you soak those black-eyed peas in cold water with about three tablespoons of salt for those 3 to 4 hours, they soften up so much better. It really helps the flavor penetrate deep into the pea.
But hey, life gets busy! If you’re short on time, don’t stress. You can skip the long soak, but listen closely: the cooking time will increase by about ten minutes, maybe even a little more, after the initial 30 minutes of simmering. If you’re in a real pinch, try the quick-soak method: cover the peas with water, bring it *boiling hot, turn the heat off, and just let them sit for one hour. That buys you enough credit to start cooking shortly after.
If you are interested in exploring another silky-smooth recipe once you nail this one, you absolutely must try my creamy chicken and wild rice soup recipe!
Equipment Needed for The Ultimate Soup Recipes Guide for Beginners
Okay, let’s talk tools! The absolute beauty of making this soup is you don’t need anything specialized or crazy expensive. Honestly, if you have a decent big pot, you’re practically set. We keep the equipment list super short so you can get right to making that wonderful, cozy comfort food!
When I was first learning the ropes, I used the biggest stockpot my tiny apartment kitchen had, and it worked perfectly. Don’t overthink this part; we are keeping it functional!
- Large bowl: This is non-negotiable! You need a big bowl—like, bigger than you think—to soak those black-eyed peas for several hours. They swell up a surprising amount, and you don’t want water slopping all over your counter.
- Large, heavy pan (or stockpot): This is where all the action happens! Because we are cooking meat and then simmering the whole batch, a heavy-bottomed pan is crucial. It distributes the heat much more evenly, which means less chance of your peas or bacon scorching on the bottom while they simmer away.
That’s it! No fancy immersion blenders or mandolins required for this foundational soup recipe. Now that you know what you need, maybe check out some other great ideas for inspiration over at Work Week Lunch!
Making Your The Ultimate Soup Recipes Guide for Beginners Cozy and Customizable
Just because this is a beginner recipe doesn’t mean it has to be boring! One of the very best things about making big pots of soup is how forgiving they are. When you’re learning, getting the seasoning just right or finding a way to tailor it to your family is important for making it feel like *your* cozy dish.
We already listed smoked turkey as an option for the ham hocks, but feel free to experiment with other smoked bits! Smoked sausage that you dice up works wonderfully, or even a nice piece of smoked pork shoulder if you have leftover bits from supper. The smoke is really the flavor backbone here.
If you want to turn this into a real hearty meal that sticks to your ribs, think about adding some root vegetables during the last 15 minutes of simmering. Small diced carrots or even a cup of cubed sweet potatoes would be delicious and add color without much extra work. My creamy tomato basil soup is another great chunky option when you’re ready for Step Two!
Ingredient Swaps for Different Comfort Food Vibes
If you can’t find Creole seasoning, don’t panic and don’t run to the store! You can easily mix up your own flavor profile. Try using a Cajun seasoning blend if that’s what you have—it’s usually spicier, so maybe use a little less to start.
My favorite trick, though, is if you’re craving something a little less spicy, swap the Creole seasoning for smoked paprika, a pinch of ground cumin, and some dried oregano. It gives the soup a completely different, earthy feel, which is lovely for a rainy day.
Now, want to make this naturally vegetarian? It’s easy! You just omit the bacon and the ham hocks completely. If you do that, you MUST compensate for the lost smoky flavor. When you sauté your onions and celery, add a tablespoon of liquid smoke essence, or use a really rich, dark vegetable broth instead of water to boost that savory base. You won’t even miss the meat, I promise!
Storing and Reheating Your Beginner Soup
Homemade soup tastes even better the next day, which is perfect because this recipe makes enough for leftovers! Handling storage correctly is just as important as getting the simmer time right when you’re starting out. We want this cozy dish to be just as comforting on Tuesday as it was on Sunday.
When it comes to leftovers, the biggest thing to remember is that the flavors will deepen overnight, which is fantastic! The ham hocks will continue to break down, making the broth richer. If you want to save it for later, make sure you pull those bay leaves out before you jar it up, otherwise, it can get a little overpowering.
Best Way to Store Your Leftovers
The best method is portioning! Instead of putting the entire pot in the fridge, divide the soup into smaller, single-serving, airtight containers. If you use glass containers, make sure they are cool before you put the hot soup in, or you risk a thermal shock crack—oops! I try to let the soup cool down on the counter for about 30 minutes first, just to take the edge off the heat.
This black-eyed pea soup will easily keep in the refrigerator for a good 4 to 5 days. That’s practically a whole week of easy lunches sorted! If you know you won’t eat it all by then, freezing is an option. Try to leave about an inch of space at the top of your container if freezing, because liquids expand when they freeze, and we don’t want cracked lids.
How to Reheat for Maximum Comfort Food Feel
For the very best texture and to control the liquid perfectly, reheat this soup on the stovetop. Just dump the container into a saucepan over medium heat. It’s important to stir often, especially as it thaws or warms up.
Here’s my biggest tip: Soups tend to thicken up overnight as the peas absorb the extra broth. If yours looks more like a stew when you reheat it, don’t worry! Just splash in a little extra chicken broth or even just water until you get that beautiful, soupy consistency back that you loved when it was fresh. It should only take about 8 to 10 minutes to get it steaming hot all the way through. Trust me, that first spoonful of reheated smoky goodness is worth the tiny bit of extra effort!
If you want to see what else you can do with hearty legume recipes after you master this one, my hearty beef and vegetable barley soup is just as warming and filling!
Frequently Asked Questions About The Ultimate Soup Recipes Guide for Beginners
Every time I teach a beginner how to make a big pot of soup, a few questions always pop up! That’s wonderful, because asking questions means you’re learning and getting ready to make this dish your own signature cozy meal. Here are the most common things I hear about making this black-eyed pea dish the perfect comfort food starting point.
Can I make this soup without soaking the black-eyed peas?
Oh, I totally get it—sometimes you wake up craving soup and realize you forgot to plan ahead! The short answer is yes, you absolutely can skip the soaking! It just changes the cooking dynamics a bit. If you skip that initial 2 to 3-hour soak, you need to plan on adding more active simmer time once you start cooking. Instead of just 30 minutes covered, you might need to simmer them for closer to 40 or even 50 minutes until they are perfectly tender. They’ll get soft, but it just takes patience!
How do I make this soup thicker for a more comfort food texture?
That’s one of my favorite adjustments! If you want that thick, almost stew-like texture that really clings to a spoon, you have two great options. The easiest involves uncovering the pot during the last 10 minutes of simmering. Letting the steam escape concentrates the broth nicely. My other trick—which I love because it tastes so natural—is taking about one cup of the cooked beans out, mashing them really well against the side of the pot with a wooden spoon, and stirring that mashed paste back into the soup. It thickens everything beautifully without adding anything weird!
What is the best way to serve this cozy soup?
Serving hot soup is all about presentation and dipping companions! For this specific black-eyed pea soup, you can’t beat having something substantial on the side to soak up that smoky, flavorful broth. I always serve mine piping hot, just ladled into big bowls, alongside some crusty, fresh bread. If you happen to be making cornbread, that is even better—it’s the perfect pairing.
If you feel like you’ve mastered this flavor profile and want to try something incredibly rich and cheesy next time, you should absolutely bookmark my loaded baked potato soup recipe!
Next Steps After Mastering The Ultimate Soup Recipes Guide for Beginners
Wow, you actually did it! You’ve successfully navigated The Ultimate Soup Recipes Guide for Beginners and you have a beautiful, deeply flavorful pot of black-eyed pea soup cooling on your counter. That’s a huge win, and you should feel so proud of yourself for making something so wonderfully cozy from scratch!
Now that you know how sturdy and forgiving soup-making really is, I want to hear all about it! Seriously, hearing from you guys keeps me inspired in the kitchen every single day. Did you stick exactly to the recipe, or did you sneak in some extra chopped pepper? Tell me everything when you get a chance!
The best way to keep this momentum going is to keep practicing! Cooking is all about repetition and tweaking slightly until it becomes second nature. Don’t let this be the last pot you ever make!
If you’re ready to dive into the next adventure—maybe something a little more complex using techniques you’ve learned here—head over to my main recipes page. There are tons of other simple, nourishing meals waiting for you.
When you feel generous, come back and let me know how this soup turned out! Leaving a rating helps other beginners feel brave enough to try their first homemade pot. Happy cooking, friend!
The Ultimate Soup Recipes Guide for Beginners
Ingredients
Equipment
Method
- Place the dried black-eyed peas in a large bowl and cover them completely with cold water. Let them soak for 2 to 3 hours.
- In a large, heavy pan, cook the chopped bacon over medium heat until it is brown and crispy, which takes about 5 to 6 minutes.
- Add the ham hocks to the pan and cook them for 5 minutes.
- Add the onions, celery, garlic, thyme, and bay leaves to the pan. Sauté for about 3 to 5 minutes until the onions become soft.
- Pour in the chicken broth or water.
- Drain the soaked beans, rinse them, and add them to the pot. Season with Creole seasoning, salt, and pepper. Stir the mixture and bring it to a boil.
- Reduce the heat to low, cover the pot, and simmer for about 30 minutes, stirring sometimes, until the beans are tender and reach your desired thickness.
- Stir in the fresh chopped spinach.
- If the beans become too thick while cooking, add more stock or water until the texture is soupy.
- Remove the bay leaves from the soup. Adjust the salt and pepper seasoning if necessary. Serve the soup with fresh bread.
Nutrition
Notes
Tried this recipe?
Let us know how it was!
Gluten-Free Nutritionist & Family Meal Planning Expert
Working as a pediatric dietitian at Children’s Hospital of Denver, I kept meeting families overwhelmed by managing their children’s celiac disease. Parents stressed, kids frustrated, everyone eating bland boxed “gluten-free” products.
That’s when I realized my calling: creating practical, balanced gluten-free solutions for real families with busy schedules. I’ve developed 375+ family-friendly recipes focusing on lunch boxes, after-school snacks, and make-ahead dinners that actually work.
My meal planning system was featured in Parents Magazine, and I presented research at the Rocky Mountain Pediatric Nutrition Conference. My evidence-based approach ensures recipes meet both taste and health standards—families need solutions that work in the real world, not just perfect test kitchens.