If you’re anything like me, you know that finding the *truly* perfect chicken wing recipe—one that actually gets crispy in the oven without a deep fryer—feels like winning the lottery. I spent ages testing, tasting, and basically bathing in flour trying to crack the code, especially once I started needing gluten-free options. But wow, after endless game nights and kitchen chaos, I finally nailed it! This, my friends, is The Only Chicken Wings Recipes Recipe You’ll Need (2025). It’s all about that bold Creole seasoning flavor base, balanced with rich garlic butter, and the texture? Forget flour dredging; we get it right naturally. That game night when everyone kept asking for seconds? That was the night this recipe was born, proving nobody misses out on epic crunch!
Why This Is The Only Chicken Wings Recipes Recipe You’ll Need (2025)
Honestly, I stopped looking for other wing recipes the second I perfected this one. What makes it the best? It’s the trilogy of flavor: that unbelievably crispy skin achieved just with heat, the deep, warm punch of the homemade Creole seasoning, and that final, luscious toss in fresh garlic butter. Forget soggy bottoms! We tested this relentlessly.
This recipe handles crowds beautifully. It’s robust enough for a big game night or family party, and because it skips the heavy flour dredging, it stays genuinely delicious even when slightly cooled. If you’ve struggled making baked wings that actually deliver that satisfying crunch, trust me, this version right here ends that search. For another flavor inspiration rooted in similar warmth, you should absolutely check out my Cajun flavor profiles, or see how others tackle New Orleans style wings over at RecipeTin Eats!
Ingredients for The Only Chicken Wings Recipes Recipe You’ll Need (2025)
Okay, let’s talk about what you need to grab for this flavor explosion! Since this recipe is so straightforward, the quality of what you buy really matters. Remember what I said about testing? I’ve run this exact breakdown dozens of times to ensure the perfect coating ratio.
This recipe is sized perfectly to feed four people as a main meal, or you can stretch it to feed about eight to ten folks if you’re serving them up as part of a bigger appetizer spread. Don’t skimp on the butter or the garlic; that finish is non-negotiable!
First up, you need about 1.25 kg of chicken wings—that means separating your drumettes and wingettes. If you buy whole wings (the ones still in that ‘Z’ shape), just slightly under 1.5 kg will do, but you’ll want to use a pair of kitchen shears to snip them apart at the joints first. We aren’t using the wing tips here; save those for stock!
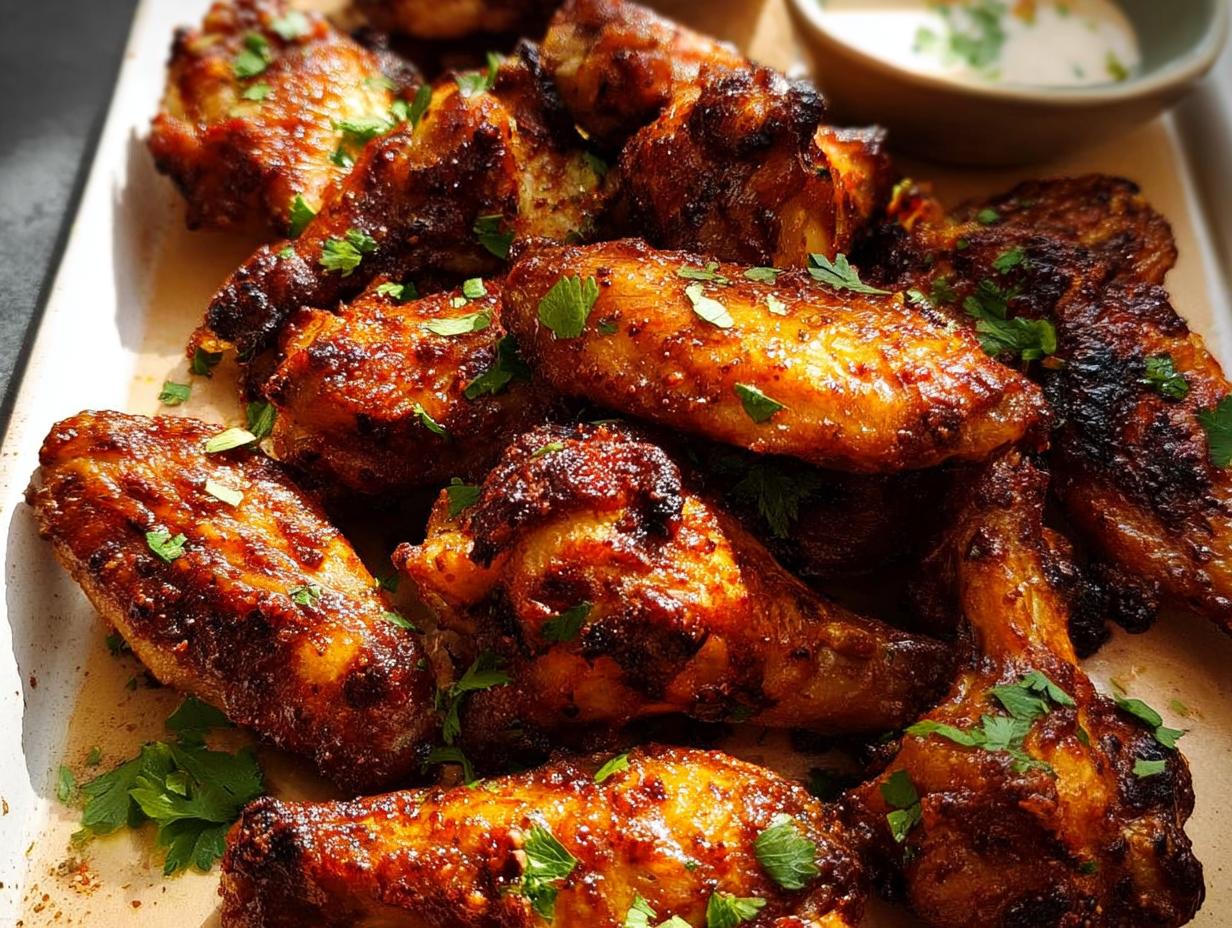
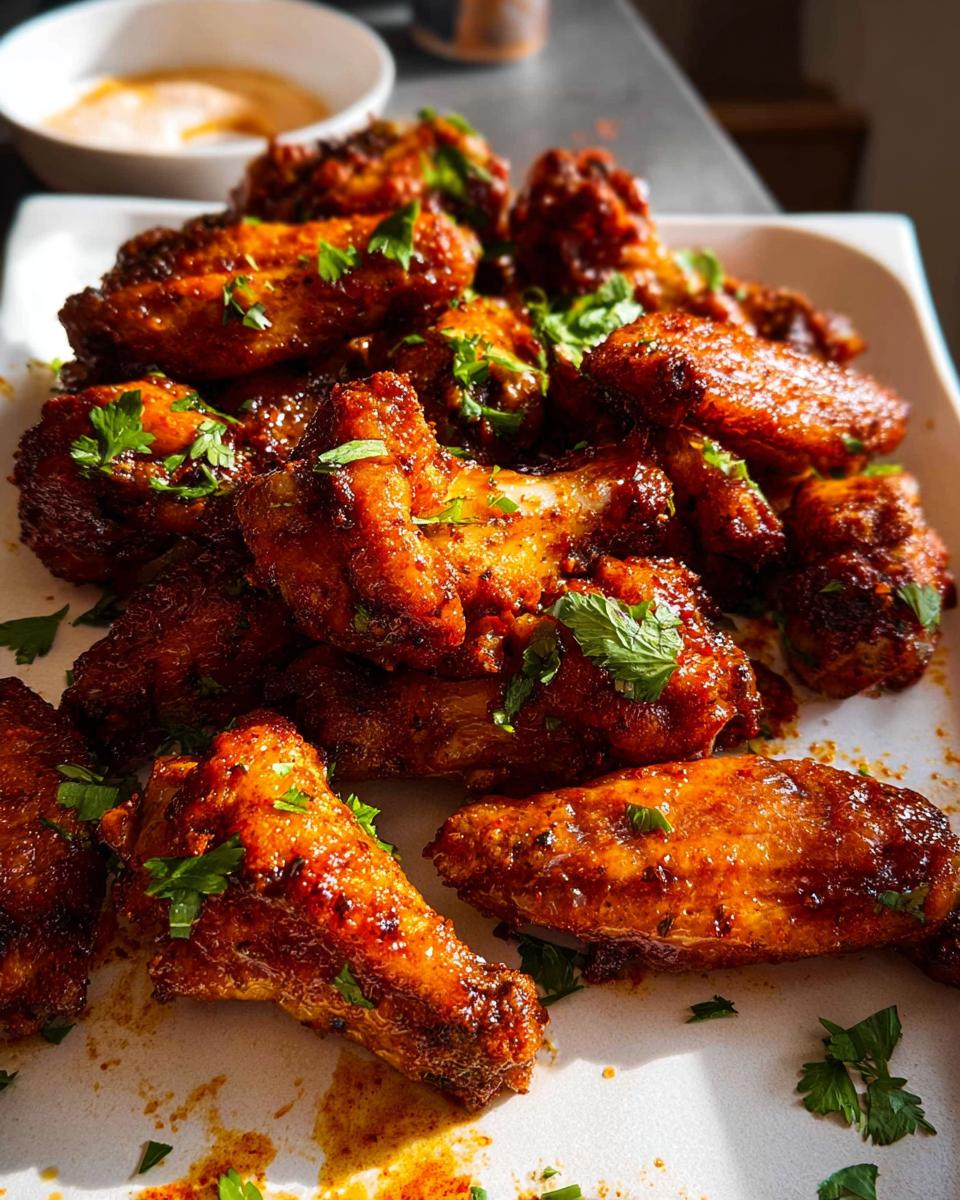
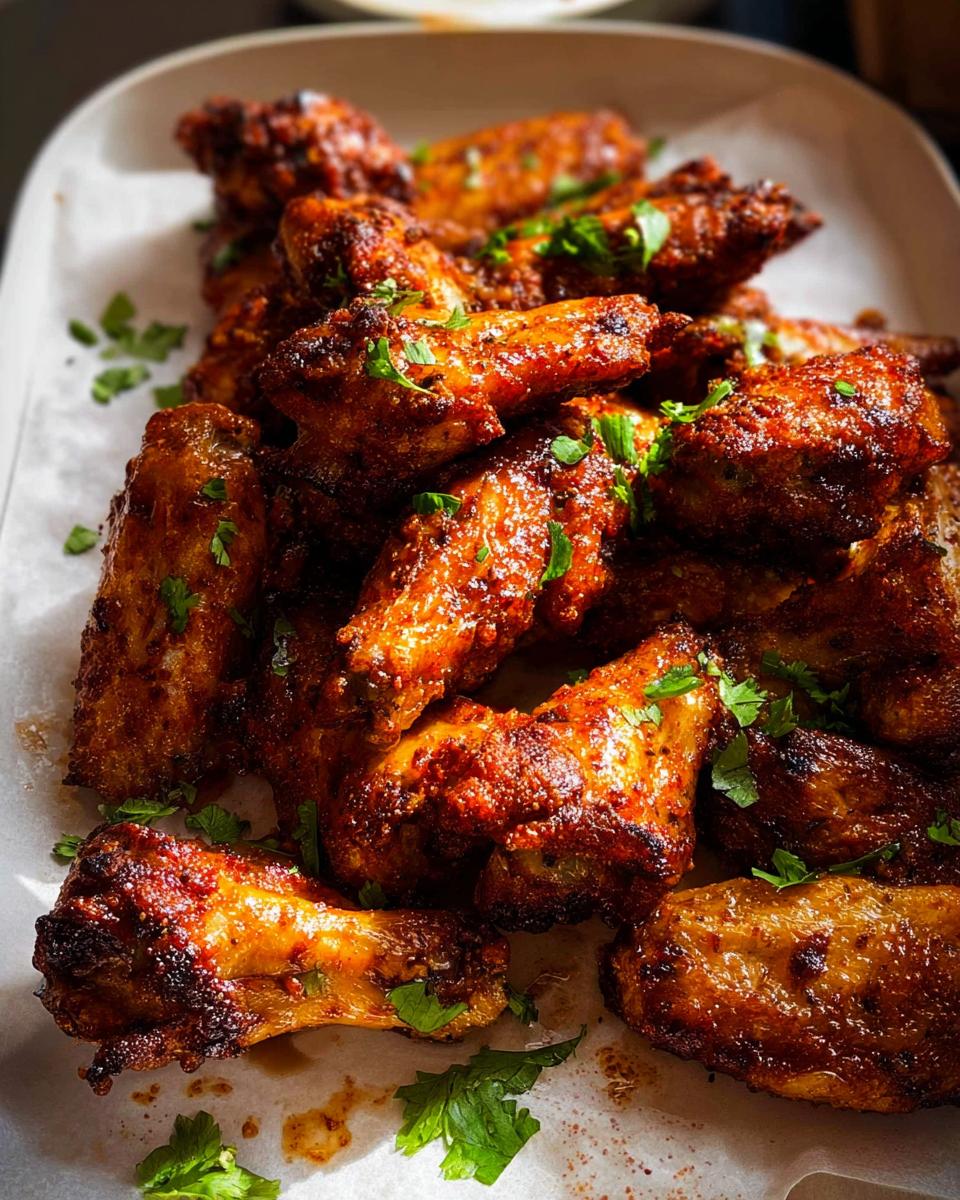
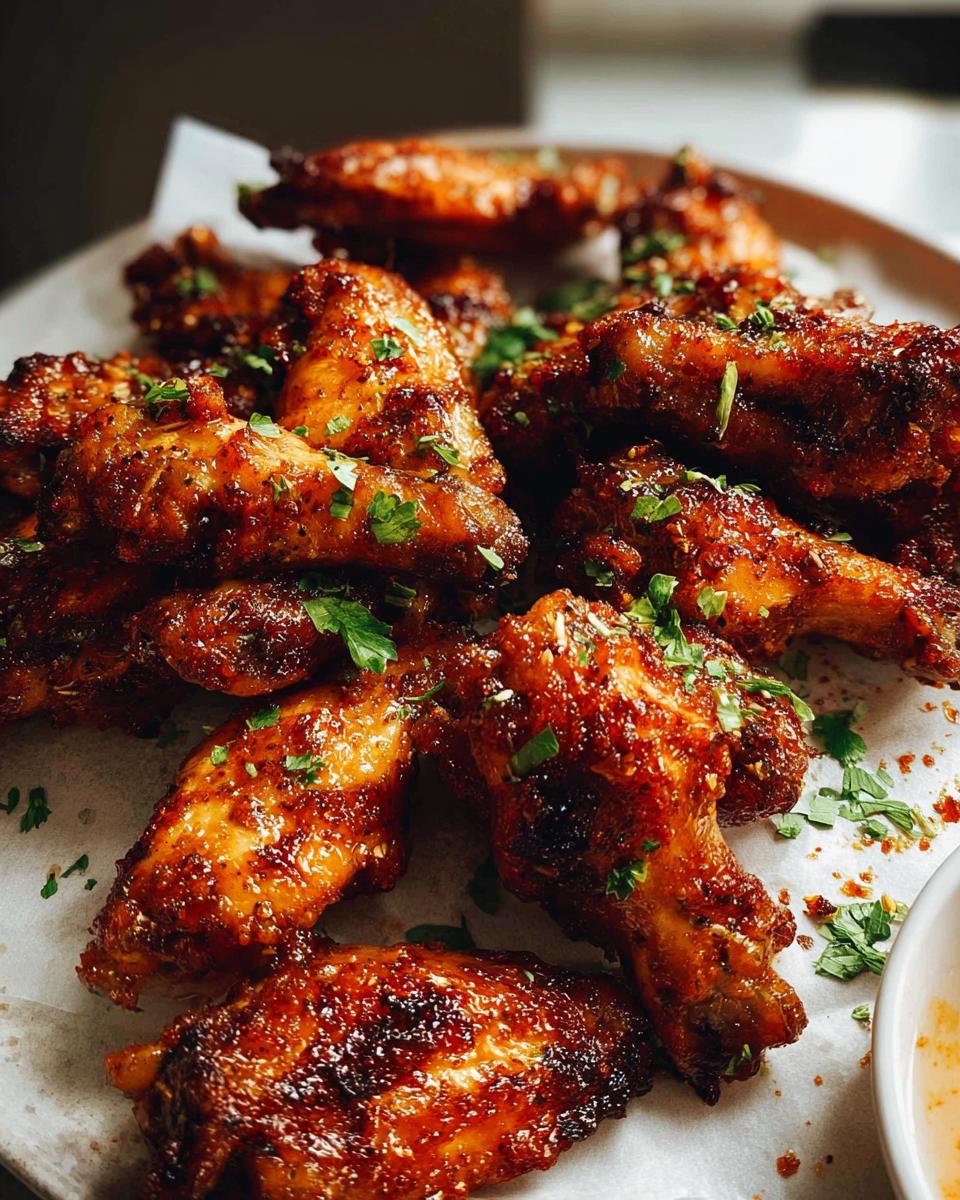
For the wet coating, you’ll melt down 50 grams (that’s about three tablespoons) of unsalted butter, and you need to crush up two good cloves of garlic really finely for that. Then, totally optional, but lovely for presentation, grab about 2 tablespoons of fresh parsley or green onion to sprinkle over top at the very end.
For the Homemade Creole Seasoning Mix
This is where the real magic lives, so please use spices that still smell potent! If your spices have been hiding in the back of the cabinet since last year, you might want to replace them before starting. We are building layers of flavor here, so make sure that brown sugar is packed down tightly when you measure it!
You’ll need:
- 1.5 tablespoons of brown sugar (make sure it’s tightly packed!)
- 2.5 teaspoons of regular paprika
- 1.5 teaspoons of kosher salt or good cooking salt
- 1 teaspoon each of garlic powder and onion powder
- 0.5 teaspoon each of black pepper, dried thyme, and dried oregano
- And just a tiny kick with 0.25 teaspoon of cayenne pepper.
Mix all those dry things up until they look like one uniform, beautiful red-orange dust. If you stumble upon other great wing ideas, maybe check out my collection of Pinterest-worthy wing recipes!
Step-by-Step Instructions for The Only Chicken Wings Recipes Recipe You’ll Need (2025)
Alright, put on your apron! Now that we have all those glorious spices mixed up, it’s time to put some heat on these wings. Getting that perfect bake requires a little bit of setup, but trust me, the payoff is worth every second. Remember my game night struggle? It all came down to making sure the wings weren’t crowded—that’s the secret to avoiding that watery mess!
Preparing the Oven and Seasoning
First things first: we need serious heat. Get your oven preheated to 200\u00b0C, or 390\u00b0F if you run yours a bit hotter (or 180\u00b0C if you use the fan force setting). Now, grab your large tray. This part is important for cleanup and for getting that crisp!
Line the tray completely with aluminum foil first. Why foil? Because the butter drips! Then, put a sheet of baking paper right on top of the foil. This combo works magic. While that’s heating up, take five minutes to mix your melted butter with that crushed garlic in one small bowl. Then, in a different small bowl, mix up all those Creole seasoning ingredients we just listed until they look uniform.
Coating and Buttering the Wings
Dump your cut wings into a nice, large bowl. We are seasoning in two stages because that really helps keep the flavor locked in. Sprinkle about half of your incredible seasoning mix over the wings and toss everything around until the first layer is coated. Then, sprinkle over the remaining seasoning and toss again until every single piece is evenly blanketed in that color.
Once they’re seasoned perfectly, pour that gorgeous garlic butter right over the top. Give everything one final, vigorous toss so every wing is glistening and coated in that garlicky perfume. This fat layer helps everything crisp up beautifully in the heat.
Baking and Finishing
Now, the absolute key: lay those buttered wings onto your prepared tray. Make sure they are sitting in a single layer with space between them—I stress this because if they touch, they steam instead of bake, and we want crunch, not dampness! You can see a fantastic example of how crucial spacing is if you check out my tips for crispy oven-baked wings.
Bake them for 45 to 50 minutes total. But here’s the technique: at the 30-minute mark, pull the tray out and baste them generously with the juices already pooling on the tray. Do this again at the 40-minute mark. When they come out the last time, they should look beautifully golden and slightly caramelized.
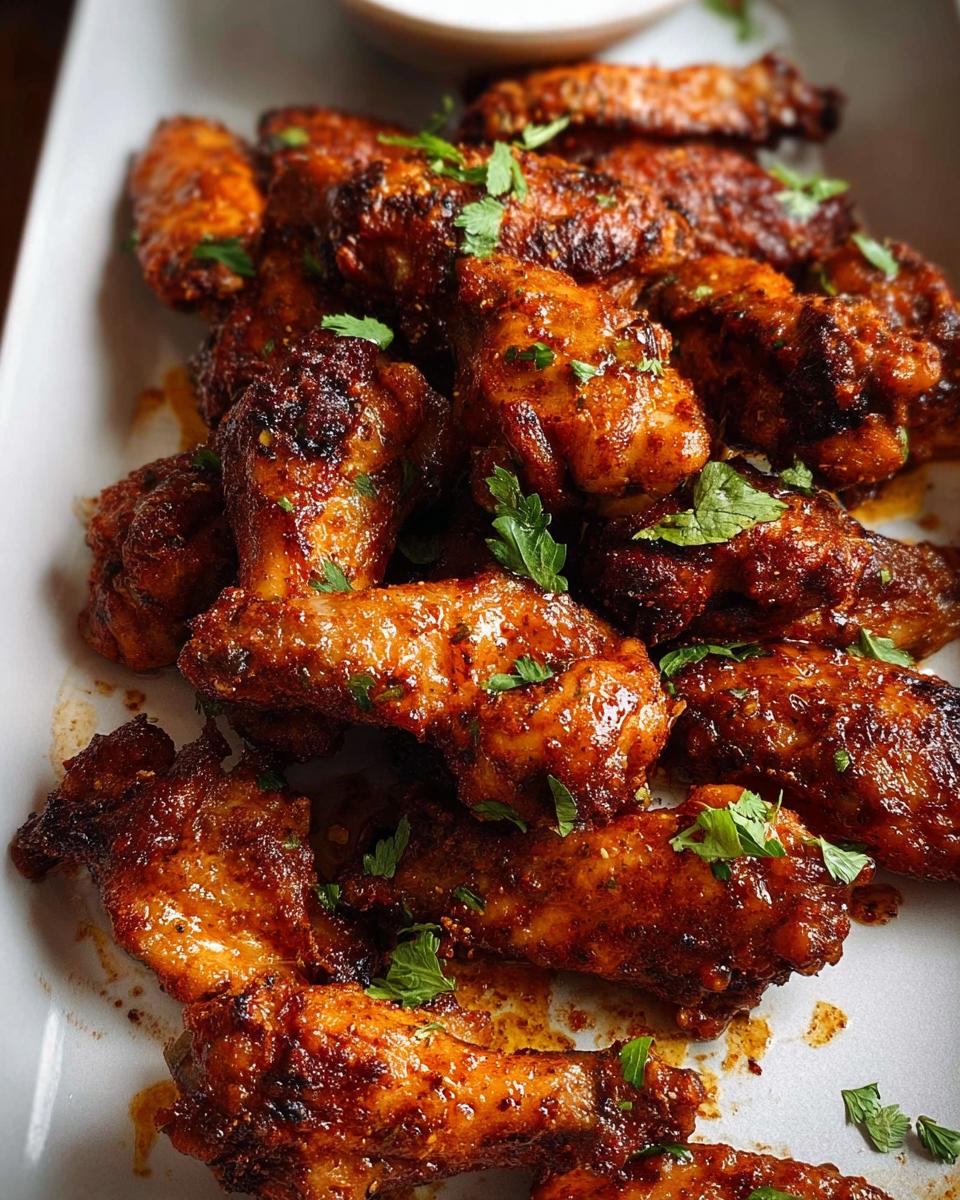
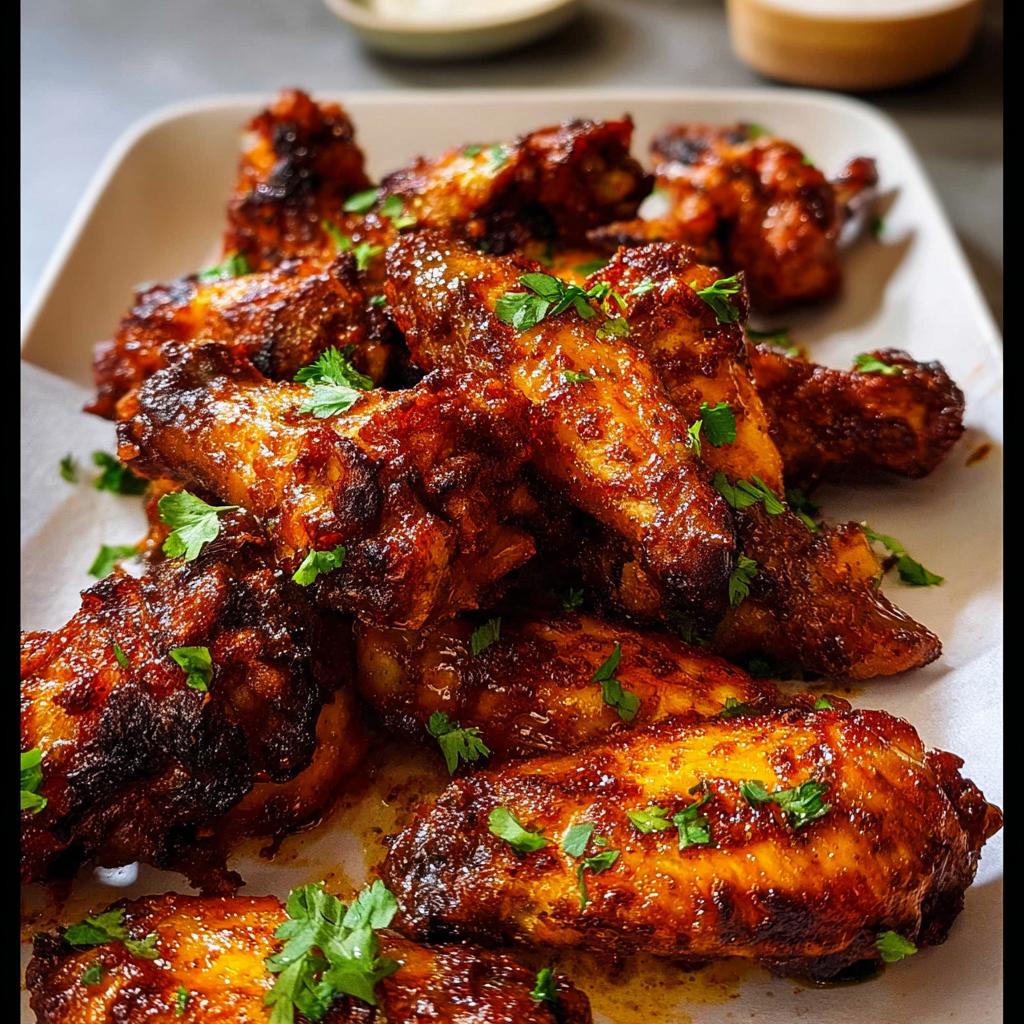
Take the tray out of the oven for the very last time. Baste them one final, glorious time with all those accumulated tray juices. Transfer them immediately onto a serving plate, and then pour every last wonderful drop of that pan sauce right over the top before you sprinkle on that fresh parsley or green onion garnish. If you like a saucier finish, you can check out my instructions for sticky BBQ versions, but this baked version is perfect as is!
Tips for Success with The Only Chicken Wings Recipes Recipe You’ll Need (2025)
I’ve learned a few things the hard way so you don’t have to! The biggest game-changer for baked wings is making sure they have breathing room on that tray. If you crowd them even a little bit, all those lovely fats and butters turn into steam, and suddenly your crispy wings are sad sponges. Seriously, use two trays if you have to!
Also, don’t skip the basting. Those little dips back into the oven juices at 30 and 40 minutes are what build up that incredible caramelized crust over time. It’s almost like glazing them in stages.
And remember what I mentioned in the ingredient section about whole wings? If you’re working with those ‘Z’ shaped wings, take the time to cut them. It makes them cook more evenly, and you get those perfect drumettes and wingettes every time. For a completely different, fiery approach after you master this one, take a peek at my Mango Habanero wings!
Serving Suggestions and Variations for Your Wings
Wow, we’ve made the perfect wings—now what do we do with the aftermath? Well, first off, that amazing Creole seasoning mix doesn’t just retire after coating the chicken, no way! You can absolutely shake some of that leftover goodness onto roasted vegetables like potatoes or cauliflower before you throw them in the oven. It’s fantastic on firm tofu too, if you have vegetarian friends joining the wing feast!
These wings shine as a main snack at any gathering. If you are layering up a huge spread for a party, these crispy guys are perfect next to something cool and creamy, like a simple homemade ranch dressing or a big bowl of crunchy coleslaw. They are wonderful served alongside my Sweet Chili Glazed Wings if you want a sweet counterpoint to this spicy savory dish.
But let’s talk about the next day! These are such a quick and easy dish to double up on specifically for next-day lunch prep. Since they are baked, not fried, they hold up better in the fridge.
If you’re looking for something different for your next wing night, but still want that baked appeal, you could try switching the seasoning profile entirely! Have you ever considered a rich glaze? Check out my recipe for Teriyaki Sesame Baked Wings for a totally different vibe that still uses the oven!
Storage and Reheating Instructions
Even the most perfect batch of wings never lasts long in my house, but let’s face it, sometimes you have leftovers! I always hope for leftovers because reheating these baked wings is actually super simple and brings back that amazing crispness. Do not, I repeat, DO NOT just toss them in the microwave; that’s how you turn crunchy goodness into rubbery sadness.
When you’re putting them away, make sure they’ve cooled down just slightly first. Do not seal up a hot container; that traps steam and makes everything soggy! Once they are at room temperature, pop them into an airtight container. They’re good to go in the fridge for about three to four days. I’ve kept them that long, and they were still delicious!
Now for the reheating magic. My favorite way, which takes the longest but gives you the best result, is putting them back into a hot oven—say, 375\u00b0F (about 190\u00b0C)—on a dry baking sheet for about 8 to 10 minutes. That heat crisps up the exposed skin again!
If you’re in a hurry, your air fryer will be your best friend. Toss them in at 370\u00b0F for about 5 minutes, shaking the basket halfway through. It wakes them right up! These reheat so well, which makes them perfect for grabbing mid-week if you made a big batch—much like my honey garlic sticks that reheat beautifully in an air fryer!
Making Quick and Easy Lunch or Sandwich Options
We’ve talked about how amazing these wings are right out of the oven for a party, but let’s get real—the true sign of a fantastic recipe is how it performs the next day, especially when life gets busy. That’s where the secondary keywords come in handy! Believe it or not, these crispy, seasoned wings make for a seriously satisfying quick and easy lunch.
If you happen to have any leftovers (which I highly doubt, but still!), don’t just reheat them whole on day two. Instead, pull the meat right off the bone. Since we baked these babies, the meat is tender and already seasoned perfectly with that Creole kick!
That shredded chicken is gold. My favorite thing to do is toss that shredded wing meat with just a teaspoon of mayo or plain Greek yogurt—just enough to bind it—and maybe a sprinkle of extra fresh pepper. Suddenly, you have an incredible, flavor-packed filling ready for a stunning sandwich! Use your favorite gluten-free bread or pile it high on a fresh salad green. It takes about two minutes, beats any sad desk lunch, and honors the crispy texture we worked so hard to achieve the day before.
Making a big batch on Sunday means you’ve already done half the work for your weekday meals. It’s just another reason why I insist this is The Only Chicken Wings Recipes Recipe You’ll Need (2025)—it plays double duty!
Frequently Asked Questions About The Only Chicken Wings Recipes Recipe You’ll Need (2025)
When I share a recipe this near and dear to my heart, I always get a flood of questions, especially from fellow cooks wanting to adapt things for their own kitchens. Wings can be tricky, right? Here are the things I get asked most often about making this recipe the absolute best for your gathering!
How do I make these wings gluten-free?
This is my favorite question! The wonderful news is that this recipe, as written, is naturally gluten-free! See? No flour, no cornstarch dredging needed. We rely on the baking paper and the combination of the butter and seasoning to create that beautiful crust, which means anyone dealing with gluten sensitivities can totally enjoy these without worry.
If you’re worried about cross-contamination in your own kitchen, just make sure your spices haven’t been processed on shared equipment, but ingredient-wise, you’re all set. If you’re looking for similar crispy, flavorful goodness in a different setting, you must check out my Garlic Parmesan Air Fryer Wings—it’s another guaranteed winner!
Can I make these wings ahead of time?
You know, you can definitely prep ahead, which is a lifesaver when hosting! You can mix your Creole seasoning blend days ahead of time and keep it in a sealed jar. You can also mix the butter and crush the garlic and keep that refrigerated. But for the best results, I really recommend only seasoning and coating the wings right before they go into the oven. The baking process is what sets that texture. If you have to pause, go ahead and bake them, let them cool, refrigerate them, and remember to reheat them in the oven or air fryer the next day, just like I explained in the storage section!
Why didn’t my wings get crispy?
Oh, I feel your pain! That’s usually one of two things, nine times out of ten. The first—and biggest—culprit is crowding the pan. If the wings are touching, they steam, and steaming equals soft skin. You need air circulating around every single wing. The second reason? You didn’t baste them at the 30 and 40-minute marks! Those little bastes seem small, but they help build up that layer of caramelized goodness that turns into the crust.
Is the Creole seasoning too spicy for kids?
That’s a fair question! The heat here comes entirely from the cayenne pepper, which I only ask for a quarter teaspoon of. For most adults, this provides a lovely little warmth that complements the savory spices, but it isn’t overwhelmingly hot. If you’re serving younger children, you can skip that quarter teaspoon of cayenne completely. You’ll still get all the amazing flavor from the paprika, thyme, and onion powder, but without the kick. It’ll be much more mild, tasting more like a delicious savory herb rub!
Share Your Experience with The Only Chicken Wings Recipes Recipe You’ll Need (2025)
Now that you have the secrets to achieving that perfect baked, garlic-buttered, Creole-kissed wing, I absolutely want to hear about it! Cooking is a conversation, and I love seeing how you bring these recipes into your own kitchens. Don’t be shy—tell me everything!
First off, please hop down into the comments and give this recipe a rating. Did it finally beat out the questionable takeout wings in your book? Also, I’m always interested in hearing about your little tweaks! Maybe you added smoked paprika or maybe you used fresh rosemary instead of thyme—let me know what flavor adjustment you tried!
If you snapped a picture of that glorious, crinkled, crispy pile of wings fresh out of the oven, tag me on social media! Seriously, seeing my recipes succeed in your homes is what feeds my soul. You can find me under the same name, and I always check out the amazing spreads you put together. It truly means the world when you share your success.
If you’re looking for more tried-and-true favorites that come straight from my heart and kitchen, make sure you explore the rest of my recipe archives. Happy cooking, and I can’t wait to see your wing masterpieces!
The Only Chicken Wings Recipes Recipe You’ll Need (2025)
Ingredients
Equipment
Method
- Preheat the oven to 200°C/390°F (180°C fan-forced). Line a large tray with foil then baking paper.
- Mix the butter and crushed garlic in a small bowl. Mix the Creole seasoning ingredients in a separate small bowl.
- Put the wings in a large bowl. Sprinkle over half the seasoning, toss until coated. Sprinkle with the remaining seasoning and toss again until all wings are evenly coated.
- Pour the garlic butter over the seasoned wings and toss to coat.
- Spread the wings out on the prepared tray, skin-side up. Arrange them in a single layer with space between them.
- Bake for 45 to 50 minutes. Baste the wings with the tray juices at the 30 minute and 40 minute mark, until the wings are golden.
- Remove the tray from the oven. Baste generously again, transfer the wings onto a serving plate, and pour all the tray juices over them.
- Sprinkle with your choice of fresh greenery and serve.
Notes
Tried this recipe?
Let us know how it was!
Gluten-Free Culinary Storyteller & Recipe Heritage Specialist
Getting diagnosed with non-celiac gluten sensitivity in my late twenties felt like losing my Italian identity. Growing up in nonna’s Brooklyn kitchen, learning traditional techniques that suddenly became off-limits—I decided to fight for those family food traditions instead of giving up.
With my food journalism background and European baking training, I became obsessed with recreating authentic flavors in gluten-free formats. I’ve adapted 400+ traditional recipes from various cultures, with my gnocchi recipe winning “Recipe of the Year” from the National Gluten-Free Living Awards in 2022.
I collaborate with the Italian-American Cultural Center to document traditional family recipes and volunteer with the Westchester Celiac Support Group, teaching monthly pasta-making classes.
Food is the heart of family storytelling. No one should sacrifice their cultural heritage due to dietary restrictions.