We all fall into the sandwich rut sometimes, right? It’s easy to just slap some turkey between two slices and call it a day. But truly satisfying food, the kind that feels special even on a Tuesday night, comes from leveling up the technique. You don’t just put things together; you build an experience! When I finally learned How to Make Sandwich Ideas Recipes Like a Pro (2025), everything changed for me.
I still remember the first time I tried to make a gluten-free sandwich that truly captured the essence of my nonna’s classic Italian meals. Armed with a handful of gluten-free flours, I set out to recreate her beloved porchetta sandwich. After a few trials and errors, my kitchen transformed into a bustling Italian deli, filled with fragrant herbs and roasted meats. That moment marked a turning point; I realized that I could honor my heritage and adapt recipes to fit my needs. Each sandwich I create now is not just a meal but a celebration of family history and resilience, proving that anyone can make remarkable sandwiches that tell their own story.
Mastering the Art: Why How to Make Sandwich Ideas Recipes Like a Pro (2025) Changes Everything
Honestly, there’s a huge difference between just slapping ingredients together and actually *constructing* a superior sandwich. That’s what learning How to Make Sandwich Ideas Recipes Like a Pro (2025) is all about—it moves us beyond basic assembly into technique and balance. We’re talking about that 2025 trend where comfort food means making the familiar taste absolutely incredible.
It’s about control! When you master these techniques, you control the texture, flavor layering, and moisture levels. Suddenly, a simple baked slider isn’t just filling; it’s an event. If you want to see some amazing baked creations, check out this inspiration on delicious baked sandwiches.
This approach is about building fantastic layers so every bite hits just right.
Essential Components for How to Make Sandwich Ideas Recipes Like a Pro (2025)
Wow, look at us getting serious about ingredients! When you’re learning How to Make Sandwich Ideas Recipes Like a Pro (2025), you realize the magic isn’t just in the oven; it’s in the quality of what goes in first. This baked slider recipe is great because it’s designed for a crowd—we’re aiming for a full dozen perfect little bites here. Get your components ready, and trust me, you’ll feel like you’re running a mini-deli right out of your kitchen!
The Foundation: Buns and Layering for Perfect How to Make Sandwich Ideas Recipes Like a Pro (2025)
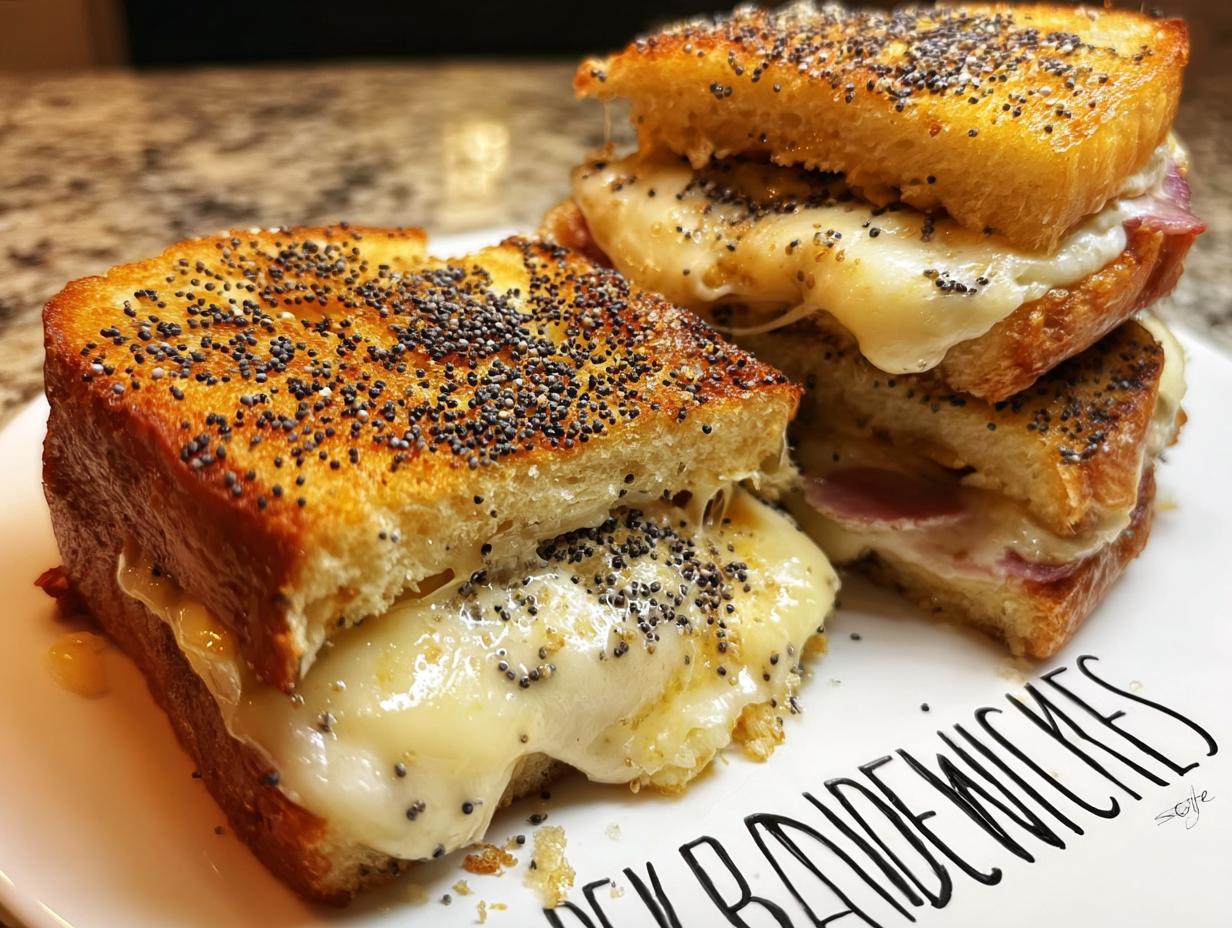
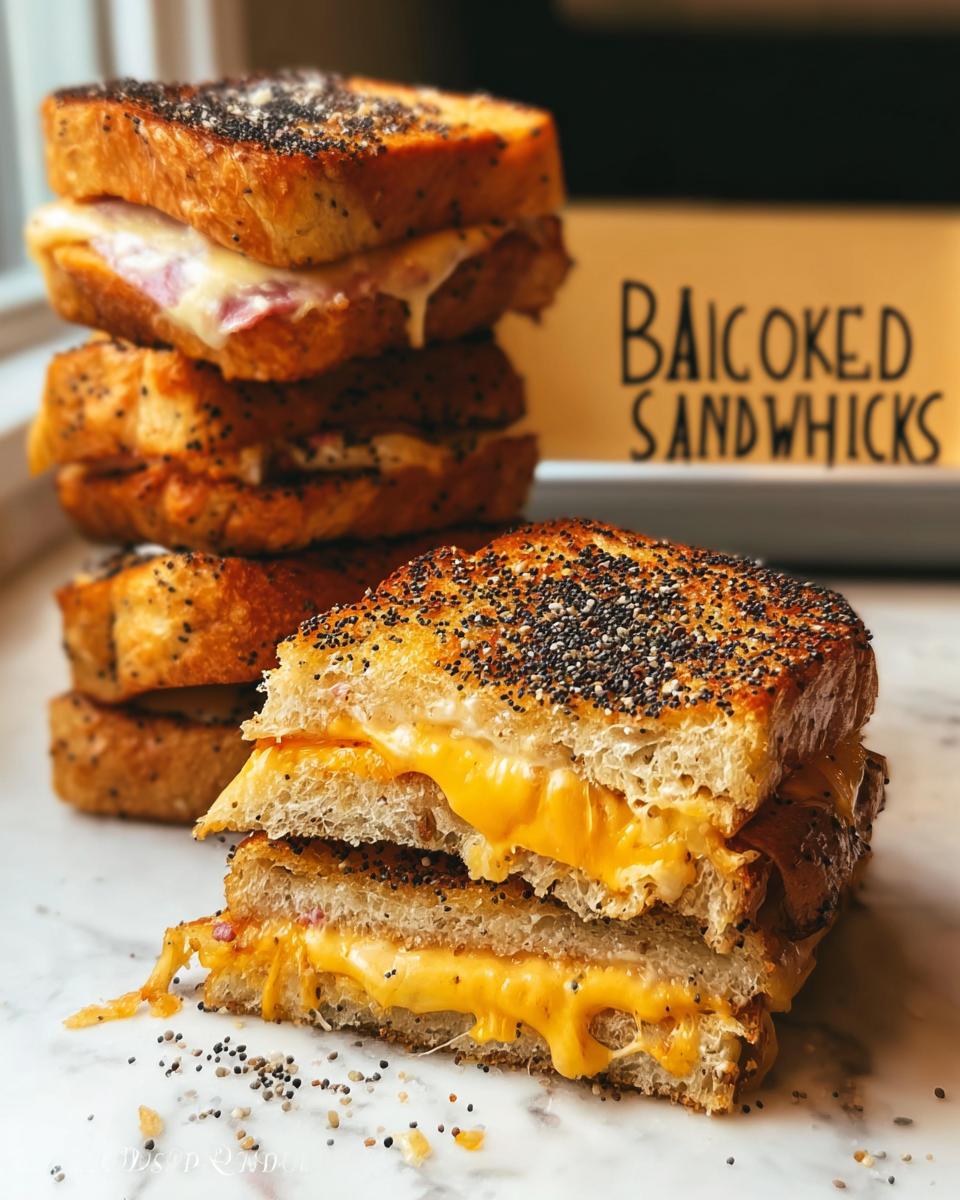
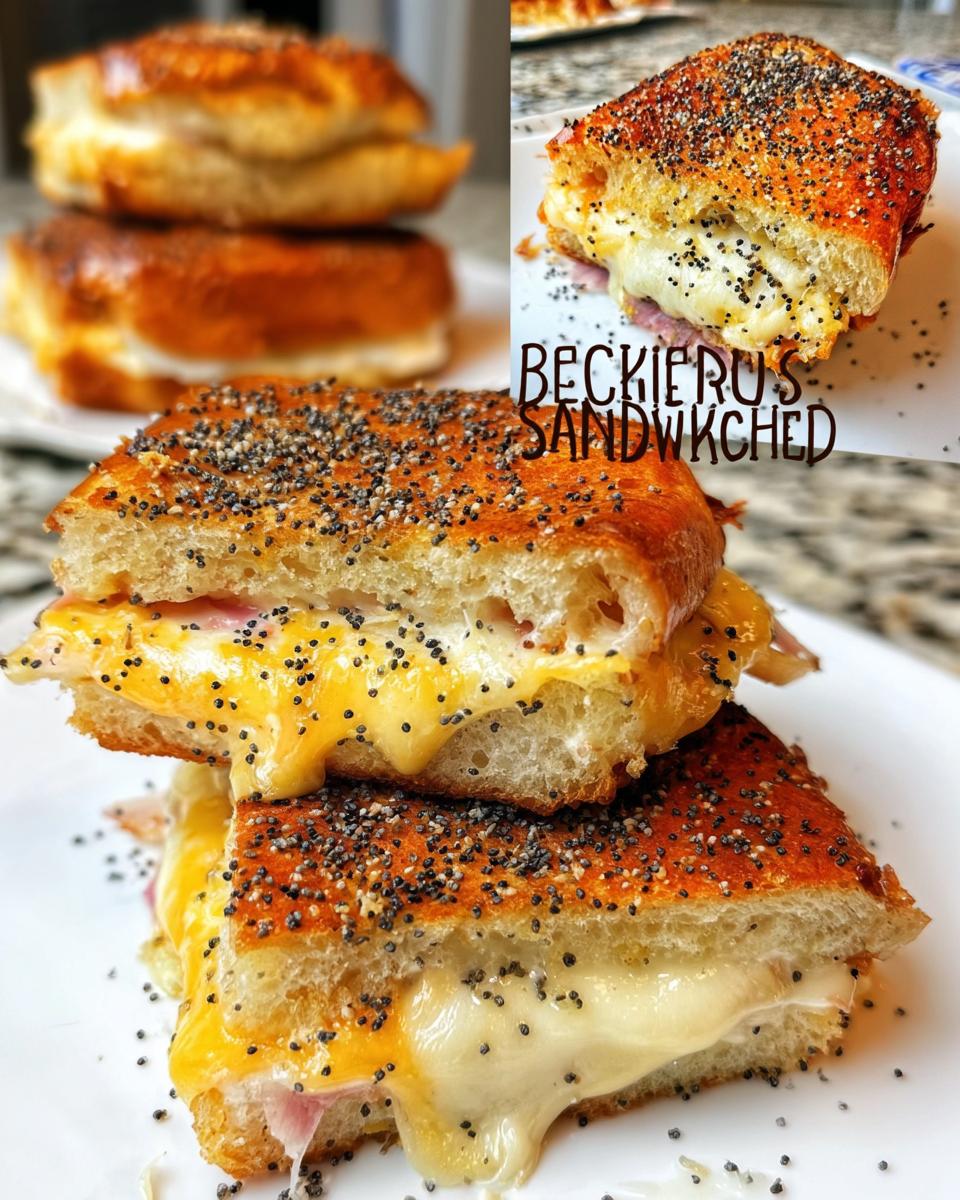
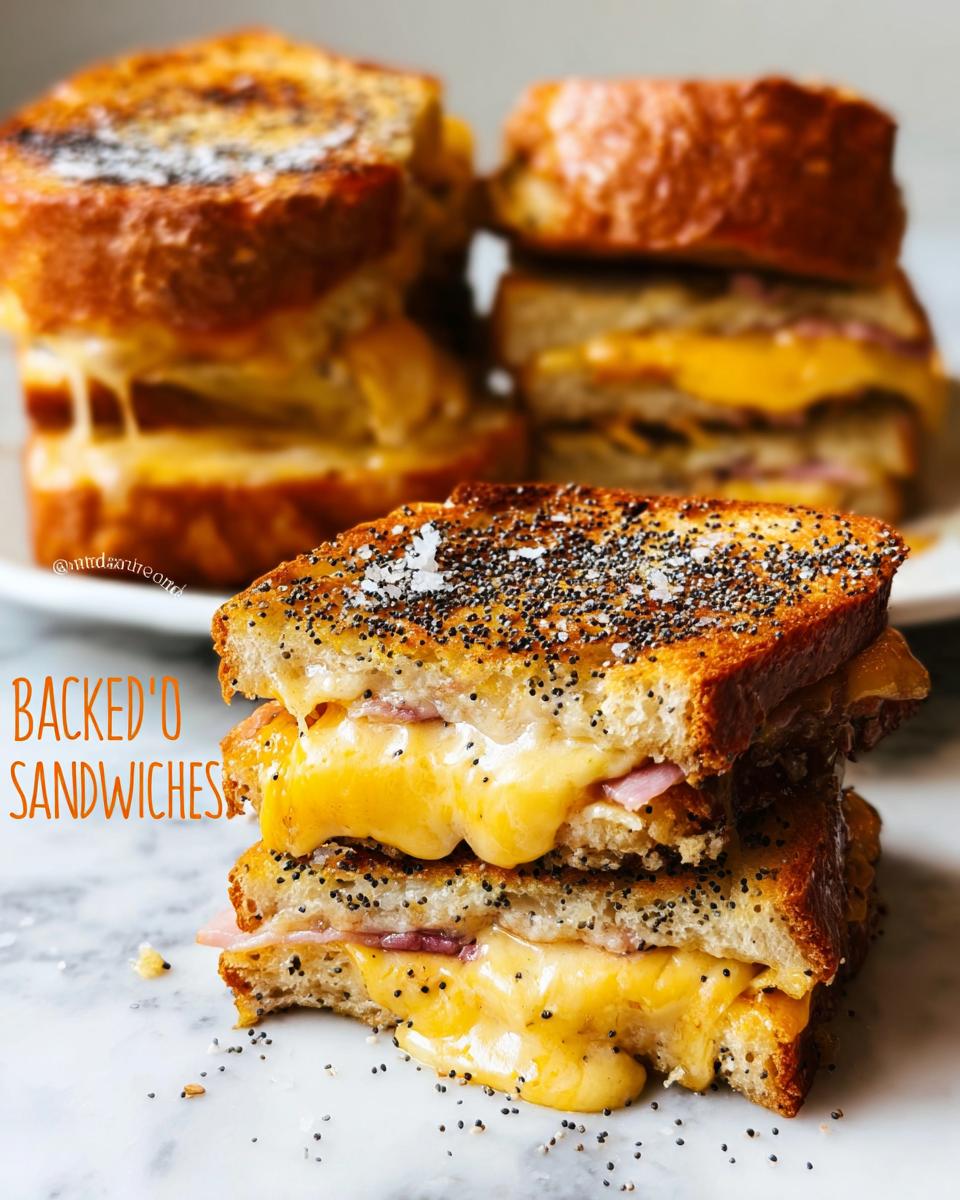
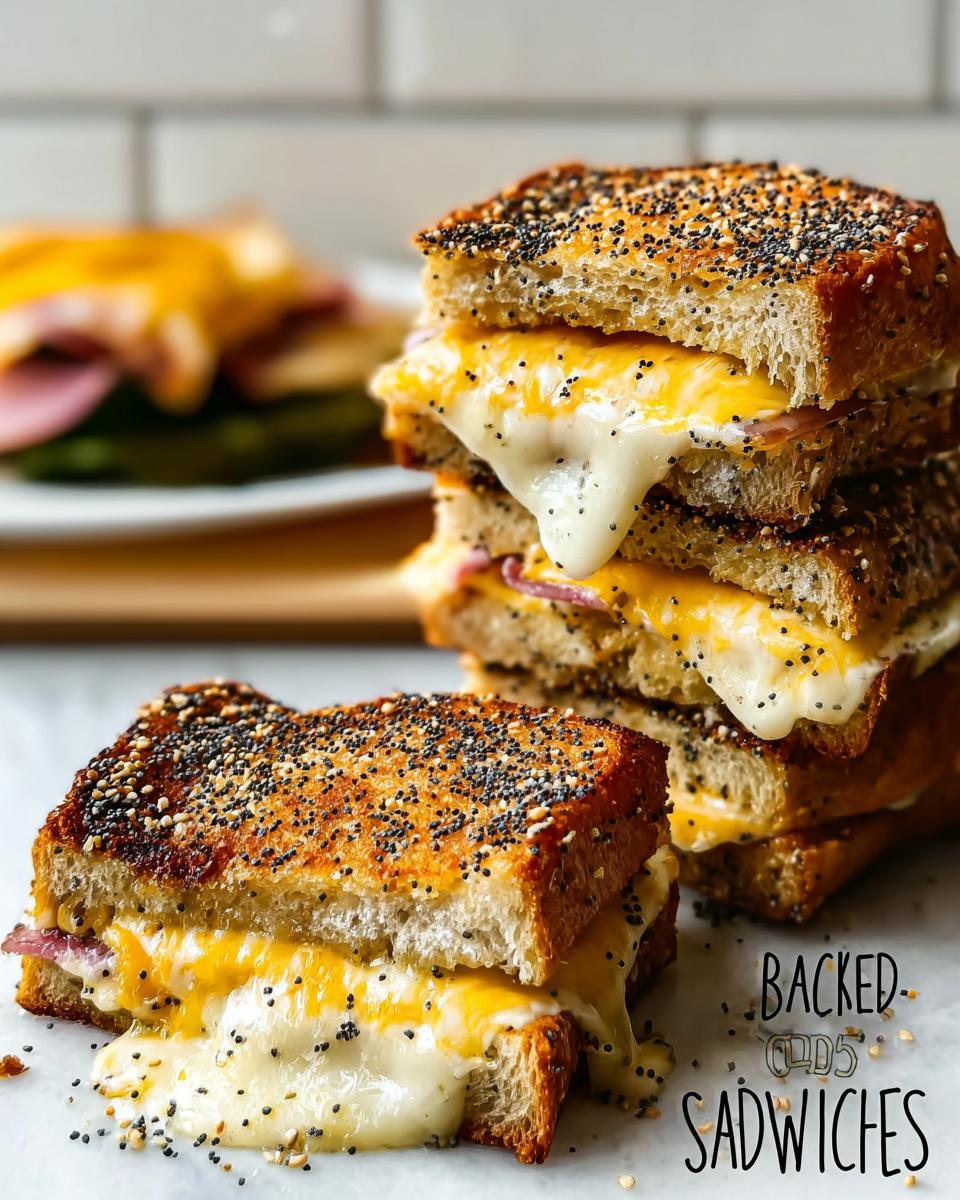
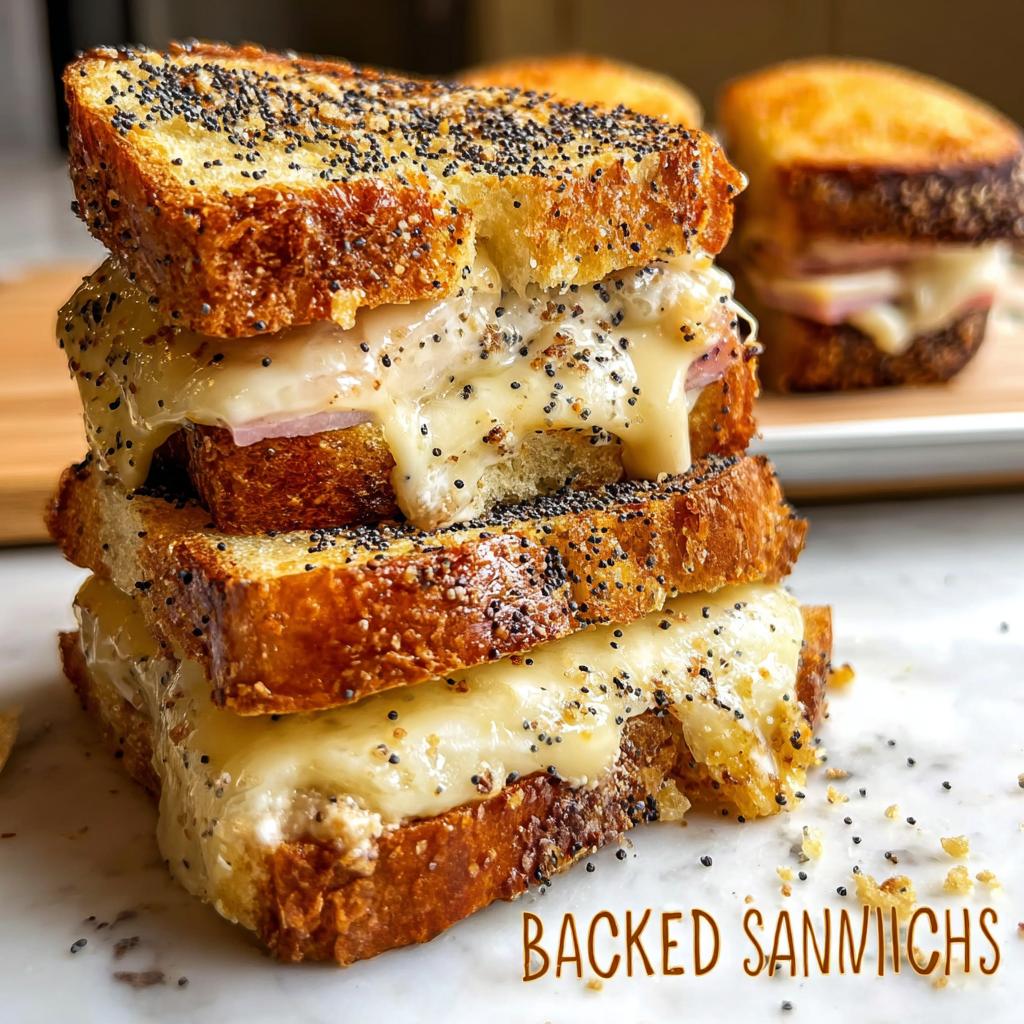
First up, you need that dozen buns or rolls. They have to be sturdy enough to handle the soak, but soft enough to squish nicely! For the filling, we’re talking about layering 0.5 to 0.75 pounds of thinly sliced meat—ham or turkey works great, but use what you love. Next, lay 12 slices of cheese right on top. The key here is even distribution; you want cheese contact near every edge so you get that glorious melt.
Crafting the Signature Sauce and Toppings
The sauce is what sends these over the top from basic lunch to pro level. You really need 1/2 cup of melted butter whisked with 2 tablespoons of honey or dark brown sugar—that sweetness is crucial! Stir in 1 tablespoon each of mustard and Worcestershire sauce. Don’t forget the crowning jewel: 1 tablespoon of poppy seeds sprinkled all over the top before baking. That little crunch is everything!
Step-by-Step Baking Instructions for How to Make Sandwich Ideas Recipes Like a Pro (2025)
Okay, now that we have our amazing components layered and our sauce ready, let’s get into the assembly part of mastering How to Make Sandwich Ideas Recipes Like a Pro (2025). This process is super straightforward, but the order really matters for that eventual gooey, slightly caramelized crust.
When you’re ready to bake, you can do it right away, but here’s a pro secret: letting them sit is fantastic! Don’t worry if you need to refrigerate these for several hours or even overnight before baking. That soak time lets the sauce really get into the bread, which is exactly what we want for flavor.
Assembling and Soaking the Sandwiches
First things first, you make sure all your meat and cheese slices are nestled nicely on those dozen rolls—remember, even coverage from edge to edge! Then, get them into your baking pan. Next, you take that beautiful melted butter sauce we whipped up and pour it slowly and evenly right over the entire top surface of all the assembled sandwiches. You can check out some other easy baking inspiration over at my favorite spot for great recipes if you need an idea while you wait.
Make sure that sauce coats everything! That buttery soak is what leads to that wonderful baked texture instead of just dry, steamed bread underneath the melted cheese.
Baking Time and Temperature Secrets
Preheat your oven to 350ºF. We’re aiming for that perfect melt and a nice golden top, so the magic window is usually 20 to 25 minutes. If you notice the tops are getting a little too dark—maybe you’re loving the color but worried about burning—just loosely drape a sheet of foil over the pan for the last 10 minutes. That shields the top while letting the cheese inside get totally smooth and lava-like.
Always check the center; you want that cheese gooey, but you don’t want the bread dissolving! That 20-25 minute mark is usually spot on for a dozen rolls perfectly baked.
Pro Tips for Perfect Crispy Results
We want that crunchy top, right? That’s the whole point of this baked technique, but sometimes the bottom gets a little sad and soggy from all that delicious sauce soaking in. Don’t panic! True pro sandwich makers know how to manage moisture.
If you’re cooking smaller batches, definitely think about your air fryer. It’s phenomenal for getting that truly crispy exterior on bread. Just don’t overload the basket! Or, for the oven method, try putting a cooling rack inside your baking pan before you assemble those beauties. This elevates them just slightly, letting air circulate underneath as they bake, ensuring you get that satisfying crunch on the bottom layer too. That’s a hallmark of making sandwiches like a pro!
Customizing Your How to Make Sandwich Ideas Recipes Like a Pro (2025)
I absolutely love that learning How to Make Sandwich Ideas Recipes Like a Pro (2025) means you are never, ever stuck with boring options. The basic ham and Swiss is a classic for a reason, but we are home chefs now; we need adventure, right? The beauty of this baked method is how resilient it is to substitutions. You can completely transform the flavor profile just by swapping out the filling.
Think about using leftover shredded chicken instead of those deli slices. If you’ve got some great seasoned chicken from last night’s dinner, shred it up and mix it gently with a tiny bit of mayo or ranch before layering it in. It creates such a hearty texture! You can find some great ways to prep that chicken over here if you need ideas for your next meal prep Cheddar Ranch Baked Chicken Recipe.
Meat and Cheese Combinations for Next-Level Flavor
This is where you get bold! If you’re feeling savory, skip turkey and try roast beef layered with sharp Provolone—it gets so creamy when it melts. Or, for something smokier, layer smoked ham with Gouda cheese; the nutty flavor just sings with that sweet sauce soaking in. If you’re using a spicier mustard in your sauce, try pairing it with pepper jack cheese. Don’t be afraid to mix your textures, too. One half of the batch can have deli meat, and the other half can be that amazing leftover shredded chicken. It keeps everyone interested!
Storage and Reheating: Keeping How to Make Sandwich Ideas Recipes Like a Pro (2025) Fresh
One of the best parts about mastering How to Make Sandwich Ideas Recipes Like a Pro (2025) is that you get leftovers! And yes, I know what you’re thinking: soggy baked sandwiches reheated are a tragedy. But these are surprisingly sturdy!
If you have any left, just cover the baking pan tightly with plastic wrap and pop the whole thing right into the fridge. They keep really well for about three to four days.
When it comes to reheating, I have two preferred methods. If you want to keep that slight crispness, definitely stick them back in a 325ºF oven for about 10 minutes. But if you’re in a rush, the microwave works just fine—just pop one or two slices on a paper towel. You might lose a little texture, but the flavor is still totally there. Sometimes, honestly, I just eat them cold the next day, and they are still fantastic!
Frequently Asked Questions About Pro Sandwich Making
Whenever I share this recipe, people always have a few questions about switching things up or making sure they get that perfect result. It makes total sense; cooking is all about adaptation! I love hearing what variations everyone tries out. If you are looking for other ways to incorporate quick, savory meals using ingredients like chicken, you should check out this other great resource for healthy one-pot chicken and brown rice.
Can I use gluten-free bread for this recipe?
Oh, absolutely, you can! That’s important if you’re cooking for friends or family with restrictions, just like I had to when I started experimenting with my nonna’s meals. Gluten-free breads are amazing these days, but you have to keep one thing in mind: GF bread tends to soak up moisture much faster than traditional rolls. So, if you go this route, you might want to skip the overnight soak and bake them immediately after pouring the sauce on. They might just taste a little less saturated, which can be perfect for you!
How do I ensure the bottom doesn’t get soggy?
Soggy bottoms are the arch-nemesis of a great baked sandwich, aren’t they? This happens because the bottom bread just sits in the sauce runoff. If that scares you, I have a trick that works wonders. Before assembling anything, line your baking pan with a sheet of parchment paper—but here’s the pro move: place a simple wire cooling rack *on top* of the parchment paper, and then assemble your sandwiches on the rack. This allows air circulation underneath, draining any excess moisture away from the bread while the top gets its beautiful soak. It’s a game-changer for keeping everything delightfully sturdy!
Can this recipe be adapted for the air fryer?
Yes, you can totally use the air fryer to make these sliders, and you’ll get incredible, shatteringly crispy tops! The main thing is that air fryers handle smaller batches much better than a dozen all at once. You’ll need to split these into two or maybe three groups. Set your air fryer to about 325ºF, or maybe just slightly lower than your main oven setting, and cook them for about 10 to 12 minutes total, checking them halfway through. If they are cooked on a rack inside a small, oven-safe dish that fits your basket, that helps tremendously too!
Beyond the Bake: Other Pro Sandwich Techniques to Try
So, you’ve mastered the magical baked slider! That’s huge! But remember, learning How to Make Sandwich Ideas Recipes Like a Pro (2025) isn’t just about one recipe; it’s about developing an instinct for building flavor towers.
Once you understand how baking or butter-soaking affects texture, you can apply that intuition to totally different sandwiches. It’s about seeing every component—the bread, the spreads, the filling—as an opportunity to build moisture and contrast.
The next time you’re grabbing bread, think about toasting both sides lightly before applying any wet spreads. Even if it’s a cold sandwich, a quick trip under the broiler prevents sogginess! It’s a small step, but it adds serious structure, similar to how we managed the moisture in those baked rolls.
For some great, creative ways to look at transforming simple bread meals, you need to explore this collection of ideas on Avocado Toast five ways—it shows how a simple base can support complex flavor layers.
Also, never underestimate the power of a proper spread. Don’t just sloppily slather mayonnaise on; use a small offset spatula to apply a thin, even coating edge-to-edge. This acts as a moisture barrier between the bread and wetter fillings like tomato slices or slaw. Think about it: professional delis never skip this tiny step. They know those little details are what separate an okay lunch from a fantastic one!
Your Next Steps in How to Make Sandwich Ideas Recipes Like a Pro (2025)
Wow, you’ve done it! You’ve moved past just making lunch and actually learned How to Make Sandwich Ideas Recipes Like a Pro (2025). That feeling of knowing you can transform simple rolls into something this amazing is just the best, isn’t it?
Now that you’ve got the technique down for these baked beauties, I really want to hear about it! Did you try smoked Gouda instead of Swiss? Tell me in the comments below what meat and cheese combo stole the show for you this time around.
Don’t forget to rate this recipe if you loved how easy and delicious it turned out. Go on—your next amazing sandwich creation awaits!
How to Make Sandwich Ideas Recipes Like a Pro (2025)
Ingredients
Equipment
Method
- Assemble the sandwiches by layering your choice of meat and cheese on the buns or rolls.
- Place the assembled sandwiches in a baking pan and set them aside.
- In a small saucepan or glass measuring cup, mix all the sauce ingredients. Boil or microwave the mixture until the butter is melted.
- Pour the prepared sauce evenly over the sandwiches.
- Sprinkle the poppy seeds over the tops of the sandwiches.
- You can bake the sandwiches immediately, or you can refrigerate them for several hours or overnight before baking.
- Bake at 350ºF for 20 to 25 minutes, or until the tops are brown and the cheese is melted. If you prefer less browning, cover the sandwiches loosely with foil during baking.
Nutrition
Notes
Tried this recipe?
Let us know how it was!
Gluten-Free Culinary Storyteller & Recipe Heritage Specialist
Getting diagnosed with non-celiac gluten sensitivity in my late twenties felt like losing my Italian identity. Growing up in nonna’s Brooklyn kitchen, learning traditional techniques that suddenly became off-limits—I decided to fight for those family food traditions instead of giving up.
With my food journalism background and European baking training, I became obsessed with recreating authentic flavors in gluten-free formats. I’ve adapted 400+ traditional recipes from various cultures, with my gnocchi recipe winning “Recipe of the Year” from the National Gluten-Free Living Awards in 2022.
I collaborate with the Italian-American Cultural Center to document traditional family recipes and volunteer with the Westchester Celiac Support Group, teaching monthly pasta-making classes.
Food is the heart of family storytelling. No one should sacrifice their cultural heritage due to dietary restrictions.