Oh gosh, the holidays, right? That moment when you look at your counter covered in ingredients and you just want to hide in the pantry? I totally get that feeling. It used to send me into a spiral until I finally cracked the code on making something truly spectacular without needing a mile-long shopping list.
This is where my comfort food comes in: the 7-Ingredient Stuffing Recipes (No Fuss). Trust me, this recipe is a lifesaver. I developed these super simple methods right after my son got diagnosed a while back, and realizing we couldn’t have stuffing that year was just heartbreaking. It felt like a huge piece of our celebration was missing!
So, I went to work, and I hammered out a version that tastes like tradition but uses barely anything. It’s flavorful, it bakes up perfectly moist, and honestly, it makes holiday prep so much less stressful. This 7-ingredient approach is what I rely on now for every single gathering.
Why This is Your Go-To 7-Ingredient Stuffing Recipes (No Fuss)
If you’re anything like me, you want that warm, savory stuffing on the table but hate the chaos of juggling fifteen different bags of spices and veggies. That’s exactly why this recipe grabbed the top spot at our house.
- It’s genuinely quick! The active prep is super short, leaving you time for everything else.
- We trim the ingredient list right down to seven main players—no pantry scouring needed.
- Despite being simple, the flavor is deep and satisfying. You won’t feel like you sacrificed anything!
Speed and Simplicity: The No Fuss Approach
We are talking about seven core things you need to grab, plus salt and pepper. That’s it! Even if you’ve never made stuffing before, this recipe holds your hand through the whole process. The steps are straightforward, and you can even get the hard part done the day before. It’s designed for busy people who still want amazing food.
Traditional Flavor with Minimal Ingredients
You might think less ingredients means less taste, right? Wrong! We use the power combination of shallots and a few intensely flavored fresh herbs—sage, rosemary, thyme—that really punch up the flavor profile. These aromatics do the heavy lifting so you don’t have to buy ten different dried spices. It tastes like Thanksgiving the second it hits the oven!
Essential Equipment for Your 7-Ingredient Stuffing Recipes (No Fuss)
You don’t need every fancy gadget under the sun for this stuffing, which I love! Keeping the equipment list short means easier cleanup, which is huge on busy days. We are mostly working with your basic baking pans and a mixing bowl.
You’ll need three core things:
- A 9×13 inch baking dish—this is where the magic sets in the oven.
- A large skillet for softening those wonderful aromatics and herbs.
- A big bowl for tossing everything together.
Oh, and don’t forget a baking sheet because we toast the bread first! See? Super simple.
Ingredients for Flavorful 7-Ingredient Stuffing Recipes (No Fuss)
Okay, let’s talk about what goes into this wonderful, simple stuffing. Remember, we rely on quality ingredients since there aren’t that many of them! For E-E-A-T, I really stress the details here—how you cut and prepare things matters a ton for the final texture.
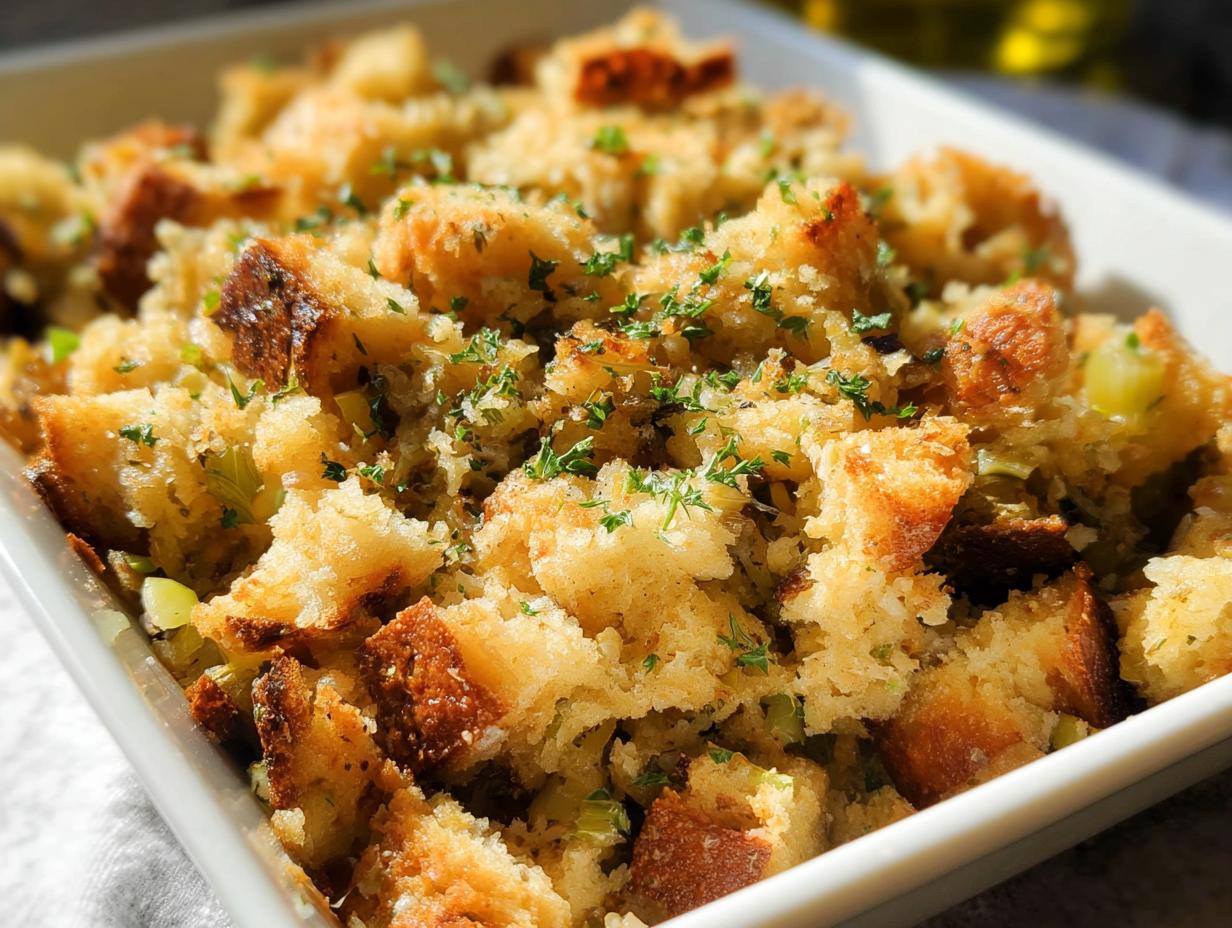
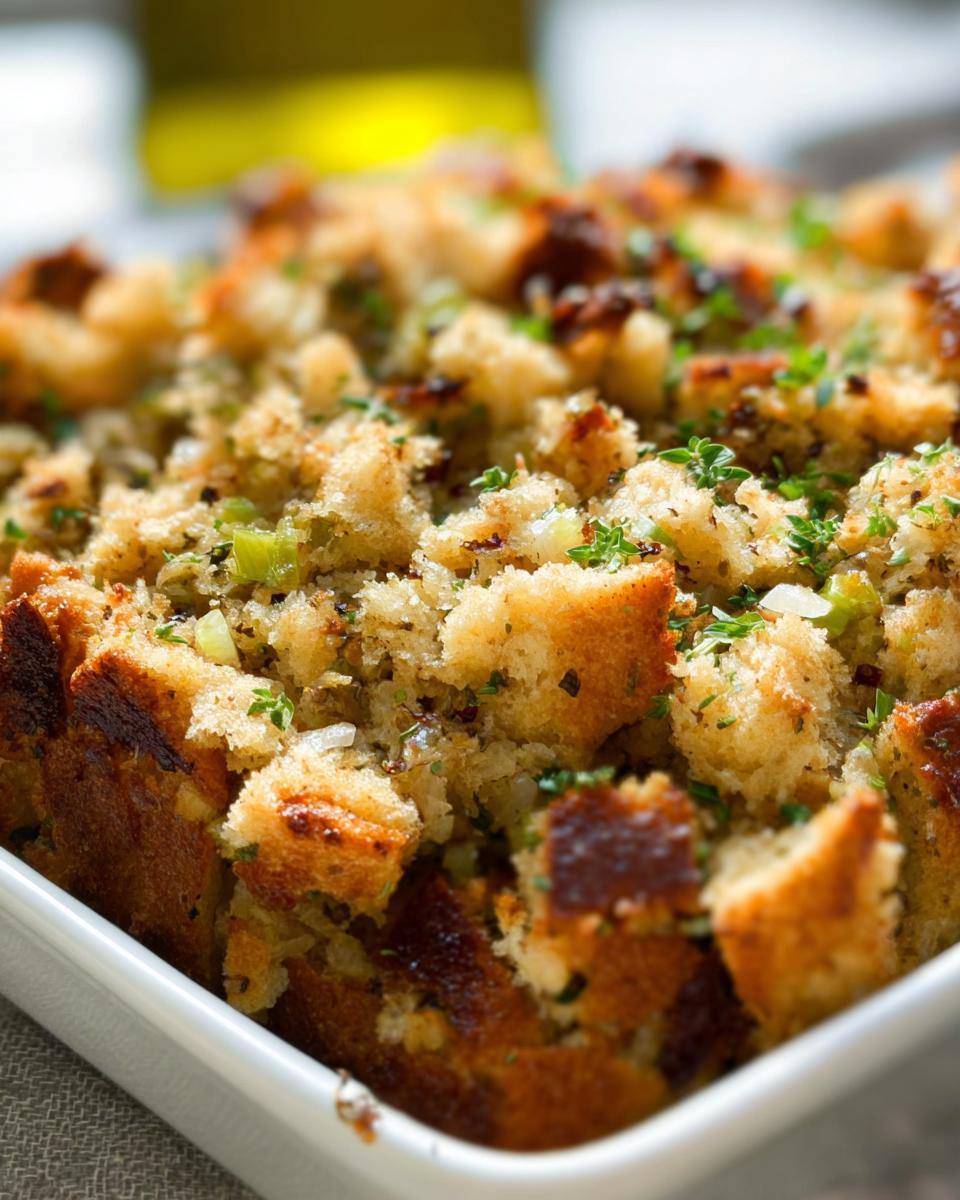
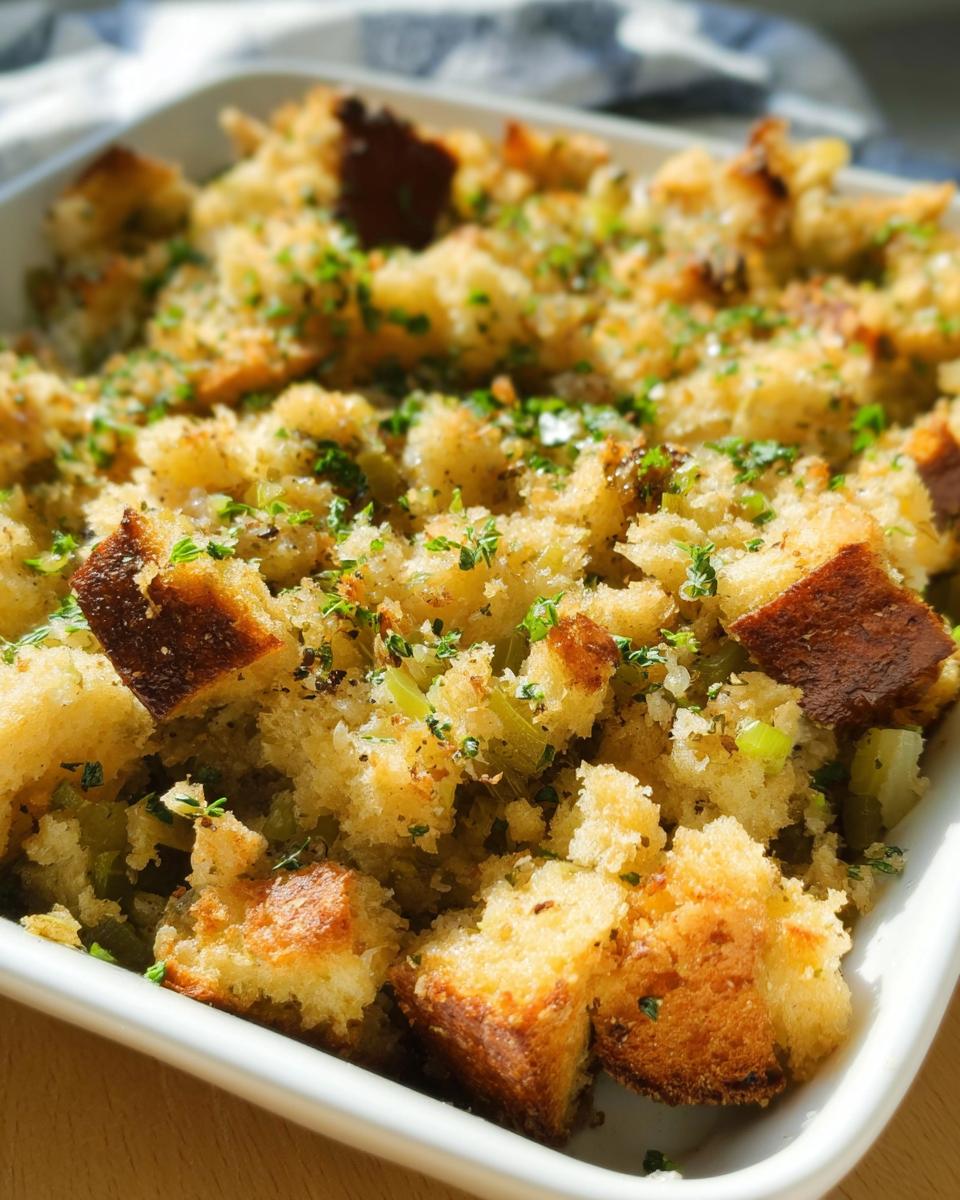
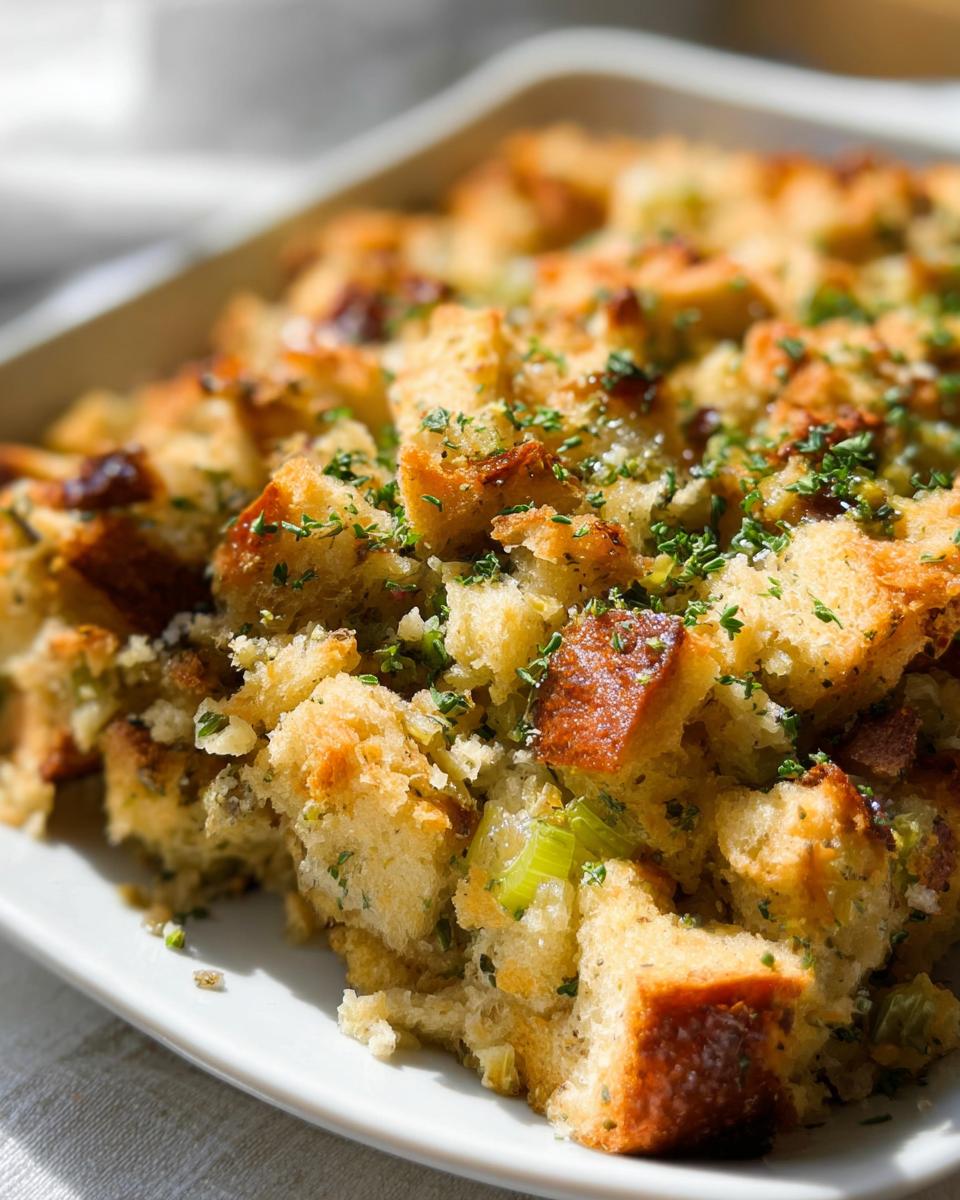
First thing’s first: you need about 12 cups of cubed country bread. This is the backbone of your stuffing, so treat it right. If you want that fantastic texture that doesn’t turn to mush, this next part is non-negotiable. Making this ahead? You can absolutely do that, which is why I love this recipe; you can get the bread ready the day before! Planning ahead, like my friend over at No Fuss Stuffing suggests, saves so much kitchen stress.
The Bread Base and Drying Step
You absolutely must let this bread sit out overnight, or at least for 12 hours. I usually slice up a whole loaf of day-old country bread into small, half-inch cubes and just leave it right on the counter spread out on a baking sheet. Why? Because wet bread turns into paste when you bake it. Dry bread soaks up the broth just enough to become tender inside while keeping that slight chew on the outside.
If you’re in a total panic and don’t have 12 hours, you can cheat a little by toasting them in a 450-degree oven until they just start getting edges of gold. But seriously, overnight drying is where the real texture secret lives!
Aromatics and Fresh Herbs
This is where we pack flavor in instantly. Forget dried stuff here; we want real, vibrant taste. You’ll need one large shallot and two stalks of celery, both minced up nice and small. Everything needs to cook down together so it disappears into the stuffing!
Then come the superstars: finely minced garlic, fresh parsley, fresh sage, fresh thyme leaves, fresh savory, and fresh rosemary. Using fresh herbs here makes such a huge difference. You only need about a tablespoon of each (except parsley, which gets a little more love), but the smell when these hit the hot butter is heavenly. If you’re wondering where to source these, sometimes the smaller pots of herbs at the market are perfect!
Binding Liquid and Seasoning
For the liquid, grab 2 1/4 cups of low-sodium chicken or vegetable broth. Low sodium is my go-to because we can always add more salt later, but you can never take it out! Season generously with 1 teaspoon of kosher salt and freshly ground black pepper.
We mix the veggies and herbs in butter first, and we season them there. Then, once everything is combined with the broth, you *must* taste the mixture before it goes into the oven. This is your last chance to adjust the salt and pepper so your bread base absorbs everything perfectly. Don’t be shy with that final seasoning check!
Step-by-Step Guide to Perfect 7-Ingredient Stuffing Recipes (No Fuss)
Watching this come together is honestly the best part of making stuffing. It seems so simple, but these steps lock in that amazing texture you dream about—moist inside, just a little crispy on top. Don’t rush the drying; that’s our biggest secret weapon for this recipe!
Preparing the Bread Cubes
First up, cut your loaf of country bread into those nice little half-inch cubes. Don’t worry about perfect shapes; rustic pieces are perfect! Spread them out on a baking sheet and let them sit on the counter away from everything for a good 12 hours, ideally overnight until they feel completely dry to the touch. No moisture allowed!
When you’re ready to bake, crank your oven up high to 450 degrees. Toss those dry cubes with a little oil and bake them for just a few minutes until you see lovely golden edges. Pull them out and set them aside.
Sautéing the Aromatics and Herbs
Now we build the flavor base! Drop your butter into a large skillet over medium heat. Once it’s melted and smelling nutty, toss in the minced shallot and celery. Let those cook down until they are fragrant and soft—this usually takes about 6 minutes. We aren’t trying to brown them, just soften them up so they melt into the stuffing seamlessly.
Next, throw in your minced garlic, parsley, sage, thyme, savory, and rosemary. Cook that mixture for just one more minute until the herbs really start to bloom. Seriously, the smell! Hit it with your salt and pepper here, give it a good stir, and take a taste of the aromatic butter mixture.
Assembling and Baking the 7-Ingredient Stuffing Recipes (No Fuss)
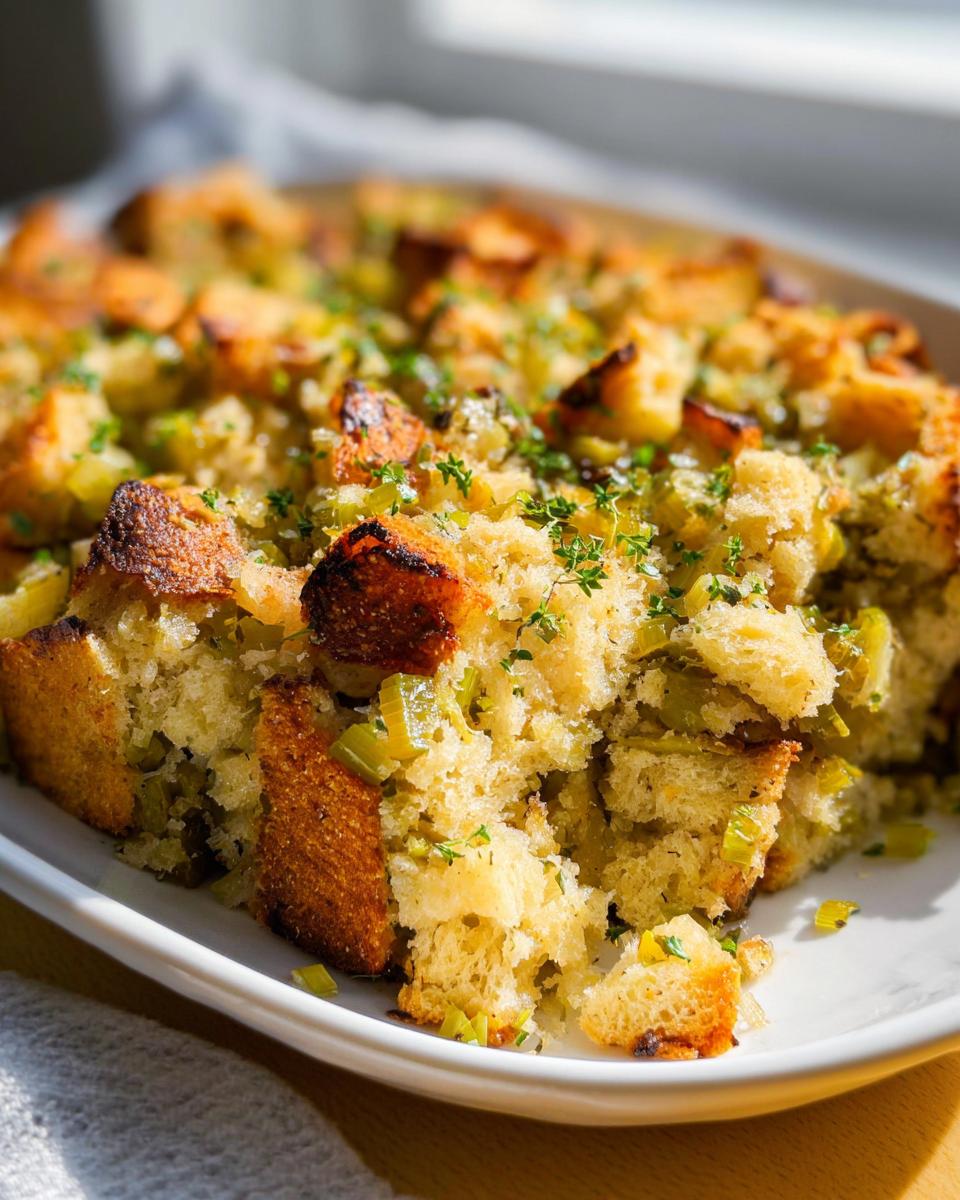
Time to mix! Put all those toasted bread cubes into your biggest bowl. Pour that fragrant vegetable and herb mix right over the top and toss it gently until it’s all coated. Then, slowly pour in your 2 1/4 cups of broth. You have to toss until every single piece of bread has soaked up that liquid—ensure there are no dry clumps hiding in the bottom!
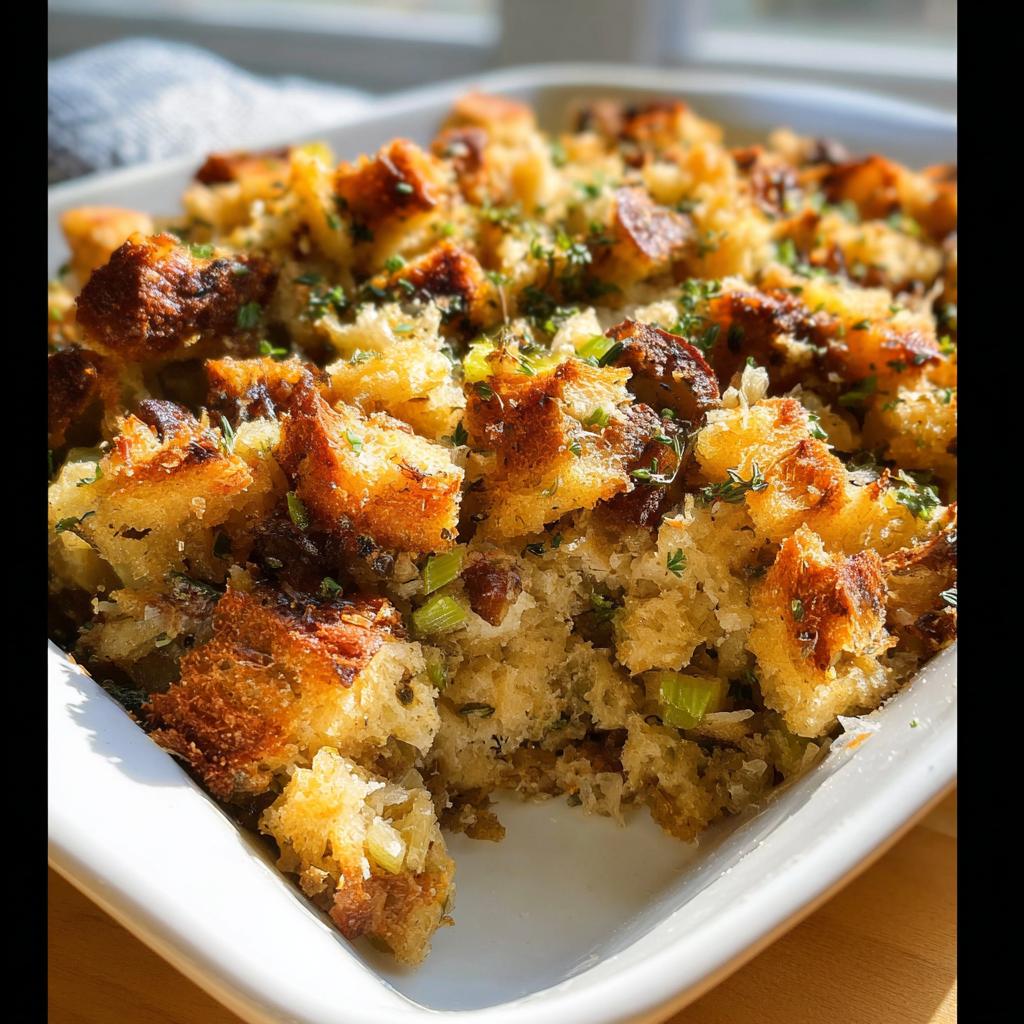
Transfer everything to your buttered 9×13 dish. Cover it super tightly with foil and bake it at 350 degrees for about 45 minutes. This steamy time ensures the center gets perfectly tender. After that, yank the foil off and bake for another 15 to 20 minutes uncovered. That’s how we get that lovely, crisp, golden crown on top. If you want a recommendation on what to serve with this, my herb-roasted potatoes are fantastic alongside it!
Tips for Success with Your 7-Ingredient Stuffing Recipes (No Fuss)
Even though this recipe is super simple, there are a few little tricks I learned over the years that stop stuffing from going sideways. A soggy bottom is my personal nightmare, and seasoning is everything when you’re working with fewer ingredients. If you nail these two things, you’re golden!
Achieving the Perfect Bread Texture
I can’t stress this enough: the bread has to be dry. If you try to use fresh bread right out of the bag, you’ll end up with bread pudding, not stuffing. It needs to be rock hard on the outside when you start mixing. Don’t worry about buying special bread for this, either. Stale bread is your best friend here! That day-old baguette or basic loaf that’s sitting on your counter feeling sad? Perfect. That’s what we need.
If your bread cubes feel even a tiny bit soft when you mix the herbs in, throw them back on that baking sheet and toast them for 5 more minutes at 350 degrees. It buys you a little insurance against mushiness. It’s about creating a little framework for that broth to soak into. When I’m making a cheesy side dish like my creamy potato leek gratin, I always make sure the base ingredient is perfectly prepped first, and the same rule applies here!
Broth Absorption Control
This is the number one reason stuffing fails. People dump the broth in all at once, right? Big mistake! You need to be gentle here. Pour in about three-quarters of the required broth, and then toss everything together really thoroughly. Use your hands if you have to, making sure every single piece of bread gets wet.
Then, let it sit for five minutes. The bread will start slurping up the liquid! After it sits, see how much is left in the bottom of the bowl. If it looks like it could use more moisture—especially if you are using very dry bread—add the rest of the broth a little at a time. Remember, less liquid is always better at first because you can always add more, but you can’t take it out! You want every cube coated, but you don’t want a puddle at the bottom of your dish.
Serving Suggestions for This Simple Stuffing
Honestly, once this 7-ingredient stuffing is out of the oven and smelling up the house, you’ll be craving everything else on the table! Because this recipe is so straightforward and herb-forward, it pairs beautifully with almost any main dish you can imagine.
For Thanksgiving, of course, it’s perfect next to turkey, but don’t save this just for holidays! It’s my go-to savory side for a simple weeknight roast chicken. If you’re making my classic lemon herb roasted chicken, this stuffing acts as the perfect savory anchor on the plate. It’s just so satisfying without being overly rich or complicated.
Storage and Reheating 7-Ingredient Stuffing Recipes (No Fuss)
One of the best things about keeping the ingredient list short is that leftovers behave so much better! I always make a double batch because everyone goes back for seconds, and having leftovers for lunch the next day is amazing. But how do you keep that perfect texture when you reheat it?
Listen, storing your stuffing correctly is almost as important as drying the bread! You can actually stop the process at two different points, which is super convenient, especially when chaos reigns in the kitchen before dinner.
First, if you’re making this ahead of time, stop right after you mix the broth in and move it to the buttered dish. Cover that dish tightly—I mean TIGHTLY—with foil and pop it into the fridge. It holds beautifully for a couple of days like that
When you’re ready to bake, just add about 10 to 15 minutes to the covered baking time since it’s starting cold. You still need that initial covered bake time to get the center nice and steamy before you uncover it for the crispy top.
Now, for the actual leftovers. If it’s already baked, let it cool completely, cover it tight, and it’s good in the refrigerator for about 4 to 6 days. That’s ample time to enjoy it later, maybe mixed into hash!
When reheating leftovers, I find the oven is still the best bet to bring back that original texture. Pop the covered dish back into a 350-degree oven. Give it about 20 to 30 minutes until it’s hot all the way through. If you want that crispy top back, pull the foil off for the last 10 minutes. Don’t try to microwave big portions, or you’ll get that sad, rubbery texture. If you just need a single serving warmed up quickly, a tiny bit in the microwave is fine, but the oven always wins!
If you are looking for something fun to use up those leftovers besides just reheating them, you should check out my recipe for a Turkey and Sweet Potato Skillet Hash. It’s a perfect next-day brunch!
Frequently Asked Questions About Easy Stuffing
You’ve got a fantastic, easy stuffing recipe for Thanksgiving now, but sometimes little questions pop up when you’re actually in the kitchen, right? That’s totally normal! When you simplify things, you sometimes need a little extra clarity on substitutions. Here are the things I hear most often about this simple stuffing.
Can I use dried herbs instead of fresh herbs in this stuffing?
Oh, I totally get it—sometimes the recipe calls for fresh herbs, but you only have the dried jars staring back at you! You absolutely can substitute, but you have to be careful about the ratio. Dried herbs are much more potent than fresh ones because the moisture has been taken out. For this recipe, I recommend using about one-third of the amount of dried herbs as called for with the fresh.
So, if I ask for 1 tablespoon of fresh sage, use just 1 teaspoon of dried sage. If you add too much dried herb mix, your wonderful, simple stuffing can end up tasting harsh instead of savory. Since this recipe relies on the quality of the herbs for so much flavor, taste as you go if you use dried!
Is this recipe safe to make ahead for Thanksgiving?
YES! This is what I love most about this recipe for busy times like Thanksgiving prep. You can stop the process right after you mix in the broth and put the whole thing, still uncovered, into the fridge. I usually let it chill overnight. It keeps the bread from getting soggy before baking begins!
When you pull it out for baking day, just remember the cold temperature. You might need to add an extra 10 or 15 minutes to that initial covered baking time to make sure the center heats all the way through before you uncover it to get that nice golden top. It’s a huge stress reliever!
What kind of bread works best for this 7-ingredient stuffing?
If you take away only one lesson about making great stuffing, let it be this: use sturdy, dry bread! You don’t want that soft, squishy bread you use for sandwiches. That kind of bread just absorbs the liquid too fast and ends up dissolving into mush, which nobody wants in their holiday stuffing.
My favorite is a day-old country loaf, sourdough, or even French bread if it’s a bit stale. The key is texture; you want a loaf that holds its shape when you cube it. The sturdier the bread, the better it handles the broth and comes out of the oven with that perfect, slightly firm exterior. If you’re looking for more great ideas for holiday sides, check out all my best recipes!
Sharing Your 7-Ingredient Stuffing Recipes (No Fuss)
Wow, we made it! Now you have zero excuses for stress this year because you have the easiest, most delicious, 7-ingredient stuffing in your back pocket. I truly hope this recipe brings a little more ease and a lot more flavor to your table, whether it’s a quiet Tuesday dinner or the biggest Thanksgiving feast.
I live for hearing from you guys! Did you try the recipe? Did you use chicken broth or veggie broth? Tell me how it went!
Please leave me a rating right here on the page if you loved how quickly this came together. And if you made it, snap a picture and tag me on social media! I love seeing this simple stuffing grace your holiday tables. If you want to know more about my kitchen adventures and why I focus on simple, flavorful food, you can always pop over to my About Page!
7-Ingredient Stuffing Recipes (No Fuss)
Ingredients
Equipment
Method
- Cut the bread into 1/4 to 1/2 inch cubes. Leave the cubes out overnight to dry.
- Preheat the oven to 450 degrees F. Place the bread cubes on a baking sheet, drizzle with oil, and bake for a few minutes until golden. Set the toasted bread aside.
- Preheat the oven to 350 degrees F and butter a 9×13 inch baking dish.
- In a large skillet over medium heat, melt the butter. Add the minced shallots and celery and cook until soft and fragrant, about 6 minutes.
- Stir in the garlic, parsley, sage, thyme, savory, and rosemary. Cook until fragrant, about 1 more minute. Season with salt and pepper to taste.
- Place the dried bread cubes in a large bowl along with the cooked vegetable and herb mixture. Toss to combine.
- Gently stir in the chicken or vegetable broth. Season generously with additional salt and pepper if needed, and toss until the bread is completely coated.
- Transfer the stuffing mixture to the buttered baking dish and cover it tightly with foil. Bake until cooked through, about 45 minutes. Remove the foil and cook until the top bread is golden, about 15 to 20 minutes more.
- Serve the stuffing garnished with fresh chopped parsley.
Nutrition
Notes
Tried this recipe?
Let us know how it was!
Gluten-Free Chef & Latin Cuisine Innovation Specialist
My youngest son’s celiac diagnosis at four changed everything. Suddenly, all those traditional Brazilian and Portuguese recipes from my avó needed to be completely reimagined without losing their soul.
After graduating from Johnson & Wales and working Miami’s Latin fusion scene, my son’s diagnosis became my calling. How do you make gluten-free empanadas that taste like childhood? Over eight years, I’ve developed 320+ gluten-free recipes celebrating authentic Latin flavors using cassava flour and plantain alternatives.
My gluten-free empanada recipe won “Best Appetizer” at the 2023 Miami Gluten-Free Food Festival. I ran “Sabores Sin Gluten,” a catering business serving Miami’s Latino community—quinceañeras, family gatherings, all the celebrations that matter.
Food is culture, and everyone deserves to experience the joy of sharing traditional family meals, regardless of dietary restrictions.