Friends, let’s be honest: chicken thighs get such a bad rap sometimes, but they are undeniably the most flavorful, forgiving cut of poultry out there! They are perfect for turning an average Tuesday into something spectacular. If you’re ready to learn How to Make Chicken Thigh Recipes Like a Pro (2025), you’ve come to the right spot. Mastering the simple technique we use here guarantees crispy skin and meat that melts in your mouth every single time.
I still remember the first time I decided to cook chicken thighs for my friends. It was a simple gathering, but I wanted to impress them with something special. I marinated the thighs overnight, infused with garlic, herbs, and lemon, which filled my kitchen with its enticing aroma. As the chicken sizzled on the grill, I couldn’t help but feel a mix of excitement and nerves. When the meal was finally served, I was met with compliments and smiles all around. That experience ignited my passion for creating flavorful chicken thigh recipes, and I realized how a well-cooked dish could bring people together, turning a regular dinner into a cherished memory.
I’m Elena Brown, your Gluten-Free Culinary Storyteller, and I’ve spent years perfecting reliable, flavorful meals like this one. Trust me, getting that ‘pro’ finish is easier than you think!
Why Mastering How to Make Chicken Thigh Recipes Like a Pro (2025) Matters
Honestly, any recipe where you just toss things on a tray can be amateur hour. But when you learn how to treat that skin right—getting it shatteringly crisp while keeping the meat under perfectly juicy—that’s when you start cooking like someone who knows their way around a kitchen. That’s the whole trick to mastering How to Make Chicken Thigh Recipes Like a Pro (2025)!
Chicken thighs are so wonderfully versatile, bouncing easily from a weeknight dinner to something you’d happily serve when company comes over. When you nail the technique, you unlock restaurant-quality flavor without needing fancy equipment. You just need to know the secrets to pulling moisture out just right. If you’re ready to see why mastering this staple cut is so important for leveling up your overall cooking game, check out the links for more inspiration on my favorite baked chicken dishes right here: amazing chicken thigh ideas.
For more on simple, reliable baked chicken that always works, my friend Kristine has a great standard recipe over here: Kristine’s Baked Chicken Thighs. But remember, the real payoff comes from knowing *why* we do each step!
Essential Ingredients for How to Make Chicken Thigh Recipes Like a Pro (2025)
When we are aiming for that professional result in our home ovens, the ingredients have to be spot on. This isn’t the time for guesswork! Every measurement in this dry rub is calculated to balance savory depth with just a hint of caramelization. Get ready to stock up on these essentials because this combination is what separates a good thigh from an *amazing* one. You can find tons of other ideas for baked chicken that rely on great spice blends over here: my favorite baked chicken preparations.
For the Dry Rub Seasoning
Forget those sad, dusty spice packets! We are building real flavor here. You’ll need 1 tablespoon of Italian seasoning (or dried oregano if that’s what you have on hand) paired up with 2 teaspoons each of paprika for color and garlic powder. Don’t skip the onion powder—we use 1 teaspoon of that too. And here’s the secret to that slightly dark, gorgeous crust: we use 2 teaspoons of brown sugar. It melts beautifully and helps everything stick. Finish it off with 1 teaspoon of coarse Kosher salt (if you use the finer table salt, cut that down to just ½ teaspoon!) and ½ teaspoon of black pepper. Whisk it all together in a small bowl until it looks like perfectly blended magic dust.
Primary Components for How to Make Chicken Thigh Recipes Like a Pro (2025)
Now for the star of the show: you need about 3 pounds of skin-on, bone-in chicken thighs. That skin is non-negotiable if you are aiming for that pro, crackly texture! We’re using about 8 thighs, give or take. Make sure they are fresh, and please—pat them bone-dry later! We also need about 2 tablespoons of good olive oil. The oil acts as the perfect binder for our gorgeous dry rub, making sure that seasoning paste adheres right where we want it before it hits the heat.
Step-by-Step Instructions: How to Make Chicken Thigh Recipes Like a Pro (2025)
Okay, this is the part where we stop reading and start cooking! This is the core method that takes you straight to pro status when learning How to Make Chicken Thigh Recipes Like a Pro (2025). Remember, chicken needs heat to crisp up, so let’s get that oven ready. You need to preheat it to a strong 400° F. While that’s heating, grab your 13×9-inch baking dish, or if you prefer easier cleanup (I know I do sometimes!), line a rimmed baking sheet with foil or parchment paper. Don’t forget to check out my favorite one-pan dinner combo for an easy cleanup weeknight using a similar technique here!
Preparation and Seasoning Application
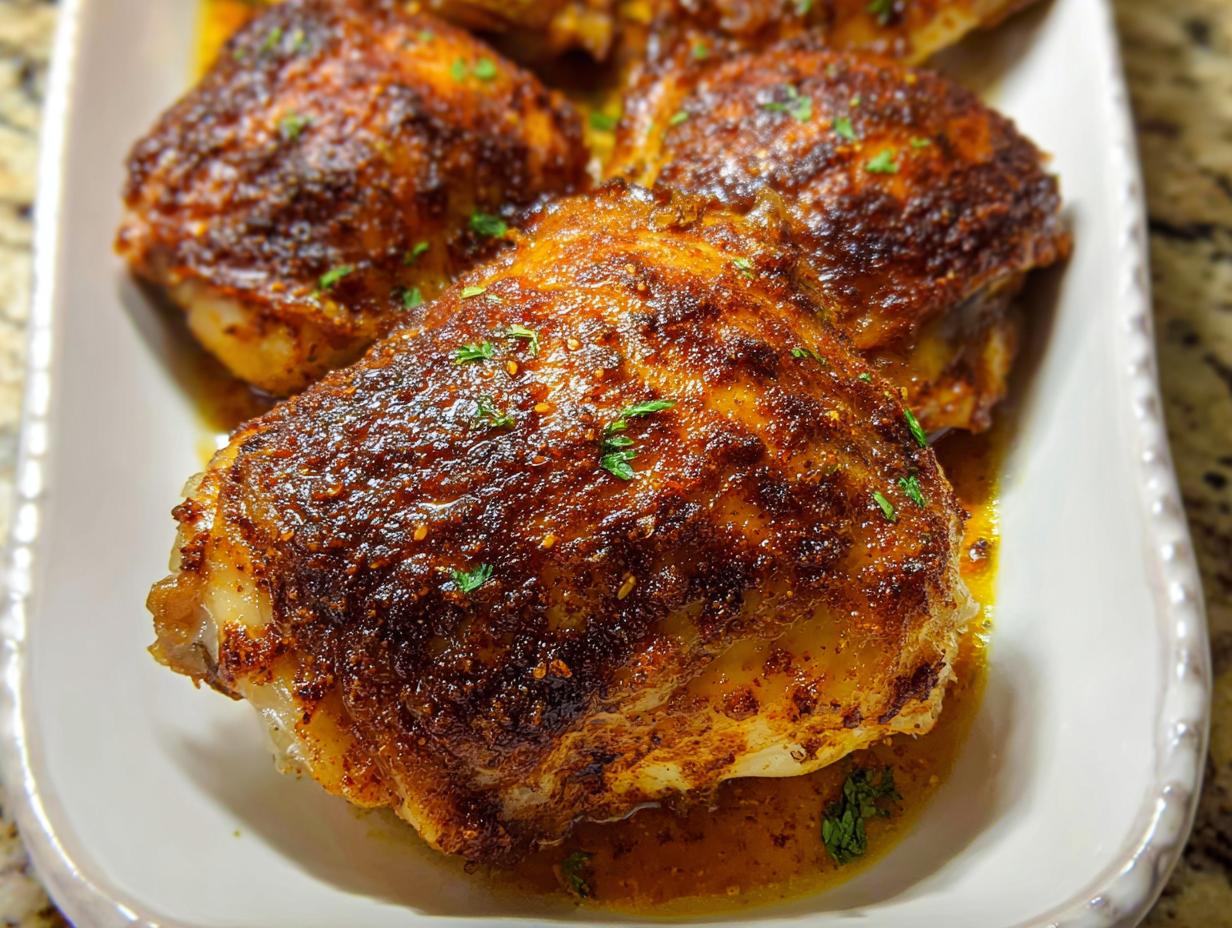
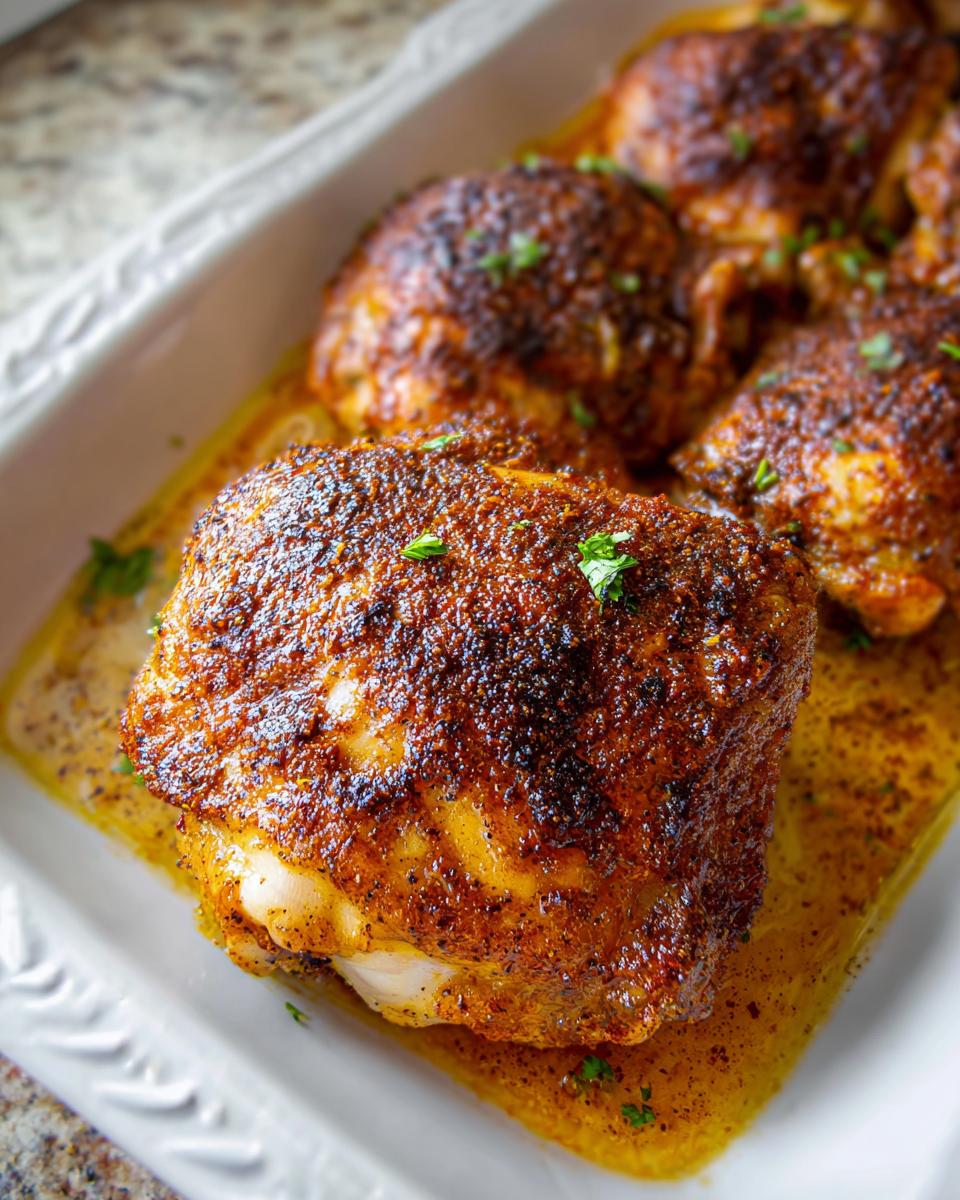
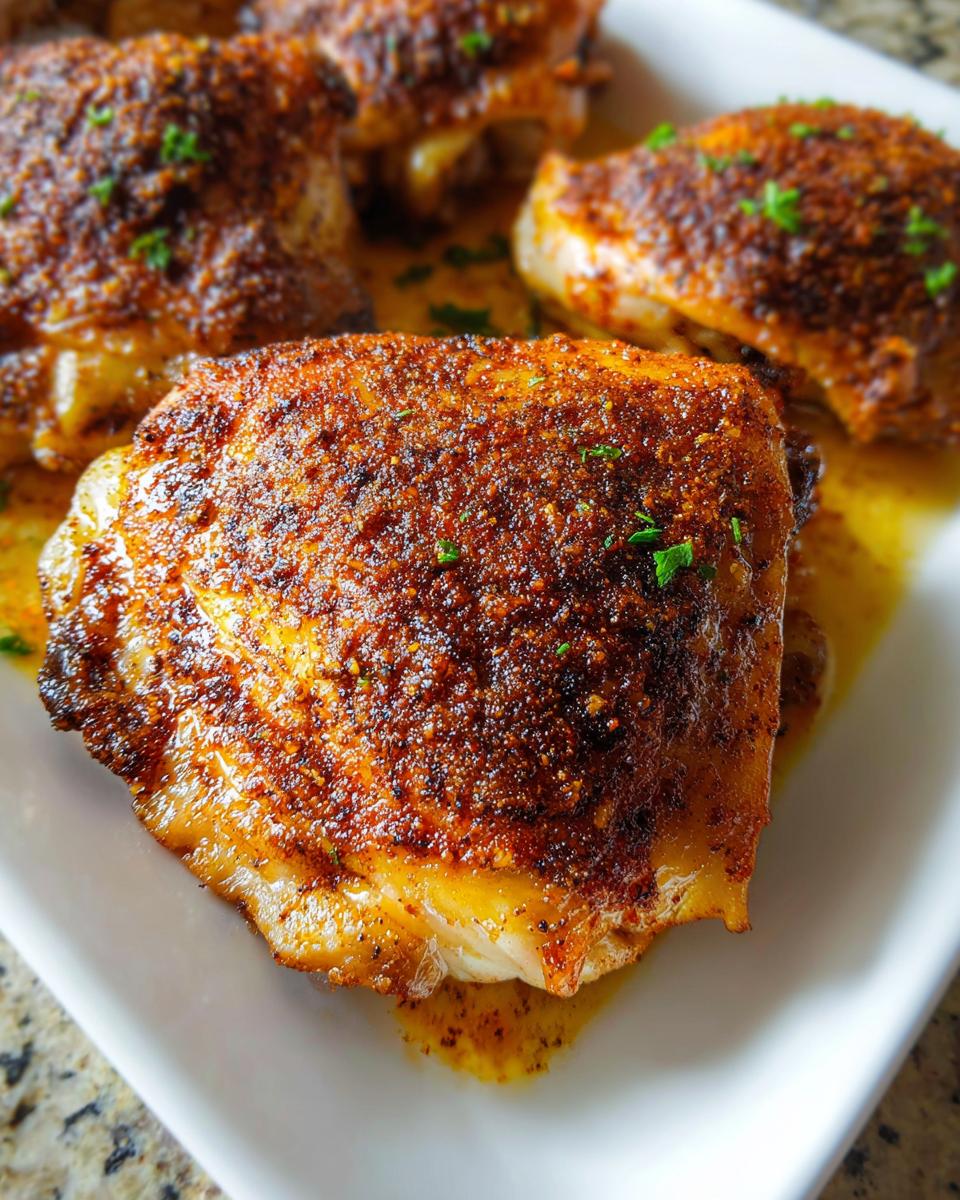
The absolute most crucial step for crispy skin is drying the chicken. Seriously, grab those paper towels and blot every inch of that thigh. Moisture is the enemy of crispiness! Once they are totally dry, put them in your baking dish or sheet. Now, rub both sides gently with that olive oil we talked about. Don’t be shy with the spice blend we mixed up. Sprinkle it liberally!
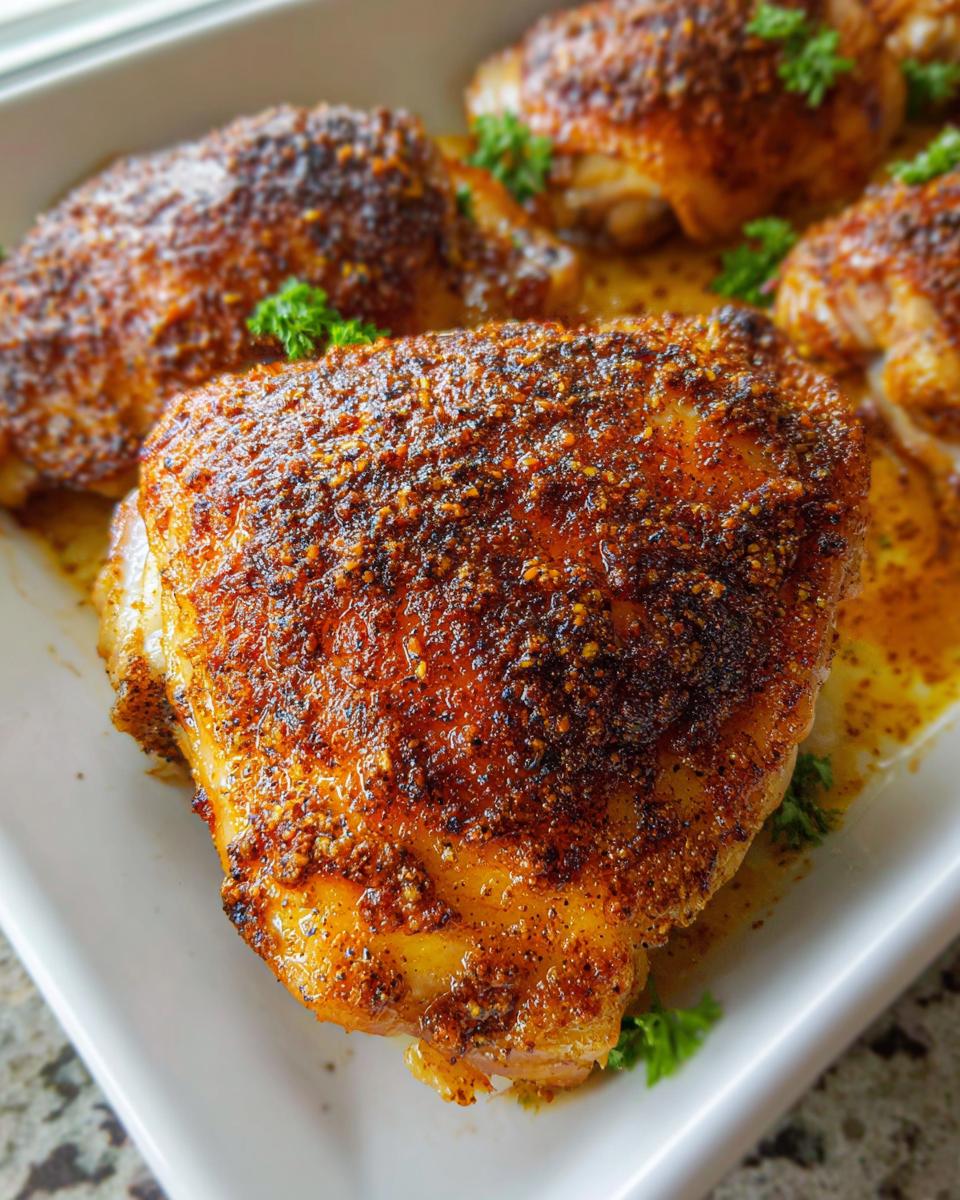
Here is the flavor secret, the real pro move: use your fingers to gently lift up the skin over the meat and try to work just a little bit of that seasoning blend directly onto the meat underneath the skin. It takes an extra second, but I promise, the flavor payoff when you bite into it is unbelievable and really showcases how to make chicken thighs taste gourmet.
Baking Technique for Perfect Results
Lay those gorgeous, seasoned thighs skin-side up; this orientation is key. They bake uncovered the whole time—we don’t want steam trapping in there! Pop them into that 400° F oven. We are looking for a cook time that lands us right at an internal temperature of 165° F in the thickest part of the meat, avoiding the bone. Depending on how big your thighs are, this usually takes between 30 to 40 minutes. Keep an eye on them, but resist the urge to open the door too often when learning any new technique!
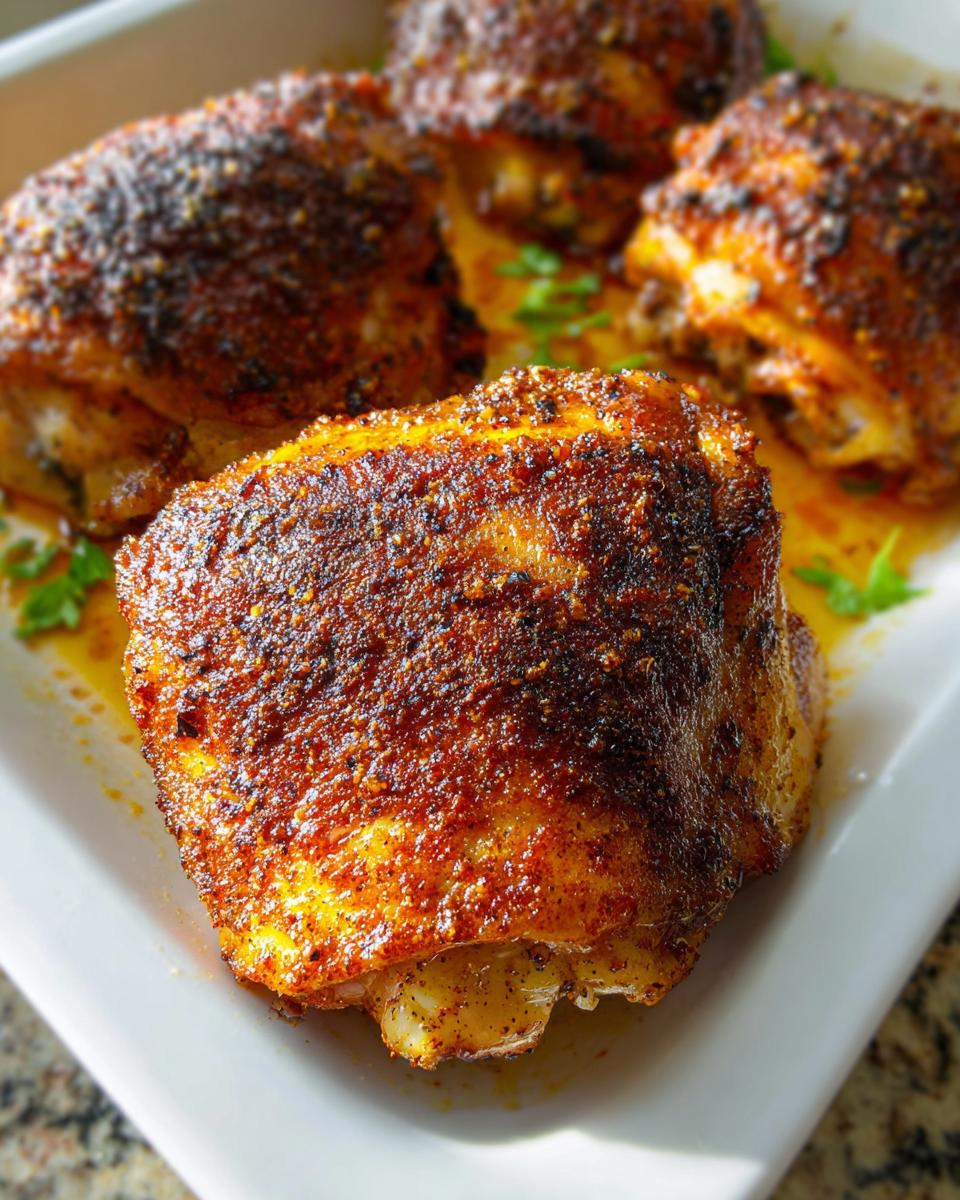
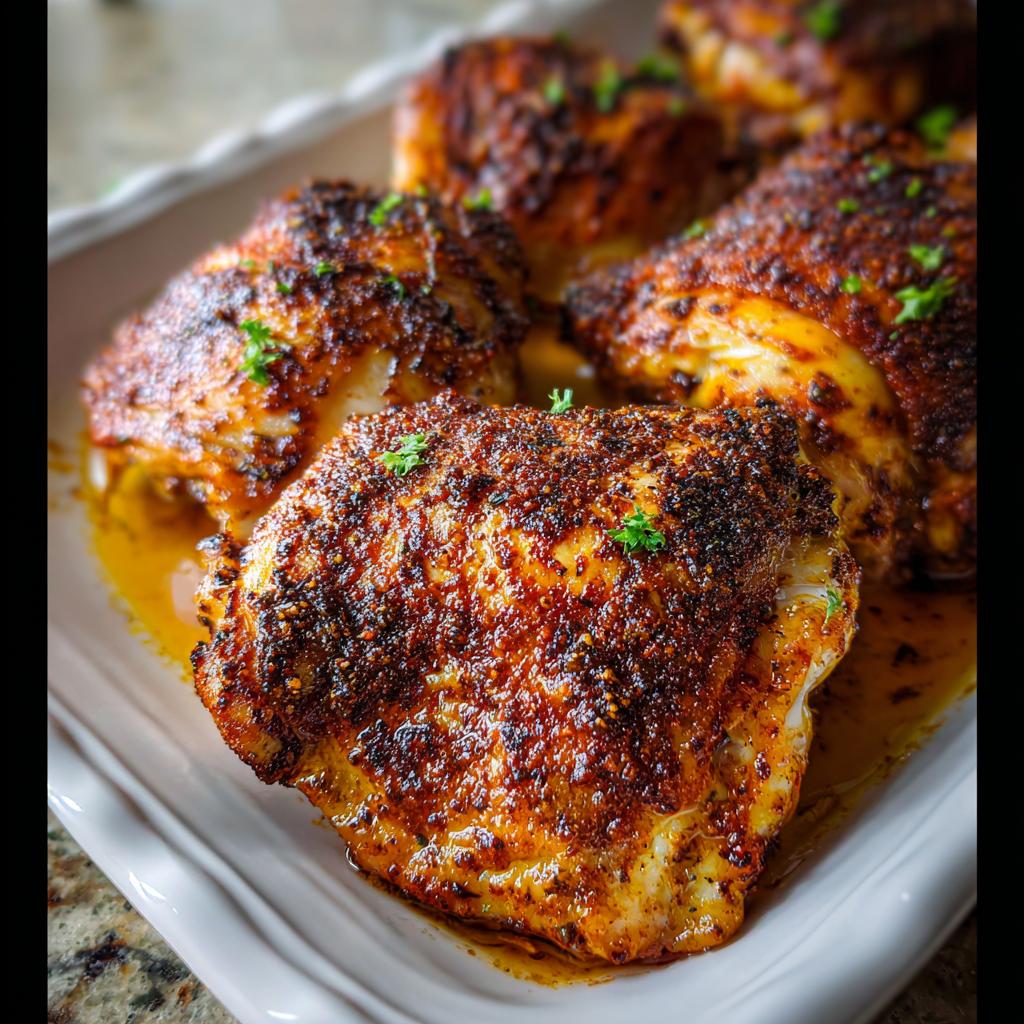
Achieving Crispy Skin: The Pro Finish
If you pull them out at 165° F and the skin looks awesome—golden brown and puffed up—you’re done! If you want that next-level, restaurant-style shatter, this is when you switch to broil. Carefully move your broiler-safe dish under the broiler and watch it like a hawk. Seriously, five seconds can turn golden to burnt! It only needs a few minutes. A critical safety thing here: if you used parchment paper on the baking sheet, you absolutely must remove it before you turn on the broiler, or you’ll have a fiery mess! That method works great for baking, but parchment under direct heat indoors is a hard no-go.
For more easy chicken recipe inspiration that feels elevated, check out this collection: easy chicken recipes inspiration.
Pro Tips for How to Make Chicken Thigh Recipes Like a Pro (2025)
Learning How to Make Chicken Thigh Recipes Like a Pro (2025) isn’t about complicated recipes; it’s about tiny details that make a huge difference. The first pro tip I already hammered home, but I’ll say it again because it’s that vital: pat those thighs bone-dry with paper towels before anything else. Seriously, get rid of every drop of surface moisture if you want that beautiful, crisp skin.
When placing them in the pan, make sure there’s a little space between each thigh. If they are crowded, they steam instead of roast, and suddenly, you’ve lost all that hard-earned crispiness! They need room to breathe and let that heat circulate. Also, don’t race the clock when they come out of the oven! Just like a big roast, a quick rest—say, five minutes on a clean cutting board—lets those juices redistribute. This keeps the meat tender and juicy, even a day later.
Now, let’s talk versatility, because even pros adjust! If you end up with boneless, skinless thighs instead of bone-in, no crisis. Just remember that they cook faster—we’re talking about 10 minutes less cooking time generally. Keep that meat thermometer handy! If you want more inspiration on achieving meat that just falls apart, check out some other techniques I love for making chicken truly melt-in-your-mouth: my melt-in-your-mouth chicken ideas.
Ingredient Notes and Substitutions for Your Chicken Thigh Recipe
I know we all run to the spice cabinet and find we’re missing one little thing! Don’t panic if your Italian seasoning jar is giving you the side-eye. This dry rub is super flexible, which is why it feels so approachable for everyday cooking. If you don’t have Italian seasoning, dried oregano or even just some dried thyme and basil mixed together will totally work.
The key thing is that brown sugar element, please don’t skip swapping that out for white sugar if you can help it, as it really helps the crust form beautifully. And on salt—I mentioned Kosher salt because the larger flakes are easier to sprinkle evenly, but if you use table salt, just remember to cut the amount in half! That’s a pro move right there: understanding how different salt types measure up. When you’re looking for other simple flavor pairings for baked chicken, I always adore using balsamic flavors for a sweet and tangy twist; check out this inspiration for sheet pan balsamic chicken!
Serving Suggestions to Complete Your Meal
So you’ve nailed that perfect, crispy-skinned chicken thigh—congratulations! Now, what goes alongside this masterpiece? Since these chicken thighs have such a robust savory flavor from the paprika and garlic, I usually keep the sides bright and simple. Seriously, you can’t go wrong with some roasted ranch potato wedges. They bake right alongside the chicken, making cleanup a breeze, and the ranch flavor complements the herbs beautifully. You can find my favorite recipe for those delicious wedges here.
If you want something greener, try tossing some broccoli or green beans with just a little lemon juice and olive oil while the chicken rests. That little bit of acidity just cuts through the richness of the thigh fat perfectly. Easy, flavorful sides mean you nailed the whole dinner!
Storage and Reheating Instructions for Leftover Chicken Thighs
Leftover chicken thighs are a gift, but only if you store and reheat them correctly! Always cool them down first, then tuck them into an airtight container. Don’t leave them sitting out too long; we’re aiming for juicy perfection tomorrow, not dryness!
The secret to bringing the crisp skin back to life is avoiding the microwave if you can—it steams the skin, poor thing. Pop those leftovers in a toaster oven or a conventional oven set around 350° F for about 10 minutes. If you have an air fryer, even better! Ten minutes in the air fryer will re-crisp that skin wonderfully. It’s the best way to reheat chicken and keep my ‘pro’ status intact, even on day two! For more quick dinner ideas that keep well, take a look at my collection of easy dinner recipes.
Frequently Asked Questions About How to Make Chicken Thigh Recipes Like a Pro (2025)
I know when you master a new technique, a million little questions pop up! That’s totally natural, and honestly, the best way to become a confident cook is to ask. Don’t worry if your kitchen setup is slightly different from mine; that’s why we talk about substitutions and technique over exact measurements sometimes. This is where you show off your newfound pro skills!
Can I make this recipe using boneless, skinless chicken thighs?
You absolutely can, but remember that we are changing the structure of the cook! Bone-in, skin-on thighs take longer because bone conducts heat differently than muscle alone. If you switch to boneless, skinless thighs, you’ll want to start checking the temperature around the 20-minute mark. Generally, they take about 10 minutes less cooking time than the bone-in version. Keep that eye on the thermometer, though; 165° F is still the target!
What if I don’t have an oven? Can I adapt this for a different cooking method?
Oh yes, this dry rub is truly amazing across the board! If you’re heading outside, the rub works perfectly on the grill. Just make sure your grill grates are clean and oiled slightly, and use medium heat, turning occasionally. If you want that ultimate crispiness indoors without the oven, the air fryer is your best friend! You can read about my favorite way to adapt this very seasoning blend for the air fryer right here. Just remember, air fryers cook hotter and faster than an oven, so watch those times closely!
Share Your Results and Culinary Adventures
Now it’s your turn to show off! Seriously, I want to see those crispy skins! Once you’ve tried mastering How to Make Chicken Thigh Recipes Like a Pro (2025), come back and let me know how it went. Did you manage to stuff seasoning under the skin? Tell me your favorite part in the comments below. If you’re on social media, snap a picture and tag me—don’t forget you can always reach out directly through my contact page too. Happy cooking, friends!
How to Make Chicken Thigh Recipes Like a Pro (2025)
Ingredients
Equipment
Method
- Preheat your oven to 400° F. Prepare a 13×9-inch baking dish or line a rimmed baking sheet with foil or parchment paper.
- In a small bowl, whisk together the seasonings until they are well combined.
- Pat the chicken thighs dry using paper towels and place them in the baking dish.
- Rub both sides of the chicken with olive oil. Sprinkle the seasoning mixture over the chicken, rubbing it onto both sides. Try to rub some of the mixture underneath the skin as well as on top of the skin for more flavor. Arrange the chicken thighs skin side up on the pan.
- Bake in the preheated oven uncovered, without moving or turning, until the internal temperature of the thickest part of the chicken (not touching the bone) reaches at least 165° F. This takes about 30-40 minutes, depending on the size of your chicken thighs.
- If you want extra crispy skin, you can broil the chicken for a few minutes. Make sure you use a broiler-safe baking dish or pan, and do not place parchment paper under the broiler.
Nutrition
Notes
Tried this recipe?
Let us know how it was!
Gluten-Free Culinary Storyteller & Recipe Heritage Specialist
Getting diagnosed with non-celiac gluten sensitivity in my late twenties felt like losing my Italian identity. Growing up in nonna’s Brooklyn kitchen, learning traditional techniques that suddenly became off-limits—I decided to fight for those family food traditions instead of giving up.
With my food journalism background and European baking training, I became obsessed with recreating authentic flavors in gluten-free formats. I’ve adapted 400+ traditional recipes from various cultures, with my gnocchi recipe winning “Recipe of the Year” from the National Gluten-Free Living Awards in 2022.
I collaborate with the Italian-American Cultural Center to document traditional family recipes and volunteer with the Westchester Celiac Support Group, teaching monthly pasta-making classes.
Food is the heart of family storytelling. No one should sacrifice their cultural heritage due to dietary restrictions.