
Ugh, mornings! We’ve all been there, right? That moment when you stare into the fridge and sigh because the usual breakfast routine just isn’t cutting it anymore. Well, put down the stale cereal, because I’m sharing The Only Breakfast Ideas Recipes Recipe You’ll Need (2025). It’s packed with everything—from trending new flavors to those super easy recipes that save the day!
I learned this lesson the hard way once when I was rushing my kids before school, realized we were out of everything, and panicked! So, I raided what was left of my nonna’s pantry—some sweet bananas, eggs, and a bit of gluten-free flour—and whipped up some amazing banana pancakes that instantly became a fixture on our table. That’s what cooking is about: mixing tradition with a dash of creativity.
As your own Gluten-Free Culinary Storyteller & Recipe Heritage Specialist, I promise this collection will inspire you. If you’re looking for something delicious to kickstart your day, you’ve come to the right place. Get ready to explore some fantastic new ways to love your < breakfast!
Why This is The Only Breakfast Ideas Recipes Recipe You’ll Need (2025)
What makes this little collection of recipes—and especially this star recipe—the only one you’ll need? Simply put, it hits every single requirement for modern eating. It’s comprehensive, meaning you won’t be searching again next week! In 2025, flavor is king, but convenience can’t be ignored. These ideas bridge that gap perfectly, giving you those big, impressive tastes without the all-day commitment.
We cover trends, but we always keep things grounded in real kitchen routines. Whether you are whipping up a week-day breakfast or planning a marvelous weekend brunch, you’ll find something here that works for your schedule. Trust me, these recipes offer huge flavor payoffs!
Quick Preparation for Busy Mornings
I know you’re busy. Who isn’t? While these rolls require a bit of rise time, the actual active work time is super short! The total process is about 218 minutes, but it’s hands-off time for most of that—that’s why I call it great for parents and professionals. You mix the dough, let the mixer do the hard work, and then it pretty much takes care of itself during the rise periods.
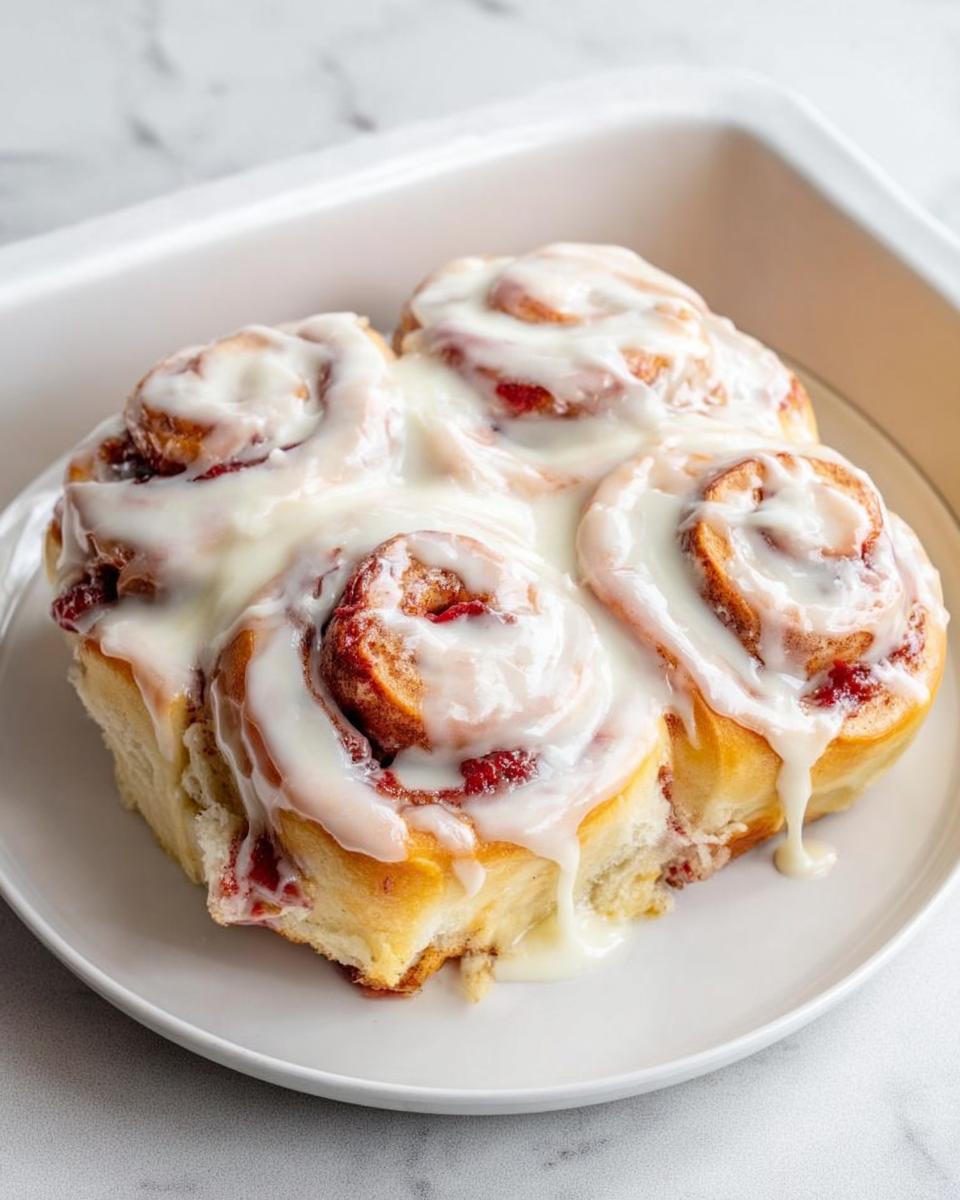
A Flavor Twist: Strawberry Jam Cinnamon Rolls
To really show off what I mean about trend-setting flavor, look no further than the feature recipe! We aren’t just doing standard cinnamon rolls here. I traded some of that heavy brown sugar mix for homemade strawberry jam and fresh, perfectly chopped strawberries. It brings a beautiful, bright tartness that cuts through the richness.
It’s exciting, it’s vibrant, and it looks incredible on a holiday table or just for a Tuesday morning treat. Check out all the inspiration you need for amazing < breakfast ideas and inspiration!
Gathering Your Ingredients for The Only Breakfast Ideas Recipes Recipe You’ll Need (2025)
Now, for the serious part—making sure we have everything before we start rolling! If you want amazing results, especially with yeasted dough, taking a moment to organize your ingredients is half the battle. I always lay everything out; it keeps me calm when the process ramps up, and it ensures we don’t forget anything important.
Dough Components
For the main cinnamon rolls, you’ll need to gather these carefully:
- 1 cup whole milk, making absolutely sure it’s warm, not hot!
- 1/4 cup sugar
- 1 package active dry yeast (that’s the 1/4 ounce size)
- 3-1/2 cups all-purpose flour, plus an extra 1/4 cup set aside just for dusting later
- 1 large egg, make sure this is at room temperature
- 4 tablespoons butter, softened just right
- 1 teaspoon vanilla extract
- 1 teaspoon salt
Then for that lovely, fruity filling, don’t forget:
- 3/4 cup seedless strawberry jam
- 3/4 cup fresh strawberries, chopped precisely
- 1/2 teaspoon ground cinnamon
The Cream Cheese Glaze
This topping is worth the effort, honestly. Get these ready so you can whip it up while the rolls are still warm from the oven:
- 4 ounces cream cheese, softened nicely
- 2 tablespoons butter, also softened
- 1-1/4 cups confectioners’ sugar
- 1 tablespoon whole milk
- 1/2 teaspoon vanilla extract
See? Seeing it all laid out like this makes tackling the dough so much less intimidating. Time to get mixing!
Mastering the Dough: Steps for The Only Breakfast Ideas Recipes Recipe You’ll Need (2025)
Okay, we’ve got our ingredients gathered, which is step one for any great < breakfast, but now we need to tackle the dough. Working with yeast can feel a little fussy, but trust me, it’s really just about temperature control. This is where we create that pillowy, soft base that will hold all that amazing strawberry flavor.
Activating Yeast and Mixing The Dough
First things first: we need to wake up that yeast! In your stand mixer bowl—use that dough hook attachment, it saves your arms!—gently stir your warm milk with the sugar. The temperature of the milk is key here; if it’s too hot, you kill the yeast, and if it’s too cold, it just sleeps in. We want foamy activity! Sprinkle the packet of active dry yeast right on top and just let it sit there for about five to ten minutes until it looks nicely foamy. That means it’s alive and ready!
Once it’s bubbly, turn the mixer to medium speed. Now, add your flour in gradually—don’t dump it all at once! Mix in the egg, the softened butter, vanilla, and salt slowly. Keep mixing until the whole thing comes together nicely and it starts pulling away from the sides of the bowl. It should feel supple, not sticky.
First Rise and Dough Handling
When the dough looks happy, transfer it to a clean, greased bowl. I always give it a gentle pat down. Cover it up with a clean towel and let it do its thing in a warm spot for one and a half to two long hours. The dough needs to double in size—don’t rush this! It’s the magic happening inside.
If you’re planning an epic weekend brunch and need to prep ahead, this is where you cheat! Once it doubles, instead of letting it keep going, punch it down gently, cover it tightly, and pop that bowl right into the refrigerator. It will have a slow, cold rise overnight, and you just need to let it warm up on the counter for an hour before you roll it out the next morning. It’s the best trick for making an easy recipes day feel luxurious!
Shaping and Filling: Key Techniques for Perfect Rolls
Alright, the dough has risen beautifully—it should be puffy and full of air. This next part is where we transform that blob into those gorgeous swirls we all dream about! Don’t worry about being an expert here; the dough is forgiving, but a little precision goes a long way in getting those perfect 8 rolls on your cutting board.
First, punch that dough down gently. Grab your remaining 1/4 cup of flour and lightly dust your cutting board. Use your rolling pin to flatten the dough out. You aren’t aiming for paper-thin here; we want a nice, even rectangle that is about 1/4-inch thick. Take your time keeping the thickness consistent across the whole surface.
Preparing the Strawberry Jam Filling
While the dough is flattening, get your filling ready. This is where the punch of fresh flavor comes from! Just take that seedless strawberry jam, your chopped fresh strawberries, and that little bit of cinnamon. Quickly stir them together in a small bowl until they are just combined. That’s it for the mixing—no need to overwork it!
Now, take a spatula. Spread this gorgeous strawberry mixture evenly right over the surface of your rolled-out dough. Make sure you get right to the edges, but leave about a half-inch border on one of the long sides—we need that bare edge to help seal everything up later, trust me on this one!
Rolling and Second Rise
This is the fun, slightly messy part! Starting with the long edge that is fully covered in filling, begin rolling the dough up, nice and tight. You want a firm roll so you don’t get gaps or weird air pockets inside. Think of it like wrapping a present securely!
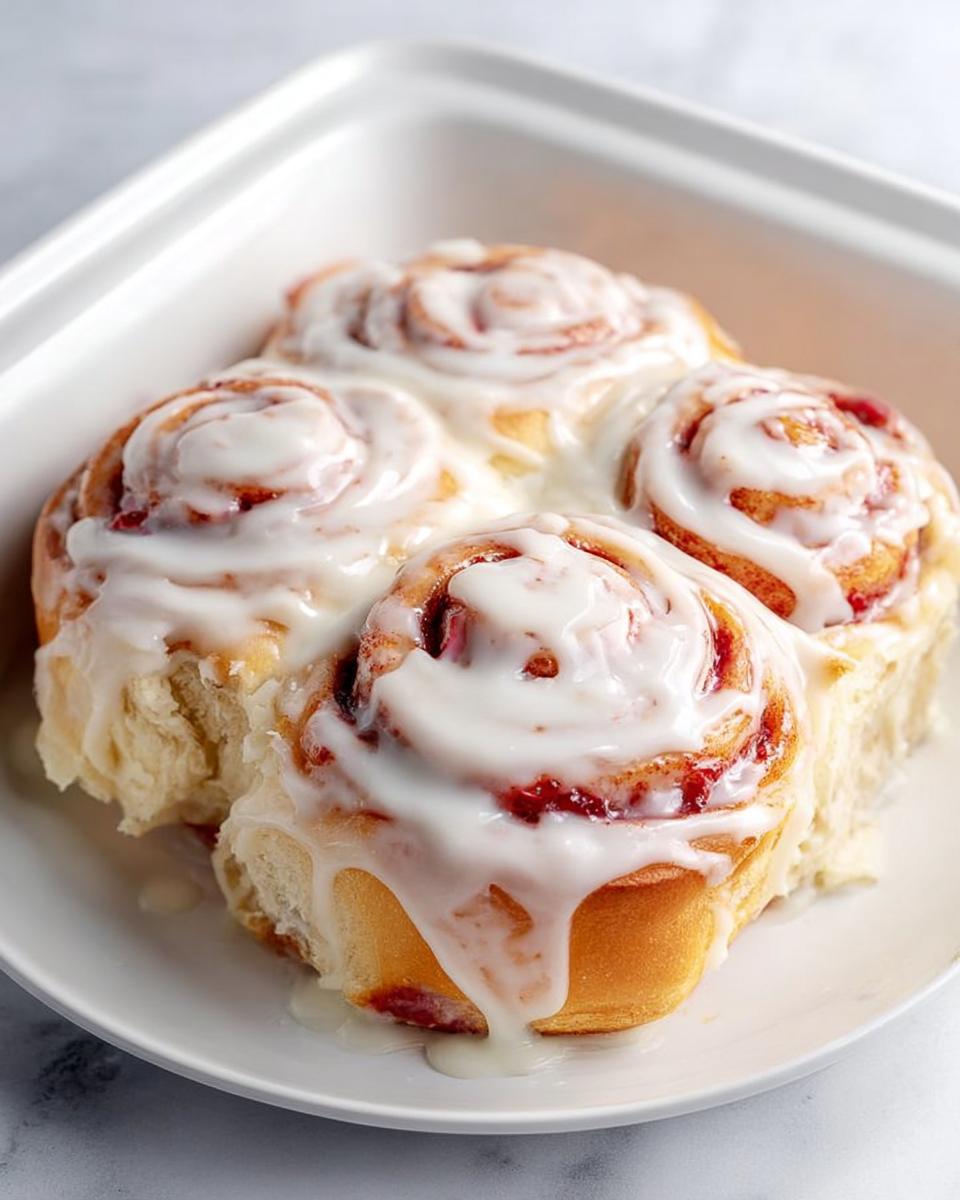
Once you have that long log, use a knife to cut it into 8 equal, thick strips. Place these beauties cut-side up into your greased 13×9-inch baking dish. Now, they need a little rest before heading into the oven. Cover them lightly with a towel again and let them enjoy their second rise for exactly 30 minutes. This bit of downtime is important because it allows the rolls to puff up beautifully and relax before baking. If you want to see another amazing fruit-filled < roll idea, check this out!
Baking and Glazing: Finishing The Only Breakfast Ideas Recipes Recipe You’ll Need (2025)
The waiting is the hardest part, isn’t it? But now it’s time for the oven magic! Make sure your oven is fully preheated to 350 degrees F before those rolls even think about going in. We want them to bake evenly right from the start.
Achieving Golden Brown Perfection
Pop the dish in and set your timer for 35 to 38 minutes. You are looking for those edges to be a nice, lightly golden brown. Don’t let them get too dark; we want soft pastries, not crunchy ones! While the rolls are baking, that’s the perfect moment to start whipping up that decadent glaze so everything is ready to go the second they come out.
Whipping Up the Cream Cheese Glaze
Grab your clean mixing bowl. First, beat the softened cream cheese and the softened butter together on medium speed until they look perfectly smooth—that usually takes a solid two or three minutes. Don’t rush that smoothing step! Once you have a creamy base, gradually mix in your confectioners’ sugar, followed by the milk and the vanilla extract. Beat it for just another minute or two until it’s glossy and spreadable. That sweet, tangy aroma is heavenly while you wait for your < breakfast bake!
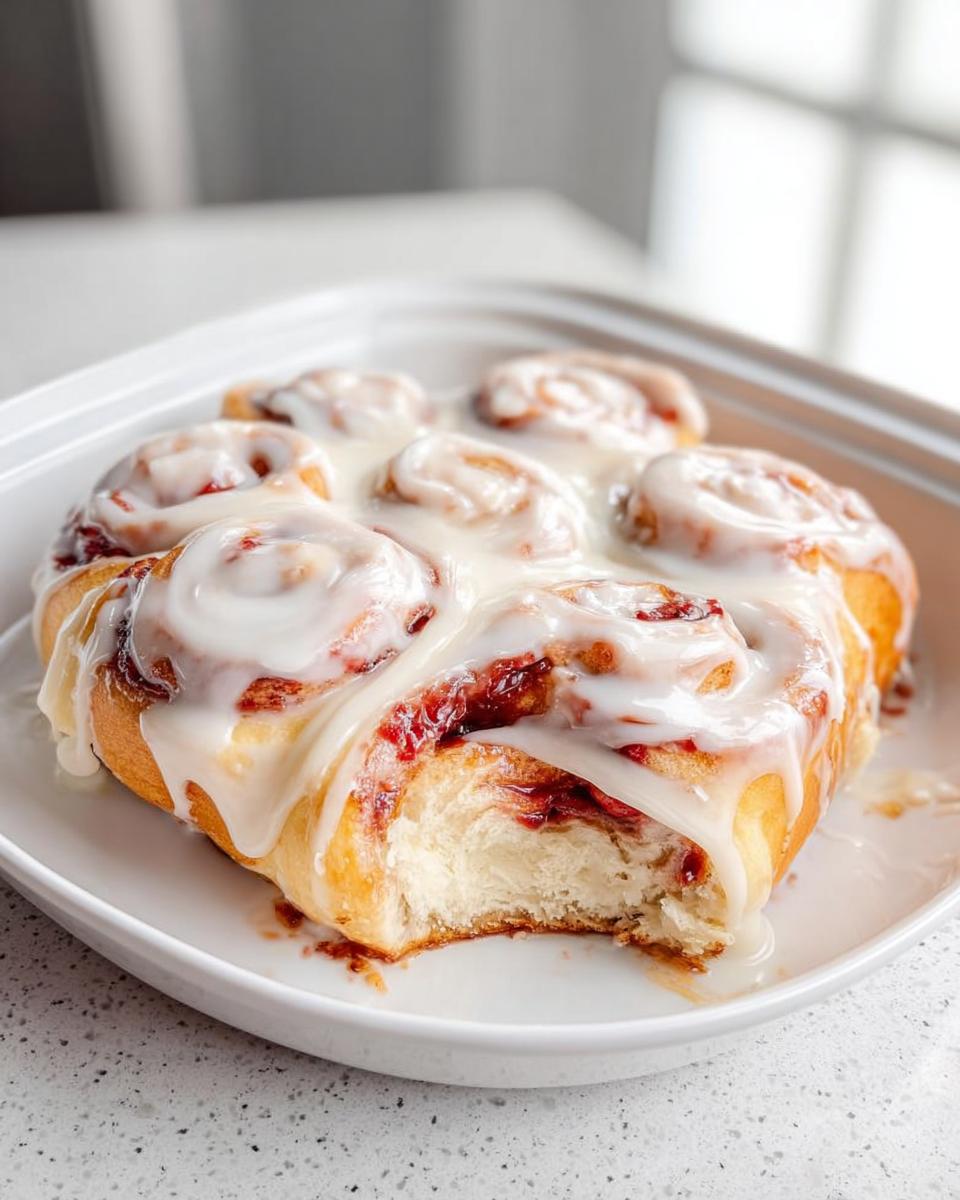
Once those rolls are out, spread that amazing glaze all over them while they are still warm—melty glaze is just the best way to finish any great morning meal.
Tips for Success with This Easy Recipes Breakfast
Making these strawberry jam cinnamon rolls is one of my favorite easy recipes, but even the easiest things can trip us up if we skip a tiny detail! Since you want that perfect, fluffy texture and a glaze that melts just right, I want to share a couple of insider secrets I learned from my nonna about preparation. These small steps turn a good roll into an absolutely killer brunch centerpiece!
Ingredient Temperature Matters
Honestly, temperature is everything when it comes to soft doughs and creamy frostings. You absolutely must use room temperature eggs in your dough mixture! A cold egg shocks the rest of the dough ingredients, especially the butter, which can make your whole mixture seize up a bit. We want smoothness!
The same rule applies to the fats we use for the glaze. Make sure your cream cheese and butter for the glaze are *softened*. If they are straight from the fridge, you’ll end up with cream cheese chunks in your glaze instead of that luxurious, pourable topping. Softened means you can easily leave an indent with one finger; don’t microwave it until it’s greasy!
Preventing Soggy Bottoms
Our 13×9-in. baking dish is lovely, but because these rolls are so moist from the jam and the sugar, the bottoms can sometimes get a little heavy or, heaven forbid, stick! Since we want the easiest cleanup possible for this amazing breakfast, here is my favorite trick.
Don’t skip generously greasing the dish first. After you grease it really well, take a piece of parchment paper and cut it to fit the bottom of the dish. Lay it in there before you put the rolls in. The paper will catch any sticky drips, and when these are done, you can use the edges of the paper to lift the entire batch right out, leaving you with a perfectly clean dish. That is a true time-saver for weekend cooking, and it helps keep those bottoms from absorbing too much grease while baking!
For more inspiration on making your busy mornings stress-free, definitely check out my tips on < easy recipes that simplify weeknight routines too!
Equipment Needed for The Only Breakfast Ideas Recipes Recipe You’ll Need (2025)
When we talk about these wonderful recipes being some of the best easy recipes out there, part of the ease comes from knowing exactly what tools you need before you start! You don’t need a whole commercial kitchen set up to make these amazing rolls, thankfully.
I’ve put together the list based on what I used when testing this batch to ensure everything works smoothly. Having these items ready means you can move from prep to the first rise without scrambling around the kitchen!
Here are the main necessities for getting these Strawberry Jam Cinnamon Rolls baked up perfectly:
- Stand mixer with dough hook: Since this is a yeasted dough, the mixer does the heavy lifting for proper kneading. Your arms will thank you! This is essential for getting that smooth, elastic texture.
- Rolling pin: You need this to get that perfect uniform 1/4-inch thickness on your dough rectangle.
- Cutting board: A clean, large surface is needed both for rolling and for cutting those 8 even strips of filled dough.
- 13×9-in. baking dish: This is the vessel that holds all 8 rolls snugly while they bake into one giant, shareable breakfast treat.
Having these few things ready means you’re set up for success! If you ever have questions about substitutions or equipment in general, please don’t hesitate to reach out; you can always connect with me here: < Send me a message!
Storage and Serving Suggestions for This Brunch Favorite
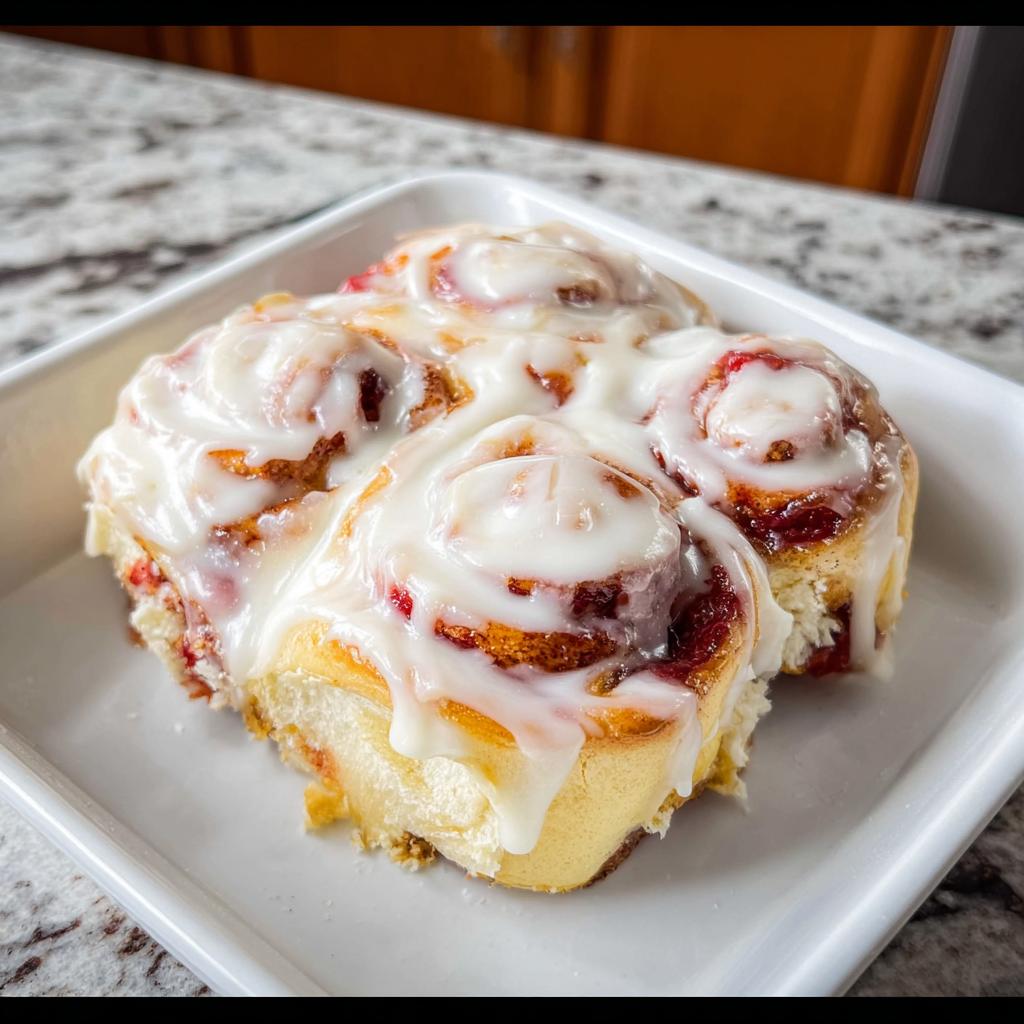
You made a full batch of 8 rolls, and goodness, they are irresistible when fresh! But let’s be real—sometimes you can’t eat all 8 rolls in one sitting. Don’t panic if you have leftovers! I want these delicious breakfast treats to last you through the week, or at least until tomorrow’s brunch gathering.
If you happen to have any remaining rolls, here is my system. For serving them the next day while they are still super fresh, just cover the baking dish tightly with plastic wrap or aluminum foil. You can keep them right on the counter at room temperature for about two days. Since they are so jammy and rich, they hold up really well!
If you need them to last longer than that, definitely move them to the refrigerator. They’ll keep nicely there for up to four or five days. When you are ready to enjoy one—and trust me, warming them up is a must—you have two fast options. The microwave is your friend for speed: pop one roll on a plate with a tiny splash of water beside it (this creates a little steam) and heat it for about 15 to 20 seconds. It comes out steaming hot and gooey!
For a slightly better texture, especially if you have a few rolls, you can wrap them loosely in foil and place them in a low oven—say, 300 degrees F—for about 8 to 10 minutes until they are warm all the way through. That gentle heat really revives the cinnamon swirl!
To really complete the experience after reheating, you might need just a touch more glaze if you spread it all on the first day. If you saved some glaze, microwave that briefly too! And remember, these rich sweet rolls pair perfectly with a strong black coffee or a side of fresh, tart fruit—maybe some raspberries or sliced kiwi—to balance out that sweetness. It’s the perfect way to extend the joy from your amazing baking session. Check out some other amazing make-ahead options when planning your next < breakfast casserole ideas!

Frequently Asked Questions About This Breakfast
I totally get it; when you find a recipe that looks this good, you start brainstorming all the ways you might change it or simplify it! Since we want this to be your go-to for every breakfast and brunch, I’ve pulled together the most common questions I get asked about yeasted doughs and making things work for different lifestyles. We’re keeping it easy!
Can I use instant yeast instead of active dry yeast in this breakfast?
Oh, absolutely! That’s a great question for keeping things moving when you’re short on time. Yes, you can totally swap the active dry yeast for instant yeast. If you use instant, you get to skip that whole foamy activation step! Just mix that instant yeast right in with your 3-1/2 cups of flour, sugar, salt, and everything else when the recipe calls for adding the dry ingredients. It saves five to ten minutes right at the start, which is perfect for a fast easy recipes morning prep!
Is this recipe suitable for gluten-free diets?
Since I know so many of you are looking for gluten-free options, I always get asked about the flour! You are right to ask—this particular version calls for standard all-purpose flour to keep it classic. However, this dough handles substitutions beautifully. If you want to make this gluten-free, simply swap out that flour for a good quality 1:1 gluten-free baking blend. You might notice it feels a little different once you start kneading, so just have a splash more milk or a tiny bit more flour reserved, just in case you need to adjust the liquid slightly to get that perfect dough consistency.
How can I make this a make-ahead brunch option?
This is my favorite way to enjoy these rolls, honestly! It turns a big effort into a five-minute job on Saturday morning. Remember that step after the first rise, when the dough has doubled? Instead of letting it continue rising at room temperature, cover that bowl really, really tightly with plastic wrap and pop it straight into the fridge. It slows way down overnight. Then, the morning you want to bake? Pull it out and let it sit on the counter, still covered, for just about an hour until it feels relaxed and room temperature before you roll it out and shape the rolls. You are basically doing all the heavy lifting the day before your big < brunch!
Share Your Experience with The Only Breakfast Ideas Recipes Recipe You’ll Need (2025)
Wow, we made it! You’ve tackled the dough, rolled those beautiful strawberry swirls, and slathered on that tangy cream cheese glaze. Doesn’t that smell incredible? I really hope these Strawberry Jam Cinnamon Rolls are officially inducted into your family’s stack of favorite breakfast staples now. They certainly are in ours!
But honestly, the recipe isn’t truly finished until I hear back from you all! I absolutely love seeing how everyone tackles their baking adventures. Did your jam swirl come out perfectly tight? Did you add a sprinkle of lemon zest to the glaze like I sometimes secretly do?
Please, drop a rating below! Tell me how many stars you are giving this collection of amazing easy recipes. If you snap a picture of those golden-brown beauties, tag me on social media! Seeing your creations truly inspires me to keep diving deep into those treasured culinary stories. Your feedback helps me continue sharing these amazing traditions. You can find some other fun baking adventures over here, like my < maple pecan banana bread recipe!
Happy baking, and I hope every morning you get to enjoy a truly special meal!
Strawberry Jam Cinnamon Rolls
Ingredients
Equipment
Method
- In the bowl of a stand mixer fitted with a dough hook, stir together warm milk and sugar. Sprinkle yeast on top; let sit until foamy for 5 to 10 minutes.
- Turn mixer speed to medium; gradually mix in 3-1/2 cups flour, egg, butter, vanilla extract, and salt. Mix until dough comes together and pulls away from the sides.
- Transfer dough to a greased bowl. Cover with a towel; let rise at room temperature for 1-1/2 to 2 hours or until the dough has doubled in size.
- Sprinkle a cutting board with the remaining 1/4 cup flour. Transfer dough to the floured surface. Use a rolling pin to roll the dough into a 1/4-inch-thick rectangle.
- Use a knife to cut 8 even strips of dough down the length of the rectangle.
- In a small bowl, stir together strawberry jam, chopped strawberries, and cinnamon.
- Using a spatula, spread the mixture evenly over the dough.
- Starting with the long end of each strip, tightly roll the dough up to form a roll. Repeat with all 8 strips. Place in a greased 13×9-in. baking dish. Cover with a towel; let rise an additional 30 minutes.
- Preheat oven to 350 degrees F. Bake 35 to 38 minutes or until edges are lightly golden brown.
- Meanwhile, place cream cheese and butter in a large mixing bowl. Beat on medium speed until smooth, 2 to 3 minutes. Gradually mix in confectioners’ sugar, milk, and vanilla extract; beat another 1 to 2 minutes.
- Spread cream cheese glaze on warm cinnamon rolls. Serve immediately.
Nutrition
Notes
Tried this recipe?
Let us know how it was!
Gluten-Free Culinary Storyteller & Recipe Heritage Specialist
Getting diagnosed with non-celiac gluten sensitivity in my late twenties felt like losing my Italian identity. Growing up in nonna’s Brooklyn kitchen, learning traditional techniques that suddenly became off-limits—I decided to fight for those family food traditions instead of giving up.
With my food journalism background and European baking training, I became obsessed with recreating authentic flavors in gluten-free formats. I’ve adapted 400+ traditional recipes from various cultures, with my gnocchi recipe winning “Recipe of the Year” from the National Gluten-Free Living Awards in 2022.
I collaborate with the Italian-American Cultural Center to document traditional family recipes and volunteer with the Westchester Celiac Support Group, teaching monthly pasta-making classes.
Food is the heart of family storytelling. No one should sacrifice their cultural heritage due to dietary restrictions.