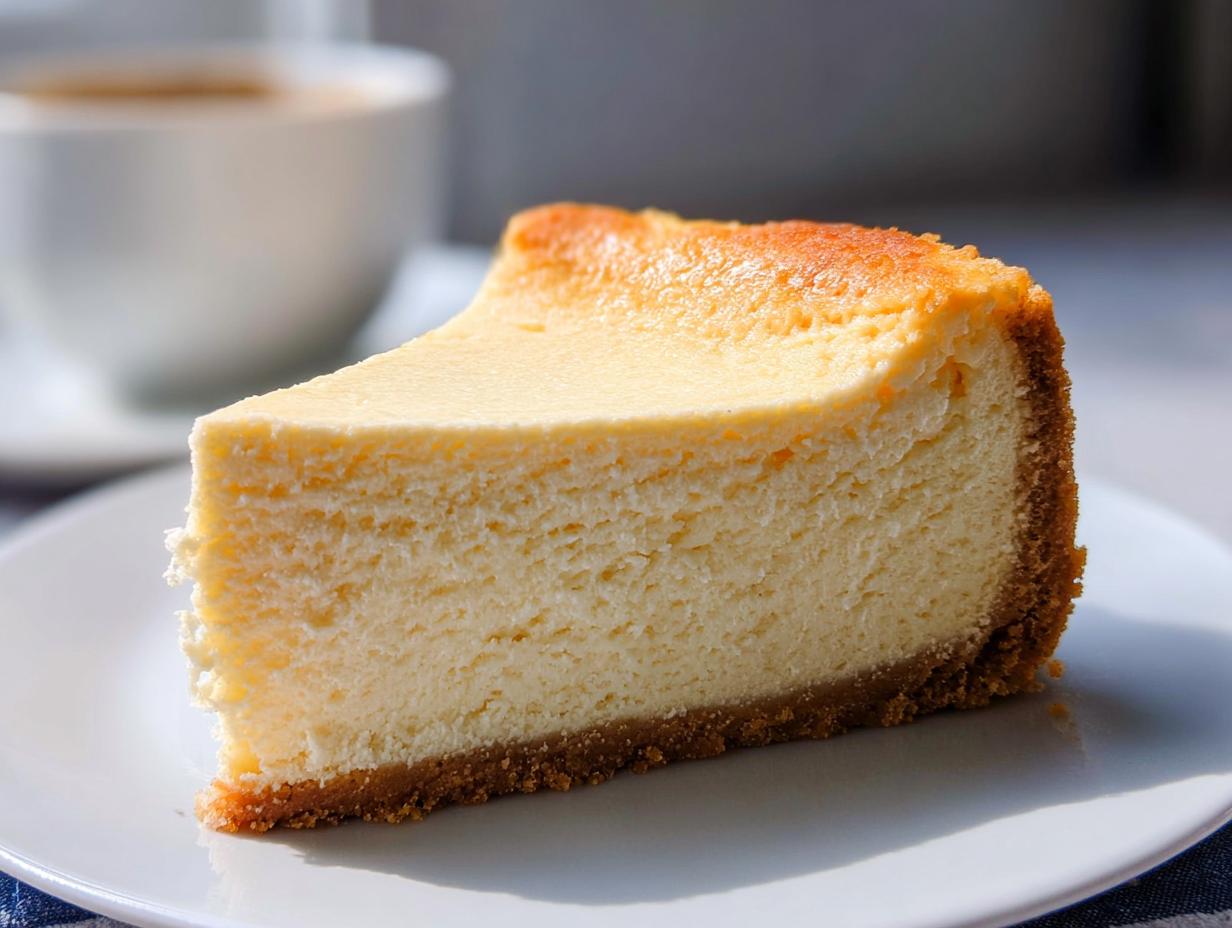
Oh, the cheesecake! Seriously, there’s nothing quite like pulling apart a perfectly chilled slice of a truly decadent baked dessert. The moment I first tasted a rich, dense slice of **Classic New York Baked Cheesecake** down in the city, I was hooked. It’s creamy, it’s tangy, and it’s pure comfort food, which is why I’ve spent years perfecting this formula.
You know, my avó used to make these incredible creamy delights at home, and recreating that nostalgic, perfect texture has been my personal mission as a gluten-free chef. It’s all about managing the bake—no cracks, just silky smooth goodness. Trust me, achieving that authentic, almost impossibly creamy texture at home is totally within reach with this tried-and-true method. I promise, this is the recipe that will make you a cheesecake legend!
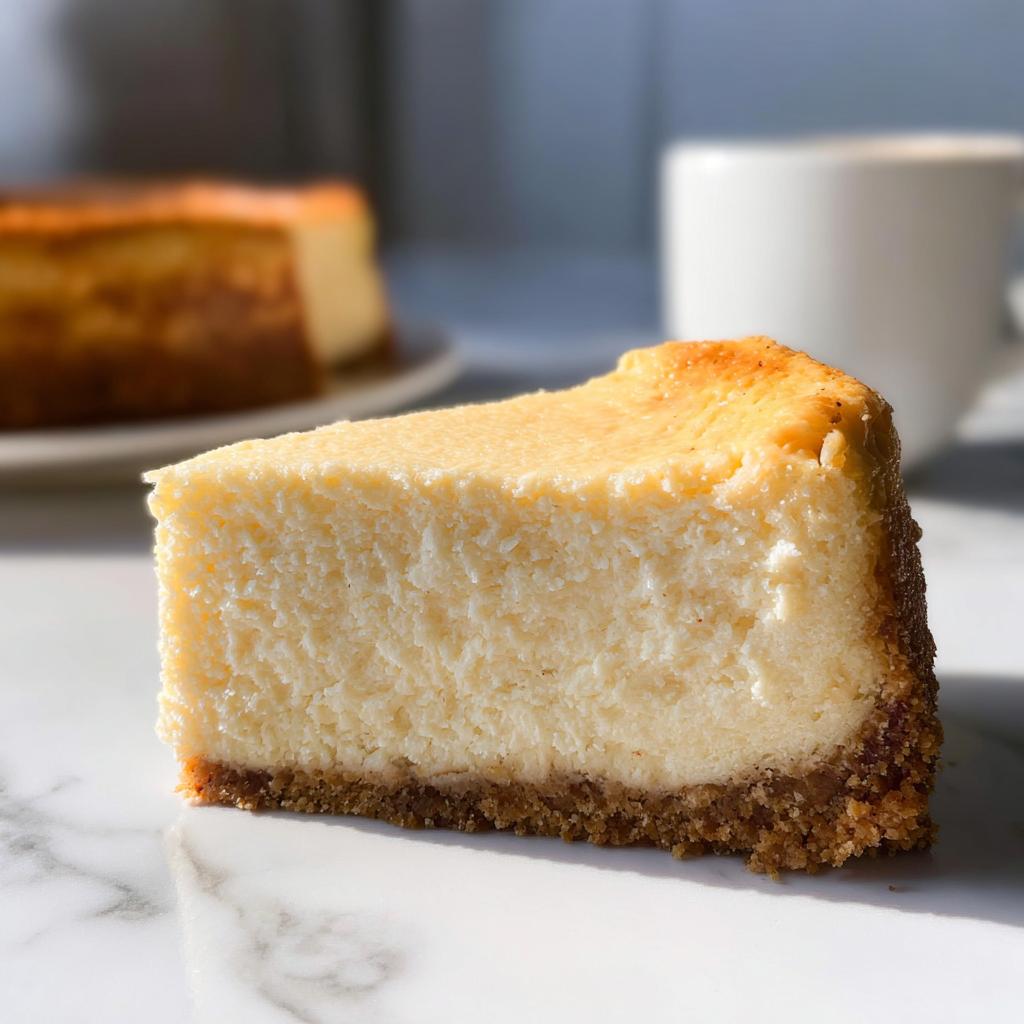
Why This Classic New York Baked Cheesecake Recipe Works (Experience & Expertise)
Making a truly iconic **Classic New York Baked Cheesecake** isn’t actually about complicated acrobatics; it’s about respect for the process and knowing a few key secrets. I’ve spent so much time testing every variable so *you* don’t have to! This isn’t just another recipe; it’s a roadmap to success, hitting those perfect notes that make it one of the best creamy dessert ideas out there.
Here’s the quick rundown on why this technique guarantees that dreamy result:
- Seriously Creamy Texture: We use plenty of full-fat cream cheese and keep the mix time low. That’s the secret to density without being heavy!
- Authentic Flavor Profile: That little bit of lemon zest and juice cuts through the richness perfectly, just like the best diners do it.
- The Water Bath Magic: We’re using a water bath setup—I know, it sounds fussy—but it’s the absolute best way to ensure gentle, moist heat, which is what prevents those awful cracks.
Essential Ingredients for the Perfect Classic New York Baked Cheesecake
Okay, let’s talk ingredients. Because honestly, a cheesecake is only as good as what you put into it! With this **baked cheesecake recipe**, consistency is king, and that starts way before you even turn on the mixer. My biggest, most important advice here—the thing my avó always hammered into me—is that your cream cheese MUST be fully, completely, utterly at room temperature. We’re talking soft enough that it mashes easily, but not so melted it’s shiny. That room temperature magic ensures you get that smooth, lump-free base we’re aiming for.
We break this down into two simple groups. Get these things ready, and you’re halfway to success!
For the Graham Cracker Crust
This base needs to be sturdy so it can hold up all that creamy goodness. Make sure you measure those crumbs accurately!
- 1.5 cups graham cracker crumbs (Measure this after crushing about 12 whole crackers, trust me)
- 5 tablespoons unsalted butter, melted
- 2 tablespoons sugar
- 1/8 teaspoon salt
For the Rich Filling of Your Classic New York Baked Cheesecake
This is where the iconic texture lives. Sour cream is non-negotiable for that slight tang that distinguishes a true New York style. And please, use fresh lemon zest! It brightens everything up.
- 32 oz cream cheese (This needs to be room temperature!)
- 2 cups sugar
- 3 tablespoons all-purpose flour (This acts as a stabilizer)
- 4 teaspoons vanilla extract
- 1 teaspoon lemon zest (from one whole lemon, packed!)
- 2 teaspoons fresh lemon juice
- 1/4 teaspoon salt
- 6 large eggs (also at room temperature, please!)
- 1/2 cup sour cream
- Optional: Berry sauce, for serving
Step-by-Step Instructions for Your Classic New York Baked Cheesecake
Alright, this is where the magic happens! Don’t let the water bath intimidate you; I promise it’s key to that smooth, bakery-style finish. Treat this like a gentle bake, not a race. We want everything to merge slowly and beautifully. Remember, patience is not just a virtue here, it’s an ingredient!
Preparing the Crust and Oven Setup
First things first, you need to get the oven ready. Preheat it to 375°F. Now, for the important bit: the foil wrapping. Grab your springform pan—the 9 or 10-inch one—and wrap it completely in heavy-duty aluminum foil. I use two layers, just wrapping them around the bottom and sides extra securely. This is your insurance policy against leaks from the water bath, trust me, you don’t want soggy crust!
While the oven is heating, mix up your crust ingredients (crumbs, melted butter, sugar, salt) and press that firmly and evenly into the bottom of your secured pan. Pop it in the oven for just 10 minutes until it sets up nicely. Once that’s done, pull it out and immediately drop the oven temp down to 325°F. Oh, and get that kettle boiling!
Mixing the Creamy Filling for Classic New York Baked Cheesecake
This step is all about gentle mixing; we are incorporating, not whipping air into this batter! In your mixer, start with your room-temperature cream cheese, sugar, and the flour. Beat it on medium speed for about a minute until it’s just smooth. Scrape those sides down; we need everything uniform.
Now, add the flavorings: vanilla, lemon zest, lemon juice, and salt. Mix just until you see them disappear. Next, the eggs—one by one—on LOW speed. If you go too fast, you introduce air, and air causes cracks later. After the final egg is just barely mixed in, gently fold in the sour cream. Stop mixing the second everything looks combined. If you want to chat more about my mixing philosophies, check out my mission page here!
Baking the Classic New York Baked Cheesecake in a Water Bath
Set your foil-wrapped cheesecake pan inside that large roasting pan. Pour the batter right over that pre-baked crust. Now, gently pour the boiling water into the roasting pan—be careful, it’s hot! The water needs to come about an inch up the side of the cake pan. This warm, steamy environment keeps the cheesecake baking evenly.
Bake this beauty at 325°F for about 1 hour and 30 minutes to 1 hour and 45 minutes. The key sign it’s done isn’t just the toothpick test—it’s the wobble! If you nudge the roasting pan, the very center of the cheesecake should wobble slightly, like firm Jell-O, but the edges should look set. If the top looks too brown near the end, just loosely drape some foil over it. If you’re interested in other gluten-free bakes, see my baking category!

For more official guidance, check out this recipe recommendation from other bakers: here at Once Upon a Chef.
Cooling and Chilling for the Best Texture
You absolutely cannot rush the cooling process, or you’ll send the cake into shock! Carefully take the whole roasting pan out of the oven. Leave the cheesecake sitting in that cooling water bath for a full 45 minutes. You must let that temperature drop slowly. After 45 minutes, pull the springform pan out, run a thin knife around the edge to loosen the cake from the sides (it shrinks as it cools, so this stops sticking!), and then cover it loosely.
Then, it goes into the fridge for the long nap: at least 8 hours, but honestly, overnight is best. This chilling time is non-negotiable; it allows the structure to firm up completely so you get that dense, creamy slice. If you skip the chill, it melts and won’t hold its beautiful shape!
Ingredient Notes and Substitutions for Your Classic New York Baked Cheesecake
I know many of you are looking for ways to make this classic dessert fit your dietary needs, just like I always have to, being a gluten-free chef! The good news is that this cheesecake is naturally very easy to adapt. If you’re worried about the crust, you can swap those graham cracker crumbs for any store-bought gluten-free variety or even use crushed vanilla wafers. I even have a great recipe for homemade gluten-free bread crumbs that work in a pinch!
For the filling, we stick mostly to dairy because that’s what makes it New York style, but sour cream can sometimes be swapped 1:1 with equal parts plain Greek yogurt if you prefer a slight texture change. Just make sure whatever you use is full-fat! Remember, we are aiming for rich here, not light and airy.
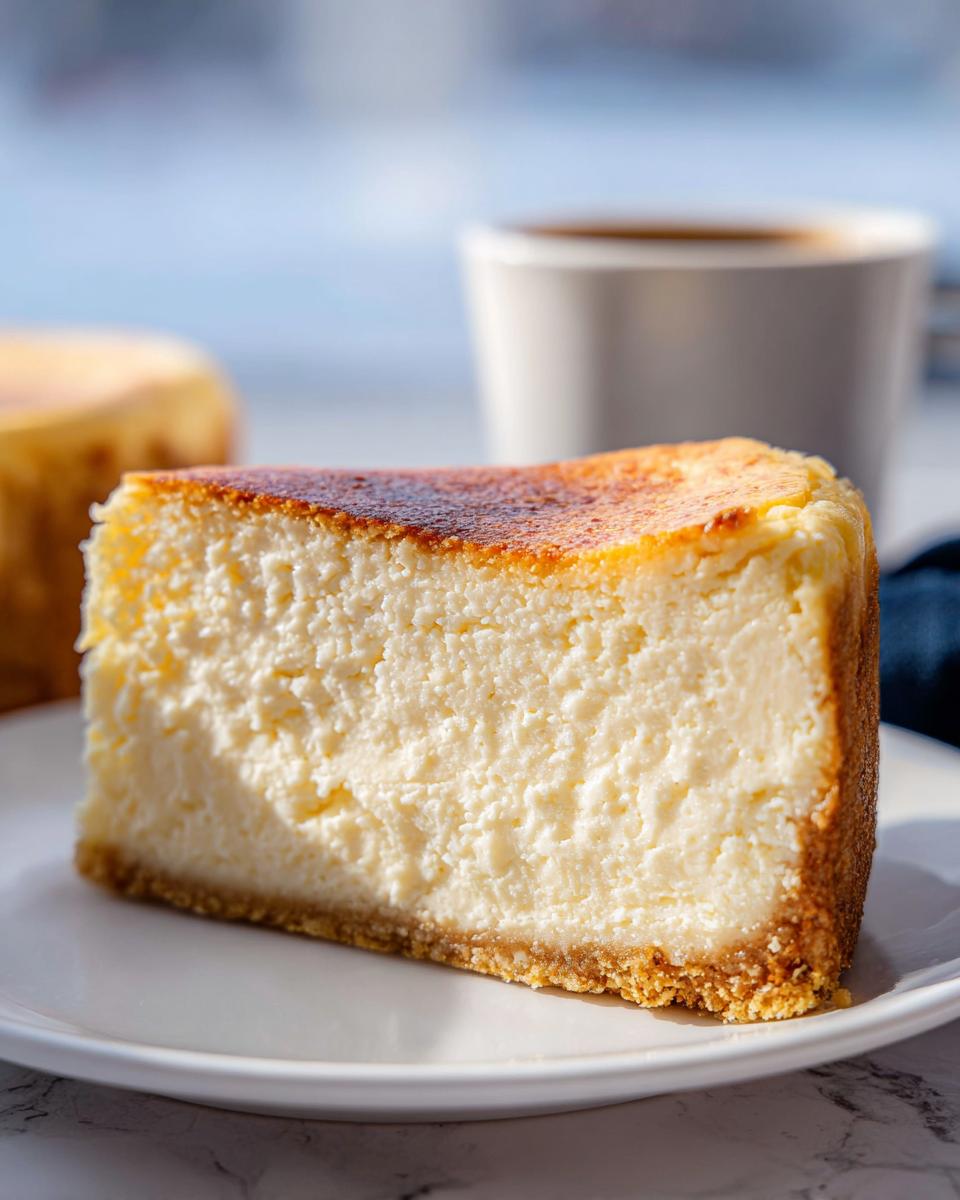
Tips for a Crack-Free Classic New York Baked Cheesecake
Cracks! The sworn enemy of every cheesecake baker. I swear, the first few times I made this, I’d open the fridge and that perfectly smooth surface would have a spiderweb across it. Don’t let that happen to you! Preventing cracks isn’t luck; it’s about managing temperature changes, and since you’ve already seen how important that water bath is, let’s talk about the other two major secrets for keeping your **Classic New York Baked Cheesecake** pristine.
These aren’t suggestions; these are the rules I learned the hard way.
Rule Number One: Everything Must Be Room Temperature. Seriously, I can’t stress this enough. If your cream cheese or eggs are cold, you will naturally beat them longer to try and smooth out the clumps. That extra beating incorporates air. Air bubbles rise during baking, pop near the top surface, and bam—crack city! Make sure they sit out for at least two hours before you start.
Rule Number Two: Low Speed Mixing Only. When you are blending that filling, use the mixer on medium-low or low speed. The paddle attachment is meant to gently fold things together, not whip them into a frenzy. If you see a lot of bubbles forming on the surface of the batter in the bowl, you’ve added too much air, and you’re setting yourself up for trouble during the bake. Scrape, mix gently, scrape, mix gently—that’s the mantra.
Rule Number Three: Don’t Forget the Slow Cool Down. This is the follow-up to the water bath. When the baking time is up and the center wobbles perfectly, you pull it out of the oven; but you leave it *in* the hot water bath for 45 minutes minimum. This gentle decrease in temperature stops the filling from suddenly shrinking away from the sides of the pan. Sudden temperature shifts cause the structure to tear. Think of it like taking a relaxing bath instead of jumping straight into an ice bath!
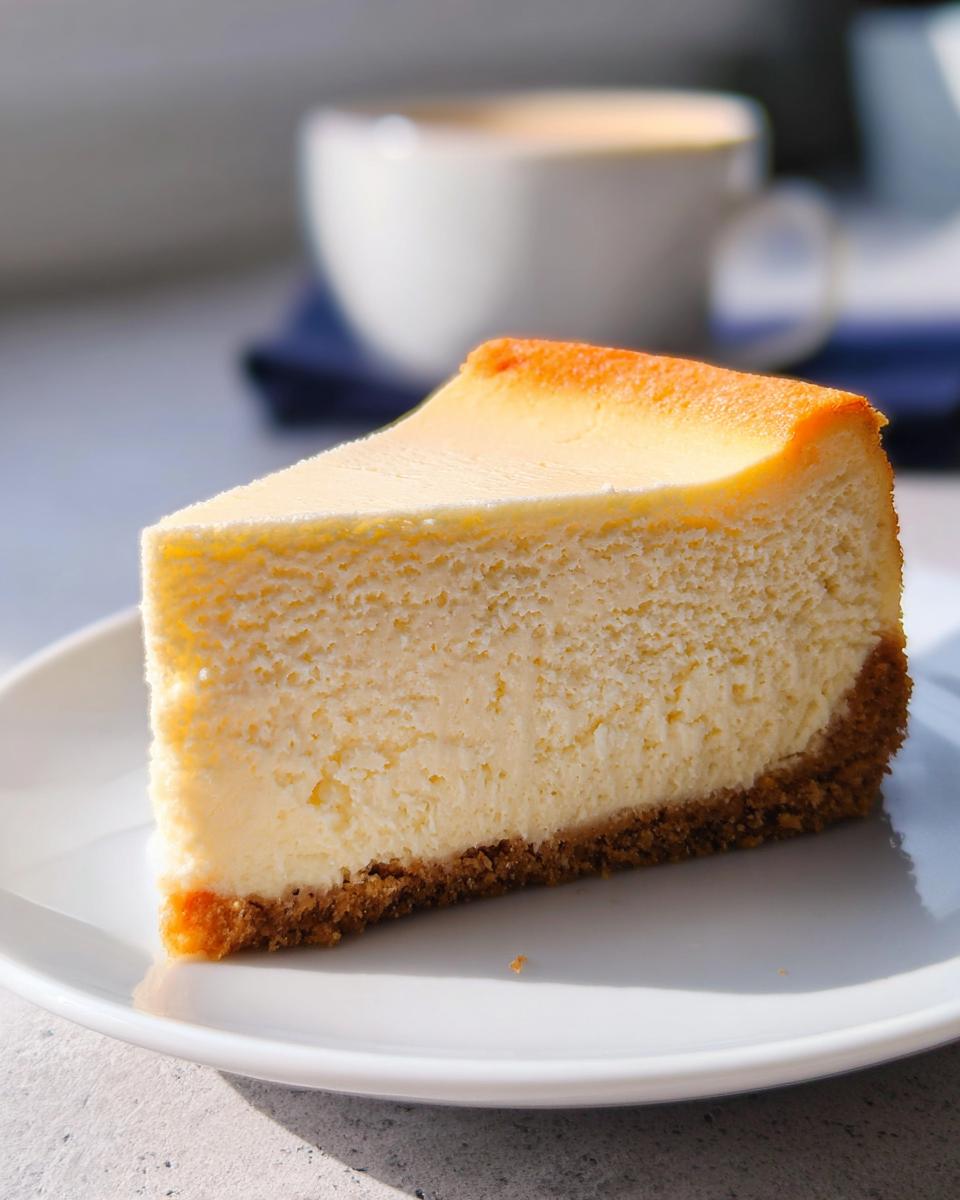
Serving Suggestions for Your Special Occasion Sweets
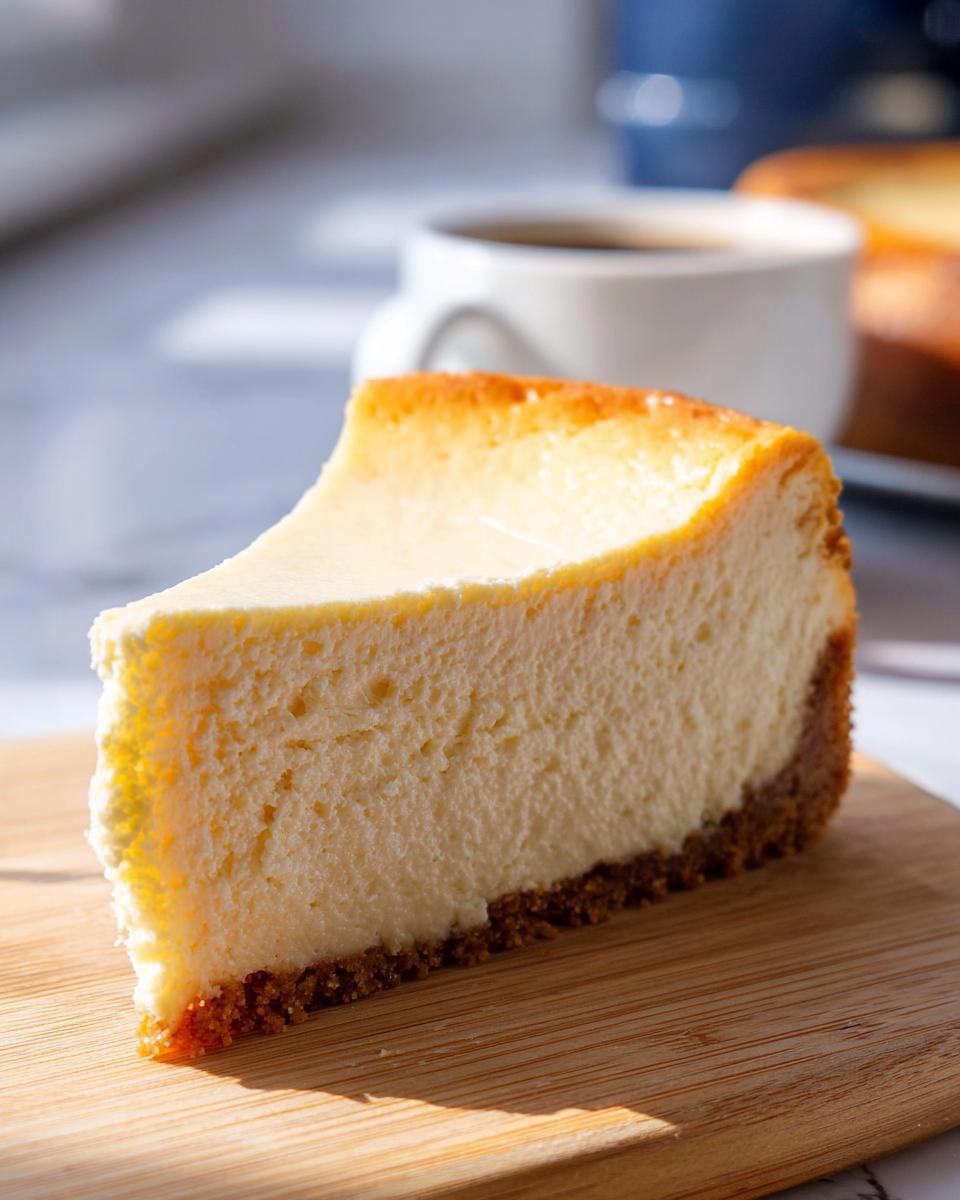
This magnificent **Classic New York Baked Cheesecake** truly deserves center stage when planning your **special occasion sweets**! Once it’s fully chilled overnight, that creamy, dense texture is ready for its big moment. I highly recommend letting it sit on the counter for about 20 minutes before slicing; this takes the chill off just enough so the texture really sings.
Presentation is everything! While I adore the simple look, nothing says celebration like a quick topping. Drizzling just a little homemade berry sauce over the top makes it stunning. If you need another simple, make-ahead stunner for your party menu, check out my recipe for chocolate mousse!
Storing and Reheating Your Classic New York Baked Cheesecake
Now, if you manage to have any leftover—which, bless your heart if you do—storing this masterpiece is super straightforward. The great thing about a proper **Classic New York Baked Cheesecake** is that it actually tastes better the next day once it’s settled in the cold! You can keep it right in that springform pan in the refrigerator for up to two full days. Just make sure you wrap it tightly with plastic wrap. Don’t let it sit uncovered, or it’ll start soaking up all those random fridge smells, and nobody wants that!
But what if you’re planning way ahead? This is amazing news: it freezes beautifully! If you want to make this ahead for a big holiday bash or just want cheesecake ready whenever the craving strikes, you definitely can. Wrap the unwrapped cake *first* in plastic wrap—use a good, tight layer—and then follow it up with aluminum foil, or just toss the whole thing into a heavy-duty freezer bag. It holds up like a champ for about three months in the deep freeze.
When it’s thaw time, just transfer the wrapped cake straight to the refrigerator the night before you plan to serve it. It needs that slow, gentle transition to come back to life perfectly. I always prep my freezer-friendly breakfasts ahead of time, and freezing cheesecake is just as easy! You’ll pull out something that tastes like you just baked it.
Frequently Asked Questions About New York Cheesecake
You’ve got questions, and I’ve got the answers! Making a **new york cheesecake** is an art, and sometimes it feels like there are a million little details that can trip you up. Don’t worry, we’ve all been there. Here are the frequently asked things I hear whenever I share this beloved recipe with friends.
Can I skip the water bath when making this new york cheesecake?
Oh, honey, please don’t! I know it feels like extra work with all that foil wrapping, but skipping the water bath is the number one reason people end up with sunken or cracked cakes. The water bath creates steam, which keeps the heat around the cheesecake gentle and even. Without it, you get dry heat cooking the edges too fast, causing the center to bubble up and then collapse when it cools. For that perfect texture—one of the best **creamy dessert ideas** out there—you just have to use it.
How long does it take for the Classic New York Baked Cheesecake to fully set?
This is one area where you cannot rush things, ever. The minimum chilling time for this **Classic New York Baked Cheesecake** is a full 8 hours, but I tell everyone who will listen: overnight is always the target. While it feels firm after 4 or 5 hours in the fridge, it truly sets up its structure and develops that perfect dense, yet creamy mouthfeel over that longer period. Trust me, waiting that extra few hours guarantees the slice you want!
What is the best way to get a truly creamy dessert ideas texture?
It all comes down to temperature and speed, like we talked about. The absolute main point for that incredible, smooth texture is making sure your cream cheese and eggs are completely at room temperature—no shortcuts! If they are cold, you over-mix trying to smooth out lumps, incorporating too much air. Remember: low speed, gentle mixing, and never mix once the batter looks uniform. That gentle handling is the secret handshake for creamy perfection. If you ever have more specific questions about troubleshooting, feel free to reach out via my contact page!
Estimated Nutritional Information for This Baked Cheesecake Recipe
Listen, when we’re talking about a rich, full-fat, amazing **Classic New York Baked Cheesecake**, we know we aren’t aiming for diet food here! This is a showstopper dessert for special occasions, and that means we need to be realistic about the richness. I’ve run the numbers based on the standard recipe measurements, but please remember these are just estimates. Since I’m always experimenting, especially with my lower-carb crust swaps, these numbers can change based on what ingredients you keep on hand!
Here is the average breakdown per slice—and remember, this recipe yields about 10 generous slices, so treat yourself!
- Calories: Roughly 659 per slice. Worth every single one, I promise!
- Fat: Around 43 grams. That high-quality cream cheese really contributes to that signature mouthfeel.
- Carbohydrates: About 59 grams. A chunk of this comes from that delicious graham cracker crust.
- Protein: About 11 grams.
- Sugar: This clocks in high, around 49 grams, mostly from the sugar we added, but also naturally from the dairy.
Keep in mind that if you skip the optional berry sauce, your final sugar count will be lower. For those of you making substitutions, especially if you’re trying out some gluten-free crusts or alternative sweeteners, the final count will definitely shift. But for the purist recipe? This is what you’re looking at for an authentic slice of heaven!
Share Your Classic New York Baked Cheesecake Creations
Whew! We made it! I am so excited for you to try making this **Classic New York Baked Cheesecake**. Seriously, this isn’t just a recipe; it’s an experience, and I genuinely want to hear how it turns out for you!
When you pull that perfect, uncracked, velvety smooth cheesecake out of the fridge after its mandatory long chill, please don’t be shy! Head back here and leave a star rating. Tell me what you thought—did that water bath work its magic? Did you serve it plain or with your own special toppings?
And if you’re sharing pictures online, tag me! I absolutely adore seeing your kitchen creations come to life. Tagging me lets me peek at your beautiful bakes. Use the hashtag #ClassicNYCheesecake so I don’t miss it. Seeing your success is the best part of sharing these old family recipes. Find more of my favorites over on my main recipes page!
Happy baking, my friend. Now go eat some incredible cheesecake!
Classic New York Baked Cheesecake
Ingredients
Equipment
Method
- Preheat the oven to 375°F and set an oven rack in the lower middle position. Wrap a 9- or 10-inch springform pan with one large piece of heavy-duty aluminum foil, covering the underside and extending all the way to the top so there are no seams on the bottom or sides of the pan. Repeat with another sheet of foil for insurance. Spray the inside of the pan with nonstick cooking spray.
- Combine the graham cracker crumbs, melted butter, sugar, and salt in a medium bowl. Stir until the mixture is well combined. Press the crumbs into an even layer on the bottom of the prepared pan. Bake the crust for 10 minutes until set. Remove the pan from the oven and set it aside.
- Reduce the oven temperature to 325°F. Set a kettle of water to boil.
- Beat the cream cheese, sugar, and flour together in the bowl of an electric mixer fitted with the paddle attachment or beaters on medium speed for about 1 minute until just smooth. Scrape the bottom and sides of the bowl to combine the mixture evenly. Add the vanilla, lemon zest, lemon juice, and salt; beat on low speed until just combined. Add the eggs one at a time, mixing on low speed until incorporated, scraping the bowl as needed. Mix in the sour cream. Make sure the batter is uniform but do not over-mix.
- Check that your oven has cooled to 325°F, then set the cheesecake pan in a large roasting pan. Pour the batter on top of the crust. Pour the boiling water into the large roasting pan so it comes about 1 inch up the side of the cake pan. Bake until the cake is just set, 1 hour and 30 minutes to 1 hour and 45 minutes. If the cheesecake begins to look too golden on top near the end, cover it loosely with foil. The cake should not look liquidy but will wobble slightly when the pan is nudged; it will continue to cook as it cools.
- Carefully remove the roasting pan from the oven and set it on a wire rack. Cool the cheesecake in the water bath until the water is just warm, about 45 minutes. Remove the springform pan from the water bath and discard the foil. If the cake sticks to the sides, run a thin-bladed knife around the edge to loosen it. Cover the cake with plastic wrap and transfer it to the refrigerator to cool for at least 8 hours or overnight.
- Remove the sides of the springform pan before serving. You can serve the cheesecake directly from the base of the pan. To transfer it to a serving platter, run a long, thin spatula between the crust and the pan bottom, and then use two large spatulas to carefully move the cheesecake to a serving dish. Slice with a sharp knife, wiping the knife clean between slices. Serve with berry sauce if desired.
Nutrition
Notes
Tried this recipe?
Let us know how it was!
Gluten-Free Chef & Latin Cuisine Innovation Specialist
My youngest son’s celiac diagnosis at four changed everything. Suddenly, all those traditional Brazilian and Portuguese recipes from my avó needed to be completely reimagined without losing their soul.
After graduating from Johnson & Wales and working Miami’s Latin fusion scene, my son’s diagnosis became my calling. How do you make gluten-free empanadas that taste like childhood? Over eight years, I’ve developed 320+ gluten-free recipes celebrating authentic Latin flavors using cassava flour and plantain alternatives.
My gluten-free empanada recipe won “Best Appetizer” at the 2023 Miami Gluten-Free Food Festival. I ran “Sabores Sin Gluten,” a catering business serving Miami’s Latino community—quinceañeras, family gatherings, all the celebrations that matter.
Food is culture, and everyone deserves to experience the joy of sharing traditional family meals, regardless of dietary restrictions.